1
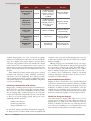
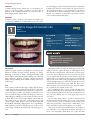
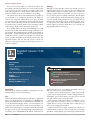
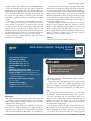
Cosmetic Imaging Systems
REALITY’S CHOICES
1.
Dentrix Image 4.0 Cosmetic Lite
Dentrix
2.
ViperSoft 3.1 Cosmetic Lite
Integra Medical
3a.
EagleSoft Version 11.00
EagleSoft
3b.
Smile-Vision Cosmetic Imaging Service
Smile-Vision
4.
Digital Dentist
Digident
©2005 REALITY Publishing Co. Vol. 19
The Ratings
233
Cosmetic Imaging Systems
Product
Dentrix Image 4.0
Cosmetic Lite
Cost
Training
Ease of Use
$5,395.00
User Manual, Training
Software, Training CD
included in software cost.
8 hour “live” session
for $995.00
Designed for dentistry,
very user friendly
$5,395.00
User Manual, Training
Software, Training CD
included in software cost.
8 hour “live” session
for $995.00
Designed for dentistry,
very user friendly
$8,640.00
1-day live for $1,080.00
Designed for dentistry,
very user-friendly
$49.00/case
Not necessary
Designed for dentistry,
very user-friendly
$1,847.00
Training Manual
and Training CD
Off-the-shelf program,
moderate learning curve
Dentrix
ViperSoft 3.1
Cosmetic Lite
Integra Medical
EagleSoft
Version 11.00
EagleSoft
Smile-Vision
Cosmetic Imaging
Service
Smile-Vision
Digital Dentist
Digident
Cosmetic imaging allows us to create a new smile for patients
without ever touching their mouths. This is all done through the
magic of a computer, color monitor, digital or intraoral camera,
and mouse using specialized software. You basically take a digital
picture and save it in your computer. Then, in some systems, you
split the screen to create two identical images of the patient. One
image is left untouched while you create simulated procedures on
the other.
These simulated procedures include closing spaces, repairing
fractured teeth, veneering, crowning, bleaching, recontouring,
orthodontics, and tooth lengthening. Even surgical procedures
such as a simple gingivoplasty to correct a gummy smile to major
orthognathic surgery for total maxillary-mandibular realignment
can be done with imaging.
Enhancing Communication with Patients
Imaging has a powerful potential for improved communication,
which can lead to increased treatment plan acceptance. Patients
who need to “see” what can be accomplished are the main candidates for imaging, while a rushed businessperson who only wants
to know the “bottom line” will probably not want to take the time
to allow you to perform imaging properly. This person can be
identified by the three questions:
(1) What is the solution?
(2) How long will it take?
(3) How much will it cost?
cause him or her to respond favorably. Imaging may or may not
be that button for many people. It is just another way of “tangibilizing the intangible.”
Although imaging won’t automatically increase case acceptance, the enhanced communication with patients by giving them
the opportunity to participate in creating their smiles helps to
boost their confidence and ultimately reinforces your commitment to excellence. Imaging is not a panacea of success for all —
it is another tool for communication, education, and internal
marketing. Imaging also says that you have an interest in and are
committed to cosmetic dentistry.
External Marketing Possibilities
Imaging can also be a tremendous tool for external marketing. It
can be used to demonstrate new advances in dentistry to breakfast
clubs, senior citizens groups, hospital staff meetings, civic groups,
health fairs, etc. When you show a patient what he or she may
look like after your beautiful creation, you appear to be a “stateof-the-art” dentist. Some people would rather see their own image
than before and after photographs of someone they don’t know.
Should You Charge For Imaging?
Some offices charge for imaging, while others use it as a tool to
generate interest in esthetic procedures. Offices that charge for
imaging believe it is similar to any other diagnostic service and,
therefore, it should be fee-based. One way of lessening the resistance to this fee is by including it in your consultation fee. You can
then credit this fee if the patient proceeds with treatment.
In other words, imaging is useful, but don’t think it is a magic bullet. Each person has a “button” which, if found and pushed, will
234
The Ratings
©2005 REALITY Publishing Co. Vol. 19
Cosmetic Imaging Systems
Second Opinions
Another effective way of using imaging is during second opinion
consultations. It can give you a distinct advantage over the first
dentist when the patient can visualize the potential results. The
patient is always given a color print of the before and after image
to take home. This allows for family and friends to be involved in
the decision of whether to pursue treatment.
With the use of imaging to educate, it may be possible to elevate the awareness of each patient’s dental needs and desires. This
change in perception could lead to much greater demand for your
services by each person who undergoes an evaluation in your office.
The Real Results vs. the Imaged One
The once feared legal implication of guaranteeing results through
imaging is really a non-issue. As long as prudence is used, imaging
can prevent unrealistic expectations of the final results. Actually,
the results you are able to achieve with real dentistry usually look
better than the created image anyway. Imaging will not make a
poor dentist into a good one. Don’t even consider buying an imaging system if you can’t perform the dentistry you create on the screen.
Lab Communications
Imaging can also be used to improve communication with the lab
when you are designing a case. Create the look that you are striving for and email it to the lab even before you present the
treatment plan to the patient. The lab may have treatment suggestions or could inform you of limitations you would want to
consider. This type of communication could result in fewer
remakes, more predictable results, and less post-treatment patient
dissatisfaction.
The Imaging Session:
Full Face vs. Smile
There are advocates of both approaches, but we have found it is
much easier to image a smile view instead of a full face. The smile
view gives you better detail and a closer look at the problem. After
you finish the image, you can always insert the new smile into a
full face. This way, you can have both views. Imaging a full face
may be OK if you are demonstrating a rhinoplasty, but it is too
small and hard to see the changes when it comes to teeth and the
surrounding soft tissues.
Before and After
A before image is captured in the computer and the patient leaves.
Between visits, the imaging staff member or an imaging service
creates the changes to the patient’s smile. The patient returns and
the new smile is presented, either on a monitor or on a hard copy.
This option gives patients a view to what is possible, but does not
really give them an understanding of their choices.
Interactive
Interactive imaging is done with the patient right by your side (or
by the side of the staff member in your office assigned to do imaging). This type of service is entirely different from merely showing
patients before and after images.
with you. They can ask “what if ” questions that can follow
other “what if ” questions. Once one change to a smile is
made, a patient may want to see another change. So, in
essence, interactive imaging is a form of co-discovery. This
type of dialogue is not possible when you merely present
before and after images to the patient.
• Disadvantages There are two main disadvantages to interactive imaging: cost of the time required to do the imaging
and staff training. It is more time consuming to image a
patient interactively due to the communication that transpires between the patient and the imaging staff member.
This varies with each office. But, by far, the most expensive
and least predictable disadvantage is staff training and performance.
The success of interactive imaging is directly dependent on the
staff member doing it. The imaging staff member must have multiple talents, including good communication skills, computer
literacy, and a thorough knowledge of cosmetic dentistry. The
learning curve is very steep and, if this staff member leaves your
practice, your imaging services will be severely curtailed until you
can find a new one. This happened to one of our Editorial Team
Members, who trained and lost two imaging staff members within one year. This Editorial Team Member has since gone back to
doing cosmetic mockups with composite, since it is too time-consuming for him to do his own imaging.
There are, no doubt, a number of dentists who operate their
imaging systems themselves. Many of these dentists do it because
it is fun and it breaks the tedium of everyday dentistry. But, in the
final analysis, it is usually too expensive for the dentist to do the
imaging.
POTENTIAL ADVANTAGES
+
+
+
+
+
+
+
Increased case acceptance
Increased referrals to and from plastic surgeons
and other esthetic/cosmetic professionals
Increased staff excitement in dentistry
Improved diagnostic capabilities
Improved laboratory communications
Improved patient communications
Increased “fun” for the dentist
POTENTIAL DISADVANTAGES
–
–
–
–
–
–
Cost
Training time
Need for additional personnel
Operating time
Space requirements
Patient expectations going beyond results that are
achievable — resulting in patient dissatisfaction
• Advantages When your patients take part in imaging, they
have the opportunity to discuss many different changes
©2005 REALITY Publishing Co. Vol. 19
The Ratings
235
Cosmetic Imaging Systems
Software
Cosmetic imaging software, which used to be stand-alone programs, is now more typically a module in an entire suite of
applications. The evaluations that follow are restricted to the cosmetic imaging module of these suites.
more than happy to sell you brand name hardware at substantially higher prices than you can find online, the typical scenario in
most computerized offices is to buy the hardware yourself either
directly from the computer manufacturer such as Dell or via an
Internet store. Therefore, we have deleted any mention of hardware from the evaluations that follow.
Hardware
Computers, printers, monitors, and cameras are basically commodities today. While there are still software vendors who will be
Dentrix Image 4.0 Cosmetic Lite
1
Dentrix
(4.3)
www.dentrix.com
SAMPLING
Cost: $5,395.00
Support:
Includes:
• Cosmetic Imaging Software,
multi-user
• Toll-free phone support for
30 days
$1,895.00 additional to classic
Dentrix support per year
Warranty: 90 days
Training: $995.00 (8 hours)
Easiest to use
Better program at no extra cost
Still need to be computer-savvy
Options can be confusing
Description
Updated program designed specifically for dental purposes.
Functions include Zooming In/Out, Rotating an Image,
Mirroring or Inverting an Image, Creating Before/After Split
Screen, Lighten Smile, Removing Stains, Pulling Color, Blending
Image Properties, Drawing an Image, Sharpening/Softening
Image, and Copy/Reshape. It also includes a library of stored cosmetic images.
Use
Once you have downloaded the images, simply select the picture
of your choice for imaging. After selecting the picture, click on the
toolbar, select split screen before/after, side by side, or top and bottom. If the captured smile is not straight, you should correct it
before you split the image to facilitate the imaging. A dotted rectangle will appear, enabling you to choose the area where you want
to work. You are now ready to begin imaging. A horizontal icon
bar located on the top left corner of the image offers several
options: Lighten Smile, Remove Stain with Brush, Pull with
Brush, Blend with Brush, Sharpen/Soften Area, Copy/Reshape,
Smile-In Library, and Add or Edit Library. You can also zoom in
on the image to facilitate the small details of the imaging procedure.
236
The Ratings
The Lighten Smile tool makes the bleaching procedure a very
simple process. First, capture the image you wish to lighten. To do
this, select the rectangular mode and frame the area. Don’t worry
if you cover some of the gingiva. You can erase specific areas. Once
you are satisfied with the area that you have selected, choose the
Lighten Smile icon. A small box with a red and a green light will
appear on the screen. Click on the green light when you are ready
to begin the lightening process. Click the red light when you are
satisfied with the shade. This program, which also allows you to
add and subtract color and/or tint if necessary, makes the whitening of teeth look more natural in some cases.
The Copy/Reshape offers a variety of tasks including rotate,
pull down, pull up, flip upside down, right, left, etc. It allows you
to close diastemas, lengthen and rotate teeth, and much more. To
save your work, click the save icon on the upper right corner of
your screen.
You can add as many smiles as you like to the Library and
access them at any time. In addition, once you are in the program,
it is not necessary to restart it each time you want to select a new
smile. This program has a unique feature, which allows you to
pick a new smile from the screen in which you are working.
This current version has various useful features. For example, if
you would like to use a smile from the Library, the image you
insert is now transparent, which allows you to place the smile
©2005 REALITY Publishing Co. Vol. 19
Cosmetic Imaging Systems
more precisely over the original image. You can adjust the brightness and contrast of the image if necessary, but the new version has
an automatic color-correcting feature for PC card images (digital
camera images), which corrects minor flaws in the color.
If you double click on an image, it automatically goes to full
screen and if you click on the full screen image it will return to its
original form. The Spotlight feature is available on the Digital XRay module, Cosmetic Imaging Module, and Intraoral Camera
module. If you want to zoom in on a particular area, you have that
option, as well as the Regular Zoom, Colorize, Invert Colors, and
SuperClear features. You now have the option to email your
images in several common formats to other Vipersoft users or to
insurance companies.
Training
Although we believe that this system is user friendly, we are not
suggesting that training is not necessary. On-site installation and
8-hour training sessions are available. There is also a terrific CD
training program, which can be loaded onto your computer in
case you need to reference anything in the future. The CD allows
you to watch each step and then minimize the training program
so you can actually do the particular action in your image. You can
then go back to the training program, watch the next step, and so
on. The system comes with a User’s Manual and also includes
numerous tutorials, which allow you to refresh your imaging skills
whenever necessary.
Vipersoft 3.1 Cosmetic Lite
2
Integra Medical
(4.2)
www.vipersoft.com
Cost: $5,395.00
SAMPLING
Includes:
• Cosmetic Imaging Software, multi-user
• Toll-free phone support for 30 days
Support:
$995.00 per year and applicable upgrades
Warranty: 90 days
Training: $995.00 (8 hours)
Easiest to use
Integrates with other programs
Still need to be computer-savvy
Options can be confusing
Description
Designed specifically for dental purposes.
Use
Once you have downloaded the images, simply select the picture
of your choice for imaging. After selecting the picture, click on the
toolbar, select split screen before/after, side by side, or top and bottom. If the captured smile is not straight, you should correct it
before you split the image to facilitate the imaging. A dotted rectangle will appear, enabling you to choose the area where you want
to work. You are now ready to begin imaging. A horizontal icon
bar located on the top left corner of the image offers several
options: Lighten Smile, Remove Stain with Brush, Pull with
Brush, Blend with Brush, Sharpen/Soften Area, Copy/Reshape,
Smile-In Library, and Add or Edit Library. You can also zoom in
©2005 REALITY Publishing Co. Vol. 19
on the image to facilitate the small details of the imaging procedure.
The Lighten Smile tool makes the bleaching procedure a very
simple process. First, capture the image you wish to lighten. To do
this, select the rectangular mode and frame the area. Don’t worry
if you cover some of the gingiva. You can erase specific areas. Once
you are satisfied with the area that you have selected, choose the
Lighten Smile icon. A small box with a red and a green light will
appear on the screen. Click on the green light when you are ready
to begin the lightening process. Click the red light when you are
satisfied with the shade. This program, which also allows you to
add and subtract color and/or tint if necessary, makes the whitening of teeth look more natural in some cases.
The Copy/Reshape offers a variety of tasks including rotate,
pull down, pull up, flip upside down, right, left, etc. It allows you
to close diastemas, lengthen and rotate teeth, and much more. To
save your work, click the save icon on the upper right corner of
your screen.
The Ratings
237
Cosmetic Imaging Systems
You can add as many smiles as you like to the Library and
access them at any time. In addition, once you are in the program,
it is not necessary to restart it each time you want to select a new
smile. This program has a unique feature, which allows you to
pick a new smile from the screen in which you are working.
This current version has various useful features. For example, if
you would like to use a smile from the Library, the image you
insert is now transparent, which allows you to place the smile
more precisely over the original image. You can adjust the brightness and contrast of the image if necessary, but the new version has
an automatic color-correcting feature for PC card images (digital
camera images), which corrects minor flaws in the color.
If you double click on an image, it automatically goes to full
screen and if you click on the full screen image it will return to its
original form. The Spotlight feature is available on the Digital XRay module, Cosmetic Imaging Module, and Intraoral Camera
module. If you want to zoom in on a particular area, you have that
option, as well as the Regular Zoom, Colorize, Invert Colors, and
SuperClear features. You now have the option to email your
images in several common formats to other Vipersoft users or to
insurance companies.
3a
Training
Although we believe that this system is user friendly, we are not
suggesting that training is not necessary. On-site installation and
8-hour training sessions are available. There is also a terrific CD
training program, which can be loaded onto your computer in
case you need to reference anything in the future. The CD allows
you to watch each step and then minimize the training program
so you can actually do the particular action in your image. You can
then go back to the training program, watch the next step, and so
on. The system comes with a Vipersoft User’s Manual and also
includes numerous tutorials, which allow you to refresh your
imaging skills whenever necessary.
EagleSoft Version 11.00
EagleSoft
(3.8)
NEW
Cost: $8,640.00
Includes:
• Practice Management module (multi-user)
• Video Capture
• Cosmetic Imaging
Voice Activation Module: $1,260.00
Support:
$1,440.00 per year
Warranty: Covered under support.
Training: $1,080.00 (1 day)
Description
Updated program designed specifically for dental purposes. It also
includes a library of stored cosmetic images.
Use
Click on the Advanced Imaging Icon. It will open to a patient list
where you pick the images you would like to see. Highlight the
patient you would like to choose and then click on the USE button. In the Advanced Imaging window, you can download your
images from any source such as a disk, an intraoral camera, or a
scanner. You can then import your images from the file tab, which
also gives you the option of browsing images, importing images,
save, delete, export, and DICOM. In the file tab, you also have an
238
The Ratings
Most imaging capabilities
Can access other modules without exiting
program
Cannot buy program without practice
management module
Most expensive
email button that opens your mailbox immediately when you
click on it. This is a very convenient feature.
You have a variety of printing options—regular print, print all,
or print custom. In print custom, a window will appear with several template options. This is where you set up print, you can add
text, date, and time, and you can print labels.
Once you have downloaded an image, you will need to save it
in the system before you begin to alter it or it will not save the
original. After it is saved, you can click on the cosmetic tab to get
started on the imaging transformation.
In this window, five boxes appear in the left side. The first one
is labeled Brushes. In this box, there are eight choices of imaging
capabilities. Smudge will grab a piece of the image and blend it any
©2005 REALITY Publishing Co. Vol. 19
Cosmetic Imaging Systems
way that you prefer. Eraser will do just that. Paint will brush stroke
a solid color. Magnify will set a large circle where you place the
magnifying glass and magnify about 20%. Whitener will let you
lighten selected areas by brush stroke. Defocus will actually focus
an area and make it look sharper, although it the word means just
the opposite. Set Color will let you select the paint color. Match
Color will let you pull a specific color from the image with which
to paint.
The next box is named Selections. This is where you can Copy
area, i.e., where you can drag any part of the image and paste it
onto itself. But to do this action, you must first Select Area. You
can Flip and Mirror the area, Add to Library, Match Color, Edit
Selection and Select Teeth, the latter of which is where you can
bleach the teeth to your preferred level. However, this function is
pure lightening and does not allow you to alter the hue. In some
instances, this bleaching function may not look very natural.
The Try In box has a Clipboard function, Import File, Library
and Add to Library Function.
The Basic Operations box has Close, Save, Zoom, Paint, Delete,
Reload, Undo, and Comparison, which could be the coolest function of the entire program. Once you have made all of the changes
to get that smile just right, you choose this function and the magic
begins. It brings up three images: before, after, and a progression
morphing image that shows the before image and slowly or rapidly
(you can choose your speed) morphs it into the after image. You
can also choose to print and it will bring up a before and after formatted page on which to print.
The last box will give you levels from which to choose for your
changes to appear. Defocusing, Whitening, Transparency, and Size
that let you pick what kind of changes. When you return to the
Advance Imaging window, the Effects button also gives you cosmetic imaging choices. You can Smooth, Sharpen, Colorize, Invert,
Emboss, and Emboss 3d, which lets you choose the degree of
embossing, plus make it lighter or darker.
Training
1-day training sessions are available at extra cost.
Smile-Vision Cosmetic Imaging System
(3.8)
Smile-Vision
3b
ENCORE
Cost: $55.00 Individual cases
Prepaid Discount Package
Cost: $294.00/6 cases ($49/case)
Cost: $564.00/12 cases ($47/case)
Cost: $960.00/24 cases ($40/case)
Options:
Digitalizing a print or slide: $14.00
Close-up images (Eyes not visible): 50% surcharge
Printing: $21.00/2 sets of 5"x 8" glossy before and
after prints (One set returned in a display folder and
envelope for patient).
Standard Turnaround Time for Imaging:
1 to 3 work days.
Rush Services for Imaging:
• $21.00 One Hour Turnaround
• $9.00 24 Hour Guaranteed Turnaround
Description
Smile-Vision is an internet service that offers cosmetic imaging at
a reasonable cost with a minimum investment; your only requirement is a digital camera to capture the images unless you pay the
additional fee for digitizing a print.
Smile-Vision’s System allows you to submit the patient’s photo
along with your imaging instructions by simply selecting the
image file on your computer in the area provided on the imaging
order form. You can upload any JPEG image, up to 8 MB in size.
©2005 REALITY Publishing Co. Vol. 19
Inexpensive way to do cosmetic imaging
Doesn’t require staff to do it
Need a computer with web access
Every case looks the same!
A file under 1 MB in size (about 800 KB) is all that is needed to
provide excellent results.
This website only accepts JPEG images. This system provides
two audio CD’s, “What Every Dentist Should Know about
Delivering an Effective, Emotional & Powerful Cosmetic Case
Presentation” and “Up Your Case Acceptance” at no additional cost.
Use
To start using this cosmetic imaging service, go to the SmileVision website. Click on “Advanced ordering system”, go to the
“secure site” and register and send your pictures. There are no
charges for setup or maintenance of your personal home page. To
submit a case you have two options: you can do it via email or
directly on the website. For security reasons they discourage the
use of email when sending images.
On the imaging order form, fill in the patient’s name, then
select whether or not you want Smile-Vision to image the patient
with an aesthetically ideal smile by choosing “yes” or “no” in the
box provided. The next question asks you to select the specific
The Ratings
239
Cosmetic Imaging Systems
imaging options: Maxillary, Mandibular, Whitening, Teeth
Coloring, LVI shape desired, and Gingival Contouring. You may
select “No Change/No” or “Change/Yes”. The next question gives
you the opportunity to add additional imaging instructions or
comments.
The next section allows you to attach your “Before” photo by
providing the “browse” option so you can select your file from
your computer and attach the photo. The next section of the form
asks you to choose the delivery of your completed case — either
to your web page with no prints, or to your web page and have
mounted prints sent to you. The next section gives the option of
one hour, next day or standard delivery which is usually a one-tothree day turnaround. Then submit the form. The system will not
allow you to change your photos or imaging instructions after they
have been entered. If you discover an error after you send the case,
you will have to resubmit the case.
When the cosmetic image is completed, you will receive an
email. You can view the image on the website, print them, or
mail them to the patient directly with your comments. To download pictures from your Smile-Vision personal home page, point
4
to the pictures on your site with your mouse and right click on
your mouse, save the picture on your hard drive, and then print
the images.
Smile-Vision also offers a service called “Turn Your Imaging
Case Into a Wax Replica!” in which the doctor sends the study
models so they can create a wax-up with a prep guide and template
for the provisional restorations. We didn’t evaluate this service.
Training
This system does not require any training, but basic knowledge of
Windows is recommended, along with some photographic experience. Smile-Vision does, however, offer some guidelines for taking
cosmetic imaging portraits.You may send both full face and teethonly shots, but it recommends sending a full face shot. If you want
a teeth-only shot to show to the patient, you might consider asking Smile-Vision to create a teeth-only shot from the same full-face
image. This option can be the most cost and time efficient.
Digital Dentist
Digident
(3.5)
Cost: $1,847.00
Includes:
• Imaging software (Picture Publisher 10.0)
• Lorin Library (Smile Style Guide + Digital Smile
Designs CD)
• Practice Images Library and completed simulations
• Tutorial CD
• Tutorial Manual
• Toll-free phone support for 30 days
• Unlimited email support for one year
Support: $395.00/yr (email) after one year
Includes:
• Unlimited phone/email support & loaner if
needs repairs
Lorin Library Shape Guide: $149.00
Lorin Library Smile Style Guide CD: $847.00
Warranty: Unlimited on software
Description
Combines an off-the-shelf image editing program, Picture
Publisher 10.0, with a training system invented by a dentist. This
program is compatible with Windows XP. Includes the image editing software, the training manual, the training CD, and the Lorin
Library Smile Style Guide Digital CD and workbook, which is
designed to be educational for the patient, discussing the smile,
240
The Ratings
Inexpensive
Can be customized
Doesn’t integrate with any practice
management software
Still need to be computer-savvy
and how the shapes of the teeth affect the entire smile. This is
accomplished in the workbook in three steps, choosing from six
designs versus the old workbook, which had 18 designs and confused some of the patients.
First the patient chooses the preferred cuspid shape. Then,
from the cuspid family, the patient and doctor will select from six
different incisor shapes that correspond to that group. And the
third step is to select the relative length of the incisors. The smiles
are printed in grayscale, trying to focus the attention of the viewer on the shapes rather than the color of the teeth or lips.
The CD gives the dentist the opportunity to choose from 18
smile designs. There are five versions of each design. The first four
versions show the design with various incisal-occlusal angles and
mouth posture. These variations are what make authentic fullsmile transfers possible. The fifth version is used in tooth-by-tooth
imaging techniques.
©2005 REALITY Publishing Co. Vol. 19
Cosmetic Imaging Systems
Digident offers a 10-day trial period for the software. If you
return the software within 10 days, you will receive a refund
minus the shipping charges and a 10% restocking charge.
to change the color, you can reduce the yellow color by selecting
Blue in the Channel box and increase the percentage of the balance to neutralize the yellow color of the patient’s teeth.
Use
While installation is not included or offered, it is extremely simple, especially if you follow the user-friendly manual. Everything
is included to properly install the system.
Once you have downloaded the images that you captured of
the patient on the digital camera, simply select the picture of your
choice for imaging. After selecting the picture, click on the toolbar, select Save to save it as a before image and then save it again
as an after image. This after image will be the “master” image the
system uses to do the actual imaging. However, this system does
not have split screen, before-and-after, side-by-side, or top and
bottom capabilities. When you finish the imaging, you must select
both files (before and after) and arrange the window to display
both of them.
The training CD shows how to customize your toolbar. It also
has step-by-step, how-to-do cosmetic procedures like diastema
closure, gingivoplasty, whitening, and smile makeover.
Enameplasty demonstrates the technique of Cloning, which
allows you to copy small areas of your image with the clone tool.
This tool is helpful if you want to add or reduce small areas of
tooth structure.
Masking is the process of selecting areas of your image. This section will show you how to create and manipulate masks.
Objects are small images within your “master” image. This section shows you how to work with objects and how to make the
teeth narrower, wider, longer, shorter, and how to flip.
Whitening demonstrates how to do masking. For example, if you
want to bleach teeth, select the area you want to bleach and then
do the color adjustment with Color Balance tools, such as the
Channel option. Selecting Master from the Channel box allows
you to change the value or brightness (but not the hue) of the
teeth. For example, if your patient has yellow teeth and you want
©2005 REALITY Publishing Co. Vol. 19
Full Smile Transfer or Tooth-by-Tooth shows you how to use
the smile libary to create your image more quickly. You can transfer a full-smile or tooth from the Lorin Library and place it onto
your patient’s mouth, as the case may dictate.
Training
The CD-ROM tutorial demo is very easy to follow. The “Getting
Started” option automatically customizes your toolbar, which is a
great improvement over older software versions. The only items
you have to manually install are the practice images, completed
simulations, and the Lorin Library v.4. The CD tutorial allows
you to pause, and can be minimized so you can follow along each
step-by-step movie tutorial. It includes nine different procedures
such as bleaching, diastema closure, bonding, full smile transfer,
tooth-by-tooth, etc.
The CD tutorial is set up to begin with simple imaging techniques, such as whitening, and progresses to more difficult
techniques, such as full-smile makeovers. Also included is a 154page step-by-step manual, which is a printed form of the CD
tutorial. It gives you step-by-step instructions on producing dental simulations and features a very detailed table of contents
outlining exactly what is in the manual. This manual has five
appendices, including a very helpful Frequently Asked Questions
section. With this system, the dentist receives 30 days of telephone
support and unlimited email support for one year.
The Ratings
241
Cosmetic Imaging Systems
REALITY
Dentrix Image 4.0 Cosmetic Lite is the most updated version of this easy-to-use software. Using an SQL
(Structured Query Langauge) database, you can now
perform the cosmetic transformations more quickly
than in the past.
Even though it is very intuitive, there is a good manual plus a CD with demonstrations. Training sessions
are offered in eight-hour blocks, which are available at
an extra cost. But if you are reasonably computer savvy,
you probably won’t need this extra training (and cost).
One of the main benefits of this system is a split screen
feature, which allows you to view the original image
while simultaneously altering a second image.
ViperSoft 3.1 Cosmetic Lite is also an easy software
to use, but unlike its close cousin Dentrix Image, the
Vipersoft version has not yet been updated.
Nevertheless, it still features split screen.
EagleSoft Cosmetic Imaging module cannot be purchased by itself. If its attributes appeal to you, the least
expensive multi-user option is to buy the Practice
Management program along with Video Capture and
Cosmetic Imaging. Unfortunately, this restriction
makes Eaglesoft the most expensive program in this
category. Nevertheless, the Cosmetic Imaging program
is a very good one, possibly the best of the bunch.
Features such as the morphing image should really
entertain patients.
Smile-Vision is an option for those dentists and staff
members who don’t have the time, inclination, or even
computer skills required to do cosmetic imaging. It
requires only a camera and the results are good, but it
is important to communicate in detail on the prescription to obtain the desired results without having all
smiles look exactly the same, a comment echoed by all
of our evaluators. While it is recommended to capture
and send a full face picture, some evaluators prefer the
smile view vs. the full face.
Even if you know how to use imaging software, you
may not see it as a productive use of time.
Nevertheless, if you enjoy doing it and use it as a great
way to enhance rapport with the patient, as well as an
opportunity to custom create a treatment plan, this is
probably not the system for you.
Digital Dentist, unlike the other two systems, is not a
dedicated dental imaging system, but an off-the-shelf,
modified program. You are able to perform imaging
with this system, but it definitely requires more steps
than ViperSoft/Dentrix Image or Image FX. Closing a
diastema or bleaching, for example, takes longer and
requires more tools. However, the user manual and
tutorial CD allows easy understanding for computer
experts and novices alike, since it takes you step-bystep. All dentists should be able to use this program
without any problems at all. And it is the least expensive program in this category. The new workbook also
helps the patient understand different smile styles.
Unfortunately, it is not compatible with any practice
management systems.
OTHER PRODUCTS IN THIS CATEGORY
242
Image FX 5.0
SciCan
Imaging Suite
DIS Software
ProImage Dental Image
Dent-X
Imaging Software
Smart Technology
Niamtu Imaging System
Niamtu
TigerView Smile Design
Studio
Televere Systems
The Ratings
©2005 REALITY Publishing Co. Vol. 19