1
Pan & Tilt Head
Operators Guide
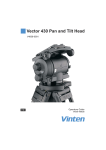
Vector 950
Vinten
Camera Control Solutions
Vector 900
Pan and Tilt Head
Publication Part No. V3996-4980
Issue 1
Copyright © Vinten Broadcast Limited 2005
All rights reserved throughout the world. No part of this document may be stored in a retrieval system, transmitted, copied
or reproduced in any way including, but not limited to, photocopy, photograph, magnetic or other record without the prior
agreement and permission in writing of
Vinten Broadcast Limited.
Vinten, Vector and Quickfix are registered trademarks of Vinten Broadcast Limited.
Preface
Thank you and congratulations on your new Vector 950
from Vinten
We want you to get the most from your new Vector 950, and therefore encourage you to read this
operators guide to familiarise yourself with its many features, some of which may be new to you.
It also covers essential health and safety information and a section on maintenance that will ensure you keep your new product in perfect condition.
To receive additional benefits, register with Vinten now, on line by visiting www.vinten.com/register, or by completing the enclosed form.
Features and benefits of your new Vector 950
The Vector 950 has been specifically designed to meet the exacting demands of camera operators working with full facility studio and OB cameras. The Vector 950 offers a high level of control
with many unique features.
• Suitable for a wide range of cameras, from 16-120 kg (35-264.5 lb) at 150 mm (6 in.) C
of G and supplied with a wedge adaptor.
• The unique Perfect Balance system provides infinite adjustment, enabling you to
achieve perfect camera balance throughout the tilt range, regardless of drag setting.
• A retractable adjuster provides extensive camera fore and aft movement so that you
can position the camera easily and perfectly.
• The digital counterbalance display provides an LCD numerical display, indicating the
level of counterbalance chosen to balance the camera. This is particularly useful if
you regularly change your camera, lens, viewfinder or battery combination, as you
can quickly 'dial in' the number that suits that particular combination.
• You can keep up with the action as it happens with the responsive TF Drag control. It
provides a wide range of infinitely adjustable, frictionless drag from very light to extremely heavy, suitable for operating conditions down to - 40°C and up to + 60°C. The
TF drag system also allows you to pan extremely quickly or “whip pan” from one position to another, recovering instantly without any spring back.
• You can set up easily in low light conditions using the illuminated level bubble and
back-lit display.
• Easy to carry, with an integral, fold-away handle.
Once again, thank you for choosing the Vector 950.
We are confident it will give you many years of reliable
performance.
Safety - read this first
3
Warning Symbols in this Operators Guide
Where there is a risk of personal injury, injury to others, or damage to the pan
and tilt head or associated equipment, comments appear, highlighted by the
word WARNING! and supported by the warning triangle symbol.
Technical data
Weight
15 kg (33 lb)
Height to wedge adaptor mounting face
24.8 cm (11.3 in.)
Length
22.5 cm (8.9 in.)
Width
34.2 cm (13.5 in.)
Typical payload
Tilt range
16-120 kg (35-264.5 lb) - See balance graph (Fig 3)
60 kg payload to ±90°, 120 kg payload to ±60°
Pan range
Operating temperature range
360°
- 40°C to + 60°C (- 40°F to + 140°F)
Pedestal/tripod fixing
Four-hole flat base
`Quickfix' adaptor
Mitchell adaptor
Further information
For further information or advice regarding this pan and tilt head, please contact Vinten Broadcast
Limited, your local Vinten distributor (see back cover) or visit our website.
For details on maintenance and spare parts, please refer to the Vector 950 Pan and Tilt Head
Maintenance Manual and Illustrated Parts List (Publication Part No. V3996-4990) This is obtainable from Vinten Broadcast Limited or your local Vinten distributor. For information on-line, visit
our website at
www.vinten.com.
4
Contents
Page
Preface . . . . . . . . . . . . . . . . . . . . . . . . . . . . . . . . . . . . . . . . . . . . . . . . . . . . . . . . . . . . . . . . . . . . 3
Safety - read this first . . . . . . . . . . . . . . . . . . . . . . . . . . . . . . . . . . . . . . . . . . . . . . . . . . . . . . . . 3
Technical data . . . . . . . . . . . . . . . . . . . . . . . . . . . . . . . . . . . . . . . . . . . . . . . . . . . . . . . . . . . . . . 4
Further information. . . . . . . . . . . . . . . . . . . . . . . . . . . . . . . . . . . . . . . . . . . . . . . . . . . . . . . . . . 4
Introduction
Perfect balance . . . . . . . . . . . . . . . . . . . . . . . . . . . . . . . . . . . . . . . . . . . . . . . . . . . . . . . . . . . 8
TF drag . . . . . . . . . . . . . . . . . . . . . . . . . . . . . . . . . . . . . . . . . . . . . . . . . . . . . . . . . . . . . . . . . 8
Pan and tilt brakes . . . . . . . . . . . . . . . . . . . . . . . . . . . . . . . . . . . . . . . . . . . . . . . . . . . . . . . . . 8
Centre lock. . . . . . . . . . . . . . . . . . . . . . . . . . . . . . . . . . . . . . . . . . . . . . . . . . . . . . . . . . . . . . . 8
Illuminated level bubble . . . . . . . . . . . . . . . . . . . . . . . . . . . . . . . . . . . . . . . . . . . . . . . . . . . . . 8
Pan bar . . . . . . . . . . . . . . . . . . . . . . . . . . . . . . . . . . . . . . . . . . . . . . . . . . . . . . . . . . . . . . . . . 9
Wedge adaptor . . . . . . . . . . . . . . . . . . . . . . . . . . . . . . . . . . . . . . . . . . . . . . . . . . . . . . . . . . . 9
Four-hole mounting plate . . . . . . . . . . . . . . . . . . . . . . . . . . . . . . . . . . . . . . . . . . . . . . . . . . . . 9
Carrying handle . . . . . . . . . . . . . . . . . . . . . . . . . . . . . . . . . . . . . . . . . . . . . . . . . . . . . . . . . . . 9
Electronic unit . . . . . . . . . . . . . . . . . . . . . . . . . . . . . . . . . . . . . . . . . . . . . . . . . . . . . . . . . . . . 9
Operation
Installing the head . . . . . . . . . . . . . . . . . . . . . . . . . . . . . . . . . . . . . . . . . . . . . . . . . . . . . . . . 10
Pan bars. . . . . . . . . . . . . . . . . . . . . . . . . . . . . . . . . . . . . . . . . . . . . . . . . . . . . . . . . . . . . . . . 10
Fitting a camera . . . . . . . . . . . . . . . . . . . . . . . . . . . . . . . . . . . . . . . . . . . . . . . . . . . . . . . . . . 10
Stability . . . . . . . . . . . . . . . . . . . . . . . . . . . . . . . . . . . . . . . . . . . . . . . . . . . . . . . . . . . . . . . . 12
Balancing the head . . . . . . . . . . . . . . . . . . . . . . . . . . . . . . . . . . . . . . . . . . . . . . . . . . . . . . . 12
Locking the platform . . . . . . . . . . . . . . . . . . . . . . . . . . . . . . . . . . . . . . . . . . . . . . . . . . . . . . 14
Pan and tilt brakes . . . . . . . . . . . . . . . . . . . . . . . . . . . . . . . . . . . . . . . . . . . . . . . . . . . . . . . . 14
Pan and tilt drag. . . . . . . . . . . . . . . . . . . . . . . . . . . . . . . . . . . . . . . . . . . . . . . . . . . . . . . . . . 14
Digital display. . . . . . . . . . . . . . . . . . . . . . . . . . . . . . . . . . . . . . . . . . . . . . . . . . . . . . . . . . . . 15
Servicing
General . . . . . . . . . . . . . . . . . . . . . . . . . . . . . . . . . . . . . . . . . . . . . . . . . . . . . . . . . . . . . . . . 16
Routine maintenance. . . . . . . . . . . . . . . . . . . . . . . . . . . . . . . . . . . . . . . . . . . . . . . . . . . . . . 16
Cleaning. . . . . . . . . . . . . . . . . . . . . . . . . . . . . . . . . . . . . . . . . . . . . . . . . . . . . . . . . . . . . . . . 16
Electronic unit battery replacement . . . . . . . . . . . . . . . . . . . . . . . . . . . . . . . . . . . . . . . . . . . 17
Balance mechanism digital display calibration. . . . . . . . . . . . . . . . . . . . . . . . . . . . . . . . . . . 18
Adjustments . . . . . . . . . . . . . . . . . . . . . . . . . . . . . . . . . . . . . . . . . . . . . . . . . . . . . . . . . . . . . 19
Repositioning the wedge adaptor . . . . . . . . . . . . . . . . . . . . . . . . . . . . . . . . . . . . . . . . . . 19
Platform slide clamp adjustment. . . . . . . . . . . . . . . . . . . . . . . . . . . . . . . . . . . . . . . . . . . 20
Pan and tilt brake adjustment . . . . . . . . . . . . . . . . . . . . . . . . . . . . . . . . . . . . . . . . . . . . . 20
Parts List . . . . . . . . . . . . . . . . . . . . . . . . . . . . . . . . . . . . . . . . . . . . . . . . . . . . . . . . . . . . . . . . . 21
Associated publication
Vector 950 Pan and Tilt Head
Maintenance Manual
Publication Part No. V3996-4990
5
(1)
(15)
(14)
(2)
(13)
(3)
(12)
(4)
(11)
(5)
(10)
(9)
(8)
(7)
(6)
Vector 950 Pan and Tilt Head (Right-Hand Side)
(1)
Wedge adapter operating lever
(2)
Sliding plate adjustment handle
(3)
Carrying handle
(4)
Centre lock plunger
(5)
Balance knob
(6)
Tilt brake lever
(7)
Pan brake lever
(8)
Centre lock release lever
(9)
Illuminated level bubble
(10)
Timer button
(11)
Digital display
(12)
Illumination button
(13)
Graduated sliding plate
(14)
Wedge adapter
(15)
Wedge adapter mounting screw
6
(16)
(17)
(22)
(18)
(21)
(19)
(20)
Vector 950 Pan and Tilt Head (Left-Hand Side)
(16)
Sliding plate clamp lever
(17)
Pan bar mounting
(18)
Tilt drag adjustment knob
(19)
Pan drag adjustment knob
(20)
Battery cover
(21)
Mitchell adapter key way
(22)
Four-hole mounting plate
7
Introduction
The Vector 950 pan and tilt head embodies a unique and patented spring counterbalancing mechanism, thin film (TF) drag assemblies for pan and tilt motions and an adjustable camera mounting
plate.
Perfect balance
The spring counterbalancing mechanism comprises four springs operating against a three-dimensional cam connected to the camera mounting platform. The balance mechanism is adjusted by
a knob (5), situated on the right front lower part of the main body, which varies the mechanical
advantage between the cam and the springs. The knob has a ‘push in and turn’ action and is fitted
with a clutch to prevent inadvertent damage to the balance mechanism.
Maximum and minimum payloads that can be balanced, and tilt ranges, are dependent on the
weight of the camera and accessories and on the centre of gravity (C of G) height.
The graph shows the range of load and C of G height that can be maintained in balance. The shaded area of graph corresponds to those load/C of G combinations that can be balanced over the
full tilt range. The area to the right indicate the progressively reducing tilt range with greater load
and higher C of G.
Where a load/C of G combination falls outside of the graph it will be necessary to increase or decrease the weight or the C of G height - if possible - to enable the head to balance the load.
A digital display (11) indicates the setting of the balance mechanism on a scale of 0-100. The display is active when the balance knob (5) is turned and extinguishes automatically approximately
15 seconds after adjustments are complete. The display may be lit by pressing the illumination
button (12). The battery for the system is housed in a compartment in the base of the head, closed
by a cover (20).
TF drag
Both the pan and tilt mechanisms incorporate the Vinten thin film (TF) system to ensure smooth
movement of the camera about these axes and are fitted with control knobs (18)(19) to adjust the
drag setting. The whip-pan facility is unaffected by the pan drag setting. Both drag knobs are provided with scales illuminated by the button (12). The lights will go out after approximately 15 seconds.
Pan and tilt brakes
Friction brakes on each axis allow the head to be locked at any chosen position. The operating
levers for both brakes (6)(7) are located side-by-side on the right-hand side of the head.
Centre lock
A centre lock (4) allows the head to be locked in the horizontal position.
Illuminated level bubble
A level bubble (9), illuminated by pressing the illumination button (12), is fitted to the rear of the
head. The same button also illuminates the pan and tilt drag knob scales and the LCD display.
The light will go out after approximately 15 seconds.
8
Pan bar
Pan bar mounting points (17) are located at the rear of the head, on either side of the camera
mounting platform. A telescopic pan bar is supplied and is attached using a pan bar clamp, with
angular adjustment available on the mount serrations. A second pan bar may be fitted.
Wedge adaptor
The camera is attached to the head by means of a wedge adaptor (14), which is mounted on a
graduated sliding plate (13). The position of the slide plate is adjusted by a retractable knob (2)
and a clamp (16) is provided to hold the slide plate in position.
Four-hole mounting plate
The head is provided with a standard Vinten four-hole mounting plate (22), which includes a
`Quickfix' mounting and provision for use of a Mitchell adapter (21).
Carrying handle
A retractable carrying handle (3) is provided on the right-hand side of the head. The handle is
spring-loaded to the closed position.
Electronic unit
An electronic unit is fitted to the rear of the head, powered by a battery housed in a compartment
(20) in the base of the head. The unit comprises a two-row digital display (11) and two push-button
buttons - an illumination button (12), which illuminates the LCD display, levelling bubble and the
pan and tilt drag knob scales for 15 seconds, and a timer button (10). Pressed singly or in conjunction with each other, the buttons provide control of the time, stopwatch and calibration functions.
For a detailed description of each function, see Digital display on page 15.
9
Operation
Installing the head
WARNING! If using lifting equipment to raise or lower the head, use slings or
straps. DO NOT use shackles.
Ensure that slings or straps are securely attached to the head. A
suitable lifting point is at the rear of the platform, accessed by
moving the sliding plate (13) to the fully forward position.
DO NOT attach lifting slings or straps to the carrying handle.
The Vector 950 head may be installed on a standard ‘Vinten’ tripod or pedestal using the four
mounting bolts and washers provided or by using a `Quickfix' adaptor.
Adaptors are available which enable the heads to be installed on tripods or pedestals fitted with
other mountings. These are listed in the Parts List under Optional accessories.
WARNING! Before installing the head, hold a fixing bolt in position and
check that the threaded end does not project more than 12 mm
(15/32 in.) above the mounting face
After mounting the head on a tripod, use the level bubble (9) to set it level. The level bubble may
be illuminated by pressing the illumination button (12). The light will go out after approximately 15
seconds.
Pan bars
Fit the pan bars on the mountings (17) and adjust the position of each one before tightening the
clamps. Adjust the length of the telescopic pan bar. Optional fixed and short fixed pan bars are
available (see Main assemblies in the Parts List).
Fitting a camera
WARNING! Do not rely on the tilt brake when changing the payload. Always
engage the centre lock.
Ensure that the weight and C of G height of the total payload is
within the range for which the head is designed
If installing on a pedestal, lock the pedestal in the fully
depressed position before installing the camera.
To fit a camera, proceed as follows:
If not already fitted, install the wedge adaptor (14) in the middle position on the sliding plate
(13) (see Servicing on page 16).
Attach the wedge to the camera/lens.
Ensure that the centre lock (4) is engaged (see “Locking the platform” on page 14).
10
Slide the wedge adaptor operating lever (1) forward (parallel to the wedge) about 6 mm (1/
4 in.) against spring tension. Pull the operating lever out, away from the body of the wedge
adaptor, as far as it will go.
Insert the camera wedge into the wedge adaptor and push it forward into full engagement.
Push in the operating lever (1) until it lies parallel with the wedge adaptor body. During this
operation resistance of the spring-loaded over-centre mechanism will be felt. As the lever
reaches the end of its travel it will slide back (parallel to the wedge) to the locked position.
Confirm that the lever is in the locked position. This is indicated by coloured bands above
the lever. When the green band only is visible, the lever is locked. If any of the red band can
be seen, the lever is not locked.
Install the remainder of the payload (lens, zoom and focus controls, viewfinder, prompter
etc).
Centre Of Gravity Height (mm)
250
200
±90
150
±80
±70
±60
100
50
0
20
40
60
80
100
120
140
160
180
200
Total Payload (kg)
Balance Graph
11
Stability
WARNING! When mounting the head on a tripod, it is possible to set the tripod legs so that the centre-of-gravity of the tilted payload falls
outside the footprint of the tripod, leading to instability.
Use the mid-level or floor spreader to ensure that the tripod legs
are spread sufficiently so that the centre-of-gravity of the tilted
payload remains within the footprint of the tripod.
Where possible, use the tie-down hook on the tripod for additional stability.
Balancing the head
NOTE:
It is important that the pan bar(s) and all camera accessories (lens, zoom and
focus controls, viewfinder, prompter etc.) are fitted in their operational position
before balancing the head. Any equipment fitted or adjusted later will
unbalance the head.
Balancing the Vector 950 head achieves two objectives. Firstly, when a head is correctly balanced
the operator will need a minimum amount of even effort to move the head. Secondly, once balanced, the head and its payload can be set to any tilt position and the head will maintain this position with ‘hands off’.
The graph shows the range of load and C of G height that can be maintained in balance. The shaded area of graph corresponds to those load/C of G combinations that can be balanced over the
full tilt range. The area to the right indicate the progressively reducing tilt range with greater load
and higher
C of G.
Fore and aft balance
When positioning the payload it is important to be aware of the potential danger of an unbalanced
payload falling away suddenly. Before disengaging the centre lock, push in and turn the balance
adjustment knob (8) to its mid point setting (50 on the digital display). Depending on the payload
weight, it may be necessary to increase or decrease this setting to enable the payload to be correctly balanced fore and aft.
Balance the payload fore and aft as follows:
Ensure that the centre lock is engaged (see “Locking the platform” on page 14) and that the
camera and all accessories are fitted.
Turn the tilt drag adjustment knob (18) to its minimum setting.
Push in and turn the balance adjustment knob (5) to its mid point setting.
WARNING! Be prepared to prevent the head falling away suddenly. In the
event of the head falling away violently, increase the setting on
the balance adjustment knob (5).
12
Holding the pan bar to steady the platform, disengage the centre lock (see “Locking the platform” on page 14).
Release the sliding plate clamp (16) and pull out the sliding plate adjustment knob (2) until
it engages with the platform drive. Turn the knob to move the sliding plate fore and aft to
achieve horizontal balance.
NOTE:
The sliding plate is graduated to facilitate balancing. If the balance setting of
the payload is known, turn the knob until that setting is reached.
The horizontal balance is correct when no perceptible tilting force can be felt on the pan bar
with the platform level. Apply the sliding plate clamp (16) and push in the adjustment knob
(2) to its stowed position.
If there is insufficient movement in the sliding plate to achieve balance, reposition the
wedge adaptor (see “Repositioning the wedge adaptor” on page 19), refit the load and repeat the horizontal balancing procedure.
The sliding plate is graduated. Make a note of the position to facilitate rebalancing this particular payload.
Payload weight and C of G height adjustment
When fore and aft balance has been achieved, carry out the payload weight and C of G height
adjustment as follows:
NOTE:
If the digital balance setting of the payload is known, push in and turn the
balance knob (5) until the digital display (11) shows that setting.
Using the pan bar, tilt the platform forward and backward. When correctly balanced, there
should be no perceptible tilting force on the pan bar at any angle of tilt and the head should
remain in any tilt position to which it is set.
NOTE:
Setting the platform level will facilitate adjusting the balance setting
If the head tends to fall away when the platform is tilted, set the platform level and push in
and turn the balance adjustment knob (5) clockwise to increase the balance setting. If the
head tends to spring back to centre, set the platform level and push in and turn the balance
adjustment knob (5) counter-clockwise to decrease the balance setting.
When the payload weight and C of G height adjustment is complete, check that the fore and
aft balance remains satisfactory. Re-adjust the position of the sliding plate if necessary.
The digital display (11) will display the balance setting while balance is being adjusted.
Make a note of the final setting to facilitate rebalancing this particular payload.
After balancing, exercise the head through both axes to confirm that it operates smoothly.
13
Locking the platform
The centre lock mechanism is operated by a plunger on the right-hand side of the head. To engage the lock, hold the platform in the horizontal position and push the plunger (4) inwards until it
latches and the release lever (8) appears. Use the pan bar to rock the platform slightly whilst pushing the button.
To release the centre lock, rock the platform slightly and push down on the release lever (8).
Pan and tilt brakes
The pan (7) and tilt brakes (6) are operated by levers on the right of the head. The brakes are
applied by pushing the appropriate lever down and released by pulling the lever up.
The brakes should be applied whenever the camera is left unattended.
Pan and tilt drag
Both the pan and tilt mechanisms incorporate the Vinten thin film (TF) system to ensure smooth
movement of the camera about these axes and are fitted with control knobs to adjust the drag setting.
Both drag knobs are provided with illuminated scales, graduated from 0 to 9. To illuminate the
scales, press the button (12). The light will go out after approximately 15 seconds.
The drag adjustment knobs are mounted on the left-hand side of the head. The smaller pan drag
knob (19) is on the front lower part of the main body, with the larger tilt drag knob (18) in the centre
on the tilt drag housing.
To increase drag, turn the knob clockwise, towards a higher graduation. To decrease drag, turn
the knob anti-clockwise, towards a lower graduation.The whip-pan facility is unaffected by the pan
drag setting.
(11.1)
(11.2)
(12)
(10)
(11.3)
Digital Display
14
Digital display
The digital display (11) comprises a two-row LCD display. It has three modes of operation, selected by the buttons (10)(12). The display may be illuminated by pressing the illumination button (12).
Clock and stopwatch
The top row of the display is a 24-hour clock (11.1), which is always visible. This is the default
mode. The bottom row is a stopwatch, counting in seconds and minutes from 00:00 to 59:59.
To set the clock:
Press both buttons (10)(12) momentarily. The hours display will flash.
Use the timer button (10) to increment the hours.
Press the illumination button (12). The minutes display will flash.
Use the timer button (10) to increment the minutes.
Press the illumination button (12) to exit and start the clock.
To display, start, stop or clear the stopwatch:
Momentarily pressing the timer button (10) will display, start, stop or clear the stopwatch in
that sequence.
Balance
Balance mode is active any time the balance adjustment knob (5) is turned (unless the stopwatch
is running) and remains active for 15 seconds after adjustment has finished. In this mode the bottom row shows the setting of the balance mechanism on a scale of 0.0 to 100.0 The BAL legend
(11.3) is also lit. The top row of the display shows the 24-hour clock.
Calibration
This mode allows the balance display to be calibrated (see “Balance mechanism digital display
calibration” on page 18). It is activated by pressing and holding both buttons (10)(12) for five seconds.
Low battery
The low battery indicator (11.2) will flash whenever the battery requires replacement (see
“Electronic unit battery replacement” on page 17).
15
Servicing
General
The Vector 950 pan and tilt head is robustly made to high engineering standards and little attention
is required to maintain serviceability save regular cleaning.
Refer to the appropriate section in the Maintenance Manual if any defect is apparent. Adjustments
and repairs should be carried out only by a competent person.
Routine maintenance
Replace the electronic unit battery whenever the low battery indicator flashes.
During use, check the following:
Check the effectiveness of the pan and tilt brakes. Reset as necessary.
Check the effectiveness of the slide plate clamp. Reset as necessary.
Check the operation of the balance mechanism digital display and the illumination of the
LCD, level bubble and drag knobs. Replace battery if necessary.
No further routine maintenance is required.
Cleaning
During normal use the only cleaning required should be a regular wipe over with a lint-free cloth.
Dirt accumulated during storage or periods of disuse may be removed with a semi-stiff brush. Particular attention should be paid to the wedge location faces of the wedge adaptor.
NOTE:
Use only detergent-based cleaners. DO NOT use solvent- or oil-based cleaners,
abrasives or wire brushes to remove accumulations of dirt as these damage
the protective surfaces
Use out-of-doors under adverse conditions may require special attention and the head should be
covered when not in use. Salt spray should be washed off using fresh water at the earliest opportunity. Sand and dirt act as an abrasive and should be removed using a semi-stiff brush or a vacuum cleaner.
16
Electronic unit battery replacement
The battery powers the digital display and illuminates the LCD, the level bubble and the drag knob
scales.
The battery should be replaced whenever the low battery indicator flashes.
NOTE:
Removal of the battery will not affect the calibration of the balance mechanism
display.
Prise out the battery cover (20).
Pull the battery (20.1) out of the battery compartment as far as the wiring will allow.
Pull the connector (20.2) off the terminals of the old battery and push it onto the terminals
of the new battery (20.1).
Install the battery (20.1) in the battery compartment, ensuring that the wiring is neatly
stowed.
Refit the battery cover (20).
Press the illumination button (12) and ensure that the balance mechanism digital display
(6), the level bubble (9) and drag knob scales (18, 19) are lit for approximately 15 seconds.
Turn the balance knob (5) and ensure that the balance display (11) is active for approximately 15 seconds.
Reset the clock (see “Clock and stopwatch” on page 15).
(18)
(12)
(19)
(11)
(20.2)
(9)
(20.1)
(5)
(20)
Electronic unit battery replacement
17
Balance mechanism digital display calibration
The digital display (11) indicates the setting of the balance mechanism on a scale of 0 (minimum
setting) to 100 (maximum setting). In the unlikely event of this system requiring calibration, proceed as follows:
NOTE:
If more than five minutes is allowed to elapse before completion, the system
will shut down and revert to its previous settings.
Level the platform and apply centre lock (4).
Press and hold both buttons (10)(12) until CAL is displayed on the top row of the display.
Push in and turn the balance knob (5) counterclockwise until its minimum end stop is
reached, then turn back two full turns. The bottom row of the display will flash 0.
Press and release the timer button (10). The bottom row of the display will flash 100.
Push in and turn the balance knob (5) clockwise until its maximum end stop is reached, then
turn back two full turns.
Press and release the timer button (10). Calibration is now complete and the display will
revert to the default clock mode.
After calibration, rebalance the head (see “Balancing the head” on page 12).
(4)
(5)
(12)
(11)
(10)
Balance mechanism digital display calibration
18
Adjustments
To enable the payload to be correctly balanced, the wedge adaptor may require repositioning.
The following adjustments may be necessary after prolonged use:
The platform slide clamp may require adjustment.
The pan and tilt brakes may require adjustment.
Repositioning the wedge adaptor
The wedge adaptor (14) is secured by four cap head screws (15) which pass through the wedge
adaptor into the sliding plate (13). The wedge adaptor may be fitted in three positions.
WARNING! Overlong screws will prevent the sliding plate from operating.
Always use the screws provided (M6 x 30 mm).
To reposition the wedge adaptor:
Engage the centre lock (see “Locking the platform” on page 14) and remove the payload.
Hold the body of the wedge adaptor (14) and use a 4 mm hexagon wrench to remove four
securing screws (15).
Reposition the wedge adaptor (14) on the sliding plate (13), ensuring that the narrow end
of the wedge adaptor faces forwards
Insert the four screws (15) in the holes in the wedge adaptor and tighten..
(16)
(16.1)
(16.2)
Platform slide clamp adjustment
19
Platform slide clamp adjustment
The platform slide clamp should be set so that, in the up or clamped position it prevents the platform slide from being moved, while in the down or released position it allows free adjustment of
the slide. To adjust the clamp, proceed as follows:
Pull the slide clamp lever (16) fully upwards.
Slacken the clamp screw (16.2).
Turn the slotted shaft (16.1) fully clockwise to apply the clamp.
Tighten the clamp screw (16.2).
Move the lever over its full range and ensure that, in the clamped position, it prevents the
slide from being moved, while in the released position it allows free adjustment of the slide.
Re-adjust if necessary.
Pan and tilt brake adjustment
The pan (7) and tilt brakes (6) are operated by levers on the right of the head. The brakes are
applied by pushing the appropriate lever down and released by pulling the lever up.
If the brakes become ineffective, adjustment should be carried out by qualified personnel in accordance with the Maintenance Manual (Publication Part No. V3996-4990).
20
Parts List
The following list includes the main assemblies, user-replaceable spare parts and optional accessories. For further information regarding repair or spare parts, please contact Vinten Broadcast
Limited or your local distributor.
For information on-line, visit our website at
www.vinten.com
Main assemblies
Vector 950 pan and tilt head
V3996-0001
Wedge adaptor
3389-3
Standard wedge plate
3053-3
Short wedge plate
3391-3
Telescopic pan bar and clamp
3219-82
Fixed pan bar and clamp
3219-94
Short fixed pan bar and clamp
3219-93
Fixing bolt
L054-714
Washer - for fixing bolt
L602-122
Spanner - for fixing bolts
J551-001
User-replaceable spare parts
Battery - 9V, 6LR61 (PP3, 6AM6, MN1604, E-BLOCK or equivalent)
C550-023
Optional accessories
Heavy-duty Quickfix adaptor
Levelling adaptor Quickfix to 4-bolt flat base
3490-3
3328-30
Lightweight Mitchell adaptor
3103-3
Heavy-duty Mitchell adaptor for Vinten pedestal mounting in conjunction with Hi-hat adaptor Part No. 3055-3
3724-3
21