1
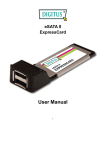
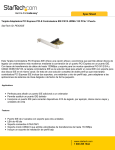
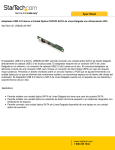
eSATA II EXPRESSCARD User Manual 1 Features and Benefits Fully compliant with ExpressCard Specification 1.0 ExpressCard/34 Form Factor Module Serial ATA generation 2 transfer rate of 3.0Gbps Supports hot plug for extend Serial ATA port Supports Windows 7, Vista, XP, 2000 Package Contents 1x eSATA II 300 1-Port ExpressCard 1x Driver CD 1x User Manual System Requirements Windows 7, Vista, XP, 2000 ExpressCard-enabled system ExpressCard slot 2 with an available Hardware Description Hardware Installation General instructions for installing the card are provided below. Since the design of system may vary, refer to your system’s reference manual for further information, if needed. Insert the Card into the ExpressCard slot of your system. Make sure it is inserted all the way in for a solid connection. 3 Driver Installation For Windows® 2000/XP/Server 2003/Vista/ 7 1. At the Found New Hardware Wizard window pop-up, please click Cancel button to cancel the driver installation for the device at this moment. The driver for this device will be installed in the next step. 2. Please insert the CD driver bound with eSATA II 300 1-Port ExpressCard into your CD-ROM Drive. 3. At the Windows desktop, click Start, then Run. 4. Type D:\DS-31101\Windows\Setup.exe, then click OK. (Change D:\ to match your CD-ROM drive letter) 5. Follow the on-screen instructions to complete the installation. 6. Restart Windows to complete the installation. To Verify Windows® 2000/XP/Server 20003/Vista/7 Installation Click on the “Device Manager” tab in System Properties, which you access from the Windows Control Panel. You should see an “JMicron JMB36X RAID Controller” installed under “SCSI and RAID controllers (Storage controllers – Vista)” item. 4 START > Control Panel > System > Device Manager Hot-Plugging A Hard Disk Drive To remove a drive from a powered up system, do the following: 1. Right click My Computer and click Manage. 2. Select Device Manger. 3. Click Disk Drives, right click the target disk and select Disable/Enable. 4. You can now remove the target disk. 5