1
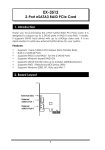
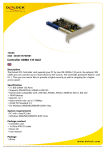
Size: 105 x 148mm * 100P 雪銅紙 * 騎馬釘裝訂, 一本德文(在前)英文手冊, 另一本西班牙文(在前)波蘭文手冊 * 兩面, 正四色反四色彩色印刷 Do not throw the appliance away with the normal household waste at the end of its life, but hand it in at an official collection point for recycling. By doing this you will help to preserve the environment. 1.0 Safety Instruction Put the Device always on a stable and straight Surface. In case of falling it can be damaged. Don’t place the Device into direct Sunlight or in Places with high Temperature. This can damage the Device or shorten his average useful Life. Don’t place it in the near of Heat Sources, like Radiators or other heat producing Devices. Don’t expose the Device to Rain, Water, Wetness or high Humidity. Don’t place it in the Bathroom or the Kitchen in the near of a Sink. Avoid the direct Contact with Water. Don’t try to open the Device. Prior to the first use of our product make a backup of your data. We are not liable for any loss of data, unless you can accuse us intention or gross negligence. In any case, liability for loss of data is limited to the effort that is necessary to restore from existing backup copies. Congratulations to the Purchase of the PC0064! Please read the Manual and Safety Instructions before using the Product for the first Time. Otherwise Damage can be the Result. 2.0 Introduction The PCI-Express SATA controller card PC0064 brings a high performance 6.0Gbps hardware RAID 0/RAID 1 solution to desktop/consumer storage applications utilizing a native 1-Lane PCI Express 2.0 interface. The card supports SATA 6Gbps devices complaint with Serial-ATA Revision 3.0 specification and ATA/ATAPI-7 specification. It is also backward compatible with SATA 1.5Gbps and 3.0Gbps devices. The LED indicator headers on the card are specially designed so -1- that the front panel LED indicator can show Read/Write activities of any hard disk drives connected to the card. The orientation and position of the two internal SATA ports are well designed so that cable wiring is very easy in small form factor computer chassis. The card also comes with an internal Parallel-ATA port providing support for up to one legacy ATA/ATAPI storage devices such as IDE hard drives. 2.1 Specification General Chipset: Marvel 88SE9128 Compliant with PCI-Express 2.0 Base Specification Based on Marvel 88SE9128 PCI-Express 2.0 SATA 6Gbps hardware RAID controller Lane PCI-Express 2.0 interface supports communication speed of 2.5Gbps and 5.0Gbps Unique Hard Drive Activity LED indicator circuit design: The LED blinks when there is read/write activity on any one of the hard drive connected to SATA port of this add-on card Supports Windows 7 32/64-bit, Server 2008 32/64-bit, Vista 32/64-bit, Server 2003 32/64-bit, XP 32/64-bit, and Linux Serial-ATA (SATA) Interface Two SATA 6.0Gbps ports Compliant with Serial-ATA Specification 3.0 Supports communication speed of 6.0Gbps, 3.0Gbps, and 1.5Gbps Compatible with SATA-III (6Gbps), SATA-II (3Gbps), SATA-I (1.5Gbps) hard drives and SSD’s Supports Gen 1i, Gen 1x, Gen 2i, Gen 2m, Gen 2x, and Gen 3i Supports Hardware RAID 0 and RAID 1 Supports Native Command Queue (NCQ) Supports SATA Port Multiplier FIS based switching or command based switching Supports SATA port Hot-Plug and AHCI 1.0 Supports ATA and ATAPI commands -2- Parallel-ATA (PATA / IDE) Interface One PATA port supporting ATA/ATAPI/IDE devices (Master and Slave) Compliant with ATA/ATAPI-7 specification Supports DMA protocols, and UDMA-6 133Mbps data transfer rate Supports Multiword DMA and PIO modes for data transfer Supports IDE programming interface 2.2 Package Content 1 x PCI-Express SATA RAID card 1 x Driver CD 1 x User manual 1 x LED cable 3.0 Hardware Installation WARNING Before installing and activating RAID function, please make sure you have a complete backup of your existing data from your hard drives. Manufacturer is not responsible for data loss due to abuse, misuse, or neglect. Should you have any installation problem, please contact your dealer for assistance. Turn off your computer and all external devices connected to it. Disconnect your computer from the power sources. Open the computer case. Refer to your computer user manual for more details. Find an available PCI-Express 2.0 slot and remove the slot bracket. Save the bracket screw for later use. Align the controller card horizontally with respect to the slot and insert it into the slot firmly and evenly. Take care not to force it into the slot. Once you have properly positioned the controller card into the slot, fasten it to the computer case with the screw you have just saved. -3- Mount the hard disk(s) on the computer case. Connect the power cable to the hard disk(s). Connect the SATA hard disk(s) to the controller card with the SATA cable. Connect the computer case’s front panel Hard Disk LED cable to pin header JP4. Connect the one end of the LED cable (included) to pin header JP5, and the other end to your JP4 motherboard’s HDD LED connector. Secure the computer case and switch on your computer. 4.0 RAID BIOS SETUP Skip this section if you are not going to create a RAID virtual disk. Press the [Ctrl] + [M] key combination during the controller card’s POST (Power On Self Test). After pressing [Ctrl] + [M], you may have to wait a few seconds before the BIOS screen appears. Figure 2 shows the messages displayed during the POST of the SATA controller card. Follow the on-screen help and information to configure various RAID functions, such as selecting RAID Level (RAID 0 or RAID 1), selecting RAID 0 stripe size (32K or 64K), manually rebuilding a RAID 1 virtual disk, etc. -4- If you created a RAID virtual disk but later you don’t want the RAID function, simply erase the RAID configuration data in the BIOS. Note: The PATA (IDE) interface does not support RAID function. 5.0 Driver Installation 5.1 Windows 2003/2008/XP/Vista/7 1. Start Windows and insert the driver CD into the CD-ROM drive, assume drive D. 2. Windows will automatically detect the SATA card. Select “Locate and install driver software (recommended)” and click Continue. And then select “I don’t have the disc. Show me other options”. Click on: Browse my computer for driver software, and then browse to the following folder on the driver CD according to your operating system: Win XP/Vista/Server 2003/2008 and Win 7 32-bit: D:\Marvell\88SE91xx\Windows\Win_32bit\ Win XP/Vista/Server 2003/2008 and Win 7 64-bit: D:\Marvell\88SE91xx\Windows\Win_64bit\ 3. Follow the on-screen instructions to install the driver. 4. After successful installation, the SATA card is listed under Storage controllers as Marvell 91xx SATA 6G Controller. 5. For the RAID controller, an additional device Marvell 91xx Config SCSI Processor Device is detected. Select “Locate and install driver software (recommended)” and click Continue. And then select “I don’t have the disc. Show me other options”. Click on: Browse my computer for driver software, and then browse to the following folder on the driver CD according to your operating system: Win XP/Vista/Server 2003/2008 and Win 7 32-bit: D:\Marvell\88SE91xx\Windows\RAID\Win_32bit\ Win XP/Vista/Server 2003/2008 and Win 7 64-bit: D:\Marvell\88SE91xx\Windows\RAID\Win_64bit\ 6. Follow the on-screen instructions to install the driver. 7. After successful installation, the device is listed in the Device Manager as Marvell 91xx Config Device (under System devices). -5- 5.2 For Linux: Note: Marvell does not provide Linux drivers for AHCI and IDE/ATA devices. Drivers for AHCI devices Linux distributions contain Inbox drivers for AHCI devices. The drivers are installed automatically during the Linux OS installation. Drivers for IDE/ATA devices Linux distributions with kernel version 2.6.19 and above include inbox drivers for IDE/ATA devices (Source: http://www.kernel.org/pub/linux/kernel/v2.6/ChangeLog-2.6.19). In most distributions, the kernel does not load the inbox drivers for IDE/ATA devices by default. The procedure for enabling support for IDE/ATA devices in Linux is as follows: Enabling Support for IDE/ATA Devices during a Clean Installation of Linux: This section describes the procedure for enabling support for IDE/ATA devices during a clean installation of Linux. To enable support for IDE/ATA devices during a clean installation of Linux: 1. Boot from the Linux installation CD / DVD 2. Select Installation and press Enter 3. Type the following command into the Boot Options command line: ata_generic.all_generic_ide=1 4. Press Enter to continue with the Linux OS installation Enabling Support for IDE/ATA Devices on an Existing Installation of Linux: This section describes the procedure for enabling support for IDE/ATA devices on an existing installation of Linux. To enable support for IDE/ATA devices on an existing installation of Linux: -6- 1. Login as root. 2. Right-click the Desktop and select Open In Terminal. 3. Type the following commands: ls cd /boot/grub/ vim menu.lst 4. Type the following command at the end of the kernel line for the title paragraph that lists the version information for the Linux distribution. ata_generic.all_generic_ide=1 5. Browse to File and select Save. 6. Reboot the system for the changes to take effect. 5.3 Updating Drivers: The latest drivers and last-minute change to this document are available on this website: http://www.drivers-download.com Search for the following Download Code from “Drivers Search”: Chipset. Marvell 88SE9128 Description PCI-Express to SATA 6Gbps Hardware RAID controller card Download Code DL-0141101 The CE mark confirmed that this product meets the main requirements of the Directive 2004/108/EC of the European Parliament and the Council of Europe concerning telecommunications and terminals regarding the Safety and health of users and of electro-magnetic interference compliance. The CE has been demonstrated. These statements are deposited by the manufacturer. -7-