1
Ovi-Scan
User manual
www.bcftechnology.com
Ovi-Scan
Contents
page
Introduction
3
Operator safety
4
Display layout
5
Operating instructions
6
1 Preliminary switch on
6
2 Controls 7
2.1 Power button
7
2.2 Menu system
7
2.2.1 Tally
8
2.2.2Display
9
2.2.3Control
10
2.2.4Image
11
2.2.5Foetal age
12
2.2.6Drafting
13
2.2.7RFID
14
2.2.8 Modes
14
3 Module removal/refitting
15
4 Portable power sources
16
4.1 12-volt DC source
16
5 Duo-Scan option
17
5.1 Mode control
17
6 Ovi-Scan console
18
Appendix A - Safety principles
19
Appendix B - Safety devices
20
Appendix C - Gel powder mix
21
Appendix D - Service and maintenance
23
Appendix E - Key to scanner connectors
25
Main service centres
26
Accessories 27
2
Introduction
Since 1983 BCF Technology Ltd has been developing, manufacturing and distributing worldwide
animal husbandry equipment becoming market leader in the development and production for
real time ultrasound pregnancy scanners for most animal species.
BCF, in consultation with leading experts in animal husbandry applications, have combined the best
features of the old version of Ovi-Scan with the latest state of the art technology. The result is the
new Ovi‑Scan: an ultrasound scanner which is small, light, robust, portable and truly versatile. The
Ovi‑Scan also incorporates a removable scan module which, with additional accessories, can be used
to provide even greater portability.
The Ovi-Scan is designed and manufactured in Scotland by:
BCF Technology Ltd
3 Tailend Court
Starlaw Road
Livingston EH54 8TE
Scotland, United Kingdom
Tel: +44 (0) 1506 460 023
Fax: +44 (0) 1506 460 045
E-mail: [email protected]
Web: www.bcftechnology.com
As specialists in providing ultrasound imaging equipment for animal husbandry applications,
we understand the importance of having reliable equipment. All BCF products are designed and
manufactured to withstand the environments in which they are going to be used. However, should you
experience any problems with your Ovi-Scan, BCF Technology service engineers will be available to
provide rapid service support and ensure optimum performance of your BCF system.
The Ovi-Scan meets all essential and safety requirements of all current relevant European Directives.
The CE mark on the rear panel is a symbol of this conformance. If you require any further information
regarding these directives please contact us directly. This product is classed as electronic equipment.
At the end of its useful life it should not be disposed of with general waste, it should be take to a
recycling point for electrical/electronic equipment. The crossed-out wheelie bin symbol is placed on
the rear panel as a reminder in conformance with the European WEEE Directive.
Note:All BCF Technology products are to be used for animal applications only.
3
Ovi-Scan
Operator safety
The Ovi-Scan is designed to operate only from a 12-volt DC source.
The use of a 12-volt lead acid battery ensures safety from electrical hazard.
If the unit is to be powered from a mains adapter, use only the BCF supplied adapter and use only in
dry conditions. See Appendix A – Safety principles and Appendix B – Safety devices.
When charging batteries, use only the BCF supplied charger. This charger is matched to the battery
capacity and will ensure long life and continued safety. Higher charge rates from unsuitable chargers
may lead to hazards from fire or battery leakage in addition to reducing battery life.
Although the Ovi-Scan runs from a low voltage source, dangerous voltages are generated within
the unit. For this reason, no attempt should be made to disassemble either the scanner or console.
Should you require any assistance please contact a BCF Technology service engineer.
4
Display layout
1.
RANGE
FREQ
POWER
GAIN
=
=
=
=
22 CM
3.5 MHZ
9
6
TALLY
COUNT
RUN
EMPTY
ONE
TWO
0
0
0
TOTAL = 0
THREE
FOUR
LATE
0
0
0
% LAMB = 100
2.
NEG TALLY
5.
3.
4.
TALLY
RUN/TOT
ADD+CLEAR
1. The current range, operating frequency, power and gain settings are displayed at the top left hand
corner of the screen.
2. The remote tally counter results are always displayed at the top of the screen; these are counted
from the remote tally box, connected to the front panel at ‘Tally’ (See Appendix E, connector F).
3. The grey bar below this contains 32 of the 256 shades of grey. This helps with the adjustment of
brightness and contrast and gives a comparison of grey intensity for the ultrasound picture.
4. The real time ultrasound sector can be displayed either as an inverted image or non inverted
image. As the range is altered, the speed of the probe varies to provide the best quality image.
The smaller the range, the faster the probe rotates.
5. The current function of the ‘soft’ keys is displayed along the bottom of the screen.
5
Ovi-Scan
Operating instructions
The operating instructions are to be read with reference to Appendix E on Page 25.
1 Preliminary switch on
Before connecting or disconnecting the probe, ensure that the console power is switched off and
that both probe and console connectors are free from dirt.
Connect the probe to the front connector marked ‘PROBE’ (G).
Rotate the probe connector until the notches on the probe and scanner align, and then screw the
retaining ring clockwise to lock the connector in position.
Connect the remote tally connector (optional) to the front panel marked ‘TALLY’ (F). Rotate the
connector until the notch on the tally connector aligns with the key on the console, then tighten
the outer ring to secure.
The Ovi-Scan is designed to operate only from a 12 volts DC source.
Use only BCF supplied battery pack, vehicle adapter cable, AC adapter or portable power station.
• Check that the connector is of correct polarity.
• Connect the battery cable to connector: (K) on the rear panel of the module. Rotate
connector until the notch on the power connector aligns with the key on the console then
tighten the outer ring to secure.
• Press and hold the ‘POWER’ button (L) on the front panel until the system beeps.
The green ‘DC POWER’ light (M) should be illuminated and the console will now perform a system
initialisation.
If the probe is connected, it will start to rotate.
The sector scan and settings will be displayed on the screen.
The buzzer will sound twice; the second indicates that the system initialisation is complete and the
system is ready to function.
If the supply voltage is too low (less than 9 volts) the system will display a ‘Low Battery’ message
for 6 seconds before powering down.
If the console and module cannot establish communications then the console will display a ‘Check
Duo Comms’ message before switching to the Duo-Scan video input. Unclip the latches and remove
the Duo-Scan module (see 3 Module removal/refitting). Check the five contacts on the base of the
Duo-Scan and within the console are clean, and refit the Duo-Scan module.
6
2 Controls
All functions of the console are set using menus selected using keys below the screen.
2.1 Power Button
The power button on the front of the pull out module is a soft power button, it does not disconnect
the power, but puts the system into a low-power, standby mode.
This button also doubles as an image freeze button (see 2.2.4 B), a short press will freeze the image,
a long press (more than 2 seconds) will power the system down.
2.2 Menu System
All functions of the Ovi-Scan are set using menus selected using the ‘soft keys’ below the screen, on
the pull out module.
Soft Key 1 (on the left) is used to cycle through the menus; the other keys are then used to access
sub-menus and settings.
The system defaults to the ‘TALLY’ menu on power up and cycles through the menus in the following
sequence: ‘Display’, ‘Control’, ‘Image’, ‘Ellipses’, ‘Drafting’, ‘RFID’ and ‘Modes’ before
returning to ‘TALLY’.
7
Ovi-Scan
2.2.1 Tally menu
TALLY
RUN/TOT
ADD+CLEAR
NEG TALLY
Use the Remote Tally Box to keep a count of foetal lambs identified.
For 0, 1, 2 or 3 lambs press the corresponding number on the box.
For 4 lambs press 1 and 3 simultaneously.
To register as a ‘Late’ press 0 and 1 simultaneously.
The total sheep and % lamb figures are automatically updated.
The Ovi-Scan stores the tally count even when it is switched off and power is removed. In addition
to displaying the running tally, a ‘total’ tally can be displayed. This function allows you to view
combined statistics, for instance if several flocks are being scanned for one customer.
To use this function the previous totals must be cleared before use.
Note: The Tally controller functions regardless of which menu is currently displayed.
A: Run/Tot
To toggle between running tally and total tally press soft key 2 (RUN/TOT). When displaying
total tally, counting is not possible. Return to running tally to continue counting.
B: Add+Clear
To reset the running tally and add it to the total, press soft key 3 (ADD+CLEAR). Before starting
the next flock, take a note of the running tally displayed.
C: Neg Tally
To remove a tally entry if a mistake has been made, press soft key 4 (NEG TALLY) then press the
value that has to be removed on the tally box. Repeat these two steps for each item that has to be
removed. Pressing the (NEG TALLY) button again cancels the operation.
It is important to ensure that both running tally and total tally are both cleared for each
customer (see 2.2.7 for ‘Clear Tally’ function).
8
2.2.2 Display menu
DISPLAY
BRIGHT 12
CONTRAST 10
↓
↑
The ‘DISPLAY’ menu contains 2 sub-menus: ‘BRIGHTNESS’ and ‘CONTRAST’.
To alternate between these, press soft key 2.
To adjust the settings, use the arrow keys at soft keys 3 and 4.
The grey bar may be used as a guide in setting these controls; when the controls are set to suit
the lighting conditions, individual blocks should be discernible within both the lighter and darker
extremes of the grey bar.
The current brightness and contrast settings are displayed (values between 1 and 16).
9
Ovi-Scan
2.2.3 Control menu
CONTROL
RANGE
GAIN
POWER
FREQUENCY
↓
↑
The ‘CONTROL’ menu contains 4 sub-menus ‘RANGE’, ‘GAIN’, ‘POWER’ and ‘FREQUENCY’. Press
soft key 2 to cycle through the sub-menus then use the arrow keys at soft keys 3 and 4 to adjust the
settings.
A: Range
When ‘RANGE’ is displayed above soft key 2, the arrow keys can be used to adjust the range to the
following values: 3 cm, 6 cm, 9 cm, 12 cm, 16 cm, 19 cm, 22 cm, 25 cm, 28 cm and 32 cm.
As the range is increased the probe speed and ultrasound frame rate are reduced, allowing time for
the ultrasound echoes to return from greater depths.
Note: The range can also be adjusted via the tally controller. Pressing tally ‘1’ & ‘2’ simultaneously
shifts the range up, pressing ‘3’ & ‘0’ simultaneously shifts the range down.
B: Gain
When ‘GAIN’ is displayed above soft key 2, the arrow keys can be used to adjust the gain within the
range 1-10.
This is typically set to 6 so that the background noise is just visible, but can be used to alter echo
levels as required.
C: Power
When ‘POWER’ is displayed above soft key 2, the arrow keys can be used to adjust the power within
the range 1-10.
This increases or decreases the penetration of ultrasound. Power should be set to 9 and only
decreased when scanning in the lower ranges (below 12cm).
D: Frequency
When ‘FREQUENCY’ is displayed above soft key 2, the arrow keys can be used to adjust the frequency
to the following values: 2.5 MHz; 3.5 MHz; 5.0 MHz and 7.5 MHz.
N.B. The default value for each of the above settings can be altered by the user, see 2.2.8
10
2.2.4 Image menu
IMAGE
INVERT
REVERSE
FREEZE
A: Invert
At switch on, the image is displayed with the probe head at the bottom of the screen.
To change the orientation of the scan display, press soft key 2, ‘INVERT’. Press ‘INVERT’ again to return
to the original orientation.
B: Reverse
At switch on, the image is displayed with the scan sweeping clockwise.
To change the scan direction, press soft key 3, ‘REVERSE’. Press ‘REVERSE’ again to return to the
original direction.
C: Freeze
A complete ultrasound image frame can be held by pressing soft key 4, ‘FREEZE’. To return to real time
ultrasound, press ‘FREEZE’ key again.
When the image is frozen, no ultrasound pulses are transmitted. In ‘Freeze’ mode, the user can cycle
through the menus as normal, but only the ‘Foetal Age’ and ‘Display’ settings can be altered.
N.B. The default ‘Invert’ and ‘Reverse’ settings can be altered by the user, see 2.2.8.
11
Ovi-Scan
2.2.5 Foetal age menu
FOETAL AGE
OFF
CATTLE
SHEEP
Size or
units
Size or
units
On/Off
On/Off
The ‘FOETAL AGE’ menu provides access to aging indicators for both cattle and sheep.
Press soft key 2 to switch between ‘OFF’, ‘CATTLE’ and ‘SHEEP’. If appropriate, a crown-rump length
indicator is also displayed for cattle.
All sizes of indicator can be individually switched on or off, button 3 is used to select the indicator or
the displayed units and button 4 switches the indicator on/off or, in the case of units selects between
days, weeks or millimetres.
A: Cattle
The cattle trunk diameter indicators are displayed in five sizes: 67 days, 77 days, 91 days, 105 days
and 119 days. The crown rump length is displayed in one size of 63 days.
Note: Cattle indicators are only available on ranges of 16 cm – 25 cm.
B: Sheep
The sheep indicators are available in six sizes: 56, 63, 70, 77, 84 and 91 days. 56 & 77 days are
displayed as short lines, near the root of the scan area, representing trunk diameter, the remaining
indicators are displayed as ellipses representing trunk diameter.
Note: Sheep indicators are only available on ranges of 19 cm – 28 cm. The 91 day indicator is only
available on the 25 cm & 28 cm ranges.
12
2.2.6 Drafting menu
DRAFTING
TALLY 0
DELAY
100
The drafting menu is used to configure the switching of the drafting outputs, each tally value
(0, 1, 2, 3, 4 and late) has separate settings for delay, and 4 gates.
A: Selecting Tally
Pressing soft key 2 cycles through the tally values in the following sequence; ‘0’, ‘1’, ‘2’, ‘3’, ‘4’
and ‘Late’.
B: Select Delay or Gate
Pressing soft key 3 cycles through the delay and gate options in the following sequence:
‘Delay’, ‘Gate 1’, ‘Gate 2’, ‘Gate 3’, ‘Gate 4’.
C: Set up Delay time or Gate settings
Pressing soft key 4 cycles through the available values for the option selected in column 3.
If ‘delay’ is selected, then pressing soft key 4 will cycle through delays of 100 mS, 300 mS and
500 mS.
If one of the gates is selected then pressing soft key 4 will cycle through the gate options (‘on’, ‘off’
or ‘disabled’).
Example:
To set up tally 1 for a 300 mS delay with gate 1 on, gate 2 off.
Press soft key 1 until the drafting menu is visible.
Press soft key 2 until ‘tally 1’ is visible in the 2nd column.
Press soft key 3 until ‘Delay’ is visible in the 3rd column.
Press soft key 4 until ‘300’ is visible in the 4th column.
Press soft key 3 until ‘Gate 1’ is visible in the 3rd column.
Press soft key 4 until ‘On’ is visible in the 4th column.
Press soft key 3 until ‘Gate 2’ is visible in the 3rd column.
Press soft key 4 until ‘Off’ is visible in the 4th column.
Note: The drafting settings are stored in the system even when power is removed.
The switched outputs are accessed via the ‘Drafting’ connector ‘Q’
13
Ovi-Scan
2.2.7 RFID menu
RFID
FLASH OFF
TALLY CLEAR
The RFID menu can be used to configure the Ovi-Scan so that tally data can be transferred to certain
manufacturers’ RFID scanners via the ‘Serial Data’ connector ‘P’.
B: FLASH ON/OFF
Pressing soft key 3 will switch the flash on tally press on or off. If this option is on, then the
greyscale bar on the display will flash whenever a button on the tally controller is pressed.
C: Tally Clear
Pressing soft key 4 will clear the total tally stored in the Ovi-Scan.
2.2.8 Modes menu
MODES
OVI-STORE
DUO-STORE 1
RF CHAN 3
The ‘MODES’ menu is used to store the default settings for the system in both Ovi-Scan and Duo-Scan
modes.
A: OVI-STORE
Pressing soft key 2 will store the current depth, frequency, gain and power settings as well as the
scan orientation, direction settings, brightness & contrast and all foetal aging indicators.
B: DUO-STORE
Pressing soft key 3 will store the current depth, frequency, gain and power settings as well as the
scan orientation, direction settings and all foetal aging indicators for use in Duo-Scan mode. Up to 8
different settings may be stored.
Each time the button is pressed, a new Duo-Scan mode is stored, once the limit of 8 is reached, the
scanner needs to be switched off and on to start again from mode 1.
The displayed value (i.e. ‘Duo-Store1’) shows which mode will be stored when the button is pressed.
C: RF Chan 3
Pressing soft key 4 changes the RF channel that the Duo-Scan transmits on.
14
3 Module removal/refitting
The scan module can be removed for use with other accessories to provide a mobile, backpack
mounted scanner (Duo-Scan).
To remove the module:
• Ensure that the power is switched off
• Release the latches on both sides of the console
• Withdraw the module
To refit the module:
• Ensure that the power is switched off
• Gently insert the module
Once the module is fully home, both latches should be closed.
15
Ovi-Scan
4 Portable power sources
4.1 12 Volt DC source
The Ovi-Scan will operate directly from an independent stable 12-volt DC source using the Connector
K (see Appendix E on page 25) on the rear panel. The DC power consumption is approximately 20VA.
PRECAUTIONS:
The instrument should not be connected to any source with a voltage greater than that of a
12 volts vehicle battery or damage may result.
Connecting the battery in reverse polarity may damage the instrument and the battery source.
To avoid the risk of explosion do not short circuit the positive and negative terminals of the
battery.
It is recommended that the supply leads from the battery should have in line overload
protection (fuse) close to the battery.
16
5 Duo-Scan option
The scan module can be removed from the Ovi-Scan console and used with other accessories as a
highly portable scanner (Duo-Scan).
The Duo-Scan accessories allow the ultrasound image to be viewed on display headset, or remote
monitor options, with the module housed in a wipedown case mounted in a backpack with a battery.
Displays are connected to the ‘Display’ connector ‘H’.
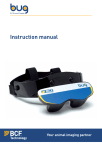
When operating as Duo-Scan the ultrasound image can be viewed on BUG BCF Universal Goggles and
on the Easi-Scan Remote Display monitor.
The battery clips onto the rear of the module.
The standard probe and portable display are connected to the front panel of the module.
When powered from a battery, the unit is switched on by front panel power button.
When used as a Duo-Scan, a number of modes may be stepped through using soft key 1, ‘MODE’. No
system or tally information is displayed on screen, only the greyscale bar and ultrasound image are
displayed.
In Duo-Scan mode, a battery capacity and voltage reading are displayed in the lower corners of the
display. The menu disappears after approximately 7 seconds, leaving only the scan, voltage and
battery capacity displayed.
5.1 MODE CONTROL
All possible modes are stepped through by pressing soft key 1 ‘Mode’.
The default modes may be changed whilst the Duo-Scan module is in the console (see 2.2.8).
Before inserting the module in the Ovi-Scan console, ensure that the power is off, and slide gently
home. If some resistance is met, ensure that the module is the right way up and that the latches are
open. Once the module is fully home, both latches should be closed.
MODE 1
POWER
GAIN
↓
↑
Pressing soft key 1 will cycle through all available modes, for each mode, the range and frequency will
be displayed briefly on the screen.
Pressing soft key 2 will alternate between power and gain and soft keys 3 and 4 are used to adjust
the selected value.
17
Ovi-Scan
6 Ovi-Scan console
The Ovi-Scan console can be used as a stand alone video monitor. If the console is switched on
without the Duo-Scan attached, it will automatically switch into ‘Video Monitor’ mode. In this
mode, the displayed video input can be changed by pressing the buttons on the tally controller.
Note: To switch the console on without a Duo-Scan attached, press buttons 1, 2 or 3 on the
attached tally controller.
Button 1:
Pressing button 1 on the tally controller will select the external video input (connector ‘M’) on the
rear panel of the console.
Button 2:
Pressing button 2 on the tally controller will select the RF video input. The console defaults to RF
channel 1 and each subsequent press will cycle through the 4 available channels.
The selected RF channel is fed out through the ‘Ext Vid’ connector ‘N’.
Button 3:
Pressing button 3 on the tally controller will select the digital video input, this is the input used
by the Duo-Scan. This allows the Duo-Scan output to be viewed on the console even if correct
communications have not been established.
Button 0:
Pressing button ‘0’ on the tally controller will put the console into low-power standby mode.
Brightness/Contrast control
The brightness and contrast in video mode can be adjusted as follows:
Pressing ‘1’ & ‘2’ on the tally increases the selected parameter.
Pressing ‘3’ & ‘0’ on the tally decreases the selected parameter.
Pressing ‘2’ & ‘3’ on the tally switches between brightness and contrast.
18
Appendix A – Safety principles
If the scanner must be powered from a mains supply, rather than a 12-volt battery, observe the
following safety suggestions.
Ensure the equipment is of good working order and electrical bonding is intact.
If an extension lead is to be used it must be properly constructed and in good condition; it must be a
three core cable (live, neutral and earth) and be used with 3-pin connectors.
For this reason we recommend that you always use your own leads which you know are safe. Do not
turn up at a site and rely on being able to find an extension lead available for your use.
This is important for two reasons:
• To act as a safety barrier between the operator and any live parts.
• If an internal fault should occur within the extension lead, mains voltage is conducted away
through the earth lead. The resulting current would trip a Residual Current Device (RCD), if
fitted, or blow a mains fuse.
An RCD is designed to trip at 30 mA of earth current which combined with a suitable low earth
impedance should result in a maximum voltage shock of no more than 50 volts at which the RCD will
then cut off isolating the equipment at zero potential.
If no RCD is fitted then the mains fuse would blow, however, this takes significantly longer (depending
on fuse rating) and can result in shock voltages of much higher values, unless an isolating step down
transformer with a centre tap is used in which case the maximum voltage present would be 55 volts.
A small voltage may exist between the instrument case and the ground when significant earth
current is flowing in the vicinity. This might be enough to be felt by the operator or the subject and
the following guide-lines should be followed.
• Do not set up for operation close to an electric fence, especially an electric fence control box.
• Do not set up for operation near the main earth point of an electricity supply installation.
• If another piece of equipment becomes faulty which is connected without an RCD, it would not
be protected by your RCD, it is possible then that dangerous voltages may appear on the earth
lead.
The only way to protect against any earth problem is to supply your own earth line from your crate
and to an earth rod or metal work close to where you are working.
Note: The safest manner of operation is from a 12 volts battery source.
19
Ovi-Scan
Appendix B – Safety devices
Residual Current Devices (RCDs)
A Residual Current Device has two specific purposes:
1. To protect plant and equipment from fires started by (usually) low fault currents passing from
live to earth.
2. To prevent fatal electric shock to personnel by reducing to “safe” levels (not eliminating) the
value and length of time a person is exposed to current flow through the body.
An RCD does not detect over currents or short circuits and must be used in conjunction with
conventional circuit protection devices, which may be included in the same physical package. The
most common value of operating current for an RCD is 30 milliamps (mA).
An RCD should be tested by stimulating an earth fault condition which is independent of any test
facility within the device. The test push should be used at regular intervals in order to test the
function of the tripping mechanism. It does not test if the device will operate in the event of an earth
fault.
Anti-Surge adapter
The function of the anti-surge adapter is to reduce the possibility of equipment damage caused by
voltage transients appearing on mains supply lines. These transients can be extremely large and if
the anti-surge device is not quick enough (nano-second operation) the transient can get through.
Transients can also be induced on local supply cables and extension leads. Therefore, fit the antisurge device close to the scanner.
20
Appendix C – Gel powder mix
Ovi-Scan Gel has been formulated particularly to meet the requirements of animal scanning services
for a low cost ultrasonic coupling fluid although its use in other applications is appropriate.
The gel is supplied in powder form and mixed with water to form the coupling fluid. The packs of gel
powder supplied are suitable for mixing up to 12 litres of gel; the low volume of powder required to
produce large quantities of gel makes it easy to store and transport.
You can control the consistency of the gel by varying the proportions of the mix to compensate for
various factors e.g. method of application, shearing equipment used, operator preference etc.
Ovi-Scan Gel is a product of BCF Technology Ltd which has been tested for oral toxicity, dermal
irritation and eye irritation. It is defined as non toxic and non irritant.
It contains no bactericidal or fungicidal additives.
Guidance for mixing
1. As the mixture contains water and the gel powder does not contain any anti-corrosive
ingredients, it is important to use containers which are not likely to corrode.
2. The gel component is strongly hydrophilic and mixing can present difficulties since a very
small amount of water will readily disperse through a large quantity of powder forming a hard
lump. Left alone the lump will slowly disperse and beyond a certain point dilution becomes
very easy. Continuous stirring of the water and the slow addition of the gel powder will
produce a suitable solution.
3. Generally speaking the smoother the surface the higher the viscosity and the less the amount
of couplant required.
4. The final consistency of the gel is determined by the ratio of powder to water. The powder
is supplied in packages which are labelled with the quantity of water to be added and it is
important to measure the water accurately to obtain consistent results. A one and a half
percent solution has been found to be ideal for automatic application to smooth skin areas
used in sector scanning.
5. The gel will be ready for use within a few minutes of mixing. However, we recommend that the
gel is mixed the evening before it is required to ensure that a supply is available on arrival
at the working site. This is particularly so in the early stages when mixing experience is
limited. Concentrated solutions can be mixed and diluted further on site to give the required
consistency.
21
Ovi-Scan
Use of powered mixing devices
Set up a fairly rapid down current of water which will flow through the paddle of the mixing tool. Pour
the powder into the flow of water so that it is evenly dispersed through the liquid. Drill guns fitted
with the paint stirring tool are excellent for the mixing of large volumes of gel.
Note: When using electrically powered mixers it is important to ensure the electrical equipment
is in good condition. The appliance should not be used with damaged cables, insecure clamps or
inadequate earthing connections where these are required. This is particularly applicable if mixing
is carried out on site.
22
Appendix D – Service and maintenance
As specialists in providing ultrasound imaging equipment for animal husbandry applications,
we understand the importance of having reliable equipment. All BCF products are designed and
manufactured to withstand the environments in which they are going to be used. However there is no
substitute for careful usage.
The Ovi-Scan was designed for reliability in the animal husbandry marketplace. However, should you
experience any problems with your Ovi-Scan, BCF Technology service engineers will be available to
provide rapid service support and ensure optimum performance of your BCF system.
AXIAL AND RADIAL PROBE
• Always clean the probe immediately after use and before any contamination can dry in. The
probe head can be immersed in warm (not hot) water to clean.
• The probe connector is carrying critical pulses from the console to the probe head and back,
it is imperative to keep these contacts clean and free of contamination. To maintain a good
contact, clean the connectors using methylated spirits (or equivalent alcohol) and a small,
non-metal brush to gain access to the contacts, flush with alcohol and leave to drain hanging
downwards.
• Never force a connector if it will not go together easily. Debris may collect between the pins
and can be carefully removed with a small screwdriver.
• Be very careful to avoid anything getting into the gold plated connector inserts, this may
cause damage and some of these are expensive to replace.
• Do not knock or scrape the transducer window, this may cause the window to burst. Do not
push against the probe window, the sealing may be damaged or fluid may be forced out of
the internal expansion tube. If a window or its seal leaks then the probe must be returned to
BCF Technology Ltd. Further use of the probe with a window leakage will continue to damage
other internal parts of the probe due to dirt from outside contaminating the internal gears.
• Do not forcibly bend or pull the cable connecting the probe to the module.
• Examine the probe regularly for any damage, especially the window. The chamber behind the
window is filled with a silicon fluid and it is normal for a small bubble, about 1 mm diameter,
to be present. A large bubble or signs of leaking fluid should be referred to a BCF Technology
service engineer.
• Any other problems or maintenance queries should be referred to a BCF Technology service
engineer.
23
Ovi-Scan
Ovi-Scan CONSOLE
• Keeping all the connectors clean and dry is especially important, use methylated spirits (or
equivalent alcohol) and a small tooth brush to gain access to the contacts, flush with alcohol
and leave to drain/dry.
• The aluminium outer case and PVC carrying case can be cleaned using a cloth with warm,
soapy water. The front panel can be cleaned with a cleaning agent such as isopropyl alcohol
cleaning cloths.
Note: If using soap and water on the front panel ensure that no water enters any of the
connectors.
• Examine all cables (power and probe) on a weekly basis for signs of damage such as cracks or
splits. Pay extra attention close to connectors and joints. If damage is found it is imperative to
have repairs carried out immediately to avoid further damage or risk of electric shock.
• The console display is easily marked or damaged, take care to avoid sharp or pointed objects
near the display. Do not use abrasive cleaners on the display, computer screen wipes or
isopropyl alcohol are ideal for cleaning the display.
• Any other problems or maintenance queries should be referred to a BCF Technology service
engineer.
To ensure optimum performance we recommend that the equipment is serviced once a year by a
BCF service engineer. The service engineer will thoroughly check the equipment, ensuring that
electrical safety is being maintained, and advise of any work which appears to be necessary.
24
Appendix E – Key to scanner connectors
Console rear panel
Duo-Scan and console front panels
25
Ovi-Scan
Main service centres
BCF Technology Ltd – UK
3 Tailend Court
Starlaw Road
Livingston EH54 8TE
Scotland, United Kingdom
Tel: +44 (0) 1506 460 023
Fax: +44 (0) 1506 460 045
E-mail: [email protected]
Web: www.bcftechnology.com
BCF Technology Ltd – IRE
Unit 2, Quayside Business Park
Mill Street, Dundalk
Co. Louth, Ireland
Tel: +353 (0) 42 932 0070
E-mail: [email protected]
Web: www.bcftechnology.com
BCF Technology USA Ltd., LLC
2625 Highway 14 West, Suite K
Rochester, MN 55901
Tel: +1 507-529-8200
Toll Free: +1 800-210-9665
E-mail: [email protected]
Web: www.bcftechnology.com
BCF Ultrasound Australasia Pty Ltd
10/56 Norcal Road
Nunawading 3131
Melbourne, Victoria
Australia
Tel: +61 (0) 3 9894 8980
E-mail: [email protected]
Web: www.bcfultrasound.com
26
Accessories
Radial probe (rectal)
Axial probe
Batteries and charger
Video cable
BUG
(BCF universal goggles)
DC lead
Carry bag
Tally counter
Gel feed system
27
Ovi-Scan
www.bcftechnology.com
© BCF Technology Ltd, July 2011