1
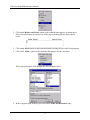
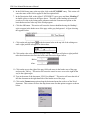
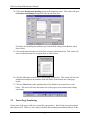
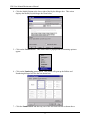
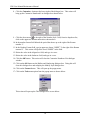
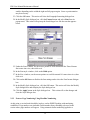
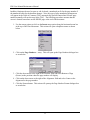
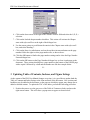
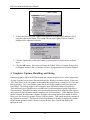
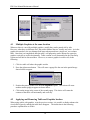
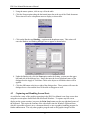
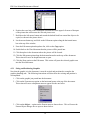
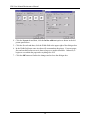
FRS User Manual Maintenance Manual
6. Position the cross hair of the rectangular selection tool at the upper left corner of that part
of the picture that will become the selected picture area.
7. Hold down the left mouse button and stretch the dashed lined box around the object to be
copied, as shown in the picture above.
8. Let the mouse button up, and click on the Edit menu option along the horizontal menu
bar at the top of the window.
9. From the Edit menu option dropdown list, click on the Copy option.
10. Switch back to the Word document that the picture will be pasted into.
11. Click that place in the document where the picture will be located.
12. Click the Edit menu option along the horizontal menu bar at the top of the document.
This action will cause its dropdown menu to open.
13. Click the Paste option on the Edit menu. This action will paste the selected graphic area
into the Word document.
4.3.1 Sizing and Positioning Graphics
Now that the graphic is in the document, it must be resized and positioned to complete the
graphics-handling task. The following instructions will show how the resizing and position is
accomplished.
1. Click on the graphic just pasted into the document.
2. Click on the Format menu option on the horizontal menu at the top of the document.
This action will cause a dropdown menu to appear like the one below.
3. Click on the Object ... option on the Format menu as shown above. This will cause the
Format Object dialogue box to open as shown below.
19