1
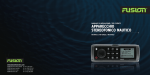
USER / INSTALLATION MANUAL
MARINE STEREO
MS-IP600 / MS-CD600 / MS-AV600
www.fusionelectronics.com
FUSION Electronics New Zealand
FUSION Electronics Australia
FUSION Electronics Europe
FUSION Electronics USA
Ph: +64 9 369 2900
Ph: +61 1300 736 012
Ph: +44 1268 889580
Ph: +1 623 580 9000
Downloaded from Caradio-Manual.com Manuals
SPECS & LICENSING
021
PRECAUTIONS
Do not attempt to open the units chassis. There are no user
serviceable parts or adjustment’s inside.
HANDLING COMPACT DISCS (CD/CD-R/CD-RW)
This unit has been tested with all compatible authentic iPod models
under normal expected operating conditions, free from any preexisting defects in either the unit or the iPod. » Avoid exposing the disc to direct sunlight
No responsibility can be taken for use of the unit other than under
normally expected operating conditions in conjunction with fully
functional and undamaged iPod units which have been manufactured
and authorised by Apple Inc.
BEFORE INSERTING IPOD (MS-IP600)
» Avoid touching the surface of the disc
» Ensure the disc is clean
» Ensure the disc is not scratched or damaged
PLAYBACK OF CD-R/CD-RW
» If your CD-R/CD-RW will not play, Ensure that the last recording session was closed or finalized.
Please ensure iPod dock connector is clean, dry & free from damage.
Check that the units iPod dock is free from obstructions. Insert
correct sleeve combination to match your iPod (Never insert iPod
without a correct sleeve.)
FCC COMPLIANCE STATEMENT
Ensure iPod is inserted with display facing upwards, Never force your
iPod into the dock, if the iPod does not mate with reasonable ease
the sleeve/iPod combination is most likely incorrect.
» This device must accept any interference received, including interference that may cause undesired operation.
Always remove your iPod from the unit when not in use & do not
leave in your vessel, this in turn prevents risk of theft or damage as
vessel cabins can reach extreme temperatures.
RECORD YOUR PRODUCT DETAILS HERE:
Do not remove iPod or use stereo in a distractive manner whilst
operating the vessel, check and obey all marine laws in association
with use.
Take care when removing iPod from unit as surfaces may be warm.
Downloaded from Caradio-Manual.com Manuals
This device complies with part 15 of the FCC rules. Operation is
subject to the following two conditions:
» This device may not cause harmful interference, and
Model Number
Date Of Purchase
Affix Receipt Here
Allow 50mm (2”) for
cables at rear of unit.
SPECS & LICENSING
020
SPECIFICATIONS AND LICENSING
CD PLAYER
SPECIFICATIONS
CHASSIS DIMENSIONS Depth 168mm - 6-5/8”
Width 180mm – 7-1/8”
Height 52mm – 2-1/16”
Laser power Class 1
SUPPORTED MEDIA
» Only use discs with the following logo’s on the label.
FACE PLATE DIMENSIONS Depth 35mm – 1-3/8”
Width 217mm – 8-9/16”
Height 79mm – 3-1/8”
OPERATING VOLTAGE: 10.2 – 16VDC Negative ground
» If you use discs without the above logo’s, correct performance cannot be guaranteed.
FUSE RATING:
15 Amp
» You can play audio discs recorded on DVD +R -R,
CD-R (Recordable), or CD-RW (Re Writable) media
OUTPUT POWER: 70 Watts x 4 (Max)
26 Watts RMS @ 4 Ohms
43 Watts RMS @ 2 Ohms
» MP3 formatted audio files can also be played on DVD +R -R , CD-R and CD-RW containing these files.
SPEAKER IMPEDANCE: 2 – 4 Ohms per channel
» iPod classic, 80GB 120GB 160GB (2007, 2009);
» iPod with video, 30GB 60GB 80GB;
» iPod touch; iPod touch (2nd Gen);
» iPod nano (3nd Gen); iPod nano (4th Gen);
» iPod nano (5th Gen)
For latest news on supported iPod models visit
www.fusionelectronics.com
PRE – OUTPUT VOLTAGE: 3V
TUNING RANGE
Europe and Australasia:
FM Radio
Frequency Range: 87.5 – 108 MHz
Frequency step: 100 kHz
USA
FM Radio
Frequency Range: 87.5 – 107.9 MHz
Frequency step: 200 kHz
AM Radio
Frequency Range: 522 – 1620 MHz
Frequency step: 9 kHz
AM Radio
Frequency Range: 530 – 1710 MHz
Frequency step: 10 kHz
COMPATIBLE WITH THE FOLLOWING iPod MODELS:
LICENSING
Apple, the Apple logo, iPod and iTunes are Trademarks of Apple
Computer, Inc., registered in the U.S. and other countries.
© 2007 SIRIUS Satellite Radio Inc. “SIRIUS” and the SIRIUS dog logo
are trademarks of Sirius Satellite Radio Inc. All rights reserved.
PUBLISHED BY FUSION ELECTRONICS LIMITED. © Copyright 2009 by FUSION Electronics Limited. All rights reserved. Specifications and design are subject to change without notice. v5.2
YOU CAN HELP PROTECT THE ENVIRONMENT Please remember to respect the local regulations: Hand in the non-working electrical equipment to an appropriate waste disposal centre.
Downloaded from Caradio-Manual.com Manuals
CONTENTS
BUTTON DESCRIPTION
INSTALLATION
CONNECTIONS
WIRING DIAGRAM
GENERAL OPERATION
RADIO OPERATION
SIRIUS SATELLITE RADIO (USA ONLY)
CD/MP3 OPERATION
AUX OPERATION
iPod OPERATION
DVD OPERATION
MS-AV600 IR REMOTE OPERATION
ZONE OPERATION
MENU STRUCTURE
TROUBLESHOOTING
FUSION MARINE ACCESSORIES
SPECIFICATIONS AND LICENSING
2
4
5
6
7
8
9
10
11
12
14
15
16
17
18
19
20
iPod EXTERNAL DOCK
iPod CONNECTION CABLE (1.5m)
MS-IPDOCK / MS-IPDOCKG2
MS-IP15L2
Connect this external iPod
dock to the Marine CD Stereo
(MS-CD600) or the Marine DVD
Stereo (MS-AV600) to provide
the additional benefit of an
integrated housing for your
iPod. The bulkhead mount dock
complies with IPx5 Waterproof
Standards, protecting your iPod from the harsh marine environment.
The iPod marine external dock can be flush mounted or wall mounted.
Enables the connection of your
iPod to the Marine CD Stereo
(MS-CD600) or the Marine DVD
Stereo (MS-AV600).
MS-IP600 model shown
ROTARY ENCODER
Turn
To adjust volume, move up or down a menu
structure, or adjust a specific setting item.
Press
To select a highlighted option, confirm a setting.
Press to step through each zone for volume
adjustment.
Press and Hold
For quick access to subwoofer level adjustment
Downloaded from Caradio-Manual.com Manuals
CATCH RELEASE BUTTON
Press down to open front panel.
EJECT (MS-CD600 and MS-AV600 only)
Press to eject CD/DVD. (Located inside front panel)
POWER
Press to turn the unit ON/OFF.
MENU
Press to enter Menu System. Press to return to
previous screen.
MARINE WIRED REMOTE
MARINE ZONE AMPLIFIER
MS-WR600
MS-AM702
The Marine Wired Remote Control
extends the capabilities of the
Stereo by enabling local control
of the audio in each zone of your
vessel. Up to three remote’s can
be linked to the Stereo, via a
CANbus network, providing true
system flexibility.
The Marine 2x70 Watt D-Class
Zone Amplifier is designed
to support the multi-zone
technology of the Marine Stereo.
The Zone Amplifier is small,
enabling discrete installation and
when combined with the Marine Stereo provides the platform for a True
multi-zone audio system.
MARINE ACCESSORIES
FUSION MARINE ACCESSORIES
019
BUTTON DESCRIPTION
002
BUTTON DESCRIPTION
BUTTON DESCRIPTION
003
TROUBLESHOOTING
018
TROUBLESHOOTING
RESET BUTTON
Press the Reset button in the event of a malfunction to reset the unit,
where normal operation is not automatically restored within 1 minute.
RADIO
Press to access the Radio source AM - FM - SIRIUS.
CD (MS-CD600 only)
Press to access the CD/MP3 source.
DVD (MS-AV600 only)
Press to access the DVD/CD/MP3 source.
Press and Hold
Press to access Auxiliary source.
iPod
PLAY/PAUSE
Press to access the iPod source.
Press again to access Auxiliary source (MS-CD600
& MS-AV600).
DVD/CD/MP3/iPod - Pause / resume the current track.
AM/FM/Sirius - Switch between Auto/Preset tuning
mode.
BACK/PREVIOUS
Short Press
AM/FM/Sirius - Store the current station as a Preset.
DVD/CD/MP3/iPod - Select the previous track.
AM/FM/Sirius - Start tuning down the frequency
spectrum. (Auto/Manual tuning mode) or previous
preset (Preset mode).
Press and Hold
DVD/CD/MP3/iPod - Rewind the current track.
AM/FM/Sirius - Enter Manual Tuning mode.
Downloaded from Caradio-Manual.com Manuals
DVD/CD/MP3/iPod - Select the next track.
AM/FM/Sirius - Start tuning up the frequency
spectrum. (Auto/Manual tuning mode) or next
preset (Preset mode).
DVD/CD/MP3/iPod - Forward the current track.
AM/FM/Sirius - Enter Manual Tuning mode.
AUX (MS-IP600 only)
RESET BUTTON
FORWARD/NEXT
Short Press
Press and Hold
MUTE
Mutes all sound in all zones.
CLOCK
Displays the clock.
DISPLAY
Press to enter the display settings screen.
Adjustment can be made to the Contrast and
Brightness.
IF ANY MODIFICATION TO THE VESSEL IS REQUIRED, SUCH AS DRILLING HOLES ETC FUSION
RECOMMENDS CONSULTATION WITH YOUR BOAT DEALER OR MANUFACTURER BEFOREHAND.
ROOT MENU
» Remove the Sun Cover from the unit
» Fit mounting gasket
» Use either the supplied 4 x wood screws, or 4 x machined screws
and metal clamps to affix the unit into position.
» Insert the unit into the mounting hole
» The unit must be mounted within 30 degrees of the horizontal plane.
» Pull down the front face to expose the mounting screw locations.
Note: In some circumstances a back strap or
brace may be required at the rear of the Unit
(Back Strap / brace is not included).
Mounting Gasket
ELECTRICAL WIRING
Appropriate mounting is very important to
ensure correct operation. Select a location
that allows both free/open airflow around
rear of chassis, whilst minimizing exposure
to moisture. Allow adequate room at the rear
of the unit for the cable looms (approx 2-3”).
Caution: The MS-IP600, MS-CD600 and MS-AV600 are designed for vessels with a 12V DC Negative ground electrical system
Downloaded from Caradio-Manual.com Manuals
MENU STRUCTURE
MENU STRUCTURE
017
INSTALLATION
004
INSTALLATION
The FUSION Marine Stereo makes it possible to have 3 ‘Zones’, that
have independent volume control.
Zone 1 and 2 are powered and can be linked, Zone 3 requires a
FUSION Marine Amplifier. All Zones have adjustable volume limits.
Note: If the Zone is selected as ‘Off ’ The features are not available.
ZONE SETUP
Press the ‘Menu’ button and select ‘Zones’. Select the Zone you wish
to setup.
ZONE ON/OFF
Select ‘On’ if Zones are present on the vessel.
Note: Zone 1 cannot be turned OFF
VOLUME LIMIT
Select ‘Volume Limit’ to set the desired maximum output volume for
each individual Zone.
LINEOUT
Lineout gives you the ability to connect a FUSION Marine Amplifier.
Note: The lineout can independently be assigned to Zone 1, 2 or 3.
Press the ‘Menu’ button and select ‘Zones’. Select ‘Lineout’. Select the
Zone you are assigning to the Lineout.
SUBWOOFER
DESCRIPTION
Battery +12VDC
Accessory +12V switched
Negative Ground
Remote Amplifier Turn On
COLOUR
Yellow
Red
Black
Blue/White
Refer to the wiring diagram for reference (pg 6)
Note: The +12V switched and +12V battery can be joined for some
installation requirements.
ZONE CONNECTIONS
Zone 1 White = Speaker Left Positive
White / Black = Speaker Left Negative
Grey = Speaker Right Positive
Grey/ Black = Speaker Right Negative
Zone 2 Green = Speaker Left Positive
Green / Black = Speaker Left Negative
Purple = Speaker Right Positive
Purple / Black = Speaker Right Negative
Connect an AM/FM marine antenna.
Press the ‘Menu’ button and select ‘Zones’. Select ‘Subwoofer’ then
‘Subout Zone’. Select the desired subwoofer zone.
Note: The subwoofer can independently be assigned to Zone 1, 2 or 3.
AUX INPUT
Note: Speaker connection (2 Ohm Stereo minimum). 2 pairs of 4 Ohm
Connect an Auxiliary source to the left and right RCA
(White = L, Red = R).
speakers per channel can be connected in parallel to achieve 2 Ohm
configuration.
SUB FILTER
iPod CONNECTION (MS-CD600 and MS-AV600 only)
Zone 3/Lineout Low level output
Change the assigned zone of the subwoofer. Also adjust the sub
level and filter.
SUBOUT ZONE
ANTENNA CONNECTION
Connect the 1.5m iPod accessories lead MS-IP15L (not included), or
connect the MS-IPDOCK (not included)
Allows the volume control to operate Zones 1 + 2 as a combined pair.
The Zone set up for Zone 1 and 2 can be configured separately when
in this mode.
SUB LIMIT
SIRIUS SATELLITE RADIO (For use in USA only)
Press the ‘Menu’ button and select ‘Zones’. Select ‘Subwoofer’ then
‘Sub Limit’. Select the desired maximum subwoofer output volume.
Connect to SiriusConnect™ tuner (not included)
Press the ‘Menu’ button and select ‘Zones’. Select ‘Zone 1’ then
‘Link Zone 1 + 2’. Select ‘On’ to activate this feature.
Note: Press and Hold the ‘Rotary Encoder’ for quick access to
Connect a marine wired remote to the CANbus system connector.
Up to 3 remotes can be connected to the system.
subwoofer level adjustment
WIRED REMOTE (MS-WR600)
VIDEO CONNECTION (MS-AV600)
Connect the composite video or the S-Video output to a TV / LCD
monitor.
Downloaded from Caradio-Manual.com Manuals
CONNECTIONS
CONNECTIONS
Press the ‘Menu’ button and select ‘Zones’. Select ‘Subwoofer’ then
‘Sub Filter’. Select the desired frequency.
LINK ZONE 1 + 2
005
ZONE OPERATION
016
ZONE OPERATION
(For connection to external amplifier)
White RCA= Left Output
Red RCA = Right Output
Orange RCA= Subwoofer Output
Note: Line Output / Sub can both be independently assigned to Zone 1,
Zone 2 or as a unique Zone 3.
MENU
Direct access to the menu
SETUP Used to access the DVD settings
SYSTEM SET UP TV System - Auto Play - TV Type SEL NAVIGATION Navigate & adjust using the up, Note: The +12V switched and +12V
battery can be joined for some
installation requirements.
Downloaded from Caradio-Manual.com Manuals
down, left & right keys.
Select the item with the SEL key
- Password - Rating -Default Exit Setup
LANGUAGE SET UPOSD Language - Audio Language - Subtitle Language Menu Language - Exit Setup
VIDEO SET UP
Brightness - Contrast - Hue - Saturation - Sharpness Exit Setup
POWER
Press to turn the unit ON / OFF
CLOCK
Displays the clock
PREVIOUS
Selects previous track
MUTE Mutes all sound in all zones
NEXT
Selects next track
SOURCE
Select the source required
DVD - iPod - AUX - FM - AM - Sirius
PLAY/PAUSE Pause or play the track
BACK
Rewind track
ZOOM
Select picture size video output
FORWARD
Fast-forward track
SUB-T
Select subtitle language
STOP
Press Once: to ‘Pre-stop’
Press Again: to stop disc completely
RANDOM
Press to cycle through options
REPEAT
Press to cycle through options
DISPLAY
Press to cycle through options
0-9 KEYPAD Direct track access
VOLUME
Press + to increase the volume
Press - to decrease the volume
Press volume then ‘SEL’ to select
different zone for volume adjustment
MS-AV600 IR REMOTE
MS-AV600 IR REMOTE OPERATION
015
WIRING DIAGRAM
006
WIRING DIAGRAM
GENERAL OPERATION
007
DVD OPERATION
014
DVD OPERATION
GENERAL OPERATION
PRECAUTIONS
POWER
TONE
Press the ‘Power’ button to turn the unit ON/OFF
Adjust the treble and bass settings. Press the ‘Rotary Encoder’ to
switch between bass and treble selection.
MS-AV600 only
Never insert foreign objects into the disc slot. If the disc does not
insert easily, there may already be another disc inserted. Some
disc formats may not be readable if the format is not compatible.
PLAYING A DVD/CD/MP3
Press the ‘DVD’ button to select DVD / CD / MP3 source. Playback of
the disc will start automatically. The disc loading time will vary.
Note: The disc will resume from the start.
DVD/CD/MP3 NAVIGATION
SELECTING A SOURCE
RADIO
CD / DVD CD/MP3 (MS-CD600) / DVD (MS-AV600)
AM/FM/Sirius (Sirius - US Only)
iPod/AUX Press for iPod
Press twice for AUX (MS-CD600 and MS-AV600)
AUX
DVD FUNCTIONS
Turn the ‘Rotary Encoder’ to adjust the volume.
DVD
Press to access the DVD/CD/MP3 source
PLAY/PAUSE
Play or Pause the track
BACK/PREVIOUS Short Press: Selects previous track/chapter
Press and Hold: Rewind
NEXT/FORWARD Short Press: Selects next track/chapter
Press and Hold: Fast-forward
Adjust the audio balance from left to right.
Navigation is controlled by the supplied Infrared Remote Control, and
is presented on external screen. (See MS-AV600 IR Remote Operation)
BALANCE
Press the desired source button:
REGIONS
FM Radio
Frequency Range: 87.5 – 108 MHz
Frequency step: 50 kHz
ADJUSTING THE VOLUME
ZONE VOLUME
Zone 3
Note: The last adjusted zone, becomes the start of the above zone
selection cycle.
SETUP
Adjust the Clock time, 12/24 hour. Turn the ‘Rotary Encoder’ to adjust the
Hour, Press to confirm, repeat to adjust the minutes. Press to confirm.
Select Europe for the following tuner frequency stepping:
AUX (MS-IP600)
Press the ‘Rotary Encoder’ to step through zones.
Zone 1
All zones
Zone 2
CLOCK ADJUST
Press the ’Menu’ button and select ‘Setup’. Select the desired
function. Turn the ‘Rotary Encoder’ to adjust or press to switch
selection (if available). Press ’Menu’ to return.
Note: Remember, whilst in the Setup system the ‘Menu’ button acts
as a back/return to the previous screen.
AM Radio
Frequency Range: 522 – 1620 MHz
Frequency step: 9 kHz
Select USA for the following tuner frequency stepping:
FM Radio
AM Radio
Frequency Range: 87.5 – 107.9 MHz Frequency Range: 530 – 1710 MHz
Frequency step: 100 kHz
Frequency step: 10 kHz
Note: Select ‘Europe’ for Australasian tuner frequency stepping
LANGUAGE
Select the desired language for the on screen display.
POWER SAVE
OFF Backlight on constantly
ON Backlight display goes off after one minute of non-operation
Note: The MS-CD600, MS-IP600 and MS-AV600 feature Clock
battery back up and EEPROM technology. This allows the unit to be
completely disconnected from the constant +12V voltage supply
(Battery switch) with no settings being lost.
Downloaded from Caradio-Manual.com Manuals
iPod Operation
013
RADIO OPERATION
008
RADIO OPERATION
SETUP
REGION SELECTION
Press the ‘Menu’ button and select ‘Setup’. Select ‘Tuner Region’ and
select your tuner region.
PRESETS
You can manually store radio frequencies in the preset memory, or
automatically in FM band. There are 15 presets available per band.
STORING A STATION AS A PRESET
Press the ‘Radio’ button to select band. FM – AM – SIRIUS (USA only)
When listening to a frequency, press and hold the ‘Play’ button to
store preset.
Alternatively: Press the ‘Menu’ button and select ‘Presets’. Select
‘Save Current’ to store station.
AUTOMATIC SEEK TUNING
AUTOMATIC SEARCH AND STORE PRESETS (FM only)
OPERATION
BAND SELECTION
Press the ‘Previous’ or ‘Next’ button to scan to the next station.
MANUAL SEEK TUNING
Press and hold the ‘Previous’ or ‘Next’ button for 3 seconds to enter
manual mode. The manual tuning icon will flash on screen. Press the
‘Previous’ or ‘Next’ button to step up and down the spectrum.
Note: After remaining idle for six seconds, the tuning mode will
revert to automatic.
Press the ‘Menu’ button and select ‘Search Stations’ to automatically
search and store stations.
Note: Automatic search mode will erase all other presets already
stored, and will automatically store the stations into the preset
menu in numerical order.
RECALLING A PRESET STATION
To listen to a radio frequency stored in the preset menu, select
the required band, FM - AM - Sirius. Press the ‘Play’ button to
enter ‘Presets’ mode. Press the ’Previous’ or ‘Next’ button to select
previous or next preset.
Alternatively: Select the required band. FM - AM - Sirius. Press ‘Menu’
and select ’Presets’. Select the desired preset.
DELETING A STORED PRESET
Press ‘Menu’ and select ‘Presets’. Select ‘Remove Presets’. Select the
desired preset, or ‘All’.
Downloaded from Caradio-Manual.com Manuals
F.A.S.T
FUSION ALPHA SEARCH TECHNOLOGY
If your iPod contains more than 50 Artists, Songs or Albums you can
use F.A.S.T to quickly navigate by letter or number.
Example: Press the ‘Menu’ button and select ‘Artists’. Select ‘D’
and the first ‘Artist’ beginning with ‘D’ will automatically highlight.
Using the ‘Rotary Encoder’ you can then scroll up or down from this
selection.
F.A.S.T THRESHOLD
The threshold (number of items) at which point the Alpha Search
screen appears for iPod menus can be changed. To change the
threshold, navigate as follows - press the ‘Menu’ button and select
‘Setup’, then ’Searching’. Select your desired item number threshold.
ON
OFF
50
100
200
400
800
NO iPod CONNECTED
If this appears on the display possible causes are
»
Ensure the iPod is correctly connected
»
Ensure the cable is not excessively bent (MS-CD600, MS-AV600)
»
The iPods battery remains low (refer to iPod manual and charge the battery)
USA only - SIRIUS TUNER NOT INCLUDED
Note: To check your iPod model, go to www.apple.com/support
PRECAUTIONS FOR iPod
(MS-IP600 only) Before inserting your iPod into the MS-IP600 you
must first insert the correct sleeves to match iPod model.
» For the iPod nano (3rd gen), the iPod must be placed inside the adapter sleeve, and then placed inside Dock sleeve combination A.
»
Before inserting iPod,
Please ensure iPod dock connector is clean, dry & free from damage.
Check that unit iPod dock is free from obstructions.
Insert correct sleeve combination to match your iPod
Never insert iPod without a correct sleeve.
» Ensure iPod is inserted with display facing upwards, Never force your iPod into the dock, if the iPod does not mate with reasonable ease the sleeve/iPod combination is most likely incorrect.
and enter the serial number found on the back of the iPod.
LISTENING TO AN iPod
Press the ‘iPod’ button. Playback of the iPod will start automatically.
iPod NAVIGATION
Press the ‘Menu’ button to enter the iPod menu. The rotary encoder
operates similar to the click wheel on your iPod. Turn to navigate and
press to enter.
Note: Press the ‘Menu’ button to return to the previous menu screen.
iPod
Press to access the iPod source
PLAY/PAUSE
Play or Pause the track
SELECTING THE CORRECT IPOD SLEEVE
BACK/PREVIOUS Short Press: Selects previous track
Press and Hold: Rewind track
iPod NEXT/FORWARD
Short Press: Selects next track
Press and Hold: Fast-forward track
(MS-IP600 only) A different set of sleeves is used for each iPod model.
The different sleeve combinations are outlined in the chart below:
iPod with video, 30GB
iPod with video, 60GB 80GB
iPod classic, 80GB
iPod classic, 160GB (2007)
iPod classic, 120GB
iPod classic, 160GB (2009)
iPod touch, iPod touch, 2nd gen
iPod touch, 2nd gen (2009)
nano, 3rd Gen
nano, 4th Gen
nano, 5th Gen
Other
TOP SLEEVE
A
A
B
B
B
B
D
D
D
A
E
G
F
Downloaded from Caradio-Manual.com Manuals
BOTTOM SLEEVE
A
B
A
B
A
A
D
D
A
A + adapter
E
G
F
REPEAT / SHUFFLE
Press the ‘Menu’ button and select ‘Repeat/Shuffle’.
Select ‘Repeat Track’, ‘Shuffle Track or ‘Shuffle Album’.
Select ON/OFF. Default setting is OFF.
ACTIVATING YOUR SIRIUS TUNER
You must activate the SIRIUS tuner before you can begin to receive the
SIRIUS Satellite Radio Service.
In order to activate your radio subscription, you will need the SIRIUS
ID (SID) which uniquely identifies your tuner. The 12 digit SID is
displayed on the LCD on initialization. MS-CD600, MS-IP600 and MSAV600 will display the SID on Channel 0.
Power on your system and make sure that you are receiving good signal,
you are able to hear audio on the SIRIUS Preview channel (Ch-184)
Note: Have your credit card handy and contact SIRIUS on the internet
at https://activate.sirius.radio.com/ and follow the prompts to
activate your subscription. You can also call SIRIUS toll-free at 1-888539-SIRIUS (1-888-539-7474) Once activated, you will be able to
begin enjoying SIRIUS Satellite Radio’s digital entertainment and can
tune to other channels.
SIRIUS OPERATION
Press ‘Radio’ to select Sirius source radio.
SIRIUS NAVIGATION
Press the ‘Menu’ button and navigate the functions.
CHANNELS
Select the desired channel (listed in channel order) and music preference
CATEGORY
Select the desired genre type. (The unit will only play the selected option)
FAVOURITES
Add your favourite channel to your favourites list by selecting ‘Add
Favourite’ (Maximum 15 channels). Remove channels by selecting
‘Remove Favourite’. Select ‘All’ or the individual channel. Exit by
pressing the ‘Menu’ button.
Alternatively: Press and hold the ‘Play’ button to store favourite.
PARENTAL MODE
ENABLE ON/OFF
Select to enable channels to be locked/unlocked
PIN #
Turn the ‘Rotary Encoder’ to select number and press to enter, repeat
to enter the 4 digit code. (Factory setting is 0000)
Note: Must be entered before the following items are operational.
LOCK / UNLOCK
Select the channel to be locked or unlocked
SKIP / UN-SKIP
Select the channel to be bypassed
CHANGE PIN
Personalise your Pin number. (4 digits max)
SIRIUS SATELLITE RADIO
SIRIUS SATELLITE RADIO
009
iPod Operation
012
iPod OPERATION
AUX OPERATION
011
CD/MP3 OPERATION
010
CD/MP3 OPERATION
AUX OPERATION
PRECAUTIONS FOR CD/MP3
CONNECTING AN
AUXILIARY AUDIO DEVICE
LISTENING TO YOUR
AUXILIARY AUDIO DEVICE
» The Left & Right AUX RCA plugs are located at the rear of the unit.
» Press the ‘AUX’ button to select AUX mode (MS-IP600) or press the ‘iPod’ button twice (MS-CD600 or MS-AV600)
MS-CD600 only
Never insert foreign objects into the CD slot. If the CD does not insert
easily, there may already be another disc in the unit. Some CD-R/CD-RW
may not be readable if the format is not compatible.
The format of an MP3 disc must be ISO9660 Level 1 or 2 or Joliet
in the expansion Format. When naming an MP3 file, ensure the file
extension is .MP3
LISTENING TO A CD/MP3
Press the ‘CD’ button. Playback of the CD will start automatically.
CD NAVIGATION
Press the ‘Menu’ button and select ‘Tracks’. Select desired track.
CD / MP3 FUNCTIONS
CD
Press to access the CD/MP3 source
PLAY/PAUSE
Play or Pause the track
BACK/PREVIOUS Short Press: Selects previous track
Press and Hold: Rewind track
NEXT/FORWARD Short Press: Selects next track
Press and Hold: Fast-forward track
Downloaded from Caradio-Manual.com Manuals
MP3 NAVIGATION
Note: The MP3 disc will take approx 10 seconds to load the disc data
(if available) to the unit.
Press the ‘Menu’ button and select ‘Songs’ to enter the MP3 root
directory. Use the ‘Rotary Encoder’ to navigate the functions of your
MP3 folders and files. Select the highlighted folder or file.
Note: Press the ‘menu’ button to return to the previous menu screen.
REPEAT / SHUFFLE
Press the ‘Menu’ button and select ‘Repeat/Shuffle’.
Select ‘Repeat Track’, ‘Repeat Album’, ‘Shuffle Album’ or ‘Shuffle All’.
Select ON/OFF. Default setting is OFF.
» Connect your auxiliary audio device.
Note: You may require an adapter cable to connect your device.
» Start playback on your auxiliary audio device. Use both the volume control on your auxiliary device (if available) and the volume control on the FUSION Marine Stereo to set the volume level.