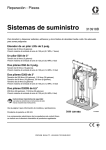
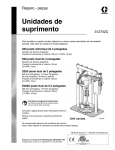
1
Instructions - Parts
Gear Meter System
312744B
ENG
For continuous bead dispense control. For professional use only.
Not approved for explosive atmospheres.
970175, Bottom Inlet Gear Meter
970176, Top Inlet Gear Meter
970177, Horizontal Inlet Gear Meter
970194, Heated Hose Horizontal Inlet Gear Meter
918465, 918473, 918477 Gear Pump
617517, Electrical Control
5000 psi (34.47 MPa, 344 bar) Maximum Working Pressure
Important Safety Instructions
Read all warnings and instructions in this manual.
Save these instructions.
ti11243a
ti11239a
Contents
Warnings . . . . . . . . . . . . . . . . . . . . . . . . . . . . . . . . . 3
Component Identification . . . . . . . . . . . . . . . . . . . . 5
Gear Meter System . . . . . . . . . . . . . . . . . . . . . . . 5
Electrical Control Unit . . . . . . . . . . . . . . . . . . . . . 6
Gear Meter Junction Box . . . . . . . . . . . . . . . . . . 7
Buttons . . . . . . . . . . . . . . . . . . . . . . . . . . . . . . . . 8
Lights . . . . . . . . . . . . . . . . . . . . . . . . . . . . . . . . . 8
Switches . . . . . . . . . . . . . . . . . . . . . . . . . . . . . . . 8
Displays . . . . . . . . . . . . . . . . . . . . . . . . . . . . . . . . 8
Communications Diagram . . . . . . . . . . . . . . . . . . 9
Setup . . . . . . . . . . . . . . . . . . . . . . . . . . . . . . . . . . . . 10
Connections . . . . . . . . . . . . . . . . . . . . . . . . . . . 10
. . . . . . . . . . . . . . . . . . . . . . . . . . . . . . . . . . . . . 14
Set Pressure Display . . . . . . . . . . . . . . . . . . . . . 15
Potentiometer Settings . . . . . . . . . . . . . . . . . . . 16
Adjust Gear Motor Speed . . . . . . . . . . . . . . . . . 16
Calibrate Flowrate . . . . . . . . . . . . . . . . . . . . . . . 16
Pressure Relief . . . . . . . . . . . . . . . . . . . . . . . . . 16
Flushing . . . . . . . . . . . . . . . . . . . . . . . . . . . . . . 16
Operation . . . . . . . . . . . . . . . . . . . . . . . . . . . . . . . . 17
Startup . . . . . . . . . . . . . . . . . . . . . . . . . . . . . . . 17
Dispense . . . . . . . . . . . . . . . . . . . . . . . . . . . . . . 17
Shutdown . . . . . . . . . . . . . . . . . . . . . . . . . . . . . 17
2
Maintenance . . . . . . . . . . . . . . . . . . . . . . . . . . . . . . 18
Troubleshooting . . . . . . . . . . . . . . . . . . . . . . . . . . . 19
Repair . . . . . . . . . . . . . . . . . . . . . . . . . . . . . . . . . . . 20
Remove Gear Pump . . . . . . . . . . . . . . . . . . . . . 20
Install Gear Pump . . . . . . . . . . . . . . . . . . . . . . . 21
Remove Electric Motor . . . . . . . . . . . . . . . . . . . 21
Install Electric Motor . . . . . . . . . . . . . . . . . . . . . 22
Remove Brake Clutch . . . . . . . . . . . . . . . . . . . . 22
Install Brake Clutch . . . . . . . . . . . . . . . . . . . . . . 22
Parts . . . . . . . . . . . . . . . . . . . . . . . . . . . . . . . . . . . . 23
Wiring Schematics . . . . . . . . . . . . . . . . . . . . . . . . . 35
Accessories . . . . . . . . . . . . . . . . . . . . . . . . . . . . . . 44
Windshield Nozzles . . . . . . . . . . . . . . . . . . . . . . 44
Fluid Filters . . . . . . . . . . . . . . . . . . . . . . . . . . . . 44
Repair Kits . . . . . . . . . . . . . . . . . . . . . . . . . . . . . . . 44
Gear Pump Repair Kits . . . . . . . . . . . . . . . . . . . 44
Dimensions . . . . . . . . . . . . . . . . . . . . . . . . . . . . . . . 45
Technical Data . . . . . . . . . . . . . . . . . . . . . . . . . . . . 46
Graco Standard Warranty . . . . . . . . . . . . . . . . . . . 48
Graco Information . . . . . . . . . . . . . . . . . . . . . . . . . 48
312744B
Warnings
Warnings
The following warnings are for the setup, use, grounding, maintenance, and repair of this equipment. The exclamation point symbol alerts you to a general warning and the hazard symbol refers to procedure-specific risk. Refer back
to these warnings. Additional, product-specific warnings may be found throughout the body of this manual where
applicable.
WARNING
ELECTRIC SHOCK HAZARD
Improper grounding, setup, or usage of the system can cause electric shock.
• Turn off and disconnect power at main switch before disconnecting any cables and before servicing
equipment.
• Connect only to grounded power source.
• All electrical wiring must be done by a qualified electrician and comply with all local codes and
regulations.
EQUIPMENT MISUSE HAZARD
Misuse can cause death or serious injury.
• Do not operate the unit when fatigued or under the influence of drugs or alcohol.
• Do not exceed the maximum working pressure or temperature rating of the lowest rated system
component. See Technical Data in all equipment manuals.
• Use fluids and solvents that are compatible with equipment wetted parts. See Technical Data in all
equipment manuals. Read fluid and solvent manufacturer’s warnings. For complete information
about your material, request MSDS forms from distributor or retailer.
• Check equipment daily. Repair or replace worn or damaged parts immediately with genuine manufacturer’s replacement parts only.
• Do not alter or modify equipment.
• Use equipment only for its intended purpose. Call your distributor for information.
• Route hoses and cables away from traffic areas, sharp edges, moving parts, and hot surfaces.
• Do not kink or over bend hoses or use hoses to pull equipment.
• Keep children and animals away from work area.
• Comply with all applicable safety regulations.
FIRE AND EXPLOSION HAZARD
Flammable fumes, such as solvent and paint fumes, in work area can ignite or explode. To help prevent
fire and explosion:
• Use and clean equipment only in well ventilated area.
• Eliminate all ignition sources; such as pilot lights, cigarettes, portable electric lamps, and plastic drop
cloths (potential static arc).
• Keep work area free of debris, including solvent, rags and gasoline.
• Do not plug or unplug power cords or turn lights on or off when flammable fumes are present.
• Ground equipment, personnel, object being sprayed, and conductive objects in work area. See
Grounding instructions.
• Use only Graco grounded hoses.
• Check gun resistance daily.
• If there is static sparking or you feel a shock, stop operation immediately. Do not use equipment
until you identify and correct the problem.
• Do not flush with gun electrostatics on. Do not turn on electrostatics until all solvent is removed from
system.
• Keep a working fire extinguisher in the work area.
312744B
3
Warnings
WARNING
SKIN INJECTION HAZARD
High-pressure fluid from dispense valve, hose leaks, or ruptured components will pierce skin. This may
look like just a cut, but it is a serious injury that can result in amputation. Get immediate surgical
treatment.
• Do not point dispense valve at anyone or at any part of the body.
• Do not put your hand over the end of the dispense nozzle.
• Do not stop or deflect leaks with your hand, body, glove, or rag.
• Follow Pressure Relief Procedure in this manual, when you stop spraying and before cleaning,
checking, or servicing equipment.
PRESSURIZED EQUIPMENT HAZARD
Fluid from the gun/dispense valve, leaks, or ruptured components can splash in the eyes or on skin and
cause serious injury.
• Follow Pressure Relief Procedure in this manual, when you stop spraying and before cleaning,
checking, or servicing equipment.
• Tighten all fluid connections before operating the equipment.
• Check hoses, tubes, and couplings daily. Replace worn or damaged parts immediately.
MOVING PARTS HAZARD
Moving parts can pinch or amputate fingers and other body parts.
• Keep clear of moving parts.
• Do not operate equipment with protective guards or covers removed.
• Pressurized equipment can start without warning. Before checking, moving, or servicing equipment,
follow the Pressure Relief Procedure in this manual. Disconnect power or air supply.
4
312744B
Component Identification
Component Identification
Gear Meter System
970175, Bottom Inlet Service Meter
J
L
LINE VOLTAGE:
POWER:
LT111
DUTY CYCLE:
LT117
LT131
G
A
PB1131
SS125
SS169
PB169
480
2.0
LT160
R
ARM VOLTAGE:
FREQ: 60HZ
8.3
0-180V
1.25
ELECTRICAL DIAGRAM No.:
SS135
3 o
PHASE:
FULL LOAD AMPS:
4KVA
MOTOR H.P.:
W
C57904
DANGER
LT154
R
480 VOLTS
PB158
A
MAIN SEALER DISCONNECT
THIS DISCONNECT DISABLES ALL
480V ELECTRICAL POWER TO:
GRACO DISPENSING SYSTEM
PB1132
TO LOCK OUT POWER:
1. ALLOW FIXTURE TO COMPLETE ITS
CYCLE.
DEPRESS "EMERGENCY STOP"
PUSHBUTTON.
VERIFY POWER OFF BY EXAMINING
PILOT LIGHTS.
PLACE DISCONNECT HANDLE IN
"OFF" POSITION AND INSERT
SAFETY PADLOCK.
PLACE BOTH AIR LOCK-OUT VALVES
IN "OFF" POSITION AND INSERT
SAFETY PADLOCK.
DEPRESS "START" PUSHBUTTON
TO VERIFY THAT SYSTEM IS
LOCKED OUT.
2.
TD321
3.
4.
5.
6.
PD166
K
B
N
M
G
D
C
H
F
E
ti11238a
970177, Horizontal Inlet Service Meter
LINE VOLTAGE:
POWER:
LT111
DUTY CYCLE:
LT117
G
LT131
A
PB1131
SS125
SS169
PB169
480
2.0
LT160
R
ARM VOLTAGE:
FREQ: 60HZ
K
8.3
0-180V
1.25
ELECTRICAL DIAGRAM No.:
SS135
3 o
PHASE:
FULL LOAD AMPS:
4KVA
MOTOR H.P.:
W
B
N
D
C57904
DANGER
LT154
R
480 VOLTS
PB158
MAIN SEALER DISCONNECT
THIS DISCONNECT DISABLES ALL
480V ELECTRICAL POWER TO:
GRACO DISPENSING SYSTEM
PB1132
TO LOCK OUT POWER:
1. ALLOW FIXTURE TO COMPLETE ITS
CYCLE.
DEPRESS "EMERGENCY STOP"
PUSHBUTTON.
VERIFY POWER OFF BY EXAMINING
PILOT LIGHTS.
PLACE DISCONNECT HANDLE IN
"OFF" POSITION AND INSERT
SAFETY PADLOCK.
PLACE BOTH AIR LOCK-OUT VALVES
IN "OFF" POSITION AND INSERT
SAFETY PADLOCK.
6. DEPRESS "START" PUSHBUTTON
TO VERIFY THAT SYSTEM IS
LOCKED OUT.
2.
TD321
3.
4.
5.
PD166
F
A
H
E
C
M
L
J
G
ti11236a
FIG. 1
A
B
C
D
E
F
G
Gear Meter Control Panel
Gear Meter Junction Box
Material Inlet
Material Outlet
Applicator
Air Valve
Gear Meter
312744B
H
J
K
L
M
N
Gear Pump
Electric Motor
Gear Reducer
Breather
Fill Port
Drain Port
5
Component Identification
Electrical Control Unit
AU
AS
AV
AT
AE
AJ
AH
AK
AR
AF
AP
AC
AB
AM
AN
AD
AL
AA
AQ
ti11239a
FIG. 2
AA
AB
AC
AD
AE
AF
AH
AJ
AK
AL
AM
AN
AP
AQ
AR
AS
AT
AU
AV
6
Emergency Stop Button
Start Button
Fault Reset Button
Manual Mode Dispense Button
Power Indicator Light
Control Active Light
Motor Active Light
Over Pressure Fault Light
Material Outlet Pressure Below Minimum Light
Motor On/Off Switch
Speed Signal Input (POT / ANALOG) Switch
Dispense (MANUAL / ROBOT)
Tachometer Display
Pressure Display
Main Sealer Disconnect Lever
Transformer
R53 - Analog Robot Interface Connector
P50 - Meter Interface Cable
P176 - Transducer Cable
312744B
Component Identification
Gear Meter Junction Box
Top View
BA
BB
BC
Front View
AH
AA
BD
Bottom View
BF
BE
FIG. 3
Key:
BA
BB
BC
BD
R176 Connector
R50 Connector
Motor Speed Sensor Connector
XDR Cable
312744B
BE SOL 206 Cable
BF SOL 202 Cable
7
Component Identification
Buttons
PB1132 and PB1133 - Emergency Stop Buttons
(AA): Engage either of these buttons to stop system
operation. PB1132 is located on the Gear Meter Control
Panel, while PB1133 is located on the Gear Meter Junction Box.
LT154 - Material Outlet Pressure Below Minimum
(AK): This red indicator light is illuminated when the
pressure transducer detects that the pressure is below a
set point. To program the minimum pressure set point
see Set Pressure Display on page 15.
Switches
PB1131 - Start Button (AB): Engage button to put the
system into an “ON” state when both emergency stop
buttons (PB1132 & PB1133) are disengaged and the
Main Sealer Disconnect Lever is on. The green Control
Active Indicator light LT117 (AF) will illuminate.
SS125 - Motor ON/OFF (AL): In the “off” state, the
motor and the supply pump will be off. In the “on” state,
the motor will turn on. The system will not dispense,
however, until a dispense signal is present and the pressure is within an acceptable range.
PB158 - Fault Reset Button (AC): Engage button when
the system has faulted due to an overpressure condition. The system will resume normal operation as long
as the pressure has gone back down to an acceptable
level. See Dispense on page 17 for more information.
SS135 - Speed Signal Input (POT / ANALOG) (AM):
This selector switch determines how the motor speed is
set.
PB169 - Manual Mode Dispense Button (AD): Engage
button to open the dispense gun when selector switch
SS169 is set to “MANUAL”.
Lights
LT111 - Power Indicator Light (AE): This white indicator light is illuminated when there is power to the system
and the Main Sealer Disconnect Lever (AR) is on. The
states of the emergency stop buttons (PB1132 and
PB1133) do not affect this light.
LT117 - Control Active (AF): This green indicator light
illuminates after the Start Button (PB1131) has successfully put the system into the “on” state and remains lit
until either of the emergency stop buttons (PB1132 and
PB1133) have been pressed or the Main Sealer Disconnect Lever (AR) has been turned off.
LT131 AND LT129 - Motor Active (AH): These amber
indicator lights illuminate when the motor is on (SS125
is set to “On”). LT131 is located on the Gear Meter Control Panel, while LT129 is located on the Gear Meter
Junction Box.
LT160 - Over Pressure Fault (AJ): This red indicator
light is illuminated when the outlet pressure transducer
detects that the pressure is above a maximum limit.
When this condition occurs the motor disconnects from
the gear pump via a clutch. To program the over pressure set point see Set Pressure Display on page 15.
8
•
“POT” Mode: the motor speed is determined by the
settings on the potentiometers POT 1 – POT4.
•
“ANALOG” Mode: the voltage present on wires 3131
and 3105 (pins A and B of connector R53) determines the motor speed.
See Potentiometer Settings on page 16 for descriptions of each potentiometer.
SS169 - Dispense (MANUAL / ROBOT) (AN): This
selector switch determines how the dispense signal is
issued to the system.
•
“MANUAL: the dispense push button (PB169) controls the dispense signal.
•
“ROBOT”: the robot dispense signal on wires 1711
and 1083 (pins A and B of connector R52) control
the dispense state.
•
The output control signals “Sealer in Cycle”, “Sealer
Ready”, and “Sealer Maintenance Required” are
only valid when SS169 is set to “ROBOT”.
Displays
TD321 - Tachometer Display (AP): This digital display
shows the current speed (RPM) of the gear motor.
PD166 - Pressure Display (AQ): This digital display
shows the current output pressure as measured by the
pressure sensor near the material outlet port. This module controls the system’s minimum and maximum pressure limits. To program see Set Pressure Display on
page 15.
312744B
Component Identification
Communications Diagram
Gear Meter Control Panel
(617517)
P50
SOL206
SOL202
Dispense Gun
Brake/Clutch
SOL 206
P50
R50
SOL 206
SOL 202
SOL 202
Pressure
Transducer
XDR
XDR
Gear Meter Junction Box
P176
P176
R176
R52
Robot Interface
R53
4CL3
4CL3
Supply Pump Junction Box
FIG. 4
Cables
P176 – Transducer Cable
R52 – Discrete Robot Interface Connector
This cable runs between Gear Meter Control Panel and
Gear Meter Junction Box.
This connector provides a means to connect a cable
between the Gear Meter Control Panel and a robot controller that carries discrete signals. This cable carries the
following signals:
•
•
•
•
•
•
•
•
Robot Dispense Signal
Sealer Ready
Sealer in Cycle
Sealer Maintenance Required
Select Speed 2
Select Speed 3
Select Speed 4
Power
4CL3 – Supply Pumps Interface Cable
This cable runs between the Main Electrical Control
Panel and the Supply Pump Junction Box.
SOL 206– Solenoid Cable
This cable runs between the Gear Meter Junction Box
and the Dispense Gun (SOL206).
SOL 202– Solenoid Cable
This cable runs between the Gear Meter Junction Box
and the Brake/Clutch (SOL202).
R53 – Analog Robot Interface Connector
XDR – Transducer Cable
This connector provides a means to connect a cable
between the Gear Meter Control Panel and a robot controller that carries an analog speed signal.
This cable runs between the Gear Meter Junction Box
and the Pressure Transducer.
P50 – Meter Interface Cable
This cable runs between the Gear Meter Control Panel
and the Gear Meter Junction Box.
312744B
9
Setup
Setup
Robot Connections
Supply hoses are not included with the Gear Meter. We
recommend 1-1.5 in. ID hose with nylon or PTFE core
and SST overbraid for 5000 psi (34.47 MPa, 344 bar).
Two connectors are available for external robot controller I/O signals. The R52 connector is available for discrete communication signals, while the R53 connector is
available for an analog speed input. See R53 Connector on page 14.
R52 Connector
High pressure fluid filters should be used between the
supply unit and the gear meter inlet. See Fluid Filters
on page 44.
Connections
Power
The system requires 480 VAC, 3-phase, 60 Hz line voltage with ground. The system is not approved for use
with 50 Hz line voltage. All electrical wiring must be performed by a qualified electrician and comply with all
local codes and regulations.
1. Wire each phase to a separate terminal on Main
Sealer Disconnect DISC100 (AR).
2. You must connect ground to the Gear Meter Control
Panel (A). The ground wire must be connected to
the ground bar above DISC100.
System Cables
The input and output signals on R52 use a 120 VAC
interface. Three types of signals are available from this
connector:
Output – Output signals are driven by the Gear Meter
Control Panel and provide feedback to the robot controller. An output signal is a 120 VAC signal as referenced
between the wire corresponding to the desired output
and wire 1083.
Input – Input signals originate from an external robot
controller and can command the Gear Meter to dispense or change speeds. Input signals must be of the
dry-contact type between wire 1711 and the wire corresponding to the desired input.
Power – 120 VAC power signals are provided on R52.
Table 1: R52 Signals on page 11 identifies available
R52 signals and provides a brief description of each signal. The Pin ID correlates to that shown in FIG. 5 on
page 13.
1. Connect P50 cable from the Gear Meter Control
Panel (A) to the Gear Meter Junction Box (B). Cable
P50 provides ground to the gear meter. See page
41 for a detailed pin out.
Use only cables supplied by Graco or cables that
meet the requirements shown in the wiring schematic on page 41.
2. Verify that there is a good connection between the
ground in the Gear Meter Junction Box (B) and the
ground of the Gear Meter Control Panel (A).
3. Connect cable P176 from the Gear Meter Control
Panel (A) to the Gear Meter Junction Box (B).
4. Connect cable 4CL3 from the Gear Meter Control
Panel (A) to the Supply Pump Junction Box.
10
312744B
Setup
Table 1: R52 Signals
Pin ID
Wire ID
Color
Pin Type
Usage: Description
A
1711
Red
Power
Power for Sealant Interface: Power is connected to this wire when the Dispense Mode
Switch SS169 (AN) is set to robot mode.
B
1083
White
Power
Power for Sealant Interface (Common):
This wire is not affected by the state of the
Dispense Mode Switch SS169 (AN). This
common power line is also connected to
ground.
C
GND
Green
Power
Ground
D
R52-D
Red
-
-
E
R52-E
Red
-
-
F
1832
Red
Output
Sealer in Cycle:
An active signal is put on this wire when all of
the following conditions are true:
•
•
•
•
•
The Dispense Mode Switch SS169 (AN)
is set to “Robot”.
The Motor Selector Switch SS125 (AL) is
set to “On”.
Outlet pressure is above the minimum
pressure set point.
Outlet pressure is not above the maximum pressure.
The Robot Dispense Signal is active on
R52-Y.
G
R52-G
Red
-
-
H
R52-H
Red
-
-
J
R52-J
Red
-
-
K
2261
Red
Input
Engage POT #2* (Select Speed #2): This
signal is activated by closing a dry contact
between wire 1711 and wire 2261 at the
robot controller. An active signal on this wire
will set the speed of the motor according to
the mechanical setting of POT2.
L
2281
Red
Input
Engage POT #3* (Select Speed #3): This
signal is activated by closing a dry contact
between wire 1711 and wire 2281 at the
robot controller. An active signal on this wire
will set the speed of the motor according to
the mechanical setting of POT3.
M
2301
Red
Input
Engage POT #4* (Select Speed #4): This
signal is activated by closing a dry contact
between wire 1711 and wire 2301 at the
robot controller. An active signal on this wire
will set the speed of the motor according to
the mechanical setting of POT4.
N
R52-N
Red
-
-
312744B
11
Setup
Pin ID
Wire ID
Color
Pin Type
Usage: Description
P
R52-P
Red
-
-
Q
R52-Q
Red
-
-
R
R52-R
Red
-
-
S
R52-S
Red
-
-
T
1831
Red
Output
Sealer Maintenance Required:
An active signal is put on this wire when the
Dispense Mode Switch SS169 (AN) is set to
“ROBOT” and one or more of the following
conditions is true:
•
•
•
U
1831
Red
Output
The Motor Selector Switch SS125 (AL) is
set to “Off”.
Outlet pressure is not above the minimum pressure of set point.
Outlet pressure is above the maximum
pressure.
Sealer Ready:
An active signal is put on this wire when all of
the following conditions are true:
•
•
•
•
The Dispense Mode Switch SS169 (AN)
is set to “ROBOT”.
The Motor Selector Switch SS125 (AL) is
set to “On”
Outlet pressure is above the minimum
pressure set point.
Outlet pressure is not above the maximum pressure.
V
R52-V
Red
-
-
W
R52-W
Red
-
-
X
R52-X
Red
-
-
Y
1712
Red
Input
Robot Dispense Signal:
This signal is activated by closing a dry contact between wire 1711 and wire 1712 at the
robot controller. Asserting a signal on this
line will do the following:
•
•
•
Z
R52-Z
Red
-
-
a
R52-a
Red
-
-
12
Open dispense gun.
If the Motor Selector Switch SS125 (AL)
is set to “on”, the supply pumps on will
be activated.
If the motor is on and the supply pressure is below the maximum limit, the
brake will be disengaged and the clutch
will be engaged.
312744B
Setup
Pin ID
Wire ID
Color
Pin Type
Usage: Description
b
R52-b
Red
-
-
c
R52-c
Red
-
-
d
R52-d
Red
-
-
e
R52-e
Red
-
-
f
R52-f
Red
-
-
g
R52-g
Red
-
-
By default, POT 1 is engaged only if POT 2, POT 3,
and POT 4 are disengaged.
FIG. 5 depicts the pin-out of the R52 receptacle (Amphenol SINE type A431-2P04-E5).
A
M
N
L
a
Y
K
Q
g
X
e
R
c
d
W
S
U
G
D
T
V
H
C
b
f
J
B
P
Z
E
F
ti11387a
FIG. 5: R52 Pin-Out Receptacle
312744B
13
Setup
Table 2: R53 Signals identifies the available R53 signals and provides a brief description of each signal. The
Pin ID correlates to the pins identified in FIG. 6.
R53 Connector
The R53 connector is available as an analog speed
input from a robot controller. An acceptable signal from
a robot controller is a 0 – 10 VDC signal.
Table 2: R53 Signals
Pin ID
A
Wire ID
Color
3131
Blue
Usage: Description
Analog Speed Command Input 0 - 10 VDC
From Robot (+):
Connect to the (+) wire of a 0-10 VDC analog
controller. The speed of the motor directly
correlates to this voltage, where 0 volts commands the slowest possible speed and 10
volts commands the fastest possible speed.
B
3105
Blue
Analog Speed Command Input 0 - 10 VDC
From Robot (-):
Connected to the (-) wire of a 0-10 VDC analog controller.
C
Do Not Wire
-
Do Not Connect
D
GND
Green
Ground
E
Do Not Wire
-
Do Not Connect
FIG. 6 depicts the pin-out of the R53 receptacle (Amphenol type 97-3102A-14S-5P).
A
E
B
D
C
ti11388a
FIG. 6: R53 Pin-Out Receptacle
14
312744B
Setup
Set Pressure Display
Pressure Display PD166 (AQ) shows the outlet pressure. The pressure display is factory programmed with
default over pressure and minimum outlet pressure values.
1. Press the “Down” arrow key on PD166 (AQ) and
verify that the display is set to “Input” and not “Totalized.” This will display the outlet pressure value, not
a totalized sum.
The optimum values vary from system to system
based on variables such as hose length and material viscosity. The best settings for a particular application may be found empirically.
Program Module #2
Scaled by Signal Method
Function
dECPNt
0
round
1
SCALE
yes
dSP 1
0
INP 1
4.00
dSP
1000
INP 2
7.19
Program Module #3
Front Panel Lockout
Function
Graco Set Values
Programming of the pressure display is divided into
modular steps. Use the up and down arrows beneath
the display to navigate the set-up menu and change the
function values. The “P” button is used to select a programming module or function and to save the function
values.
1. Press “P” to enter programming mode. The message “Pro”, followed by a number, should appear.
The number identified is the selected Program Module.
Value
Value
dSP AL
yes
Ent AL
yes
dSPHYS
yes
ENthYS
yes
rSt AL
yes
dSPbUF
no
rStbUF
no
SELdSP
no
RSttOt
no
tArE
no
2. Press the “Up” or “Down” arrow keys to scroll the
functions in the current program module.
Program Module #6
Alarms
3. Press “P” to select the highlighted function. Use the
“Up” or “Down” arrows to change the value.
Function
4. Press “P” to save the function value.
The following tables show the functions and Graco set
values used. Program Modules 1, 4, 5, 7, 8, 9 are not
used. See the Red Lion Controls Model IMP Instruction Manual (not provided by Graco) for all of the default
programming values and description of all the Program
Modules.
The over pressure set point is controlled by Alarm 2
(AL-2) and has a factory default setting of 5000 psi
(34.47 MPa, 344 bar).
The under pressure set point is controlled by Alarm 1
(AL-1) and has a factory default setting of 1000 psi (6.89
MPa, 68.94 bar).
312744B
Value
trAC
no
dISP
no
LAtC-1
no
ASN-1
input
AL-1
1000
HyS-1
1
Act-1
hi
LAtC-2
no
ASN-2
input
AL-2
5000
HyS-2
1
Act-2
hi
15
Setup
Potentiometer Settings
Adjust Gear Motor Speed
The Speed Signal Input Selector Switch SS135 (AM)
determines how the gear motor speed is set. SS135 can
be set to “POT” or “ANALOG.”
1. Turn Main Sealer Disconnect Lever (AR) off.
“POT” - The speed is based on the physical settings of
one of the potentiometers.
Each potentiometer, POT 1 – POT 4, can scale the
motor speed between the minimum and maximum
motor speed. Therefore, each potentiometer can be set
to a unique “speed” and can be called upon by activating
the corresponding pin on connector R52. Only one signal (pin K, L, or M of connector R52) should be activated
at a time.
“ANALOG” - The speed of the gear motor is determined by the analog voltage signal that is supplied by
the robot controller and the setting on the “ANALOG
SPAN” potentiometer.
POT 1
The POT 1 potentiometer can be used to set the speed
of the Gear Meter motor while in “MANUAL” or “ROBOT”
dispense mode. This is the only potentiometer that can
control the gear meter speed when the Dispense Mode
Switch SS169 (AN) is set to “MANUAL”.
When Dispense Mode Switch SS169 (AN) is set to
“ROBOT”, POT 1 is the default potentiometer if no other
active signals are detected on pins K-M of connector
R52.
POT 2 - 4
In addition to POT 1, potentiometers POT 2 – POT4 can
be used to set the speed of the Gear Meter motor when
a robot controller is connected. Each potentiometer represents a speed setting that can be saved and called
upon by the robot controller. These settings can only be
accessed via an external signal from a robot controller
on pins K-M of connector R52.
ANALOG SPAN
This potentiometer can be used to scale the analog
input voltage from the robot controller. This potentiometer should be set to 500 when programming the robot.
16
2. Open the Gear Meter Control Panel (A) door and
locate the potentiometers. See Part No. 617517,
Electrical Control on page 35.
3. Slide the lever beneath the potentiometer to the left
and adjust the value.
4. Turn each potentiometer knob to increase or
decrease the motor speed.
5. Slide the lever to the right to lock the potentiometer.
Calibrate Flowrate
1. See Startup on page 17.
2. Chart the flowrate for each analog VDC set point
and determine the desired flowrate.
3. VDC setpoints need to be programmed into the
robot if dispensing in “ROBOT” mode.
Pressure Relief
1. Turn off air supply to supply unit.
2. Turn off gear pump at gear meter control panel (A)
using Motor On/Off switch SS125 (AL).
3. Set Dispense Mode Switch SS169 (AN) to “MANUAL” and push Manual Mode Dispense Button
PB169 (AD).
Flushing
Refer to material manufacturer for recommended flushing compound.
CAUTION
Urethane material should not be exposed to atmosphere. Use grease or petroleum jelly to seal off urethane material in components from atmosphere.
312744B
Operation
Operation
2. Depress Manual Mode Dispense Button PB169
(AD) to dispense material. This button must be held
down to maintain a flow of material.
Startup
1. Turn Main Sealer Disconnect Lever (AR) on. The
Power Indicator Light LT111 (AE) should illuminate,
indicating that power is on and that ground is connected.
2. Depress Start button PB1131 (AB). The Control
Active Light LT117 (AF) should illuminate.
ROBOT Dispense Mode
1. Set Dispense Mode Switch SS169 (AN) to
“ROBOT.”
2. Close dry contacts in the robot control panel
between wires 1711 and 1712 to dispense.
•
The sealer ready signal (wire 1813) will be on if the
following conditions are present:
• Motor is on.
• Pressure is greater than the allowable minimum
• Pressure is less than the allowable maximum.
•
The sealer in cycle signal (wire 1832) will be on if
the following conditions are present:
• Sealer ready is true.
• Robotic dispense signal is present.
•
The sealer maintenance required signal will be on if
the following conditions are present:
• Motor is not on.
• Material pressure is below minimum.
• Material pressure is above maximum.
3. Turn Motor Selector Switch SS125 (AL) on. The
Motor Active Lights LT129 and LT131 (AH) should
illuminate.
4. Set the Dispense Mode Switch SS169 (AN) to
“MANUAL” or “ROBOT” dispense mode.
5. Select speed with the Speed Signal Input Selector
Switch SS135 (AM).
a. POT Mode: See Potentiometer Settings on
page 16.
b.
Analog Mode: the motor speed is controlled by
a 0-10 VDC signal applied to wires 3131 (+) and
3105 (common). It is suggested that ANALOG
SPAN potentiometer be set to 500 to allow easier adjustment when reprogramming the robot
output speed signal.
Overpressure Fault
The Overpressure Fault Light LT160 (AJ) illuminates
when the pressure transducer detects that the pressure
is above a maximum limit. An overpressure condition
will turn the supply pumps off.
Dispense
1. Open the dispense gun and disengage the drive
system.
Once the system has been setup, the system is ready to
dispense.
2. Depress the Fault Reset Button PB158 (AC) to reset
the system after the cause for the fault is rectified.
Pump activation is controlled by a pushbutton or a
robotic dispense signal. The supply pump is only activated when dispensing occurs in order to prevent large
pressure increases downstream of the gear meter. This
helps prevent stall pressure build up in the gear meter
that can result in downstream pressure creep depending
on the material viscosity.
Shutdown
MANUAL Dispense Mode
1. Set SS169 (AN) to “MANUAL.”
312744B
At any time, Emergency Stop Buttons PB1132 or
PB1133 (AA) may be pushed to stop dispensing operations.
1. Turn Motor Selector Switch SS125 (AL) off. The
Motor Active Lights LT129 and LT131 (AH) will turn
off indicating that the motor is inactive.
2. Turn Main Sealer Disconnect Lever (AR) off. The
Power Indicator Light LT111 (AE) will turn off.
17
Maintenance
Maintenance
CAUTION
Urethane material should not be exposed to atmosphere. Use grease or petroleum jelly to seal off urethane material in components from atmosphere.
Reference the following manuals for detailed maintenance and repair procedures of the Gear Meter components listed below. These manuals are not provided by
Graco.
Part
Gear Pump (35)
18
Manual
Kawasaki Gear Pump Technical Bulletin No. 703M
Gear Reducer (19)
SEW-EURODRIVE Gearmotors and Gear Reducers Operating Instructions 01 805
52 US
Electric Motor (31)
Baldor Electric Company Intergral Horsepower D.C. Motor Installation and Operation
User Manual MN605
Brake Clutch (25)
Nexen Air Champ Products User Manual FORM NO. L-20134-F-0200
Pressure Display
Red Lion Controls Model IMP Instruction Manual
312744B
Troubleshooting
Troubleshooting
Problem
Supply pumps are off.
Cause
Overpressure condition
Solution
Open the dispense gun and disengage the drive system. Depress Fault
Reset Button PB158 (AC) to reset.
Pressing the Manual Mode Dispense System is in “ROBOT” mode.
Button PB169 (AD) does not dispense material
Turn Dispense Mode Switch SS169
(AN) to “MANUAL” mode. The manual dispense button does not have an
effect on the system while SS169
(AN) is set to “ROBOT”.
Gear motor does not respond to ana- System is in “POT” speed mode.
log speed control mode.
The Speed Signal Input Selector
Switch SS135 (AM) must be manually set to “ANALOG” in order for an
analog signal to drive the motor control board.
ANALOG SPAN potentiometer is set
to 0%.
312744B
Increase the ANALOG SPAN potentiometer setting. It is recommended
that this potentiometer be set to 50%
when programming the robot controller. The potentiometer proportionally
weights the analog signal.
19
Repair
Repair
5. Remove four screws (CE) and lockwashers (CG)
from gear pump spacer (CD). See FIG. 8.
Each figure in the repair section includes an identification table. Use the two letters in the left column of the
table to identify a reference number used in one of the
three gear pump parts lists.
Remove Gear Pump
1. Relieve pressure. See Pressure Relief on page 16.
2. Turn power off with Main Sealer Disconnect Lever
(AR). The Power Indicator Light LT111 (AE) will turn
off.
918465 918473 918477
CD
CE
CF
CG
CH
CJ
CK
CL
CH
105
106
109
117
133
135
136
137
CL
205
206
209
217
233
235
236
237
305
306
309
317
333
335
336
337
CL
CK
3. Disconnect input and output fluid hoses from gear
pump (CJ).
CAUTION
Urethane material should not be exposed to atmosphere. Use grease or petroleum jelly to seal off urethane material in components from atmosphere.
4. Remove four screws (CA), lockwashers (CB), and
coupling guard (BC). See FIG. 7.
CJ
CE, CG
918465 918473 918477
CA
CB
CC
138
139
143
238
239
243
338
339
343
CD
CF
FIG. 8: Gear Pump
CC
CA, CB
FIG. 7: Coupling Guard
20
312744B
Repair
6. Remove four screws (CM), lockwashers (CN), and
two o-rings (CL) from the inlet flange (CK) and outlet
flange (CH). Check the o-rings for damage and
replace as necessary. See FIG. 8 and FIG. 9.
132
153
232
253
1. Connect gear pump (CJ) to gear spacer with three
screws (101, 201, 301).
2. Carefully lower and align the gear pump and gear
reducer coupling parts together. Ensure coupling
(118, 218, 318) is connected.
918465 918473 918477
CM
CN
Install Gear Pump
332
353
CH
CM, CN
3. Connect gear pump (CJ) and spacer (CD) to frame
(CF) with screws (CE) and lockwashers (CG). See
FIG. 8.
4. Install inlet flange (CK) and outlet flange (CH), two
o-rings (CL), four lockwashers (CN), and screws
(CM). See FIG. 9.
5. Install coupling guard (CC), four lockwashers (CB),
and screws (CA). See FIG. 7 on page 20.
6. Connect input and output fluid hoses to gear pump
(CJ).
Remove Electric Motor
1. Relieve Pressure. See Pressure Relief on page 16.
FIG. 9: Gear Pump Outlet Flange
7. Carefully pull away from the gear reducer the gear
pump (CJ), gear spacer (CD) and half of coupling
(118, 218, 318) attached to pump. Lay on a clean
worksurface. See FIG. 8.
2. Turn motor selector switch SS125 (AL) off. LT129
and LT131 (AH) will turn off, indicating that the
motor is inactive.
3. Turn power off with Main Sealer Disconnect Lever
(AR). The Power Indicator Light LT111 (AE) will turn
off.
4. Open wire box on the electric motor and disconnect
A1, A2, and ground wires. See FIG. 10.
8. Remove three screws (101, 201, 301) from the bottom of gear spacer (CD). See FIG. 8.
9. Install bypass manifold (104, 204. 304) or spare
gear pump (CJ). See FIG. 8.
It is recommended that you have an extra gear
pump on hand to continue operating the gear meter
system while the gear pump is repaired.
See Kawasaki Gear Pump Technical Bulletin
No. 703M for detailed gear pump repair procedures.
FIG. 10
312744B
21
Repair
5. Remove two screws from clutch housing guards;
remove guards. Disconnect black air hoses from the
clutch assembly. See FIG. 11.
6. Open the wire box on the speed sensor motor
adapter (CP). Disconnect the white, red, and black
wires. See FIG. 11.
7. Loosen fitting (CR) at top of speed sensor motor
adapter (CP). See FIG. 11.
128
131
145
228
231
245
Install Electric Motor
1. Connect electric motor (CQ) and the module drive
unit of the clutch assembly.
2. Install electric motor (CQ) and module drive unit to
the module brake unit with four black socket head
cap screws.
918465 918473 918477
CP
CQ
CR
See the Baldor Electric Company Intergral Horsepower D.C. Motor Installation and Operation
user manual MN605 for detailed repair procedures.
328
331
345
3. Tighten fitting (CR) on top of speed sensor motor
adapter (CP). See FIG. 11.
CP
4. Connect A1, A2, and ground wires in the wire box
on the electric motor.
5. Install clutch housing guard and connect black air
hoses.
The motor must turn counterclockwise. Reverse A1
and A2 wires if necessary.
Remove Brake Clutch
1. See Remove Electric Motor.
CQ Clutch housing guard screws
CR
FIG. 11
2. Remove four bolts and lockwashers from the gear
reducer adapter.
3. Disconnect the module brake unit of clutch.
8. Secure electric motor (CQ) to hoist.
9. Remove four black socket head cap screws that
connect the module brake unit and the module drive
unit.
10. Pull the electric motor (CQ) and the module drive
unit of the clutch assembly away from the module
brake unit; lay on worksurface.
See the Nexen Air Champ Products user manual
FORM NO. L-20134-F-0200 for detailed repair procedures of the brake clutch (125, 225, 325).
Install Brake Clutch
1. Install module brake unit of clutch to gear reducer
adapter with four bolts and lockwashers.
CAUTION
The Modular Drive Unit ball bearing is loose fitting by
design. Do not allow the ball bearing to fall off the
Modular Drive Unit.
2. See Install Electric Motor.
11. Disconnect the module drive unit and the electric
motor (CQ).
22
312744B
Parts
Parts
Part No. 970175, Bottom Inlet Service Meter
Part No. 970176, Top Inlet Service Meter
3
Bottom Inlet Service Meter
5, 6, 7
4
2
ti11243a
4
2
5, 6, 7
3
Top Inlet Service Meter
ti11245a
312744B
23
Parts
Part No. 970177, Horizontal Inlet Gear Meter System
Part No. 970194, Horizontal Inlet Gear Meter System with Heated Hose
4
5, 6, 7
Horizontal Inlet Gear Meter System
2
3
ti11244a
15.37 in. (390.40 mm)
TC118
TC132
0000
0000
TC125
TC150
0000
0000
LT106
R
PB104
11
LT116
A
SS114
25.26 in. (641.6 mm)
R
12
2
Horizontal Inlet Gear Meter System
with Heated Hose
6, 9
4
8
3
ti11246a
24
312744B
Parts
Part No. 970175, 970176, 970177, 970194, Gear Meter Systems
Gear Meter Systems
Bottom Inlet
Service
Meter,
970175
Top Inlet
Service
Meter,
970176
Horizontal
Inlet Service
Meter,
970177
Horizontal
Inlet Gear
Meter with
Heated Hose,
970194
✔
Ref.
No.
Part No.
Description
1
617517
CONTROL, electrical; see
page 33
✔
✔
✔
2
C59755
KIT, installation, 1 ft disp
hose
✔
✔
✔
C59758
KIT, 1 ft urethane heated
dispense hose
3
PUMP, gear pump assembly
✔
918477
See page 31
918465
See page 27
918473
See page 29
918473
See page 29
✔
4
918490
KIT, repair
✔
✔
✔
5
918539
APPLICATOR, ball seat,
3/4 port, 42:1
✔
✔
✔
6
156172
FITTING, union, swivel
✔
✔
✔
7
C20487
FITTING, nipple, hex
✔
✔
✔
8
15B919
MODULE, isolation valve
✔
FITTING, swivel
✔
9
✔
11
C59555
CONTROL, 4 zone controller
✔
12
C07738
CABLE, jumper 14 soc to
14 pin
✔
312744B
25
Parts
26
312744B
Parts
Part No. 918465, Top Inlet Gear Pump
SIDE VIEW
FRONT VIEW
104
102, 103
105
136, 137
104
132, 153
134, 154
135
106, 117
133, 137
101
132, 153
108
109
118
165, 139,
140, 141
143
138, 139
142
119
120, 121
110, 111
122, 123, 124
150, 151
See Detail A
144
125
115, 116
126, 127, 107
145
150, 164
146, 147
128
112, 113,
122, 114,
166
148
129, 130
144, 155, 156,
157, 158, 159,
160
122, 123, 163
122, 123
131
145, 149
ti11403a
ti11234a
Detail A
To gear reducer
side of clutch
To motor side of clutch
ti11465a
312744B
27
Parts
Part No. 918465, Top Inlet Gear Pump
Ref.
No.
101
102
103
104
105
106
107
108
109
110
111
112
113
114
115
116
117
118
119
120
121
122
123
124
125
126
127
128
129
130
131
132
133
134
135†
136
137
138
139
140
141
142
143
144
145
146
147
148
149
150
151
153
154
155
156
157
28
Part No.
109114
100214
101864
617465
617505
C19835
100133
C19736
C19008
C06187
C50125
C19445
C36183
100731
517458
517456
C19075
100128
C19407
C12509
597151
C52543
C52546
100131
C52559
104472
100020
C52556
617449
517473
517457
617448
C20261
112166
100016
110755
100015
C52545
C20720
C20721
C20819
158491
110138
C20874
C06022
C07430
517474
C19766
Description
SCREW, cap, socket hd
WASHER, lock
SCREW, cap socket hd
MANIFOLD
SPACER, gear pump
SCREW, cap socket head
WASHER, lock
PLUG, o-ring
FRAME
SCREW, drive
MARKER
FITTING, adapter, swivel
FILTER
BRACKET
FITTING, elbow, streeT
MUFFLER
WASHER
COUPLING, jaw type flex
GEAR, reducer
SCREW, cap, hex hd
WASHER, lock
FITTING, connector, male
TUBE, nylon, rnd; 7 ft
FITTING, elbow
CLUTCH, brake
STUD, threaded
NUT, full hex
ADAPTER, motor, speed sensor
SCREW, cap
WASHER, lock
MOTOR, D.C.
SCREW
FLANGE
TRANSDUCER
PUMP, hi-flo precision gear
FLANGE
O-RING
SCREW, cap, socket hd
WASHER, lock
WASHER, plain
NUT, hex mscr
JUNCTION BOX
GUARD, coupling
FITTING, flex conduit; 5 ft
FITTING, flex conduit
FITTING, conduit, tee
FITTING, nipple
CONNECTOR, conduit straight
PACKING, o-ring, conduit sealing
VALVE
CONNECTOR, sealed
WASHER, lock
PACKING
SCREW, machine, binding
RING
WIRE, copper, electrical
Qty.
3
2
2
1
1
4
4
1
1
6
1
1
1
1
4
4
4
1
1
4
4
6
1
2
1
4
4
1
4
4
1
8
1
1
1
1
2
4
6
2
2
1
1
1
3
1
1
1
1
2
1
8
1
5
6
9
Ref.
No.
158
159
160
163
164
165
166
Part No.
157021
C07501
100284
C20365
C07431
103345
C20004
Description
WASHER, lock
WIRE, copper, electrical
NUT, hex mscr
FITTING, tee, air
CONNECTOR, sealed
SCREW, cap socket hd
SCREW, cap
Qty.
5
18
5
1
1
4
2
† See Repair Kits on page 44 for Gear Pump repair
parts (purchase separately).
312744B
Parts
Part No. 918473, Horizontal Inlet Gear Pump
SIDE VIEW
TOP VIEW
202, 203
204
234, 256
204
236, 237
206, 217
233, 237
232, 253
232, 253
201
235
205
243
208
209
238, 239
218
244, 245, 257,
258, 259, 260,
261, 262
220, 221
219
222, 223, 224
264
265
225
212, 213,
214, 222,
255, 266,
267
226, 227, 207
242
228
210, 211
222, 223
248, 246,
247
215
240, 241, 254
244, 245, 249
231
See Detail A
ti11461a
ti11460a
Detail A
To gear reducer
side of clutch
250
229, 230
312744B
To motor side of clutch
251
216
ti11462a
29
Parts
Part No. 918473, Horizontal Inlet Gear Pump
Ref.
No.
201
202
203
204
205
206
207
208
209
210
211
212
213
215
216
217
218
219
220
221
222
223
224
225
226
227
228
229
230
231
232
233
234
235†
236
237
238
239
240
241
242
243
244
245
246
247
248
249
250
251
253
254
255
256
257
258
30
Part No.
109114
100214
101864
617465
617505
C19837
100133
C19736
C19008
C06187
C32390
100731
517458
517456
C19075
100128
C19407
C12509
C19391
C52543
C52546
100131
C52559
104472
100020
C52556
617449
517473
517457
617448
C20261
112166
100016
110755
100015
C52545
C20720
C20721
C20819
158491
110138
C20874
C06022
C07430
100643
C50125
517474
C19766
Description
SCREW, cap, socket hd
WASHER, lock
SCREW, cap socket hd
MANIFOLD
SPACER, gear pump
SCREW, cap, socket hd
WASHER, lock
PLUG, o-ring
FRAME, gear pump
SCREW, drive
MARKER
FITTING, adapter, swivel
FILTER
BRACKET, J-Box
FILTER, vent, breather
WASHER
COUPLING, jaw type flex
GEAR, reducer
SCREW, cap, hex hd
WASHER, lock
FITTING, connector, male
TUBE, nylon, rnd
FITTING, elbow
CLUTCH, brake
STUD, threaded
NUT, full hex
ADAPTER, motor, speed sensor
SCREW, cap
WASHER, lock
MOTOR, D.C.
SCREW
FLANGE
TRANSDUCER
PUMP, hi-flo precision gear
FLANGE
O-RING
SCREW, cap, socket hd
WASHER, lock
WASHER, plain
NUT, hex mscr
JUNCTION BOX
GUARD, coupling
FITTING, flex conduit; 3 ft
FITTING, flex conduit
FITTING, conduit, tee
FITTING, nipple
CONNECTOR, conduit straight
PACKING, o-ring, conduit sealing
VALVE
CONNECTOR, sealed
WASHER, lock
SCREW, cap, socket hd
BRACKET
PACKING
SCREW, machine, binding
RING
Qty.
3
2
2
1
1
4
4
1
1
6
1
1
1
2
2
4
1
1
4
4
2
4
2
1
4
4
1
4
4
1
8
1
1
1
1
2
6
6
6
6
1
1
1
2
1
1
2
1
1
1
8
6
1
1
5
6
Ref.
No.
259
260
261
262
264
265
266
267
Part No. Description
WIRE, copper, electrical
157021 WASHER, lock, int
C07501 WIRE, copper, electrical
100284 NUT, hex mscr
513421 WIRE, 3 cond. 18 gauge
BRACKET, FRL mounting
100166 NUT, full hex
C20004 SCREW, cap
Qty.
7
5
14
5
5
1
1
1
† See Repair Kits on page 44 for Gear Pump repair
parts (purchase separately).
312744B
Parts
Part No. 918477, Bottom Inlet Gear Pump
SIDE VIEW
FRONT VIEW
331
349, 345
322, 323,
324
309
362
344
348
315, 316
328
346, 347
326, 327,
307
338, 339,
340, 341
345
325
See
Detail A
322, 323
320, 321
312, 313,
314, 322
344, 355,
356, 357,
358, 359,
360
342
319
343
310, 311
338, 339
318
306, 317
308
305
332, 353
333, 337
301
336, 337
334, 354
335
ti11463a
302, 303
ti11464a
304
304
Detail A
To gear reducer
side of clutch
329, 331
To motor side of clutch
350, 351
ti11465a
312744B
31
Parts
Part No. 918477, Bottom Inlet Gear Pump
Ref.
No.
301
302
303
304
305
306
307
308
309
310
311
312
313
314
315
316
317
318
319
320
321
322
323
324
325
326
327
328
329
330
331
332
333
334
335†
336
337
338
339
340
341
342
343
344
345
346
347
348
349
350
351
353
354
355
356
32
Part No.
109114
100214
101864
617465
617505
C19835
100133
C19736
C19008
C06187
C50125
C19445
C36183
100731
517458
517456
C19075
100128
C19407
C12509
C19391
C52543
C52546
100131
C52559
104472
100020
C52556
617449
517473
517457
617448
C20261
112166
100016
110755
100015
C52545
C20720
C20721
C20819
158491
110138
C20874
C06022
C07430
517474
C19766
Description
SCREW, cap, socket hd
WASHER, lock
SCREW, cap socket hd
MANIFOLD
SPACER, gear pump
SCREW, cap, socket hd
WASHER, lock
PLUG, o-ring
FRAME
SCREW, drive
MARKER
FITTING, adapter, swivel
FILTER
BRACKET
FITTING, elbow, street
MUFFLER
WASHER
COUPLING, jaw type flex
GEAR, reducer
SCREW, cap, hex hd
WASHER, lock
FITTING, connector, male
TUBE, nylon, rnd; 6 ft
FITTING, elbow
CLUTCH, brake
STUD, threaded
NUT, full hex
ADAPTER, motor, speed sensor
SCREW, cap
WASHER, lock
MOTOR, D.C.
SCREW
FLANGE
TRANSDUCER
PUMP, hi-flo precision gear
FLANGE
O-RING
SCREW, cap, socket hd
WASHER, lock
WASHER, plain
NUT, hex mscr
JUNCTION BOX
GUARD, coupling
FITTING, flex conduit; 5 ft
FITTING, flex conduit
FITTING, conduit, tee
FITTING, nipple
CONNECTOR, conduit straight
PACKING, o-ring, conduit sealing
VALVE
CONNECTOR, sealed
WASHER, lock
PACKING
SCREW, machine, binding
RING
Qty.
3
2
2
1
1
4
4
1
1
6
1
1
1
1
2
2
4
1
1
4
4
2
1
2
1
4
4
1
2
2
1
8
1
1
1
1
2
8
8
2
2
1
1
1
2
1
1
1
1
1
1
8
1
5
6
Ref.
No.
357
358
359
360
362
Part No. Description
WIRE, copper, electrical
157021 WASHER, lock
C07501 WIRE, copper, electrical
100284 NUT, hex mscr
513421 WIRE, 3 cond. 18 gauge
Qty.
9
5
18
5
8
† See Repair Kits on page 44 for Gear Pump repair
parts (purchase separately).
312744B
Parts
Part No. 617517, Electrical Control
515
Front of Electrical Control Panel
516
ti11241a
517
Inside Electrical Control Panel
See Wiring Schematics on page 35.
ti11239a
312744B
33
Parts
Part No. 617517, Electrical Control
Ref.
No.
515
516▲
517▲
Part No.
196165
15F279
196548
Description
BOARD, dc motor drive
LABEL
LABEL
Qty.
1
1
1
▲ Replacement Danger and Warning labels, tags, and
cards are available at no cost.
34
312744B
Wiring Schematics
Wiring Schematics
Part No. 617517, Electrical Control
312744B
35
Wiring Schematics
Part No. 617517, Electrical Control
36
312744B
Wiring Schematics
Part No. 617517, Electrical Control
312744B
37
Wiring Schematics
Part No. 617517, Electrical Control
38
312744B
Wiring Schematics
Part No. 617517, Electrical Control
312744B
39
Wiring Schematics
Part No. 617517, Electrical Control
40
312744B
Wiring Schematics
Part No. 617517, Electrical Control
312744B
41
Wiring Schematics
Gear Meter Junction Box
42
312744B
Wiring Schematics
Gear Meter Junction Box
312744B
43
Accessories
Accessories
Repair Kits
Windshield Nozzles
Part No. Description
C51172 End Cut Windshield Nozzle
Qty.
1
Fluid Filters
Part No.
241403
248253
108357
C58997, Module Filter
Part No.
518779
515216
210658
116586
515222
Description
ADAPTER, pipe, female
HOUSING, filter
VALVE, ball
O-RING
ELEMENT, filter
Qty.
2
1
1
1
1
970126, Header Assembly Filter
Part No.
210658
617122
102814
118854
521975
518779
518741
C20490
515216
516715
100840
116586
44
Description
VALVE, ball
FRAME, header stand
GAUGE, press, fluid
VALVE, ball, high pressure
FITTING, union, pipe
ADAPTER, pipe, female
BUSHING
FITTING, nipple, hex
HOUSING, filter
ELEMENT, filter
FITTING, elbow, street
O-RING
Gear Pump Repair Kits
Qty.
2
1
2
4
4
4
4
8
2
2
2
2
Description
SHAFT, gear
SEAL
O-RING
Qty.
1
4
2
241404, Hard Metal Repair Kit
Description
SHAFT, gear
SHAFT, gear
SEAL
DRIVE GEAR
DRIVEN GEAR
SPACER
Qty.
1
1
4
1
1
4
312744B
Dimensions
Dimensions
Model 970175, Gear Meter
617517, Electrical Control
ti11243a
Part No.
ti11239a
Width
Height
Depth
26 in (660 mm)
59 in. (1498 mm)
23 in. (584 mm)
38 in. (965 mm)
64 in. (1626 mm)
12 in. (305 mm)
Gear Meter
970175
970176
970177
970194
Electrical Control
617517
312744B
45
Technical Data
Technical Data
D.C. Electric Motor
Horsepower . . . . . . . . . . . . . . . . . . . . . . . . . . . . . . . .
Maximum current drive . . . . . . . . . . . . . . . . . . . . . . .
Average current draw. . . . . . . . . . . . . . . . . . . . . . . . .
Baldor P/N . . . . . . . . . . . . . . . . . . . . . . . . . . . . . . . . .
2 HP @ 1750 RPM
9.3 amps
4.7 amps
CDP3585
Air Clutch Assembly
Shaft size . . . . . . . . . . . . . . . . . . . . . . . . . . . . . . . . . . 0.875 in. diameter bore and output shaft
Maximum air supply. . . . . . . . . . . . . . . . . . . . . . . . . . 50 psi (0.34 MPA, 3.44 bar)
Nexen P/N
MDB875
Gear Reducer Assembly
Description. . . . . . . . . . . . . . . . . . . . . . . . . . . . . . . . . Foot mount parallel helical gear reducer, c-face input,
36.84:1 reduction with flexible coupling
SEW Eurodrive P/N . . . . . . . . . . . . . . . . . . . . . . . . . . R87AM145
Gear Pump Assembly
Description. . . . . . . . . . . . . . . . . . . . . . . . . . . . . . . . .
Capacity. . . . . . . . . . . . . . . . . . . . . . . . . . . . . . . . . . .
Inlet Thread (on flange) . . . . . . . . . . . . . . . . . . . . . . .
Outlet Thread (on flange). . . . . . . . . . . . . . . . . . . . . .
Maximum inlet pressure. . . . . . . . . . . . . . . . . . . . . . .
Maximum outlet pressure . . . . . . . . . . . . . . . . . . . . .
Maximum temperature. . . . . . . . . . . . . . . . . . . . . . . .
Maximum viscosity. . . . . . . . . . . . . . . . . . . . . . . . . . .
Maximum rotational speed. . . . . . . . . . . . . . . . . . . . .
Displacement . . . . . . . . . . . . . . . . . . . . . . . . . . . . . . .
Recommended fluid filtration . . . . . . . . . . . . . . . . . . .
Kawasaki P/N . . . . . . . . . . . . . . . . . . . . . . . . . . . . . .
Wetted parts
Inline type, high flow precision gear pump
152 cubic in./min
1.5 in.-11.5 in. npt (f)
1.5- 11.5 in. npt (m)
4267 psi (29.4 MPa, 294.19 bar)
5689 psi 39.2 MPa, 392.24 bar)
250 °F (121 °C)
100,000 poise (10,000 Pa.s)
50 rpm
50 cc/rev (3.05 cubic in./rev)
200 mesh or finer
HF50-CM-28
D2 tool steel with tuftride coating; 1018 carbon steel; fluoroelastomer
Electrical Control Enclosure
Required Voltage Supply . . . . . . . . . . . . . . . . . . . . . . 480 VAC, 3-phase, 60 Hz (not rated for 50 Hz service)
FLA . . . . . . . . . . . . . . . . . . . . . . . . . . . . . . . . . . . . . . 8.3 Amps
46
312744B
Technical Data
312744B
47
Graco Standard Warranty
Graco warrants all equipment referenced in this document which is manufactured by Graco and bearing its name to be free from defects in
material and workmanship on the date of sale to the original purchaser for use. With the exception of any special, extended, or limited warranty
published by Graco, Graco will, for a period of twelve months from the date of sale, repair or replace any part of the equipment determined by
Graco to be defective. This warranty applies only when the equipment is installed, operated and maintained in accordance with Graco’s written
recommendations.
This warranty does not cover, and Graco shall not be liable for general wear and tear, or any malfunction, damage or wear caused by faulty
installation, misapplication, abrasion, corrosion, inadequate or improper maintenance, negligence, accident, tampering, or substitution of
non-Graco component parts. Nor shall Graco be liable for malfunction, damage or wear caused by the incompatibility of Graco equipment with
structures, accessories, equipment or materials not supplied by Graco, or the improper design, manufacture, installation, operation or
maintenance of structures, accessories, equipment or materials not supplied by Graco.
This warranty is conditioned upon the prepaid return of the equipment claimed to be defective to an authorized Graco distributor for verification of
the claimed defect. If the claimed defect is verified, Graco will repair or replace free of charge any defective parts. The equipment will be returned
to the original purchaser transportation prepaid. If inspection of the equipment does not disclose any defect in material or workmanship, repairs will
be made at a reasonable charge, which charges may include the costs of parts, labor, and transportation.
THIS WARRANTY IS EXCLUSIVE, AND IS IN LIEU OF ANY OTHER WARRANTIES, EXPRESS OR IMPLIED, INCLUDING BUT NOT LIMITED
TO WARRANTY OF MERCHANTABILITY OR WARRANTY OF FITNESS FOR A PARTICULAR PURPOSE.
Graco’s sole obligation and buyer’s sole remedy for any breach of warranty shall be as set forth above. The buyer agrees that no other remedy
(including, but not limited to, incidental or consequential damages for lost profits, lost sales, injury to person or property, or any other incidental or
consequential loss) shall be available. Any action for breach of warranty must be brought within two (2) years of the date of sale.
GRACO MAKES NO WARRANTY, AND DISCLAIMS ALL IMPLIED WARRANTIES OF MERCHANTABILITY AND FITNESS FOR A
PARTICULAR PURPOSE, IN CONNECTION WITH ACCESSORIES, EQUIPMENT, MATERIALS OR COMPONENTS SOLD BUT NOT
MANUFACTURED BY GRACO. These items sold, but not manufactured by Graco (such as electric motors, switches, hose, etc.), are subject to
the warranty, if any, of their manufacturer. Graco will provide purchaser with reasonable assistance in making any claim for breach of these
warranties.
In no event will Graco be liable for indirect, incidental, special or consequential damages resulting from Graco supplying equipment hereunder, or
the furnishing, performance, or use of any products or other goods sold hereto, whether due to a breach of contract, breach of warranty, the
negligence of Graco, or otherwise.
FOR GRACO CANADA CUSTOMERS
The Parties acknowledge that they have required that the present document, as well as all documents, notices and legal proceedings entered into,
given or instituted pursuant hereto or relating directly or indirectly hereto, be drawn up in English. Les parties reconnaissent avoir convenu que la
rédaction du présente document sera en Anglais, ainsi que tous documents, avis et procédures judiciaires exécutés, donnés ou intentés, à la suite
de ou en rapport, directement ou indirectement, avec les procédures concernées.
Graco Information
For the latest information about Graco products, visit www.graco.com.
TO PLACE AN ORDER, contact your Graco distributor or call to identify the nearest distributor.
Phone: 612-623-6921 or Toll Free: 1-800-328-0211 Fax: 612-378-3505
All written and visual data contained in this document reflects the latest product information available at the time of publication.
Graco reserves the right to make changes at any time without notice.
Original instructions. This manual contains English. MM 312744
Graco Headquarters: Minneapolis
International Offices: Belgium, China, Japan, Korea
GRACO INC. P.O. BOX 1441 MINNEAPOLIS, MN 55440-1441
Copyright 2007, Graco Inc. is registered to ISO 9001
www.graco.com
Revised 03/2010