Transcript
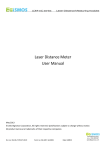
eGismos EYC-60 Laser Power Meter User Manual
•
•
•
•
•
Introduction
Specification
Component & Features
Some precaution
Measuring procedure
Thank you for choosing our laser beam power meter, in order to use the device
correctly and effectively please read the instruction carefully prior to use of the
device.
I . Introduction
The laser beam power meter could provide a faster way to measure the laser beam
power from 635nm ~ 830nm, applicable range from DVD player, CD player to laser
indicator and so on.
II . Specification
Beam wavelength measure range:
635nm ~ 830nm.
Beam power measure range:
0.1mW ~ 5mW.
Adjust the beam power position:
0.3mW, 1mW, 3mW, 5mW,
Accuracy:1,5mW+5% 0.3,3mW+10% for three specific wavelengths.
Photosensor:
Silicone photo diode (sensor diam 9mm).
Photosensor head:
Dimension:23.5(D)x120.5(L)mm.
Wire length:1 meter.
Device dimension:
141(L)x98(W)x35(H)mm.
III. Component & Features(Fig 1.)
1.Wave length slide switch
There are four position in the slide switch, for the visible beam 635nm&650nm,
and for ultra red beam 830nm, also a position CAL for active the wave length
adjusting knob, move to the proper position on the slide switch, to measure the
different values 635nm, 650nm, 830nm.
Ex. For measuring laser beam power of 650nm, adjust the wavelength slide switch
(as Fig 2) to position 650nm.
2.Wave length adjust knob
a. Select the wave length slide switch to CAL position(as Fig 3)
b. With position 830nm, could measure wave length 830nm, with position 635nm, could
measure wavelength 635nm, with laser beam power between 635nm~680nm, adjust the knob
in-between, a reference readout will be shown(as Fig 4).
3. Reset adjusted knob
Reset the needle on indicator back to zero by the reset-adjusted knob(as Fig 1)
4. Indicator panel
There are three readout on the panel in full position, there are 3, for value 0.3mW divide by 5,
(as Fig 5).
5. Beam power select knob
There are 4 position in beam power select knob, they are:0.3mW, 1mW, 3mW, 5mW (as Fig
6).
IV .Some precaution
1. Avoid direct contact of photosensor, since the contaminated surface could cause readout error,
clean the surface of the device by fine paper socked with alcohol.
2. Note avoid human eye contact by laser beam when measure the high power beam, since the
invisible ultrared beam will damage the eyesight, so special attention and special safe
procedure should be taken.
3. Into a dark room when a weak beam power is measured, since the light surrounding will
nfluence the beam, and cause readout error.
4. Input laser beam should locate on the center of the light sensor, the beam should diffuse
average on the effect range. Locate the laser beam and beam sensor in a line, this could avoid
beam reflect (as Fig 7)
5. Do not hit or bent the laser beam sensor by foreign object, this will damage the beam sensor.
V .Measuring procedure
1. Prior to measure
Connect the beam sensor into measuring device, and follow the procedures below:
a. Adjust the beam power position to 10mW, the needle should back to zero.
b. If not, adjust the reset knob to move the needle back to zero.
2. Beam power measuring
a. For ultrared beam select wavelength to 830nm, for visible beam select wavelength to
635nm(see wave length slide switch).
b. Select power position to 5mW first, after that choosing a suitable lower power position for
accurate readout.
c. For measure the ultrared beam, the important thing is to make sure the angle for measuring,
move the beam sensor to ultrared beam, there will be a position shown the biggest readout,
that is the point the beam shaft actually located, take some measuring at this point.
d. Away the point of measuring, the beam shaft will move up, down, left or right. Generally
speaking, the beam should locate on the effect range of the sensor, that is the position to
measure the biggest beam intensity.
ADJUSTMEN
Data
Experiment
Meterman