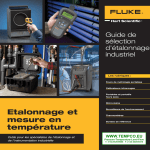
Download Temperature Measurement and Calibration
Transcript
Multifunction
Process Calibrator
Industrial
Calibration
Selection
Guide
Look
inside for:
Field Metrology Wells
Infrared Calibrators
Handheld and Field
Dry-Wells
1
Micro-Baths
Temperature
Measurement
and Calibration
Tools for industrial instrumentation
and calibration technicians
Environmental Monitoring
Thermometer Readouts
Reference Sensors
Selection guide
JO)
0
JO)
0
2
Legend
RTD calibration
Dial thermometer calibration
Temperature transmitter,
switch, and controller loop
calibration
Infrared thermometer and
thermal imager calibration
Monitoring temperature and
humidity
Selection guide
NEW! Precision Infrared
Calibrators
NEW! Field Metrology Wells
Handheld dry-wells
Model
9142/9142P
page 4
9143/9143P
page 4
9144/9144P
page 4
4180
page 6
4181
page 6
9100S
page 8
9102S
page 8
Range
–25 °C to 150 °C
4-20 mA
33 °C to 350 °C
4-20 mA
50 °C to 660 °C
4-20 mA
–15 °C to 120 °C
35 °C to 500 °C
35 °C to 375 °C
–10 °C to 122 °C
± 0.2 °C
± 0.2 °C
± 0.35 °C
± 0.35 °C
± 0.35 °C
± 0.25 °C
± 0.25 °C
Best Accuracy
Applications
Field dry-wells
Model
Range(s)
Best Accuracy
Sensors
9009
page 9
9103
page 10
9140
page 10
9141
page 10
–15 °C to 350 °C
–25 °C to 140 °C
35 °C to 350 °C
50 °C to 650 °C
± 0.2 °C
± 0.25 °C
± 0.5 °C
± 0.5 °C
Applications
9150
page 10
PRT
page 15
150 °C to 1200 °C –200 °C to 670 °C
± 5 °C
Thermistor
page 15
0 °C to 100 °C
See pages 14–15 See pages 14–15
thermocouples
Micro Baths
Thermometer readouts and environmental monitoring
3
Model
6102
page 11
7102
page 11
Range
35 °C to 200 °C
–5 °C to 125 °C
± 0.25 °C
± 0.25 °C
± 0.25 °C
± 0.008°C
± 0.006 °C
± 0.006 °C
n/a
n/a
n/a
1
1
4
Best Accuracy
Channels
7103
page 11
1521/1522
page 14
1502A
page 13
1529
page 13
–30 °C to 125 °C –200 °C to 962 °C –200 °C to 962 °C –200 °C to 962 °C
Applications
Fluke is pleased to offer a selection of Hart Scientific dry-wells and reference
thermometers made specifically for industrial applications.
Field
Multifunction
dry-wells Wells
Metrology
and
Process
furnaces
Calibrator
Hart Scientific 9142, 9143, 9144 Field
Metrology Wells
• Lightweight, portable, and fast
• Cool to –25 °C in 15 minutes and heat to 660 °C in 15 minutes
• Built-in two-channel readout for PRT, RTD, thermocouple,
4-20 mA current
• True reference thermometry with accuracy to ± 0.01 °C
• Specifications guaranteed in an ambient range of 13 °C to 33 °C
• On-board automation and documentation
• Metrology performance in accuracy, stability, uniformity,
and loading
Field Metrology Wells offer accuracy, portability, and speed for nearly
all field calibration applications. These units are packed with functionality and are remarkably easy to use. Field Metrology Wells are
light weight, small, and quick to reach temperature set points, yet
also stable, uniform, and precise. This industrial product line is perfect for transmitter loop, comparison calibration, or a simple check of
a thermocouple sensor. There is no need to have to carry additional
tools into the field as the “process” option offers a built-in readout for
resistance, voltage, and mA measurement, 24V loop power, and onboard documentation.
Ordering Information
9142-X Field Metrology Well, –25 °C to 150 °C
9142-X-P Field Metrology Well, Process Version,
–25 °C to 150 °C
9143-X Field Metrology Well, 33 °C to 350 °C
4
Typical applications:
• Loop calibration of temperature transmitters
• Thermocouple calibration or verification
• Calibrations of RTDs or PRTs
• Testing of thermostatic switches
• Verification of industrial thermometers
9144-X Field Metrology Well, 50 °C to 660 °C
Each unit includes: Accredited report of calibration, insert, insert
removal tool, power cord, user manual, 9930 Interface-it software,
serial cable, test leads (process versions only), spare PRT connector
(process version only)
9144-X-P Field Metrology Well, Process Version,
50 °C to 660 °C
Recommended accessories: carrying case, MET/TEMP II automated
calibration software, reference temperature sensor
9143-X-P Field Metrology Well, Process Version,
33 °C to 350 °C
9142-CASE Case, Carrying, Field Metrology
Wells
5616-12-A PRT 305 mm x 6.35 mm (11.75 in
x 1/4 in) w/ NIST traceable calibration, –200 °C
to 420 °C
5609-12-A PRT 305 mm x 6.35 mm (11.75 in x
1/4 in) uncalibrated, –200 °C to 660 °C
1923-4-7 Calibration, PRT –200 °C to 660 °C
X = insert (interchangeable). Specify “A”, “B”,
“C”, “D”, “E”, or “F”
Field Metrology Wells
Summary specifications for 9142, 9143, and 9144
9142/9142-P
9143/9143-P
9144/9144-P
Range
–25 °C to 150 °C
33 °C to 350 °C
50 °C to 660 °C
Display Accuracy
± 0.2 °C
± 0.2 °C
± 0.35 °C (420 °C)
± 0.5 °C (660 °C)
Stability
± 0.01 °C
± 0.02 °C (33 °C)
± 0.03 °C (350 °C)
± 0.03 °C (50 °C)
± 0.05 °C (660 °C)
Heating Time (max)
23 min
5 min
15 min
Cooling Time
15 min to –25 °C
14 min to 100 °C
25 min to 100 °C
Weight
8.2 kg (18 lbs)
7.3 kg (16 lbs)
7.7 kg (17 lbs)
Process Version Accuracy
± 0.01 °C at –25 °C
± 0.02 °C at 155 °C
± 0.02 °C at 50 °C
± 0.04 °C at 350 °C
± 0.02 °C at 50 °C
± 0.07 °C at 660 °C
RTD inputs (process version)
2-, 3-, 4-wire RTD. Resistance range of 0 to 400 Ω. Ni-120, PT-100 (385),
PT-100 (3926), PT-100 (JIS), or Ω
TC inputs (process version)
Type J, K, T, E, R, S, B, L, U, N, C, and mV
mA Specs (process version)
Range: 0-24 mA with 24-28 V dc loop power
mA Accuracy: 0.02% of rdg + 0.002 mA
9142 Insert Options
5
9143/9144 Insert Options
Precision infrared
calibrators
Hart Scientific 4180 and 4181 Precision
Infrared Calibrators
Accurate yet portable
• Combined temperature range of –15 °C to 500 °C
• Infrared display accuracy as good as ± 0.35 °C on both units
• Convenient handle and weight of 9.5 kg (21 lbs) or less for portability
Easy to get dependable results
• Each unit is given an accredited radiometric calibration for consistent, reliable, and traceable results
• Corrections for emissivity are performed automatically with no manual calculations
• Audio/visual stability indication provided for ease of use
• Stores thermometer calibration routines including temperature set-points,
calibration distance, emissivity setting, and use of external aperture
A superior target
• 152 mm (6 in) diameter target addresses critical size-of-source effect issues
for infrared thermometers and thermal imager calibration requirements
• Stability as good as ± 0.05 °C over 30 minutes for both models
• Uniformity as good as ± 0.1 °C over the inner 127 mm (5 in) diameter
Each unit includes: Accredited radiometric report of calibration, protective
target cover, manual, 9930 Interface-It software
Recommended accessories: Protective carrying case
Do you calibrate your infrared thermometers and thermal imagers? Even
those infrared thermometers that cannot be adjusted can benefit from a
calibration that demonstrates the consistency and validity of your results. A
trusted calibration means less worry, fewer questions and more time being
productive. The 4180 Series of Precision Infrared Calibrators for infrared
thermometers and thermal imagers is fast, accurate, and easy to use. It
comes with an accredited calibration from one of the world’s most trusted
temperature calibration laboratories, sample calibration procedures for Fluke
thermometers built right in, and everything you need to get started making
high-quality infrared thermometer calibrations. This is the perfect solution for
any infrared thermometer or thermal imager within its temperature range.
6
Ordering information
4180 Precision Infrared Calibrator,
–15 °C to 120 °C
4181 Precision Infrared Calibrator,
35 °C to 500 °C
4180-CASE Protective carrying case
4180-DCAS Protective carrying case
with wheels
Precision infrared
calibrators
Excellent performance
The 4180 reaches temperatures from –15 °C to 120 °C and the 4181 has
a temperature range from 35 °C to 500 °C. Check out the uniformity of the
large six-inch targets shown in the thermal imager photo. The uniformity and
stability are so good that variations can’t be detected with a thermal imager.
Uniformity is important in infrared temperature calibration work because an
infrared thermometer will “see” as much as the entire target when placed at
the appropriate calibration distance and each pixel of a thermal imager registers a temperature that needs to be both accurate and consistent across
the imager.
Why calibrate?
Business decisions costing thousands of dollars are
based on the results of your measurements, so they
had better be right! It can be very expensive to shut
down a line for repairs and maintenance but it might
be catastrophic if the shut down is unplanned. To
stand by your recommendations with confidence, you
should definitely have your thermometers calibrated.
Application notes
For information on emissivity, size of source effect and
radiometric calibration see the Hart Scientific application note “Infrared Temperature Calibration 101” and
have a look at our Guide to Infrared Thermometer
Calibration to get started quickly with your new calibrator. You can download both documents from our
web site.
Summary Specifications for 4180 and 4181
4180
4181
Temperature Range
(@ 23 °C ambient and
0.95 emissivity)
–15 °C to 120 °C
35 °C to 500 °C
Infrared Display
Accuracy
± 0.40 °C at –15 °C
± 0.35 °C at 0 °C
± 0.45 °C at 120 °C
± 0.35 °C at 35 °C
± 0.55 °C at 200 °C
± 1.6 °C at 500 °C
Display Resolution
0.01 °
Target Size
152 mm (6 in) dia.
Stability
± 0.1 °C at –15 °C
± 0.05 °C at 0 °C
± 0.1 °C at 120 °C
± 0.05 °C at 35 °C
± 0.2 °C at 250 °C
± 0.4 °C at 500 °C
Uniformity (5.0-inch
diameter zone at the
center of the target)
± 0.15 °C at –15 °C
± 0.1 °C at 0 °C
± 0.25 °C at 120 °C
± 0.1 °C at 35 °C
± 0.5 °C at 250 °C
± 1.0 °C at 500 °C
Heating Time
15 min: –15 °C to 120 °C
14 min: 23 °C to 120 °C
20 min: 35 °C to 500 °C
Cooling Time
15 min: 120 °C to 23 °C
20 min: 23 °C to –15 °C
100 min: 500 °C to 35 °C
40 min: 500 °C to 100 °C
Stabilization Time
10 minutes
10 minutes
7
Handheld
Multifunction
Process Calibrator
dry-wells
Hart Scientific 9100S and 9102S Handheld Dry-Well
Temperature Calibrators
• A temperature source that you can take anywhere
• Fast and easy calibrations of temperature sensors
• 9100 model weighs only 2 lbs, 3 oz (1 kilogram)
• Temperature ranges from –10 °C to 375 °C
• Stability during calibrations to ± 0.05 °C
• Direct interface to the Fluke 744 Documenting Process Calibrator
Each unit includes RS-232 interface, instrument control software and a
NIST-traceable calibration.
Recommended accessories: carrying case, additional inserts, reference
temperature sensor and indicator, battery pack
Temperature sensor calibration is easy with a
handheld dry-well.
2514 dry-well
interface cable
Ordering information
8
HART Scientific
3.5 mm
interface cable
9100S Handheld Dry-Well
9300 Rugged Carrying Case, 9100
9102S Handheld Dry-Well, comes with your
choice of two 3102 inserts
3102-1 Insert, AL 1/16 in (1.6 mm)
3102-2 Insert, AL 1/8 in (3.2 mm)
3102-3 Insert, AL 3/16 in (4.8 mm)
3102-4 Insert, AL 1/4 in (6.4 mm) (Standard)
3102-6 Insert, AL 3/8 in (9.5 mm) (Standard)
3102-7 Insert, AL 7/16 in (11.1 mm) (Standard)
3102-8 Insert, AL 5/32 in (4 mm) (Standard)
2514 Dry-well interface cable to Fluke 744
Insert. Specify “A”, “B”, “D”
HART
Scientific
Dry-well
(DB9)
HART Scientific
Dry-well (3.5 mm)
Easily connect a Fluke 744 to a dry-well for a fully automated temperature
calibration that includes the temperature transmitter and temperature sensor.
9308 Hard Carrying Case, 9102/9132
9320A Battery Pack, 115V (9102S run
time: 4 hrs)
Null modem
9100 fixed-block options
Field
dry-wells
Hart Scientific 9009 Industrial Dual-Block Calibrator
Cut your calibration time in half
• Calibrate temperature sensors fast
• Independently controlled cold and hot blocks
• –15 °C to 110 °C (cold block), 50 °C to 350 °C (hot block)
• Self-contained in a rugged watertight case
• Four removable inserts,
• Direct interface to Fluke 744
Each unit includes four removable inserts, including two with holes that are
6.4 mm (1/4 in) and two with holes that are 4.8 mm (3/16 in) in diameter.
Each unit also includes a power cord, insert removal tool, RS-232 interface,
instrument control software and a NIST-traceable calibration
Recommended accessories: additional inserts, reference temperature sensor
and indicator
Why calibrate thermometers? Because
your performance will go up and your
costs will come down. As suggested in
the example in Table 1, the cost of inaccurate measurements can be quite high.
Tip: While you’re checking your
transmitter sensor at one temperature,
the other well can be heating or
cooling to your next set-point.
Now it’s easy to work twice as fast.
High Cost of Not Calibrating a Sensor
Process fluid
Water
Flow rate
100 gallons per minute
Control temp
38 °F
Energy cost
Rate per kW-Hr
Energy cost
70,812 (Rate) per year
Ordering information
Table 1. Annual cost of energy due to a 1 °C
temperature error
9009-B Dual Block Dry-Well
(Black), –15 °C to 350 °C
System accuracy improved by more than 75%!
RSS Error ± °C
1.2
0.8
0.4
0
Standard Sensor
Calibrated Sensor
System accuracy improvement achieved with a calibrated Pt100 sensor.
9009-Y Dual Block Dry-Well
(Yellow), –15 °C to 350°C
3102-1 Insert 1.6 mm (1/16 in)
3102-2 Insert 3.2 mm (1/8 in)
3102-3 Insert 4.8 mm (3/16 in)
3102-4 Insert 6.4 mm (1/4 in)
3102-5 Insert 7.9 mm (5/16 in)
3102-6 Insert 9.5 mm (3/8 in)
3102-7 Insert 11.1 mm (7/16 in)
3102-8 Insert 4 mm (5/32 in)
2514 Dry-well interface cable
to Fluke 744
9
Field dry-wells
and furnaces
Hart Scientific dry-wells interface
directly to the Fluke 744 for fully
automated calibration.
Hart Scientific 9103, 9140 and 9141 Field
Dry-Wells and 9150 Thermocouple Furnace
Ordering information
10 9103 Dry-Well, –25 °C to 140 °C
9140 Dry-Well, 35 °C to 350 °C
9141 Dry-Well, 50 °C to 650 °C
9150 Thermocouple Furnace,
150 °C to 1200 °C
Temperature sensor test and calibration
• Lightweight and very portable
• Accuracy to ± 0.25 °C
• RS-232 and Interface-it software
included
• Interchangeable inserts
• 9103 goes as low as –25 °C.
• 9140 is 6 pounds (2.7 kg) and 9141 is
3.6 kg (8 pounds)
• 9140 and 9141 reach max temp in
12 minutes
• 9150 extends up to 1200 °C covering a
wide range of T/C types.
• Direct interface to Fluke 744
Recommended accessories: carrying
case, additional inserts, reference temperature sensor and indicator
Each dry-well includes one of four
available well inserts, an optional carrying
case, RS-232 interface, instrument control
software and a NIST-traceable calibration.
9316Rugged Carrying Case for 9103
9308Rugged Carrying Case for 9140
9309Rugged Carrying Case for 9141
9315Rugged Carrying Case for 9150
2514 Dry-Well Interface Cable
to Fluke 744
Insert (interchangeable).
Specify “A”, “B”, “C”, “D”
9103, 9140, 9141 and 9150 Insert Options
1/16 in
(1.6 mm)
1/2 in
(12.7 mm)
1/8 in
(3.2 mm)
Insert “A”
1/4 in
(6.35 mm)
Insert “B”
3/16 in
(4.8 mm)
3/8 in
(9.5 mm)
3/8 in
(9.5 mm)
3/16 in
(4.8 mm) 1/4 in
(6.35 mm)
1/4 in
(6.35 mm)
Insert “C”
3/8 in
(9.5 mm)
3/16 in
1/4 in
(4.8 mm) (6.35 mm)
Insert “D”
3 mm
4 mm
6 mm
6 mm
4 mm
3 mm
Micro-Baths
Hart Scientific 6102, 7102 and 7103 Micro-Baths
Portability and extreme stability
• Temperature sensor calibration
• Stability to ± 0.015 °C
• Ranges from –30 °C to 200 °C
• Accepts oddly shaped sensors
• Exceptional bath portability
• Direct interface to Fluke 744
Each unit includes a stir bar,
power cord, RS-232 interface,
instrument control software and a
NIST-traceable calibration.
Recommended accessories:
Fluid, case, reference probe and
meter, extra stir bar, tank extension for LIG, MET/TEMP II
Hart Scientific MET/TEMP II Software
Easy-to-use temperature calibration automation software
• Fully automated calibration of RTDs, thermocouples, thermistors and
many heat sources
• Calibrates up to 100 sensors at up to 40 points
• Performs coefficient calculations and generates tables and reports
• Reports conform to ANSI and NCSL standards
Each unit includes: CD, RS-232 multiplexer box, adapter, and PC cable
Tip: For improved accuracy, use an external reference
temperature indicator and sensor such as a 1521 and
5615-12-I combination.
Ordering information
Hart Scientific LogWare and LogWare II Data
Logging and Analysis Software
7103 Micro-Bath, –30 °C to 125 °C
(includes a transport seal lid and a 2085 test lid)
Turns any Hart Scientific
thermometer readout into
a real-time data logger
7102 Micro-Bath, –5 °C to 125 °C
(includes a transport seal lid and a 2082-P test lid)
• Calculates statistics and
6102 Micro-Bath, 35 °C to 200 °C
(includes a transport seal lid and a 2082-M test lid)
• User-selectable alarms,
5010-L Silicone Oil, type 200.05, 1 liter
(usable range: –40 °C to 130 °C)
•
5013-L Silicone Oil, type 200.20, 1 liter
(usable range: 10 °C to 230 °C)
displays customized graphs
•
•
delayed start times, and
sample intervals
Logging intervals from
1 second to 24 hours
User-settable alarm functions
Choose LogWare II for readouts
with more than one channel
9317 Carrying Case for 7103
See data logged in real-time.
9310 Carrying Case for 6102
9311 Carrying Case for 7102
9934-M Software, LogWare, 1-channel, multi user
9934-S Software, LogWare, 1-channel, single user
9935 LogWare II, multiple channel logging software
9938 Software, MET/TEMP II
2514 Dry-Well Interface Cable to Fluke 744
* Software requires Windows® 98 or higher
11
Thermometer
readout
Hart Scientific 1529 Chub-E4 Thermometer
Lab-quality accuracy on four channels
• Four channels for PRTs, thermistors and thermocouples
• Simultaneous measurement on four channels
• Displays eight user-selected data fields
• Logs up to 8,000 readings
• Battery provides eight hours of continuous operation
• Compatible with LogWare and MET/TEMP II software
Recommended accessories: PRT (5626-12-L, 5615-12-L,
or 5627A-12-L), thermistor (5611T-L or 5610-L), rugged
carrying case (holds 1529 and four probes), LogWare II
multi channel logging software (see page 11)
Hart Scientific 1502A “Tweener” Thermometer
Great price and performance in one package
• PRT readout with accuracy to ± 0.006 °C
• Reads both 100 W and 25 W probes
• 0.0001° resolution
• Optional battery pack available
• Compatible with LogWare and MET/TEMP II software
Recommended accessories: PRT (5626-12-D, 5615-12-D,
or 5627A-12-D), 9301 carrying case fits Tweener and
12 in probe, LogWare II single channel logging software
Summary specifications for 1502A and 1529
1529 PRT / RTD
1529 Thermistor
1529 Thermocouple
Tweener
Inputs
2 channels PRT/thermistor and 2 channels TC, or 4 channels PRT/thermistor, or
4 channels TC, specify when ordering; PRT/thermistor channels accept 2, 3, or
4 wires; TC inputs accept B, E, J, K, N, R, S, T, and Au-Pt TC types
1-channel 4-wire
PRT
Temperature range
–189 °C to 960 °C
(–308 °F to 1760 °F)
Measurement range 0 to 400 W
–50 °C to 150 °C
(–58 °F to 302 °F)
–270 °C to 1800 °C
(–454 °F to 3272 °F)
–200 °C to 962 °C
(–328 °F to 1764 °F)
0 to 500 KW
–10 to 100 mV
0 to 400 W
Characterizations
ITS-90, IEC-751(DIN
“385”), CallendarVan Dusen
Steinhart-Hart,
YSI-400
NIST Monograph 175, 3-point
deviation function applied to
NIST 175, 6th-order polynomial
ITS-90 subranges 4,
6 thru 11, IPTS-68
Callendar-Van Dusen
Temperature
accuracy, typical
(meter only)
± 0.006 °C at 0 °C
± 0.009 °C at 100 °C
± 0.0025 °C at 0 °C
± 0.025 °C at 100 °C
Ext. RJC: Int. RJC
K at 600 °C ± 0.15 °C: ± 0.4 °C
T at 200 °C ± 0.1 °C: ± 0.3 °C
± 0.006 °C at 0 °C
± 0.009 °C at 100 °C
Temperature
resolution
0.001°
0.0001°
0.01 to 0.001°
0.001 °
Operating range
16 °C to 30 °C
Logging intervals
0.1, 0.2, 0.5, 1, 2, 5, 10, 30, or 60 seconds; 2, 5, 10, 30, or 60 minutes
Communications
RS-232 (tweener) and IR ports included, IEEE-488 (GPIB) optional
Size (HxWxD)
102 x 191 x 208 mm (4.0 x 7.5 x 8.2 in)
61 x 143 x 181 mm
(2.4 x 5.6 x 7.1 in)
Weight
2 kg (4.5 lb)
1.0 kg (2.2 lb)
Calibration
Accredited NIST-traceable resistance calibration and NIST-traceable voltage calibration provided
Ordering
Information
1529 Chub-E4, 2 TC and
2 PRT/Thermistor Inputs
1529-R Chub-E4,
4 PRT/Thermistor Inputs
1529-T Chub-E4,
4 TC Inputs
5611T-L Flexible Teflon
coated precision thermistor,
0 °C to 100 °C
5610-9-L Precision
thermistor, 0 °C to 100 °C
2506-1529 IEEE Option
9322 Rugged Carrying Case
1502A “Tweener”
PRT Thermometer (110 V)
2506 IEEE Option
2508 Serial Cable Kit
9301 Carrying Case, fits
Tweener and 12 in. probe
9308 Carrying Case, fits
Tweener and 6 in probe
5626-12-X Secondary
PRT (12 in x 1/4 in),
–200 °C to 660 °C
5616-12-X Secondary
13
PRT (12 in x 1/4 in),
–200 °C to 420 °C
5627A-12-X Precision
Industrial PRT
(12 in x 1/4 in),
–200 °C to 420 °C
X= Lead termination.
Specify “D” for
Tweener, “L” for
Chub-E4
9935 LogWare II, multiple
channel logging software
9934-M Software,
LogWare, 1-channel, multi
user
Handheld
thermometer readouts
Hart Scientific 1521 and 1522 Handheld Thermometers
Built to last and built to perform
• PRT readout accuracy to ± 0.025 °C
• 0.001° resolution
• Reads RTDs and thermistors
• Hart’s INFO-CON connector manages probe coefficients
• 1522 log up to 10,000 readings
• Compatible with LogWare and MET/TEMP II software
Recommended accessories: PRT (5626-12-I, 5615-12-I, or 5627A-12-I),
thermistor (5611T-I or 5610-I), 9318 carrying case fits 1521/1522 and
12 in probe, LogWare II single channel logging software (see page 11)
Summary specifications for 1521 and 1522
Temperature Accuracy (± °C) (includes sensor drift and calibration)
Temperature
sensor
14
5626
5616
5615
5627A
5610/
5611T
–200 °C
0.008
0.013
0.025
0.027
N/A
0 °C
0.024
0.026
0.026
0.052
0.01
100 °C
0.034
0.036
0.037
0.069
0.019
420 °C
0.069
0.074
0.076
0.141
N/A
660 °C
0.1
N/A
N/A
N/A
N/A
Ordering Information
Operating range 0 °C to 40 °C
1521 Thermometer, handheld,
1 channel
Memory 1521 – Stores 6 readings in “Hold” mode 1522 – Logs 10,000 readings in
“Auto Logging” mode, 100 readings in “Demand Logging” mode
1522 Thermometer, handheld,
1 channel data logger, 110 V
Power Rechargeable nickel-metal-hydride batteries (ac adapter included)
5626-12-I Secondary PRT
(12 in x 1/4 in),–200 °C to 660 °C
Weight 0.4 kg (1 lb)
5616-12-I Secondary PRT
(12 in x 1/4 in),–200 °C to 420 °C
Size (HxWxD) 197 x 107 x 38 mm D (7.75 x 4.2 x 1.5 in)
NIST-tracebale calibration included
5627A-12-I Precision Industrial PRT
(12 in x 1/4 in),–200 °C to 420 °C
5611T-I Flexible Teflon coated precision
thermistor, 0 °C to 100 °C
5610-9-I Precision thermistor, 0 °C to 100 °C
9934-S Software, LogWare 1-channel,
single user
9934-M Software, LogWare 1-channel,
multi user
9318 Case, 1521/1522, probe carrying
Included: Adapter/charger
Use the 1521 for accurate test, measurement,
and calibration.
Temperature
sensors
Each probe includes:
• Individual report of calibration
• Probe linearization coefficients
• Resistance vs. temperature table
• Termination to match your thermometer readout
(see spec chart)
Tip: Improve the accuracy of your calibration by using an
external reference thermometer. Calibrated temperature
sensors and indicators can improve your results by a
factor of 2 or more.
Recommended accessories: 2601 probe carrying case
(for probes up to 12 in long), 2609 probe carrying case
with handle (for probes up to 20 in long)
Summary specifications
PRT
Accuracy w/ Chub-E4 or Tweener
(includes drift)
Model
Range
Type of Cal
–200 °C
0 °C
Max °C
Dimensions
Unique Selling Point
5626-12-X
–200 °C to 661 °C
Accredited
± 0.006
± 0.009
± 0.037
6.35 x 305 mm
Best reference
5609-12-X
–200 °C to 670 °C
Order 1930-4-7†
± 0.010
± 0.011
± 0.054
6.35 x 305 mm
Highest temperature
5608-12-X
–200 °C to 500 °C
Order 1930-4-R
± 0.010
± 0.011
± 0.031
3.2 x 305 mm
Excellent immersion
5616-12-X
–200 °C to 420 °C
Traceable
± 0.012
± 0.013
± 0.035
6.35 x 298 mm
Best value
†
5615-12-X
–200 °C to 420 °C
Accredited
± 0.024
± 0.014
± 0.041
6.35 x 305 mm
Accredited calibration
5615-9-X
–200 °C to 420 °C
Accredited
± 0.024
± 0.014
± 0.041
4.76 x 229 mm
Accredited calibration
5615-6-X
–200 °C to 300 °C
Accredited
4.76 x 152 mm
Smallest
± 0.024
± 0.014
± 0.041
5626-12-X
–200 °C to 661 °C
Accredited
± 0.006
± 0.009
± 0.037
6.35 x 305 mm
Best reference
5609-12-X
–200 °C to 670 °C
Order 1930-4-7†
± 0.010
± 0.011
± 0.054
6.35 x 305 mm
Highest temperature
5608-12-X
–200 °C to 500 °C
Order 1930-4-R†
± 0.010
± 0.011
± 0.031
3.2 x 305 mm
Excellent immersion
5616-12-X
–200 °C to 420 °C
Traceable
± 0.012
± 0.013
± 0.035
6.35 x 298 mm
Best value
5615-12-X
–200 °C to 420 °C
Accredited
± 0.024
± 0.014
± 0.041
6.35 x 305 mm
Accredited calibration
5615-9-X
–200 °C to 420 °C
Accredited
± 0.024
± 0.014
± 0.041
4.76 x 229 mm
Accredited calibration
5615-6-X
–200 °C to 300 °C
Accredited
± 0.024
± 0.014
± 0.041
4.76 x 152 mm
5627A-12
–200 °C to 420 °C
Accredited
± 0.030
± 0.050
± 0.125
4.76 x 305 mm
Smallest
Most rugged
5627A-9
–200 °C to 300 °C
Accredited
± 0.030
± 0.050
± 0.100
4.76 x 229 mm
Most rugged
5627A-6
–200 °C to 300 °C
Accredited
± 0.030
± 0.050
± 0.100
4.76 x 152 mm
Most rugged
Thermistor
5610-9-X
0 °C to 100 °C
Traceable
N/A
± 0.009
± 0.023
3.2 x 229 mm
High accuracy
5611T-X
0 °C to 100 °C
Traceable
N/A
± 0.009
± 0.023
3 x 6100 mm
Teflon, flexible
X= Lead termination. Specify “A” for 9142/9143/9144, “D” for Tweener, “L” for Chub-E4, and “I” for 1521/1522.
Accuracy calculated at k=2 95% confidence interval
†
Calibration ordered separately. For individual probe calibration order the 1923-4-7 or 1923-4-R calibration.
15
Multifunction
Fluke...
Process
Calibrator
more
than
just tools
Since 1948 the Fluke Corporation has been dedicated to the design
and manufacturing of innovative test and measurement instruments. Fluke also leads the way in providing programs, training and
resources that help you stay at the forefront of your profession.
Training Seminars in American Fork Utah
www.hartscienific.com/seminars
Get real training from real experts that lays out the basics and builds up to
more advanced material for more advanced learners.
• Principles of Temperature Metrology and Infrared Temperature Metrology
• Principles of Temperature Metrology and Product Training
• Principles of Temperature Metrology and Advanced Topics in
Temperature Metrology
• Principles of Temperature Metrology and Product Training
Training seminars in Europe
www.fluke.co.uk/fpm_training
Onsite training: Call for availability
Service
Some of the best service and lowest uncertainties
are available in our primary and secondary calibration laboratories located in the US and Europe. We
offer NVLAP accredited calibration services in the
US and UKAS accredited calibration services are
available in Europe. Don’t forget to pay a visit to our
calibration laboratory when you come for training.
16
Fluke.Keeping your world
up and running.
®
Fluke Corporation
Hart Scientific Division
799 E Utah Valley Drive
American Fork, UT 84003
Fluke Europe B.V.
PO Box 1186, 5602 BD
Eindhoven, The Netherlands
www.fluke.eu
For more information call:
In the U.S.A. (800) 443-5853 or
Fax (425) 446-5116
In Europe/M-East/Africa (31 40) 2 675 200 or
Fax (31 40) 2 675 222
In Canada (800)-36-FLUKE or
Fax (905) 890-6866
From other countries +1 (425) 446-5500 or
Fax +1 (425) 446-5116
Web access: http://www.fluke.com
©2007 Fluke Corporation. All rights reserved.
PRM is a trademark of Yokogawa Electric Corporation.
Specifications subject to change without notice. Printed
in U.S.A. 12/2007 3246833 C-EN-Rev A
Pub. ID: 11336-ENG, Rev 01


