1
Page 3 of 5
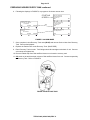
PARTS & ACCESSORIES SETUP:_________________________________________
1. Remove the Blue and Red Hoses from the accessories box and OIL the seals on each end.
2. Connect the open end of the Blue and Red Hoses to the low and high side service ports
respectively on the backside of unit.
3. Connect the Red and Blue adapters (0647028707 and 0647028708) to the Red and Blue Hoses
from the service ports respectively.
4. Remove the two P-Clip Hose Holders (07180108) and Screw (16826) from the accessories box.
Slide the red and blue hoses through the p-clips. Using the supplied screw, mount both p-clips to
the unit's back panel near the cord wrap.
5. Place the O-Ring Kit (EAK0027C00AS) on top of unit.
6. Remove the Oil Charge Bottle (1585) from the accessories box. Attach the oil charge bottle to
the port just below the power switch on front of unit. (Refer to the User’s Manual on operation of
the Oil Charge feature.)
7. Peel the backing from the User's Manual Envelope (4211000101) and apply the envelope, with
the open end on top, to either side of the unit, or in the location designated by the customer.
8. Remove the User's Manual, and place the remainder of the documents in the envelope.
BE SURE TO REVIEW THE USER'S MANUAL WITH THE CUSTOMER DURING TRAINING.
9. Place the User's Manual in the Envelope.
10. Remove Recovery Tank (7009244701) from its box. Remove cardboard wrap from Recovery
Tank. Set on floor in front of unit.
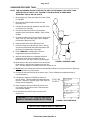
PREPARING NEW RECOVERY TANK: _____________________________________
1. Referring to FIGURE 2, open the BLUE valve on
Recovery Tank to release ALL COMPRESSED AIR.
2. Remove the Particle Filter from the Recovery Tank.
OIL seal. (BLUE VALVE)
3. Attach Low Side Tank Adapter (115080) to the BLUE
valve of Recovery Tank. (DO NOT OVER TIGHTEN).
4. Connect the BLUE service hose to the low side tank
adapter. Open the vehicle adapter.
5. Plug AC Cord to a 115VAC outlet. Turn unit on using
the front power switch.
FIGURE 2 RECOVERY TANK
!
THIS UNIT MUST BE PLUGGED IN TO A PROPER AC OUTLET FOR
UNIT TO OPERATE CORRECTLY. REFER TO UNIT ID PLATE LOCATED
ON BACK OF UNIT. EXTENSION CORDS ARE NOT RECOMMENDED,
BUT IF AN EXTENSION CORD MUST BE USED, USE A CORD THAT IS
LESS THAN 50 FEET WITH A 16 AWG, OR ABOVE 50 FEET AND LESS
THAN 100 FEET WITH A 14 AWG.
TEEAC304C (02/02/1999) REV A.