Download EEAC315A - Snap
Transcript
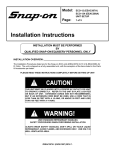
Model:
EEAC315A
KoolKare™
DiagnosTech™ System
Page:
1 of 3
Installation Instructions
INSTALLATION MUST BE PERFORMED
BY
QUALIFIED PERSONNEL ONLY
INSTALLATION OVERVIEW: _____________________________________________
The Installation Procedures listed is for the KoolKare DiagnosTech system. The unit is shipped as a fully
assembled unit, with the exception of the items listed in the Parts & Accessories List.
PLEASE READ THESE INSTRUCTIONS COMPLETELY BEFORE SETTING UP UNIT
!
THIS UNIT MUST BE PLUGGED INTO A PROPER AC OUTLET FOR UNIT
TO OPERATE CORRECTLY. REFER TO THE UNIT ID PLATE LOCATED
ON BACK OF UNIT. EXTENSION CORDS ARE NOT RECOMMENDED,
BUT IF AN EXTENSION CORD MUST BE USED, USE A CORD THAT IS
LESS THAN 50 FEET WITH A 14 AWG, OR ABOVE 50 FEET AND LESS
THAN 100 FEET WITH A 12 AWG.
!
USE STANDARD REFRIGERANT HANDLING
SAFETY PROCEDURES WHEN PERFORMING INSTALLATION
ALWAYS WEAR SAFETY GOGGLES, DON’T SPILL OR TOUCH LIQUID
REFRIGERANT, AVOID FLAMES, AND EXCESSIVE HEAT. USE ONLY IN
WELL VENTILATED AREA.
TEEAC315A0 (06/30/2000) REV A.
Page 2 of 3
PARTS & ACCESSORIES: _______________________________________________
PART NUMBER
1-2405
1-15080
1-6181
2-7642
2-7742
EAK0027C00AS
EAA0248L50A
EAA0248L51A
TEEAC315A0
ZEEAC315A
DESCRIPTION
Screw
Low Side Adapter Fitting
Filter, Conical
Temperature Probe (15’)
Temperature Probe (25’)
O-Ring Kit for Service Couplers
Boom Hanger, High Side
Boom Hanger, Low Side
Installation Instructions
User’s Manual
QTY
4
1
2
1
1
1
1
1
1
1
UNPACKING UNIT AND ACCESSORIES: ___________________________________
1. Cut bands and slide the complete carton off the pallet.
2. Remove the top of the carton and packing pads from top of KoolKare DiagnosTech system.
3. Slide large box off the KoolKare DiagnosTech system.
4. Remove packaging material from all sides of the KoolKare DiagnosTech system. Remove the
plastic wrap from the KoolKare DiagnosTech system.
5. Remove accessory box from rear of the KoolKare DiagnosTech system and set aside.
6. Break the back side of the lower carton to allow the KoolKare DiagnosTech system to roll out.
7. Carefully slide the KoolKare DiagnosTech system off the lower carton. Tipping the KoolKare
DiagnosTech system on the back wheels will assist in removing from lower carton.
8. Remove shipping pad from underneath the KoolKare DiagnosTech system.
PARTS & ACCESSORIES SETUP: ________________________________________
1. Remove all parts and accessories from box. Verify against list above.
2. Locate the 2 Boom assemblies (EAA0248L50A & EAA0248L51A). Locate the screws (4).
3. Mount the 2 Boom assemblies to the back of the KoolKare DiagnosTech system using the
supplied screws.
4. Locate the Blue Pod Hose Assembly (EAA0248L07A). Remove the packing material.
5. Drape the Pod Hose Assembly over the boom for storage.
6. Locate the Red Pod Hose Assembly (EAA0248L06A). Remove the packing material.
7. Drape the Pod Hose Assembly over the boom for storage.
8. Locate the 2 Temperature Probes (2-7642, 15’, & 2-7742, 25’). Connect the 2-7642 to the Temp
1 and the 2-7742 to Temp 2 near the top left side of the rear of KoolKare DiagnosTech system.
INSTALLING VIRGIN TANK: _____________________________________________
1. Locate a new R-134a Virgin Tank.
2. Connect the yellow tank hose (located in the back of the KoolKare DiagnosTech system from
underneath the cabinet) to the R-134a Virgin Tank.
3. Turn tank upside down and set on top of the virgin tank holder. Secure using the Velcro strap.
4. Turn virgin tank valve on.
TEEAC315A0 (06/30/2000) REV A.
Page 3 of 3
INITIAL STARTUP SEQUENCE: __________________________________________
1. Plug the KoolKare DiagnosTech system into a standard 115Volt AC outlet.
2. Turn the KoolKare DiagnosTech system on using the front panel power switch.
3. Wait for the 1 minute warm-up to complete.
4. Press the NEXT button to go to the next menu. Press the SETUP button.
5. Press the Elevation button to set the elevation level and to calibrate the internal transducers.
Follow the screen instructions for proper procedure.
6. Press the Time/Date to adjust if incorrect.
7. Press CANCEL button to return to the main menu.
8. Wait 5 minutes and the KoolKare DiagnosTech system will automatically fill the internal recovery
tank to 15 pounds.
You may elect to perform the manual fill by selecting NEXT on the main menu, then select
OPTIONS.
INSTALLATION COMPLETE/SETUP COMPLETE
FINAL REVIEW: _______________________________________________________
•
Review the User’s Manual for full operation of the KoolKare DiagnosTech system.
•
Fill out the warranty registration form and mail back to EquiServ.
Or go online at www.EquiServ.com and fill out the online warranty registration form.
•
Be sure to turn off the R-134a Virgin tank when not in use.
•
After reviewing the User’s Manual, place it in the holder, on front of unit, for future use.
•
For Technical Support, please call EquiServ at 1 800-225-5786.
REPLACEMENT PARTS: ________________________________________________
•
High Side Service Coupler (1-27180)
•
Low Side Adapter Fitting (1-15080)
•
Low Side Service Coupler (1-27280)
•
Master Filter/Dryer (1-9881)
•
Printer Ink Cartridge (2-20466)
•
Paper Roll (5-8126)
•
Refrigerant Identifier Filter (EEAC300A1)
•
Service Coupler O-Ring Kit (EAK0027C00AS)
TEEAC315A0 (06/30/2000) REV A.


