1
011/9664616
ME7000_14
03/11
s.r.l. mect
TPAC tutorial
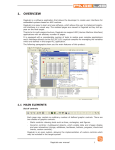
1.0 INDEX
1.0 INDEX --------------------------------------------------------------------------------------------------------- 3
2.0 TPAC - AT A GLANCE------------------------------------------------------------------------------------ 7
2.1 FBD EXAMPLE ------------------------------------------------------------------------------------------ 8
2.2 LD EXAMPLE --------------------------------------------------------------------------------------------- 8
2.3 ST EXAMPLE--------------------------------------------------------------------------------------------- 8
2.4 IL EXAMPLE ---------------------------------------------------------------------------------------------- 8
3.0 HOW TO INSTALL THE DEVELOPMENT SUITE -------------------------------------------------- 9
4.0 HOW TO CONFIGURE TPAC ---------------------------------------------------------------------------- 9
5.0 HOW TO DEVELOP A SIMPLE PROGRAM -------------------------------------------------------- 12
5.1 TO CREATE A NEW PROJECT --------------------------------------------------------------------- 12
5.2 COMMON STEPS TO CREATE A NEW PROGRAM ------------------------------------------- 12
5.3 PROJECT DESCRIPTION ----------------------------------------------------------------------------- 13
5.4 INSERT THE IOS --------------------------------------------------------------------------------------- 13
5.5 THE FBD PROGRAM ---------------------------------------------------------------------------------- 14
5.6 THE ST PROGRAM ------------------------------------------------------------------------------------ 16
5.7 COMPILE AND DOWNLOAD THE PROGRAM------------------------------------------------- 16
6.0 HOW TO DOWNLOAD A PROGRAM INTO TPAC ----------------------------------------------- 17
6.1 HOWTO DOWNLOAD PLC PROGRAM ---------------------------------------------------------- 17
7.0 HOW TO CREATE AN HMI INTERFACE ----------------------------------------------------------- 18
7.1 HOW TO DISPLAY A TEXT FILE ------------------------------------------------------------------ 22
7.1.1 inserting a text file in an HMI project ------------------------------------------------------------ 22
7.1.2 Using text file in the HMI environment---------------------------------------------------------- 24
8.0 HOW TO CONFIGURE A CANOPEN NETWORK------------------------------------------------- 24
8.1 EDS File List --------------------------------------------------------------------------------------------- 26
8.2 Insert a node in the network ---------------------------------------------------------------------------- 26
8.3 Node Configuration -------------------------------------------------------------------------------------- 26
8.3.1 MECT CanOPEN Node ---------------------------------------------------------------------------- 26
8.3.2 CanOPEN Node Manual Configuration --------------------------------------------------------- 29
8.3.2.1 Administration Objects ............................................................................................ 30
8.3.2.2 File Info.................................................................................................................... 30
8.3.2.3 Device Info .............................................................................................................. 31
8.3.2.4 Object Dictionary..................................................................................................... 32
8.3.2.5 Parameter List .......................................................................................................... 32
8.3.2.6 Variable List ............................................................................................................ 33
8.3.2.7 SDO and PDO list.................................................................................................... 33
8.4 Object List------------------------------------------------------------------------------------------------- 33
8.5 Network parameter configuration---------------------------------------------------------------------- 34
8.6 Main Menu ------------------------------------------------------------------------------------------------ 35
8.6.1 File Menu--------------------------------------------------------------------------------------------- 35
8.6.1.1 Build the configuration file...................................................................................... 35
8.6.1.2 Download the configuration file .............................................................................. 35
8.6.1.3 Project Save ............................................................................................................. 35
8.6.2 Tools Menu------------------------------------------------------------------------------------------- 35
8.6.2.1 Rearrange ................................................................................................................. 36
8.6.2.2 EDS Import .............................................................................................................. 36
8.7 Using the CANopen objects in the PLC -------------------------------------------------------------- 36
8.7.1 SDO Usage ------------------------------------------------------------------------------------------- 37
8.7.1.1 SDORead in a PLC program .................................................................................. 37
8.7.1.2 SDOWrite in a PLC program................................................................................... 38
9.0 RESETTING THE SYSTEM ----------------------------------------------------------------------------- 38
ME7000_14 03/11
3
s.r.l. mect
TPAC tutorial
10.0 RECEIPTS ------------------------------------------------------------------------------------------------10.1 INTRODUCTION-------------------------------------------------------------------------------------10.1.1 Programmer side ----------------------------------------------------------------------------------10.1.2 Final User side ------------------------------------------------------------------------------------11.0 LANGUAGE MANAGEMENT IN HMI ENVIRONMENT ------------------------------------11.1 INTRODUCTION-------------------------------------------------------------------------------------11.2 STRING TABLE --------------------------------------------------------------------------------------11.3 INSERTING A NEW LANGUAGE ---------------------------------------------------------------11.4 MODIFY TPAC LANGUAGE----------------------------------------------------------------------12.0 SOFT KEYBOARD -------------------------------------------------------------------------------------13.0 COLOR DEFINITION HMI ---------------------------------------------------------------------------14.0 FUNCTION BLOCKS ----------------------------------------------------------------------------------PID ----------------------------------------------------------------------------------------------------------Self tuning PID --------------------------------------------------------------------------------------------32 bit up – down counter---------------------------------------------------------------------------------32 bit up counter-------------------------------------------------------------------------------------------32 bit down counter ---------------------------------------------------------------------------------------Byte to bit --------------------------------------------------------------------------------------------------Word to bit -------------------------------------------------------------------------------------------------Word to byte -----------------------------------------------------------------------------------------------Double word to byte --------------------------------------------------------------------------------------MUX_8_x_1 multiplexer 8 per 1 -----------------------------------------------------------------------COMPARE-------------------------------------------------------------------------------------------------GAIN--------------------------------------------------------------------------------------------------------FF_D: D flip-flop -----------------------------------------------------------------------------------------FF_T: T flip flop ------------------------------------------------------------------------------------------Date_ Read: read the current date-----------------------------------------------------------------------Time_ read: read the current time-----------------------------------------------------------------------TimeE_write: write the current time-------------------------------------------------------------------Date_write: write the current date ----------------------------------------------------------------------ONE_SEC: one second pulse----------------------------------------------------------------------------pulse---------------------------------------------------------------------------------------------------------pulses--------------------------------------------------------------------------------------------------------pwm ---------------------------------------------------------------------------------------------------------freq_div -----------------------------------------------------------------------------------------------------digital_in_filter --------------------------------------------------------------------------------------------chrono-------------------------------------------------------------------------------------------------------timer_retrig-------------------------------------------------------------------------------------------------timer_rit_ecc -----------------------------------------------------------------------------------------------timer_rit_dis -----------------------------------------------------------------------------------------------timer_coil---------------------------------------------------------------------------------------------------r_trig --------------------------------------------------------------------------------------------------------Set_Reset ---------------------------------------------------------------------------------------------------start ----------------------------------------------------------------------------------------------------------stop ----------------------------------------------------------------------------------------------------------Cell (Only TPAC 02 cell version) ----------------------------------------------------------------------14.1 Embedded Functions ---------------------------------------------------------------------------------15.0 HOW TO CONFIGURE TPAC THROUGH THE WEB INTERFACE ------------------------15.1 Preface---------------------------------------------------------------------------------------------------15.2 Open TPAC web interface ---------------------------------------------------------------------------15.3 Configuration-------------------------------------------------------------------------------------------16.0 FUNCTIONS ---------------------------------------------------------------------------------------------16.1 IMMEDIATE FUNCTIONS-------------------------------------------------------------------------ME7000_14 03/11
4
39
39
39
39
42
42
42
43
43
44
46
47
47
48
49
50
50
51
51
52
52
53
54
55
55
56
56
56
57
57
58
58
58
59
59
60
60
61
62
63
64
64
65
65
65
66
66
68
68
68
70
73
73
s.r.l. mect
TPAC tutorial
16.2 DELAY FUNCTIONS--------------------------------------------------------------------------------- 74
16.3 TIMERS-------------------------------------------------------------------------------------------------- 75
16.4 VIDEO CONTROL FUNCTIONS ------------------------------------------------------------------ 75
16.5 RECEIPTS FUNCTIONS ----------------------------------------------------------------------------- 77
16.6 DATE AND TIME FUNCTIONS ------------------------------------------------------------------- 83
16.7 MECT SERIAL FUNCTIONS ----------------------------------------------------------------------- 83
16.8 MODBUS Functions ----------------------------------------------------------------------------------- 85
16.9 CanOpen FUNCTIONS ------------------------------------------------------------------------------- 91
16.10 HMI TEXT FILE IMPORT FUNCTIONS-------------------------------------------------------- 93
16.11 DATALOGGER -------------------------------------------------------------------------------------- 93
16.11.1 CRYPTO-DATALOGGER – CFR21/11 ---------------------------------------------------- 96
16.12 STRINGS MANIPULATION FUNCTIONS----------------------------------------------------- 98
16.13 DATE FUNCTIONS --------------------------------------------------------------------------------- 98
17.0 TPAC Remote Options ----------------------------------------------------------------------------------- 99
17.1 Remote Desktop --------------------------------------------------------------------------------------- 100
17.2 Remote Desktop Access ------------------------------------------------------------------------------ 100
17.3 Setting Remote Desktop Password------------------------------------------------------------------ 101
17.4 Monitor-------------------------------------------------------------------------------------------------- 101
17.5 Variables Upload -------------------------------------------------------------------------------------- 101
17.6 Monitor Access ---------------------------------------------------------------------------------------- 103
17.7 Remote PLC -------------------------------------------------------------------------------------------- 104
17.8 PLCLIB Description ---------------------------------------------------------------------------------- 104
17.9 Functions------------------------------------------------------------------------------------------------ 106
17.10 Working with PLCIB in a Turbo C++ environment -------------------------------------------- 108
17.11 VPN ACCESS CONFIGURATION -------------------------------------------------------------- 108
17.12 PKI setting up----------------------------------------------------------------------------------------- 108
17.13 Certification authority ------------------------------------------------------------------------------- 109
17.14 Session key-------------------------------------------------------------------------------------------- 109
17.15 TPAC certificate and private key ------------------------------------------------------------------ 110
17.16 Client certifcate and key ---------------------------------------------------------------------------- 110
17.17 TPAC VPN Configuration-------------------------------------------------------------------------- 110
17.18 Client VPN Configuration -------------------------------------------------------------------------- 110
17.19 TPAC VPN address---------------------------------------------------------------------------------- 111
18.0 USB ALLOWED OPERATIONS --------------------------------------------------------------------- 111
19.0 APPENDIX 3 --------------------------------------------------------------------------------------------- 112
19.1 Software Registration --------------------------------------------------------------------------------- 112
19.2 Registration code request for LogicLab, PageLabe and NetBuilder --------------------------- 112
19.3 LogicLab and PageLab registration ----------------------------------------------------------------- 113
19.4 NetBuilder registration-------------------------------------------------------------------------------- 113
19.5 Software update ---------------------------------------------------------------------------------------- 114
19.5.1 System software update -------------------------------------------------------------------------- 114
19.5.2 Services software update------------------------------------------------------------------------- 114
19.5.3 User software update ----------------------------------------------------------------------------- 114
ME7000_14 03/11
5
s.r.l. mect
TPAC tutorial
ME7000_14 03/11
6
s.r.l. mect
TPAC tutorial
2.0 TPAC - AT A GLANCE
TPAC has many peripherals, that may be divided in four sets (see the user manuals for details):
1. local control IO
• PNP digital input 0-24V
• PNP digital output 0-24V
• Analog input 0-20mA, 12 bits resolution; max sample rate 500 samples per second
• Analog output 4-20mA, 12 bits resolution, refresh frequency 500Hz
• Incremental encoders, max count 228
• rpm
2. remote control IO
• 2 CAN channels 1 Mb/sec with CAN OPEN protocol.
• 1 RS485 or 1 RS232, 115kbit per second
3. TPAC ports
• 1 LAN port 10Mbit per second
• 1 USB 1.0 port master
4. Human Machine Interface
• LCD 320 x 240 color STN
• Touch screen interface
• 16 keys keyboard
A description of the TPAC port usage in a PAC project is given below.
The shortest PLC cycle may be 1ms, the timer accuracy is ± 30µs. Time Cycle must be configured
by user.
A TPAC program is composed by two elements:
1. PLC program built by the Axel LogicLab software
2. Human Machine Interface developed using the Axel PageLab software
A PLC program may be developed in the following IEC 61131-3 compliant languages:
FBD
LD
SFC
ST
IL (AWL)
Functional Block Diagram
Ladder
Sequential Function Chart
Structured Text
Instruction List
Graphical
Graphical
Graphical
Textual
Textual
Like electric schematic
Ladder schematic
States diagram
Pascal-like language
Assembler-like language
To illustrate the various languages, a very simple program is developed.
The program sets output_0 to 1 when the logic input_0 is set to 1 and the logic input_1 is set to 0.
ME7000_14 03/11
7
s.r.l. mect
TPAC tutorial
2.1 FBD EXAMPLE
2.2 LD EXAMPLE
2.3 ST EXAMPLE
IF INPUT_0 AND (NOT INPUT_1 ) THEN
OUTPUT_0:=1;
ELSE
OUTPUT_0:=0;
END_IF;
2.4 IL EXAMPLE
START:
LD
XOR
AND
ST
INPUT_1
INPUT_1
INPUT_0
OUTPUT_0
Further details about programming languages will be provided throughout the tutorial. (see section
“Develop a simple program”).
ME7000_14 03/11
8
s.r.l. mect
TPAC tutorial
3.0 HOW TO INSTALL THE DEVELOPMENT SUITE
TPAC is supplied with a CD containing the software that a user must install into a Windows
system based personal computer.
The supplied software is
• Mect Dashboard
• Axel LogicLab: PLC software
• Axel PageLab: Human Machine Interface software
• Axel LLComp: communication software to download the PLC program into TPAC
• Trama Netbuilder: CanOpen netbuilder
• Microsoft Windows .net framework 2.0: needed if not already available on the PC
• SUN J2SE runtime.
To install the entire suite from CD execute TPAC.exe that leds to a guided installation procedure.
Once the installation is completed an icon named TPAC is placed on the desktop. The installed
software needs to be registered, please refer to Appendix 3, for information about the registration
procedure.
4.0 HOW TO CONFIGURE TPAC
Before any project development, executing the TPAC dashboard configures the TPAC.
ME7000_14 03/11
9
s.r.l. mect
TPAC tutorial
and select the model of
To create a new project in the PLC section click on the new project icon
hardware for which you are creating the project. The button "Set Directory"allows you to set the
path on your hard drive where the project will be created. Fill in the "Project Name" field with the
name of the project and then click on "Create Project". To start the programming environment,
press "Start PLC”.
In the Target box the following buttons are available:
•
Export current configuration save on a USB device or on the local file system the
current network configuration or the reset configuration.
•
Launch web browser Starts the web browser and connects to the TPAC by the local
area network using the configuration specified as “Net Configuration”
In the same box the LAN configuration can be set and eventually, if the need arises, the flag that
restores the original settings for the system can be selected.
To restore factory settings see chapter "Reset the system. "
The network configuration is a must for the TPAC since all programming software works through
LAN. Choose “DHCP” if in your LAN network a DHCP server automatically releases IP addresses;
select “STATIC” if the DHCP server is not present or you prefer a static IP address assignment. In
the latter case you must insert the IP address you plan to use.
NOTE: If the TPAC IP address is set by a DHCP server, the leased address must be known, since
needed by all software programming tools.
The network settings or the reset configuration can be saved on a USB device or on the local file
system using the "Export current configuration" that will create a file, respectively:
"Net.conf" including the LAN setup or “reset.conf” containing the reset settings.
Once the configuration file is saved on the USB device, to configure the
TPAC just insert the USB device in the USB slot and switch on the TPAC. The TPAC will load the
newc onfiguration that will be active from the next reboot.
Once the TPAC got its configuration it becomes ready to be programmed.
ME7000_14 03/11
10
s.r.l. mect
TPAC tutorial
The Settings window in the high left corner displays four buttons:
•
Back to the homepage (back to the previous page)
•
Save configuration (save current configuration on the hard disk)
•
Export current configuration (save current configuration on a USB pen drive)
•
Launch web browser (Start a web browser and connect to the TPAC by IP the address
defined in the Net configuration)
Besides the aforementioned buttons the Settings window offers five sections:
1.
2.
3.
4.
5.
Net Configuration (LAN network set up)
Splash Image (system start up image)
USB Pen
Firmware Upgrade
Reset
In the first section you can set the TPAC network IP address. Choose “DHCP” if in your LAN
network a DHCP server automatically releases IP addresses; select “STATIC” if the DHCP server
is not present or you prefer a static IP address assignment. In the latter case you must insert
manually in the Net Configuration window the IP address you plan to use.
NOTE: If the TPAC IP address is set by a DHCP server, the leased address must be known, since
needed by several configuration procedures.
ME7000_14 03/11
11
s.r.l. mect
TPAC tutorial
5.0 HOW TO DEVELOP A SIMPLE PROGRAM
TPAC may be programmed in five IEC 61131-3 compliant languages. This tutorial covers
simple program with all these languages.
A new project needs to be defined before developing a program.
a
5.1 TO CREATE A NEW PROJECT
The Dashboard main window, through section PLC, allows users to create new projects. First
select the project target hardware and click on the New project button (the one circled in red) and
then click Set workspace, this will display a window to select the project destination directory.
Once selected the destination folder press Open, insert the name of the project to be created by
filling the Project name field. Press the button Create project to complete the project creation
step.
Press the launch PLC button to start with programming, it will activate the PLC programming
environment.
5.2 COMMON STEPS TO CREATE A NEW PROGRAM
To create a new program select Programs in the Workspace window (left side of the main
window), then right click it and a New program tag is displayed. Left click the tag and a New
program window will show up, as in the following figure.
ME7000_14 03/11
12
s.r.l. mect
TPAC tutorial
This window allows the programming language selection. The project exemplify first the
graphical language, then we’ll go through the textual ones.
Hence choose the FBD (Function Block Diagram) as the programming language, insert the program
name and then click OK.
You are ready to input the project.
5.3 PROJECT DESCRIPTION
The implemented project consists in an on-off pressure regulator. The pressure in a room has to
stay between two thresholds. If the pressure is over the high threshold (threshold_1), it is reduced
by setting output 0 to logic 1, leading to a discharge valve opening. If the pressure is below the low
threshold (threshold_2), it is incremented by setting output 1 to logic 1. A digital input enables to
operation the pressure regulator.
5.4 INSERT THE IOS
The first step is the PLC IOs configuration. From the project description we require: an analog
input ( pressure measurement), two digital outputs (valve opening) and one digital input (the
enable).
The PLC accesses the TPAC IO pins through input and output state variables. These IO variables
are already defined in the TPAC template. Thus the first step is to map the project IOs to the PLC
variables as listed below:
• the project output 0 to the output variable DO_1, which is directly connected to the output 1
on the rear terminal block of the TPAC;
• the project output 1 on the DO_2 variable, directly connected to the output 2 of the TPAC;
• the project enable input to DI_1;
• the project analog input to ANALOG_INPUT_1.
Next step is to define the threshold variables threshold_1 and threshold_2. In the workspace
window select the folder I/O variables, right click to pop up the tag New I/O variable then left
click it to show up the I/O variable declaration window.
ME7000_14 03/11
13
s.r.l. mect
TPAC tutorial
Click over the User area row to view the I/O block free indexes window. By clicking twice on the
showed row, the variable will be assigned to that memory location, this avoids memory variables
overlapping. Type the name of the variable (threshold_1) in the field Name of the I/O variable
declaration, and click OK; the variable will be created and available to the program. By the same
procedure assign threshold_2 variable.
5.5 THE FBD PROGRAM
In the workspace window expand the I/O variables tree. In this tree select which input or output
to use, then drag and drop it into the program window. The software will ask if the selected
variable is an input or an output. Choose the right type and then press OK.
ME7000_14 03/11
14
s.r.l. mect
TPAC tutorial
Perform the same operations for the internal variables, threshold_1 and threshold_2.
In the program window you'll see the pads corresponding to the selected inputs and outputs.
After positioning the IOs and the variables in the program window, they have to be connected to
the functional blocks that implement the program behavior.
In the library window select the Operator and standard blocks tab. If the library window is not
active, activate it by typing Ctrl+L or select View->Library in the main window menu.
You can select the needed functional blocks, drag and drop them into the program window to
obtain a layout similar to the one illustrated below. If the needed functional block is not available
in the system functional blocks set, you can access an additional set of functional blocks created by
MECT. To list these blocks, select the Function blocks entry from the workspace window.. For
details about functional block, please refer to the section: Functional Blocks.
ME7000_14 03/11
15
s.r.l. mect
TPAC tutorial
Finally, we need to draw the wiring that properly connects the elements. This is achieved by right
clicking in the program window and selecting Connection mode from the pop up menu that
appears. The cursor changes shape to mean that now we can draw the connections between the
elements of the diagram. For instance, click first on the connection pin of the DI_1 input and then
on the connection pin EN of the GE functional block. A connection wire should be drawn between
the two pins. Repeat these operations until you wire all the elements as shown in the figure
above.
At this stage the program is ready to be compiled and downloaded the on the TPAC, as will be
described in the section Compile and download the program.
5.6 THE ST PROGRAM
The same functionality can be implemented using the following code in the Structured Text
language. Repeat the steps described in the section Common steps to create a new program and
select ST instead of FBD.
IF DI_1 = 1 THEN
DO_2 := 1;
IF AnIn0 >= threshold_1 THEN
DO_1 := 1;
DO_2 := 0;
ELSIF AnIn0 <= threshold_2 THEN
DO_1 := 0;
DO_2 := 1;
END_IF;
ELSE
DO_1 := 0;
DO_2 := 0;
DO_3 := 0;
END_IF;
5.7 COMPILE AND DOWNLOAD THE PROGRAM
Before being able to compile the program, it must be assigned to a task. To this purpose select
Task in the workspace window, by right click, then click on the Task configuration tag that
shows up. In the column Program name of the Task configuration pop up window, select the task
ME7000_14 03/11
16
s.r.l. mect
TPAC tutorial
to be assigned to the program, then press Select. An Object browser pop up window shows up.
Select the program name and press OK to validate the choice and close the window.
Once the program is assigned to a task we can proceed to compile and download it into the TPAC.
To compile the project, select Recompile all in the menu Project. The compilation progress and
log can be monitored in the Output window.
If the program has been modified since the last download on the TPAC or a new project was
loaded, DIFF. CODE will be displayed in the right end of the status bar of the main window. In this
case, to update the program on TPAC, select Download code in the Communication menu. In the
Output window is logged the result of the download operation.
6.0 HOW TO DOWNLOAD A PROGRAM INTO TPAC
Before downloading a program into TPAC, a communication link between the target (TPAC) and
the personal computer with the development environment has to be established.
It’s necessary to connect the target to a personal computer using the TCP/IP network.
6.1 HOWTO DOWNLOAD PLC PROGRAM
Prerequisite:
•
the TPAC IP address must be known.
•
Setup the communication parameters of the development environment using the TPAC IP
address.
ME7000_14 03/11
17
s.r.l. mect
TPAC tutorial
Choose Settings from the Communication menu. In the Device Link Manager Configuration
window select the GDB protocol. If it’s not active, press the Activate button. Next click on
Properties and the GDB config window shows up. Select as Port: TCP/IP set the IP address to the
address of the TPAC. Set 5000 as port number, and leave all other parameters unchanged. Click
OK on both pop-up windows.
Now we’re ready to connect to the TPAC. In the Communication menu of the main window, select
Connect, to establish a connection between the target and the PC. When a link is up, on the right of
the status bar of LogicLab you’ll see:
• DIFF. CODE, meaning that a connection is established but the code on the TPAC is
different from the one in the development environment.
• CONNECTED meaning that a connection is established and the code on the TPAC is the
same as the one in the development environment.
• ERROR meaning that there is a problem with the connection between the TPAC and the
development environment.
7.0 HOW TO CREATE AN HMI INTERFACE
When a PLC program has been created, we may need to develop also an HMI interface. From the
dashboard create a New project as explained for the PLC. To launch the project (or to open an
existing one), press the button Launch HMI: the HMI developing environment begins.
ME7000_14 03/11
18
s.r.l. mect
TPAC tutorial
NOTE: Before starting the PageLab HMI designer needs to be linked with the TPAC variables
defined in the TPAC project. To this aim select Link PLC variables file… in the menu Project.
Then find in the PLC project folder the .exp file, select the file and click open. The IO variables
created in the TPAC development environment are now visible in the HMI project.
As done for the PLC project, we first need to define the communication parameters with the TPAC.
Select the menu Project->Communication settings, then follow the steps described in section
How To download PLC program.
To begin the HMI project we define a new page. In the project window, select Pages right click
on it, then left click on the Insert page tab in the pop up menu that appears. In the New page pop
up window insert the name of the page and then click OK button, as in the figure below.
To display the page layout canvas, click twice on the Page name in the Project window. A blank
page will show up and you can start populating it with the available elements.
To insert an object into the page select the element to be inserted from the Page menu. The
available objects are:
ME7000_14 03/11
19
s.r.l. mect
TPAC tutorial
•
•
•
•
•
•
Static
Image
Animation
Edit
Button
Custom control
For our project we will define two pages: a welcome page and an operative page.
The welcome page has three elements: two static objects and one button and looks like the
following picture.
To insert the button, select the New Button entry in the Page menu, then place the button on the
page, in the desired position. The right part of the main window will list all the properties of the
button element. These properties can be edited to suit your needs.
Among the most important elements of a button there's its action. To assign an action select the row
Action, then the action to associate from the drop down menu. In our example, we want that the
ME7000_14 03/11
20
s.r.l. mect
TPAC tutorial
button opens the operative page, hence we select the OpenPage entry as shown in the figure
below.
As depicted for the button example, we may insert others elements, such as static labels or images.
The operative page has more objects than the welcome one. There are five static labels, two input
fields and two output objects. The properties of objects are inserted in the same way as described
for the button element above.
ME7000_14 03/11
21
s.r.l. mect
TPAC tutorial
Before compiling the project, we need to set the page from which the visualization starts. From the
project window select Pages, and right click on it, then left click on the Page proprieties label in
the pop-up window. In the Page properties window, select General, then from the pages list,
select which page to use as the first, then press OK.
When all the pages are defined, the project can be compiled. From the menu Project select
Generate code, which compiles the project.
Before being able to download the project into the TPAC a connection has to be established with it,
in the same way as for the LogicLab environment.
Once the connection is established code download occurs by selecting Download project from the
Project menu.
7.1 HOW TO DISPLAY A TEXT FILE
A HMI project may require static text, like help instructions, to be viewed on the screen.
Such kind of information cannot be stored in the retentive variables since they have a different role.
The programmer can display one or more text files stored on the TPAC flash through the
HMItextLoad() function.
7.1.1 inserting a text file in an HMI project
A text file can be uploaded into a HMI project by clicking the + button in the dashboard HMI
section and picking the selected file. To cancel a text file click on the - button and chose the file to
be deleted.
ME7000_14 03/11
22
s.r.l. mect
TPAC tutorial
the user is prompted to chose
When all needed files have been selected by clicking the button
the logical drive that maps the USB pen; the text file archive will be saved on that drive after
pressing the OK button.
ME7000_14 03/11
23
s.r.l. mect
TPAC tutorial
By plugging the USB pen into the TPAC and rebooting the device the text files will be transferred
on the TPAC flash drive and made available to the programmer.
7.1.2 Using text file in the HMI environment
Text files are manipulated through the HMItestLoad(‘file_name’) function. This function searches
for the file with the specified file name and returns an error code. If the returned code is 0 the
function was successful and the HMI_LOAD variable contains the returned file pointer.
The following code details an example for the HMItestLoad function:
res:=HMItextLoad('instruction.txt');
IF res = 0 THEN
output:=FILE_READ;
ELSE
output:='File not available';
END_IF;
HmitestLoad looks for the file named “instruction.txt”. If the file exists, res is 0, hence ouput
(declared as a 1000 character string) contains the file pointer returned by the function. By assigning
output to a HMI text box the file content is displayed on the screen.
8.0 HOW TO CONFIGURE A CANOPEN NETWORK
The TPAC works as CanOPEN master device hence a number of CanOPEN node devices can be
connected to the master in order to build a CanOPEN network. These CanOPEN node devices must
be configured and the configuration parameters with the master must also be set. The previous
mentioned configuration are set through a specific software that depends from the CanOPEN master
hence it is bounded to the TPAC. Mect provides the Can Builder CanOPEN network configurator.
ME7000_14 03/11
24
s.r.l. mect
TPAC tutorial
If you want to manage a CANOpen network, from the CANOpen section of the dashboard, create
or open a project.
Click on the icon “New Project”
and through the “Set Workspace” button select the project
destination folder. Fill in the Project Name field with your project name and click on the “Create
Project” button to complete the project creation and start the Can Builder software.
The CanBuilder main window is made by three sections:
• EDS file list
• CanOPEN Nodes instantiated in the network
• Network parameter settings
ME7000_14 03/11
25
s.r.l. mect
TPAC tutorial
8.1 EDS File List
The left side of the Can Builder window showes the list of EDS file available to create a CanOPEN
network.
8.2 Insert a node in the network
To add a node in the CanOPEN network select the EDS file that represents the node to be created.
By double clicking on the chosen EDS file a new node will be instantiated in the network and will
be visible in the central section of the Can Builder window. Also, an ID will be automatically
assigned to the node; by default the ID will be the first still free.
8.3 Node Configuration
Once a node has been instantiated, the configuration file that contains variables and parameters
value must be created to allow the communication with the CanOPEN master.
Even if the Can Builder software supports the configuration of a generic Node in case of MECT
CanOPEN nodes the software allowes a graphical configuration that simplify this activity.
The following section describes the configuration of a MECT CanOPEN node, while the
configuration of a generic one is depicted in section 8.3.2
8.3.1 MECT CanOPEN Node
When building a CanOPEN network based on the MECT MPNC module, after instantiating the
number of required nodes by double clicking on the instance to configure the following window
appears:
ME7000_14 03/11
26
s.r.l. mect
TPAC tutorial
The configuration window offers two sections: the left one showes the various kind of MECT
MPNC available terminal while the right one will contain the tarminal instances that will compose
the node. To configure the node select the kind of terminal you wish to use and drag it on the right
side of the configuration window. Each terminal will be automatically assigned with an identifier.
Pay attention, the sequence of instantiated terminal must be the same when phisically assembling
the node.
ME7000_14 03/11
27
s.r.l. mect
TPAC tutorial
Analog terminal channels can be configured one by one. Right click with the mouse on an analog
terminal and select the Bus Coupler Setup option in the pop up that will appear.
The Bus Coupler Setup window showes all the channel available for the terminal. Each channel can
be configured by selecting one of the available channel configuration option in the dropdown menu
related to the channel itself.
ME7000_14 03/11
28
s.r.l. mect
TPAC tutorial
To save the chosen configuration press the “Node Config” button, while to matain the previous
settings just press the Exit button. Once terminal configuration has been accomplished by closing
the terminal configuration window you’ll be back in the main CanBuilder window where the
Download Configuration File button allowes the transfer of the CanOPEN Network configuration
to the TPAC CanOPEN Master as showed in section 8.6.1.2.
8.3.2 CanOPEN Node Manual Configuration
To configure a node, right click on the node instance as shown in the below picture and chose the
Node Config option.
A new window, with 10 configuration tabs will appear. Those tabs are described in the following
sections.
ME7000_14 03/11
29
s.r.l. mect
TPAC tutorial
8.3.2.1 Administration Objects
In this section you can set and visualize the value of the following parameter:
• The node ID eventually it can be modified here
• Node Guarding enabled/disabled state
• Node virtualization
• Node name as shown in the EDS file
• Prefix for network variables to be exported in the PLC
All modifications will be retained only if confirmed by pressing the OK button.
8.3.2.2 File Info
This section showes data contained in the EDS file related to the node. All shown data cannot be
changed by the user.
ME7000_14 03/11
30
s.r.l. mect
TPAC tutorial
8.3.2.3 Device Info
The third section shows the data regarding the characteristics of the selected node, as the number of
PDO, the baud rate available, etc.
ME7000_14 03/11
31
s.r.l. mect
TPAC tutorial
8.3.2.4 Object Dictionary
In this section, that contains the list of the node dictionary object, the user can set node parameters
and variables.
As can be seen from the figure, the window is divided into several sections, the left side contains
the list of objects available in the node that need configuration. By selecting an object, its properties
are shown in the top part of the window, its. For each object with write access (w) you can insert a
parameter that will be sent by master in the configuration step in order to configure the node;
besides you can associate to the object a variable to make the object accessible through the PLC.
For some objects, such as those that enable PDO, you must enter more than one parameter which
will be sent in sequence to the node by the master during the configuration. We will see later how to
change the order used to send configuration parameters.
Read only (ro) object type can be bound only to a single a variable whose value can be read
through the PLC.
To clear any parameters or variables select with the mouse the value to delete, right click on it and
chose delete in the pop-up menu that will appear. Remind that items to change in this section are
closely linked to the node and the application you wants to achieve.
In order to use the SDO service by PLC, the program Can Builder must assign a name to the
dictionary object to which you need to access to.
8.3.2.5 Parameter List
The parameters set in the Object dictionary tab are collected in this section as shown below.
Theese parameters are sequentially sent by the master at the inizialization step. The Parameter list
tab showes the order that will be used to send them. If necessary, you can rearrange the order of
ME7000_14 03/11
32
s.r.l. mect
TPAC tutorial
configuration parameters by moving them in the Parameter list by selecting the item you want to
move and using the up-down available arrows.
8.3.2.6 Variable List
The picture below lists the variables created in the Object Dictionary; those variables will be
user-accessible via the PLC. The list of variables can not be changed.
8.3.2.7 SDO and PDO list
Sections RSDO, TSDO, RPDO, TPDO show respectively:
• SDO with read permission
• SDO with write permission
• PDO with read permission
• PDO with wirte permission
Theese lists are read only and contain a different representation of the object dictionary.
8.4 Object List
In previous sections we have seen that some objects have associated parameters or
variables and we have seen how the lists of variables and parameters can be created. Going back to
the Can Builder main window by selecting the tab “Variable list” the list of the variables
associated to all the nodes that form your network will be displayed.
ME7000_14 03/11
33
s.r.l. mect
TPAC tutorial
In the same way by selecting the tab “Parameters List” you can visualize the list of parameters that
will be sent from the master to the nodes available in the network during the configuration step.
The previous mentioned lists summarize all variables andp arameters that will be used in your
network configuration.
8.5 Network parameter configuration
The rightmost portion of Can Builder main window shows the parameters used to configure the
CANopen network:
• Baud rate: speed of data transmission
• CAN Channel: which of the two TPAC CAN channels must be used
• Cycle time: of the CANopen network
• Guard time: time between two Node Guarding messages sent by the master
• Life Time: number of Guard time periods over which the master message is considered
disconnected when a Node Guarding messagges is not received.
• Sync Enable: the master is required to send sync
• Manage NG toggle bit: the master is required to send NG message with data bit that will
toggle each time.
The previous mentioned parameter will be sent ot the master during the configuration.
ME7000_14 03/11
34
s.r.l. mect
TPAC tutorial
Once the network parameters have been modified to retain the new values save the CanOPEN
project.
8.6 Main Menu
The main Can Builder menu is made by:
• File
• Tools
• Help
8.6.1 File Menu
The file menu allowes:
• build the configuration file
• download the configuration file
• save project
• exit
8.6.1.1 Build the configuration file
In the project folder this option creates the configuration file to be sent to the master.
8.6.1.2 Download the configuration file
Configuration file are downloaded to the TPAC by the LAN network connection. Chose “download
configuration file” in the file menu. The following window will appear
Set the IP address for the TPAC master on your network and press the “Link to OP” button this will
enable the transfer of your configuration file.
8.6.1.3 Project Save
Select “Save the Project” to save your project file in order to re-use your project later.
8.6.2 Tools Menu
The Tools Menu containns:
• Rearrange
• Import EDS
ME7000_14 03/11
35
s.r.l. mect
TPAC tutorial
8.6.2.1 Rearrange
When nodes are repeatedly inserted and deleted from a network it can happen that nodes are no
more sorted with with increasing ID. The rearrange button restores the correct sorting.
8.6.2.2 EDS Import
MECT Can Builder software allows the usage of any type of CANopen node with a MECT
CanOPEN master. However, in order to use a node, the EDS file related to the node provided by
the node manufcturer must be imported in the configuration tool. By chosing EDS Import on the
menu Tools a dialog box that allows you to insert and manage a new type of node will be opened.
Conversely, cancellation of an EDS file is done by selecting the file you want to delete form the
EDS file list. Right click with the mouse on the selected file and chose from the pop-up menu that
will appear the “Delete EDS” option.
8.7 Using the CANopen objects in the PLC
8.7.1 Import Can variables in LogicLab
We must import the variables created with Can Builder to make the inserted node available, into
our PLC project, and use them as any other PLC variables.
To import the CANOpen variables, from the LogicLab menu Project select Import object from
library. In the opened pop up window, browse the file system until you reach the project directory
created by Can Builder and open the var.exp file. Rember that variables file have .exp extension.
ME7000_14 03/11
36
s.r.l. mect
TPAC tutorial
Select the Variables tab on the pop-up window Object browser. A list of CAN variables is
presented, select all, and press the button Import object.
The selected variables will be inserted into the PLC project and become usable like any other
variable.
8.7.2 SDO Usage
CANOpen protocol relates PDO to variables that need to be known in real time or need to be
heavily modified during the PLC execution. On the contrary the protocol takes care of less
frequently updated data such as node configuration parameters, usually modified only at the
beginning of a new running cycle, through the SDO (Service Data Object).
The SDO is serviced by two functions SDORead and SDOWrite that allows node configuration.
SDOs can access any parameter defined in the node object dictionary but they are not suited to
make real time parameter modification since they require an acknowledgment and so are quite slow.
After naming all the objects that you need to access to, upload CanOPEN project on the TPAC
target as described above. Once configured, the objects are read and written in the PLC program by
invoking the SDORead SDOWrite and functions.
SDO Objects will be read and written in the PLC program by calling the SDORead and SDOWrite
functions.
8.7.2.1 SDORead in a PLC program
The function res:=SDORead(0,'pr80') requires two parameters: the first specifies which of the
available CANOpen network is indented to receive the request; the second one states the name
given to the object through the Can Builder program.
ME7000_14 03/11
37
s.r.l. mect
TPAC tutorial
The function returns an error code: 0 on success. Detailed explanation about error codes is available
in the user manual. It worth to point out that for the SDORead function a 0 error code means only
that the SDO service requesting a parameter has correctly been forwarded and accepted in the
network.
Actually the addressee node will answer by its time schedule hence receiving the 0 code from a
SDORead does not imply that the data is accessible. The data is stored in the SDODATA variable
only when, after SDORead operation, the SDOStatus variable is set to a value different from 0.
8.7.2.2 SDOWrite in a PLC program
Besides the network and the name of the object involved in the request, the SDOWrite function,
requires, as additional parameter, the value to be written in the addressed CANOpen object.
The function returns an error code reporting a successful execution or a failure.
SDO services need an acknowledgement; the node receiving a write request, answers by sending a
confirmation upon data receipt. Hence, in order to make consecutive writing, when the PLC
program issues a SDOWrite it must wait until the SDOStatus variable goes to a value different
from 0 before starting the next writing operation.
NOTE: To properly deal with SDORead and SDOWrite functions each object in the network
needs to be identified univocally. Working with two identical nodes belonging to the same network
and making access to the same object (i.e. object 2000.51) implies assigning to each object a unique
name.
9.0 RESETTING THE SYSTEM
If you can no more obtain the control of TPAC ( for programming or configuring it) there is a back
door that make possible reset the TPAC. From the Target section of the dashboard, open a project
or create a new one. Press the button Settings, the window will show the configuration parameters.
Check the Reset label. Insert into a USB port of the PC the pen-drive, then press the button: export
current configuration. The pen-drive will be loaded with a reset configuration.
Afterwards, plug the pen-drive into the USB port of the TPAC, then power it on. The code files of
PLC, HMI and CANOpen will be erased from TPAC flash memory. The TPAC becomes free from
code files that may be the cause of problems.
ME7000_14 03/11
38
s.r.l. mect
TPAC tutorial
10.0 RECEIPTS
10.1 INTRODUCTION
TPAC has the ability to manage the receipts into a PLC program. When a HMI project is created
the receipts software package is automatically loaded.
In this manual we’ll describe both what the programmer and what the final user have to do to use
the receipts in a PLC project.
10.1.1 Programmer side
When a PLC program wants to use the receipts the first step for a programmer, is to define the
receipt needed variables and declare them into the retentive memory.
Once defined, the programmer have to link the variables to the receipt. This step take place in the
HMI environment. When a new project is created, the global function: Rcpt_add_vars is available
to the programmer.
Inside this procedure, two functions deal with adding variables: Rcpt_add_tyReal_par to add a
float variable and Rcpt_add_tyDInt_par to add a signed integer variable.
The above mentioned functions require four parameters:
• The list position of variable: integer from 0 to N.
• The name of PLC variable to be associated, as defined into the PLC project.
• The mnemonic associated to the variable that may be either the variable name or the any
other name. The maximum string length is 18 characters.
• The measurement unit associated to the variable. The maximum string length is 5 characters.
The function return zero if the operation is correctly handled.
For instance to insert the PLC variable Var1, in the first position of a receipt, defined as real
variable, with mnemonic “speed” and measure unit “m/s”. The result is stored into the Result
variable.
Result:=Rcpt_add_tyReal_par(0,Var1,'speed','m/s');
To use receipt values into a PLC program the selected receipt parameters need to be copied into
the PLC. The programmer must predispose this copy, by inserting into the procedure
Rcpt_store_vars, the functions that assign the value of each element to the corresponding PLC
variable. The functions to be called are: Rcpt_get_tyDInt_par(j) to copy the element j of the
receipt in a signed integer variable, and Rcpt_get_tyReal_par(j), to copy the element j into a real
variable.
The Rcpt_store_vars procedure is called when the user press the Store button.
Note: The PLC variables that belong to the receipt must be placed into the retentive memory
block. In this way, the variables values will not be lost when the TPAC is turned off.
To call the receipt package main window, the programmer needs to open the window “ric”.
10.1.2 Final User side
A graphical interface is made available for the final user in order to:
• Insert new receipts.
• See the receipts parameters.
• Delete receipts.
ME7000_14 03/11
39
s.r.l. mect
TPAC tutorial
•
•
•
Scan the receipts list.
See and modify receipts descriptions.
See and modify the values of PLC variables part of a receipt
To create a new receipt
Pressing the button New, shows the New receipt window. In this window the user must insert the
name of receipt and, if needed, its description.
To insert the name of the receipt the user must touch the field Receipt name. A virtual keyboard
appears on the screen. Receipt names are limited to maximum18 characters. To confirm the
insertion, press ↵ on the virtual keyboard or enter on the hardware one.
ME7000_14 03/11
40
s.r.l. mect
TPAC tutorial
The field receipt description is an explanation associated to the receipt that helps the user to better
identify it. Touching the field Description displays the virtual keyboard. At most 190 characters
may be contained into the description field. To end the description typing, press the Esc button on
the virtual keyboard.
By pressing OK, the receipt with its name and description is saved.
The parameters values of the new receipt are loaded from actual PLC variables.
If ESC is chosen the New receipt page is closed and no receipt is created.
Delete a receipt
To delete a receipt from the list, after selecting it, press Canc, a dialog window will ask to confirm
the deletion. If Yes is chosen, the receipt will be definitely lost.
Visualization and description change
The description associated to a receipt is shown by pressing the button View in the page Receipt.
When the description window is shown, to modify the text, press on the text box field and the
virtual keyboard will be available. To exit while saving the modification, press Save, otherwise
press Esc to discard any changes.
Modify the value of receipt parameters
If you have a newly created receipt or you selected an old one, four parameters are visible on the
screen. To view all the other parameters associated with the chosen receipt just press the arrows
buttons placed on the left part of parameters fields. Each parameter has three attributes: Variable
ME7000_14 03/11
41
s.r.l. mect
TPAC tutorial
Name, Value and m u (measurement unit). The Variable name and m u, are fixed (defined by the
programmer) and can’t be modified by the user; the field Value instead, may be changed by the
user. If any changing is required the user may save it through the button Save in the Receipt page.
Saving the receipt parameters into the PLC variables
The receipts are saved on the TPAC flash memory. To save receipt’s parameters into the PLC
program, the user must select the needed receipt through the receipts scan buttons and then press
the Store button. The parameters values of the receipt are inserted into the PLC variables and
immediately used by the program.
Visualization of actual PLC variables
The Load button, allows the user to see the receipts actual values of PLC variables.
11.0 LANGUAGE MANAGEMENT IN HMI ENVIRONMENT
11.1 INTRODUCTION
When inserting a string in a PageLab project, is always possible to write the plain text, or use a
resources string, by calling its identifier. In the first case the text will be always constant, while, by
using the resources string the text will be displayed in the active language.
11.2 STRING TABLE
To show the string table, press the Tag Resouces in the project window, then select the key: String
table. The table is composed by two columns, the left column contains an identifier (ID), the right
one the string that will be shown on screen (Caption).
ME7000_14 03/11
42
s.r.l. mect
TPAC tutorial
button in the tool bar, a new row will be added. Select
To add a string to the table press the
the ID cell, and insert the identifier name, then select the cell Caption and insert the string to be
associated.
11.3 INSERTING A NEW LANGUAGE
From the project window select Pages and then Page properties to view the window Pages
properties. Select the Tab Language selection; the available languages field shows the list of
languages defined until now. To add a new language press the button Add…, insert the name of the
language, then press Insert: the new language is added to the list.
To set the new current language in the PageLab environment highlight a language in the Available
languages list and press the button Select. When pressing OK the Page properties window will be
closed and all changes saved.
Once selected the language, the programmer must modify the strings table by inserting the string
translations. Open the strings table as described in the previous section, and modify the values in the
Caption column.
NOTE: The just described language selection does not modify the language shown on the TPAC, it
is only used by programmer to fill the strings tables in PageLab environment.
11.4 MODIFY TPAC LANGUAGE
Modifying the variable sysLangID changes the language displayed by TPAC screen. Values
assignable to this variable are defined by constants. For example if there are 3 languages defined in
ME7000_14 03/11
43
s.r.l. mect
TPAC tutorial
Pagelab: ITA, and ENG FRA, the compiler will create three constants: kLangITA; kLangENG;
kLangFRA. To change the displayed languages assign one of the constant variables to sysLangID
and then restart the TPAC.
To change the language without having to reboot the system you need to modify the global function
chg_lang () within the HMI program.
For each language created inside PageLab two other constants are generated. These constants are
made by a suffix that represents the name of the created language (eg ITA, ENG, FRA, etc.) and a
prefix: kbLangIdx for elements defined in the strings table and kbEnumIdx for enumerative
strings. With respect to the above-mentioned example the following constants will be creted:
kLangIdxITA, kLangIdxFRA, kLangIdxENG and kbEnumIdxITA, kbEnumIdxENG and
kbEnumIdxFRA.
The function chg_lang () will be amended as follows:
CASE sysLangID OF
kLangITA: dummy:=Video_LoadLanguage(?kbResStrings[kbLangIdxITA],
?kbResEnums[kbEnumIdxITA] );
kLangENG: dummy := Video_LoadLanguage( ?kbResStrings[kbLangIdxESP],
?kbResEnums[kbEnumIdxESP] );
kLangFRA: dummy :=Video_LoadLanguage( ?kbResStrings[kbLangIdxFRA],
?kbResEnums[kbEnumIdxFRA] );
END_CASE;
x1 := 1 ;
y1 := 1 ;
x2 := 318 ;
y2 := 238 ;
bStatRedrw := TRUE ;
bMapsReset := TRUE ;
EXIT ;
The lines to be included within the CASE construct are as many as the languages t to be
managed. This procedure must be called whenever a change occurs in the sysLangID variable.
12.0 SOFT KEYBOARD
By default on the TPAC front panel there is a numeric keyboard, but in case of receipts for which
some alphanumeric edit boxes fields exists, the numeric keyboard is not enough. In this case when
the user touch the edit box field a virtual keyboard with alphabetic keys is available.
The default keyboard layout looks like the following:
ME7000_14 03/11
44
s.r.l. mect
TPAC tutorial
The programmer may define by himself a keyboard with different layout and functions.
To define a new keyboard, the programmer must create an image of the keyboard he wants to create
in gif standard.
For example, suppose that we need to create a four keys keyboard, with these keys: +-*/. Through
a graphic editor create the following image:
The keyboard image must be less than 320 x 240 pixels, otherwise it can’t be correctly shown on
the screen. Also the file must be named skbd.gif.
Besides the keyboard image, the programmer needs to create a description file that contains its
functionalities.
On the first row of the description the file contains the keyboard image dimensions (in pixels).
From the second row and on, for each key there's a line with the following information:
•
•
•
•
•
Key ASCII code
Top left corner x coordinate
Top left corner y coordinate
Bottom right x coordinate
Bottom right y coordinate
The description file must be named skbd.txt.
In example case the skbd.txt file will be:
100 100
42
45
47
43
3
51
3
51
3
3
51
51
48
96
48
96
48
48
96
96
These files, once created needs be saved onto TPAC, as described in the section Update software
ME7000_14 03/11
45
s.r.l. mect
TPAC tutorial
13.0 COLOR DEFINITION HMI
TPAC uses a 256 color palette, coded in RGB standard, with an eight bit code for each color. By
default in PageLab 16 colors are defined whose codes reported in the following table.
ID hexadecimal RGB code
0. 000000
1. 000080
2. 008000
3. 800000
4. 008080
5. 800080
6. 808000
7. 808080
8. AAAAAA
9. 0000FF
10. 00FF00
11. FF0000
12. 00FFFF
13. FF00FF
14. FFFF00
15. FFFFFF
When further colors are needed the programmer can add the new color in the file
C:\Programmi\MECT\TPAC_01\dashboard\MECTjar\TemplateHMI\Targets\TPAC.def, the
new colors that you wish to add.
NOTE: The colors number must always be a power of 2.
ME7000_14 03/11
46
s.r.l. mect
TPAC tutorial
14.0 FUNCTION BLOCKS
PID
Parmeter
CONTROL
Data Type
REAL
Data Width
32
Description
Quantity under measurement
KP_in
REAL
32
Proportional Constant
KI_in
REAL
32
Integrative Constant
KD_in
REAL
32
Derivative Constant
SETPOINT
REAL
32
Setpoint
CYCLE
UDINT
32
PID Time Cycle in ms
CUT_BACK
REAL
32
Cutback Constant
START
BOOL
8
Start Regulating Command
COMMAND
REAL
32
Regulating value (-100% , +100%)
ERROR
BOOL
8
Reports that some parameters are not set properly
Description of PID Regulation.
When START goes to 1, the function block performs PID adjustment depending on the chosen
parameters. The output regulator takes values ranging from -100% to +100%. When the time cycle
or the constant proportional KP_in is set to 0, the function block raises the exit ERROR and no
regulation is performed.
ME7000_14 03/11
47
s.r.l. mect
TPAC tutorial
Self tuning PID
Parameter
CONTROL
Data type
REAL
Data Width
32
Description
Qunatity under measurement
START
BOOL
8
Selftuning Start Command
SETPOINT
REAL
32
Setpoint
KP_out
REAL
32
Calculated Proportional Constant
KI_out
REAL
32
Calculated Integrative Constant
KD_out
REAL
32
Calculated Derivative Constant
COMMAND
REAL
32
Regulating value (-100% a +100%)
TUNED
BOOL
8
Indicates when self tuning is complete
CUT_BACK
REAL
32
Calculated CutBack Constant
Description of PID self-tuning
When START goes to 1, the function block begins the self-tuning procedure using the parameters
set. The COMMNAD output varies according to the chosen tuning algorithm. Once the self-tuning
is completed the output TUNED is raised and outputs KP_out, KI_out, KD_out and CUT_BACK
exhibit the calculated values.
ME7000_14 03/11
48
s.r.l. mect
TPAC tutorial
32 bit up – down counter
Parameter
PRESET
Data Type Dimension
UDINT
32
Description
Counter value set from 0 to 2^32
CLK
BOOL
1
Clock input
DIRECTION BOOL
1
RESET
BOOL
1
SYNC
BOOL
1
COUNT
UDINT
32
DIRECTION = 1 count up
DIRECTION = 0 count down
If RESET = 0 the count set to zero, if DIRECTION = 1
(count up)
Counter set to PRESET if DIRECTION = 0 ( count
down)
SYNC set to 1
Terminal count Output. It stays to 1 if, in count up, it has
the PRESET value, or in count down if it has 0
Counter current value
Description
32 bit up- down counter
The counter changes value if on the CLK input a rising edge is detected
If DIRECTION = 1 the counter is incremented by 1, if DIRECTION = 0 the counter value is
decremented by 1.
If DIRECTION = 1, when the counter equals the PRESET value, the output SYNC is set to 1.
If DIRECTION = 0, when the counter equals the 0, the output SYNC is set to 1.
At the next rising edge on the CLK input, if DIRECTION = 1, the counter restarts from 0, if
DIRECTION = 0 the counter restarts from PRESET value.
If RESET = 0 the counter sets the value to 0 if DIRECTION = 1, set to PRESET, if DIRECTON =
0.
If RESET = 0 the counter never changes its value
ME7000_14 03/11
49
s.r.l. mect
TPAC tutorial
32 bit up counter
Parameter
PRESET
Data Type Dimension
UDINT
32
Description
Counter value set from 0 to 2^32
CLK
BOOL
1
Clock input
RESET
BOOL
1
SYNC
BOOL
1
COUNT
UDINT
32
If RESET = 0 the count set to zero,
SYNC set to 1
Terminal count Output. It stays to 1 if, in count up, it
has the PRESET value.
Counter current value
Description
32 bit up- counter
The counter changes value if on the CLK input a rising edge is detected
When the counter equals the PRESET value, the output SYNC is set to 1.
At the next rising edge on the CLK input, the counter restarts from 0,
If RESET = 0 the counter sets the value to 0
If RESET = 0 the counter never changes its value
32 bit down counter
Parameter
PRESET
Data Type Dimension
UDINT
32
Description
Counter value set from 0 to 2^32
CLK
BOOL
1
Clock input
RESET
BOOL
1
SYNC
BOOL
1
Counter set to PRESET
SYNC set to 1
Terminal count Output. Set to 1 if counter value is 0
COUNT
UDINT
32
Counter current value
ME7000_14 03/11
50
s.r.l. mect
TPAC tutorial
Description
32 bit down counter
The counter changes value if on the CLK input a rising edge is detected
When the counter equals the 0 value, the output SYNC is set to 1.
At the next rising edge on the CLK input, the counter restarts from PRESET,
If RESET = 0 the counter sets the value to PRESET
If RESET = 0 the counter never changes its value
Byte to bit
Parameter
IN
Data Type Dimension
BYTE
8
Description
Input Byte
B0..B7
BOOL
Output Bits
1
Description
Split the input byte in eight bits
Word to bit
Parameter
IN
Data Type
WORD
Dimension
16
Description
Input word
B0..B15
BOOL
1
Output Bits
ME7000_14 03/11
51
s.r.l. mect
TPAC tutorial
Description
Splits the input word in 16 bits
Word to byte
Parameter
IN
Data Type Dimension
WORD
16
Description
Input word
BYTE0
BYTE
8
Output Byte low
BYTE1
BYTE
8
Output Byte high
Description
Splits the input word in two bytes
Double word to byte
Parameter
IN
Data Type Dimension
UDINT
32
Description
Input Double word
BYTE0
BYTE
8
Output byte 0
BYTE1
BYTE
8
Output byte 1
BYTE2
BYTE
8
Output byte 2
BYTE3
BYTE
8
Output byte 3
Description
Splits the input double word in four bytes
ME7000_14 03/11
52
s.r.l. mect
TPAC tutorial
MUX_8_x_1 multiplexer 8 per 1
Parameter
INPUT_1..
INPUT_8
SELECT
Data Type
BOOL
Dimension
1
Description
Input Bits
USINT
8
Select which input bit is sent to the output
OUT_VAL
BOOL
1
Output bit
Description
OUT_VAL output is the input bit selected by SELECT input.
ME7000_14 03/11
53
s.r.l. mect
TPAC tutorial
COMPARE
Parameter
MAX_VAL
Data Type
UDINT
Dimension
32
Description
Max limit value
MIN_VAL
UDINT
32
Min limit value
INPUT_VAL UDINT
32
Input value
START
BOOL
1
HIGH
BOOL
1
LOW
BOOL
1
Output: set to 1 if the input value is into the range
limits
Output: set to 1 if input value is greater then max
limit value
Output: set to 1 if input value is smaller then min
limit value
Description
ON-OFF control
If the 32 bit input value is into the range set by MAX_VAL and MIN_VAL limits, the output
START is set to 1.
If the input is greater than MAX_VAL output START is reset, the output HIGH is set to 1; if input
is smaller then MIN_VAL, the output START is reset, the output LOW is set to 1.
ME7000_14 03/11
54
s.r.l. mect
TPAC tutorial
GAIN
Parameter
X
Data Type
UDINT
Dimension
32
Description
input X
A
UDINT
32
Multiplier parameter
B
UDINT
32
Divisor parameter
C
UDINT
32
Offset
Y
UDINT
32
Output Y
Description
Calculates the function value Y=X*(A/B)+C
FF_D: D flip-flop
Parameter
D
Data Type
BOOL
Dimension
1
Description
Input Bit
CLK
BOOL
1
Clock input
Q
BOOL
1
Output bit
Description
The output Q, is equal to the input D when a rising edge is detected on the CLK input.
ME7000_14 03/11
55
s.r.l. mect
TPAC tutorial
FF_T: T flip flop
Parameter
CLK
Data Type
BOOL
Dimension
1
Description
Clock input
T
BOOL
1
Output bit
Description
The output T toggles its value at every rising edge on the CLK input
Date_ Read: read the current date
Parameter
YY
MM
DD
Data Type
UINT
UINT
UINT
Dimension
8
8
8
Description
Year
Month
Day
Description
Call this function to update the system variables
DATA_YY
DATA_MM
DATA_DD
Time_ read: read the current time
Parameter
HH
MM
SS
Data Type
UINT
UINT
UINT
ME7000_14 03/11
Dimension
8
8
8
Description
hours
minutes
seconds
56
s.r.l. mect
TPAC tutorial
Description
Call this function to update the system variables
TIME_HH
TIME_MM
TIME_SS
TimeE_write: write the current time
Parameter
HH
MM
SS
ENABLE
Data Type
UINT
UINT
UINT
BOOL
Dimension
8
8
8
1
Description
hour
Minutes
Seconds
Enable bit
Description
When ENABLE = 1 call this function, to change the value of the system time with the value
currently available on the inputs
Date_write: write the current date
Parameter
YY
MM
DD
ENABLE
Data Type
UINT
UINT
UINT
BOOL
Dimension
8
8
8
1
Description
Year
Mounth
Day
Enable bit
Description
When ENABLE = 1, call this function to change the value of the system date with the value
currently available on the inputs
ME7000_14 03/11
57
s.r.l. mect
TPAC tutorial
ONE_SEC: one second pulse
Parameter
SYNC
Data Type
BOOL
Dimension
1
Description
One second pulse
Description
Every one second, a pulse with a lifetime of a PLC cycle is generated.
pulse
Parameter
ENABLE
Data Type
BOOL
Dimension
1
Description
Enable bit
PERIOD
UINT
16
Pulse duration
OUT
BOOL
1
Output pulse
Description
When ENABLE is 1, the output OUT is set to 1 for PERIOD ms
pulses
Parameter
N_PULS
Data Type
UINT
Dimension
16
Description
Number of output pulses
PULSE_ON
UINT
16
ON state of each pulse
PULSE_OFF UINT
16
OFF state of each pulse
ME7000_14 03/11
58
s.r.l. mect
TPAC tutorial
STR
BOOL
1
Enable input
OUT
BOOL
1
Output
Description
When input STR detects a rising edge, on the output is present a train of N_PULS pulses, whose
on state is equal to PULSE_ON ms and off state is equal to PULSE_OFF ms
pwm
Parameter
PERIOD
Data Type
UINT
Dimension
16
Description
PWM period
DC
UINT
16
Duty cycle
RESET
UINT
16
Reset input
OUT
BOOL
1
Output
Description
When RESET is set to 1, on the output is present a square wave whose period is equal to PERIOD
and duty cycle is DC.
freq_div
Parameter
CLK
Data Type
BOOL
Dimension
1
Description
Input frequency
DIV
UINT
16
Division factor
OUT
BOOL
1
Output
Description
Divides the input frequency by the factor value set on the DIV input.
ME7000_14 03/11
59
s.r.l. mect
TPAC tutorial
digital_in_filter
Parameter
IN
Data Type
BOOL
Dimension
1
Description
Input signal
FILT
UINT
16
Filtering factor
OUT
BOOL
1
Output
Description
If the input is stable for almost FILT number of PLC cycles, its value is propagated to the output
chrono
Parameter
MINS
Data Type
UDINT
Dimension
16
Description
Minutes set
START
BOOL
16
Start chrono
OUT
BOOL
1
Terminal count
OUT_TIME
UDINT
1
Time elapsed
Description
When RESET is set to 1 and a rising edge is detected on the START input, the chrono starts to
count until it reaches the value set on MINS input, then output OUT is set to 1.
The count stop if RESET input is reset.
ME7000_14 03/11
60
s.r.l. mect
TPAC tutorial
timer_retrig
Parameter
CLK
Data Type
UDINT
Dimension
32
Description
Clock input
TIMER
BOOL
1
Choose one of 128 available timers
DELAY
BOOL
1
Delay setup
RESET
UDINT
32
Reset timer
SYNC
BOOL
1
Terminal count output
CURR
UDINT
32
Counter current value
Description
RETRIGGERED DELAY INPUT TIMER
Starts the selected timer if on the CLK input is detected a rising edge and RESET is set to 1.
The timer works for a DELAY even if the CLK input goes 0 before the time is ended.
The output SYNC is set to 1 when the time is elapsed.
The timer is restarted if a new rising edge is detected on CLK input.
ME7000_14 03/11
61
s.r.l. mect
TPAC tutorial
timer_rit_ecc
Parameter
CLK
Data Type
UDINT
Dimension
32
Description
Clock input
TIMER
BOOL
1
Choose one of 128 available timers
DELAY
BOOL
1
Delay setup
RESET
UDINT
32
Reset timer
SYNC
BOOL
1
Terminal count output
CURR
UDINT
32
Counter current value
Description
DELAY INPUT TIMER 1
Starts the selected timer if on the CLK input is detected a rising edge and RESET is set to 1.
The timer works for a DELAY time then it sets the SYNC output.
If the CLK input goes 0 before the time is elapsed the timer is reset.
The output SYNC is set to 1 when the time is elapsed.
The timer is restarted if a new rising edge is detected on CLK input.
ME7000_14 03/11
62
s.r.l. mect
TPAC tutorial
timer_rit_dis
Parameter
CLK
Data Type
UDINT
Dimension
32
Description
Clock input
TIMER
BOOL
1
Choose one of 128 available timers
DELAY
BOOL
1
Delay setup
RESET
UDINT
32
Reset timer
SYNC
BOOL
1
Terminal count output
CURR
UDINT
32
Counter current value
Description
DELAY INPUT TIMER 2
Starts the selected timer if on the CLK input is detected a falling edge and RESET is set to 1.
The timer works for a DELAY time then it sets the SYNC output.
If the CLK input goes 1 before the time is elapsed, the timer is reset.
The output SYNC is set to 1 when the time is elapsed.
The timer is restarted if a new falling edge is detected on CLK input.
ME7000_14 03/11
63
s.r.l. mect
TPAC tutorial
timer_coil
Parameter
CLK
Data Type
UDINT
Dimension
32
Description
Clock input
TIMER
BOOL
1
Choose one of 128 available timers
DELAY
BOOL
1
Delay setup
RESET
UDINT
32
Reset timer
SYNC
BOOL
1
Terminal count output
CURR
UDINT
32
Counter current value
Description
RETRIGGERABLE COIL
Starts the selected timer if on the CLK input is detected a rising edge and RESET is set to 1.
The timer works for a DELAY even if the CLK input goes 0 before the time is ended.
The output SYNC is set to 1 until the time is elapsed.
The timer is restarted if a new rising edge is detected on CLK input.
r_trig
Parameter
CLK
Data Type
BOOL
Dimension
1
Description
Clock input
Q
BOOL
1
Output
Description
Q output is set when a rising edge is detected on the CLK input. Q is 0 when input CLK is 0
ME7000_14 03/11
64
s.r.l. mect
TPAC tutorial
Set_Reset
Parameter
SET
Data Type
BOOL
Dimension
1
Description
Set input
RESET
BOOL
1
Reset input
OUT
BOOL
1
Output
Description
Output is set to 0 if RESET input is 1, Output is set to 1 if input SET is 1
start
Parameter
OUT
Data Type
BOOL
Dimension
1
Description
Output set to 1
Dimension
1
Description
Output set to 0
Description
Output is set to logic level 1
stop
Parameter
OUT
Data Type
BOOL
Description
Output is set to logic level 0
ME7000_14 03/11
65
s.r.l. mect
TPAC tutorial
Cell (Only TPAC 02 cell version)
Parameter
Sensibilita
Data Type
REAL
Dimension
4
Description
Cell Sensibility
FondoScala
REAL
4
Call range
Ingresso
REAL
4
Cell input (variables: from CELL_1 to CELL_4)
Abilita
BOOL
1
If 1, Enable function block
SensNom
REAL
4
Nominal sensibility of attached cell
Uscita
REAL
4
Measured weight
Description
If Abilita = TRUE the measured weight is based on: cell input, FondoScala, and Sensibilita.
The real sensibility is rated with Nominal sensibility of cell.
14.1 Embedded Functions
Name
ABS
ACOS
ADD
AND
ASIN
ATAN
ATAN2
CEIL
COS
COSH
DIV
EQ
EXP
FLOOR
GE
GT
JMP
LE
LIMIT
ME7000_14 03/11
Description
Absolute
arcosine
Arithmetic addition
Logical bitwise AND
Arsine
Arctangent
Arctangent of Y/X
Ceiling of a value
Cosine
Hyperbolic cosine
Arithmetic division
Equal
Base e exponential
Floor of a value
Greater or equal
Greater than
Jump
Less or equal
Limit
66
s.r.l. mect
TPAC tutorial
Name
LN
LOG
LT
MAX
MIN
MOD
MOVE
MUL
MUX
NE
NOT
OR
POW
R
RET
ROL
ROR
S
SEL
SHL
SHR
SINH
SQRT
SUB
TAN
TANH
TO_BOOL
TO_DINT
TO_INT
TO_REAL
TO_SINT
TO_UDINT
TO_UINT
TO_USINT
XOR
ME7000_14 03/11
Description
Natural logarithm
Base –10 logarithm
Less than
Maximum value selection
Minimum value selection
Modulo operator
Move
Arithmetic multiply
Multiplexer
Not equal
Not
Logical or
Power
Boolean reset
Return
Binary rotate left
Binary rotate right
Set
Selector
Binary shift left
Binary shift right
Hyperbolic sines
Square root
Arithmetic subtraction
Tangent
Hyperbolic tangent
Conversion to BOOL
Conversion to DINT
Conversion to Int
Conversion to REAL
Conversion to SINT
Conversion to UDINT
Conversion to UINT
Conversion to USINT
Logic XOR
67
s.r.l. mect
TPAC tutorial
15.0 HOW TO CONFIGURE TPAC THROUGH THE WEB
INTERFACE
15.1 Preface
The TPAC has a set of parameters and devices that must be configured before their usage. Any
Internet browser executes these configurations through a web interface.
15.2 Open TPAC web interface
The following example is based on the Internet Explorer browser version 6.0 (IE6). Switch on the
TPAC and plug a network cable to connect the device to the local network; then, on a host pc, run
IE6 and insert in the address field: http:// <IP address of TPAC>.
The TPAC IP address assignment is described in the section TPAC Configuration.
After entering the IP address, press Enter, the TPAC responds by sending to the browser the web
page shown in the picture below. The loaded web page contains the following section:
•
•
•
•
•
•
Network Configuration
System Configuration
PLC setup
IO Setup
IO Configuration
IDs
ME7000_14 03/11
68
s.r.l. mect
TPAC tutorial
…
ME7000_14 03/11
69
s.r.l. mect
TPAC tutorial
15.3 Configuration
The Network Configuration section allows changing the IP address to which TPAC will reply
after the next reboot.
The System Configuration section allows the activation of a number of parameters:
• The watchdog
• The MECT serial protocol
• The cancellation of the recipes saved on TPAC within a previous project
• The restart of the system
• The touch screen calibration
• The download of the PLC and HMI currently running on TPAC
Section PLC setup allows to set the cycle time for each of the available PLC. Inserting the required
time value for the PLC cycle in the available text box sets the cycle time: time value must be
expressed in milliseconds. It worth to point out that only cycle times for effectively used PLC must
be set; hence if you plan to use a single PLC, set the time cycle for PLC0 to the requested value and
turn off the other two PLCs. Checking the box Free Run will make the corresponding PLC to run
without a predetermined cycle time.
NOTE: A non-zero PLC cycle time for an unneeded one, lowers the overall system performances
since a PLC uses CPU time.
An output device can be driven exclusively by a single PLC. The IO Setup section assigns analog
outputs, digital output, CanOpen channels and encoders that each PLC is entitled to use.
In the following example the network CAN 0 is assigned to PLC 0 and network CAN 1 to PLC 1. If
Idle is selected the corresponding CANOpen network will not be handled by TPC010. As
mentioned earlier, a PLC can manage both CANOpen network, but it is unfeasible to assign a
CANOpen network more than one PLC at the same time. Analog and digital outputs are subject to
the same constraint.
ME7000_14 03/11
70
s.r.l. mect
TPAC tutorial
The IO Configuration section configures for both, digital and analogue channels, the kind of
physical value detected (in the case of analog inputs) or generated (in the case of exits).
Once finished, press Set values to save the TPAC configuration parameters. On the next reboot
configuration parameters will be automatically set.
ME7000_14 03/11
71
s.r.l. mect
TPAC tutorial
The last section shows software and firmware revisions IDs for the system components.
ME7000_14 03/11
72
s.r.l. mect
TPAC tutorial
16.0 FUNCTIONS
A number of functions are made available to control TPAC:
1. Immediate functions
2. Input delay functions
3. Timers
4. Video control functions
5. Receipts functions
6. Date and Time
7. MECT Serial
8. MODBUS RTU
9. CanOpen
10. HMI text file import
11. Data logger
12. Strings functions
13. Date sum and subtraction functions
16.1 IMMEDIATE FUNCTIONS
Into the PLC, outputs changing or inputs acquisition occur every cycle, but sometimes it is
necessary to update the outputs as soon as possible without waiting the end of the cycle. In these
cases there are available some functions called immediate, that update the outputs. These functions
are listed below:
Name
Description
Input parameters
Reads the encoder value.
Parameters: encoder number -1.
Example of encoder 2 read:
read_value:=
Imm_read_encoder(1);
Returns the read value if success,
0xffffffff if failure.
Imm_read_encoder
Imm_set_encoder
Imm_set_encoder_mode
ME7000_14 03/11
Sets the value of encoder Parameters: encoder number –1;
counter.
preset value to set the encoder.
Example to set the encoder 1
to 14322:
result:=
Imm_set_encoder(0,14322);
Sets the encoder counter
mode.
Example of set the mode 3
on encoder 1:
result:=
Imm_set_encoder(0,3);
73
Returns 0, if success, 1 if failure.
Parameters: encoder number-1;
mode to set the encoder.
Returns 0 if success, other if
failure.
s.r.l. mect
TPAC tutorial
Reads the digital input value. Parameters: input number-1.
Imm_read_digital_input
Example of read the input Returns the read value if success,
45:
0xffff if failure.
read_val:=
Imm_read_digital_input
(44);
Reads the outputs state.
Parameters: (detecting output -1) /
2.
Imm_read_digital_feedb
Returns the read value if success,
Example
of
read
of
output
9
ack
and 10 status:
0xffff if failure.
Read_val:=
Imm_read_digital_feedback
(4);
Sets the digital outputs.
Parameters: output number-1;
setting value (0 1).
Imm_write_digital_outpu
Example of set 1 to the Returns 0 if success, other if
t
output 3:
failure.
result:=
Imm_write_digital_output
(2,1);
Reads the analog input value. Parameters: analog input - 1.
Imm_read_analog_I
Imm_write_analog_o
Example of reading the Returns the read value if success,
analog input 2:
0xffff if failure.
Read_val:=
Imm_read_analog_i (1);
Sets the analog output value. Parameters: analog output number
- 1; value (0 - 4095) to be writtne
on the output.
Example of write the value Returns 0 if success, other if
100 on analog output 1:
failure.
result:=
Imm_write_analog_o
(100,0);
16.2 DELAY FUNCTIONS
To reduce the digital inputs sensibility, it is possible to make a digital filtering of inputs, that makes
to consider reliable an input when it is stable for a while. The settling time is user defined. For
each delayed input the programmer, must do two steps:
• set in the variable DEALY_DI[input], the delay time (in ms)
• call the function di_delay_set(input).
The input parameter must contain the delayed input. The inputs are numbered from 0 to 47.
Example of delaying the input 5 of 100ms:
DELAY_DI[4]:=100;
result:=di_delays_set(4);
In the example the function di_delays_set() returns 0 if succeed, it returns not zero value for
failure.
ME7000_14 03/11
74
s.r.l. mect
TPAC tutorial
16.3 TIMERS
A number of timers (128) are available for the programs.
When the programmer set the timers[j] variable with the required time (where j may be a value
from 0 to 127), the timer starts to count, and on timeout the variable timers[j] is zeroed. To trigger
the timer put a 1 into TIMERS_FLAG[j] variable.
16.4 VIDEO CONTROL FUNCTIONS
Some functions to directly control the video are available to the programmer.
Name
Description
Input parameters
LCDSS_set_timeout
Sets the the screensaver Parameters: Timeout of the
timeout, in second.
sscreensaver.
Example of set the timeout of Returns 0 if success, other if
the screensaver to 5 minutes:
fail.
result:=
LCDSS_set_timeout
(300);
Reads the screensaver timeout Parameters: constant.
LCDSS_get_timeout
LCD_set_backlight
ME7000_14 03/11
Example of screensaver timeout
reading:
result:=
LCDSS_set_timeout
(0);
Sets the screen brightness from
0 to 100%.
Example
of
setting
the
brightness to 54%:
result:=
LCD_set_backlight
(54);
75
Returns
the
timeout value.
screensaver
Parameters: brightness of the
screen;
Returns 0 if success, other if
fail.
s.r.l. mect
TPAC tutorial
LCD_get_backlight
Reads the screen brightness.
Parameters: constant.
Example of reading the Returns the brightness value.
brightness:
brightness:=
LCD_get_backlight (0);
Switches on the screen.
Parameters: constant.
LCDSS_on
LCDSS_off
LCDSS_enable
Example of screen switch on:
result:= LCDSS_on (0);
Switches off the screen.
Example of screen switch off:
result:= LCDSS_off (0);
Returns 0 if success, other if
fail.
Parameters: constant.
Returns 0 if success, other if
fail.
Enables the screensaver.
Example
of
screensaver
enabling:
result:= LCDSS_enable (0);
Disables the screensaver.
Parameters: constant.
Returns 0 if success, other if
fail.
LCDSS_disable
ME7000_14 03/11
76
Parameters: constant.
s.r.l. mect
TPAC tutorial
16.5 RECEIPTS FUNCTIONS
The receipts package has already been created by MECT. The programmer may use the available
functions, or if needed, can create by himself receipts interface.
Name
Description
Rcpt_set_curr
Sets the parameter of current Parameter:
receipt.
Parameter:
Rcpt_save_curr
Input parameters
Example: result:=Rcpt_set_curr
(ric_name, description);
The ric_name parmeter contains
the receipt namewhile
the
description
contains
the
description of receipt.
Saves on flash memory the
current receipt.
Example:
result:=Rcpt_save_curr (0);
Deletes all the receipts saved.
receipt name.
description.
Returns 0 if success, other if
fail.
Parameter:
constant.
Returns 0 if success, other if
fail.
Parameter:
constant.
Rcpt_clean_all
Example: result:=Rcpt_clean_all Returns 0 if success, other if
(0);
fail.
ME7000_14 03/11
77
s.r.l. mect
TPAC tutorial
Rcpt_clean_list
Deletes the current receipt data.
Example:
result:=Rcpt_clean_list (0);
Parameter:
constant.
Returns 0 if success, other if
fail.
Deletes the current receipt data.
Parameter:
constant.
Rcpt_clean_curr
Rcpt_remove
Example:
Returns 0 if success, other if
result:=Rcpt_clean_curr(0);
fail.
Deletes from flash memory a Parameter:
the
receipt
receipt.
name to delete.
Rcpt_remove_all
Example: result:=Rcpt_remove Returns 0 if success, other if
(ric_name);
fail.
The variable ric_name contains
the name of the receipt to be
deleted.
Deletes from flash all the saved Parameter:
constant.
receipt.
Example:
(0);
result:=Rcpt_remove Returns 0 if success, other if
fail.
Checks for the receipt name.
Parameter:
the
name to search for.
Example:
result:=Rcpt_exists
(ric_name);
The variable ric_name contains
the name of the receipt.
Returns the first receipt saved in
the list and set it as current
receipt.
Example:
ric_name:=Rcpt_get_first_set_cu
rr (0);
The variable ric_name contains
the name of the returned receipt.
Returns the next receipt in the
receipts list on flash and set it as
current receipt.
Example:
address:=Rcpt_get_next_set_curr
(0);
ric_name:=address;
The variable ric_name contains
the receipt address.
Returns the previous receipt in
the receipts list on flash and set it
as current receipt..
Returns 0 if success, other if
fail.
Rcpt_exists
Rcpt_get_first_set_curr
Rcpt_get_next_set_curr
Rcpt_get_prev_set_curr
ME7000_14 03/11
78
Parameter:
receipt
constant.
Returns the name of receipt.
Parameter:
constant.
Returns the receipt addressor 0
if the end of receipt list is
reached.
Parameter:
constant.
s.r.l. mect
TPAC tutorial
Rcpt_load_curr
Rcpt_set_curr_descr
Rcpt_get_curr_descr
Rcpt_add_ty_USInt_par
Example:
address:=Rcpt_get_prev_set_curr
(0);
ric_name:=address;
The variable ric_name contains
the receipt address.
Loads the current receipt
parameters.
Returns the address of receipt
or 0 if the top of the receipt
list is reached.
Example:
result:=Rcpt_load_curr
(ric_name);
The parameter
ric_name
contains the name of the receipt.
Sets the description of current
receipt.
Example:
result:=Rcpt_set_curr_descr
(description);
The parameter
description
contains the description of the
receipt.
Loads the current receipt
description.
Example:
description:=Rcpt_set_curr_descr
(0);
The variable description contains
the returned description of the
receipt.
Adds an unsigned 8 bit integer
parameter to the list.
Returns 0 if success, other if
fail.
Example:
result:=Rcpt_add_ty_USInt_par
(0,PLC_var1,’length’,'mm');
Rcpt_add_ty_SInt_par
ME7000_14 03/11
Parameter:
name.
Parameter:
the
receipt
description.
Returns 0 if success, other if
fail.
Parameter:
constant.
Returns the description string.
Parameter:
receipt
list
index
Parameter:
PLC variable
name
Parameter:
Mnemonic
associated to the variable
Parameter:
Measure Unit
associated to the variable
Returns 0 if success, other if
fail
Adds a signed 8 bit integer Parameter:
receipt
list
parameter to the list.
index
Parameter:
PLC variable
name
Parameter:
Mnemonic
associated to the variable
Parameter:
Measure Unit
associated to the variable
79
s.r.l. mect
TPAC tutorial
Example:
result:=Rcpt_add_ty_SInt_par
(0,PLC_var2,’wide’,'mm');
Rcpt_add_ty_UInt_par
Rcpt_add_ty_Int_par
Rcpt_add_ty_UDInt_par
Rcpt_add_ty_DInt_par
ME7000_14 03/11
Returns 0 if success, other if
fail
Adds an unsigned 16 bit integer Parameter:
receipt
list
parameter to the list.
index
Parameter:
PLC variable
name
Parameter:
Mnemonic
associated to the variable
Parameter:
Measure Unit
associated to the variable
Example:
Returns 0 if success, other if
result:=Rcpt_add_ty_UInt_par
fail
(0,PLC_var1,leng,'mm');
Adds a signed 16 bit integer Parameter:
receipt
list
parameter to the list.
index
Parameter:
PLC variable
name
Parameter:
Mnemonic
associated to the variable
Parameter:
Measure Unit
associated to the variable
Example:
Returns 0 if success, other if
result:=Rcpt_add_ty_Int_par
fail
(0,PLC_var2,wide,'mm');
Adds an unsigned 32 bit integer Parameter:
receipt
list
parameter to the list.
index
Parameter:
PLC variable
name
Parameter:
Mnemonic
associated to the variable
Parameter:
Measure Unit
associated to the variable
Example:
Returns 0 if success, other if
result:=Rcpt_add_ty_UDInt_par fail
(0,PLC_var1,leng,'mm');
Adds a signed 32 bit integer Parameter:
receipt
list
parameter to the list.
index
Parameter:
PLC variable
name
Parameter:
Mnemonic
associated to the variable
Parameter:
Measure Unit
associated to the variable
Example:
Returns 0 if success, other if
result:=Rcpt_add_ty_Dint_par
fail
(0,PLC_var2,’wide,'mm');
80
s.r.l. mect
TPAC tutorial
Rcpt_add_ty_Real_par
Rcpt_get_ty_USInt_par
Rcpt_get_ty_SInt_par
Rcpt_get_ty_UInt_par
Rcpt_get_ty_Int_par
Rcpt_get_ty_UDInt_par
Rcpt_get_ty_DInt_par
Rcpt_get_ty_Real_par
Rcpt_get_param_comment
ME7000_14 03/11
Adds a Real parameter to the list. Parameter:
receipt
list
index
Parameter:
PLC variable
name
Parameter:
Mnemonic
associated to the variable
Parameter:
Measure Unit
associated to the variable
Example:
Returns 0 if success, other if
result:=Rcpt_add_ty_Real_par
fail
(0,PLC_var,’speed’,'m/s');
Reads an unsigned
8 bit Parameter:
the parameter
parameter from receipt list.
receipt index.
Example:
Returns the read value.
PLC_var1:=Rcpt_get_ty_USInt_
par (0);
Reads a signed 8 bit parameter Parameter:
the parameter
from receipt list.
receipt index.
Example:
Returns the read value.
PLC_var2:=Rcpt_get_ty_SInt_pa
r (1);
Reads an unsigned
16 bit Parameter:
the parameter
parameter from receipt list.
receipt index.
Example:
Returns the read value.
PLC_var3:=Rcpt_get_ty_UInt_p
ar (2);
Reads a signed 16 bit parameter Parameter:
the parameter
from receipt list.
receipt index.
Example:
Returns the read value.
PLC_var4:=Rcpt_get_ty_Int_par
(3);
Reads an unsigned
32 bit Parameter:
the parameter
parameter from receipt list.
receipt index.
Example:
PLC Returns the read value.
_var5:=Rcpt_get_ty_UDInt_par
(4);
Reads an unsigned
32 bit Parameter:
the parameter
receipt index.
parameter from receipt list.
Example:
PLC Returns the read value.
var6:=Rcpt_get_ty_DInt_par (5);
Reads Real parameter from Parameter:
the parameter
receipt list.
receipt index.
Example:
PLC Returns the read value.
var7:=Rcpt_get_ty_Real_par (6);
Reads the parameter mnemonic
Parameter:
the parameter
receipt index.
Example:
Returns the read string.
ric_name:=Rcpt_get_param_com
ment (6);
Reads the parameter type.
Parameter:
the parameter
receipt index.
81
s.r.l. mect
TPAC tutorial
Reads the parameter type.
Parameter:
the
receipt index.
Example:
Reads
the measurement unit of
type:=Rcpt_get_param_type (6);
parameter.
Types
list:
Example:
0
unsigned (6);
short
um:=Rcpt_get_param_um
(unsigned 8 bits)
signedcurrent
short (signed
Reads 1 the
receipt8
bits)
description.
2 unsigned int (unsigned
Example:
16 bits)
description:=Rcpt_get_curr_desc
r(0); 3 signed int ( signed 16
bits)
4 unsigned
(unsigne
Reads the
number short
of parameters
bits)
into the8receipt.
5
signed double int
Example:
(signed
32 bits)
result:=Rcpt_get_curr_param_co
unt(0); 6 unsigned double int
(unsigned
32 bits) from a
Bulk import
of receipts
7
float
(real)
usb device to the TPAC
Returns the variable
type.
Parameter:
the parameter
receipt index.
Returns the read string.
Rcpt_get_param_type
Rcpt_get_param_type
Rcpt_get_param_um
Rcpt_get_curr_descr
Rcpt_get_curr_param_count
Rcpt_import
parameter
Parameter:
constant.
Returns
description.
the
Parameter:
constant.
Returns
the
parameters.
receipt
number
of
Parameter:
index
that
identifies the usb device and
relative path to the directory
where the receipts are stored.
Returns 0 on success, >0 for
error
Example:
Result:=Rcpt_import(1,
temp/receipts);
Bulk export of recipts from Parameter:
index
that
TPAC to a usb device
identifies the usb device and
relative path to the directory
where receipts will be saved.
Example:
Returns 0 on success, >0 on
Result:=Rcpt_export(1,
error
temp/receipts);
ME7000_14 03/11
82
s.r.l. mect
TPAC tutorial
16.6 DATE AND TIME FUNCTIONS
Two functions allows to read and write current date.
Function Name
DateTimeRead
DateTimeWrite
Description/
Example
Example:
Result:= DateTimeRead(0);
Example:
Result:=
DateTimeWrite(0);
Input Parameters /
Returned Value
Updates the following variables:
TIME_HH,
TIME_MM,
TIME_SS,
DATE_YY,
DATE_MM,
DATE_DD
Updates the RTC time with values hold
inside variables:
TIME_HH,
TIME_MM,
TIME_SS,
DATE_YY,
DATE_MM,
DATE_DD
16.7 MECT SERIAL FUNCTIONS
The TPAC can interface through serial connection (RS232 or RS485) MECT devices therefore four
functions are offered that read device status or set their parameters.
These functions return a code indicating whether the operation was successful or not. The error
code table is given below:
0 - ACK - success
1 - NACK
9 - Data format error
11 - TX ID error
12 - transmitted command code error
13 – transmitted integer value error
14 - transmitted hexadecimal value error
15 - TX error for a real value
16 - TX error on data type
21 - TX error
31 - RX BCC error
32 - timeout
33 - RX error
41 - incorrect received string
100 - unknown error
ME7000_14 03/11
83
s.r.l. mect
TPAC tutorial
Description
Example
Read an hexadecimal
variable from a MECT
device
Input Parameter/
Returned Value
Input:
id:INT: MECT device address;
command: STRING: Command Code
dd:UDINT: Number of digit required by
the protocol (6 or 8)
Output:
INT: Returned error code
MECT_H_swrite
Write on a MECT device
hexadecimal variable
Input:
id:UINT: MECT device address;
command: Command code
value:UINT: Variable value
dd:UDINT Number of digit required by
the protocol (6 or 8)
Output: Returned error code
MECT_sread
Read an ASCII variable
from a MECT device
Input:
id:INT: MECT device address;
command: STRING: Command code
dd:UDINT: Number of digit required by
the protocol (6 or 8)
Output: Returned error code
MECT_swrite
Write on a MECT device
ASCII variable
Input:
id:UINT MECT device address;
command: Command code
value:UINT: Variable value
dd:UDINT Number of digit required by
the protocol (6 or 8)
Output: Returned error code
Function Name
MECT_H_sread
MECT_H_sread() Example
Read an hexadecimal value from serial port: error:=MECT_H_sread(1,'SW',6);
Retrieved data is stored in PLC_MECT_enq variable.
MECT_sread() Example
Read an ASCII value from serial port: error:=MECT_sread(1,'RO',6);
Retrieved data is stored in PLC_MECT_enq variable.
MECT_H_swrite() Example
Write an hexadecimal value on serial port: error:=MECT_H_swrite(1,'SW'16#0001,6);
MECT_swrite() Example
Write an ASCII value on serial port: error:=MECT_swrite(1,'SW'16#0001,6);
ME7000_14 03/11
84
s.r.l. mect
TPAC tutorial
16.8 MODBUS Functions
TPAC implements the MODBUS master functionality. Communication is based on RS232 or
RS485 serial support according to the MODBUS RTU protocol specification. MODBUS
availability and serial communication paramenters are set through the TPAC web setup interface
accessible by any web browser at http:// < TPAC ip address>.
The following MODBUS function are made available:
01 Read Coil Status
02 Read Input Status
03 Read Holding Registers
04 Read Input Registers
05 Force Single Coil
06 Preset Single Register
15 Force Multiple Coil
16 Preset Multiple Registers
22 Mask Write 4X Register
23 Read/Write 4X Registers
Name
Description/Example
MB_f01
Reads the ON/OFF status of
discrete outputs (0X reference
coils) in the slave. Function
does not support boradcast.
Example:
Input parameters/ Returned
value
INPUT:
slave_addr: UINT slave
address
start_addr: UINT starting coil
to be read (coil 1 actually
addresses coil 0)
count: UINT number of the
coil to be read, max count
allowed is 256
OUTPUT:
Returned value: UINT
0 if modbus request has been
fulfilled 1 if modbus is busy
Error: if any it’s written in
MODBUSstatus[1];
Values: Read data are stored in
MODBUSdata array.
MODBUSdata[0] = number of
the read items
MODBUSdata[i] = coil status
1 ON , 0 OFF from to
lower to the higher adress
requested.
ME7000_14 03/11
85
s.r.l. mect
TPAC tutorial
MB_f02
Reads ON/OFF status of
discrete inputs (1X reference)
in the slave. Function does not
support boradcast.
Example:
INPUT:
slave_addr: UINT slave
address
start_addr: UINT starting
input to be read (input 1
actually adresses input 0)
count: UINT number of the
input sto be read, max count
allowed is 256.
OUTPUT:
Returned value: UINT
0 if modbus request has been
fulfilled 1 if modbus is busy;
Error: if any it’s written in
MODBUSstatus[1];
Values: Read data are stored in
MODBUSdata array.
MODBUSdata[0] = number of
the read items
MODBUSdata[i] = input status
1 ON , 0 OFF from to
lower to the higher adress
requested.
MB_f03
ME7000_14 03/11
Read the holding registers in a
slave and put data into an
array. (4XXXX reference).
Function does not support
broadcast.
86
INPUT:
slave_addr: UINT slave
address
start_addr: UINT starting
register address to be read
(register 40001 actually
addresses register 40000)
count: UINT number of
register to be read limited to
256
byteorder: USINT data byte
format (modbus rtu data byte
are organized with HI byte
first, but some controllers put
LO byte first)
0 HI – LO order
1 LO – HI order
s.r.l. mect
TPAC tutorial
Example:
OUTPUT:
Returned value: UINT
0 if modbus request has been
fulfilled 1 if modbus is busy;
Error: if any it’s written in
MODBUSstatus[1];
MB_f04
Read the holding registers in a
slave and put data into an
array. (4XXXX reference).
Function does not support
broadcast.
Example:
Values: Read data are stored in
MODBUSdata array.
MODBUSdata[0] = number of
the read items
MODBUSdata[i] = register
value
INPUT:
slave_addr: UINT slave
address
start_addr: UINT starting
register address to be read
(register 30001 actually
addresses register 30000)
count: UINT number of
register to be read limited to
256
byteorder: USINT data byte
format (modbus rtu data byte
are organized with HI byte
first, but some controllers put
LO byte first)
0 HI – LO order
1 LO – HI order
OUTPUT:
Returned value: UINT
0 if modbus request has been
fulfilled 1 if modbus is busy;
Error: if any it’s written in
MODBUSstatus[1];
MB_f05
ME7000_14 03/11
Forces either ON or OFF the
referenced coil status.
Function does support
broadcast, in this case tha same
coil refrence is forced in all the
attached slave.
87
Values: Read data are stored in
MODBUSdata array.
MODBUSdata[0] = number of
the read items
MODBUSdata[i] = register
value
INPUT:
slave_addr: UINT salve
address
coil_addr: UINT coil address
coil_state: UINT 0 forces the
coil status to OFF, 1 forces the
coil status to ON
s.r.l. mect
TPAC tutorial
Example:
OUTPUT:
Returned value: UINT
0 if modbus request has been
fulfilled1 if modbus is busy;
Error: if any it’s written in
MODBUSstatus[1];
MB_f06
Preset a value into a single
holding register (4X reference).
When broadcast, the function
presets the same register
reference in all attached slaves.
INPUT:
slave_addr: UINT slave
address
reg_addr: UINT register
address to be referenced
(register 40001 actually
reference register 40000).
Value to be written in the
register is read from
MODBUSdata[0]
OUTPUT:
Returned value: UINT
0 if modbus request has been
fulfilled 1 if modbus is busy;
Example:
Error: if any it’s written in
MODBUSstatus[1];
MB_f0F
Forces each coil (0X reference)
in a sequence of coils to either
ON or OFF. When broadcast
the function forces the same
coil references in all attached
slaves.
INPUT:
slave_addr: UINT slave
address
coil_addr: UINT coil starting
address
coil_count: UINT number of
coils to be set
Values to be set for coils are
read from the MODBUS data
array.
MODBUSdata[i]: coil status
(0 OFF, 1ON)
MODBUSdata[0] status for
coil_addr
MODBUSdata[1] status for
coil_addr +1
MODBUSdata[N] status for
coil_addr +N
ME7000_14 03/11
88
s.r.l. mect
TPAC tutorial
Example:
OUTPUT:
Returned value: UINT
0 if modbus request has been
fulfilled 1 if modbus is busy;
Error: if any it’s written in
MODBUSstatus[1];
MB_f10
Preset values into a sequenze
of holding registers (4X
references). When broadcast
the function presets the same
register references in all
attached slaves.
INPUT:
slave_addr: UINT slave
address
start_addr: UINT starting
register address
count: UINT number of
registers to be set
Values to be set for coils are
read from the MODBUS data
array.
MODBUSdata[0] start_addr register value
MODBUSdata[1] start_addr+1 register value
MODBUSdata[N] start_addr + N register value
Example:
OUTPUT:
Returned value: UINT
0 if modbus request has been
fulfilled 1 if modbus is busy;
Error: if any it’s written in
MODBUSstatus[1];
MB_f16
ME7000_14 03/11
Modifies the contents of a
specified 4X register using a
combination of an AND mask
an OR mask and the register
current contents. The function
can be used to set or clear
individual bits in the register.
Broadcast is not supported.
89
INPUT:
slave_addr: UINT slave
address
start_addr: UINT register
address
Mask values are read from
MODBUSdata
MODBUSdata[0] AND
mask
MODBUSdata[1] OR mask
s.r.l. mect
TPAC tutorial
Example:
OUTPUT:
Returned value: UINT
0 if modbus request has been
fulfilled 1 if modbus is busy;
Error: if any it’s written in
MODBUSstatus[1];
MB_f17
Performs a combination of one
read and one write operation in
a single modbus transaction.
The function can write new
contents to a group oa 4X
registers and then return the
contents of another group of
4X registers. Broadcast is not
supported.
INPUT:
slave_addr: UINT slave
address
start_addr: UINT starting
address for the registers to be
read
count: UINT number of
location to be read
reg_addr: UINT starting
address for the registers to be
written
reg_count: UINT number of
the registers to be written
byteorder: USINT data byte
format (modbus rtu data byte
are organized with HI byte
first, but some controllers put
LO byte first)
0 HI – LO order
1 LO – HI order
Value to be written into
registers are read from
MODBUS dat array.
MODBUSdata[0] reg_addr
register value
MODBUSdata[1] reg_addr
+ 1 register value
MODBUSdata[N] reg_addr
+ N register value
ME7000_14 03/11
90
s.r.l. mect
TPAC tutorial
Example:
OUTPUT:
Returned value: UINT
0 if modbus request has been
fulfilled 1 if modbus is busy;
Error: if any it’s written in
MODBUSstatus[1];
Read values are stored in the
MODBUSdata array.
MODBUSdata[0] = number of
the read elements.
MODBUSdata[1] = start_addr
register value
MODBUSdata[2] =
start_addr+1 register value
MODBUSdata[N] = start_addr
+ N –1 register value.
MODBUS function example:
SLAVE_ADD:=1;
START_ADD:=40689;
COUNT:=12;
ORDER:=0;
IF MODBUSstatus[0] = 0 THEN
MB_READ1:=MB_f03(SLAVE_ADDRESS, START_ADD, COUNT, ORDER);
END_IF;
IF MB_READ1 = 0 THEN
(* LINE FREQUENCY*)
Hz:=MODBUSdata[5]/10;
(* POWER FACTOR*)
PF_Tot:=TO_USINT(MODBUSdata[8]/10);
END_IF;
16.9 CanOpen FUNCTIONS
Two functions are given to read and write SDO on CanOpen network.
A code is returned indicating whether the operation was successful or not. The error code table is
given below:
0 - OK
1 - Variable name invalid
2 – Not existent variable
3 - CAN channel number invalid
126 - Node is not in running state
127 - Operation not yet available
ME7000_14 03/11
91
s.r.l. mect
TPAC tutorial
Function Name
SDORead
Description/
Example
Read a variable from a
CanOpen node through
SDO
Input Parameter /
Returned Value
Input:
ch: UINT:CanOpen Network (0 or 1) to
poll
var_name: STRING:
String containing the variable name as
defined in the CanOpen Netbuilder setup
of the network
Output:
Error Code
SDOWrite
Write on a variable of a
CanOpen node through
SDO
Input:
ch: UINT:CanOpen Network (0 or 1) to
poll
var_name: STRING: String containing
the variable name as defined in the
CanOpen Netbuilder setup of the
network
data: UDINT: Value to be written
Output:
Error Code
SDORead() Example
Read the variable pr80 from a node in the CanOpen network number 1.
IF can_var= 0 THEN
ris:=SDORead(1,'pr80');
can_var:=1;
END_IF;
IF ris =0 THEN
IF SDOStatus > 0 AND can_var = 1 THEN
count_can:=count_can+1;
can_var:=0;
PR80_2:=SDODATA;
END_IF;
END_IF;
Since the node takes some time to respond to a request, the value read from the node by the
SDORead function is stored in the SDOData variable, but is not immediately available. The
programmer must therefore check SDOStatus variable, which is set to 0 as a result of the
command, and goes to 1 when SDOData contains the value read from the node. SDOStatus goes
back to zero after a reading of SDOData.
SDOWrite() Example
Write 100 in the pr81 variable for a CanOpen node on the network 0:
IF SDOStatus = 0 THEN
ris:=SDOWrite(1,'pr81',100);
END_IF;
ME7000_14 03/11
92
s.r.l. mect
TPAC tutorial
Before writing check that SDOStatus is zero meaning that previous write operation was successful.
16.10 HMI TEXT FILE IMPORT FUNCTIONS
To view one or more text files in a HMI project, call the function HMItextLoad. The function
returns a code indicating whether the operation was successful or not. The error codes table is given
below:
0 - Success
1 - Error reading file contents
2 - Invalid file name
3 - File does not exist
4 - File cannot be open
Function Name
Description/
Example
Input Parameter /
Returned Value
Input:
Filename
Output:
Error code
HMItextLoad
If the function returns zero, the variable FILE_READ contains the address of the read file. To
display the file contents, create a string variable long enough to contain the file and assign the
FILE_READ pointer to the created string.
The following example shows the usage of the HMItextLoad function: define the variable
File_content as a 500 items STRING variable in which the file contents will be saved.
If a call to HMItextLoad returns zero assign the value in the FILE_READ variable to
File_content, otherwise write an error message.
Result:= HMItextLoad(‘italian_instruction ’);
IF Result = 0 THEN
File_content:=FILE_READ;
ELSE
File_content:=’ file not available’;
END_IF;
As a result of the previously described step the variable File_content may be either the content of
read file or the error message. To display the File_content assign the variable to a TextBox in HMI
entering the property "Assoc string".
16.11 DATALOGGER
This section details functions available to store data on a disc mounted on the external USB port,
thus enabling the recording of variables values or events that occurred during the TPAC operation.
The data are stored in text file easily readable into a spreadsheet program for further processing.
Each function returns a code indicating whether the operation was successful or not. The fuctions
and the error code table is given below:
Function Name
ME7000_14 03/11
Input Parameter /
Returned Value
Description
93
s.r.l. mect
TPAC tutorial
Datalog_start
Datalog_get
Input:
Load the USB disk on the TPAC
and check if the available space on BUFF_LENGHT : UDINT
the disk is enough for data logging. Number of sample to log
CHANNELS: UDINT Number of input
to log
INDEX: UINT identifier for the usb
device to be used as storage area (from 1
to 4)
Output:
Error Code DINT
-1 - OK
-2 – Cannot load the USB disk
-3 – Cannot estimate the free space
available on USB disk
-4 – Cannot create the directory to store
logged data
>=0 – MAX allowed BUFF_LENGHT
Save a variable on the USB disk
Input:
LABEL : STRING: String containing
the tag to be associated the logged data
i.e. the heading of the data column.
VALUE: REAL: the name of the
variable that is logged.
Output:
Error code: DINT
* 0 - OK
* 1 Error
Datalog_stop
Stop the logging and create the log Input:
file
FILE: STRING:
File name for the log file
Output:
Error Code: DINT:
* 0 OK
* >0 error
The programmer must calculate the space needed to store the data for the required time, giving that
each sample stands for 100byte.
If there’s the need to sample five variables every four seconds for three hours, the
BUFF_LENGTH is
5variables * 3 * 3600seconds/4seconds = 13500
That means a free area on the USB disk at least of :
100byte * 5variables * 3 * 3600seconds/4seconds = 1350000 bytes.
If after three hours the sampling process is not stopped, data acquired earlier will be overwritten
following a circular buffer logic.
ME7000_14 03/11
94
s.r.l. mect
TPAC tutorial
If you run the Dalaog_start () function and there’s no enough free space on the USB disk to host the
requested number of samples, the function returns the maximum number of samples allowable by
the USB disk.
After the USB disk has been loaded and free available space evaluated, the Datalog_get() function
is called with the required frequency (in the example once every four seconds). Input parameters for
the Datalog_get() functions are the tag/label to associate to the logged data and the name of the
variable to log.
When the samplig process is over, calling the Datalog_stop() function with the chosen log filename
will output the log.
Sampled data will be available both, in the file given as input parameter for Datalog_stop () and
also in the tempdata directory where there’s stored a file, whose name is the chosen tag, for each
sampled variable.
Below an example of a program in ST, that acquires and saves data from two variables:
(************
variables
VAL1:=(AIN_CH1-4.0)*600.0/16.0;
VAL2:=(AIN_CH2-4.0)*600.0/16.0;
(************
************)
mounting disk
************)
IF state = 0 THEN
num_ch:=2;
(*channel to sample*)
acq_rate:=4;
(* sampling frequency, each 4 seconds*)
acq_dur:=2;
(* acquisition duration 2 hours*)
(* required_byte = 180000*)
(* buffer_lenght = 1800*)
buffer_lenght:=acq_dur*3600/ acq_rate;
ris:=Datalog_start(buffer_lenght, num_ch);
(* there should be at least required_byte of free space on the disk
to honor buffer_lenght *)
state:=1;
END_IF;
(************
setup samples number
************)
IF
state = 1 THEN
IF res < 0 THEN (* loading usb error*)
state:=3;
ELSIF res >0 THEN
(* free space is not enough *)
max_camp:=res;
state:=2 ;
ELSE
state:=2;
max_camp:= buffer_lenght;
END_IF;
TIMERS[1]:=4000;
samples:=0;
END_IF;
(************
data recording
************)
IF state = 2 THEN
ME7000_14 03/11
95
s.r.l. mect
TPAC tutorial
IF
TIMERS[1]=0 AND samples < max_camp THEN
TIMERS_FLAG[1]:=1;
samples:=samples+1;
dummy:=Datalog_get('Temp_ch1',VAL1);
dummy:=Datalog_get('Temp_ch2',VAL2);
ELSIF samples >=max_camp THEN
state:=4;
END_IF;
END_IF;
(************
stop recording
************)
IF state=4 THEN
res:=Datalog_stop('data.txt');
state:=5;
END_IF;
IF state=5 THEN
IF res=0 THEN
state:=6;
ELSIF res<0 THEN
state:=7;
END_IF;
END_IF;
16.11.1 CRYPTO-DATALOGGER – CFR21/11
Datalogger functionality is available also with full compliance to CFR21/11 standard.
The TPAC Crypto-Datalogger works as the previously described standard datalogger except that,
data are ciphered in memory before being written to the storage media.
Decrypted data are available only to whom hold the cipher key and the authorization password used
to log the data themselves, thus ensuring data integrity and protection. Once decrypted, data are
available in text format for easy elaboration with a standard spreadsheet tool.
Name
Description
CryptoDatalog_start
Connect the USB device to
TPAC, check for the available
free space and initialize the
cipher.
ME7000_14 03/11
96
Input Parameter /
Returned Value
Input:
BUFF_LENGHT : UDINT space
required to save data on the usb device
CHANNELS: UINT number of
variables to be logged
INDEX: UINT identifier for the usb
device (from 1 to 4) to be used as storage
area
KEY: STRING 16 characters cipher key
PWD: STRING 8 characters password
s.r.l. mect
TPAC tutorial
CryptoDatalog_get
Save crypted variable value on
the usb device.
CryptoDatalog_stop
Stop Logging. The usb device
contains in the directory
tempdata/ the crypted datalog
for each requested variable.
CryptoDatalog_decrypt
Decrypt variables single
datalogs and create the text full
datalog .
CryptoDatalog_eject
Unmount USB key
ME7000_14 03/11
Output:
Error code DINT
-1 - OK
-2 – USB device cannot be accessed
-3 – Cannot estimate the free space on
the usb device
-4 – Cannot create/cancel directory to
save data
>=0 - MAX number of byte available on
the usb device
Input:
LABEL : STRING: Label for the data to
be saved used as heading of the data
column
VALUE: REAL: Value of the variable
to be saved.
Output:
Error codes: INT
* 0 - OK
* 1 error
Input: costant
Output:
Error Code: UINT:
* 0 OK
* >0 error
Input:
FILE: STRING full datalog filename
SRC_INDEX: UINT identifier (from 1
to 4) for the usb device containing the
source data
DST_INDEX: UINT identifier (from 1
to 4) for the
KEY: STRING 16 characters cipher key
PWD: STRING 8 characters password
Output: INT
* 0 – OK
* > 0 – Error
Input:
INDEX: : UINT identifier for the usb
device (from 1 to 4) to be used as storage
area
Output: INT
* 0 – OK
* > 0 – Cannot unmount USB device
97
s.r.l. mect
TPAC tutorial
16.12 STRINGS MANIPULATION FUNCTIONS
String manipulation is handled by two functions.
Function Name
Str_concat()
Str_inttostr()
Description/
Example
Concatenates two strings
Input parameter /
Returned Value
Input:
IN1:STRING: string to which String2 is
appended
IN2:STRING: string to append to
String1
Convert an integer into a string
Res:=Str_inttostr(34,string1,3,TR
UE);
Result: string1 will be ‘034’
Output:
BOOL: Function result
FALSE OK
TRUE FAIL
Input:
X:UDINT: integer to convert
DEST:STRING: resulting string
WIDTH:USINT: number of digit to be
copied into the string
ZERI:BOOL: set zero filling for missing
digits
Output:
BOOL: function result
FALSE OK
TRUE FAIL
Example: Str_concat():
Define the two strings, String1 and String2, to be appended and an integer that stores function
result.
String1:=’abc’;
String2:=’defg’;
Res:=Str_concat(String1,String2);
When Res = 0 Sgring 1 will be ‘abcdefg’
Example: Str_inttostr():
Define a string and an integer value that stores function result.
Convert to string the number 34 with the result expressed in three digits; zeros make the string
completion.
Res:=Str_inttostr(34,string1,3,TRUE);
When Res=0 String1 will be:’034’
16.13 DATE FUNCTIONS
Two functions handle date manipulation by adding an offset or calculating the difference between
given dates.
Description/
Input Parameter /
Function Name
Example
Returned Value
ME7000_14 03/11
98
s.r.l. mect
TPAC tutorial
Date_add()
Add an offset expressed in days,
weeks, months or year to a give
date and return a string congaing
the calculated date.
TYPE: STRING: offset type ‘D’ Days,
‘W’ Weeks, ‘M’ Months, ‘Y’ Year, to be
added to date represented by the string
START.
START:STRING string representing
the starting date to which offset will be
added to.
Date format is: DD-MM-YYYY
OFFS:UDINT: offset value
Output:
STRING: string that contains the
resulting date.
Date_diff()
Calculate the difference between
two dates, and returns a value
expressed in days, weeks, months
or years.
START: STRING: first date
END: STRING: second date
TYPE: STRING: result type time unit
Output:
DINT:
Contains the difference between first and
second date expressed in the chosen
result type time unit.
Example Date_add()
Define a string to contain the function result.
Add 2 weeks to the date expressed as DD-MM-YYYY.
String1:=Date_add(‘W’,’06-03-2008’,2);
String1 will be: ’20-03-2008’.
In case of a wrong intial date format (i.e. the initial date is expressed as MM-DD-YYYY instead of
DD-MM-YYYY) the result string String1 will contain ‘Error’.
Example Date_diff()
Define a DINT variable to contain the function result.
Calculate how many days there are between the ’25-03-2008’ and ’18-03-2008’.
Res:=Date_diff(’25-03-2008’, ’18-03-2008’,’D’) ;
Res will be –8.
17.0 TPAC Remote Options
Starting from software release 3.0 TPAC10 includes the following new features:
• Remote Desktop : remote access to HMI interface
• Monitor: PLC variables state monitoring
• Remote PLC: remote PLC creation or remote intercation with on-board PLC to mange
system’s I/O.
The above mentioned features are accessible through LAN interface hence a valid IP configuration
must be provided to the operator panel; access through WAN is granted by means of proper virtual
private network configuration.
ME7000_14 03/11
99
s.r.l. mect
TPAC tutorial
NOTE: Hereafter TPAC remote options will be exemplified assuming the default TPAC IP
address: 192.168.0.210. During normal operations TPAC default IP address must be replaced by
the address assigned on your own LAN.
17.1 Remote Desktop
The TPAC offers remote WEB access to the HMI environment allowing the final users to interact
with the HMI by their computer mouse like if they were working directly on the TPAC touchscreen
interface.
17.2 Remote Desktop Access
To access remote desktop features open the browser ( either Internet Explorer 6.0, Mozilla
Firefox 2.0 or higher ) and type in the address bar the following URL:
http://192.168.0.210/remote_desktop/
A web page like the one depicted below will appear. Insert the remote desktop access password and
press OK. The fully functional HMI page currently displayed on the TPAC screen will be also
visible and accessible by the mouse in the browser until when the “Disconnect” button is pressed.
ME7000_14 03/11
100
s.r.l. mect
TPAC tutorial
17.3 Setting Remote Desktop Password
Remote Desktop default password is “root”. To set a different password follw the link “Set
Password” available in the http://192.168.0.210/remote_desktop/ web page. In the displayed form
insert the current password, the new password, retype the new password as confirmation and press
button SET. The freshly changed password is immediatly active and must be used for the next log
in. The remote desktop password never expires and can be changed whenever necessary.
17.4 Monitor
PLC variable’s values can be accessed through the monitor feature. Also programmer's plc variable
and I/O status are made available.
17.5 Variables Upload
Before accessing PLC variables through the monitor feature the variables data set created by the
PLC programmer must be exported to the TPAC.
When a plc project is compiled by LogicLab the tool creates also an “.exp” file that needs to be sent
to the TPAC to synchronize the variables data set.
From LogicLab Tools menu chose upload_var, the following window will be displayed.
ME7000_14 03/11
101
s.r.l. mect
TPAC tutorial
The UPLOAD PLC Vars window displays:
•
the IP Address field that shows the IP already set for the current project connection, if
necessary please modify the address with the IP of the TPAC where the variables data set needs
to be exported.
•
the username and password fields show the last credentials provided to access the TPAC,
please change them according to your current TPAC configuration
•
the field File List shows all the exp files in the current project directory.
Once the fields IP address, username and password are filled with the correct values click on the
Connect button and wait until the red box becomes green which means the connection with the
TPAC has been successfully established.
Select the “exp” file to be uploaded to the TPAC and press the Upload button. Upon successful
completion, a messagge box “Upload OK” will be displayed.
ME7000_14 03/11
102
s.r.l. mect
TPAC tutorial
17.6 Monitor Access
To access the monitor feature type, in the browser address bar, the following address
http://192.168.0.210/monitor/ . In the displayed web The left portion of the displayed page supplies
the PLC variables and I/O list logically grouped as defined by the PLC programmer.
To view current I/O staus, variable’s value as single or group expand the the tree and select the
elements whose value is desidered. Selection are made by checking the box on the left side of the
variable’s name for single variable selection and by checking the group name for multiple selection.
Press the button “GET VALUES “ to retrieve the values/state for the selected items. To update the
displayed values mantain or modify your selection and press the “GET VALUEs” button whenever
needed.
The “CLEAR” button cancel the displayed values.
ME7000_14 03/11
103
s.r.l. mect
TPAC tutorial
17.7 Remote PLC
The TPAC PLCLIB library allowes the programmer to:
1. Create a PC application that accesses the TPAC I/O system: analog/digital local
input/output or CAN bus input/output.
2. Interact with the PLC program eventually already programmed for the panel by writing in a
specific memory area.
PLCLIB is made available as windows dll in both OMF and COFF format.
17.8 PLCLIB Description
PLCLIB publishes through the plclib.h header the following data type and functions..
Data type
plcuservar_t
The plcuservar_t is used to allocate in memory the array containg all the PLC variables defined in
the PLC program to which is directed the communication. Since the array is memory allocated it
needs to be freed by the programmer when no more needed.
The array consist of structured items, defined as:
Typedef struct plcuservar {
char name[32];
char type[16];
}plcuservar_t;
ME7000_14 03/11
104
s.r.l. mect
TPAC tutorial
The name of the variable is used to read/write it.
The detailed description of the meaning and the usage of each variables comes with the PLC
documentation. The type of the variable can be used by the user to rapresent it.
The following variable type are available:
TYPE
BOOL
SINT
USINT
INT
UINT
DINT
UDINT
BYTE
WORD
DWORD
STRING[N]
ME7000_14 03/11
DIMENSION (BYTE)
1
1
1
2
2
4
4
1
2
4
N
RANGE
From 0 to 1
From –128 to +127
From 0 to 255
From –32768 to + 32767
From 0 to 65535
From –2^31 to + 2^31 – 1
From 0 to 2^32 – 1
From 0 to 255
From 0 to 65535
From 0 to 2^32 – 1
‘\0’ Terminated string
105
s.r.l. mect
TPAC tutorial
17.9 Functions
Plc_init
NAME
plc_init
PROTOTYPE
int plc_init( char *hostname)
DESCRIPTION
Open the communication with the plc
PARAMETER
Char * hostname: is either the hostname or an IPv4 address in
standard dot notation IP1.IP2.IP3.IP4
RETURED
VALUE
•
•
0 on error;
the plc communication descriptor on success
Plc_release
NAME
plc_release
PROTOTYPE
int plc_release( int plcID)
DESCRIPTION
Close the communication with the plc.
PARAMETER
Int plcID: PLC communication descriptor returned by plc_init
function.
RETURNED
VALUE
•
•
0 on success
Negative on error
Plc_var_list
NAME
plc_var_list
PROTOTYPE
int plc_var_list( int plcID, plc_uservar_t **list)
DESCRIPTION
Provide the variables available from the PLC
memory allocated in a plcuservar_t array.
ME7000_14 03/11
106
s.r.l. mect
TPAC tutorial
PARAMETER
•
•
Int plcID: plc communication descriptor
plcuservar_t ** pointer to the memory allocated variable
array.
RETURNED
VALUE
•
•
number of the read variables on success
0 or negative on error
Plc_var_read
NAME
plc_var_read
PROTOTYPE
int plc_var_read( int plcID, char *label void *data)
DESCRIPTION
attempts to read the variable named label
into the data buffer provided by the user.
PARAMETERS
•
•
•
Int plcID: plc communication descriptor
char * label : variable identifier
void *data : pointer to the buffer used to store the value of
the variable named label
RETURNED
VALUE
•
•
0 on success
negative on error
Plc_var_write
NAME
plc_var_write
PROTOTYPE
int plc_var_write( int plcID, char *label void *data)
DESCRIPTION
attempts to write the variable named label
with the content of the data buffer provided by the user.
PARAMETERS
•
•
•
Int plcID: plc communication descriptor
char * label variable identifier
void *data pointer to the buffer used to store the value of
the variable named label
RETURNED
VALUE
•
•
0 on success
negative on error
ME7000_14 03/11
107
s.r.l. mect
TPAC tutorial
NOTE
When trying to write value to "read only" variables will cause
errors. See PLC documentation for the list of writable variables.
When interacting with the PLC already programmed on the panel
the plc_var_write function must be used only to perform wirte in
the RemoteArea. Writing on any of the other variables may
results in unpredictable behaviour or errors.
17.10 Working with PLCIB in a Turbo C++ environment
PLCLIB required format to work with TurboC++ is OMF
Turbo C++ project must include the following files:
3. plclib.h – Header proiding the dll interface
4. plclib_omf.lib – dll import library, to be imported in the project or called by the directive
#pragma comment(lib, “plclib_omf.lib”)
5. plclib_omf.dll – Dll that will be called during program execution. To be copied in the same
folder of the program executable.
17.11 VPN ACCESS CONFIGURATION
TPAC remote features can be accessed also from multiple networks by activating the already
embedded VPN server. A Virtual Private Network ( VPN) delivers private network services over a
public infrastructure by means of authentication and content encryption to grant communication
security. At a glance using the VPN service requires TPAC configuration and pc client/s installation
and configuration.
To simplify VPN usage when security is not a major concern, the TPAC can adopt the provided
standard VPN configuration both for the panel and the client; the latter is included in the
installation cd along with the vpn client executable software.
If using the standard configuration the TPAC is accessible by vpn clients on the ip address
10.8.0.1. The connecting clients will requires the installation of openvpn-2.0.9-install.exe software ;
furthermore one of the provided client configuration must be copied in the sub-directory config of
the installation path.
When an ad hoc configuration is needed besides installing the vpn client software on the connetting
clients a PKI (public key infrastructure) needs to be established The PKI grants the communication
security through a separate certificate and private key for the server and each client, and a master
Certificate Authority (CA) certificate and key which is used to sign each of the server and client
certificates.
17.12 PKI setting up
From the installation CD copy the openvpn-2.0.9-install.exe file in any directory on the pc where
you wish to install the client. Double click on the executable name, the installation wizard will
guide you through the installation process. The default installation path is C:\Program
Files\OpenVPN, you can change it if necessary.
Once installation has been completed the directory C:\Program Files\OpenVPN\easy-rsa contains
all the tools needed to set up your PKI.
ME7000_14 03/11
108
s.r.l. mect
TPAC tutorial
NOTE:
This tutorial is written assuming the installation path unchanged from the default proposed by the
wizard.
OpenVPN will only run on Windows 2000 or later. Also note that OpenVPN must be installed and
run by a user who has administrative privileges (this restriction is imposed by Windows, not
OpenVPN). The restriction can be sidestepped by running OpenVPN in the background as a
service, in which case even non-admin users will be able to access the VPN, once it is installed.
17.13 Certification authority
OpenVPN supports bidirectional authentication based on certificates, meaning that the client must
authenticate the server certificate and the server must authenticate the client certificate before
mutual trust is established. Both server and client will authenticate the other by first verifying that
the presented certificate was signed by the master certificate authority (CA), and then by testing
information in the now-authenticated certificate header, such as the certificate common name or
certificate type (client or server).
From START->RUN… type “command” to open a DOS console window and cd to C:\Program
Files\OpenVPN\easy-rsa. Run the following batch
> init-config
Now edit the vars.bat file and set the KEY_COUNTRY, KEY_PROVINCE, KEY_CITY,
KEY_ORG, and KEY_EMAIL parameters. Don't leave any of these parameters blank. For
example:
export
export
export
export
export
KEY_COUNTRY=”IT.”
KEY_PROVINCE=”Italy”
KEY_CITY=”Turin”
KEY_ORG=”MyCompany”
KEY_EMAIL= [email protected]
Run the following commands:
> vars
> clean-all
> build-ca
The clean –all command will cancel any preexisting pki infrastructure while the final command
build-ca will build the certificate authority (CA) certificate and key. Note that in the above
sequence, most queried parameters were defaulted to the values set in the vars.bat files. The only
parameter which must be explicitly entered is the Common Name, for example "MyCompanyCA".
The certificate authority (CA) certificate ca.crt and key ca.key files are stored in C:\Program
Files\OpenVPN\easy-rsa\2.0\keys
17.14 Session key
VPN connections require also a session key rebuilt by default each hour by using the parameters
from the pem file. To get the parameter file cd to C:\Program Files\OpenVPN\easy-rsa. Run the
following batch
> build-dh
The obtained dh1024.pem file is stored in C:\Program Files\OpenVPN\easy-rsa\2.0\keys
ME7000_14 03/11
109
s.r.l. mect
TPAC tutorial
17.15 TPAC certificate and private key
Now we will generate a certificate and private key for the server. From the prompt console in the
C:\Program Files\OpenVPN\easy-rsa directory run the following batch:
> build-key-server tpac010
As in the previous step, most parameters can be defaulted. When the Common Name is queried,
enter "tpac010". Two other queries require positive responses, "Sign the certificate? [y/n]" and "1
out of 1 certificate requests certified, commit? [y/n]".
17.16 Client certifcate and key
Generating client certificates is very similar to the previous step. . From the prompt console in the
C:\Program Files\OpenVPN\easy-rsa directory run the following batch:
> build-key my_pc
As in the previous step, most parameters can be defaulted. When the Common Name is queried,
enter "my_pc". Again answer yes to the sign certificate query. You will obtain the ny_pc.crt and
my_pc.key files respectively certificate and key for the client. Remember this step can be repeated
to genereate as many as client certificate and key you need.
Now we need only to move all these configuration file in the proper directories to complete the
VPN set up.
17.17 TPAC VPN Configuration
From the SAMPLE_VPN directory on the installation cd copy the sample_server.conf file.
Open the file with a text editor and modify it according to your needs. You are not allowed to
change the used protocol (udp), the used device (tun) and the path and name for the server
certificates and key. Once you are finished, rename the sample_server.conf file in tpac010.conf
Open your browser and type the following address http://192.168.0.210/vpn.cgi to access the vpn
configuration upload page. Upload the following files:
• ca.crt
• dh1024.pem
• tpac010.key
• tpac010.crt
• tpac010.conf
17.18 Client VPN Configuration
From the SAMPLE_VPN directory on the installation cd copy the sample_client.conf file.Open the
file with a text editor and modify it according to the server configuration and substitute in the
following lines
cert ./client.crt
key ./client.key
the filename you ha chosen for the client certificate and key, in the above example “my_pc”
cert ./client.crt cert ./my_pc.crt
key ./client.key key ./my_pc.key
ME7000_14 03/11
110
s.r.l. mect
TPAC tutorial
Also rename the sample_client.conf file with the COMMON NAME you have chosen for the client,
in our example the client.conf file will be my_pc.conf.
Copy the following files:
• ca.crt
• my_pc.crt
• my_pc.key
• my_pc.conf
in the C:\Programmi\OpenVPN\config directory.
This completes your client configuration.
To configure more than one client install the vpn client (openvpn-2.0.9-install.exe) on each pc client
and repeat steps outlined in paragraph 17.16 and 17.18 as many times as you need.
17.19 TPAC VPN address
If using the standard configuration TPAC VPN address is 10.8.0.1 otherwise the address is
specified in the tpac010.conf file.
NOTE: if you require to contact by vpn connection the TPAC from external networks please be
sure that your gateway allows udp communication on port 1194 and that such communication is
redirected to the TPAC.
18.0 USB ALLOWED OPERATIONS
To expand the number of usb memory device actually pluggable into the panel, one and only one
usb hub can be connected to the TPAC usb port. Four port hub usb device is the maximum
expansion currently supported. The programmer retrieves the number and the working status of the
available usb port through the USBstatus array, while the USBfeedback array reports the
locked/unlocked status for the whole usb subsystem, i.e. availability to process the requested
operation (cfr TPAC manual).
Permitted operation are between two usb device or on the same usb device itself:
• Copy file or directory
• Delete file or directory
Operations that refers to directory are performed recursively.
Name
Description
Usb_copy
Copy the specified file in the
specified destination.
Copy the specified directory with
ME7000_14 03/11
111
Input Parameter /
Returned Value
Input:
SRC : STRING Path on the usb device
for the file or directory to be copied
DST: STRING Path on the usb device
where the file or directory must be
copied to
SRC_INDEX: USINT identifier (from 1
to 4) for the usb device containing the
source data
DST_INDEX: USINT identifier (from 1
to 4) for the data destination usb device
s.r.l. mect
TPAC tutorial
Output:
Error code UINT
* 0 – OK
* 1 – Error
Usb_delete
Save crypted variable value on the Input:
usb device.
LABEL : STRING: Label for the data to
be saved used as heading of the data
column
VAR: REAL: Value of the variable to be
saved.
Output:
Error codes: DINT
* 0 - OK
* 1 error
Usb_mkdir
Create a directory on the chosen
usb device
INDEX: USINT identifier (from 1 to 4)
of the target usb device
Output:
Error Code: UINT:
* 0 OK
* 1 error
* 2 Directory already exists
19.0 APPENDIX 3
19.1 Software Registration
The development software
LogicLab
PageLab and
NetBuilder,
must be registered.
19.2 Registration code request for LogicLab, PageLabe and NetBuilder
The installation program, in its final stage, prompts the user a registration form that asks some
personal details and the approval for the MECT newsletter subscription.
ME7000_14 03/11
112
s.r.l. mect
TPAC tutorial
Once the form has been filled, by pressing the button Register an email will be sent to MECT. This
email contains the registration code request for LogicLab, PageLab and NetBuilder software and the
serial number of the hard disk where the installation has took place.
If the software installation has been completed on a PC with no Internet connection the
aforementioned email must be copied and manually sent to MECT.
The registration step can be also performed after completing the installation through the register.exe
program available on the installation CD. The program launches the to be filled registration form.
NOTE: register.exe execution must take place on the same PC where the development software has
been installed.
19.3 LogicLab and PageLab registration
Once the registration code have been shipped, to register Axel software (LogicLab and PageLab)
follow the instruction displayed in the registration window.
19.4 NetBuilder registration
When the code is shipped complete the registration by inserting the code in the registration form.
ME7000_14 03/11
113
s.r.l. mect
TPAC tutorial
19.5 Software update
TPAC is based on different software that can be updated disjointedly.
Software can be grouped as follows:
1. System Software (the OS and libraries)
2. Services Software (configuration and settings for example the soft keyboard style)
3. User Software (PLC HMI program and Can network settings)
Software belonging to group 1 and 2 can be updated merely through USB pen.
Instead software described in group 3 can be updated through USB pen or LAN (by using the
development tool LogicLAb, PageLab and NetBuilder)
19.5.1 System software update
MECT supplies to its customers system software update by means of a file named sysupdate.sh
To upgrade the TPAC user must copy the file sysupdate.sh on the USB, plug the pen in the usb
port and then reboot the device. Updates will be automatically effective upon reboot completion.
Update files can be also loaded on the USB pen through the dashboard. Go through Target..
Settings, and then Firmware upgrade, a window for sysupdate.sh file selection will be displayed
by pressing Browse. Once selected the update file it can be download on the USB pen by pressing
Export current configuration.
19.5.2 Services software update
Services software includes all user modified software that is not specific to any project.
To update such files, like soft keyboard files pursue the following steps: build the update file on the
PC (for example skbd.txt and skbd.gif), copy the new files on the USB pen and plug the pen on the
TPAC and reboot the device. Updates become effective once the TPAC restarts.
19.5.3 User software update
User software groups all application software, PLC and HMI programs and CANOPen
configuration.
Two kinds of possible TPAC users can be distinguished: the programmer and the final user.
The former can update programs running on the TPAC through the development tool PageLab,
LogicLab and NetBuilder. The latter may not have the development environment or it can happens
that the TPAC is used on equipments without Ethernet connection; in these cases update can be
provided through the USB pen. Once the update file named sysupdate.sh is available, it must be
copied on the USB pen. By restarting the TPAC with the USB pen plugged the device will
automatically obtain the updates. Sysupdate.sh is built through the command Download current
application available in the TPAC web interface.
ME7000_14 03/11
114