1
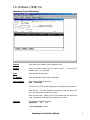
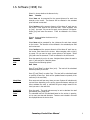
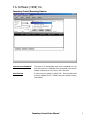
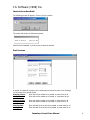
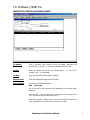
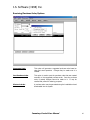
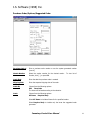
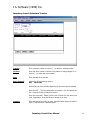
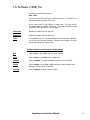
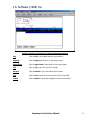
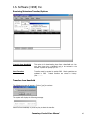
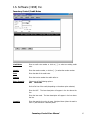
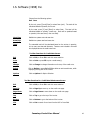
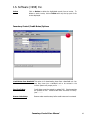
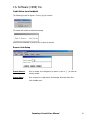
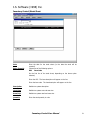
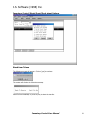
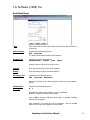
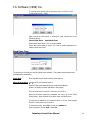
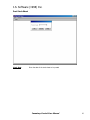
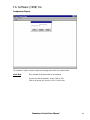
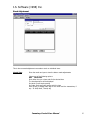
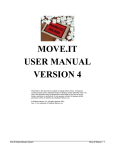
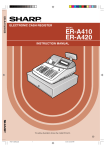
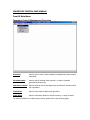
INVENTORY CONTROL USER MANUAL
From JS Main Menu:
Inventory Control/Maintenance/Receiving
Receiving
Used to enter invoices. Stock quantities are adjusted and prices may be
maintained.
Purchase Orders
Used to enter a purchase order manually, or create a computer
generated purchase order.
Interstore Transfer
Used to create an invoice and adjust stock quantities for transfers within
the organization.
Credit Note
Used to enter credits to adjust stock quantities.
Stock Sheet
Used to create stock sheets for manual inventory, or using the telxon.
For more information on the above menu choices, please refer to the following pages.
J.S. Software (1998) Inc.
Inventory Control/Receiving
Invoice
Enter the invoice number from the supplier invoice
Vendor
Select the vendor number for the desired vendor.
Vendors, click[…], or press F6.
Date
Enter the date of the invoice
PO Number
Enter the purchase order number if applicable
Enter Items By
Choose from the following options:
UPC Item Code
To view list of
On the first line of the invoice, depending on the above option selected;
Enter the UPC. The item description will appear in the box above the
line. Press the F6 key to search for an item.
Enter the item code. Select from the list of items with the same item
code, if applicable. Press the F6 key to search for an item.
Discount
Choose from the following options:
No (blank)
%
$
Select no discount, continue
Inventory Control User Manual
2
J.S. Software (1998) Inc.
Select %, choose whether the discount is by:
Item
Invoice
Select item and be prompted for the percent discount for each item
entered on the invoice. The discount will be reflected in the extended
price field and invoice total.
Select invoice and the percent discount will be taken off each item on
the invoice. Enter items on the purchase order. When complete, click
on [exit]. A prompt “Do you want to apply invoice discount” will appear.
Select [yes] and enter the amount. It will be reflected in the invoice
total.
Select $, choose whether the discount is by:
Item
Invoice
Select item and be prompted for the $ discount for each item entered
on the invoice. The discount will be reflected in the extended price field
and invoice total.
Select invoice and the percent discount will be taken off each item on
the invoice. Enter items on the invoice. When complete, click on [exit].
A prompt “Do you want to apply invoice discount” will appear. Select
[yes] and enter the $ amount. It will be reflected in the invoice total.
Quantity
Unit
Enter the quantity by unit or by case. Weighted items (when the scale is
set to Y) are entered to 3 decimal places.
Choose from the following options:
Unit Case
Press [I] and [Enter] to select Item (unit). The total will be calculated
based on quantity X unit cost.
Press [C] and [Enter] to select Case. The total will be calculated based
on quantity X case cost. Stock will be updated based on quantity X the
case size (in the next field).
Cost/Case
Enter case cost and how many items per case. System will calculate unit
cost and then depending on the pricing type and tolerance settings will
either calculate the retail, or calculate the gross margin based on the
retail you enter in the next field.
Retail/Spl
Enter the retail. The retail tolerance may be set to calculate the retail
automatically using fixed gross.
The extended total will be calculated based on the entries in quantity,
unit or case, case size and discounts. Taxes are not included in this total
but displayed above the invoice lines.
Total
Inventory Control User Manual
3
J.S. Software (1998) Inc.
Tool Bar Functions for Receiving Screen
Exit
Click on Exit, or Press F4 to exit this menu selection.
Print
Click on Print or press F5 to print an invoice(s).
Change
Click on Change to change information on the top of the invoice.
Delete
Click on Delete or press Ctrl + F12 to delete an entire invoice, while
displaying the top part of the invoice.
Options
Click on Options to select Invoice Options.
Tool Bar Functions for Receiving Maintenance Screen
Exit
Click on Exit, or Press F4 to exit this menu selection.
Page Up
Click on Page Up to move up on the invoice page.
Page Down
Click on Page Down to move down on the invoice page.
Top
Click on Top to go to the top of the invoice.
Bottom
Click on Bottom to go to the bottom of the invoice.
List
Click on List to search for an item from the UPC or Item field.
Update
Click on Update to display the record in Point of Sales.
Info
Click on Info to display pricing screen.
Delete
Click on Delete to delete the highlighted record from an invoice.
Inventory Control User Manual
4
J.S. Software (1998) Inc.
Inventory Control/Receiving/Options
Invoices From Handheld
This option is for downloading items from a handheld unit. You
may scan items into a handheld unit to be entered in the invoice.
System will prompt you for invoice #, PO # and date.
Post Invoices
Invoices must be posted to update POS. Stock quantities and
prices are updated in POS. Posted invoices are stored in history.
(see Reports..
Inventory Control User Manual
5
J.S. Software (1998) Inc.
Invoices from Handheld
The following prompt will appear. Click on [yes] to continue
The system will display the following message.
Send file from Handheld, or press any key to abort the transfer.
Post Invoices
A specific # or date OR a range of #’s or dates may be entered for each of the following:
Ie: all invoices for a specific vendor
Enter the invoice number to be posted, or press enter for all
Starting Invoice
Ending Invoice
Enter the invoice number to be posted, or press enter for all
Starting Vendor
Ending Vendor
Enter the vendor number to be posted, or press enter for all
Enter the vendor number to be posted, or press enter for all
Starting Date
Ending Date
Enter the date of the invoice to be posted, or press enter for all
Enter the date of the invoice to be posted, or press enter for all
Inventory Control User Manual
6
J.S. Software (1998) Inc.
INVENTORY CONTROL/PURCHASE ORDER
PO Number
Enter a purchase order number or use the system [generate next
number] key, or click on […] to select an existing purchase order.
Vendor
Select the vendor number for the desired vendor.
Vendors, click[…], or press F6.
PO Date
Enter the date the purchase order is created.
Shipping Date
Enter the expected shipping date of the order.
Enter Items By
Choose from the following options:
UPC Item Code
To view list of
On the first line of the purchase order, depending on the above option
selected;
Enter the UPC. The item description will appear in the box above the
line. Press the F6 key to search for an item.
Enter the item code. Select from the list of items with the same item
code, if applicable. Press the F6 key to search for an item.
Inventory Control User Manual
7
J.S. Software (1998) Inc.
Discount
Choose from the following options:
no
%
$
Select no discount, continue
Select %, choose whether the discount is by:
Item
Invoice
Select item and be prompted for the percent discount for each item
entered on the purchase order. The discount will be reflected in the
extended price field and purchase order total.
Select invoice and the percent discount will be taken off each item on
the purchase order. Enter items on the purchase order. When
complete, click on [exit]. A prompt “Do you want to apply invoice
discount” will appear. Select [yes] and enter the amount. It will be
reflected in the purchase order total.
Select $, choose whether the discount is by:
Item
Invoice
Select item and be prompted for the $ discount for each item entered
on the purchase order. The discount will be reflected in the extended
price field and purchase order total.
Select invoice and the percent discount will be taken off each item on
the purchase order. Enter items on the purchase order. When complete,
click on [exit]. A prompt “Do you want to apply invoice discount” will
appear. Select [yes] and enter the amount. It will be reflected in the
purchase order total.
Quantity
Unit
Enter the quantity by unit or by case. Weighted items (when the scale is
set to Y) are entered to 3 decimal places.
Choose from the following options:
Unit Case
By the unit, press [I] and [Enter] to select Item (unit). The total will be
calculated based on quantity X unit cost.
By the case, press [C] and [Enter] to select Case. The total will be
calculated based on quantity X case cost. Stock will be updated based
on quantity X the case size (in the next field).
Cost/Case
Defaults to system cost and case size. It may be changed.
Retail/Spl
Defaults to system retail and case size. It may be changed.
Total
The extended total will be calculated based on the entries in quantity,
unit or case, case size and discounts. Taxes are not included in this total
but displayed above the invoice lines.
Inventory Control User Manual
8
J.S. Software (1998) Inc.
Tool Bar Functions for Purchase Order Screen
Exit
Click on Exit, or Press F4 to exit this menu selection.
Print
Click on Print or press F5 to print purchase order(s).
Change
Click on Change to change information on the top of the purchase
order.
Next #
Click on Next # for a system generated purchase order number.
Delete
Click on Delete or press Ctrl + F12 to delete the selected item on
a purchase order. To delete an entire purchase order, click on Delete
while displaying the top part of the purchase order.
Options
Click on Options to select Purchase Order Options.
Tool Bar Functions for Purchase Order Maintenance Screen
Exit
Click on Exit, or Press F4 to exit this menu selection.
Page Up
Click on Page Up to move up on the purchase order page.
Page Down
Click on Page Down to move down on the purchase order page.
Top
Click on Top to go to the top of the purchase order.
Bottom
Click on Bottom to go to the bottom of the purchase order.
List
Click on List to search for an item from the UPC or Item field.
Update
Click on Update to display the record in Point of Sales.
Info
Click on Info to display purchase and stock information screen.
Delete
Click on Delete to delete the highlighted record from the purchase
order.
Inventory Control User Manual
9
J.S. Software (1998) Inc.
Receiving/Purchase Order/Options
Suggested Order
This option will generate a suggested purchase order based on
sales and stock quantities. Changes may be made once it is
created.
Post Purchase Order
This option is used to post the purchase order that was created
manually or the suggested purchase order. Once the purchase
order is posted, changes cannot be made to it. It may be
recalled and printed for ordering purposes.
Electronic Order
A purchase order may be generated using the handheld unit and
downloaded into the system.
Inventory Control User Manual
10
J.S. Software (1998) Inc.
Purchase Order/Options/Suggested Order
Purchase Order #
Enter a purchase order number or use the system generated number
[next #].
Vendor Number
Select the vendor number for the desired vendor.
Vendors, click[…], or press F6.
Order Date
Enter the date the purchase order is created.
Shipping Date
Enter the expected shipping date of the order.
Order By
Choose from the following options:
UPC Item Code
The items will be listed according to the selection.
Order
Choose from the following options:
All Items Required Only
To view list of
Select All Items to include all items for the specified vendor.
Select Required Only to include only the items the suggested order
generates.
Inventory Control User Manual
11
J.S. Software (1998) Inc.
Sort By
Choose from the following options:
Location Class Family
Items may be
eliminated from the purchase order. Ie: To exclude items with a blank
location, enter a location range starting with the first location in the
system.
Select how to sort the items on the purchase order.
Starting
Enter the starting range for the above selection.
Ending
Enter the ending range for the above selection.
Report Based On
Requirement Days
Enter the number of days before the next order.
Sales Starting
Enter the starting date for the sales the suggested order will be based
on.
Sales Ending
Enter the ending date for the sales the suggested order will be based on.
Click on OK.
appear.
A message “Building suggested order printout” will
To view, click on the OK button in the printer box.
To print the purchase order, click on the printer icon, or on File > Print.
To exit, Click on File > Close.
Choose from the following options:
Cancel Purchase Order Save Purchase Order
Click on cancel if the purchase order is no longer needed.
Click on save to make changes to the purchase order and create an
order form.
To recall the saved purchase order, see Reports…
Tool Bar Functions for Suggested Purchase Order Screen
Exit
Click on Exit, or press F4 to exit this menu selection.
Next #
Click on Next # for a system generated purchase order number.
Inventory Control User Manual
12
J.S. Software (1998) Inc.
Inventory Control/Interstore Transfer
Transfer
Enter a transfer number or click on […] to select an existing transfer.
To Store
Enter the store number to whom the products are being shipped to, or
click on […] to select the store number.
Date
Enter the date of the transfer.
Enter Items By
Choose one of the following options:
UPC Item Code
On the first line of the transfer, depending on the above option selected;
Enter the UPC. The item description will appear in the box above the
line. Press the F6 key to search for an item.
Enter the item code. Select from the list of items with the same item
code, if applicable. Press the F6 key to search for an item.
Quantity
Enter the quantity by unit or by case. Weighted items (when the scale is
set to Y) are entered to 3 decimal places.
Inventory Control User Manual
13
J.S. Software (1998) Inc.
Choose from the following options:
Unit Case
By the unit, press [I] and [Enter] to select Item (unit). The total will be
calculated based on quantity X unit cost.
By the case, press [C] and [Enter] to select Case. The total will be
calculated based on quantity X case cost. Stock will be updated based
on quantity X the case size (in the next field).
Cost/Case
Defaults to system cost and case size.
Retail/Spl
Defaults to system retail and case size. .
Total
The extended total will be calculated based on the entries in quantity,
unit or case, case size and discounts. Taxes are not included in this total
but displayed above the transfer lines.
Tool Bar Functions for Interstore Transfer Screen
Exit
Click on Exit, or Press F4 to exit this menu selection.
Print
Click on Print or press F5 to print a transfer(s).
Change
Click on Change to change information on the top of the transfer.
Delete
Click on Delete or press Ctrl + F12 to delete an entire transfer, while
displaying the top part of the transfer.
Options
Click on Options to select Transfer Options.
Inventory Control User Manual
14
J.S. Software (1998) Inc.
Tool Bar Functions for Interstore Transfer Maintenance Screen
Exit
Click on Exit, or Press F4 to exit this menu selection.
Page Up
Click on Page Up to move up on the transfer page.
Page Down
Click on Page Down to move down on the transfer page.
Top
Click on Top to go to the top of the transfer.
Bottom
Click on Bottom to go to the bottom of the transfer.
List
Click on List to search for an item from the UPC or Item field.
Delete
Click on Delete to delete the highlighted record from a transfer.
Inventory Control User Manual
15
J.S. Software (1998) Inc.
Receiving/Interstore Transfer/Options
Transfer from Handheld
This option is for downloading items from a Handheld unit. You
may scan items into a Handheld unit to be entered in the
transfer. System will prompt you for ……….
Post Transfers
Transfers must be posted to update POS. Stock quantities are
updated in POS.
Posted transfers are stored in history.
(see…………..
Transfers from Handheld
The following prompt will appear. Click on [yes] to continue
The system will display the following message.
Send file from Handheld, or press any key to abort the transfer.
Inventory Control User Manual
16
J.S. Software (1998) Inc.
Inventory Control/Credit Notes
Credit Note
Enter a credit note number or click on […] to select an existing credit
note.
Vendor
Enter the vendor number, or click on […] to select the vendor number.
Date
Enter the date of the credit note.
Invoice
Enter the invoice number the credit refers to.
Enter Items By
Choose one of the following options:
UPC Item Code
On the first line of the credit, depending on the above option selected;
Enter the UPC. The item description will appear in the box above the
line.
Enter the item code. The item description will appear in the box above
the line.
Quantity
Enter the quantity by unit or by case. Weighted items (when the scale is
set to Y) are entered to 3 decimal places.
Inventory Control User Manual
17
J.S. Software (1998) Inc.
Choose from the following options:
Unit Case
By the unit, press [I] and [Enter] to select Item (unit). The total will be
calculated based on quantity X unit cost.
By the case, press [C] and [Enter] to select Case. The total will be
calculated based on quantity X case cost. Stock will be updated based
on quantity X the case size (in the next field).
Cost/Case
Defaults to system cost and case size.
Retail/Spl
Defaults to system retail and case size. .
Total
The extended total will be calculated based on the entries in quantity,
unit or case, case size and discounts. Taxes are not included in this total
but displayed above the credit note lines.
Tool Bar Functions for Credit Note Screen
Exit
Click on Exit, or Press F4 to exit this menu selection.
Print
Click on Print or press F5 to print a credit note(s).
Change
Click on Change to change information on the top of the credit note.
Delete
Options
Click on Delete or press Ctrl + F12 to delete an entire credit note, while
displaying the top part of the invoice.
Click on Options for Option Selection.
Tool Bar Functions for Credit Note Maintenance Screen
Exit
Click on Exit, or Press F4 to exit this menu selection.
Page Up
Click on Page Up to move up on the credit note page.
Page Down
Click on Page Down to move down on the credit note page.
Top
Click on Top to go to the top of the invoice.
Bottom
Click on Bottom to go to the bottom of the invoice.
List
Click on List to search for an item from the UPC or Item field.
Inventory Control User Manual
18
J.S. Software (1998) Inc.
Delete
Click on Delete to delete the highlighted record from an invoice. To
delete an entire invoice, click on Delete with only the top part of the
invoice displayed.
Inventory Control/Credit Notes/Options
Credit Notes from Handheld This option is for downloading items from a Handheld unit. You
may scan items into a Handheld unit to be entered in the
invoice. System will prompt you for ……….
Post Credit Note
Credit Notes must be posted to update POS. Stock quantities
are updated in POS. Posted credit notes are stored in history.
(see…………..
Reason Code Setup
Reason codes must be setup before credit notes can be entered.
Inventory Control User Manual
19
J.S. Software (1998) Inc.
Credit Notes from Handheld
The following prompt will appear. Click on [yes] to continue
The system will display the following message.
Send file from Handheld, or press any key to abort the transfer.
Reason Code Setup
Reason Number
Enter a number to be assigned to a reason or click on […] to select an
existing number.
Reason Name
Enter a name for a credit reason. Ie:Damaged, Returned, Order Error
Click on OK to save.
Inventory Control User Manual
20
J.S. Software (1998) Inc.
Inventory Control/Stock Sheet
Date
Enter Items By
Enter the date for the stock sheet (ie: the date the stock will be
counted).
Choose one of the following options:
UPC Item Code
On the first line of the stock sheet, depending on the above option
selected;
Enter the UPC. The item description will appear on the line.
Enter the item code. The item description will appear on the line.
Description
Defaults to system description.
Cost/Case
Defaults to system cost and case size.
Retail/Spl
Defaults to system retail and case size. .
Quantity
Enter the stock quantity in units.
Inventory Control User Manual
21
J.S. Software (1998) Inc.
Inventory Control/Stock Sheet/Stock sheet Options
Stock from Telxon
The following prompt will appear. Click on [yes] to continue
The system will display the following message.
Send file from Handheld, or press any key to abort the transfer.
Inventory Control User Manual
22
J.S. Software (1998) Inc.
Build Stock Sheet
Date
Enter the date of the stock sheet (which should be the date the stock is
counted on).
Enter Items By
Choose from the following options:
UPC Item Code
The items will be listed according to the selection.
Primary Sort
Choose from the following options:
Subdepartment Location Class
Family
Select the area of the store you wish to count.
Starting
Enter the starting range for the above selection.
Ending
Enter the ending range for the above selection.
Secondary Sort
Choose from the following options:
UPC Item Code Description
Items will be sorted by the above selection (within the group selection
above).
Default Stock
Quantity?
Choose from the following options:
N Y
Select N if the system stock quantity is not to be displayed.
Select Y to display the system stock quantity.
Click on OK to continue building the stock sheet. A message “Building
Stock Sheet” will appear.
Upon completion, the printer box will be displayed.
button in the printer box to display the stock sheet.
Inventory Control User Manual
Click on the OK
23
J.S. Software (1998) Inc.
To print the stock sheet, click on the printer icon, or on File > Print.
To exit, Click on File > Close.
After printing the stock sheet, or clicking on close, choose one of the
following options:
Cancel stock Sheet Save Stock Sheet
Select cancel stock sheet if it is no longer needed.
Select save stock sheet to save it for a day to make adjustments or
create a stock entry form.
Stock Entry Form
The stock entry form may be used for taking stock manually. The system stock quantities may
be displayed for comparison.
Stock Date
Enter the date used to build the stock sheet (above).
Show System Stock Choose one of the following options:
N Y
Select N if the stock quantities do not need to be displayed.
Select Y to display the stock quantities in the system.
Print the stock entry form for the inventory crew to fill in.
When the inventory team has completed the count, go to the Stock
Sheet Screen. Enter the date of the stock sheet, and enter twice.
The system will default to the system’s stock, so if your count agrees
with this, arrow down to the next line.
To maintain an item, press F9 or click on the update tab.
Upon completion, click on Exit or press F4
Inventory Control User Manual
24
J.S. Software (1998) Inc.
Post Stock Sheet
Stock Date
Enter the date of the stock sheet to be posted
Inventory Control User Manual
25
J.S. Software (1998) Inc.
Comparison Report
The comparison report is used to compare an existing stock sheet to the system stock.
Stock Date
Enter the date of the stock sheet to be compared
A printer box will be displayed. Click on [OK] to view
Click on the printer icon to print, or File > Close to exit
Inventory Control User Manual
26
J.S. Software (1998) Inc.
Stock Adjustment
This is where manual adjustments are made to stock on individual items
Month/Year
Enter the month and year to view the data or make adjustments
Choose one of the following options:
UPC
Item Code
Enter either the upc or item code for the desired item
The item description will be displayed
On Hand: Current stock quantity
On Order: Purchase Order pending with this item
Press [Enter] to display each day of the month and the transactions, if
any. Ie: Sold, Rec’d, Trans’d, Adj
Inventory Control User Manual
27