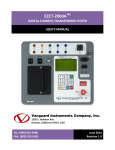
Download IRM-5000P - Vanguard Instruments Company, Inc.
Transcript
IRM-5000PTM
INSULATION RESISTANCE METER
USER’S MANUAL
Vanguard Instruments Company, Inc.
1520 S. Hellman Ave.
Ontario, California 91761, USA
TEL: (909) 923-9390
FAX: (909) 923-9391
May 2010
Revision 2
IRM-5000P USER’S MANUAL
REV 2
SAFETY SUMMARY
FOLLOW EXACT OPERATING PROCEDURES
Any deviation from the procedures described in this User’s Manual may create one or more
safety hazards, may damage the IRM-5000P, or cause errors in the test results. Vanguard
Instruments Company, Inc. assumes no liability for unsafe or improper use of the IRM-5000P.
All safety precautions provided in this manual must be observed during all phases of testing
including test preparation, test lead connection, actual testing, and test lead disconnection.
SAFETY WARNINGS AND CAUTIONS
All devices under test shall be off-line and fully isolated.
The area around the IRM-5000P’s charging circuits and test terminals must be kept clean and
dry to prevent high-voltage leakage paths which can cause hazardous conditions or erroneous
measurements. Failure to heed these precautions may result in unsafe operating conditions,
cause erroneous test results, and will void the manufacturer’s warranty.
DO NOT MODIFY TEST EQUIPMENT
To avoid the risk of introducing additional or unknown hazards, do not install substitute parts or
perform any unauthorized modification to any IRM-5000P test unit. To ensure that all designed
safety features are maintained, it is highly recommended that repairs be performed only by
Vanguard Instruments Company factory personnel or by an authorized repair service provider.
Unauthorized modifications can cause safety hazards and will void the manufacturer’s
warranty.
WARNING
Do not remove test leads during a test. Failure to heed this warning can result in electrical
shock to personnel and damage to the equipment.
i
REV 2
IRM-5000P USER’S MANUAL
TABLE OF CONTENTS
CONVENTIONS USED IN THIS DOCUMENT ..................................................................................... 1
1.0 INTRODUCTION .................................................................................................................... 2
1.1 General Description and Features ................................................................................... 2
1.2 Furnished Accessories ...................................................................................................... 4
1.3 Technical Specifications ................................................................................................... 5
1.4 IRM-5000P Controls and Indicators ................................................................................. 6
2.0 PRE-TEST SETUP ................................................................................................................... 8
2.1 Operating Voltages .......................................................................................................... 8
2.2 LCD Screen Contrast Control............................................................................................ 9
2.3 Printer Paper Control ....................................................................................................... 9
2.4 Printer Paper .................................................................................................................... 9
3.0 OPERATING PROCEDURES ................................................................................................. 11
3.1 Performing Tests ............................................................................................................ 11
3.1.1. Entering Test Record Header Information ............................................................. 11
3.1.2. Performing an Insulation Resistance Test .............................................................. 14
3.1.3. Performing a Polarization Index Ratio (PI) Test ..................................................... 22
3.1.4. Performing a Step Voltage (SV) Test ...................................................................... 28
3.1.5. Performing a Dielectric Discharge (DD) Test .......................................................... 34
3.2 Working With Test Records ........................................................................................... 40
3.2.1. Saving a Test Record............................................................................................... 40
3.2.2. Restoring a Test Record From Flash EEPROM ........................................................ 41
3.2.3. Printing a Test Record from the Working Memory ................................................ 42
3.2.4. Printing a Directory of Test Records Stored in the IRM-5000P’s Memory ............ 44
3.2.5. Erasing Test Records From the Flash EEPROM ...................................................... 46
4.0 CHANGING SETUP PARAMETERS ....................................................................................... 48
4.1 Setting the Clock ............................................................................................................ 48
4.2 Setting the Frequency .................................................................................................... 49
4.3 Setting the Temperature Units of Measure................................................................... 50
4.4 Enabling the Computer Interface .................................................................................. 51
APPENDIX A - DIELECTRIC DISCHARGE RATIO TEST DESCRIPTION ............................................... 52
APPENDIX B - GUARD TERMINAL APPLICATION ........................................................................... 53
ii
IRM-5000P USER’S MANUAL
REV 2
LIST OF TABLES
Table 1. IRM-5000P Technical Specifications ................................................................................. 5
Table 2. Functional Descriptions of IRM-5000P Controls and Indicators ....................................... 7
Table 3. Voltage Selection Jumper Settings .................................................................................... 8
Table 4. PI Ratio Table................................................................................................................... 27
LIST OF FIGURES
Figure 1. IRM-5000P Controls and Indicators ................................................................................. 6
Figure 2. 100-120 Vac Jumper Settings........................................................................................... 8
Figure 3. 200-240 Vac Jumper Settings........................................................................................... 8
Figure 4. Resistance Test Results Report Printout ........................................................................ 20
Figure 5. Resistance Plot from a Resistance Test ......................................................................... 20
Figure 6. Current Plot from a Resistance Test .............................................................................. 21
Figure 7. Polarization Index Test Results Report Printout ............................................................ 26
Figure 8. Polarization Index Test Resistance Plot ......................................................................... 27
Figure 9. Polarization Index Test Current Plot .............................................................................. 27
Figure 10. Step Voltage Test Results Report Printout .................................................................. 32
Figure 11. Step Voltage Test Resistance and Current Plots .......................................................... 33
Figure 12. Dielectric Discharge Test Results Report Printout ....................................................... 37
Figure 13. Dielectric Discharge Test Resistance Plot .................................................................... 38
Figure 14. Dielectric Discharge Test Current Plot ......................................................................... 39
Figure 15. Typical Test Record Directory Printout ........................................................................ 45
iii
REV 2
IRM-5000P USER’S MANUAL
CONVENTIONS USED IN THIS DOCUMENT
This document uses the following conventions:
•
A key or switch on the IRM-5000P is indicated as [KEY] and [SWITCH].
•
Menu options are referenced as (MENU OPTION).
•
Screen and menu names are referenced as “SCREEN/MENU NAME”.
•
The terms “test record” and “test shot” are used interchangeably.
•
IRM-5000P LCD screen output is shown as:
1. OPTION
2. OPTION
3. OPTION
4. OPTION
•
When instructions are provided, the menu item that should be selected is shown in bold as
shown below (option 3 should be selected):
1. OPTION
2. OPTION
3. OPTION
4. OPTION
•
1
2
3
4
1
2
3
4
Warning messages are indicated as:
Warning message
WARNING
•
Important notes are indicated as:
Note details
NOTE
1
IRM-5000P USER’S MANUAL
1.0
INTRODUCTION
1.1
General Description and Features
REV 2
The IRM-5000P is a microprocessor-based, high-voltage, insulation-test ohmmeter. The rugged
and portable IRM-5000P is ideal for use in electric utility substations and for industrial
applications.
This sophisticated insulation tester uses a dual-microprocessor design. One microprocessor is
dedicated to the control of the power supply and measuring circuitry, while the second is
dedicated to the user interfaces and printer control. To ensure operator safety, the
microprocessors communicate via an optical link, thus isolating the operator controls from the
dangerous high test voltages inside the unit.
The IRM-5000P measures the insulation resistance of a test material by applying a known test
voltage and measuring the resultant leakage current. The measured insulation resistance is
then displayed on the back-lit LCD screen. The IRM-5000P’s built-in 2.5-inch wide thermal
printer can print test reports in both tabular and graphic formats. Up to 100 test reports can be
stored in the unit’s internal memory. Test reports can also be transferred to a PC via the built-in
RS-232C interface. The IRM-5000P can automatically perform industry-standard tests such as
Polarization Index (PI) test, Step Voltage (ST) test, and Dielectric Discharge (DDS) test.
Test Voltage
The IRM-5000P can perform tests with preset voltages (500, 1000, 2500, 5000 Vdc), or with
user-selectable voltages ranging from 50 Vdc to 5000 Vdc with a ±2 Vdc resolution.
Insulation Resistance Test
The test voltage for an insulation resistance test can be user-selected, and the test duration can
range from 1 to 90 minutes. The IRM-5000P will then collect resistance readings throughout the
selected test period. The resistance value, test voltage, leakage current, and capacitance are
displayed on the back-lit LCD screen. The tabulated test report can be printed on the built-in
2.5-inch wide thermal printer. The report can also be printed as a graph of the resistance over
time.
Polarization Index (PI) Test
The Polarization Index (PI) measures the ratio of insulation resistance after one minute and
then after ten minutes. The Polarization Index is derived from a ratio of the two periods, where
the resistance value at ten minutes is divided by the resistance value at one minute.
PI tests can be run at preset voltages (500, 1000, 2500, 5000 Vdc) or at a user-specified voltage
from 50 Vdc to 5000 Vdc. Test results can be printed in both tabular and graphic formats.
Step Voltage (SV) Test
The Step Voltage test is based on an ideal insulator producing the same resistance
measurement at all voltages. As an example, an insulator that is over-stressed will measure
lower resistance values at higher voltages. Accordingly, the resistances measured on an overstressed insulator at increasingly higher voltages (steps) will produce decreasingly lower
resistance values.
2
REV 2
IRM-5000P USER’S MANUAL
The SV test measures insulation resistances in five equal voltage steps up to a final test voltage
of 2500 Vdc or 5000 Vdc. The voltage is stepped up in 1/5 increments of the final test voltage
every one minute, five minutes, or other user-defined time interval.
Dielectric Discharge (DDS) Test
The DDS test measures the dielectric absorption of an insulator. This test can be used to
diagnose an insulation problem in cases where multi-layered insulation is used. The default test
requires 30 minutes of applying full voltage followed by a one minute discharging of the Device
Under Test (DUT). The DD value is then calculated using the formula:
DD Ratio = Current after 1 minute (mA) / (Test Voltage X Capacitance)
Capacitor Discharge
After each test, the IRM-5000P automatically discharges any test voltage left on the test
material. An audible alarm and a message on the screen warn the operator of the shock hazard
during each discharging period.
Capacitance Display
The IRM-5000P automatically measures the capacitance of the device being tested. The
capacitance-measuring range is from 0.01 µF to 10.0 µF.
Volt Meter
The IRM-5000P can also be used to measure voltages. Measurable input voltage ranges from 50
V to 1250 V, AC or DC.
User Interface
The IRM-5000P features a back-lit LCD screen (20 characters by 4 lines) that is viewable in both
bright sunlight and low-light levels. A rugged, 16-key, membrane keypad is used to control the
unit.
Built-in Thermal Printer
The IRM-5000P’s built-in 2.5-inch wide thermal printer can print the test reports in both tabular
and graphic formats.
Internal Test Record Storage
The IRM-5000P can store up to 100 test records in Flash EEPROM. Test records can be retrieved
and printed on the built-in thermal printer, or they can be transferred to a PC via the unit’s RS232C interface.
Computer Interface
The IRM-5000P can be computer-controlled via its RS-232C interface. A Windows® XP/Vistabased analysis software application is provided with each unit. Using this software, test records
can be retrieved from the IRM-5000P and then stored on the PC for future analysis and report
generation. A special feature of the software can overlay several resistance curves on-screen
and can be used to monitor the resistance deterioration of a test material over time.
Additionally, test records can be exported in Microsoft® Excel format for further analysis.
3
IRM-5000P USER’S MANUAL
REV 2
Temperature Probe
A non-contacting, infrared, temperature sensor is provided with each unit for recording test
material temperatures.
Power Source
The IRM-5000P can operate continually for up to 6-hours using its internal rechargeable SLA
batteries, or it can be operated with an external power source.
1.2
Furnished Accessories
The IRM-5000P comes furnished with the following:
•
•
•
•
•
One 6-foot cable set
One 15-foot cable set
One RS-232C Cable
One power cord
Cable carrying duffel bag
4
REV 2
1.3
IRM-5000P USER’S MANUAL
Technical Specifications
Table 1. IRM-5000P Technical Specifications
TYPE
Insulation resistance meter
PHYSICAL SPECIFICATIONS 19”W x 7”H x 15”D, (48 cm x 17 cm x 38 cm); Weight: 24lbs (10.9 kg)
INPUT POWER 100 – 120 Vac or 220 – 240 Vac (selectable), 50/60Hz
RESISTANCE READING 100 K-ohms – 1 M-ohm ±20%,
RANGE 1 M-ohm – 1 T-ohm ±5%,
(0°C to +30°C) 1 T-ohm – 5 T-ohm ±20% , 5kV
100 K-ohms – 1 M-ohm ±20%,
1 M-ohm – 100 G-ohms ±5%,
100 G-ohms – 500 G-ohms ±5%, 500 V
1 M-ohm – 10 G-ohms ±5%, 50 V
TEST VOLTAGE Selectable from 50Vdc – 5 KVdc, in 2 Vdc steps
OUTPUT VOLTAGE ±2%, ±1v of selected voltage with load resistance greater than 100 MΩ
ACCURACY
(0°C to +30°C)
SHORT CIRCUIT CURRENT
2 mA max
CURRENT READING RANGE 0.03 nA – 2 mA; Accuracy: ±5% ±0.2 nA
(0°C to +30°C)
CAPACITANCE READING 0.01 μF – 10.0 μF (Test voltage greater than 100V); Accuracy: ±5% ±0.03 μF
RANGE
(0°C to +30°C)
VOLTAGE READING RANGE 50 – 1250 Vac (rms) or dc; Accuracy: ±5%, ±1V
(0°C to +30°C)
CAPACITOR DISCHARGE
Less than 2 Sec/μF, automatic at the end of test
HUM REJECTION 1mA per 1kv of test voltage, 2mA rms maximum
BATTERIES Two 12V, 2.0 Ah sealed lead acid batteries. Battery life: typical 6 hrs,
continuous testing. The IRM-5000P can be used while charging.
PRINTER
COMPUTER INTERFACE
Built-in 2.5-inch wide thermal printer can print test results in both tabulated
and graphic formats
One RS-232C port
INTERNAL TEST RECORD Store up to 100 test records in Flash EEPROM
STORAGE
SAFETY
UL Certified (UL 61010A-1), CAN/CSA Certified (C22.2 No. 1010.1-92)
ENVIRONMENT Operating: -10˚ to 50˚ C (15˚ to +122˚ F); Storage: -30˚ C to 70˚ C (-22˚ to
+158˚ F)
HUMIDITY (MAX)
90% RH @ 40˚ C (104˚ F) non-condensing
ALTITUDE (MAX) 2000m (6562 ft) to fully safety specifications
CABLES
One 6-foot cable set, one 15-foot cable set, ground cable, power cord, cable
bag
OPTIONS Transportation Case
WARRANTY
One year on parts and labor
The above specifications are valid at nominal operating voltage and at a
temperature of 25°C (77°F). Specifications may change without prior notice.
NOTE
5
IRM-5000P USER’S MANUAL
1.4
REV 2
IRM-5000P Controls and Indicators
The IRM-5000P’s controls and indicators are shown in Figure 1 below. A leader line with an
index number points to each control and indicator, which is cross-referenced to a functional
description in Table 2. The table describes the function of each item on the control panel. The
purpose of the controls and indicators may seem obvious, but users should become familiar
with them before using the IRM-5000P. Accidental misuse of the controls will usually cause no
serious harm. Users should also be familiar with the safety summary found on the front page of
this User’s Manual.
Figure 1. IRM-5000P Controls and Indicators
6
REV 2
IRM-5000P USER’S MANUAL
Table 2. Functional Descriptions of IRM-5000P Controls and Indicators
Item
Number
Panel Markings
1
RS-232C
110-120 Vac, 2A,
50-60Hz
Fuse: 250Vac, 3A
Fast-Blow
Power plug and fuse holder.
2
3
HIGH VOLTAGE
PRESENT
Test voltage presence indicator.
4
CHARGE
POWER
Battery charging indicator.
Power switch.
Back-lit LCD Screen (20 characters by 4 lines). Viewable in both bright sunlight
and low-light levels.
7
Rugged alpha-numeric keypad.
8
7
RS-232C PC interface.
Built-in 2.5-inch wide thermal printer.
5
6
Functional Description
9
NEG
Negative test lead terminal.
10
GUARD
Guard test lead terminal.
11
POS
Positive test lead terminal.
IRM-5000P USER’S MANUAL
2.0
PRE-TEST SETUP
2.1
Operating Voltages
REV 2
The IRM-5000P’s operating voltage is preset at the factory and is selectable between 100-120
Vac, 50/60 Hz or 200-240 Vac, 50/60 Hz. The voltage is set by placing jumpers at the JP16 and J1
jumper blocks on the main board as listed in Table 3 and illustrated in Figure 2 and Figure 3.
Table 3. Voltage Selection Jumper Settings
J1 Settings
Voltage
Selection
JP16 Settings
100 – 120 Vac
Jumper Pin 1 and 2
Jumper Pin 3 and 4
Jumper Pin 1 and 2
Jumper Pin 3 and 4
200 – 240 Vac
Jumper Pin 2 and 3
Jumper Pin 2 and 3
Figure 2. 100-120 Vac Jumper Settings
Figure 3. 200-240 Vac Jumper Settings
8
REV 2
2.2
IRM-5000P USER’S MANUAL
LCD Screen Contrast Control
To increase the LCD screen contrast, press and hold the [PAPER ∧ Contrast] key for two
seconds. Release the button when the desired contrast level has been reached.
To decrease the LCD screen contrast, press and hold the [PAPER ∨ Contrast] key for two
seconds. Release the button when the desired contrast level has been reached.
2.3
Printer Paper Control
To advance the thermal printer paper, press and release the [PAPER ∧ Contrast] key.
To retract the thermal printer paper, press and release the [PAPER ∨ Contrast] key.
2.4
Printer Paper
The IRM-5000P’s built-in thermal printer uses 2.5-inch wide thermal paper for printing test
results. To maintain the highest print quality and to avoid paper jams, the use of thermal paper
supplied by Vanguard Instruments Company is highly recommended. Additional paper can be
ordered from the following sources:
Vanguard Instruments Co, Inc.
1520 S. Hellman Avenue
Ontario, CA 91761
Tel: 909-923-9390
Fax: 909-923-9391
Part Number: VIC TP-3 paper
BG Instrument Co.
13607 E. Trent Avenue
Spokane, WA 99216
Tel: 509-893-9881
Fax: 509-893-9803
Part Number: VIC TP-3 paper
9
IRM-5000P USER’S MANUAL
2.5
REV 2
Replacing the Thermal Printer Paper
The roll of thermal paper is housed inside a dispenser underneath the printer cover. To replace
the paper, follow the steps below:
•
•
•
•
•
•
•
Unscrew the two large printer cover screws and remove the printer cover.
Remove the leftover thermal paper roll from the paper holder.
Unroll the new thermal paper roll.
Feed the thermal paper into the slot between the paper pocket and the rubber roller.
The printer will automatically pull the paper under the thermal head.
Place the paper roll into the paper holder.
Lift the thermal head and align the thermal paper if necessary.
Re-install the printer cover.
NOTE
Thermal paper has a chemical coating on one side of the paper. This side should be
facing the thermal print head. Incorrect paper loading may result in blank output on
the thermal paper.
The thermal paper will show a red stripe to indicate that the roll is about to run out
of paper.
10
REV 2
IRM-5000P USER’S MANUAL
3.0
OPERATING PROCEDURES
3.1
Performing Tests
3.1.1. Entering Test Record Header Information
You can enter the test record header information before performing tests. The record header
includes identifying information such as company, location, test description, etc. Once the
header information has been entered, it will apply to all subsequent test records. To enter the
header information:
a. When the unit is turned on, you will be presented with the “START-UP” menu:
1. RUN TEST 05/05/10
2. UTILITIES 10:10:15
Bat:
TERMINAL VTG:
1 V
•
NOTES
If the IRM-5000P is running on battery power, the battery icon will be
displayed on the LCD screen as shown above. The icon also represents the
charge level of the battery.
If the IRM-5000P is plugged in, a plug icon will be displayed on the LCD
screen as shown below:
1. RUN TEST 05/05/10
2. UTILITIES 10:10:15
Bat:
TERMINAL VTG:
1 V
•
The test terminal voltage is displayed at the bottom of the LCD screen. The
IRM-5000P can be used as a voltmeter by connecting the positive and
negative leads to a voltage source. The voltage measurement range is
from 50-1250 V(AC/DC).
Press the [2] key (UTILITIES).
b. The following screen will be displayed:
1.PRINT
3.SETUP
2.SAVE/RES
TERMINAL VTG:
Press the [3] key (SETUP).
11
1 V
IRM-5000P USER’S MANUAL
REV 2
c. The following screen will be displayed:
1.TEST ID
2.CLOCK
3.COMP INT 4.50/60Hz
5.°C/°F
TERMINAL VTG:
1 V
Press the [1] key (TEST ID).
d. The following screen will be displayed:
COMPANY
_
ENTER to Confirm
TERMINAL VTG:
1 V
Type the company name using the alpha-numeric keypad.
When pressing a key, the corresponding number on the key will be displayed first.
Pressing the key again will display the first letter on the key. Pressing the key again will
display the second letter on the key. For example, to type the letter “A”, you must press
the [2] key twice. To erase the character at the cursor position, press the [CLEAR] key.
Press the [PAPER ∧ Contrast] key to move to the next character. Press the [PAPER
∨ Contrast] key to move to the previous character. Press the [ENTER] key when you
are done typing the company name.
e. The following screen will be displayed:
LOCATION
_
ENTER to Confirm
TERMINAL VTG:
1 V
Type the location name using the alpha-numeric keypad and then press the [ENTER]
key.
f. The following screen will be displayed:
TEST DESCRIPTION
_
ENTER to Confirm
TERMINAL VTG:
1 V
Type the test description using the alpha-numeric keypad and then press the [ENTER]
key.
g. The following screen will be displayed:
12
REV 2
IRM-5000P USER’S MANUAL
OPERATOR
_
ENTER to Confirm
TERMINAL VTG:
1 V
Type the operator’s name using the alpha-numeric keypad and then press the [ENTER]
key. All header information will be saved, and you will be returned to the “START-UP”
menu.
13
IRM-5000P USER’S MANUAL
REV 2
3.1.2. Performing an Insulation Resistance Test
The insulation resistance test measures the insulation resistance at selected voltages. Since the
insulation resistance is continuously monitored during each test, users can plot the resistance
or current values versus time. Use the steps below to perform an insulation resistance test:
a. Start from the “START-UP” menu:
1. RUN TEST 05/05/10
2. UTILITIES 10:10:15
Bat:
TERMINAL VTG:
1 V
Press the [1] key (RUN TEST).
If you had previously performed a test and had not saved the test results, the
following screen will be displayed:
NOTE
Test Not Saved!
“Enter” To continue
TERMINAL VTG:
1 V
Press the [ENTER] key if you do not want to save the results from the
previous test. Continue to step b.
Press any other key if you would like to save the results from the previous test.
You will be returned to the “START-UP” menu. Please see section 3.2.1 for
instructions on how to save test results to the IRM-5000P’s Flash EEPROM.
b. The following screen will be displayed:
1. R
3. DD
TERMINAL VTG:
2. PI
4. SV
1 V
Press the [1] key (R).
14
REV 2
IRM-5000P USER’S MANUAL
c. The following screen will be displayed:
1. 1 Min
3. 30 Min
2. 10 Min
4. Custom
TERMINAL VTG:
1 V
1. 1 Min
Press the [1] key to select the 1 minute test duration. Continue to step d.
2. 10 Min
Press the [2] key to select the 10 minute test duration. Continue to step d.
3. 30 Min
Press the [3] key to select the 30 minute test duration. Continue to step d.
4. Custom
Press the [4] key to enter a custom test duration in minutes. The following
screen will be displayed:
Test Time (Minutes):
0 Minutes
TERMINAL VTG:
1 V
Type the desired test duration in minutes using the numeric keypad, and then
press the [ENTER] key. Continue to step d.
d. The following screen will be displayed:
1. 500V
2. 1000V
3. 2500V
4. 5000V
5. Custom
TERMINAL VTG:
1 V
1. 500V
Press the [1] key to select 500V for the test voltage. Continue to step e.
2. 1000V
Press the [2] key to select 1000V for the test voltage. Continue to step e.
3. 2500V
Press the [3] key to select 2500V for the test voltage. Continue to step e.
4. 5000V
Press the [4] key to select 5000V for the test voltage. Continue to step e.
15
IRM-5000P USER’S MANUAL
REV 2
5. Custom
Press the [5] key to enter a custom test voltage value. The following screen will
be displayed:
Test Voltage (50-5K)
0 Volts
TERMINAL VTG:
1 V
Type the desired test voltage (between 50 V – 5000 V) using the numeric keypad,
and then press the [ENTER] key. Continue to step e.
e. The following screen will be displayed:
ENTER D.U.T. TEMP?
1. YES
2. NO
TERMINAL VTG:
1 V
1. YES
Press the [1] key (YES) if you would like to enter the Device Under Test (D.U.T.)
temperature. The following screen will be displayed:
ENTER TEMP (0-254 F)
°F
TERMINAL VTG:
1 V
Type the D.U.T. temperature using the numeric keypad. The screen will be
updated as shown:
ENTER TEMP (0-254 F)
120 °F
TERMINAL VTG:
1 V
Press the [ENTER] key and continue to step f.
2. NO
Press the [2] key (NO) if you do not want to enter the Device Under Test (D.U.T.)
temperature. Continue to step f.
16
REV 2
IRM-5000P USER’S MANUAL
f. The following screen will be displayed:
PRINT DURING TEST?
1. YES
2. NO
TERMINAL VTG:
1 V
1. YES
Press the [1] key (YES) to print the resistance readings on the IRM-5000P’s builtin thermal printer. If this option is selected, the resistance values will be printed
at every second, starting at 10 seconds. Continue to step g.
2. NO
Press the [2] key (NO) if you do not want to print the resistance readings.
Continue to step g.
g. The following screen will be displayed if the IRM-5000P needs to perform selfcalibration:
CALIBRATING
PLEASE WAIT 25
TERMINAL VTG:
1 V
The remaining calibration time is displayed in seconds. When the calibration is
completed, the following screen will be displayed:
“ENTER” TO START!
R 5000V 10Min
TERMINAL VTG:
1 V
Press the [ENTER] key to start the test.
h. The following screen will be displayed while the test is being performed:
Bat:
Time: 09:51
Resistance:
983.8 M
Current:
47 uA
TEST VOLTAGE: 4999V
The resistance value symbols are:
T = Tera-ohm
G = Giga-ohm
NOTE
M = Mega-ohm
K = Kilo-ohm
17
IRM-5000P USER’S MANUAL
REV 2
The LCD screen will be dynamically updated displaying the remaining time along with
the resistance, current, and test voltage values. When the test is completed, the results
will be displayed as shown:
Res=989.7M
5000V 0.0uF
4.87uA
10:00
TERMINAL VTG:
1 V
Press any key to continue.
If you had entered a D.U.T. temperature in step e, the following screen will be
displayed:
NOTE
D.U.T. TEMP: 200°F
EQ R @ 40°C: 399.6G
TERMINAL VTG:
1 V
This screen shows the equivalent resistance value at 40°C. The equivalent
resistance value is automatically calculated by the IRM-5000P based on the
D.U.T. temperature entered in step e.
Press any key to continue. The following screen will be displayed:
D.U.T. TEMP: 200°F
EQ R @ 20°C: 1.599T
TERMINAL VTG:
1 V
This screen shows the calculated equivalent resistance value at 20°C. Press any
key to continue.
i.
The following screen will be displayed:
PRINT REPORT?
1.YES
2.NO
TERMINAL VTG:
1 V
Press the [1] key (YES) to print the test report (See Figure 4 for a sample test report
printout).
j.
The test report will be printed on the built-in thermal printer, and then the following
screen will be displayed:
18
REV 2
IRM-5000P USER’S MANUAL
SAVE TEST?
1.YES
2.NO
TERMINAL VTG:
1 V
Press the [1] key (YES) to save the test results.
k. The following screen will be displayed:
TEST NUMBER 1
HAS BEEN SAVED!
TERMINAL VTG:
1 V
Press any key to continue.
l.
The following screen will be displayed:
REPEAT TEST?
1.YES
2.NO
TERMINAL VTG:
1 V
Press the [2] key (NO). You will be returned to the “START-UP” menu.
Please see section 3.2.3 for instructions on how to print test results graphs.
NOTE
19
IRM-5000P USER’S MANUAL
REV 2
Figure 4. Resistance Test Results Report Printout
Figure 5. Resistance Plot from a Resistance Test
20
REV 2
IRM-5000P USER’S MANUAL
Figure 6. Current Plot from a Resistance Test
21
IRM-5000P USER’S MANUAL
REV 2
3.1.3. Performing a Polarization Index Ratio (PI) Test
The polarization index (PI) is derived from the ratio of the insulation resistance at ten minutes
divided by the insulation value at one minute. For a typical insulation, the resistance value
increases as time increases during a test.
Standard voltages of 500 V, 1000 V, or 5000 V can be used, or the user can enter a custom test
voltage value from 50 V to 5000 V. The default test duration is ten minutes, but a custom test
duration can be set from 10 to 99 minutes. Follow the steps below to perform a PI test:
a. Start from the “Start-Up” menu:
1. RUN TEST 05/05/10
2. UTILITIES 10:10:15
Bat:
TERMINAL VTG:
1 V
Press the [1] key (RUN TEST).
b. The following screen will be displayed:
1. R
3. DD
2. PI
4. SV
TERMINAL VTG:
1 V
Press the [2] key (PI).
c. The following screen will be displayed:
1. 10 Min (Default)
2. Custom
TERMINAL VTG:
1 V
1. 10 Min (Default)
Press the [1] key to select the default test duration of 10 minutes. Continue to
step d.
2. Custom
Press the [2] key to enter a custom test duration (between 10 to 99 minutes).
The following screen will be displayed:
NON-STANDARD Time?
“ENTER” to continue
TERMINAL VTG:
1 V
Press the [ENTER] key to continue.
22
REV 2
IRM-5000P USER’S MANUAL
If you press any other key besides the [ENTER] key, you will be
returned to the beginning of step c.
NOTE
The following screen will be displayed:
Test Time (Minutes):
0 Minutes
TERMINAL VTG:
1 V
Enter the test duration using the numeric keypad and then press the [ENTER]
key. Continue to step d.
d. The following screen will be displayed:
1. 500V
2. 1000V
3. 2500V
4. 5000V
5. Custom
TERMINAL VTG:
1 V
Select the desired test voltage by pressing the corresponding key ([1], [2], [3], [4], or
[5]).
e. The following screen will be displayed:
ENTER D.U.T. TEMP?
1. YES
2. NO
TERMINAL VTG:
1 V
1. YES
Press the [1] key (YES) if you would like to enter the Device Under Test (D.U.T.)
temperature. The following screen will be displayed:
ENTER TEMP (0-254 F)
°F
TERMINAL VTG:
1 V
Type the D.U.T. temperature using the numeric keypad. The screen will be
updated as shown:
ENTER TEMP (0-254 F)
120 °F
TERMINAL VTG:
1 V
Press the [ENTER] key and continue to step f.
23
IRM-5000P USER’S MANUAL
REV 2
2. NO
Press the [2] key (NO) if you do not want to enter the Device Under Test (D.U.T.)
temperature. Continue to step f.
f. The following screen will be displayed:
PRINT DURING TEST?
1. YES
2. NO
TERMINAL VTG:
1 V
1. YES
Press the [1] key (YES) to print the resistance readings on the IRM-5000P’s builtin thermal printer. If this option is selected, the resistance values will be printed
at every second, starting at 10 seconds. Continue to step g.
2. NO
Press the [2] key (NO) if you do not want to print the resistance readings.
Continue to step g.
g. The following screen will be displayed:
CALIBRATING
PLEASE WAIT 25
TERMINAL VTG:
1 V
The IRM-5000P will perform self-calibration, and then the following screen will be
displayed:
“ENTER” TO START!
PI 350V 10Min
TERMINAL VTG:
1 V
Press the [ENTER] key to start the test.
h. The following screen will be displayed while the test is being performed:
Bat:
Time: 09:43
Resistance: 2.517 M
Current:
98.16 uA
TEST VOLTAGE:
350 V
24
REV 2
IRM-5000P USER’S MANUAL
The LCD screen will be dynamically updated displaying the remaining time along with
the resistance, current, and test voltage values. When the test is completed, the results
will be displayed as shown:
Res= 40.81MK PI=7.7
350V
99.37uF 10:00
TERMINAL VTG:
3 V
Press any key to continue.
If you had entered a D.U.T. temperature in step e, the IRM-5000P will calculate
the equivalent resistance values at 40°C and 20°C and display them on the LCD
NOTE screen.
i.
The following screen will be displayed:
PRINT REPORT?
1.YES
2.NO
TERMINAL VTG:
1 V
Press the [1] key (YES) to print the test report (See Figure 7 for a sample test report
printout. See Table 4 for an interpretation of).
j.
The test report will be printed on the built-in thermal printer, and then the following
screen will be displayed:
SAVE TEST?
1.YES
2.NO
TERMINAL VTG:
1 V
Press the [1] key (YES) to save the test results.
k. The following screen will be displayed:
TEST NUMBER 8
HAS BEEN SAVED!
TERMINAL VTG:
Press any key to continue.
25
1 V
IRM-5000P USER’S MANUAL
l.
REV 2
The following screen will be displayed:
REPEAT TEST?
1.YES
2.NO
TERMINAL VTG:
1 V
Press the [2] key (NO). You will be returned to the “START-UP” menu.
Please see section 3.2.3 for instructions on how to print test results graphs.
NOTE
Figure 7. Polarization Index Test Results Report Printout
26
REV 2
IRM-5000P USER’S MANUAL
Figure 8. Polarization Index Test Resistance Plot
Figure 9. Polarization Index Test Current Plot
Table 4. PI Ratio Table
PI Ratio
Insulation Condition
Less than 1.0
Unsatisfactory
1.0 to 2.0
Questionable *
2.0 to 4.0
Good
Above 4.0
Very Good **
* A PI ratio between 1.0 and 2.0 is satisfactory for a load with low capacitance, such as short runs.
** A dry, brittle insulation may show a good PI reading but may fail under shock conditions.
27
IRM-5000P USER’S MANUAL
REV 2
3.1.4. Performing a Step Voltage (SV) Test
The step voltage (SV) test measures insulation resistances in five equal voltage steps up to a
final test voltage of 2500 Vdc, 5000 Vdc, or a user-defined voltage value. The voltage is stepped
up in 1/5 increments of the final test voltage every one minute, five minutes, or other userdefined time interval. Follow the steps below to perform a step voltage test:
a. Start from the “START-UP” menu:
1. RUN TEST 05/05/10
2. UTILITIES 10:10:15
Bat:
TERMINAL VTG:
1 V
Press the [1] key (RUN TEST) to start a test.
b. The following screen will be displayed:
1. R
3. DD
2. PI
4. SV
TERMINAL VTG:
1 V
Press the [4] key (SV).
c. The following screen will be displayed:
1. 5 Min (Default)
2. Custom
TERMINAL VTG:
1 V
Press the [1] key (5 Min).
d. The following screen will be displayed:
1. 2500V
3. Custom
TERMINAL VTG:
2. 5000V
1 V
Select the maximum test voltage by pressing the corresponding key ([1], [2], or [3]).
28
REV 2
IRM-5000P USER’S MANUAL
e. The following screen will be displayed:
ENTER D.U.T. TEMP?
1. YES
2. NO
TERMINAL VTG:
1 V
1. YES
Press the [1] key (YES) if you would like to enter the Device Under Test (D.U.T.)
temperature. The following screen will be displayed:
ENTER TEMP (0-254 F)
°F
TERMINAL VTG:
1 V
Type the D.U.T. temperature using the numeric keypad. The screen will be
updated as shown:
ENTER TEMP (0-254 F)
120 °F
TERMINAL VTG:
1 V
Press the [ENTER] key and continue to step f.
2. NO
Press the [2] key (NO) if you do not want to enter the Device Under Test (D.U.T.)
temperature. Continue to step f.
f. The following screen will be displayed:
CALIBRATING
PLEASE WAIT 25
TERMINAL VTG:
1 V
The IRM-5000P will perform self-calibration, and then the following screen will be
displayed:
“ENTER” TO START!
SV 2500V 5Min
TERMINAL VTG:
1 V
Press the [ENTER] key to start the test.
29
IRM-5000P USER’S MANUAL
REV 2
g. The following screen will be displayed while the test is being performed:
Bat:
Time: 04:59
Resistance: 10.002 G
Current:
50.2 nA
TEST VOLTAGE:
498 V
The LCD screen will be dynamically updated displaying the remaining time along with
the resistance, current, and test voltage values. When the test is completed, the results
for the first time interval and voltage step will be displayed as shown:
9.952G@ 01:00, 499V
2500V 0.00uF 05:00
TERMINAL VTG:
1 V
Press any key to continue. The results for the second time interval and voltage step will
be displayed:
9.973G@ 02:00, 1002V
2500V 0.00uF
05:00
TERMINAL VTG:
1 V
Press any key to continue. The results for the third time interval and voltage step will be
displayed:
9.851G@ 03:00, 1503V
2500V 0.00uF
05:00
TERMINAL VTG:
1 V
Press any key to continue. The results for the fourth time interval and voltage step will
be displayed:
9.847G@ 04:00, 2000V
2500V 0.00uF
05:00
TERMINAL VTG:
1 V
Press any key to continue. The results for the final time interval and voltage step will be
displayed:
9.863G@ 05:00, 2500V
2500V 0.00uF
05:00
TERMINAL VTG:
1 V
Press any key to continue.
h. The following screen will be displayed:
30
REV 2
IRM-5000P USER’S MANUAL
PRINT REPORT?
1.YES
2.NO
TERMINAL VTG:
1 V
Press the [1] key (YES) to print the test report (See Figure 10 for a sample test report
printout).
i.
The test report will be printed on the built-in thermal printer, and then the following
screen will be displayed:
SAVE TEST?
1.YES
2.NO
TERMINAL VTG:
1 V
Press the [1] key (YES).
j.
The following screen will be displayed:
TEST NUMBER 9
HAS BEEN SAVED!
TERMINAL VTG:
1 V
Press any key to continue.
k. The following screen will be displayed:
REPEAT TEST?
1.YES
2.NO
TERMINAL VTG:
1 V
Press the [2] key (NO). You will be returned to the “START-UP” menu.
Please see section 3.2.3 for instructions on how to print test results graphs.
NOTE
31
IRM-5000P USER’S MANUAL
REV 2
Figure 10. Step Voltage Test Results Report Printout
32
REV 2
IRM-5000P USER’S MANUAL
Figure 11. Step Voltage Test Resistance and Current Plots
33
IRM-5000P USER’S MANUAL
REV 2
3.1.5. Performing a Dielectric Discharge (DD) Test
The dielectric discharge (DD) test measures the dielectric absorption of a tested material. A
typical DD test is timed for 30 minutes. Follow the steps below to perform a dielectric discharge
test:
a. Start from the “START-UP” menu:
1. RUN TEST 05/05/10
2. UTILITIES 10:15:15
Bat:
TERMINAL VTG:
1 V
Press the [1] key (RUN TEST).
b. The following screen will be displayed:
1. R
3. DD
2. PI
4. SV
TERMINAL VTG:
1 V
Press the [3] key (DD).
c. The following screen will be displayed:
1. 30 Min (Default)
2. Custom
TERMINAL VTG:
1 V
Press the [1] key (30 Min).
d. The following screen will be displayed:
1. 500V
2. Custom
TERMINAL VTG:
1 V
Press the [1] key to select 500V or press the [2] key to enter a custom test voltage
value.
34
REV 2
IRM-5000P USER’S MANUAL
e. The following screen will be displayed:
ENTER D.U.T. TEMP?
1. YES
2. NO
TERMINAL VTG:
1 V
1. YES
Press the [1] key (YES) if you would like to enter the Device Under Test (D.U.T.)
temperature. The following screen will be displayed:
ENTER TEMP (0-254 F)
°F
TERMINAL VTG:
1 V
Type the D.U.T. temperature using the numeric keypad. The screen will be
updated as shown:
ENTER TEMP (0-254 F)
120 °F
TERMINAL VTG:
1 V
Press the [ENTER] key and continue to step f.
2. NO
Press the [2] key (NO) if you do not want to enter the Device Under Test (D.U.T.)
temperature. Continue to step f.
f. The following screen will be displayed:
CALIBRATING
PLEASE WAIT 25
TERMINAL VTG:
1 V
The IRM-5000P will perform self-calibration, and then the following screen will be
displayed:
“ENTER” TO START!
DD 200V 30Min
TERMINAL VTG:
1 V
Press the [ENTER] key to start the test.
35
IRM-5000P USER’S MANUAL
REV 2
g. The following screen will be displayed while the test is being performed:
Bat:
Time: 29:57
Resistance: 1.802 M
Current:
0.105 mA
TEST VOLTAGE:
200 V
The LCD screen will be dynamically updated displaying the remaining time along with
the resistance, current, and test voltage values. When the test is completed, the results
will be displayed as shown:
R= 2.179M DD=5.8
200V
3.85uF 30:00
TERMINAL VTG:
1 V
Press any key to continue.
h. The following screen will be displayed:
PRINT REPORT?
1.YES
2.NO
TERMINAL VTG:
1 V
Press the [1] key (YES) to print the test report (See Figure 12 for a sample test report
printout).
i.
The test report will be printed on the built-in thermal printer, and then the following
screen will be displayed:
SAVE TEST?
1.YES
2.NO
TERMINAL VTG:
1 V
Press the [1] key (YES).
j.
The following screen will be displayed:
TEST NUMBER 10
HAS BEEN SAVED!
TERMINAL VTG:
1 V
Press any key to continue.
36
REV 2
IRM-5000P USER’S MANUAL
k. The following screen will be displayed:
REPEAT TEST?
1.YES
2.NO
TERMINAL VTG:
1 V
Press the [2] key (NO). You will be returned to the “START-UP” menu.
Please see section 3.2.3 for instructions on how to print test results graphs.
NOTE
Figure 12. Dielectric Discharge Test Results Report Printout
37
IRM-5000P USER’S MANUAL
REV 2
Figure 13. Dielectric Discharge Test Resistance Plot
38
REV 2
IRM-5000P USER’S MANUAL
Figure 14. Dielectric Discharge Test Current Plot
39
IRM-5000P USER’S MANUAL
3.2
REV 2
Working With Test Records
3.2.1. Saving a Test Record
After performing a test, the test results are temporarily stored in the IRM-5000P’s working
memory. At the end of the testing procedure, the user is presented with an option to save the
test results to the unit’s Flash EEPROM. If the results are not saved during the testing
procedure, they can still be saved as long as another test has not been performed. To save the
test results from the last test performed:
a. Start from the “START-UP” menu:
1. RUN TEST 05/05/10
2. UTILITIES 10:15:15
Bat:
TERMINAL VTG:
1 V
Press the [2] key (UTILITIES).
b. The following screen will be displayed:
1.PRINT
3.SETUP
2.SAVE/RES
TERMINAL VTG:
1 V
Press the [2] key (SAVE/RES).
c. The following screen will be displayed:
1.SAVE
3.ERASE
2.RESTORE
4.DIRECTORY
TERMINAL VTG:
1 V
Press the [1] key (SAVE).
d. The test record will be saved in the IRM-5000P’s Flash EEPROM. The test record number
will be automatically assigned by the IRM-5000P. The following screen will be displayed
when the test record has been saved:
TEST NUMBER 11
HAS BEEN SAVED!
TERMINAL VTG:
1 V
Press any key to return to the “START-UP” menu.
40
REV 2
IRM-5000P USER’S MANUAL
3.2.2. Restoring a Test Record From Flash EEPROM
You can restore a test record from the IRM-5000P’s Flash EEPROM to the working memory. You
can then print the restored test record on the unit’s built-in thermal printer (see section 3.2.3
for printing instructions). To restore a test record:
a. Start from the “START-UP” menu:
1. RUN TEST 05/05/10
2. UTILITIES 10:15:15
Bat:
TERMINAL VTG:
1 V
Press the [2] key (UTILITIES).
b. The following screen will be displayed:
1.PRINT
3.SETUP
2.SAVE/RES
TERMINAL VTG:
1 V
Press the [2] key (SAVE/RES).
c. The following screen will be displayed:
1.SAVE
3.ERASE
2.RESTORE
4.DIRECTORY
TERMINAL VTG:
1 V
Press the [2] key (RESTORE).
d. The following screen will be displayed:
RECALL TEST
NUMBER:
TERMINAL VTG:
1 V
Type the test record number that you would like to restore and then press the
[ENTER] key. If you do not know the record number, you can first print a test record
directory using the instructions in section 3.2.4.
e. The selected test record will be restored to the working memory and the following
screen will be displayed:
TEST NUMBER 8
RESTORED!
TERMINAL VTG:
1 V
Press any key to return to the “START-UP” menu.
41
IRM-5000P USER’S MANUAL
REV 2
3.2.3. Printing a Test Record from the Working Memory
After performing a test, the results are stored in the IRM-5000P’s working memory. The
tabulated results, resistance plot, and current plot can then be printed. Also, if a record is
restored from the unit’s Flash EEPROM to the working memory, the test results can be printed
on the thermal printer. Use the steps below to print a test record from the working memory:
a. Either perform a test or restore a test record from the Flash EEPROM. Then start from
the “START-UP” menu:
1. RUN TEST 05/05/10
2. UTILITIES 15:15:15
Bat:
TERMINAL VTG:
1 V
Press the [2] key (UTILITIES).
b. The following screen will be displayed:
1.PRINT
3.SETUP
2.SAVE/RES
TERMINAL VTG:
1 V
Press the [1] key (PRINT).
c. The following screen will be displayed:
1.PLOT R
2.PLOT I
3.PLOT R,I 4.SUMMARY
TERMINAL VTG:
1 V
1. PLOT R
Press the [1] key (PLOT R) to print the resistance versus time graph. The graph
will be printed on the thermal printer and you will be returned to the “STARTUP” menu.
2. PLOT I
Press the [2] key (PLOT I) to print the current versus time graph. The graph will
be printed on the thermal printer and you will be returned to the “START-UP”
menu.
3. PLOT R,I
Press the [3] key (PLOT R,I) to print both the resistance versus time graph and
the current versus time graph. The graphs will be printed on the thermal printer
and you will be returned to the “START-UP” menu.
42
REV 2
IRM-5000P USER’S MANUAL
4. SUMMARY
Press the [4] key (SUMMARY) to print the tabulated test results. The summary
report will be printed on the thermal printer and you will be returned to the
“START-UP” menu.
43
IRM-5000P USER’S MANUAL
REV 2
3.2.4. Printing a Directory of Test Records Stored in the IRM-5000P’s Memory
You can print a directory of all the test records stored in the IRM-5000P’s Flash EEPROM using
the steps below:
a. Start from the “START-UP” menu:
1. RUN TEST 05/05/10
2. UTILITIES 15:15:15
Bat:
TERMINAL VTG:
1 V
Press the [2] key (UTILITIES).
b. The following screen will be displayed:
1.PRINT
3.SETUP
2.SAVE/RES
TERMINAL VTG:
1 V
Press the [2] key (SAVE/RES).
c. The following screen will be displayed:
1.SAVE
3.ERASE
2.RESTORE
4.DIRECTORY
TERMINAL VTG:
1 V
Press the [4] key (DIRECTORY).
d. The following screen will be displayed:
TEST DIRECTORY
1.FULL
2.BRIEF
TERMINAL VTG:
1 V
1. FULL
Press the [1] key (FULL) to print a directory of all the test records stored in the
IRM-5000P’s Flash EEPROM. A sample test record directory printout is shown in
Figure 15.
2. BRIEF
Press the [2] key (BRIEF) to print a directory of the last 15 test records stored in
the IRM-5000P’s Flash EEPROM. A sample test record directory printout is shown
in Figure 15.
44
REV 2
IRM-5000P USER’S MANUAL
Figure 15. Typical Test Record Directory Printout
45
IRM-5000P USER’S MANUAL
REV 2
3.2.5. Erasing Test Records From the Flash EEPROM
You can erase individual or all test records stored in the IRM-5000P’s Flash EEPROM. To erase a
test record:
a. Start from the “START-UP” menu:
1. RUN TEST 05/05/10
2. UTILITIES 15:15:15
Bat:
TERMINAL VTG:
1 V
Press the [2] key (UTILITIES).
b. The following screen will be displayed:
1.PRINT
3.SETUP
2.SAVE/RES
TERMINAL VTG:
1 V
Press the [2] key (SAVE/RES).
c. The following screen will be displayed:
1.SAVE
3.ERASE
2.RESTORE
4.DIRECTORY
TERMINAL VTG:
1 V
Press the [3] key (ERASE).
d. The following screen will be displayed:
1. ERASE SINGLE TEST
2. ERASE ALL TESTS
TERMINAL VTG:
1 V
1. ERASE SINGLE TEST
Press the [1] key if you would like to erase a single test record from the IRM5000P’s Flash EEPROM. The following screen will be displayed:
ERASE TEST
NUMBER:
TERMINAL VTG:
NOTE
1 V
Press the [STOP] key If you selected the erase option by mistake or
do not wish to erase a test record. You will be returned to the “STARTUP” menu.
46
REV 2
IRM-5000P USER’S MANUAL
Type the test number that you would like to erase and then press the [ENTER]
key. If you do not know the test number, you can first print a test record
directory using the instructions in section 3.2.4.
The following screen will be displayed while the test record is being deleted:
ERASING TEST
PLEASE WAIT...
TERMINAL VTG:
1 V
The following screen will be displayed when the test record has been completely
deleted:
TEST NUMBER 1
ERASED!
TERMINAL VTG:
1 V
Press any key to return to the “START-UP” menu.
2. ERASE ALL TESTS
Press the [2] key to erase all test records from the IRM-5000P’s Flash EEPROM.
The following screen will be displayed:
ERASE ALL TESTS?
1.NO
2.YES
TERMINAL VTG:
1 V
Press the [1] key if you do NOT want to erase all the test records. You will be
returned to the “START-UP” menu.
Press the [2] key if you would like to erase all the test records. The following
screen will be displayed while the test records are being deleted:
ERASING TESTS
PLEASE WAIT...
TERMINAL VTG:
1 V
The following screen will be displayed when all test records have been
completely deleted:
ERASE COMPLETE!
TERMINAL VTG:
1 V
Press any key to return to the “START-UP” menu.
47
IRM-5000P USER’S MANUAL
4.0
CHANGING SETUP PARAMETERS
4.1
Setting the Clock
REV 2
To set the IRM-5000P’s internal clock:
a. Start from the “START-UP” menu:
1. RUN TEST 05/05/10
2. UTILITIES 15:15:15
Bat:
TERMINAL VTG:
1 V
Press the [2] key (UTILITIES).
b. The following screen will be displayed:
1.PRINT
3.SETUP
2.SAVE/RES
TERMINAL VTG:
1 V
Press the [3] key (SETUP).
c. The following screen will be displayed:
1.TEST ID
2.CLOCK
3.COMP INT 4.50/60Hz
5.°C/°F
TERMINAL VTG:
1 V
Press the [2] key (CLOCK).
d. The following screen will be displayed:
ENTER
MM-DD-YY HH:MM:SS
_
Enter the month, date, time, hours, minutes, and seconds (in 24-hour format) using the
alpha-numeric keypad. When the last digit is entered, the clock will be set and you will
be returned to the “START-UP” menu.
48
REV 2
4.2
IRM-5000P USER’S MANUAL
Setting the Frequency
To set the frequency:
a. Start from the “START-UP” menu:
3. RUN TEST 05/05/10
4. UTILITIES 15:15:15
Bat:
TERMINAL VTG:
1 V
Press the [2] key (UTILITIES).
b. The following screen will be displayed:
1.PRINT
3.SETUP
2.SAVE/RES
TERMINAL VTG:
1 V
Press the [3] key (SETUP).
c. The following screen will be displayed:
1.TEST ID
2.CLOCK
3.COMP INT 4.50/60Hz
5.°C/°F
TERMINAL VTG:
1 V
Press the [4] key (50/60Hz).
d. The following screen will be displayed:
1. 60 Hz
2. 50 Hz
TERMINAL VTG:
1 V
Press the [1] key (60 Hz) to set the frequency to 60 Hz, or press the [2] key (50 Hz). The
setting will be stored and you will be returned to the “START-UP” menu.
49
IRM-5000P USER’S MANUAL
4.3
REV 2
Setting the Temperature Units of Measure
When performing tests, you can provide the Device Under Test (D.U.T.) temperature and the
IRM-5000P will automatically calculate the equivalent resistance values at 40°C and 20°C. You
can select the preferred units of measure for entering the D.U.T. temperature by using the
steps below:
a. Start from the “START-UP” menu:
1. RUN TEST 05/05/10
2. UTILITIES 15:15:15
Bat:
TERMINAL VTG:
1 V
Press the [2] key (UTILITIES).
b. The following screen will be displayed:
1.PRINT
3.SETUP
2.SAVE/RES
TERMINAL VTG:
1 V
Press the [3] key (SETUP).
c. The following screen will be displayed:
1.TEST ID
2.CLOCK
3.COMP INT 4.50/60Hz
5.°C/°F
TERMINAL VTG:
1 V
Press the [5] key (°C/°F).
d. The following screen will be displayed:
1. °C
2. °F
TERMINAL VTG:
1 V
Press the [1] key (°C) or the [2] key (°F) to select the corresponding units of measure.
The D.U.T. temperature units of measure will be set and you will be returned to the
“START-UP” menu.
50
REV 2
4.4
IRM-5000P USER’S MANUAL
Enabling the Computer Interface
The IRM-5000P can be connected to a PC via its RS-232C (serial) computer interface port. The
RS-232C port is controlled by the main microprocessor board and is optically isolated from the
high-voltage generator board. A Windows-based software package is provided with the IRM5000P that can be used to retrieve test records from the IRM-5000P. In order to use the
software with the IRM-5000P, you must first connect the unit to the PC via the RS-232C port
and then enable its computer interface. Follow the steps below to enable the computer
interface:
a. Start from the “START-UP” menu:
1. RUN TEST 05/05/10
2. UTILITIES 15:15:15
Bat:
TERMINAL VTG:
1 V
Press the [2] key (UTILITIES).
b. The following screen will be displayed:
1.PRINT
3.SETUP
2.SAVE/RES
TERMINAL VTG:
1 V
Press the [3] key (SETUP).
c. The following screen will be displayed:
1.TEST ID
2.CLOCK
3.COMP INT 4.50/60Hz
5.°C/°F
TERMINAL VTG:
1 V
Press the [3] key (COMP INT).
d. The computer interface will be enabled and the following screen will be displayed:
COMPUTER INTERFACE
MODE
You can now use the provided software to retrieve test records from the IRM-5000P.
Please refer to the IRM-5000P Software User’s Manual for further instructions.
Press the [STOP] key to disable the computer interface and return the IRM-5000P to
stand-alone mode. You will be returned to the “START-UP” menu.
51
IRM-5000P USER’S MANUAL
REV 2
APPENDIX A - DIELECTRIC DISCHARGE RATIO TEST DESCRIPTION
When a dielectric is subjected to a voltage gradient, some charge will slowly permeate into the
dielectric. The effect is referred to as Dielectric Absorption. Since the dielectric is by intent an
insulator, one can imagine that the movement of these small charges has a very long time
constant. While virtually all dielectrics exhibit the effect to some extent, poorer dielectrics or
dielectrics that have undergone degradation will absorb more charge.
The IRM-5000P’s Dielectric Discharge test uses a standard test voltage of 500V and a standard
test duration of 30 minutes. During the testing period some charge migrates into the dielectric
material under test, as described above. At the completion of the test, the insulation system is
discharged to zero potential. At the zero point, the absorbed charge will start to migrate out of
the insulator’s dielectric. After discharging the dielectric for one minute, the Dielectric
Discharge current flow is measured. As can be seen in the equation below, the Dielectric
Discharge Ratio is proportional to the current measured:
DD RATIO =
Current after 1 minute (mA)
Test Voltage × Capacitance
In general, higher ratios indicate a poorer insulation system. As one would expect, a higher test
voltage will produce a higher electric field across the insulator’s dielectric material, and more
charge can be expected to be absorbed by the dielectric. Thus, doubling the test voltage can be
expected to double both the absorbed charge as well as the discharge current measured at the
end of the test. To make the Dielectric Discharge Ratio independent of this natural
phenomenon, the formula for the Dielectric Discharge Ratio is divided by the test voltage.
An insulation system that has longer lengths of insulated conductors can naturally be expected
to absorb more charge, due to the longer length of the conductors and dielectric. Of course,
such systems will also have a higher capacitance, as the capacitance of a pair of conductors in a
cable is proportional to the length of the cable. Thus, a system with twice as much cable will
absorb, in general, twice as much charge, but will also have twice as much capacitance.
Dividing the discharge current by the measured capacitance in the DD Ratio formula above will
normalize the effect.
52
REV 2
IRM-5000P USER’S MANUAL
APPENDIX B - GUARD TERMINAL APPLICATION
When testing an insulation system, there may be times where the measured leakage current is
not necessarily a function of a poor insulation system, but rather of contamination at the
connection point, which allows leakage currents to flow along the surface of the connection
point. These readings can cause the test operator to incorrectly assume that the insulation
system under test has failed and must be replaced.
To exclude these surface effects and get an accurate measurement of the insulation system
itself, it is often advisable to perform the Insulation Test with a guard terminal attached as
shown in the figure below.
Surface leakage currents, which may flow along the surface of the exposed wires, will flow from
the Positive HV Test lead to the Guard lead. These currents are not measured by the IRM5000P. The cable itself will also have some inherent leakage current that will flow from the
Positive HV lead, through the cable, and out the Negative HV lead. The current that will be
used for the Insulation Resistance measurements.
The guard terminal is at very nearly the same voltage potential as the Negative Test lead. For
the same reason, the guard connection should be positioned to avoid arcing from the Positive
Test lead. As shown in the illustration, by placing the guard near the Negative Test lead, the risk
of arching can be avoided.
53
1520 S. Hellman Ave • Ontario, CA 91761 • USA
Phone: 909-923-9390 • Fax: 909-923-9391
www.vanguard-instruments.com
Copyright © 2010 by Vanguard Instruments Company, Inc.
IRM-5000P User’s Manual • Revision 2.0 • May 19, 2010 • TA


