1
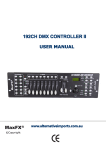
V-DMX192J
User Manual
Product Descriptions
To optimize the performance of the V-DMX-192J, please read these operating
instructions carefully to familiarize yourself with the basic operations of the
unit. It has been tested at the factory before being shipped to you, there is no
assembly required. Its' features include:
•
•
•
•
•
•
•
•
•
•
•
•
•
•
•
•
•
192 DMX channels
12 Scanners of 16 channels each
30 Banks of 8 programmable scenes
6 Programmable chases of 240 scenes
8 Sliders for manual control of channels
Assignable joystick for ease of pan and tilt movement
File dump allows data to be sent or received between two units
Auto mode program controlled by speed and fade time sliders
Fade time /Assign fade time
Blackout master button
Reversible DMX channels allows fixture to react opposite to others in a
chase
8 or 16 channel mode
Manual override allows you to grab any fixture on the fly
Built in microphone for music triggering
Midi control over banks, chases, and blackout
DMX polarity selector
Power failure memory
Read the instructions in this manual carefully and thoroughly, as it gives
important information regarding safety during use and maintenance. Please
keep this manual with the product for future reference.
Page 1
Warnings!
1. To prevent or reduce the risk of electrical shock or fire, do not expose
this unit to rain or moisture.
2. Clearing memory repeatedly may cause damage to the memory chip, be
careful not to initialize your units' frequency often to avoid this risk.
3. Only use recommended AC/DC power adaptor.
4. Be sure to save the packing in case you have to return the product for
service.
5. Do not spill any liquids into or on your controller.
6. Be sure that the local power outlet matches the required voltage for your
controller.
7. Do not attempt to operate this unit if the power cord has been frayed or
broken.
8. Do not attempt to remove or break off ground prong from the electrical
cord. This prong is used to reduce the risk of electrical shock and fire in
case of an internal short.
9. Disconnect from the main power supply before making any type of
connection.
10. Do not remove the top cover under any conditions. There are no user
serviceable parts inside.
11. Disconnect the units' main power when left unused for long periods of
time.
12. This product is not intended for home use.
13. Carefully inspect this unit for damage that may have occurred during
shipping. If it appears damaged, do not attempt any operation, please
contact your dealer immediately.
14. This product should be operated by adults only, never allow small
children to tamper or play with this unit.
15. Never operate this product under the following conditions:
o In places subject to excessive humidity
o In places subject to excessive vibration or bumps
o In areas with a temperature over 45 degrees C/113 degrees F
or less than 2 degrees C/35.6 degrees F.
Caution!
1. There are no user serviceable parts inside.
Page 2
2. Do not attempt any repairs yourself; doing so will void the
manufacturer’s warranty.
3. In the unlikely event your unit may require service, please call your
dealer.
Controls and Functions
Front Panel:
1. Scanner Buttons 1 –12
2. Scene Buttons
Press the scene buttons to load or store your scenes. There are a
maximum of 240 programmable scenes.
3. Faders
These faders are used to control the intensity of channels 1-8 and 9-16
on Page B
4. Page Selection Button
Used to select between Page A channel 1-8 and Page B channel
9-16.
5. Fog machine Button
Activates Fog Machine.
6. Speed Slider
Used to adjust the chase speed within the range of 0.1 seconds to 10
minutes.
7. Fade Time Slider
Used to adjust the fade time. Fade time is the amount of time it takes for
a scanner (or scanners) to move from one position to another, or for the
dimmer to fade in or out.
8. LCD Display
Shows the current activity or programming state
Page 3
9. Pan Joystick
This is used to control the pan movement of the scanner for
programming.
10. Tilt Joystick
This is used to control the tilt movement of the scanner for
programming.
11. Program Button
Activates the program mode.
12. Midi/Rec
Used to control midi operations or to record programs.
13. Auto/Del
Activates music mode or to delete scenes or chases.
14. Music /Bank/Copy
Activates program mode.
15. Bank Up/Down
Press the up and down button to select from the 30 banks.
16. Tap/Display
Used to create a standard beat or to change the value mode between %
and 0-255.
17. Blackout Button
Tap to momentarily pause all output.
18. Chase Buttons (1-6)
These buttons are used for activating the "chase" of programmed
scenes.
19. Find Button
When find is on, the pan or tilt joystick will control the scanner in the
smallest increments.
20. Mode Button
Pressing Find and Mode buttons allows you to activate "Assign"or
"Reverse" mode.
Page 4
Rear Panel
1. Midi In
Receives Midi data.
2. DMX Polarity Select
Used to select the DMX polarity.
3. DMX Out
This connection sends your DMX value to the DMX scanner or DMX
pack.
4. DMX In
This connector accepts your DMX input signals.
5. Fog Machine Connector
This connector is used to plug in a DMX controlled fog machine.
6. DC Input
DC-12V, 500mA min.
7. Power Switch
This switch turns the power On/Off to the DMX 192J.
8. Audio In
0.1~1Vp-p
Operation
The V-DMX 192J allows you to program 12 scanners with up to 16 channels
each, 30 banks of 8 programmable scenes, 6 chases of 240 scenes using 8
channels sliders, a joystick, and other buttons. With the joystick, you can
easily and more accurately control the movement of the fixture. And to further
your ability to dazzle the audience, it allows you to assign and reverse DMX
channels. In addition, two controllers can set up communications so that each
can send or receive a complete file dump.
Page 5
Display Information
The LCD display contains a maximum of 2 lines, each of 8 characters. Below
are the definitions.
LCD Display
Message
SN 1
BK 1
Chase 1
Step 009
Data 184
SP: 1M54s
TP: 4.25s
Ass 04 05
Res 10 13
Scene 1
Bank 1
Chase 1 is activated
Ninth step of chase
DMX value (000-255)
Current speed is 1 min. 54 sec.
Time of last two taps is 4.25sec
Assign DMX channels 4 & 5
Reverse DMX channels 10&13
Unit Setup
The unit is preset to allocate 16 channels per fixture. In order to assign your
fixture to the scanner buttons located on the left side of your controller you
will need to "space" your fixtures 16 DMX channels apart. Note: Most fixtures
only require 4, 6, or 8 channels to operate. Please refer to your fixtures' owner
manual for the correct spacing by using the Dip Switches on the unit. The
following is only an example of DMX address settings requiring 16 channels
each to program:
Fixture#
1
2
3
4
5
6
7
8
9
10
11
12
Digital #
1
17
33
49
65
81
97
113
129
145
161
177
Dip Switch Setting
1 “On”
1 & 5 “On”
1 & 6 “On”
1, 5, & 6 “On”
1 & 7 “On”
1, 5, & 7 “On”
1, 6, & 7 “On”
1, 5, 6, & 7 “On”
1 & 8 “On”
1, 5, & 8 “On”
1, 6, & 8 “On”
1, 5, 6, & 8 “On”
Page 6
Enabling The Program Mode
To enable program mode, hold the "Program" button for 3 seconds until the
LED is lit.
Set-Up Joystick
1. Press and hold the “Program” button until LED is lit.
2. Press and hold the “Mode” and “Fine” buttons at the same time, the
"Assign" LED should light. If the reverse LED lights, press the “Fine"
and “Mode” button again to enter "Assign" mode.
3. Use the “Bank” Up & Down keys to select the axis you wish to assign
(Pan & Tilt).
4. Use the “Tap /Display” button to select 8 or 16 channel mode
5. Press the button corresponding to the scanner you wish to assign.
6. While holding the “Mode” button press the scene number
corresponding to the slider which controls the movement. (Example: If
the “Pan” movement is controlled by slider # 4, press and hold the
“Mode” button while tapping scene button # 4).
7. When finished press the “Mode” and “Fine” buttons at the same time
again to exit “Assign” mode.
Scenes
Programming A Scene
1. Enter program mode (See Enabling Program Mode).
2. Check the blackout key and verify that the LED is not lit, if it is,
press it once to exit blackout mode.
3. Verify that the “Speed” and “Fade” time sliders are positioned at
zero.
4. Press the scanner button corresponding to the unit you wish to
control. You may control more than one scanner at a time by
pressing the button corresponding to the scanner(s) you wish to
program.
5. Move the faders and joystick to the desired position. If necessary,
you may select page ”B” to control channels 9-16.
6. Tap the “Bank” Up & Down buttons to choose the bank onto which
you want to store this scene. There are a total of 30 banks you can
select, you may store up to 8 scenes in each bank.
Page 7
7. Once all the scanners are programmed into the desired positions for
the scene, tap the “Midi/Rec” button to program this scene into
memory.
8. Tap the scene button you wish to store your scene into. All LED’s
will flash three times signifying this operation. The LCD readout
will show the “Bank” scene.
9. To unselect the scanner(s) you have been programming and switch
to another simply press the button of the scanner you have been
programming again, (deselecting it) and select another scanner.
10. Repeat steps 2-7 until all scenes have been programmed
11. If you don’t intend to continue programming at this time, press and
hold the program button for three seconds to exit program mode.
The LED will go out indicating this selection.
Example: Scene Program
1. Enable "Program" mode.
2. Tap the scanner 1 button to turn on its fader control.
3. Verify that the page select is set on “Page A”,if not, press the page
select button to select “Page A”.
4. Move the first and second faders all the way up to maximum value
position.
5. Select “Bank 1” using the “Bank Up/Down” buttons.
6. Press the “Midi /Rec” button.
7. Tap scene 1 to store the first scene.
8. Repeat steps 4-7 until all scenes have been programmed into “Bank
1”.
9. Tap the scanner 1 button to turn off the fader control.
10. When finished, disable program mode. You can now manually tap
through what you have just programmed.
Editing A Scene
1. Enable "Program" mode.
2. Press the “Bank” Up/Down button to select the bank containing the
scene you wish to edit.
3. Select the scene you wish to edit by tapping its scene button.
4. Use the faders and joystick to make the desired adjustments to the
scene.
Page 8
5. Once you have completed the changes, tap the “Midi/Rec” button.
6. Tap the scene button that corresponds to the scene you’re editing,
this will override the existing scene.
Be sure to select the same scene in steps 3and 6, otherwise you may
accidentally record over an existing scene.
Copy Scanner Settings
This setting allows you to copy the settings of one scanner to another.
1. Press and hold down the scanner button you wish to copy.
2. While holding down the button, tap the button of the scanner you
wish to copy the settings to.
Copy A Scene
1. Enable program mode.
2. Tap the “Bank” Up/Down buttons to select the bank containing the
scene you wish to copy.
3. Select the scene you wish to copy by pressing its scene button.
4. Using the “Bank” UP/Down button select the bank you wish to copy
the scene to.
5. Tap the Midi/Rec button.
6. Tap the scene button you wish to copy the scene to.
Deleting A Scene
1. Enable the program mode.
2. Press the desired “Scene” button to select the scene you wish to
delete.
3. Press and hold down the “Auto /Del “ button. While holding the
button, tap the scene button that corresponds with the scene you wish
to delete.
4. When the programmed scene is deleted, all DMX channels values
will be set to “0”.
Page 9
Deleting All Scenes
1. With the power “Off” press and hold down the “Program” and
“Bank Down” buttons at the same time.
2. Turn the unit back on, all scenes should be cleared.
Copy A Bank Of Scenes
1. Enable the program mode.
2. Tap the “Bank Up/Down” button until you reach the bank you wish
to copy.
3. Tap the “Midi /Rec” button.
4. Tap the “Bank UP/Down” button to select the bank you wish to copy
to.
5. Tap the “Music/Bank Copy “ button, all LEDs will briefly flash
three times indicating the function has been completed.
6. Press the program button for three seconds to exit programming
mode.
Chases:
Programming A Chase
Note: You must have already programmed scenes in order to
program a chase. This function allows you to cycle through up
to 240 scenes in a preselected order. It is recommended that before
programming chases for the first time, you delete all chases in the
controller. See Delete All Chases for instructions on how to do so.
1.
2.
3.
4.
5.
Enable the program mode.
Tap the “Chase” button to select the chase you wish to program.
Select a desired scene from the bank that has scenes stored inside it.
Tap the “Midi/Rec" button.
Repeat steps 3-4 until all desired scenes have been entered.
Inserting A Bank Of Scenes Into A chase
1. Enable the program mode.
2. Select the chase you wish to program.
3. Use the “Bank Up/Down” key to select the bank of scenes you wish
to copy.
4. Tap the “Music/Bank Copy” button.
5. Tap the “Midi/Rec" button, all LEDs will flash three times indicating
that the requested operation has been performed.
Page 10
Adding A Step
1. Enable the program mode.
2. Press the corresponding button of the chase you wish to add a step
to.
3. Press the "Tap/Display" button, the LCD will show the current step.
4. Press the “Bank Up/Down” button and scroll to the step after which
you wish to add an additional step.
5. Press the “Midi/Rec” button, the segment display will read the step
one level higher than before.
6. Tap the “Tap/Display” button again. The LCD will show the current
chase, scene, and bank. Create a desired scene and record it as a new
step or select a previously programmed scene to add to the chase.
7. Once you have selected the scene you wish to add, press the
“Midi/Rec" button again. All LEDs will flash three times indicating
the new step has been inserted into the chase.
Deleting A Step
1.
2.
3.
4.
Enable the program mode.
Select the chase that contains the step you wish to delete.
Press the “Tap/Display” button, the LCD shows the current step.
Press the “Bank Up/Down” button and scroll to the step you wish to
delete.
5. Press the “Auto/Del" button to delete the step. All LEDs will flash
three times indicating the requested operation has been performed.
Deleting A Chase
1. Press the button corresponding to the chase you wish to delete.
2. Press and hold down the “Auto /Del” button while holding down the
chase button. All LEDs will flash three times indicating that the
requested operation has been performed.
Page 11
Deleting All Chases
1. With the power “Off”, press and hold down the “Auto/Del” and
“Bank Down” buttons at the same time.
2. Turn on the power, all chases should be cleared.
Joystick/Channel Selection
Set-up Joystick
1. Enable the program mode.
2. Press and hold the “Mode and Fine” buttons at the same time, the
"Assign" LED should light. If the "Reverse" LED lights up, press
“Fine and Mode” again to enter assign mode.
3. Use the “Bank up/Down” keys to select the axis you wish to assign
(Pan or Tilt).
4. Use the “Tap/Display” buttons to select 8 or 16 channel mode.
5. Press the button corresponding to the scanner you wish to assign.
6. While holding the “Mode” button press the scene number
corresponding to the slider which controls the movement. (Example:
If the Pan is controlled by slider # 4, press and hold the “Mode”
button while tapping scene button # 4.
7. When finished, press the “Mode” button at the same time again to
exit assign mode.
Reverse Joystick Movement / DMX Channel
1. Enable the program mode.
2. Press the “Mode and Fine” buttons to enter mode, than press “Fine &
Mode” again to enter reverse mode. The reverse LED lights up
indicating reverse mode is active.
3. Use “Bank Up/Down” button to change between Pan & Tilt, the
corresponding LED lights will indicate the selection.
4. Press the “Tap/Display” button to change between 8 and 16 channel
mode.
5. Press the "Scanner" button to select the scanner.
Page 12
6. While holding the “Mode” button, press the corresponding scene
button on the channel you wish to reverse. (Example: If you are
reversing the scanner, once you verify that you are in reverse mode
and the Tilt LED is lit, check to see which slider the Tilt control is
on. Hold the “Mode” button and press the scene button that is the
same as the slider number for tilt. (Slider 5/Scene 5).
7. Continue steps 3-7 as needed. You may reverse a maximum of 48
channels for 12 scanners.
Deleting A Scanners' DMX Channels
1. Activate "Assign" or "Reverse" mode.
2. Tap the scanner button to select the scanner you wish to delete.
3. Press the “Mode” and “Auto/Del” buttons at the same time. All
LEDs will flash three times indicating the requested operation has
been performed.
Clear All DMX Channels
1. Turn off the power to the controller.
2. Press the “Mode and Auto /Del” buttons at the same time.
3. While holding the two buttons, turn the power back on, all LEDs
will flash briefly indicating the requested operation has been
performed.
Display The DMX Channel
1. Press the “Fine and Mode” buttons at the same time, putting the
controller into "Assign" mode.
2. Press the “Fine and Mode” buttons again, lighting the reverse LED.
3. Press the scanner button that is set at the desired Pan & Tilt and the
LCD will display the DMX values for the Pan & Tilt.
Page 13
Fade Time/Assign Fade Time
1. With the power “Off”, press the “Mode” and “Tap/Display” buttons
at the same time.
2. Apply the power again, tap the “Tap/Display” buttons to change
between Fade Time and Assign Fade Time, The LCD reads:
3. Press the “Mode and Tap/Display” buttons at the same time to store
your settings into memory. If you do not wish to save your settings,
press the "Blackout" button to exit this operation.
Playback:
Running Scenes
There are three modes in which to run scenes and chases. They are
Manual Mode, Auto Mode, and Music Mode.
Manual Mode
1. When the power is turned on, the unit enters manual mode
automatically.
2. Check and verify that both the Auto and Music LEDs are off.
3. Use the “Bank Up/Down” button to select the bank with the scenes
you wish to run.
4. Press the scene button corresponding to the scene you wish to
display.
Page 14
Auto Mode
1.
2.
3.
4.
5.
This function allows you to run a bank of programmed scenes in
sequence.
Press the “Auto/Del" button to enter the Auto Mode. The "Auto"
LED will light indicating the Auto Mode is active.
Use the “Bank Up/Down” button to select a bank of scenes to run.
After selecting the bank of scenes to run, you can use the speed and
fade sliders to adjust the speed of the scene progression.
Or you can use the “Tap Sync/Display” button to set the speed
instead. The amount of time between the last two taps will instruct
the controller as to the length of time between steps. This setting will
stay in effect until the speed slider is moved.
Press the “Auto /Display" button to exit Auto Mode.
Music Mode
1. Press the “Music/Bank Copy” button to activate Music Mode.
2. Use the “Bank Up/Down” button to select a bank of scenes you wish
to run. The scenes selected will run through sequentially to the beat
of the music identified by the built-in microphone.
3. Tap the “Music /Bank Copy” button again to exit Music Mode.
Running Chases:
Manual Mode
1. When the power is turned on, the unit enters manual mode
automatically.
2. Select the chase you wish to run by pressing the corresponding chase
button. Pressing this button a second time will release the chase.
Auto Mode
1. Press the “Auto/Del” button to activate Auto Mode.
2. Select the desired chase by pressing one of six chase buttons,
Pressing this button a second time will negate this selection.
3. Use the “Speed” and “Fade” time sliders to adjust the chase to your
specifications.
Page 15
Music Mode
1. Press the “Music /Bank Copy” button to activate music mode
2. Select the desired chase by pressing one of the six chase buttons, this
will activate the chase and cause it to respond to the rhythms of the
music.
File Transfer
File transfer allows the user to transfer all information stored in
one DMX-192J to a second DMX-192J. You must connect the two
units by using a 3 pin XLR cable from the “Out” of the main
unit to the “In” of the second unit receiving the information.
To Send A File Dump
1. With the power “Off”, press and hold down scanner buttons 2 and 3
and “Scene 1” button at the same time.
2. Turn the unit back on while pressing these three buttons, the LCD
will read “Transmit” indicating that the unit is ready to send the files.
3. Press “Scene 7 & 8” buttons at the same time to send the files.
4. If an error occurs during the file dump, the LCD will read
“ERROR”.
To Receive A File Dump
1. With the power “Off, press and hold down scanner buttons 8 and 9
and "Scene 2" button at the same time.
2. Turn on the power while pressing these buttons, the LCD will show
“Receive” indicating this unit is receiving the file dump.
3. When receiving is over, the unit will automatically return to normal
mode.
Page 16
Midi Channel Settings
1. Press and hold the “Midi/Rec” button for three seconds. The LCD
shows the Midi channel in use the last time.
2. Use the “Bank Up/Down “ buttons to select any of the DMX
channels 01-16 to assign to the Midi channel.
3. Press and hold the “Midi/Rec button to save your settings. The LEDs
will flash three times indicating the required operation has been
performed.
Technical Specifications:
Power Input
DMX In/Out
Midi In
Dimensions
Weight
DC 9~12V 500mA Min.
3 Pin female/male XLR socket X 1
5 Pin multiple socket
19”L x 5.25”W x 3”D
5 lbs.
Page 17