Transcript
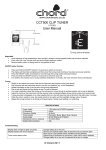
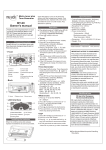
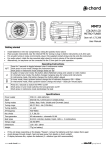
Power Up
PT – C01™ Clip on Tuner
User’s Manual
Once you have attached the tuner to your instrument or music stand, turn it on by pressing the power switch on the face of
the tuner. The tuner defaults to the tuning reference of A-440Hz. To set to another tuning reference, push the “A4” button
on the front of the tuner and press the button again to choose a new tuning reference. The pitch reference can be set
anywhere from 430Hz-450Hz. Press the power switch off and the tuner will default to A4 automatically. Take out the
battery to reset the tuner to A-440Hz.
Tuning
The tuner is now ready to help you tune your instrument. As soon as you play a note, the tuner’s color display will indicate
the note you are playing and how close it is to pitch. The left side of the display (red) indicates flat; the right side of the
display (yellow) indicates sharp.
If only red needles are lit, it means the note played is flat. If any yellow needles are lit, it means the note played is sharp.
You are in tune if the green needle and the green dot above it (at the center of meter) are lit, but no yellow needles are lit.
As the tuner is Chromatic, you can easily deal with non-standard tunings. It will read any note you play.
Power Save Feature
If no notes are detected for 3 minutes, the tuner will shut off automatically.
Battery Replacement
The tuner uses one (1) CR2032 battery. To replace the battery, open the battery cover, remove the old battery and replace it
with a new one, taking care that the positive terminal (+) is directed upwards when placed in the battery cover (plus side
toward back side of tuner). Gently push the battery door closed until you feel a slight “click.” Before using your new tuner
for the first time, take out the battery and reinsert the battery to ensure proper operation.
Tuner Features
Specifications
Thank you for choosing the Peavey PT–C01 Clip On Tuner! The frequency range detected by the Peavey PT–C01 Clip On
Tuner is optimized for all instruments, including Chromatic/Guitar/Bass/Violin/Ukulele and senses the vibrations of the
instrument.
Attaching The Tuner To Your Instrument
•
•
•
Use the clamp to attach the tuner to your instrument. Take care to avoid damaging the instrument finish. Do not
attach the tuner to your instrument if any of the rubber pads are broken or missing.
For Guitars, attach the clamp to the headstock (placing the body of the tuner either in front of or behind the
headstock). For other instruments, find the location that allows for the best sound pickup while allowing you to easily
view the display.
After attaching the tuner to your instrument, adjust the arm that connects the tuner to the clamp for optimum
viewing of the tuner display. Also, the tuner body rotates 360 degrees so the display can be placed at the best
viewing angle.
•
•
•
•
•
•
Tuning Mode: Chromatic/Guitar/Bass/Violin/Ukulele
Pitch shift: 430-450Hz
Detection range: B0-B7
Color:
Weight: < 2 oz
Accessories: Battery, Users Manual
Caution
•
•
•
Leaving the tuner attached permanently to the instrument for a long time period could cause marring of the
instrument’s finish. We recommend you remove the tuner from the instrument after you finish tuning.
Please replace the battery when the screen becomes unclear.
If the display is unclear please take out the battery and reinsert again in 10 seconds.
Features and specifications are subject to change without notice
.