1
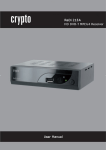
DVB-T2 DIGITAL
TV BOX
QUALITY OF DIGITAL TELEVISION
MT4158
User Manual
EN Index
Index ................................................................................................2
Introduction ..................................................................................3
Front panel.....................................................................................3
Rear view ........................................................................................3
Remote control ............................................................................4
Hardware configuration............................................................5
Connecting tuner to a TV .........................................................5
Connecting with Hi-Fi audio system ....................................5
Software Configuration.............................................................6
Startup Menu ................................................................................6
Installation Menu ........................................................................6
Automatic Channel Scanning (Auto Scan) .........................6
Manual Channel Scanning .......................................................6
Aerial Adjustment .......................................................................7
Logical Channel Number .........................................................7
Watching TV ..................................................................................7
Changing channels .....................................................................7
Using Electronic Programme Guide (EPG) .........................7
Edit Channel Menu .....................................................................7
TV Channel list..............................................................................8
Radio Channel List ......................................................................8
Delete All Channels from list ...................................................8
System Properties .......................................................................8
System Setup Menu ...................................................................8
2
Changing Language ...................................................................9
TV System Settings .....................................................................9
Local Time Setting .......................................................................9
Timer Setting ..............................................................................10
Parental Lock ...............................................................................10
On-Screen Display Settings ...................................................10
Favorite Channel Group ..........................................................11
Tools Menu ..................................................................................11
Receiver information ................................................................11
Load Factory Default ................................................................11
Software Upgrade .....................................................................12
Removing USB Device .............................................................12
Games ............................................................................................12
Recording and external Media Devices.............................13
Explore External USB Device - Media Player ....................13
Record Manager.........................................................................13
USB Storage Device Information .........................................14
USB HDD Formatting ...............................................................14
Recording Configuration ........................................................14
Jump Time Settings ..................................................................15
Recording with Timeshift .......................................................15
Start Video Buffering ................................................................15
Preview with timeshift.............................................................15
Turning off timeshift function ..............................................15
Recording .....................................................................................15
Troubleshooting ........................................................................16
Technical Specification ............................................................16
Introduction
EN
Front panel
Rear view
3
EN Remote control
1.
2.
3.
4.
5.
6.
7.
8.
9.
10.
11.
12.
13.
14.
15.
16.
17.
18.
19.
20.
21.
22.
23.
24.
25.
26.
4
STANDBY On/Off
INFO (active channel information)
PLAY
Previous / Next
PAUSE / TimeShift
MENU (otwórz/zamknij okno menu)
VOL- (Volume Down) / VOL+ (Volume Up) / CH- (Previous
Channel) / CH+ (Next Channel) / Menu Navigation (Left,
Right, Up, Down)
OK (Confirm option)
RECORD
Numeric keys
USB Menu
MEDIA Menu
TTX (Teletext)
TIMER
MODE (switch RGB/CVBS mode)
SUBTITLE (On/Off )
BACKWARD, FORWARD - fast scanning
EXIT
STOP (stop playing / recording)
EPG (otwórz elektroniczny przewodnik po programach)
BACK (Previous Channel)
TV/RADIO
AUDIO (choose audio track)
MUTE (On/Off )
FAV (Favourite Playlist)
RED/GREEN/YELLOW/BLUE – interactive buttons/submenu/Teletext Navigation
Hardware configuration
EN
The MT4158 tuner can work with several devices. Most common configurations are shown below.
Connecting tuner to a TV
Connect tuner to your TV with SCART cable or composite cable as shown below.
Connecting with Hi-Fi audio system
5
EN Software Configuration
Startup Menu
If you first time turn on tuner there will be shown “Welcome” menu Then with navigation keys setup major
options: REGION, LANGUAGE, DISPLAY MODE, ASPECT MODE and confirm with “OK”.
Automatic Channel Scanning (Auto Scan)
1. Select „Auto Scan” option and press OK.
2. Using navigation keys choose “FTA Only – Yes or No”
option.
3. Choose „Search” option and press OK to start scanning available channels.
Installation Menu
1. Press MENU button on the remote.
2. With UP/DOWN keys choose „Installation” menu,
press RIGHT to accept.
3. Use UP/DOWN to select proper submenu and press OK
4. Press EXIT to leave menu.
Manual Channel Scanning
1. Choose „Channel Scan” menu and press OK
2. Use direction buttons to switch between „Scan
Mode –By channel” and „Scan Mode – By frequency”.
6
Choose „Scan Band”, primary channel number „Ch
No.” and confirm „Search” option by pressing “OK”.
Aerial Adjustment
1. Choose „Aerial Adjustment” menu and press “OK”.
2. Switch between „Tuner Power” – ON/OFF. When this
option is turned “On” there is +5V voltage on antenna socket. If you do not use aerial that requires +5V
power supply set this option to “Off ”.
Logical Channel Number
When “Logical Channel Number” option is active you
cannot change channel number manually. When it
is turned off you can assign any number to available
channel.
Watching TV
3. Choose channel from channel list on the menu.
EN
Using Electronic Programme Guide (EPG)
1.
2.
3.
4.
Press EPG button on remote.
Use directional keys to explore list of available channels
Press GREEN button to enter „Timer Events”.
Press RED button to enter „Step time” menu.
Edit Channel Menu
1. Press MENU button on remote to enter main menu.
2. Use UP/DOWN keys to highlight „Edit Channel” option, next press RIGHT button to continue
3. Use UP/DOWN keys to select an item and press OK.
4. Press EXIT to leave menu.
Changing channels
You can select the channel you wish to watch in 3 ways:
1. By pressing CH- / CH+ buttons on remote.
2. Enter channel number manually by numeric keys on
remote.
7
EN
TV Channel list
1. Choose „Edit Channel” menu and select „TV Channel
List” option by pressing OK.
2. Use UP/DOWN keys to select proper channel and
press OK to show channel view.
3. Use color buttons on remote to access available options:
„LOCK” – to lock the channel position,
„SKIP” – to mark channel to be skipped while watching,
„MOVE” – move channel position on the list,
„SORT” – to sort channel list,
„DELETE” – to delete channel from list,
„RENAME”- to change channel description.
4. Press FAV button on remote to enter your favorite
channel list and use color keys to edit list.
Radio Channel List
1. Choose „Radio Channel List” in „Edit Channel” menu
and press OK.
2. Use UP/DOWN keys to select channel and press OK
to listen selected radio station. In this mode preview
window is not available.
Delete All Channels from list
1. From „Edit Channel” menu select „Delete All” and
press OK.
2. When confirm window
appears choose „YES” to
confirm operation or „NO” to
cancel this operation.
System Properties
System Setup Menu
System properties will allow you to set language of
your system menu, TV mode, local time, TV display
mode, timer mode setup, parental lock, OSD settings
and Favorite channel list.
1. Press MENU button on remote to enter main menu.
2. Use UP/DOWN keys to select „System Setup” menu,
press RIGHT to continue.
3. Use UP/DOWN keys to select submenu and press OK.
4. To exit menu press EXIT button.
8
EN
Local Time Setting
Changing Language
This option allows to change the language of menu,
audio track, subtitles and teletext.
¯ „Region”: choose your country where you are receiving DVB-T TV signal
¯ „GMT Usage”: „ON”/„OFF” automatic time correction
¯ „GMT Offset”: available only if “GMT Usage” is turned
on. Choose your GMT offset according the region of
your country
¯ „Date” and „Time”: manual date and time setting –
available only if “GMT Usage” option is inactive.
TV System Settings
¯ „Display mode” - available options: PAL/NTSC/AUTO
¯ „Aspect mode” (screen proportions): Auto / 4:3PS /
4:3LB / 16:9
¯ „Video output” – available options: CVBS / RGB
¯ „Digital Audio Output” (audio compression format):
Bitstream / LPCM
9
EN
Timer Setting
¯ „Timer Mode” – available options: „OFF”/„ONCE”/
„Daily”
¯ „Timer Service” (set type of action): „Channel” (preview selected channel)/„Record” (recording selected
channel).
¯ Wakeup Channel: choose channel that will be
viewed after wake up.
¯ Wakeup Date: press OK and enter the date when the
device will wake up using numeric keys.
¯ Wakeup Time: press OK and enter the time when the
device will wake up using numeric keys.
¯ Duration: press OK and enter working time after
wake up.
Parental Lock
1. Choose „System setup” menu and select „Parental
Lock” option. Press OK and when you will be asked
for password enter “0000”
2. When you enter correct password the menu will appear.
10
¯ „Menu Lock”: „ON” – scanning and editing channels
will be secured by password.
¯ „Channel Lock”: „OFF” / „AGE10 / AGE12 / AGE16 /
AGE18” auditions will be blocked for spectators under 10/12/16/18 years old.
¯ „New Password”: change password.
¯ „Confirm Password”: confirm new password.
On-Screen Display Settings
¯ OSD Timeout: 1-10 seconds.
¯ OSD Transparency: available options: „OFF” / 10% /
20% / 30% / 40%.
¯ Load Default OSD setting: load default factory settings.
Favorite Channel Group
In this menu you can rename your favorite channel
group.
1. In the „Channel menu” select „Favorite” option and
press OK.
2. Choose the group with directional keys and press
OK. Using on-screen keyboard enter new name of
the group. Select OK on the screen.
3. To leave menu press EXIT.
3. To select option use UP/DOWN keys and OK button.
4. To leave menu press EXIT.
Receiver information
Tools Menu
1. Press MENU button on remote to enter main menu.
2. Using UP/DOWN keys select the „Tools” menu and
press RIGHT button,
This option shows information about firmware versions
of all components.
1. In the „Tools” menu select „Receiver information” and
press OK.
2. To leave menu press EXIT.
Load Factory Default
This option will set default factory settings and clear
the channel list.
11
EN
EN
1. In the „Tools” menu select „Load Factory Default” option and press OK.
2. To confirm this operation select “YES”.
3. To leave menu press EXIT.
Removing USB Device
In the „Tools” menu select „Remove USB device safely”
option and press OK. Wait for confirmation and safely
remove USB device.
Software Upgrade
1. In the “Tools” menu select „S/W Upgrade by OTA” or
„Upgrade by USB” option and press OK.
2. Choose „Upgrade file” and select the firmware file.
3. Select „Start” and press OK.
4. To leave menu press EXIT.
12
Games
1. Press MENU button on remote to enter main menu.
2. Using UP/DOWN keys select the „Game” menu, press
RIGHT button to enter menu.
3. Choose game ( Tetris / Othello / Sudoku ) and press
OK to play.
4. To leave the game press EXIT.
3. To leave menu press EXIT.
EN
Recording and external Media Devices
1. Press MENU button on remote to enter main menu.
2. Highlight „REC & Media” using UP/DOWN keys, press
RIGHT button to enter.
3. Select submenu with UP/DOWN keys and press OK.
4. To leave menu press EXIT.
Record Manager
1. Select „Record Manager” in the „REC & Media” menu
and press OK.
Explore External USB Device - Media Player
1. In the „REC & Media” menu select „Media+” option
and press OK.
2. Select the file to play with UP/DOWN keys and press OK.
13
EN
2. Select the file you want to play and press OK to preview.
3. To leave menu press EXIT.
USB Storage Device Information
1. Select „DVR HDD Information” option in the „REC &
Media” menu and press OK.
2. To leave menu press EXIT.
USB HDD Formatting
1. Select „HDD Format” in the „REC & Media” menu and
pres OK.
2. Use UP/DOWN keys to select „Storage Partition” option and choose proper partition with RIGHT/LEFT
keys.
3. Select „Format” option with UP/DOWN keys and
press OK. Next choose „FAT32” or „NTFS” file system
and press OK to confirm.
Recording Configuration
1. Select „DVR Configuration” option in the „REC & Media” menu and press OK.
2. Using UP/DOWN keys select desired option:
„Timeshift”- „ON” / „OFF”
14
„Record Type”: “TS / PS”
„TS” – recording with subtitles, teletext and EPG (video format supported only by MT4158 device).
„PS” – recording in MPEG video format (format supported by MT4158 and PC computer).
3. Using „Record selection” option choose USB partition to recording.
4. To leave menu press EXIT.
Start Video Buffering
¯ During watching TV press PAUSE button on remote.
The buffering of video will be started.
¯ Use LEFT/RIGHT keys to watch video at the desired
time position. Press OK to confirm.
Note! Option „PS” is available for auditions broadcasted in MPEG-2 only.
Jump Time Settings
Using this option you can set up of jump time value using PREV / NEXT buttons.
¯ Select “Jump” option in the „REC & Media” menu and
press OK.
¯ Use LEFT/RIGHT keys to choose a value of time:
30sec, 1 min, 5 min, 10 min, 30 min.
Recording with Timeshift
Timeshift option is available only for USB HDD/Flashdrive with not less than 2GB of capacity.
¯ timeshift allows rewind playback to moment of start
recording
¯ with timeshift option turned on device will be recording till the end of free disk space.
Preview with timeshift
¯ Press PAUSE button to hold on playing
¯ Press BACKWARD button to rewind playback
¯ Press FORWARD button to forward playback
Turning off timeshift function
Press STOP button to turn off timeshift function and
start to watching real-time auditions.
Recording
¯ during watching TV press RECORD button on remote, recording will start.
¯ Press RECORD button again to hold on recording.
¯ Press STOP button and confirm with OK to stop recording.
Note! We recommend original USB Storage devices
to prevent poor recording quality.
15
EN
EN Troubleshooting
Technical Specification
Trouble
Cause
STANDBY indicator did
not light
Power cord is not plugged in Check the power cord
Burnout fuse
Contact with service
Solution
Out of signal
Antenna is not connected
to receiver
Incorrect direction of antenna or antenna damaged
Check aerial cord
Change aerial direction
No sound or video
Video source option in TV
is wrong
Choose SCART/AV
video source option
on TV
Unclear subtitles
Poor signal level
Remote control doesn’t
work
Receiver is turned off
Incorrect remote direction
IR receiver is not visible by
IR remote
Batteries are discharged or
incorrectly installed
Tuner
RF Input (IEC-TYPE, IEC 169-2, female)
RF Output RF (IEC-TYPE, IEC 169-2, male)
Frequency range:
174~230MHz (VHF)
470~862MHz (UHF)
Signal Level: -15~-70dbm
Change aerial direction
Reset channel list
Decoder:
Video Decoder
Audio Decoder
Transfer Speed
Aspect Ratio
Audio Formats
Video Output
MPEG-1/MPEG-2 MP@ML/MPEG-4 AVC/H.264 HP@L3
MPEG-1 Layer 1.2/PCM/HE-AAC v.1.0
Max 15 Mbit/s
4:3/16:9
MPEG Layer I & II, 32/44.1/48 kHz
CVBS, RGB
Turn on receiver
Correct direction of
remote
Remove obstacle
Change or correct batteries installation
Connectors:
ATuner
SCART
SPDIF
DATA PORT
RCA output
RF output x 1, RF input x 1
TV x 1
COXIAL x 1
USB
V/L/R x 1
Lost channel lock
password
Prescan all channels
again
Lost menu lock password
Contact with MediaTech helpdesk
Out of signal after install- Antenna with longer cord
ing device in other place need more power
Use external power
supply for antenna
Power:
Input Voltage
Power
Consumption
AC 220~240V, 50/60Hz
Max 8W
Note! Design and equipment specifications are subject to change
without notice.