1
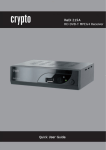
ReDi 215A User Manual
1. SAFETY INFORMATION
This sheet lists important safety information that will help to assure proper use
of the product. Please read them carefully before operation of your product.
TO REDUCE THE RISK OF FIRE AND ELECTRIC SHOCK, DO NOT
EXPOSE THIS UNIT TO RAIN OR MOISTURE.
1. To prevent electric shock do not attempt opening or removing the covers of
the device. The device uses AC220~240V and you may be expose to
dangerous voltage.
2. To clean the device always unplug the product from the wall outlet. Do not
use liquid cleaners or aerosol cleaners. Use a dry cloth for cleaning.
3. You will notice that the product has slots and openings. These are used for
ventilation to ensure reliable operation and to protect it from overheating. The
openings should never be blocked by other devices. This product should not
be placed in an installation, unless proper ventilation is provided. Do not put
anything above the product because you will block the ventilation openings
causing the device to overheat.
4.The product should be situated away from heat sources such as radiators,
heat registers, stoves, or other products (including amplifiers) that produce
heat.
Service
Do not attempt to service this product yourself, as opening or removing covers
may expose you to dangerous voltage or other hazards. Refer all servicing to
qualified service personnel.
2
Korinthou 11, 14451 Metamorfosi, Τel: 210-8098700, Fax: 210-6122512
Site: www.crypto.gr, Email: [email protected]
ReDi 215A User Manual
2. CONTENTS
1. SAFETY INFORMATION
2. CONTENTS
3. INTRODUCTION……………………………………………………………….5
3.1 About ReDi 215A
3.1.1 Front panel
3.1.2 Rear panel
3.2 Remote control
4. SYSTEM & TV CONNECTION ……………………………………………….8
4.1 General
4.2 Connection to the TV
5. GETTING STARTED …………………………………………………………..9
5.1 Welcome
5.2 Installation
6. OPERATION ………………………………………………………………….11
6.1 Changing channels
6.2 Access the Electronic Program Guide (EPG)
7. EDIT CHANNEL ……………………………………………………………….12
7.1 Edit Channel menu
7.2 TV Channel list
7.3 Radio Channel list
7.4 Delete All
8. SYSTEM SETUP ………………………………………………………………14
8.1 System setup menu
8.2 Language
8.3 TV System
8.4 Local time setting
8.5 Timer Setting
8.6 Parental lock
8.7 OSD setting
8.8 Favorite
8.9 Audio Description setting
8.10 Other
9. TOOLS ……………………………………………………………………..18
9.1 Tools main menu
3
Korinthou 11, 14451 Metamorfosi, Τel: 210-8098700, Fax: 210-6122512
Site: www.crypto.gr, Email: [email protected]
ReDi 215A User Manual
9.2 Information
9.3 Factory Setting
9.4 Upgrade by USB
9.5 Remove USB safe
10. GAMES…………..………………………………………………………….20
10.1 Othello
10.2 Sudoku
11. REC……………… ………………………………………………………….20
11.1.1 Record
11.1.2 Video
11.1.3 Music
11.1.4 Image
11.1.5 Edit menu
11.2 PVR storage information
11.3 PVR setting
12. TIMESHIFT/RECORD …………………………………………………..23
12.1 Times Shift
12.2 PVR
13. TROUBLESHOOTING ………………………………………………….27
14. SPECIFICATIONS …………………….…………………………………28
4
Korinthou 11, 14451 Metamorfosi, Τel: 210-8098700, Fax: 210-6122512
Site: www.crypto.gr, Email: [email protected]
ReDi 215A User Manual
3. INTRODUCTION
3.1 About ReDi 215A
3.1.1 Front panel
3.1.2 Rear panel
5
Korinthou 11, 14451 Metamorfosi, Τel: 210-8098700, Fax: 210-6122512
Site: www.crypto.gr, Email: [email protected]
ReDi 215A User Manual
3.2 Remote control
1. STANDBY (Switch the STB on and standby)
2. Numeric entry (Enter numeric values and select the channel directly by
entering it's number)
3. INFO (Press for current channel information)
4. Menu (Open and close the menu screen)
5. Cursor: Navigation buttons used to navigatemenus items
6. OK button (Confirm a selection within a menu)
7. RECORD (Record the TV program)
8. VOL+,- (VOL+/-:Volume Up and Down)
9. TTX (Open interactive service)
10. MEDIA (Enter Record menu)
11. Previous/Next
6
Korinthou 11, 14451 Metamorfosi, Τel: 210-8098700, Fax: 210-6122512
Site: www.crypto.gr, Email: [email protected]
ReDi 215A User Manual
12. USB (Enter Music menu)
13. MUTE (Turn off/on the volume)
14. EPG (Open up Electronic Program Guide Menu)
15. AUDIO (Select audio mode and audio track)
16. SUBTITLE (On/Off Subtitle)
17. TV/RADIO (Switch between TV and Radio)
18. Recall (playback the previous programe)
19. EXIT (Exit from menu)
20. STOP (Stop program playback or recording)
21. CH+/- (Channel Up and Down)
22. FAV (Open the Favorite list)
23. PLAY
24. Search backward /forward
25. PAUSE(Pause/Active timeshift function)
26. RED/GREEN/YELLOW/BLUE Buttons (For interactive function/Submenu
function buttons)
7
Korinthou 11, 14451 Metamorfosi, Τel: 210-8098700, Fax: 210-6122512
Site: www.crypto.gr, Email: [email protected]
ReDi 215A User Manual
4. SYSTEM & TV CONNECTION
4.1 General
There are many different types of TV and other equipment that you can
connect to the device. In this manual you will see some of the most common
ways to connect your equipment.
4.2 Connection to the TV
1. Antenna
2. RF cable
3. Scart cable
4. HDMI cable
4.3 Connecting a HiFi System
5. Coaxial cable
8
Korinthou 11, 14451 Metamorfosi, Τel: 210-8098700, Fax: 210-6122512
Site: www.crypto.gr, Email: [email protected]
ReDi 215A User Manual
5. GETTING STARTED
5.1 Welcome Screen
If you use ReDi 215A for the first time, the "Welcome" menu appears.
Press cursor button to setup the Region, Language, Display Mode and Aspect
Mode.
Highlight "OK" and press the "OK" button to start channel search.
The device will search for all available channels and it will store them. After
searching finishes, press OK to start viewing the channels.
5.2 Installation
1. Press the "MENU" button to enter main menu.
2. Press "UP"or " DOWN " button to highlight "Installation", press "RIGHT"
button to enter to the Installation menu.
3. Press "UP" or "DOWN" cursor button to highlight the desired item and
press "OK" button to enter the sub-menu .
4. Press "EXIT" button to exit.
9
Korinthou 11, 14451 Metamorfosi, Τel: 210-8098700, Fax: 210-6122512
Site: www.crypto.gr, Email: [email protected]
ReDi 215A User Manual
5.2.1 Channel scan
Here you can search manually a channel and store it to a specific channel
number.
Select the options you like in Scan Mode, Scan Band, Channel No fields and
press search to search and store the channel.
5.2.2 Auto Scan
Here you can search and store channels automatically.
Select the Country that you are.
Select FTA only if you want to search only for free to air channels.
Press Search to start auto channel search.
5.2.3 LCN
If LCN(Logical Channel Number) Select function is activated, you can't
change the original number of TV channels by scanning .
You can activate/deactivate the LCN function by setting the "LCN Mode" to
on/off.
10
Korinthou 11, 14451 Metamorfosi, Τel: 210-8098700, Fax: 210-6122512
Site: www.crypto.gr, Email: [email protected]
ReDi 215A User Manual
6. OPERATION
6.1 Changing Channels
There are three ways of channel selection - stepping through the channel list,
selection by number and from the on-screen channel list.
1. Stepping through the channel list:
To move through the channel list, press the upward arrow or downward arrow
key on the remote control.
2. Selected by number:
Enter the channel number directly by pressing numeric buttons, and press the
"OK" button to select desired channel.
3. Selected by on-screen channels list:
You can also select the required channel directly from on-screen channel list.
This is displayed using the device main menu. See "Edit Channel" in this
manual for operation details.
6.2 Accessing the Electronic Program Guide (EPG)
Accessing the EPG of all channels:
1 Press "EPG" button to enter EPG menu .
2. Press cursor button to switch between channel list, events
schedule of the selected channel and now/next events.
3. Press "Green" button to Timer the events.
4. Press "Red" button to display " Time Bar" menu.
11
Korinthou 11, 14451 Metamorfosi, Τel: 210-8098700, Fax: 210-6122512
Site: www.crypto.gr, Email: [email protected]
ReDi 215A User Manual
7.
EDIT CHANNEL
7.1 Edit Channel menu
1. Press the "MENU" button to enter main menu.
2. Press "UP" or "DOWN " button to highlight "Edit Channel", press "RIGHT"
button to enter the Edit Channel menu.
3. Press "UP" or "DOWN" cursor button to highlight the desired item and
press "OK" button to enter the sub-menu .
4. Press "EXIT" button to exit.
7.2 TV Channel list
In the TV channel list menu you can Lock, Skip, Move etc a channel from your
list.
FAV: Here you can add a channel in a Favorite list.
Press FAV button on your remote. The FAV icon is selected.
Select the channel you want with the cursor and press OK button.
Then Select the Favorite group in witch you want to add the channel and
press OK.
Press Exit and continue the same procedure for the rest of the channels.
When you finish press FAV button to exit FAV option.
Lock: Here you can lock a channel so it will be required a password to view it.
Press RED button on your remote. The Lock icon is selected.
Input your password (default password is 0000).
Now when you want to see this channel you will have to enter the password
each time.
Repeat the same for the rest of the channels you want to lock and after you
finish press RED button to exit Lock menu.
12
Korinthou 11, 14451 Metamorfosi, Τel: 210-8098700, Fax: 210-6122512
Site: www.crypto.gr, Email: [email protected]
ReDi 215A User Manual
Skip: Here you can skip channels from your channel list with ought deleting
them.
Press GREEN button on your remote to select Skip Icon.
Browse to the channel you want and press OK.
This channel will be skipped now when you change channels and you will not
be able to see it.
After you finish press GREEN button to exit Skip menu.
Move: Here you can move the channels in the position that you want.
Press YELLOW button on your remote to select Move icon.
Browse to the channel you want and press OK to select it.
Now use UP and DOWN buttons to move the channel in the position that you
want.
Press OK to leave the channel.
Repeat to change position for all the channels.
Press YELLOW button to exit Move menu.
NOTE: If LCN option is ON, then when you move a channel and it doesn’t
change its number.
If LCN is OFF the channel will take the number of the position you will place it.
Edit: Here you have more channel options like Sort,Edit and Delete.
7.3 Radio Channel list
Use same functions like TV channel list to edit your Radio channels.
7.4 Delete All
Here you can delete all the stored channels.
You will lose all stored channels and edits you have made.
Press YES to confirm and delete channels.
13
Korinthou 11, 14451 Metamorfosi, Τel: 210-8098700, Fax: 210-6122512
Site: www.crypto.gr, Email: [email protected]
ReDi 215A User Manual
8. SYSTEM SETUP
8.1 System setup menu
System setup menu allows us to set Language, TV System, Local Time
Setting, Timer Setting, Parental Lock, OSD Setting, Favorite and Auto
Standby.
1. Press the "MENU" button to enter main menu.
2. Press "UP" or "DOWN" button to highlight "System Setup", press "RIGHT"
button to enter the System Setup menu.
3. Press "UP" or "DOWN" cursor button to highlight the desired item and
press "OK" button to enter the sub-menu.
4. Press "EXIT" button to exit
8.2 Language
This menu allows you to set Language.
8.3 TV System
This menu allows us to set Video Resolution, Aspect Mode, Video Output and
Digital Audio Output.
Video Resolution:
By Source/By Native TV/480i/480p/576i/576p/720p/1080i/1080p
Aspect Mode:
Auto/4:3PS/4:3LB/16:9
Video Output::
CVBS/RGB
Digital Audio Output:: LPCM Out/ BS Out
8.4 Local Time Setting
This menu allows you to set the region and time.
Region: This menu is used for changing the region setting.
GMT Usage: This menu is used for opening the usage of GMT. The options
are: Off/ User Define/ By Region
GMT Offset: This menu is valid only when selected "User Define" in GMT
Usage menu.
The GMT offset range is "-11:30 ~ +12:00", increasing half hour progressively.
Date: "Date" and "Time" menus are valid only when selected "Off" in GMT
Usage menu.
Time: Press numeric button to input the time.
14
Korinthou 11, 14451 Metamorfosi, Τel: 210-8098700, Fax: 210-6122512
Site: www.crypto.gr, Email: [email protected]
ReDi 215A User Manual
8.5 Timer Setting
This menu allows us to set the program timer.
You can set 8 timers.
Timer Mode: Off/Once/Daily/Weekly
Timer Service: Channel/Record
Wakeup Channel: You can select a desired channel as the wakeup channel.
Wakeup Date: Press numeric button to input date.
Wakeup Time: Press numeric button to input the time.
Duration: Press numeric button to input the duration time.
8.6 Parental Lock
This menu allows you to protect the installation menu and channel, and
change the Password.
1. In "System Setup" menu, select "Parental Lock" and press "OK" button, you
are asked to input a password (the default password is"0000").
2. After inputting the correct password by pressing numeric buttons, the
parental lock menu appears.
Menu Lock: To lock the Edit channel/ installation/System setup/ Tools/REC
menu. When you want to enter these menus, you must
input the password. You can set menu lock to on/off.
Channel Lock: Off/ AGE4-AGE18
New Password: To change the password.
Confirm Password: To confirm the new password.
15
Korinthou 11, 14451 Metamorfosi, Τel: 210-8098700, Fax: 210-6122512
Site: www.crypto.gr, Email: [email protected]
ReDi 215A User Manual
8.7 OSD Setting
This menu allows you to set OSD Timeout, OSD Transparency and load
default OSD setting.
OSD Timeout: 1-10
OSD Transparency: To set the OSD transparency to Off/10%/20%/30%/40%.
8.8 Favorite
This menu allows you to rename the favorite group.
1. In Channel menu, select "Favorite", press "OK" button to enter Favorite
menu.
2. Select desired group, press "OK" button to open the mock keypad. Input
letter and numeric one by one by pressing the cursor button and press "OK"
button to confirm. After finishing input, highlight "OK" on mock keypad to
confirm, you change Favorite group name successfully.
3. Press "EXIT" button to quit the group rename menu.
16
Korinthou 11, 14451 Metamorfosi, Τel: 210-8098700, Fax: 210-6122512
Site: www.crypto.gr, Email: [email protected]
ReDi 215A User Manual
8.9 Audio Description setting
Here you can set up audio description to hear descriptions for a program for
visually impaired consumers if the channel supports this function.
AD service: ON/OFF
Use AD as default: ON/ OFF to use AD as the default audio
AD Volume offset: -3 - 3
8.10 Other
Here you have some more options like
LNB Power: ON/ OFF. It powers the antenna with a 5V voltage.
Channel Play Type All/Free/Scrambled
Beeper On/Off
Auto Standby: Off/3Hour/30Min/1Hour/2Hour/
9. TOOLS
9.1 Tools main menu
1. Press the "MENU" button to enter main menu.
2. Press " UP" or " DOWN " button to highlight "Tools", press "RIGHT" button
to enter the Tools menu.
3. Press "UP" or "DOWN" cursor button to highlight the desired item and
press "OK" button to enter the sub-menu.
4. Press "EXIT" button to exit.
9.2 Information
This menu can display some parameters of bootloader, HDCP Key,
maincode, radioback, information.
17
Korinthou 11, 14451 Metamorfosi, Τel: 210-8098700, Fax: 210-6122512
Site: www.crypto.gr, Email: [email protected]
ReDi 215A User Manual
1. In "Tools" menu, select "Receiver Information", press "OK" button to open
receiver information window.
2. Press "EXIT" button to exit.
9.3 Factory Setting
This menu allows you to re-set the device back to factory settings and clear all
existed channels.
1. In the "Tools" menu, select "Load Factory Setting" and press "OK" button.
2. A confirmation window is displayed. Select "Yes" to return back to factory
settings and clear all channels. Select "No" to cancel back to factory settings.
3. Press "EXIT" button to exit.
9.4 Upgrade by USB
We offer the functions for user to upgrade software version by USB.
1. Enter "Tools" menu, select "Upgrade by USB", press "OK" button and the
Software Upgrade menu will be shown.
2. Press cursor button to select the desired item, then highlight "Start" and
press "OK" button to start the upgrade.
3. Press "EXIT" button to exit.
18
Korinthou 11, 14451 Metamorfosi, Τel: 210-8098700, Fax: 210-6122512
Site: www.crypto.gr, Email: [email protected]
ReDi 215A User Manual
9.5 Remove USB device safely
In "Tools" menu, select "Remove USB device safely", Press "OK" button to
confirm. Then a window is displayed. Press "OK" button again.
10. GAMES
10.1 Othello
You can play Othello game .
10.2 Sudoku
You can play Sudoku game.
19
Korinthou 11, 14451 Metamorfosi, Τel: 210-8098700, Fax: 210-6122512
Site: www.crypto.gr, Email: [email protected]
ReDi 215A User Manual
11. REC
11.1 Media Player
11.1.1 Record
Here you can view your recorded files.
Select the file that you want with the cursor and press ok to start playing the
file.
While Recording is playing you can apply actions like fast forward, rewing,
pause etc with the buttons of your remote.
You can press Left and Right buttons to step forward or backward according
to the time period that you have selected in jump option (paragraph 8.10).
Press Stop button to exit to PVR menu.
In PVR menu you have also the following options
Rename: Select the file that you want and press RED button on your remote.
Use the pad that appears to change the recorded file name.
Lock: You can lock a recording so not to be viewed. Password required.
Delete: Press YELLOW button on your remote to delete the selected file.
11.1.2 Video
Select the movie file that you want and press OK to start playing the movie.
You can apply actions like fast forward, rewind, pause etc.
Also you can step forward and backward using LEFT and RIGHT buttons.
While playing a movie, press SUBTITLE button on your remote to select the
subtitle you want to view or to disable subtitles.
The device can support Embedded and SRT subtitles.
When playing SRT subtitles press BLUE button on your remote for more
Subtitle settings.
You can change Font Size, Font Color, Background Color and Position of the
subtitle.
20
Korinthou 11, 14451 Metamorfosi, Τel: 210-8098700, Fax: 210-6122512
Site: www.crypto.gr, Email: [email protected]
ReDi 215A User Manual
PLEASE NOTICE: Greek SRT subtitles are displayed correctly only when
Menu selected language is Greek.
Press EXIT to exit to Video menu.
11.1.3 Music
Here you can listen to your favorite music stored to a storage device.
Select the file that you want and press OK to start playing it.
If you exit the Music menu while music is still playing, the music will not stop.
You will have to enter again Music menu and press STOP button before
exiting.
Play List: Select what playlist you want to play from your stored playlists.
FAV: Press to add selected file to the favorites playlist.
FAV All: Press to add all the files of this folder to the favorites list.
11.1.4 Image
Here you can view your favorite images stored to a storage device.
Select the image file you want and press OK.
Press next/ prev/ pause etc when you are in slideshow mode.
Press RED button to zoom in/out a photo.
Press M/P button to view all photos in thumbnail mode.
In Images menu, press A-B button to enter image setup menu.
Select the duration of each image during slideshow and if you want the
slideshow to be repeated after last photo is displayed.
21
Korinthou 11, 14451 Metamorfosi, Τel: 210-8098700, Fax: 210-6122512
Site: www.crypto.gr, Email: [email protected]
ReDi 215A User Manual
Play List: Select what playlist you want to play from your stored playlists.
FAV: Press to add selected file to the favorites playlist.
FAV All: Press to add all the files of this folder to the favorites list.
11.1.5 Edit Mode.
In all menus, PVR, Music, etc there is available and Edit function.
With this Menu you can apply Folder actions like Copy, Paste, New folder etc.
Rename: Press RED button on the remote and use the available pad to
rename the file you selected.
Copy: Select the file or folder that you want to copy and press the GREEN
button on your remote.
Then select where you want to paste the file and press GREEN button to
apply the paste.
Delete: Move to the files that you want and press YELLOW button on the
remote. A symbol X will be added next to the file.
Press exit button and press YES if you want to delete these files.
New Folder: Press BLUE button on your remote. Use the numeric keypad
like in a mobile phone to type the folder name. Press YELLOW button on the
remote to add a new folder with the name you want.
NOTE: the folder will be added to the directory that you see at the specific
time.
11.2 PVR Storage Information
Here you can see information about the used storage space, the free storage
space etc.
22
Korinthou 11, 14451 Metamorfosi, Τel: 210-8098700, Fax: 210-6122512
Site: www.crypto.gr, Email: [email protected]
ReDi 215A User Manual
11.3 PVR Setting
Here you can edit some PVR function settings.
Timeshift: Enable or disable the Timeshift function. While Timeshift is ON
there will be used always some space on the disk for Timeshift.
Jump: While recording you can add a jump pointer every 30sec/ 1min/ 5min/
10min/ 30min, so when you view your recorded file you will be able to jump to
the specific time of the video.
Timeshift to Record: ON / OFF. If you enable Timeshift to record then when
you are recording a program you will be able to apply Timeshift function too.
23
Korinthou 11, 14451 Metamorfosi, Τel: 210-8098700, Fax: 210-6122512
Site: www.crypto.gr, Email: [email protected]
ReDi 215A User Manual
12. TIMESHIFT/ RECORD
Plugging an external Mass Storage Device on the USB port gives you access
to Time Shift/Record a broadcast programme.
- Pause a broadcast programme and continue watching it later (Time Shift )
- Record a broadcast programme.
- When the space available on the Mass Storage Device runs out, recording
operation of
broadcast will stop.
NOTE: Please use USB 2.0 disk when recording or timeshift. For timeshift
and recording feature, you need take bigger size USB pen driver or HDD
(>2GB) for recording.
12.1 Time shift
The digital receiver ReDi 215A gives you the ability to record and watch one
program interfacing with the viewing time. All you have to do is to connect an
external hard drive or a USB stick in the usb port of the device.
With this function you can:
Pause the program and continue to see if another time.
NOTE: For proper operation of TIME SHIFT it is recommend using a storage
device that supports USB 2.0 and has high speed read /write. Also if it is
possible it is recommended to use a USB stick or HDD with high storage
space. The product can support up to 2TB disks
The TIME SHIFT is a feature where you can simultaneously track, pause or
to go back and forth when you are watching a program. For example, while
watching your favorite show someone rings the door bell. No problem. Just
activate the function bt pressing “Pause” button and the press “Pause” again
to freeze the image. The device then start to record the program and when
you return you can resume viewing from where you left.
• Enable TIME SHIFT
NOTE: from default Timeshift is OFF to save space on your storage
device.
You must enable it fisrt. Please check paragraph 8.10
- To use TIME SHIFT press <PAUSE> and a bar with the time when the
recording is started (right) will appear. From this moment and forth the
channel program will be recorded.
24
Korinthou 11, 14451 Metamorfosi, Τel: 210-8098700, Fax: 210-6122512
Site: www.crypto.gr, Email: [email protected]
ReDi 215A User Manual
Each time you wish to pause or rewind the program a new bar will appear.
Notice that now the bar has 2 times. The right is the normal time showing the
on going time from the beginning when started Time Shift and the left is the
play backed time according to the time you choose to watch of the recorded
program.
During TIME SHIFT, it is possible to do the following.
- Press "PAUSE" to pause the program and <PLAY> to continue watching
later.
- Press "STEP FORWARD" or "FORWARD" to fast forward the recorded
program at specified time steps according to “Jump” settings(30 Mon - 30
minutes) or at 2χ, 4x, speed etc respectively.
- Press "STEP BACKWARD" or "BACKWARD" to quickly rewind the recording
at specified time steps according to “Jump” settings (30 Mon - 30 minutes) or
at 2χ, 4X, speed etc, respectively.
This choices affect only the recorded program, and not the function of TIME
SHIFT.
To return to the normal playing time press the "STOP" and then the <EXIT>.
The TIME SHIFT will continue to record but you will watch the normal time of
the program
• Stop TIME SHIFT
The TIME SHIFT is switch off when you change the channel or if you enter
the main menu
NOTE:
• The TIME SHIFT is disabled when you activate it for a specific channel and
you have scheduled a recording (PVR) to another channel. When that
recording starts the device will take you to that channel automatically and it
will deactivate Time Shift to the other
• The TIME SHIFT can be activated while recording a program, but only for
that channel you are recording.
12.2 Personal Video Recording (PVR)
·
Instant Recording
With this feature, with a touch of a button you can write a program you are
watching.
25
Korinthou 11, 14451 Metamorfosi, Τel: 210-8098700, Fax: 210-6122512
Site: www.crypto.gr, Email: [email protected]
ReDi 215A User Manual
- Press <RECORD> button on your remote to immediately start recording
the program you are watching
- Pressing the button again <RECORD>, you can adjust the duration of the
recording.
- Press <STOP> button to stop recording. A window will appear.
- Select YES to stop recording. Select NO to resume recording.
·
Scheduled Recording
Apart from the operation of direct recording, the device can be scheduled to
write a program in the future.
-Press and the <Menu> button and select <System Setup>, <Timer Settings>
This menu lets you set the timer for a recording.
Time Mode:
Off/Once/Daily/Weekly
Time service:
Record/Channel
Wakeup Channel: Set the channel you want to record.
Wakeup Date: Press OK and then the numbers to enter the date of
recording.
Wakeup Time: Press OK and then the numbers to enter time you want the
device to start writing.
Duration:
Press OK and then the numbers to enter the duration of the
recording
Note :
· When you write a program in a particular channel you can watch
another of the same group of four digital channels, at the same time
you make the record.
· When you have programmed a recording for a channel and you are
watching another with the time shift activated when the recording will
start the device automatically deactivate Time Shift and takes you to
the channel that is programmed to be recorded.
· During the time that a recording takes place the Time Shift function can
be activated in parallel with the recording only for that specific channel
and not for anyone else.
26
Korinthou 11, 14451 Metamorfosi, Τel: 210-8098700, Fax: 210-6122512
Site: www.crypto.gr, Email: [email protected]
ReDi 215A User Manual
13. TROUBLESHOOTING
In some region, the digital terrestrial signal may be weak. So you'd better use
an antenna with builtin signal booster.
Problem
Possible cause
What to do
Standby light not lit
Mains lead unplugged.
Mains fuse blown.
No signal found
Aerial is disconnected.
Aerial is damaged.
Out of digital signal area.
Check mains lead
Check fuse
Check aerial lead.
Check aerial.
Check with signal
provider
No picture or sound
No response to
remote control
Scart /AV is not selected
as a video source on your
TV.
Receiver off.
Handset not aimed
correctly.
Front panel obstructed.
Hand set batteries
exhausted.
Forgotten channel
lock code
Forgotten menu lock
code
The remote control
will not operate your
device
After moving the STB
to another room you
find you are no
longer able to receive
digital reception
Change the TV source
Plug in and turn on
plug.
Aim handset at front
panel.
Check for obstructions.
Replace handset
batteries.
Re-install channels to
cancel channel lock.
Contact help line.
(1) The batteries in your
remote control need
replacing.
(2) There is an
obstruction
blocking the signal path
between the remote
control and the box.
(1) Replace the
batteries.
(2) Check that there is
nothing in the way of
the path between the
remote control and the
receiver.
The aerial feed for the
new point may come
through a distribution
Try a direct feed from
system which may reduce the antenna.
the digital signal received
by the box.
27
Korinthou 11, 14451 Metamorfosi, Τel: 210-8098700, Fax: 210-6122512
Site: www.crypto.gr, Email: [email protected]
ReDi 215A User Manual
14 TECHNICALSPECIFICATIONS
Power Voltage
AC 220V / 240V 50-60Hz
Power Consumption
<6 W
Video decoder
MPEG-2 MP@HL, AVC/H.264 HP @L4.1 MPEG-4 ASP
SUPPORTED
Audio decoder
MPEG-1 Layer 1,2/PCM/HE-AAC V1.0 ICE958 SPDIF
Video output ratio
Auto/4:3PS/4:3LB/16:9
Video resolution
480i/480p/576i/576p/720p/1080i/1080p
Recording Format
Video: ts, mpg (MPEG2 channels only)
Audio
mp3
Image
jpg, bmp
TS
File type: *.ts /*.tp/*.trp
Video Codec: MPEG2 MP@ML H.264 MP/HP
Max Resolution: 1920 x 1080x30
Audio: MPEG layer 1/2/ AAC
MPG
File type: *.mpg
Video Codec: H.264 BP/MP/HP MPEG4
SP/ASP,Xvid
Max Resolution: 1920 x 1080x30
Audio: MPEG layer 1/2
MP4
File type: *.mp4
Video Codec: MPEG2 MP@ML, H.264
MP/HP MPEG4 SP/ASP,H.263/Xvid
Max Resolution: 1920 x 1080x30
Audio: MPEG layer 1/2/ AAC
AVI
File type: *avi
Video Codec: MPEG2 MP@ML, H.264
MP/HP MPEG4 SP/ASP,H.263/Xvid
Max Resolution: 1920 x 1080x30
Audio: MPEG layer 1/2/ AAC
MKV
File type: *mkv
Video Codec: H.264 BP/MP/HP
MPEG4 SP/ASP,Xvid, MPEG2 MP@ML,
H.264 MP/HP, MPEG4 SP/ASP,H.263/Xvid
Max Resolution: 1920 x 1080x30
Audio: MPEG layer 1/2/ AAC
MOV
File Type:.mov
Video codec:H.264 BP/MP/HP,MPEG4
SP/ASP,MPEG1/2 MP/HL
Max Resolution:1920x1080x30
Audio:MPEG layer 1/2/PCM/ADPCM/AAC
Video
Media Player Format
28
Korinthou 11, 14451 Metamorfosi, Τel: 210-8098700, Fax: 210-6122512
Site: www.crypto.gr, Email: [email protected]
ReDi 215A User Manual
OSD Menu
Multilingual
Teletext
Multilingual
DAT
File Type:.dat
Video codec:H.264 BP/MP/HP,MPEG4
SP/ASP,MPEG1/2 MP/HP
Max Resolution:1920x1080x30
Audio:MPEG layer 1/2/
VOB
File Type:.vob
Video codec:H.264 BP/MP/HP,MPEG4
SP/ASP,Xvid
Max Resolution:1920x1080x30
Audio:MPEG layer 1/2/
FLV
File Type:.flv
Video codec:H.263 baseline H.264 [email protected]
Max Resolution:1920x1080x30
Audio:MPEG layer 1/2/AAC
Tuner
RF Input Connector
IEC FEMALE
Loop Through
IEC Male
Receiving Channel Range
174~230MHz, 470~862MHz
Modulation
QPSK/16QAM/64QAM
Band Width
6 / 7/ 8 MHz
Outputs
1 x HDMI
1 x USB 2.0 (Host)
1 x Scart
1 x Coaxial audio
1 x Audio jack
Dimensions
WxDxH
Weight
138x 110 x 37 mm
330 gr
NOTE: Design and Specifications are subject to change without notice.
29
Korinthou 11, 14451 Metamorfosi, Τel: 210-8098700, Fax: 210-6122512
Site: www.crypto.gr, Email: [email protected]
ReDi 215A User Manual
Disposal of old electrical and electronic equipment
If you see this symbol on the product or on its packaging, you should hand
the product over to the applicable collection point for the recycling of electrical
and electronic equipment. Do not throw it away with household wastes. The
improper disposal of these products may have negative consequences for the
environment and human health. For more information about the recycling of
this product, please contact your local city office, your household waste
disposal service or the shop where you purchased it.
Declaration of Conformity*
This product is with conformity with the requirements of EMC Directive
2004/108/EC, ERP Directive 2009/125/EC and LVD Directive 2006/95/EC of
the European Parliament and European Council.
*A copy of the Declaration of Conformity is available at Crypto S.A.
30
Korinthou 11, 14451 Metamorfosi, Τel: 210-8098700, Fax: 210-6122512
Site: www.crypto.gr, Email: [email protected]