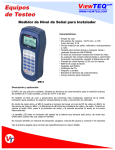
Download S9901 Dual Channel Mini Signal Strength Meter
Transcript
Dual Channel Mini Signal Strength Meter Dual Channel Mini Signal Strength Meter User Manual Dual Channel Mini Signal Strength Meter Table Content 1. Overview …………………………. 1 2. Technical Specification ……………2 3. Panel and Button Introduction ……. 5 4. Basic Operation …………………... 7 a. Power on/off ……………………. 7 b. Single Channel Measurement …... 7 c. Single Frequency Measurement … 8 d. Dual Channel Measurement ……..10 e. Tilt Measurement ………………. 12 f. C/N Measurement ……………… 13 g. AC Voltage Measurement ………15 h. Backlight Switch ………………. 15 i. Power Supply …………………... 15 j. Charge ………………………….. 16 5. Notice ……………………………. 19 Chips S. A. Tel. (504) 556-7677 556-9781 www.chipssa.com Página 1 de 9 Dual Channel Mini Signal Strength Meter 1. Overview Dual Channel Mini Signal Strength Meter is designed for the CATV engineering personnel. Dual Channel Mini Signal Strength takes the all sorts of requirements of user into consideration which possesses the characteristics such as small, light, easy for carry and low power waste etc. Meter prestores 56 China standard TV channels and 42 CATV supplement channels that make various measuring operations quick and convenient. 2. Technical Specifications: 1) Input Frequency: Range: 48~870 MHz Frequency Stability: ≤ 30ppm Definition: 10KHz 2) Measuring Frequency Level: Range: 30~120 dBµV Accuracy: ≤ ± 2dB Definition: 0.1dB 3) Measurement Bandwidth: 230KHz ± 50KHz 4) RF input impedance: 75 Ω 5) Demodulation Mode: Peak value 6) Attenuator: Automatic 7) V/A Measurement: Range: 0~40 dBµV Definition: ± 2dB 8) C/N Measurement: Definition: ± 2.5dB (Input signal ≥ 80dB) 9) IF Bandwidth: 230 ± 50 KHz 10) Voltage measurement of alternating current: Range: AC30 ~ 100V (alarm if over 100V) Accuracy: ± 1V Definition: 0.1V 11) Display mode: Backlight LCD displays large character with wide temperature range. Display size: 52 x 28 mm Chips S. A. Tel. (504) 556-7677 556-9781 www.chipssa.com Página 2 de 9 Dual Channel Mini Signal Strength Meter 12) Channel Table: Prestore in the meter: a. China standard channel table (1~56CH) b. China CATV supplement channel table (01~042CH) 13) Power Supply: DC: Hi-MH batteries AC: build-in designated charger supplies power and recharging 85V~240V/50~60Hz Charging time: about 4 hours 14) Working Environment: Working temperature range: -10 °C ~ +50 °C Relative humidity: ≤ 80% RH Storage temperature range: -20 °C ~ +60 °C 15) Dimension: 160 x 68 x 124 (mm) or 70 x 160 x 48 (mm) 16) Weight: 550g (including batteries) Chips S. A. Tel. (504) 556-7677 556-9781 www.chipssa.com Página 3 de 9 Dual Channel Mini Signal Strength Meter 3. Panel and Button Introduction (1) Speaker (2) RF signal input port (3) LCD display (4) 0-9 numeric input buttons (5) Up and down button (6) Charge indicator light (7) Channel button (8) Frequency button (9) Power switch button (10) Decimal button (11) Backlight switch button (12) C/N ratio and AV measurement button C/N measurement AV measurement Exit (13) Dual display / Tilt measurement button Dual display Tilt measurement Exit (14) Clear button Chips S. A. Tel. (504) 556-7677 556-9781 www.chipssa.com Página 4 de 9 Dual Channel Mini Signal Strength Meter 4. Basic Operations: a. Power on/off: Press on the panel when the meter is power off. Then you can hear a buzzing sound and the meter enters the single channel measurement state. Press again to turn off the meter. b. Single Channel Measurement (SCM): Meter enters the state of SCM right after power on. The screen will display like this: In the middle of the screen, it displays the channel number of current measured channel (left) and measured channel’s video carrier frequency level (right). At the left bottom, it displays the level of video carrier frequency of current channel; at the right bottom, it displays the measured V/A value of this channel. In the mode of SCM, you can enter any number among the channel 1~56, 01~042, then press the button, the meter will switch among channels. Press the ▲ or ▼ button to measure the adjacent channels. If entered wrong number, then it can be corrected by pressing the “C” button. Chips S. A. Tel. (504) 556-7677 556-9781 www.chipssa.com Página 5 de 9 Dual Channel Mini Signal Strength Meter c. Single Frequency Measurement (SFM): Enter any frequency value between 46MHz~865MHz (precision: two digits after decimal), then press meter will enter the SFM state. The screen will display like this: to confirm and The left bottom of the screen displays current frequency. If current frequency belongs to certain channel’s video carrier frequency, the screen will display correspondent channel number above the frequency, otherwise it will display “_ _ _”. In the middle of the screen, it displays the measured level value (right). In the mode of SFM, press the ▲or ▼ button to traverse the frequencies by 50 KHz. If entered wrong number, then it can be corrected by pressing the “C” button. d. Dual Channel Measurement (DCM): In the mode of SCM, the meter will enter DCM when press DCM mode. The screen will display like this: Chips S. A. Tel. (504) 556-7677 556-9781 and the upper screen will display □□ when meter enters www.chipssa.com Página 6 de 9 Dual Channel Mini Signal Strength Meter In the middle of the screen, it displays the channel number of first measured signal (left) and the measured channel’s video carrier frequency level (right). The left bottom of the screen displays channel number of second channel while right bottom of the screen displays its video carrier frequency level. Press will make the correspondent CH diagram (in the middle or lower part of the screen) flash and the “_ _ _” suggest waiting for the input of channel number. Step 1: enter the number of first measured channel – press the number button 5 to enter the channel number then press to complete the setup of first measured channel. To complete the setup of second measured channel, firstly, press again to make the CH symbol (left side of the middle screen area) flash, secondly, enter the channel number, for example “23”, then press again to confirm the input. Step 2: Press to enter the DCM mode, two CH symbols will flash alternatively and the screen will display field strength signal values of the two channels simultaneously. e. Tilt Measurement (TM) In the mode of DCM, to press will make the meter enter the TM mode and it will display the value of TM at the right bottom of the screen. The screen will display like this: Press the again to quit the DCM and TM mode and return to the SCM mode. Chips S. A. Tel. (504) 556-7677 556-9781 www.chipssa.com Página 7 de 9 Dual Channel Mini Signal Strength Meter f. C/N Measurement (CNM) In the mode of SCM to press the will make the meter enter the CNM mode and it will display the symbol of “C/N” at the right bottom of the screen. The screen will display like this: In the middle of the screen, it displays the channel number of measured channel (left) and displays the measured channel’s video carrier frequency level (right); the left bottom of the screen displays the video carrier frequency of this channel and the right bottom of the screen displays C/N measured value. In the mode of CNM, enter any channel between 1~56, 01~042 using the numeric This diagram buttons, thenshows pressthe themeasuable “Channel”range or ▲and or precision of CNM ▼ button can measure different channels. Horizontal axis is the signal level and vertical axis is the measured CNM value. The error is obtained from the intersection, horizontally or vertically. The valid range of CNM is shown as shadow area in the diagram. g. AC Voltage Measurement (ACVM) In the mode of CNM to press will make the meter enter the trunk line ACVM mode. The screen will display like this: h. Backlight Switch: Chips S. A. Tel. (504) 556-7677 556-9781 www.chipssa.com Página 8 de 9 Dual Channel Mini Signal Strength Meter Repeat to press will turn on or off the backlight. User can decide according to the light. i. Power Supply: The meter has build-in high performance Ni-MH rechargeable batteries providing the power for it. ※ This meter has energy saving mode: it will turn off automatically if no keyboard operation over 5 minutes. ※ This meter has low voltage warning function: when battery voltage is detected lower than the required working voltage, the LCD screen displays flashing “” and will turn off automatically after you hear a buzzing sound. j. Charge: When first use this meter or when LCD displays and you hear low voltage warning buzzer, please charge the batteries using the included charger. 1) When the meter is in charging, the charger’s indicator light is red. 2) Please remove the connectors between the charger and AC (110v or 200v) and the meter when complete charge. 3) Charge time: about 4 hours (depends on the environmental temperature and the situation of lack of battery voltage). 4) Suggest charging the batteries between the temperature 5~40 °C. Attention: 1) Please use the designated charge comes with the meter. Using the other charger may overheat or distort the meter or even cause fire, injury or harm to the environment. 2) Use only the authorized or certified batteries by our company. Use other batteries may cause explosion, leakage, fire, injury or harm to environment. 3) In order to keep and extend the battery life, please do not charge the battery for over 24 hours consecutively. 4) Please charge every 3 months when you do not plan to use the meter over a long period of time. 5) 5. Notice 1) Keep the product clean. Do not put the product in a place subject to excessive dust, acid, alkali, humidity. Do not clean the surface using organic, acid or alkali solvent. 2) Prevent the product from shaking and to protect the LCD by preventing the outer force applies on it. 3) Please contact local dealer or our company for failed or defected product and we will provide you immediate technical support. 4) Please do not try to repair the product by yourself which may affect its performance and void your warranty. 5) Please read this manual carefully in order to use the product properly. Chips S. A. Tel. (504) 556-7677 556-9781 www.chipssa.com Página 9 de 9


