1
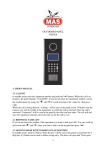
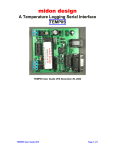
GALAXY EFES ANTIVANDAL DIGITAL PANEL
GP01HA.
USER’S MANUAL
1 BASIC PROPERTIES
•Call apt. units
•Full duplex (2-way) audio communication with apt. units
•Ability to control (built-in relay) the door strike (if installed) from the apt. units
and by Key fob, IButton,
user or apt specific or general PIN.
•Door lock relay can be controlled to set the door open / door strike trigger time.
2 FEATURES
•Entry audio feedback at the panel keypad
•On-screen display of entered number
•Audio warning signal at the entry panel when apt. PIN, I-Button or Key fob is
used to open the door.
(incl. on/off option).
•Audio warning signal at the entry panel when an apt. is called by the entry
panel.
•Ability to assign I-Buttons and Key fobs by entering an apartment number
•Door open action audio feedback at the panel
•Activate/Deactivate calls to apt.
•4 digits user PIN
•Ability to have a changeable user PIN
•About 9 key fobs / 5 I-Button per apartment capacity.
•Ability to connect security guard telephone
•Ability to connect extra camera
•Antiblock feature allowing the system to be able to avoid busy signal after a
selectable time limit
•Ability to receive a call even if the apt unit is active or in antiblock mode (hand
set off the hook)
•EFES System settings update / upload to all indoor units
1
•Warning beep (every sec) indicating that the door is open
•15 sec. inactivity timeout period in settings menus
3 FUNCTIONS
3.1 CALL an APT/FLAT
In standby mode, enter the apartment number. Entry is shown on the LED
screen. If there is a wrong
entry, press (C) to delete and correct. Press (B) (Call) to call. An audio signal
will be given and the
screen will display “Calling...”. Video doorphone screen will be activated
automatically. If
answered the audio connection will also be established. The call will be
terminated when the handset is
placed back on the hook on the video doorphone or the Antiblock Time-1 is
reached.
3.2 CALL the DOORMAN/BUILDING MANAGER
In standby mode, enter the number “255” and press (B) (Call) to call. An audio
signal will be given and
the screen will display “Calling...”. If the call is answered by the doorman, the
audio connection
will be established. The call will be terminated when the handset is placed back
on the hook on the
doorman phone or the Antiblock Time-1 is reached.
3.3 DOOR ACCESS
The building door can be opened with a key, user or apt specific or general PIN
(4 digit Personal
Identification Number / Passcode) or I-button. If the right PIN is entered or an
assigned I-button is
touched to the housing, the door lock will be opened and “OPEN” will be
displayed on the screen. If an
invalid PIN or an unassigned I-button is used, the door lock will not open and
“ERROR” will be
displayed on the screen. In both cases an audio signal will be given.
1/6
3.4 DOOR ACCESS with USER PIN
In standby mode, press the (B) button. The LED screen will display “---F.No”.
Enter the apt. number
and press (B) again. If there was a PIN assigned to that apt. “----dP” will be
displayed on screen.
Enter the 4 digit individual PIN to open the door. If a PIN was not assigned to
that apt. system will drop
out of this menu.
3.5 USER SETTINGS MENU
In standby mode, press & hold (1), (2), or (3) until “----P” is displayed. Enter
the 4 digit user PIN
and press (B) to enter the user settings menu. “Func_” will be displayed on
screen. Enter the number
2
of the desired function and press (B) within 15 sec to enter the submenu.
# Function
1 User PIN settings
2 Door access PIN settings
3 Apt PIN settings
4 Activate/Deactivate calls to apt.
5 Assigning user I-Button /Assigning user Key Fob
6 Deleting the Key Fobs assigned to an apt.
3.5.1 USER PIN SETTINGS
In user settings menu, press (1). “----nP” will be displayed on screen. Enter the
4 digit new PIN.
Press (B) to save, (C) to cancel. If cancelled reenter the new PIN and press (B)
to save.
3.5.2 DOOR ACCESS PIN SETTINGS
In user settings menu, press (2). “----nP” will be displayed on screen. Enter the
4 digit new PIN.
Press (B) to save, (C) to cancel.
3.5.3 APARTMENT PIN SETTINGS
In user settings menu, press (3). “---F.No” will be displayed on screen. Enter the
apt number (1-255)
and press (B). “----nP” will be displayed on screen. Enter the 4 digit new PIN.
Press (B) to save,
(C) to cancel.
3.5.4 ACTIVATE/DEACTIVATE CALLS TO APT
In user settings menu, press (4). “---F.No” will be displayed on screen. Enter the
apt number (1-255)
and press (B). Either “Prot_1” or “Prot_0” will be displayed on screen,
momentarily. These
numbers indicate the call status. “1” indicates call status to the apt is active and
“0” indicates call status to
the apt is deactivated. Press (1) to activate and press (0) to deactivate. Press (C)
to cancel without
saving.
3.5.5 ASSIGNING USER I-BUTTON / KEY FOB
In user settings menu, press (5). “--F.No” will be displayed on screen. Enter the
apt number (1-255)
and press (B). “TOUCH” will be displayed on screen. Please touch & hold the
desired I-button(or key
fob closer) to the housing, until “FOUND” and “RECORD” is displayed on
screen. If that specific Ibutton
was already assigned in the system, “FOUND” and “ERROR” is displayed on
screen.
2/6
3.6 SYSTEM SETTINGS MENU
In standby mode, press & hold (B). First “SySt” and then “----P” will be
displayed on the screen.
3
Enter the 4 digit system PIN and press (B) again to enter the system settings
menu. “Func_” will be
displayed on screen. Enter the number of the desired function and press (B)
again within 15 sec. to enter
the submenu.
# Function
1 System PIN settings
2 Door access PIN functionality settings
3 EFES System settings update / upload to all indoor units
4 Assigning the block no
5 Deactivate I-button/or all key fobs assigned to all apts
6 Allowing door access with apt. PIN
7 Adjusting the duration of door lock open time
8 Resetting EEPROM memory to factory settings
3.6.1 SYSTEM PIN SETTINGS
In system settings menu, press (1). “----nP” will be displayed on screen. Enter
the 4 digit new PIN.
Press (B) to save, (C) to cancel. If cancelled reenter the new PIN and press (B)
to save.
3.6.2 DOOR ACCESS PIN FUNCTIONALITY SETTINGS
In system settings menu, press (2). Either “Loc_1” or “Loc_0” will be
displayed on screen,
momentarily. These numbers indicate the door access PIN functionality status.
“1” indicates that the PIN
is active and “0” indicates that the PIN is deactivated and can’t be used to open
the door. Press (1) to
activate and press (0) to deactivate. Press (C) to cancel without saving.
3.6.3 EFES SYSTEM SETTING UPDATE / UPLOAD
In system settings menu, press (3). EFES system setting parameters and the
corresponding values in
memory will be displayed on screen, momentarily one after another. Each
parameter will be displayed,
followed by “------”. Please enter the new value or press (C) to move on to the
next parameter
without making any changes. If a new value was entered, press (B) to save.
After 5 parameters were
displayed, “SEND” and “PROGR.?” will be displayed on screen, asking
whether these parameter values
should be send to all the apt units! Press (B) to send, press (C) to cancel.
EFES apt unit’s system setting parameters and values:
▪ABS1 : Antiblock time-1 (min 90sec - max 240sec) input: 9-24
▪ABS2 : Antiblock time-2 (min 180sec - max 240sec) input: 18-24
▪EAS1 : Screen Active time-1 (min 0sec - max 30sec) input: 0-3
▪EAS2 : Screen Active time-2 (min 20sec - max 30sec) input: 2-3
▪CH_: Connection channel (CH 1 if byte 0x02, CH 1 if byte 0x00) input: 1-2
3.6.4 ASSIGNING THE BLOCK NO
4
In system settings menu, press (4). “BL.No_” and actual block number will be
displayed on screen for
a while. After this number disappears, enter the desired block number (between
0 and 15) and update this
time in memory by pressing (B).
3.6.5 DEACTIVATE I-BUTTON ASSIGNED TO AN APT
In system settings menu, press (5). “---F.No” will be displayed on screen. Enter
the apt number (1255) and press (B). “DEL_?” will be displayed on screen. Please touch & hold
the administrator Ibutton
to the housing to deactivate the I-button assigned to that apt.
3/6
3.6.6 ALLOWING DOOR ACCESS WITH APT PIN
In system settings menu, press (6). Either “dLoc_1” or “dLoc_0” will be
displayed on screen,
momentarily. These numbers indicate the door access with apt. PIN
functionality status. “1” indicates that
the PIN is active and “0” indicates that the PIN is deactivated and can’t be used
to open the door. Press
(1) to activate and press (0) to deactivate. Press (C) to cancel without saving.
3.6.7 ADJUSTING THE DURATION OF DOOR LOCK OPEN TIME
In system settings menu, press (7). “PERIOD” and “x_Sec” will be displayed
on screen. “x” is an
administrator/technician determined number between 1-8, designating the door
lock open time in memory
in seconds. After this number disappears, enter the desired digit (between 1 and
8) and update this time in
memory.
3.6.8 RESETTING EEPROM MEMORY TO FACTORY SETTINGS
In system settings menu, service technician can press “8” to reset the EEPROM
memory to factory
settings. You can see the EEPROM memory factory values in Appendix-1.
4 FUTURE POTENTIAL PROPERTIES
•Determining the first apartment number between 2-255 (other than 1)
•Confirmation from the apt unit when saving/changing the apt. PIN for the first
time.
•Quickly assigning the I-Buttons in an order of apt number.
•Audio warning signal at the apt unit when apt. PIN or I-Button is used to open
the door. (incl. on/off
option.
•Audio warning signal at the entry panel when an apt. is called (N/A in current
EFES units)
5 TECHNICAL PROPERTIES
Power consumption: Standby mode : 4W (18V-220mA)
Active mode : 5W (18V-280mA)
Apartment capacity : 255
5
Highest number assignable to an apt. : 255
PIN digits : 4
User PIN capacity : 10000
I-Button capacity (Dallas-DS1990) : 1220
Key fob capacity : 9 pcs for each apt.
Apt. unit call time : 20 sec.
Talk time limit (Antiblock) : 90sec (max. 240sec)
Door lock open time : 1-8 sec.
4/6
APPENDIX-1
5/6
TABLE 2: Apartment PINs for Door Access
Start of Address End of Address Parameter Default Value Definition
0x0020 0x0021 Door Access PIN for 1st apt. 0xFFFF 4 digit PIN ( Exp :
0x1234)
0x0022 0x0023 Door Access PIN for 2nd apt. 0xFFFF 4 digit PIN ( Exp :
0x1234)
0x0024 0x0025 Door Access PIN for 3rd apt. 0xFFFF 4 digit PIN ( Exp :
0x1234)
.......... .......... Door Access PIN for … apt. 0xFFFF
0x001F+(2*n)-1 0x001F+(2*n) 0xFFFF 4 digit PIN ( Exp : 0x1234)
.......... .......... Door Access PIN for … apt. 0xFFFF
0x021A 0x021B Door Access PIN for 254th apt. 0xFFFF 4 digit PIN ( Exp :
0x1234)
0x021C 0x021D Door Access PIN for 255th apt. 0xFFFF 4 digit PIN ( Exp :
0x1234)
0x021E 0x021F reserved 0xFFFF
Door Access PIN for nth apt.
Default Configuration Settings
Parameter Default Value Definition
0x0000 0x0001 USER SETTINGS PIN 0x1234 “1234”
0x0002 0x0003 SYSTEM SETTINGS PIN 0x5678 “5678”
0x0004 0x0004 reserved 0x04
0x0005 0x0006 Door Access General PIN 0x6666 “6666”
0x0007 0x0007 reserved 0x00
0x0008 0x0008 Authorization of door access general PIN 0x01 “1” allowed, “0”
N/A
0x0009 0x0009 DOOR STRIKE TRIGGER TIME 0x01 “1 sec”
0x000A 0x000A Authorization of door access private PIN 0x01 “1” allowed,
“0” N/A
0x000B 0x000B reserved 0x01
0x000C 0x000D reserved 0x9999 reserved for next access
0x000E 0x000F reserved 0xFFFF
0x0010 0x0010 EFES Antiblock Time – 1 0x09 90 sec
0x0011 0x0011 EFES Antiblock Time – 2 0x12 180 sec
0x0012 0x0012 0x02 20 sec
6
0x0013 0x0013 0x00 0 sec
0x0014 0x0014 EFES Connection Channel Choosing 0x00 “0” second channel,
“1” first channel
0x0015 0x001F reserved 0xFF
TABLE 1: SERIAL NUMBERS OF THE ASSIGNED I-BUTTONs
Parameter Default Value Definition
0x0320 0x0321 Assigned I-Button Capacity 0x0000 for the start “0”
0x0322 0x0327 Master I-Button Serial No 0xFFFFFFFFFFFF 5 byte serial no ,1
byte apt. no
0x0328 0x032D 1st assigned I-Button Serial No. & Apt. No. 0xFFFFFFFFFFFF
5 byte serial no ,1 byte apt. no
0x032E 0x0333 2nd assigned I-Button Serial No. & Apt. No.
0xFFFFFFFFFFFF 5 byte serial no ,1 byte apt. no
0x0334 0x0339 3rd assigned I-Button Serial No. & Apt. No. 0xFFFFFFFFFFFF
5 byte serial no ,1 byte apt. no
............ ........... .............................................................. 0xFFFFFFFFFFFF
............ ........... .............................................................. 0xFFFFFFFFFFFF 5 byte
serial no ,1 byte apt. no
............ ........... .............................................................. 0xFFFFFFFFFFFF
............ ........... .............................................................. 0xFFFFFFFFFFFF
0x1FB9 0x1FBF 1220th assigned I-Button Serial No. & Apt. No.
0xFFFFFFFFFFFF 5 byte serial no ,1 byte apt. no
0x1FC0 0x1FFF reserved 0xFF
Start of
Address
End of
Address
EFES Screen Active Time – 1
EFES Screen Active Time – 2
Start of
Address
End of
Address
6/6
TABLE 3: Call Status For The Apartments
Start of Address End of Address Parameter Default Value Definition
0x0220 0x0220 Status of 1th apt. 0x01 “1” allowed, “0” N/A
0x0221 0x0221 Status of 2nd apt. 0x01 “1” allowed, “0” N/A
0x0222 0x0222 Status of 3rd apt. 0x01 “1” allowed, “0” N/A
.......... .......... Status of … apt. 0x01
0x021F+(n) 0x021F+(n) 0x01 “1” allowed, “0” N/A
.......... .......... .................. ....... ........
0x021D 0x021D Status of 254th apt. 0x01 “1” allowed, “0” N/A
0x021E 0x021E Status of 255th apt. 0x01 “1” allowed, “0” N/A
Status of n_th apt.
7