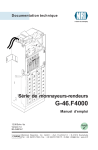
1
Technical Documentation
Changer series
G-46.F4000
User manual
12.06 Schn/ds
Edition 1.4
BA.G46F4-GB
National Rejectors, Inc. GmbH • Zum Fruchthof 6 • D-21614 Buxtehude
Phone: +49 (0)4161-729-0 • Fax: +49 (0)4161-729-115 • E-mail: [email protected] • www.nri24.com
G-46.F4000
TABLE OF CONTENTS
TABLE OF CONTENTS
1 General information
9
General information regarding this manual
Text conventions
Additional technical documentation
9
9
10
General information regarding the changer
Advantages
10
11
2 Safety instructions
12
Proper use
12
Protecting yourself and equipment
13
3 Options
14
String sensor
14
Internal audit module
14
Display
14
Peripheral systems
MDB peripheral bus
BDV peripheral bus
15
15
15
Service tools
Audit tools
USB Audit Stick & WinData
Infrared adapters
Printer
PC test station
Configuration tools
Update tools
16
16
16
16
16
16
17
17
National Rejectors, Inc. GmbH, Buxtehude
3
TABLE OF CONTENTS
G-46.F4000
4 Design
18
Overview of the device
18
Coin validator
Return lever
Keyboard
Pilot lights
Interfaces
Switching block
Label
19
19
19
19
20
21
21
Payout unit
Change tubes
Payout set
Filling level sensors
22
22
23
23
Connecting cable to the machine
23
5 Functions
24
Coin acceptance and coin sorting
26
Vending operation
Vending machine and not a change machine!
Single vend or multi vend?
What happens to the remaining credit that cannot
be paid out of the change tubes?
Changer or vending machine – Which device ends
the vending operation? (4-price devices only)
And if no product is given out ...?
(cigarette mode, 4-price devices only)
Simplex V prices
28
28
28
Cash acceptance
Which highest amount is allowed to be accepted?
How many coins, at most, are to be sorted into the
change tubes?
How can string manipulation be minimized?
4
25
Coin channels and memory blocks
National Rejectors, Inc. GmbH, Buxtehude
28
29
29
29
30
30
30
30
G-46.F4000
TABLE OF CONTENTS
Change payout
Which highest amount is allowed to be paid out?
What number of coins and which tubes will trigger
the display message "Tube empty"?
How many coins, at least, are supposed to cover
the tube bottom (security stock)?
Second price list (happy hour)
(only 4-price devices with internal audit module)
31
31
31
32
32
Vending of drinks into customer’s own cup
(eco-function, 4-price devices only)
32
Inhibiting of specific coin types
33
Disabling of inventory keys
33
Teach mode for tokens
33
Telephone code and currency code
34
Mains operation or battery operation?
(MDB devices only, not for USB/RS-232 interface)
34
Main currency and second currency (optional)
34
Display (4-price devices only)
Is the price to be displayed?
Is the time to be displayed?
(only with internal audit module)
35
35
Communication with ...
Communication with internal audit module
(optional, no MDB devices)
Communication with external audit unit
(only BDV and Simplex V devices)
Communication with BDV/MDB card reader
Communication with BDV/MDB bill validator
Communication with hoppers
(only MDB devices with hopper interface)
Communication with a recycler
35
Audit data (only devices with internal audit module)
35
35
36
36
37
37
37
38
Reset of tube counters
38
Test of connecting lines (4-price devices only)
38
National Rejectors, Inc. GmbH, Buxtehude
5
TABLE OF CONTENTS
G-46.F4000
6 Installation
39
Installing and connecting the changer
39
Installing and connecting the audit module
41
7 Start-up
42
Setting the prices
42
Filling the change tubes
43
Performing individual settings
44
Configure changer on an individual basis
44
Select data transmission protocol and mains operation
or battery operation (MDB devices only)
44
8 Operation
45
Returning change or emptying tubes using the keyboard
45
Refilling change using the keyboard
46
Inhibiting coins/activating narrow coin channel
47
Selecting the memory block
49
Reading out and printing out audit data
Print out audit data
Read out audit data via infrared interface
50
50
51
Select data transmission protocol
(MDB devices only)
52
Select mains operation or battery operation
(MDB devices only, not for USB/RS-232 interface)
53
9 Cleaning
54
10 Transport
55
6
National Rejectors, Inc. GmbH, Buxtehude
G-46.F4000
TABLE OF CONTENTS
11 Minor repairs and modifications
56
Replacing the change tubes
Remove old tubes
Install new tubes
56
56
58
Replacing the payout set
Remove old payout set
Install new payout set
59
59
59
Replacing the changer’s PCB
61
12 Technical data
63
CE certification
64
Accessories
64
13 Which functions can be set using
the configuration tools?
65
WinEMP PC programming station
65
Palm OS® application "PalmG46"
66
Setting module
67
ANNEX
Index
68
Function overview for setting module
74
SER functions
74
PRO functions
75
Troubleshooting
80
Quick diagnosis using pilot lights
80
Diagnosis using setting module
83
National Rejectors, Inc. GmbH, Buxtehude
7
G-46.F4000
1
GENERAL INFORMATION
GENERAL INFORMATION
This chapter should provide a general overview of the advantages and
options regarding the changer G-46.F4000. However, the first section
is designed to help you find your way through this manual with ease.
General information regarding this manual
This manual describes the design, operation and range of functions
of the changer series G-46.F4000. Chapters 6, 7 and 8 explain the
necessary steps for installing, starting up and operating the changer.
Chapters 9 to 11 explain how to clean and transport the changer and
how to replace its main components.
The appended chapters with side tabs "Index", "Function overview for
setting module", and "Troubleshooting" reduce the search for specific
explanations and extra help.
Text conventions
To make it easier for you to navigate within this manual and to operate
the device, the following accentuations were made in the text:
Safety instructions, which have to be observed in
order to protect operators and equipment.
Special notes, which should facilitate the use of the
changer.
1 2 3.. Requests to perform an action are numbered in another
typeface.
At the beginning of a large chapter you will find a short
"guide", which summarizes the content of the chapter.
Device functions, which are set or prepared by the
manufacturer according to customer specifications and
can be set or changed using the NRI configuration tools
(see Chap. 3 "Options" and 13 "Which functions can be
set using the configuration tools?" as well as web pages
for product accessories on the internet (www.nri24.com)).
National Rejectors, Inc. GmbH, Buxtehude
9
GENERAL INFORMATION
G-46.F4000
Additional technical documentation
Apart from the manual you already have, there is further documentation
for the G-46.F4000, e.g. about mounting dimensions, spare parts,
testing, and configuration. All documentation is available in a
compressed PDF format at www.nri24.com.
General information regarding the changer
The 4-tube changers of the G-46.F4000 series are designed to be used
for vending and service machines. These changers can be easily
adapted to suit various vending machines simply by exchanging the
connecting cable and/or the PCB and will support the following vending
machine interfaces:
• 2-price relay output (parallel interface)
• 4-price relay output (parallel interface, also in combination with
MDB)
• 4-price API (parallel interface, also in combination with MDB)
• 4-price transistor (parallel interface, also in combination with
MDB)
• Simplex V (serial interface, also in combination with MDB)
• BDV (serial interface, also in combination with MDB)
• MDB (serial interface), also with battery and wake-up line
• JVI (serial interface)
To meet the requirements of PC-based platforms the G-46.F4000 with
MDB data transfer protocol is optionally available with a USB or RS-232
interface (e.g. for ticket machines, self-serve transaction kiosks).
The integrated coin validator G-40.F4000 is based on the reliable
sensor system and false coin rejection system of the already wellknown coin validator G-40.4000 from the G-46.4 changer series.
Due to the modular design, you can set up your changer, including
accessories, on an individual basis (see Chap. 3 "Options").
To be able to react as quickly as possible to new false coins and to
enable you to make your individual adjustments, the changer can be
connected to a PC programming station which is made up of the
configuration and diagnostics software "WinEMP" (including card
reader and licence chip card) and an NRI tester for power supply of
the changer. With the aid of the Palm OS® application "PalmG46" or
with the G-55.0460 setting module, you can configure the changer
10
National Rejectors, Inc. GmbH, Buxtehude
G-46.F4000
GENERAL INFORMATION
directly on the vending machine, independently from the PC. This
manual provides a brief description of the configuration tools and a
list of the device functions that can be set on an individual basis
(see Chap. 3 "Options" and Chap. 13 "Which functions can be set
using the configuration tools?").
Tokens that were not programmed by the manufacturer can be
programmed directly on the changer by inserting the tokens.
Advantages
•
•
•
•
•
•
•
•
•
•
•
•
•
Reliable sensor system and optimum rejection of false coins
due to the integrated, electronic coin validator G-40.F4000
A coin validator which is easy to configure enables a fast
reaction to changing market situations or new false coins
Easy configuring with help from
– the PC software "WinEMP" for the workshop
– the Palm OS® application "PalmG46" or the setting module
G-55.0460 directly on the vending machine
Universal payout mechanism for different coin diameters and
thicknesses
Flexible payout combinations provided by simplified
replacement of change tubes
Universal use in virtually all vending machines provided by
simplified replacement of the cable or interface module
Faster service due to error diagnosis
Adaptation to all market requirements provided by individual
combinations with additional devices
Splash-proof electronics
Monitored coin run and controlled sorting guarantee an improved
operating reliability and protection against manipulation
Acceptance speed of 2 coins per second
Teach mode to teach up to three different tokens
Flash technology for uncomplicated and time-saving coin
validator operating software updates
National Rejectors, Inc. GmbH, Buxtehude
11
SAFETY INSTRUCTIONS
2
G-46.F4000
SAFETY INSTRUCTIONS
Before operating the device for the first time, please read through this
manual carefully at least once, and most importantly the safety
instructions. This is to ensure you have understood the contents of
this manual as well as how to operate the changer.
Proper use
The 4-tube changers of the G-46.F4000 series are designed to be used
for vending, service and entertainment machines with different
interfaces. Use the changer for this purpose only and with the
respective connecting cable and interface module. Under no
circumstances can the manufacturer be held liable for any damage
or loss resulting from improper use of the device.
The changers have been constructed in compliance with the state of
the art and the recognized safety regulations. Nevertheless this
equipment can be a source of danger. Therefore please observe the
following safety regulations.
12
National Rejectors, Inc. GmbH, Buxtehude
G-46.F4000
SAFETY INSTRUCTIONS
Protecting yourself and equipment
The changer may only be connected by a qualified
electrician.
Only use the changer according to proper use.
Under no circumstances can the manufacturer be
held liable for any damage or loss resulting from
improper use of the device.
The coin validator PCB is fitted with components
that can be damaged by electrostatic discharge.
Please observe the handling instructions for
components exposed to the risk of electrostatic
discharge.
Select the correct voltage for the changer (see label).
Ensure correct potential equalization in the vending
machine and in the changer being used (option:
metal housing).
Never pull the connecting cable of the coin validator
from the changer when a voltage is applied.
Pull the vending machine’s mains plug before you
install, clean or remove the changer.
Always transport the changer without any coins in it
and in its original packaging. It is only in this way
sufficiently protected. Never carry it by means of the
cables.
Contact NRI if you want to alter the construction of
the device to a greater extent than the modifications
described in these instructions.
Keep water and other liquids away from the changer.
If the device is no longer required, please dispose
of it correctly.
We reserve the right to make technical modifications
to the device which are not covered by these
instructions.
National Rejectors, Inc. GmbH, Buxtehude
13
OPTIONS
3
G-46.F4000
OPTIONS
To adapt the changer to suit your individual needs, you can acquire
the following accessories from NRI (cp. also product accessory pages
at www.nri24.com):
String sensor
A string sensor can be used to monitor the coin run in addition and to
achieve a higher degree of protection against manipulation (see
section "How can string manipulation be minimized?" in
Chap. 5 "Functions").
Internal audit module
You will require an audit module if you want to collect and evaluate
audit data (see Chap. 8 "Operation").
For some machine types, the audit data is collected using
the vending machine control system. In that case, an
internal audit module is not necessary.
The audit module is equipped with its own CPU, including batterybacked RAM and clock module, and is connected to the PCB of the
changer (see Chap. 6 "Installation").
The module has three serial interfaces:
• Open collector for printer connection
• TTL for PC or printer
• Optical interface for mobile data retrieval units (MDEs) for NRI
adapters, which deliver different signals:
– timed IR signals
– IRDA signals
Display
The 5-digit NRI display G-51.1093 can be connected to the 4-price
changer via the 15-pole interface. The cash inserted, the price or the
time can be shown on the display (see Chap. 5 "Functions").
14
National Rejectors, Inc. GmbH, Buxtehude
G-46.F4000
OPTIONS
Peripheral systems
If you want to connect external devices, such as bill validators or card
readers, to the changer, you can acquire the following bus systems
from NRI:
MDB peripheral bus
The MDB peripheral bus can be used to connect the MDB card systems
and MDB bill validators directly to the changer. A bill validator converter
is not required.
USB and RS-232 changers are already fitted with an MDB
peripheral bus.
4-price changers are provided with the correct PCB. For
these changers you only need a connecting cable.
BDV peripheral bus
The BDV peripheral bus can be used to connect the BDV card systems
or BDV key systems as well as the NRI bill validator converter
G-55.0562 to the changer.
4-price changers are already provided with the correct
PCB. For these changers you only need a connecting
cable.
National Rejectors, Inc. GmbH, Buxtehude
15
OPTIONS
G-46.F4000
Service tools
In order to test the changer and adapt it to your individual needs, you
can acquire the following service tools from NRI:
Audit tools
Accessories for collecting, reading out and evaluating audit data:
USB Audit Stick & WinData
The NRI USB Audit Stick is used to read out and download audit data
to the hard disk of your PC so that you can print out the audit data
or export the audit data as a .txt-file with the help of the WinData
software in order to ensure that the statistics data can be opened in
a data management program.
For further information on the USB Audit Stick and WinData please
refer to our product accessory pages at www.nri24.com and the
appropriate operating instructions.
Infrared adapters
The changer is equipped with an optical interface to read out the audit
data using mobile data retrieval units (MDEs) (see Chap. 8 "Operation").
This interface is designed for two NRI adapters, which deliver different
infrared signals:
• timed IR signals
• IrDA signals
Printer
With the convenient, user-friendly printer G-55.0510, you can print out
turnover and sales data in order to prepare audits and turnover
calculations (see Chap. 8 "Operation").
PC test station
If you only wish to check the functionality of your coin changer without
making any adjustments, the NRI test station is sufficient. The test
station is composed of the following components:
16
National Rejectors, Inc. GmbH, Buxtehude
G-46.F4000
•
•
•
•
•
OPTIONS
Test software "WinSPT",
Tester G-19.0654 for simulation and to test the device
functions,
PC connecting cable,
Connecting cable for recording the data exchange between
master and slave,
24 V DC power pack and mains cable
For further information on the WinSPT test station please refer to our
product accessory pages at www.nri24.com and the appropriate
operating instructions.
Configuration tools
To be able to react as quickly as possible to new false coins, in the
workshop or on site, and to enable you to make your individual
adjustments, the changer can be connected to:
• WinEMP PC programming station
• Palm OS® application "PalmG46"
• Setting module G-55.0460
For further information on all configuration tools please refer to our
product accessory pages at www.nri24.com and the appropriate
operating instructions.
To find out which configuration tools you can use to make which
settings, please see Chap. 13 "Which functions can be set using the
configuration tools?"
Update tools
The coin validator integrated in the changer is equipped with a
microprocessor including a flash memory. This allows the coin
validator operating software to be updated quickly and without
complications. In order to load new operating software in the coin
validator, you need one of the three following alternatives:
• WinFlash PC update station
• Mobile flash prommer G-55.0350
• Palm OS® application "PalmFlash"
For further information on all update tools please refer to our product
accessory pages at www.nri24.com and the appropriate operating
instructions.
National Rejectors, Inc. GmbH, Buxtehude
17
DESIGN
4
G-46.F4000
DESIGN
This chapter describes the general design of the changer and
also the components of the coin validator and of the payout
unit that are important for operating the device:
Return lever, keyboard, pilot lights, interfaces, switching block,
label
Change tubes, payout set, filling level sensors
•
•
Overview of the device
1
11
Return lever
Coin insert
funnel
2
Interface –
setting module/
handheld
10
Interfaces –
vending
machine,
printer, display
3
Coin validator
9
Pilot lights
L
ML
MR
R
+
4
Keyboard
5
8
Label
Interface –
WinEMP PC
programming
station
6
Change tubes
7
Payout set
Fig. 1a: Design
18
National Rejectors, Inc. GmbH, Buxtehude
G-46.F4000
DESIGN
Coin validator
Coins inserted into the coin validator 3 pass through the coin insert
funnel 11 into the measurement and validation area of the device,
where their coin properties are compared with the values of the stored
acceptance bands. Coins rejected by the coin validator pass into the
return area of the vending machine, and coins accepted for a selling
operation are either directed to the change tubes 6 or to the cash-box.
(See Fig. 1a)
Return lever
The return lever 1 on the top of the device is operated using the return
button on the vending machine if the coins that have already been
inserted are to be returned, or if a jam caused by, e.g., coins that have
become stuck must be removed. When the return lever is operated,
the measurement and validation area of the coin validator opens so
that all objects within the coin validator are directed to the return area.
(See Fig. 1a)
Keyboard
The front of the coin validator is equipped with five touch-sensitive
keys 4 with which the payout unit’s change tubes are filled, before the
device is put into operation, and emptied for the inventory (see Fig. 1a
as well as Chap. 8 "Operation").
Pilot lights
At the front of the coin validator there are also three light-emitting
diodes (LEDs) positioned underneath one another 9 (green, yellow,
red). These pilot lights are mainly used for fast diagnosis in case of
malfunction but also as an indication of the current status in normal
operation. If the green LED at the top lights up or flashes, there are
no faults and the device is working properly. If the yellow light in the
middle flashes there is a definite fault which, in general, can be easily
remedied. If the red LED at the bottom flashes, it is probably a fault
that must be remedied by a service technician. (See Fig. 1a as well
as the Appendix "Troubleshooting")
National Rejectors, Inc. GmbH, Buxtehude
19
DESIGN
G-46.F4000
Fig. 1b: Dismount the coin validator
12
Interface –
WinEMP PC
programming
station
13
14
Interface –
coin changer
Switching
block
Fig. 1c: Rear of the coin validator
Interfaces
On the rear of the coin validator in the middle, there is an interface 13,
by which the device can be connected to the changer using a ribbon
cable (already assembled). On the front of the coin validator to the
top right, there is a western modular plug 2 by which the changer can
be connected to a handheld or to the setting module for configuration
purposes. On the left side there is a PCB direct plug 8/12 which
connects the validator to the WinEMP PC programming station. (See
Fig. 1a, 1b and 1c)
20
National Rejectors, Inc. GmbH, Buxtehude
DESIGN
G-46.F4000
Switching block
Individual settings such as inhibiting various coin types can be made
using the switching block 14 on the rear of the device (see Fig. 1b and
1c as well as Chap. 8 "Operation").
Label
The label of the coin validator contains all the data defining the device
such as device type and series, as well as data programmed according
to customer specifications, such as currency and coin type.
1
2
3
4 5
6
7
14 13 12 11 10 9
8
3
Fig. 2: Label of the coin changer
1 Currency – memory block 0
2 Currency – memory block 1
3 Device type
4 Data block number
5 Data block revision number
6 Nominal voltage of coin validator
8 Coin information – memory block 1
9 Sorting – memory block 0
10 Channel number, very narrow coin
channel – memory block 0
11 Channel number, narrow coin channel
– memory block 0
12 Channel number, normal coin channel
7 Ordering code (8-digit),
– memory block 0
Order number (6-digit),
Consecutive serial number per order 13 Coin information – memory block 0
number (4-digit)
14 Coin type – memory block 0
National Rejectors, Inc. GmbH, Buxtehude
21
DESIGN
G-46.F4000
Payout unit
The payout unit consists of the four change tubes and one payout set.
To monitor the tubes, the device is equipped with filling level sensors
and tube counters.
Change tubes
The payout unit incorporates four change tubes 1–4 with different
diameters for collecting up to four different coin types, which can be
paid out to the customer. Which tube is supposed to collect which coin
type depends on the coin diameter and is programmed by the
manufacturer according to customer-specific requirements. The
storage capacity of tube coins depends on the thickness of the coin
type (guideline: approx. 61 times 0.50 euro coins per tube).
1 Tube R
2 Tube MR
3 Tube ML
4 Tube L
5
Payout set
Abb. 3: Payout unit
The coin validator checks whether an accepted coin – depending on
the programming in each case – is to be sorted into one of the four
tubes or directed into the cash-box.
If at any time you require another combination of tube coins, e.g.
several tubes for the same coin type in order to achieve a larger change
capacity, the appropriate tubes can be ordered from the NRI company
and simply be exchanged (see Chap. 11 "Minor repairs and
modifications").
However, if you change the tube combination, you must
use the configuration tools to adapt the configuration of
the coin validator (see Chap. 13).
22
National Rejectors, Inc. GmbH, Buxtehude
G-46.F4000
DESIGN
Payout set
Paying out of change is done by means of two motors installed in the
bottom of the payout set 5, which turn in order to pay out coins. The
left-hand motor is responsible for the "left (L)" 4 and "middle left (ML)" 3
tubes and the right-hand motor is responsible for the "right (R)" 1 and
"middle right (MR)" 2 tubes. (See Fig. 3)
Filling level sensors
Independent from the number of coins, the filling level of each tube
is monitored by two sensors:
• Empty sensor positioned to the height of 8 to 10 collected
coins
• Full sensor positioned at the top rim of the tube
If the full sensor of a tube signals "tube full", all further coins for this
tube will then be directed into the cash-box temporarily. Only when
coins have been paid out of this tube again, will more coins be sorted
into this tube.
Connecting cable to the machine
The connecting cable to the vending machine 10 is permanently
installed on the top left-hand side of the changer. For details on how
to install the changer in the vending machine, see Chap. 6 "Installation".
National Rejectors, Inc. GmbH, Buxtehude
23
FUNCTIONS
5
G-46.F4000
FUNCTIONS
This chapter describes the functions of the changer:
•
•
•
•
•
•
•
•
•
•
•
•
•
•
•
•
•
•
Coin acceptance and coin sorting
Coin channels and memory blocks
Vending operation
Cash acceptance
Change payout
Second price list (happy hour)
(only 4-price devices with internal audit module)
Vending of drinks into customer’s own cup
(eco-function, 4-price devices only)
Inhibiting of specific coin types
Blocking of the inventory keys
Teach mode for tokens
Telephone code and currency code
Mains operation or battery operation? (MDB devices only)
Main currency and second currency (optional)
Display
Communication with audit units/card readers/bill validators/
hoppers
Audit data
(only devices with internal audit module)
Reset of the tube counters
Test of the connecting lines
(4-price devices only)
In this chapter the functions will only be described. To find out how
to change adjustable functions, refer to Chap. 8 "Operation" regarding
settings made directly on the changer, and refer to the separate
instructions regarding settings made using the configuration tools (cp.
also Chap. 13 "Which functions can be set using the configuration
tools?").
24
National Rejectors, Inc. GmbH, Buxtehude
G-46.F4000
FUNCTIONS
Coin acceptance and coin sorting
An inserted coin initially falls into the coin validator whose inductive
and optical sensors measure such coin properties as alloy, diameter,
mass, and embossing. An upper limit and a lower limit value are stored
for each programmed coin type, a so-called acceptance band, so that
the coin validator knows whether to accept a coin or not. If the
determined measured values of the inserted coin are beyond the
acceptance band, the coin detected as being a false coin exits the
changer via the coin return area. Otherwise, the acceptance gate
opens, and the coin goes into the sorting system. Based on the
manufacturer’s programming for the respective coin type, the coin
validator checks whether that coin is to be sorted into one of the four
change tubes. If the coin is not programmed as a tube coin (see section
"Label" in Chap. 4 "Design") or the filling level sensor of the respective
tube indicates "tube full", the coin is directed into the cash-box.
The acceptance bands are programmed by the manufacturer
according to customer specifications.
National Rejectors, Inc. GmbH, Buxtehude
25
FUNCTIONS
G-46.F4000
Coin channels and memory blocks
The coin validator of the changer possesses 20 "memory slots" for
coin acceptance that can be assigned different coin types or tokens.
These "memory slots" are termed coin channels. All the coin information
that describes the processing of an inserted coin is assigned to the
coin channels; e.g. the acceptance band of a coin type/token so that
the coin type/token is accepted in that channel.
To be able to reject false coins reliably, channels with a narrow or even
a very narrow acceptance band are frequently set up for a coin type,
in addition to the standard coin channel (see section "Label" in Chap. 4
"Design"). The limit values of these coin channels are closer to one
another so that false coins with similar measured values are rejected,
if the normal channel is inhibited (see section "Inhibiting coins/
activating narrow coin channel" in Chap. 8 "Operation"). Narrow and
very narrow coin channels, however, also possess a lower acceptance
rate.
In addition, it is possible to allocate coins with different measured
values but identical coin values to different coin channels. This is how
the coin validator can, for example, accept old and new coins of the
same type.
However, a coin channel is not only assigned the acceptance
band of a coin type but also other coin information which
defines further processing: e.g. coin values, inhibiting and
sorting information.
26
National Rejectors, Inc. GmbH, Buxtehude
G-46.F4000
FUNCTIONS
The memory of the coin validator can data-manage two separately
programmed (memory) blocks 0 and 1 (see section "Label" in Chap. 4
"Design"). The 20 coin channels can be assigned to each block with
different coin types (also currencies), sorting information, etc. Only
one block can be active at a time and be used for the coin measurement
and for further coin processing. You can use the upper switching block
on the coin validator to select the desired block (see section "Selecting
the memory block" in Chap. 8 "Operation").
Since the customer-specific programming made by the
manufacturer does not allocate all 20 coin channels of
memory block 0 and 1 in most cases, coin types and the
desired further information can be assigned to channels that
are still free at any time.
The coin channels 14 to 16 of the two memory blocks are intended for
the teach mode. In these coin channels, new tokens can be taught,
without a PC programming station, directly at the vending machine
using a handheld or setting module (see section "Teach mode for
tokens" in this chapter).
National Rejectors, Inc. GmbH, Buxtehude
27
FUNCTIONS
G-46.F4000
Vending operation
This section describes which changer functions are responsible for the
basic vending operation on the vending machine.
In this section only payment with coins is taken into consideration. For
payment with bills or chip cards, see section "Communication with ..."
in this chapter.
Vending machine and not a change machine!
To ensure that the vending machine is not used as a change
machine and inserted cash is returned whenever you want,
the changer can be set up so that change is only paid out after
a vending operation (forced vend).
In addition, a maximum amount of money, which is allowed to be
accepted at most, can be configured (see section "Which highest
amount ís allowed to be accepted?" in this chapter).
Single vend or multi vend?
In principle the customer can purchase a number of products
one after the other once he has inserted his money (multi
vend). The change is not paid out until the customer has
pressed the return lever.
However, the changer can also be set to "single vend", i.e.
the customer can only insert coins until the value of the
highest set price is reached. Change is then paid out
automatically after each vend.
What happens to the remaining credit that cannot
be paid out of the change tubes?
If the remaining credit cannot be paid out (because change
tubes are empty or no appropriate tube coin programmed),
that credit can either be reset or saved for the next vending
operation/for the next customer.
28
National Rejectors, Inc. GmbH, Buxtehude
G-46.F4000
FUNCTIONS
Changer or vending machine – Which device ends
the vending operation? (4-price devices only)
The changer can either end the vending operation
independently (internal reset) or after it has received a reset
signal from the machine (external reset).
With an internal reset, the vending operation is terminated for the
changer after it has sent a signal to the vending machine (100 or
300 ms) as soon as the customer’s credit has reached the price. The
vending machine can vend the product.
With an external reset, the vending operation for the changer is only
ended when it receives a reset signal from the vending machine either
via the separate reset signal line (L8) or via the combined reset and
inhibit signal line (L6).
And if no product is given out ...?
(cigarette mode, 4-price devices only)
When the vending operation is terminated via a reset signal
from the vending machine (see above), the changer can be
set so that a renewed product selection is possible, if the
vending machine does not give out any goods, following the
first product selection, and does not send, following an
adjustable period of time, ("cigarette mode time") a reset
signal to the changer.
There is no "forced vend", i.e. the credit would be paid out again if the
customer selects a product only once.
Simplex V prices
Usually, the prices for Simplex V devices are set in the vending
machine.
However, after having enabled the price holding function, up
to 30 prices can be set in standard changers or up to 60 prices
in serial changers, if the product-specific single turnovers are
important for the audit.
By means of the prices the changer is then able to data-manage the
audit data of each product.
National Rejectors, Inc. GmbH, Buxtehude
29
FUNCTIONS
G-46.F4000
Cash acceptance
This section describes the changer functions that are important for
cash acceptance in general as well as for the acceptance of tube coins
and cash-box coins in particular.
Which highest amount is allowed to be accepted?
In order to prevent the vending machine from being used as
a change machine, you can set a maximum amount of
money which may be accepted during a single vending
operation (acceptance limitation).
If this amount is reached or exceeded, the acceptance of coins and
bills is inhibited.
How many coins, at most, are to be sorted into the
change tubes?
The changer can be configured so that each change tube
accepts no more than a specific number of coins.
When this number of coins is reached in a tube, all further coins for
this tube are then directed into the cash-box temporarily. Only when
coins have been paid out of this tube, will more be sorted into the tube.
If this function is not used, the upper filling level sensor (full sensor)
determines, irrespective of the number of coins, from when the coins
will be sorted into the cash-box and no longer into the tubes.
How can string manipulation be minimized?
The changer can be equipped with a string sensor on an optional basis.
This string sensor detects coins inserted into the device on a string
and then inhibits the coins from being accepted. By this security
measure these coins will not generate any credit.
The sensitivity of the string sensor can be individually set.
Following a case of attempted string manipulation, it is
possible to ensure that the tube coins of the next 100 coins
inserted are not sorted into the change tubes but are
redirected into the cash-box instead.
"String coins" sorted into the cash-box are more reliably detected by
the string sensor, so that any further attempts of manipulation would
probably fail.
30
National Rejectors, Inc. GmbH, Buxtehude
G-46.F4000
FUNCTIONS
Change payout
This section describes the changer functions that are important for change
payout in general as well as for the payout of tube coins in particular.
Which highest amount is allowed to be paid out?
You have the possibility to define a maximum residual
amount that the changer is supposed to pay out to the
customer at most (change limitation).
The customer must then purchase enough during one vending
operation so that the residual credit is equal to or less than the set
change limitation.
What number of coins and which tubes will trigger
the display message "Tube empty"?
You can specify a minimum number of coins that the
individual change tube must contain so that it signals "Tube
not empty" (or not yet "Tube empty"). In addition, you can
specify which change tube or which tube combination is
supposed to signal "Tube empty".
If the actual number of coins drops below the set number of coins in
this tube/these tubes, the vending machine display will indicate "Tube
empty".
If a bill validator is connected, you can inhibit the
acceptance of banknotes whilst this message is displayed
(see section "Communication with ..." in this chapter).
If no minimum number of coins is specified, the lower filling level
sensor (empty sensor) of the tubes determines, irrespective of the
number of coins, when "Tube empty" is indicated.
National Rejectors, Inc. GmbH, Buxtehude
31
FUNCTIONS
G-46.F4000
How many coins, at least, are supposed to cover
the tube bottom (security stock)?
If a security stock is configured for the individual change
tubes, the changer does not pay out a minimum number of
tube coins.
For coins that cause problems during stacking and tend to stand upright
instead of lying flat, a relatively high setting for the security stock
should be selected since the coins will no longer spring back and stand
upright when they fall onto a higher stack of coins.
The changer can also be set so that the configured security
stock can be paid out by the vending machine and the
security stock can also be transmitted to the vending
machine whenever the machine scans the tube filling level.
Second price list (happy hour)
(only 4-price devices with internal audit module)
The changer can data-manage two different prices for every product;
these prices are summarized in two price lists (standard and happyhour price list).
For the happy-hour price list, a period of time is specified
during which the vending machine is supposed to give out
the goods at a reduced price.
Vending of drinks into customer’s own cup
(eco-function, 4-price devices only)
If the customer uses his own cup for the vending of drinks
(eco-function), he will receive a price reduction amounting to
the set "subsidy amount".
The eco-function can be activated either via the reset signal
line (L8) or via the price signal line (L4).
However, the cup cancellation button must be connected to the
appropriate signal line L4 or L8.
The subsidy amount also applies for subsidized sales via
any connected card system (see section "Communication
with ..." in this chapter).
32
National Rejectors, Inc. GmbH, Buxtehude
G-46.F4000
FUNCTIONS
Inhibiting of specific coin types
If specific coin types are no longer to be accepted for
payment at the vending machine (e.g. because there are too
many false coins of a specific coin type in circulation), these
coin types can also be inhibited directly on the rear of the
coin validator using the switching block (see Chap. 8
"Operation").
You can also, e.g., inhibit high-value coin types when not
enough change is available (at least one change tube empty).
Disabling of inventory keys
The inventory keys are part of the keyboard of the changer: keys L,
ML, MR, R. These keys allow the paying out of one, several or all coins
from the corresponding change tube L, ML, MR, R.
Should these keys no longer be operated, they can be
generally disabled, or in such a way that they can be enabled
by means of the vending machine control system.
Teach mode for tokens
The changer has three memory locations (coin channels) for configuring
a maximum of three tokens. The measured values of a token can thus
be newly assigned to a coin channel directly on the vending machine
by inserting the corresponding tokens. The acceptance band generated
then accepts these tokens as payment in the vending machine.
In addition, you can choose between a normal and wide acceptance
band for the configured tokens. However, a wide acceptance band
should only be set if a limited number of the tokens are available for
generating the token measurement values, or if the tokens show very
large tolerance values. Otherwise there is the danger that too many
false coins will be accepted.
Tokens can either be configured so that the customer
receives his goods for free (free vend tokens) or so that a
specific value is assigned to the tokens (value tokens). The
changer can direct accepted tokens either into the cash-box
or into the return area and back to the customer.
National Rejectors, Inc. GmbH, Buxtehude
33
FUNCTIONS
G-46.F4000
Telephone code and currency code
Depending on which country the machine is installed in, a
telephone or currency code can be set on the changer and
be transmitted to the vending machine control system, for
example, for menu and other display texts.
This code also specifies the language for the printout of audit data.
Mains operation or battery operation?
(MDB devices only, not for USB/RS-232
interface)
MDB changers can be used in the mains mode of operation or for mainsindependent field work in the battery mode of operation. The desired
operating mode can be easily selected using two switches on the
changer’s PCB (see Chap. 8 "Operation").
If battery operation is set, the vending machine wakes up the changer
via an external wake-up line.
How long the changer is to remain switched on after the last
time the vending machine activated the changer (wake-up
time) can be set on an individual basis.
After the wake-up time has elapsed, the changer switches off
automatically and must be "woken up" again by the activation of the
external wake-up line via the machine control system.
Main currency and second currency (optional)
Should you wish the changer to accept two currencies, the
second currency can be converted into the main currency
according to an adjustable rate.
The second currency is then rounded up or down so that it can be datamanaged with the main currency.
34
National Rejectors, Inc. GmbH, Buxtehude
G-46.F4000
FUNCTIONS
Display (4-price devices only)
If a display is connected to the changer, the money inserted, the price
or the time can be shown (see Chap. 3 "Options").
Is the price to be displayed?
The changer can be adjusted, so that the respective price is
indicated for a period of 2 seconds on the vending machine
display, after the customer has selected the product he
wants to purchase.
Is the time to be displayed?
(only with internal audit module)
The time can be indicated on the vending machine display
when no money has been inserted.
Communication with ...
The following sections describe the changer functions that are relevant
to communication with the internal audit module and connected
peripheral devices.
Communication with internal audit module
(optional, no MDB devices)
•
•
•
•
•
For auditing purposes, a vending machine number and the
current time as well as basic settings for the output of audit
data via a connected printer or via the infrared interface can
be configured in the internal audit module:
Printer type (with or without start button), Printer language,
Printing speed
Extra broad printout (24 characters/line), so that audit data is
separated in "since initialization" and "since last printout" and
can be printed out side by side
Simplex V prices for single and product-specific turnovers
Which audit data are to be printed?
Is the time to be printed?
National Rejectors, Inc. GmbH, Buxtehude
35
FUNCTIONS
G-46.F4000
Communication with external audit unit
(only BDV and Simplex V devices)
If an external audit unit is connected, you only need to set
up the communication to the changer and, if necessary, set
the vending machine number.
Communication with BDV/MDB card reader
If a BDV or MDB card reader is connected to the changer, the following
settings in the changer must be taken into account for the communication
between both devices:
• Credit limitation:
Specifies the maximum amount of money with which
cards can be credited.
• Subsidy amount:
In the case of subsidized sales, the customer
receives his goods either free of charge or with a
discount amounting to the subsidy amount set. The
number of subsidized sales programmed on the card
must be enabled.
The subsidy amount also applies for the eco-function (see
section "Vending of drinks into customer’s own cup (ecofunction)" in this chapter).
•
•
36
Card discount:
The discount (0–100 %) set in the card system is
deducted from the price.
Inhibit settings for vending machine:
The card reader settings cannot be changed by the
vending machine.
National Rejectors, Inc. GmbH, Buxtehude
G-46.F4000
FUNCTIONS
Communication with BDV/MDB bill validator
If a BDV or MDB bill validator is connected to the changer, the following
settings in the changer must be taken into account for the communication
between both devices:
• Disable bill validator, if "Tube empty":
If the vending machine only has a small amount of change
and the message "Tube empty" appears, depending on the
set change tubes and the set minimum number of coins
in these tubes (see section "Change payout" in this
chapter), the bill validator can be disabled.
• Enable bill validator only if card in reader:
The bill validator can be generally enabled or only if a
card is inserted into the card reader.
Communication with hoppers
(only MDB devices with hopper interface)
If a coin type is frequently paid out as change, and the respective tube
is often empty, up to two hoppers (coin storage) can be connected to
the changer from which the vending machine can pay out coins on an
alternative basis.
In the changer, a setting must be made that one hopper or
two hoppers are connected and which coin is being collected
in the hopper so that the changer can decide which residual
credit can no longer be paid out by the changer and must be
paid out from the hoppers.
You can connect either hoppers or a recycler, but never
the both simultaneously (see section "Communication with
a recycler" in this chapter).
Communication with a recycler
A recycler (bill payout unit) can be connected to the changer, which
can, together with a bill validator, accept and change bills.
In the changer, a setting must be made that a recycler is
connected.
The recycler transmits to the changer which bill is being collected in
the recycler, so that no further settings are necessary.
You can connect either a recycler or hoppers, but never
the both simultaneously (see section "Communication with
hoppers" in this chapter).
National Rejectors, Inc. GmbH, Buxtehude
37
FUNCTIONS
G-46.F4000
Audit data
(only devices with internal audit module)
To prepare audits and turnover calculations, the audit data can either
be output using a printer or be read out using a mobile data retrieval
unit (MDE) with an optical infrared interface (see Chap. 3 "Options").
In a service case, the audit data can be displayed in
detail using the setting module (see separate instructions
for the setting module). However, the setting module is not
suitable for the audit.
The settings mentioned in this chapter in the section "Communication
with internal audit module" are important for the output of audit data.
For details on how to print out or read out the audit data, see Chap. 8
"Operation".
Reset of tube counters
After the change tubes have been emptied, e.g., for repairs,
the tube counters of the changer should be reset for the
renewed start-up operation so that, when the tubes are being
filled, the tube counter begins to count from zero and not from
the stored number of coins.
Test of connecting lines
(4-price devices only)
In a service case, the individual signal lines of the connecting cable
between the changer and the vending machine can be checked using
the setting module (see separate instructions for the setting module).
38
National Rejectors, Inc. GmbH, Buxtehude
G-46.F4000
6
INSTALLATION
INSTALLATION
This chapter describes how to install and connect the
• coin changer
• internal audit module.
Installing and connecting the changer
To avoid damage to the equipment, please make sure
that you check the following before installation:
– that the connecting cable of the changer is
suitable for vending machine interface
– that the supply voltage for the changer is the same
as the nominal voltage on its label.
To enable the changer to communicate with a PC-based
platform, we recommend to implement the comfortable NRI
PaymentManager or the NRI USB program library as well
as the NRI PC MDB protocol in the PC system (see
separate instructions).
On their PCB, 4price changers with
an operating voltage
of 110–240 V are
equipped with a
rotary switch 1,
which you can use
to select, if
1
appropriate,
the
necessary
voltage of 110/
115 V or 220/230 V.
To gain access to
the rotary switch on
the PCB, you must
remove the coin
validator and the
tube ML (see Fig. 4a
Fig. 4a: Setting the operating voltage
and
Chap. 11
"Minor repairs and modifications").
National Rejectors, Inc. GmbH, Buxtehude
39
INSTALLATION
G-46.F4000
How to install the changer in the vending machine:
1 Pull the vending machine’s mains plug.
2 Hang the changer in the vending machine using the three
mounting holes 2 on the back wall (see Fig. 4b).
3 Pull out the coin validator (see Fig. 4c).
Make sure that the coin validator is safely connected to
the changer with the ribbon cable.
3
2
2
4
Fig. 4b: Hanging up the G-46.F4000
Fig. 4c: Removing the coin validator
4 Screw the housing of the changer tightly inside the vending machine.
5 Put the coin validator back in and engage.
Make sure that there is an air space between the return
lever of the vending machine and that of the changer.
6 Connect the changer to the vending
machine using the proper connecting
cable 3 (see Fig. 4c) and also connect
any external devices, such as the
display (see Fig. 4d) or bill validator, to
the changer.
If both the vending machine
and the changer are equipped
Fig. 4d: Plug for display
with two interfaces, you must
nevertheless connect one interface only, since otherwise
you could damage the changer.
Never insert both connecting plugs at the same time!
7 If necessary, connect the changer to power using the feeder
(barrel connector) for PC application.
8 Reconnect the vending machine to the mains supply.
The three LEDs 4 on the coin validator light up briefly to test
their function. Afterwards, the green LED lights up. The
changer is operational (see Fig. 4c).
40
National Rejectors, Inc. GmbH, Buxtehude
INSTALLATION
G-46.F4000
Installing and connecting the audit module
To install the internal audit module for collecting and evaluating audit
data, proceed as follows:
1 Remove the coin validator and pull off the connecting cable
(see Fig. 4c).
2 Use the plug-in connector 1 on the rear of the PCB to plug the
audit module into the right-hand side of the main PCB 2.
The audit module is now connected to the changer via the 12-V
supply line and four data lines for serial communication
(see Fig. 5).
3 Screw on the audit module using the fastening holes provided
(see Fig. 5).
1
2
Fig. 5: Installing the internal audit module
National Rejectors, Inc. GmbH, Buxtehude
41
START-UP
7
G-46.F4000
START-UP
Since the individual functions of the changer are programmed
by the manufacturer according to customer-specific
requirements, you usually only need to set the desired prices
and fill the four change tubes with the respective coin types
when starting up the device for the first time.
Setting the prices
A maximum of four prices (or 30 prices for standard changers or
60 prices for serial Simplex V changers) can be set. In 4-price
changers with internal audit module, you can also specify four prices
that are independent of the standard prices and only apply at a certain
time of the day (happy-hour price list).
The prices can be set using the configuration tools. To find
out how to configure the prices, please refer to the respective
separate instructions.
For 4-price changers, the four standard prices can also be set using
the keyboard on the coin validator:
1 Hold down the return lever (during the entire setting procedure).
The keyboard can now be used to set the prices and can no longer
be used to fill or empty the tubes.
2 In order to set Price 1, press -key.
-key.
Price 2, press
Price 3, press
-key.
-key.
Price 4, press
The current price is shown on the vending machine display.
3 Increase the price setting by one with the -key or reduce it
by one with the -key until the desired price is displayed.
4 Release the return lever.
The new price is stored.
With "single vend", the highest set price determines how
much money the customer is allowed to insert at most in
order to ensure that he cannot use the vending machine as
a change machine. Therefore, set all prices not being used
to zero.
The smallest digit of a price can only be changed in
increments of the smallest coin value.
42
National Rejectors, Inc. GmbH, Buxtehude
G-46.F4000
START-UP
Filling the change tubes
Before the device is started up for the first time, the four change tubes
must be filled using the keyboard on the coin validator and by inserting
coins of the respective tube coin so that the changer is provided with
sufficient change to be paid out.
In many cases, the vending machine control system also
offers a filling function. In that case, this filling function
should be used, due to the fact that the control unit may
not be able to accept the filling level of the changer.
If the cash-box is not empty, it must be emptied now, because the
coins directed to the cash-box will not be counted.
The cash-box does not need to be emptied, if the changer
has been set so that only coins to be sorted into tubes
are accepted when the tubes are being filled.
1 Press the
-key.
An acoustic signal and the flashing of the green LED show that
the changer is no longer in operating mode, but in tube filling
level mode.
2 Insert tube coins
The respective tube counter counts the accepted coins, and
the changer sorts the respective coin type into its configured
tube: either until
– the full sensor is covered or
– the configured max. number of coins is reached.
Afterwards, the tube coins inserted will, depending on each
setting, either no longer be accepted and directed into the return
area, or they will be accepted and directed into the cash-box.
When inserting the first coin into each tube, make sure
the coin lies flat inside the tube (see also section "How
many coins, at least, are supposed to cover the tube
bottom (security stock)?" in Chap. 5 "Functions").
If all tubes are full:
3 Press the -key again.
Two acoustic signals and the green LED lighting up show that
the changer is no longer in filling level mode, but back in
operating mode.
If no coins are inserted in a 30-second time period, the
changer returns to operating mode, without the -key
being pressed again.
National Rejectors, Inc. GmbH, Buxtehude
43
START-UP
G-46.F4000
Performing individual settings
This section describes settings that can, but do not need to, be made
for the initial start-up.
Configure changer on an individual basis
Since the most important functions of the changer are programmed
by the manufacturer according to customer-specific requirements, it
may only be necessary to perform individual settings.
All device settings can be set using the PC configuration software
WinEMP or, more easily, using the Palm OS® application PalmG46 or
the setting module directly on site. To find out how to perform the
settings, please refer to the respective separate instructions (see also
Chap. 13 "Which functions can be set using the configuration tools?").
Select data transmission protocol and mains
operation or battery operation (MDB devices only)
The changers with serial interfaces can transmit data according to
different protocols. With the help of the switching block on the rear
of the coin validator, you can always set the device to the MDB protocol
on a permanent basis (see Chap. 8 "Operation").
With MDB changers equipped with a battery module and a wake-up line,
you can – depending on the installation location – always use the
switches on the PCB to choose between mains operation and battery
operation (see Chap. 8 "Operation") (not for USB/RS-232 interface).
44
National Rejectors, Inc. GmbH, Buxtehude
OPERATION
G-46.F4000
8
OPERATION
In this chapter you will see how to carry out functions and
settings, directly on the changer using the operating elements
(the keyboard and switching block), rather than with additional
tools.
Returning change or emptying tubes using
the keyboard
Coins can be paid out from the change tubes either individually, if you
need to test the coin acceptance, or one after another, when the tubes
need to be emptied e.g. before transit, for repairs, or in case of an
inventory.
The internal keys , ,
and
left", "middle right" und "right".
apply to the tubes "left", "middle
If MDB changers or BDV changers are configured in such
a way that the inventory keys are disabled, the keys
cannot be used.
Either the device is set up in such a way that the
keyboard can be enabled using the vending
machine control system, or the keyboard must first
be activated using a configuration tool.
To give out tube coins individually, simply press the corresponding
key. One coin will be given out each time the key is pressed.
To pay out several tube coins:
1 Hold down the corresponding key , ,
or
for approx.
five seconds.
The tube will be automatically emptied, without having to press
the key again.
2 Press any other key.
The coins will stop being paid out.
National Rejectors, Inc. GmbH, Buxtehude
45
OPERATION
G-46.F4000
Refilling change using the keyboard
In order to provide the changer with change, the keyboard on the coin
validator can be used to activate a tube filling level mode in which the
change is filled up by inserting individual coins into the changer.
In many cases, the vending machine control system also
offers a filling function. In that case, this filling function
should be used, due to the fact that the control unit may
not be able to accept the filling level of the changer.
If the tubes were not emptied previously using the inventory
keys, it could be that the tube counters are not set to zero
but to the number of coins stored prior to the emptying
operation.
In that case, the tube counters must be reset prior
to the filling operation.
If the cash-box is not empty, it must be emptied now, because the
coins directed to the cash-box will not be counted.
The cash-box does not need to be emptied, if the changer
has been set so that only coins to be sorted into tubes are
accepted when the tubes are being filled.
1 Press the
-key.
An acoustic signal and the flashing of the green LED show that
the changer is no longer in operating mode, but in tube filling
level mode.
2 Insert tube coins.
The respective tube counter counts the accepted coins, and
the changer sorts the respective coin type into its configured
tube: either until
– the full sensor is covered or
– the configured max. number of coins is reached.
Afterwards, the tube coins inserted will, depending on each
setting, either no longer be accepted and directed into the
return area, or they will be accepted and directed into the cashbox.
When inserting the first coin into each tube, make sure
the coin lies flat inside the tube (see also section "How
many coins, at least, are supposed to cover the tube
bottom (security stock)?" in Chap. 5 "Functions").
46
National Rejectors, Inc. GmbH, Buxtehude
OPERATION
G-46.F4000
If all tubes are full:
3 Press the -key again.
Two acoustic signals and the green LED lighting up show that
the changer is no longer in filling level mode, but back in
operating mode.
If no coins are inserted in a 30-second time period, the
changer returns to operating mode, without the -key
being pressed again.
Inhibiting coins/activating narrow coin channel
Using the first eight DIL switches of the switching block on the rear
of the coin validator, you can inhibit the coin types configured on the
first eight memory slots (coin channels 1–8) of the changer without
using any additional configuration tools. Which coin type was
programmed in which coin channel is indicated on the label (see Chap. 4
"Design").
To activate a narrow coin channel the normal coin channel must be
inhibited. If both channels are enabled, the wider acceptance band of
the normal coin channel is used.
To inhibit a coin type:
1 Fold the coin validator out of the changer (see Fig. 6a).
Fig. 6a: Folding out the coin validator
National Rejectors, Inc. GmbH, Buxtehude
47
OPERATION
G-46.F4000
Make sure that the coin validator is safely connected to
the changer with the ribbon cable.
2 Use a pointed object to push the respective DIL switch
(1 to 8) toward the right-hand side to ON (e.g. DIL
switch 4 for inhibiting coin channel 4, see Fig. 6b).
The coin type assigned to this channel/switch will no
longer be accepted and will be directed into the return
area from now on.
If a normal coin channel and a narrow coin channel
have been programmed on the coin validator for
one coin type, the normal coin channel must be
inhibited as described above in order
Fig. 6b: Inhibiting coins
to activate the narrow coin channel.
If both channels are activated, the
wider acceptance band of the normal coin channel is used.
If the coin type is to be inhibited, both coin channels must be
inhibited.
3 Put the coin validator back in and engage.
With the aid of the configuration tools, you have the
possibility to inhibit all programmed coin types (see
Chap. 13 "Which functions can be set using the
configuration tools?").
48
National Rejectors, Inc. GmbH, Buxtehude
OPERATION
G-46.F4000
Selecting the memory block
The changer can data-manage two independently configured (memory)
blocks 0 and 1. 20 coin channels with different values, sorting
information, and inhibiting information, etc. are assigned to each block.
The blocks are programmed by the manufacturer according to
customer-specific requirements. Only one block is active at a time
and can be used for the coin acceptance and for further coin
processing.
To select a block using DIL switch 10 of the switching block:
1 Fold the coin validator out of the changer (see Fig. 6a).
Make sure that the coin validator is safely connected to
the changer with the ribbon cable.
2 For block 1, use a pointed object
to push DIL switch 10 toward the
right-hand side to ON, and for
memory block 0 toward the lefthand side (to OFF) (see Fig. 7).
3 Put the coin validator back in and
engage.
4 Switch the power off and then on
again.
The desired memory block is
activated.
Block 0
Block 1
Fig. 7: Selecting the memory block
National Rejectors, Inc. GmbH, Buxtehude
49
OPERATION
G-46.F4000
Reading out and printing out audit data
If your changer is equipped with an internal audit module, you can use
the changer to collect and evaluate audit data so that this data can
be read out using a mobile data retrieval unit (MDE) or be output using
a printer.
Print out audit data
The internal audit module is equipped with an interface (9-pole D-SUB
plug) for connecting a printer (e.g. NRI printer G-55.0510, cp. also
product accessory pages at www.nri24.com).
Depending on the printer connected, the printout is either activated
immediately or after a start button has been pressed. If the printer does
not have a start button and the printout is activated only by connecting
the device, the printer line must be monitored by the changer to ensure
that the printer does not print out data over and over again.
Following a printout, the audit data is not deleted until the next time
a coin is inserted. Until then you can repeat the printout as often as
you wish.
•
•
•
•
•
•
•
•
50
When printing out the audit data, please note the following
possible settings:
Machine number
Printer type (with or without start button)
Printer language (telephone code/currency code)
Printing speed
Extra broad printout (24 characters/line), so that audit data is
separated in "since initialization" and "since last printout" and
can be printed out side by side
Simplex V prices for single and product-specific turnovers
Which audit data is to be printed?
Is the time to be printed?
National Rejectors, Inc. GmbH, Buxtehude
G-46.F4000
OPERATION
Read out audit data via infrared interface
To be able to read out the audit data via an infrared MDE, you will require
an NRI infrared adapter as an optical interface for (cp. also product
accessory pages at www.nri24.com):
• timed IR signals or
• IRDA signals
To read out the audit data:
1 Simply plug the adapter in the 9-pole D-SUB printer cable on
the top left-hand side of the changer.
2 Hold the infrared interface of the MDE in the direction of the
adapter.
3 Start data transmission on the MDE.
If data is read out with an MDE, the changer automatically
inhibits the deletion of audit data following a printout.
National Rejectors, Inc. GmbH, Buxtehude
51
OPERATION
G-46.F4000
Select data transmission protocol
(MDB devices only)
The changers with serial interface can transmit data according to
different protocols. With the help of the switching block on the rear
of the coin validator, you can always set the device to the MDB protocol
on a permanent basis (see Chap. 8 "Operation").
1 Fold the coin validator out of the changer (see Fig. 8a).
Fig. 8a: Folding out the coin validator
Make sure that the coin validator is safely connected to
the changer with the ribbon cable.
2 Use a pointed object to set DIL switch 9 toward the
right-hand side to ON (see Fig. 8b).
The changer is now permanently set to the MDB
protocol.
3 Put the coin validator back in and engage.
Fig. 8b: Setting the MDB protocol
52
National Rejectors, Inc. GmbH, Buxtehude
OPERATION
G-46.F4000
Select mains operation or battery operation
(MDB devices only, not for USB/RS-232
interface)
With MDB changers equipped with a battery and a wake-up line, you
can – depending on the installation location – always use the two
switches on the PCB to choose between mains operation and battery
operation:
1 Fold the coin validator out of the changer (see Fig. 8a).
Make sure that the coin validator is safely connected to
the changer with the ribbon cable.
2 For standard mains operation, use a pointed object to push the two
DIL switches on the top left-hand side of the PCB upward to STD
and, for battery operation, downward to BATT (see Fig. 9).
3 Put the coin validator back in and engage.
4 Switch the power off and then on again.
The desired operating mode is activated.
Battery
operation
Mains
operation
Fig. 9: Selecting mains operation or battery operation
National Rejectors, Inc. GmbH, Buxtehude
53
CLEANING
9
G-46.F4000
CLEANING
Only the coin validator must be wiped clean from time to time with a
damp cloth (lukewarm water with some washing-up liquid):
Under no circumstances may the cloth be so wet that
fluid runs into the device. Otherwise the PCB will be
damaged
Do not use any solvents or scouring agents which
attack the plastic of the device.
1 Pull the vending machine’s mains plug.
2 Press lever 1 upwards and open the coin validator (Fig. 10).
3 Use a cloth to wipe off the coin runway inside the coin
validator.
4 Press "Close" arrow 2 so that the metal spring engages behind
the lever 1 in order to close the coin validator again (Fig. 10).
5 Reconnect the vending machine to the mains supply.
1
2
Fig. 10: Opening and closing the coin validator flight deck
54
National Rejectors, Inc. GmbH, Buxtehude
G-46.F4000
TRANSPORT
10 TRANSPORT
Please empty the change tubes before you transport
the changer (see Chap. 8 "Operation"). Coins falling
out of the device could otherwise cause damage to
the changer’s PCB.
Pull the vending machine’s mains plug before you
remove the changer.
To avoid damages, transport the device in its
original packaging only and never by its connecting
cables.
National Rejectors, Inc. GmbH, Buxtehude
55
MINOR REPAIRS AND MODIFICATIONS
G-46.F4000
11 MINOR REPAIRS AND MODIFICATIONS
In this chapter you will find out how to easily:
replace the change tubes
replace the payout set
replace the changer’s PCB
•
•
•
Replacing the change tubes
To remove and install the tubes you will require a slotted-head
screwdriver and a small Phillips screwdriver.
Remove old tubes
1 Remove the coin validator and pull off the connecting cable
(see Fig. 11a, I).
2 Remove the tube cover on the cutouts 1 toward the front side
(see Fig. 11a, II).
3 Remove the fastening screw 2 for the cash-box channel on
the right-hand side of the device housing (absolutely required)
(see Fig. 11a, III).
4 Press down one of the middle tubes A and pull up the adjacent
tube B, so that the intermediate wall rises and then pull out the
downward-pressed tube toward the front C, (see Fig. 11a, IV).
5 Use one hand to press the intermediate wall upwards D and
pull out the remaining three tubes in the sequential order of
middle, left, right E to the extent required for the replacement
(see Fig. 11a, V).
56
National Rejectors, Inc. GmbH, Buxtehude
MINOR REPAIRS AND MODIFICATIONS
G-46.F4000
1
I
II
¨
EN
AR
C
2
III
V
IV
Fig. 11a: Removing the tubes
National Rejectors, Inc. GmbH, Buxtehude
57
MINOR REPAIRS AND MODIFICATIONS
G-46.F4000
Install new tubes
Begin by installing the outer tubes:
1 Insert the left-hand or right-hand
tube into the payout set so that the
two pins 1 at the bottom of the tube
reach into the holes of the payout
1
set (see Fig. 11b).
2 Use your hand to push the
intermediate wall upward and allow
the tube to engage in the intermediate
wall.
3 Now insert the other tubes: first the
Fig. 11b: Installing the tubes
second outer tube, and then the
inner tubes. In the case of the last
tube, the intermediate wall must be pressed upward by pressing
one of the adjacent tubes upward.
4 Check whether all tubes are properly engaged at the top and at
the bottom.
5 Tighten down the fastening screw for the cash-box channel on
the right-hand side of the device housing.
6 Insert the tube cover on the payout set and press into the
housing with slightly spread-out, lateral engaging levers.
7 Connect the coin validator via the connecting cable to the PCB
again, insert and allow to engage.
Following each alteration of the tube combination, you
must re-configure the tube coins and the sorting (see
Chap. 13 "Which functions can be set using the
configuration tools?").
58
National Rejectors, Inc. GmbH, Buxtehude
G-46.F4000
MINOR REPAIRS AND MODIFICATIONS
Replacing the payout set
To remove and install the payout set you will require a slotted-head
screwdriver and a small Phillips screwdriver.
Remove old payout set
1 Remove coin validator and tubes (see section "Remove old
tubes" in this chapter).
2 Press the right-hand side wall of the housing outward and pull
3
4
5
6
out the engaged intermediate wall 1 with the cash-box channel
(see Fig. 12, I).
Press the left-hand side wall of the housing outward and there
pull out the engaged intermediate wall 1 (see Fig. 12, II).
Pull the intermediate wall and the cash-box channel toward the
front and out of the housing.
Undo the flexible connection 2 between the payout set and the
PCB (see Fig. 12, III).
Press the right-hand and left-hand engaging hook 3 inward
simultaneously and push the payout set 4 toward the front and
out of the housing (see Fig. 12, III).
Install new payout set
1 Connect the flexible connection 2 (see Fig. 12, III).
2 Push the payout set into the housing 3 until the two engaging
hooks are engaged (see Fig. 12, III).
3 Press the intermediate wall with the cash-box into the housing,
first the left-hand side and then right-hand side.
4 Re-install the tubes and the coin validator (see section "Install
new tubes" in this chapter).
National Rejectors, Inc. GmbH, Buxtehude
59
MINOR REPAIRS AND MODIFICATIONS
G-46.F4000
1
I
1
II
2
3
3
4
III
Fig. 12: Replacing the payout set
60
National Rejectors, Inc. GmbH, Buxtehude
G-46.F4000
MINOR REPAIRS AND MODIFICATIONS
Replacing the changer’s PCB
To remove and install the PCB you will require a slotted-head
screwdriver and a small Phillips screwdriver.
For the removal of the old PCB
1 Remove coin validator and tubes (see section "Remove old
tubes" in this chapter).
2 Remove intermediate wall and cash-box channel (see section
"Remove old payout set" in this chapter).
3 Pull off the plugged-in cables from the PCB.
4 Pull off the blind plug 1 from the housing and, if present, pull
the cable toward the front and out of the cable recesses in the
housing (see Fig. 14).
5 Remove screws 2 and 3 (see Fig. 13).
6 Lift up the PCB slightly on the right-hand side and take it out
of the housing.
The new PCB is installed in the reverse order of steps (see also section
"Install new payout set" and "Install new tubes" in this chapter).
National Rejectors, Inc. GmbH, Buxtehude
61
MINOR REPAIRS AND MODIFICATIONS
G-46.F4000
1
2
3
Fig. 13: Replacing the changer’s PCB
62
National Rejectors, Inc. GmbH, Buxtehude
TECHNICAL DATA
G-46.F4000
12 TECHNICAL DATA
Supply voltage
Battery operation
115/230 V (European standard)
110/220 V AC, 120/240 V AC
24 V AC, 24 V DC
11 V to 43 V
Power consumption Standby mode:
3.5
Max.:
15.0
Battery operation
Sleep mode:
< 0.5
Standby mode: < 50.0
VA
VA
µA
mA (Wake-up mode)
Switching capacity
For AC voltage, max. 240 V; 2.5 A;
1,200 VA
Temperature range
-25 °C to +70 °C
Temperature change Max. 0.2 °C/min.
Humidity
Up to 90 %
Condensation
Not permitted
Machine interfaces
See section "General information regarding
the changer" in Chap. 1
Peripheral bus
For 4-price changers, a supply voltage of
15 V (-2 V/+5 V) is available at the
peripheral bus. The max. output power is
approx. 6 VA. Peripheral devices that
require a higher voltage or output power
must be supplied using an external power
pack.
Coin acceptance
16 coin types max. (of these, up to
3 tokens) in 20 channels
Coin diameter: 15–32 mm
Coin thickness: 1.2–3.5 mm
Paying out of coins 4 coin types max. from 4 change tubes
Coin diameter: 15–32 mm
Coin thickness: 1.2–3.5 mm
Device dimensions Height: 380.0 mm
Width: 133.5 mm
Depth: 76.5 mm (80 mm with pressed
return lever)
Mounting position
Vertical, max. deviation: ± 2°
Mark of conformity
CE (see next section)
National Rejectors, Inc. GmbH, Buxtehude
63
TECHNICAL DATA
G-46.F4000
CE certification
The CE certificate (CE = Communautés Européennes) confirms
that our products comply with specified basic requirements
of the applicable directive. The CE certificate is not a quality
assurance certificate in terms of the quality expected by the
manufacturer but only in terms of the quality demanded legally. It is
a pure administrative certificate and is intended only as proof of
compliance with the directives for the monitoring authorities and not
directed at clients or final customers.
Which directives were applied can be seen in the declaration of
conformity. The manufacturer must keep this declaration available for
the monitoring authorities only (for a minimum period of 10 years after
the last product has been introduced to the market). However, upon
request we can provide copies of this declaration for our customers.
The following directives and their subsequent changes can be applied
to our devices:
1. The EMC Directive (89/336/EEC)
for devices which cause electromagnetic interference or are
interfered with by such.
2. The Low Voltage Directive (73/23/EEC)
for electrical equipment that is used with a nominal voltage of
50–1000 V AC and 75–1500 V DC.
3. The CE Certificate Labelling Directive (93/68/EEC)
Modification directive regarding the application and use of CE
labels.
Accessories
For all details regarding the changer accessories please refer to our
web pages for the product accessories on the internet (www.nri24.com).
64
National Rejectors, Inc. GmbH, Buxtehude
G-46.F4000
WHICH FUNCTIONS CAN BE SET?
13 WHICH FUNCTIONS CAN BE SET USING
THE CONFIGURATION TOOLS?
This chapter gives you a list of the device functions you can
test and set using the WinEMP PC programming station and
using the mobile mobile configuration tools – Palm OS®
application PalmG46 or setting module.
For further information on all configuration tools please refer to our
product accessory pages at www.nri24.com and the appropriate
operating instructions.
In addition to the diagnosis of the changer, e.g. in service cases, you
can use the configuration tools to change the following settings:
WinEMP PC programming station
•
•
•
•
•
•
•
•
•
•
•
•
•
•
•
•
•
•
Giving change out of the tubes
Resetting the tube counters
Configuring the prices (standard and happy-hour)
Optimizing the acceptance of genuine coins and the rejection of
false coins
Configuring new coin types and tokens
Configuring other tube coins
Inhibiting individual coin types
Disabling inventory keys
Configuring forced vend, single vend/multi vend
Configuring residual credit data-management, internal/external
reset
Configuring second product choice (cigarette mode)
Configuring acceptance limitation (tube coins and credit)
Configuring change limitation (tube coins and credit)
Configuring the security stock
Configuring the indication on the vending machine display
(4-price devices only)
Configuring eco-function (4-price devices only)
Configuring individual wake-up time
(MDB battery devices only)
Configuring communication with external audit units/card
readers/bill validators/hoppers/recycler
National Rejectors, Inc. GmbH, Buxtehude
65
WHICH FUNCTIONS CAN BE SET?
•
•
•
•
•
•
•
G-46.F4000
Configuring second currency incl. conversion factor (optional)
Minimizing string manipulation (optional)
Configuring telephone code/currency code
Configuring smallest coin value with decimal point as a
reference value and basis of calculation for all coin values
Data block download for current coin information
Restoring old configuration state of a changer
Storing the setting of a changer for series configuration
Palm OS® application "PalmG46"
•
•
•
•
•
•
•
•
•
•
•
•
•
•
•
•
•
•
•
•
•
•
•
66
Giving change out of the tubes
Resetting the tube counters
Configuring the prices (standard and happy-hour)
Configuring up to three tokens
Configuring other tube coins
Inhibiting individual coin types
Disabling inventory keys
Configuring forced vend, single vend/multi vend
Configuring residual credit data-management, internal/external
reset
Configuring second product choice (cigarette mode)
Configuring acceptance limitation (tube coins and credit)
Configuring change limitation (tube coins and credit)
Configuring the security stock
Configuring the indication on the vending machine display
(4-price devices only)
Configuring eco-function (4-price devices only)
Configuring individual wake-up time
(MDB battery devices only)
Configuring communication with external audit units/card
readers/bill validators/hoppers/recycler
Configuring the printer interface or read-out interface
Configuring second currency incl. conversion factor (optional)
Minimizing string manipulation (optional)
Configuring telephone code/currency code
Configuring smallest coin value with decimal point as a
reference value and basis of calculation for all coin values
Storing the setting of a changer for series configuration
National Rejectors, Inc. GmbH, Buxtehude
G-46.F4000
WHICH FUNCTIONS CAN BE SET?
Setting module
•
•
•
•
•
•
•
•
•
•
•
•
•
•
•
•
•
•
•
•
•
•
•
•
•
Giving change out of the tubes
Filling/emptying the change tubes
Resetting the tube counters
Checking the connecting lines (4-price devices only)
Performing test sales (4-price devices only)
Checking the audit data (only devices with internal audit module)
Configuring the prices (standard and happy-hour)
Configuring up to three tokens
Configuring other tube coins
Inhibiting individual coin types
Disabling inventory keys
Configuring forced vend, single vend/multi vend
Configuring residual credit data-management, internal/external
reset
Configuring second product choice (cigarette mode)
Configuring acceptance limitation (tube coins and credit)
Configuring change limitation (tube coins and credit)
Configuring the security stock
Configuring the indication on the vending machine display
(4-price devices only)
Configuring eco-function (4-price devices only)
Configuring individual wake-up time
(MDB battery devices only)
Configuring communication with external audit units/card
readers/bill validators/hoppers/recycler
Configuring the printer interface or read-out interface
Minimizing string manipulation (optional)
Configuring telephone code/currency code
Configuring smallest coin value with decimal point as a
reference value and basis of calculation for all coin values
National Rejectors, Inc. GmbH, Buxtehude
67
INDEX
G-46.F4000
INDEX
A
C
Accentuations in the manual 9
Acceptance 25, 63
band 25
Card
discount 36
system, possible settings 36
Cash
acceptance, possible settings 30
return 28, 31
CE
Certificate Labelling Directive 64
certification 64
Change
payout 28, 63
narrow 25, 26
narrow, inhibit 47
normal 26
very narrow 26
limitation 30
possible settings 30
Accessories
description 14
ordering codes 64
Advantages 11
Application, proper 12
Assemble
change tubes 56
changer 40
internal audit module 41
payout set 59
PCB 61
Audit
data
description 38
print out 50
read out 50
module, internal
connect 41
description 14
install 41
possible settings 35
unit, external 36
Audits 16
possible settings 31
tubes
conditions for "Tube empty" 31
description 22
empty 45
fill 43
illustration 19
max. coin number 30
replace 56
security stock 32
stacking problems 32
Channel
description 26
inhibit 47
narrow 26
inhibit 47
normal 26
very narrow 26
Check connecting lines 38
Cigarette mode 29
Cleaning 54
B
Banknote validator 37
possible settings 37
Battery operation
description 34
select 53
BDV peripheral bus 15
Bill validator, possible settings 37
Block
default setting 21
description 27
select 49
Bus systems for periphery 15
68
National Rejectors, Inc. GmbH, Buxtehude
INDEX
channel
description 26
inhibit 47
narrow 26
narrow, inhibit 47
normal 26
very narrow 26
counters, reset 38
inhibit 33, 47
insert funnel
description 19
illustration
payout 63
rejection 25
runway, clean 54
validator
description 19
dismount 21
illustration 18
open 54
Configuration
adjustable functions 65
description 24
operating instructions 10
setting module 74
tools 17
Connecting lines, test 38
Connection 39
changer 40
internal audit module 41
Conventions in the manual 9
Credit limitation, card system 31, 36
Cup, own 32
Currency
code 34
second 34
battery/mains operation 53
memory block 49
set MDB protocol 52
Dimensions 63
Diodes
description 19
illustration 19
troubleshooting 80
Disable inventory keys 33
Discount, card system 36
Dismount
change tubes 56
coin validator 21
payout set 59
PCB 61
Display 14
indication 35
Documentation, additional 10
Drink vending in own cup 32
E
Eco-function 32
EMC Directive 64
Empty
change tubes 45
sensor 23
End vending operation 29
Exchange parts 56
External
audit unit 36
devices, possible settings 36
reset 29
National Rejectors, Inc. GmbH, Buxtehude
69
E
D
Data
block number 21
transmission protocol, MDB 52
Default setting 21
Design 18
Device
number 21
type 21
Diagnostics
pilot lights 80
setting module 83
DIL switches
description 21
illustration 21
inhibit coins/activate narrow channel
47
select
N
narrow 26
narrow, inhibit 47
normal 26
very narrow 26
D
I
Coin
acceptance 25, 63
acceptance band
X
G-46.F4000
INDEX
G-46.F4000
F
Fill change tubes 43
Filling level sensors 23
Firmware, update 17
Flash
firmware 17
prommer 17
Flight deck, open 54
Forced vend 28
Free vend token 33
Full sensor 23
Function overview, setting module 74
Functions 24
G
General information
chapter 9
G-46.F4000 10
manual 9
Give out change 31
Guide 9
Installation 39
changer 40
internal audit module 41
Instructions, additional 10
Interface
coin validator 21
description 20
display 40
handheld (PalmG46) 19
listing, vending machine interfaces
10
module, replace 61
PC programming station (WinEMP)
19, 21
printer 19
RS-232 10
setting module 19
USB 10
vending machine
description 23
illustration 19
Internal
audit module
connect 41
install 41
possible settings 35
H
Happy-hour prices 32
Highest amount
to be accepted 30
to be paid out 31
Hopper, possible settings 37
Humidity 63
I
Infrared adapter
description 14, 16
operate 51
Inhibit
coins 33, 47
inventory keys 33
narrow coin channel 47
Insert funnel
description 19
illustration 19
Install
change tubes 56
changer 40
internal audit module 41
payout set 59
PCB 61
70
reset 29
Introduction
chapter 9
G-46.F4000 10
manual 9
Inventory keys
description 19
illustration 19
operate 45
IrDA adapter
description 14, 16
operate 51
K
Keyboard
description 19
disable 33
illustration 19
operate 45
National Rejectors, Inc. GmbH, Buxtehude
INDEX
N
Label
description 21
illustration 19, 21
LEDs
description 19
illustration 19
troubleshooting 80
Lines, test 38
Low Voltage Directive 64
Narrow coin channel, inhibit 47
Nominal voltage 21
Note validator, possible settings 37
Notes 9
M
Mains operation, select 53
Maintenance 54
Manuals, additional 10
Mark of conformity 63
Marking in the manual 9
Maximum
amount
to be accepted 30
to be paid out 31
number of tube coins 30
MDB
peripheral bus 15
protocol 52
Memory block
default setting 21
description 27
select 49
Minimum number, tube coins 31
Models 10
Modifications 56
Money
acceptance, possible settings 30
return 28, 31
Motors, payout set
description 23
replace 59
Mount
change tubes 56
changer 39
internal audit module 41
payout set 59
PCB 61
Mounting position 63
Multi vend 28
D
L
E
X
G-46.F4000
N
O
I
Open coin validator 54
Operating
instructions, additional 10
software, update 17
voltage, select 39
Operation 45
Optical adapter
description 14, 16
operate 51
Options 14, 64
Order number 21
Ordering
code, changer 21
codes 64
Overview, setting module functions 74
P
PalmFlash 17
PalmG46
adjustable functions 65
description 17
operating instructions 10
Payout
change 31, 63
set
description 23
illustration 19
replace 59
unit 22
PC
applications 10
programming station
adjustable functions 65
description 17
test station 16
PCB, replace 61
Periphery
connection possibilities 15
possible settings 35
technical data 63
Pictograms in the manual 9
Pile-up problems, tube coins 32
National Rejectors, Inc. GmbH, Buxtehude
71
INDEX
Pilot lights
description 19
illustration 19
troubleshooting 80
Power consumption 63
Price
display 35
holding (Simplex V) 29
list, second 32
reduction
G-46.F4000
Reset
external 29
internal 29
signal 29
tube counters 38
Return
change 28, 31, 63
lever
description 19
illustration 19
Revision number, data block 21
card system 36
RS-232 interface 10
eco-function 32
set 42
Runway, clean 54
Printer 16
S
operate 50
settings, internal audit module 35, 50
Safety instructions 9, 12
PRO functions, setting module 74
Sale, terminate 29
Product selection, second 29
Sales data
Programming
description 38
adjustable functions 65
print out 50
description 24
read out 50
operating instructions 10
Second
setting module 74
currency 34
station
price list 32
adjustable functions 65
product selection 29
description 17
Selection, second 29
tools 17
Sensors
in tubes 23
Proper use 12
SER functions, setting module 74
Protocol
Serial number 21
listing 10
Setting module
MDB 52
adjustable functions 65
R
description 17
function overview 74
Recycler 37
operating instructions 10
Rejection 25
Settings
Remaining credit
adjustable functions 65
reset 28
description 24
return 28
setting module 74
store 28
tools 17
Remove
Signal lines, test 38
change tubes 56
Simplex V prices 29
coin validator 21
Single vend 28
payout set 59
Sorting
PCB 61
default setting 21
Repairs 56
description 25
Replace parts 56
Stacking problems, tube coins 32
Requests to perform an action 9
Start-up 39, 42
String
manipulation, protection against 30
sensor 14, 30
72
National Rejectors, Inc. GmbH, Buxtehude
capacity 63
Symbols in the manual 9
T
Teach tokens 33
Technical data 63
Telephone code 34
Temperature
change 63
range 63
Terminate vending operation 29
Test
connecting lines 38
software 16
station, PC 16
Tester 17
Text conventions 9
Time, display 35
Token, configure 33
Transport 55
Troubleshooting 80
setting module 83
Tube
-empty conditions 31
coins
E
D
U
N
description 21
illustration 21
inhibit coins/activate narrow
channel 47
select battery/mains operation 53
select memory block 49
set MDB protocol 52
Turnover data
description 38
print out 50
read out 50
Types 10
Update firmware 17
USB
Audit Stick 16
interface 10
Use, proper 12
I
Subsidy amount
card system 36
eco-function 32
Summary, chapter 9
Switching
block
X
INDEX
G-46.F4000
V
Value token 33
Variants 10
Vend, terminate 29
Vending machine interfaces 10
Voltages 63
W
WinData 16
WinEMP
adjustable functions 65
description 17
operating instructions 10
WinFlash 17
WinSPT 16
max. number 30
minimum number 31
stacking problems 32
conditions for "Tube empty" 31
counters, reset 38
description 22
empty 45
fill 43
illustration 19
max. coin number 30
replace 56
security stock 32
sensors 23
stacking problems 32
National Rejectors, Inc. GmbH, Buxtehude
73
FUNCTION OVERVIEW FOR SETTING MODULE
G-46.F4000
FUNCTION OVERVIEW FOR SETTING
MODULE
If you already know how to use the setting module and only
require the memory location of a changer setting, you will find
all SER functions and PRO functions and their memory
locations in the setting module listed in chronological order
in this chapter. For details on how to perform the setting
exactly, please refer to the separate instructions for the
setting module.
SER functions
Function
Meaning
SER
01
01 01
01 02
01 03
01 04
Empty tubes
Left tube
Middle left tube
Middle right tube
Right tube
SER
04 01
Initialize GLOBO Card system
SER
05 01
Fill tubes
SER
06
06 01
06 02
06 03
06 04
Reset tube counters
Left tube
Middle left tube
Middle right tube
Right tube
SER
07
07 01
07 02
07 03
Teach tokens
Token A in coin channel 14
Token B in coin channel 15
Token C in coin channel 16
SER
30
Perform function tests
(4-price devices only)
Check connecting lines
Perform test vends
30 01
30 02
74
National Rejectors, Inc. GmbH, Buxtehude
FUNCTION OVERVIEW FOR SETTING MODULE
G-46.F4000
PRO functions
Function
Meaning
PRO 01 01
Vending machine number
Amount limitations
Acceptance limitation for coins and banknotes
Change limitation for residual credit
Credit limitation for chip card (system)
PRO 04
04 01
Activate (1)/deactivate (0) diverse functions
11111111
FUNCTION
PRO 03
03 01
03 02
03 03
OVERVIEW
PRO 02
Set prices
02 01 Price 1
02 02 Price 2
02 03 Price 3
02 04 Price 4
0205–08 Happy-hour prices 1–4 (4-price devices only)
0205–30 Simplex-V prices 5–30 (standard devices)
0205–60Simplex-V prices 5–60 (serial devices)
Delete not payable remaining credit
Accumulate not displayable credit
(MDB devices)
Simplex-V prices activated
Inventory keys disabled (can be enabled for
BDV/MDB vending machines)
Tube security stock can be paid out by MDB
vending machines
External reset via line 6 (1), via line 8 (0)
External reset (1), internal reset (0)
(4-price devices only)
Forced vend (1),
change return after pressing the return lever (0)
Single vend (1), multi vend (0)
National Rejectors, Inc. GmbH, Buxtehude
75
FUNCTION OVERVIEW FOR SETTING MODULE
Function
04 02
G-46.F4000
Meaning
11111111
Eco-function via line 8 (1),
via price line 4 (0)
(4-price devices only)
Configuration cannot be overwritten by
BDV vending machine
Show price on display
(4-price devices only)
Happy-hour prices activated
(only 4-price devices with internal audit
module)
Eco-function activated
(4-price devices only)
2nd product selection activated (cigarette mode)
(4-price devices only)
Internal reset with delay (after 300 ms)
(4-price devices only)
Return line instead of return lever
(4-price transistor devices only)
Show the time on the display
(only 4-price devices with internal audit module)
04 03
01111111 (printer interface, only devices with
internal audit module)
Do not print tube/cash-box turnover data
Do not print product-specific turnover data
Do not print the time
MDE audit, not via printer
(display only, no setting)
Printer without start button (printer line
monitored)
1200-baud printing speed, not 110 baud
Printout with 24 characters/line (separated in
"since initialization" and "since last printout") (1),
with 12 characters/line (not separated) (0)
76
National Rejectors, Inc. GmbH, Buxtehude
FUNCTION OVERVIEW FOR SETTING MODULE
G-46.F4000
04 04
Meaning
11110001
When filling tubes, only accept coins to be
sorted into tubes
Redirect the tube coins to the cash-box after a
string manipulation
Special function for Simplex-V vending machines
activated
Transmit the tube filling level including security
stock to the vending machine
(MDB devices only)
Disable inventory keys for MDB vending machines
14 01
14 02
Set the system time
(only with internal audit module)
Time
Date
PRO 15
15 01
15 02
15 03
Inhibit coin channels
Channel 1–8 (right-hand digit = channel 1)
Channel 9–16 (right-hand digit = channel 9)
Channel 17–20 (right-hand digit = channel 17)
PRO 17
Inhibit coin channels in case of
message "Tube empty"
Channel 1–8 (right-hand digit = channel 1)
Channel 9–16 (right-hand digit = channel 9)
Channel 17–20 (right-hand digit = channel 17)
17 01
17 02
17 03
PRO 18 01
PRO 19 01
FUNCTION
PRO 14
Communication to external audit unit activated
11111 (card system settings)
Communication with BDV card system
activated
Vending machine cannot overwrite card
system settings
Allow card system discount
Allow subsidy sales
Communication with MDB card system
activated
National Rejectors, Inc. GmbH, Buxtehude
OVERVIEW
Function
77
FUNCTION OVERVIEW FOR SETTING MODULE
Function
PRO 20 01
G-46.F4000
Meaning
10XX1 (bill validator settings)
Communication with BDV bill validator
activated
Disable bill validator, if "Tube empty"
(XX = 00)
Do not disable bill validator, if "Tube
empty" (XX = 01)
Enable bill validator, only if card in reader
(XX = 10)
Enable bill validator only if card is in reader
or tube is not empty (XX = 11)
Communication with MDB bill validator
activated
PRO 21 01
Sensitivity of the string sensor
PRO 22
22 01
22 02
Conditions for message "Tube empty"
Codes for tube (combination) (1–13)
Minimum number of coins from which "Tube
empty" is not yet indicated for left tube
Minimum number of coins from which "Tube
empty" is not yet indicated for middle left tube
Minimum number of coins from which "Tube
empty" is not yet indicated for middle right tube
Minimum number of coins from which "Tube
empty" is not yet indicated for right tube
22 03
22 04
22 05
PRO 23
23 01
23 02
Happy-hour time
(only 4-price devices with internal audit module)
Switching-on time
Switching-off time
PRO 25
25 01
25 02
25 03
25 04
Maximum number of coins in
Left tube
Middle left tube
Middle right tube
Right tube
PRO 26
26 01
26 02
26 03
26 04
Security stock in
Left tube
Middle left tube
Middle right tube
Right tube
78
National Rejectors, Inc. GmbH, Buxtehude
FUNCTION OVERVIEW FOR SETTING MODULE
Function
Meaning
PRO 30
30 01
30 02
30 03
Configure value tokens
Value for token A (coin channel 14)
Value for token B (coin channel 15)
Value for token C (coin channel 16)
111
(free vend tokens)
Token A (channel 14) = free vend token
Token B (channel 15) = free vend token
Token C (channel 16) = free vend token
PRO 33 01
Subsidy amount for card system and eco-function
PRO 50 01
Smallest coin value
PRO 52 01
Telephone code/currency code (language for
printout)
PRO 53 01
Cigarette mode time (4-price devices only)
Wake-up time (MDB battery devices only)
PRO 54
54 01
54 02
Sorting into left tube
Coins from channel 1–8 (RH digit = channel 1)
Coins from channel 9–16 (RH digit = channel 9)
PRO 55
55 01
55 02
Sorting into middle left tube
Coins from channel 1–8 (RH digit = channel 1)
Coins from channel 9–16 (RH digit = channel 9)
PRO 56
56 01
56 02
Sorting into middle right tube
Coins from channel 1–8 (RH digit = channel 1)
Coins from channel 9–16 (RH digit = channel 9)
PRO 57
57 01
57 02
Sorting into right tube
Coins from channel 1–8 (RH digit = channel 1)
Coins from channel 9–16 (RH digit = channel 9)
PRO 70
70 01
70 02
Coin value for hopper coins
Hopper 1
Hopper 2
PRO 71 01
11111 (hopper settings)
Communication with hopper 1 activated
Communication with hopper 2 activated
Hoppers that send active-low coin impulses,
not active-high ones
Hoppers that send active-high empty signals,
not active-low ones
Communication with MDB hopper/recycler
activated (only serial devices with recycler
interface)
National Rejectors, Inc. GmbH, Buxtehude
79
OVERVIEW
PRO 31 01
FUNCTION
G-46.F4000
TROUBLESHOOTING
G-46.F4000
TROUBLESHOOTING
If there is a fault on the changer, the pilot lights at the top
of the coin validator show where the fault is. In order to
diagnose the cause of the fault in detail, the NRI configuration
tools are available (see section "Diagnosis using setting
module" in this chapter as well as Chap. 4).
Quick diagnosis using pilot lights
If the green LED at the top lights up or flashes, there are no faults and
the device is working properly. If the yellow LED in the middle flashes
there is a definite fault which, in general, can be easily remedied. If
the red LED at the bottom flashes, it is probably a fault that must be
remedied by a service technician.
The label at the top of the coin validator may help in locating the fault
(see Fig. 14).
Fig. 14: Quick diagnosis using pilot lights
80
National Rejectors, Inc. GmbH, Buxtehude
TROUBLESHOOTING
G-46.F4000
Meaning
Troubleshooting
lights up
Changer operational
No error
flashes
Tube filling level
mode
No error
LED
green LED
green and
yellow LED
light up
Coin inserted inhibited Check vending
from the vending
machine settings
machine
(possible that highvalue coins are
inhibited because tubes
are empty)
light up
T ROUBLESHOOTING
green and red
LED
Coin inserted inhibited Enable coin channel
from the changer
again using switching
block or setting
module, WinEMP or
PalmG46
yellow LED
flashes once
• Return lever
pressed
• Switch in coin
validator defective
flashes twice
• Coin stuck in
payout area
• Motor failure
National Rejectors, Inc. GmbH, Buxtehude
• Check return
mechanism in
vending machine
• Service case
• Remove change
tubes and jammed
coin, then pay out
one coin from each
tube using the
inventory keys
• Service case
81
TROUBLESHOOTING
LED
G-46.F4000
Meaning
Troubleshooting
• Changer inhibited by
vending machine
• Check vending
machine (possibly
empty or defective)
• Adjusted acceptance
limitation or highest
price (with "single
vend") reached, if
appropriate, use
configuration tools to
correct
• Enable changer again
using MDE
yellow LED
flashes three
times
• Changer inhibited by
internal audit module
red LED
flashes once
Fault in coin validator
• Remove jammed
coins from the coin
validator by pressing
the return lever
• Service case, coin
validator may have
to be exchanged
flashes twice
Fault in changer
Service case, device
may have to be
exchanged
flashes 3
times
Vending machine no
longer communicates
with changer (has sent
no command in 2 sec.)
Check vending
machine control
system or connecting
cable
82
National Rejectors, Inc. GmbH, Buxtehude
TROUBLESHOOTING
G-46.F4000
Diagnosis using setting module
If there is a fault on the changer, the setting module displays the
appropriate status or error message as soon as you connect it to the
changer (see Chap. 6 "Installation" and separate instructions for the
setting module). Depending on operating mode or fault, three status
or fault messages are distinguished:
• INFO messages: used in general only for information about
particular operating states.
• AN/AB messages: show where a coin was accepted (AN)/why a
coin was rejected (AB).
• FE messages:
show why the changer no longer functions
Display
Meaning
Troubleshooting
T ROUBLESHOOTING
INFO
InFo-01
• Return lever pressed • No error
• Check return
mechanism in
vending machine
• Switch in coin
• Service case
validator defective
InFo-06
Inhibit line 6 activated
from vending machine
Check line
InFo-08
Reset line 8 activated
from vending machine
Check line
InFo-09
String sensor active
• Coin on string
recognized (no error)
• Check sensor
(service case)
InFo-09A
Tube coins are sent to
the cash-box after a
recognized string
manipulation
No error, function can
be deactivated in
PRO 04 04
InFo-15
Checksum fault by
configuration
Check the PRO
functions with the
setting module and, if
necessary, correct
them
National Rejectors, Inc. GmbH, Buxtehude
83
TROUBLESHOOTING
G-46.F4000
Display
Meaning
Troubleshooting
InFo-30
Internal audit module
does not respond
Check audit module
InFo-41
Data transmission (file
transfer) prompted by
vending machine
control system
No error
InFo-42
Data transmission (file
transfer) prompted by
external audit unit
No error
InFo-43
Data transmission (file
transfer) prompted by
card system
No error
InFo-44
Data transmission (file
transfer) prompted by
bill validator
No error
InFo-48
Data transmission (file
transfer) prompted by
changer
No error
InFo-51
Vending operation
No error
InFo-52
Chip card given out
No error
InFo-80
Changer inhibited by
vending machine (not
4-price devices)
Check vending
machine (possibly
empty or defective)
InFo-81
Free vend by vending
machine (only
Simplex-V and BDV
devices)
Check vending
machine
InFo-82
Changer inhibited
because acceptance
limitation or highest
price (with "single
vend") reached
No error (purchase
goods), if necessary,
change acceptance
limitation in
PRO 03 01/02 01–04
InFo-83
Audit module inhibits
changer with audit
data
Check internal audit
module
84
National Rejectors, Inc. GmbH, Buxtehude
TROUBLESHOOTING
G-46.F4000
Display
Meaning
Troubleshooting
AN
An X YY
An X YY
No error
Accepted coin is
sorted into
X = 0 cash-box
X = 1 left tube
X = 2 middle left tube
X = 3 middle right tube
X = 4 right tube
Inserted coin accepted
in the coin channel
YY = 01–16 (channel no.)
Ab-01
If necessary widen
Measured values of
acceptance band with
the inserted coin are
outside the acceptance WinEMP
band
Ab-02
Coin inserted inhibited
by the changer
Enable coin channel
again using switching
block or setting
module, WinEMP or
PalmG46
Ab-03
Inserted coin has not
passed through
measurement section
in the appropriate
amount of time
• Remove coins or
foreign objects from
coin validator by
pressing the return
lever
• Check measurement
by air-core coil or
CP2 level (service
case)
Ab-04
Coins inserted too
quickly (two coins in
measurement area)
Insert coins again
more slowly
National Rejectors, Inc. GmbH, Buxtehude
85
T ROUBLESHOOTING
AB
TROUBLESHOOTING
G-46.F4000
Display
Meaning
Troubleshooting
Ab-05
CP3 or CP4 sensor
active
• If necessary,
eliminate coin jam in
the sorting area of
the coin validator
• Check sensors
(service case)
Ab-06
Sensor behind the
acceptance gate has
not recognized
inserted coin
(no CP3)
• Check acceptance
gate with WinEMP
and if necessary,
exchange it (service
case)
• Check CP3 sensor
(service case)
Ab-07
Sensor behind the
acceptance gate has
not recognized
inserted coin
(no CP4)
• Check acceptance
gate with WinEMP
and if necessary,
exchange it (service
case)
• Check CP4 sensor
(service case)
Ab-08
Inserted coin has
covered the sorting
control for too long
• If necessary,
eliminate coin jam in
the sorting area of
the coin validator
• Check CP4 sensor
(service case)
86
National Rejectors, Inc. GmbH, Buxtehude
TROUBLESHOOTING
G-46.F4000
Meaning
Troubleshooting
Ab-09
String manipulation
recognized
• If necessary, reduce
sensitivity of the
string sensor in
PRO 21 01
• Clean or exchange
string sensor
(service case)
• Check acceptance
gate for ease of
movement (service
case)
Ab-10
Inserted coin
recognized in false
money coin channel
No error
Ab-11
Inserted coin
recognized as enabling
token
No error
Ab-12
Inserted coin inhibited
from the vending
machine
Check vending
machine settings
(possible that highvalue coins are
inhibited because
tubes are empty)
Ab-00
Other fault with coin
acceptance
Service case
• Coin jammed in the
payout area (left
tube)
• Remove change
tube(s) and jammed
coin, then pay out
one coin from that
tube using the
inventory keys
• Service case
T ROUBLESHOOTING
Display
FE
FE-01
• Motor failure (left
tube)
National Rejectors, Inc. GmbH, Buxtehude
87
TROUBLESHOOTING
G-46.F4000
Display
Meaning
Troubleshooting
FE-02
• Coin jammed in the
payout area (middle
left tube)
• Remove change
tube(s) and jammed
coin, then pay out
one coin from that
tube using the
inventory keys
• Service case
• Motor failure (middle
left tube)
FE-03
• Coin jammed in the
payout area (middle
right tube)
• Motor failure (middle
right tube)
FE-04
• Coin jammed in the
payout area (right
tube)
• Motor failure (right
tube)
• Remove change
tube(s) and jammed
coin, then pay out
one coin from that
tube using the
inventory keys
• Service case
• Remove change
tube(s) and jammed
coin, then pay out
one coin from that
tube using the
inventory keys
• Service case
FE-13
Checksum fault in
acceptance band
Check and, if
necessary, adjust the
acceptance band of the
appropriate coin
channel with WinEMP
FE-14
Checksum fault in
coin value range
Check and, if
necessary, correct coin
values with WinEMP
FE-15
Checksum fault by
configuration
Check the PRO
functions with the
setting module and, if
necessary, correct
them
88
National Rejectors, Inc. GmbH, Buxtehude
Display
Meaning
Troubleshooting
FE-31
Vending machine
control system does
not respond
Check connecting
cable
FE-32
External audit unit
does not respond
Check connecting
cable or set up
communication in
PRO 18 01
FE-33
Card system does not
respond
Check connecting
cable or set up
communication in
PRO 19 01
FE-34
Bill validator does not
respond
Check connecting
cable or set up
communication in
PRO 20 01
FE-38
Vending machine no
longer communicates
with changer (has sent
no command in 2 sec.)
Check vending
machine control
system or connecting
cable
National Rejectors, Inc. GmbH, Buxtehude
89
T ROUBLESHOOTING
TROUBLESHOOTING
G-46.F4000