1
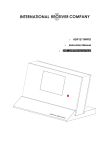
I n t e r n e t ,
P
A
N
D A B +
O
a n d
R
F M
A
R a d i o
M
A
Users Guide
Important Safety Precautions:
To achieve the utmost in enjoyment and performance from your CORD Panorama, and in order
to become familiar with its features, please read this manual carefully before operation. This
will ensure you years of faithful, trouble free performance and listening pleasure.
Important Notes:
• These safety and operating instructions should be retained for future reference.
• This appliance must not be exposed to dripping or splashing liquids. No objects filled with
liquids, such as vases, shall be placed on or near this appliance.
• Avoid installing the unit in locations described below:
o Places exposed to direct sunlight or close to heat radiating appliances such as electric
heaters.
o On top of other stereo equipment that radiate too much heat.
o Places blocking ventilation or dusty places.
o Places subject to constant vibration.
o Humid or moist places.
• No naked flame sources such as lit candles should be placed on or near the unit.
• The operation of the turning controls and switches as instructed in the manual.
• Before turning on the power for the first time, make sure the power cord is properly
installed, and fully uncoiled.
For safety reasons, do not remove any covers or screws or attempt to gain access to the inside
of the product for any reason. Doing so will expose you to dangerous voltage, and will void
your warranty immediately.
Refer any servicing to qualified personnel.
There are no user serviceable parts inide the unit.
CAUTION: TO REDUCE THE RISK OF ELECTRIC SHOCK DO NOT REMOVE COVER (OR BACK).
NO USER SERVICEABLE PARTS INSIDE, REFER SERVICING TO QUALIFIED SERVICE PERSONNEL.
DANGEROUS VOLTAGE:
Dangerous Voltages, that may be of sufficient magnitude to constitute a risk of
electric shock to persons is present within this product’s enclosure.
ATTENTION;
The owner’s manual contains important operating and maintenance instructions,
for your safety, it is necessary to refer to the manual.
WARNING: TO PREVENT FIRE OR SHOCK HAZARD, DO NOT EXPOSE THIS APPLIANCE TO
DRIPPING OR SPLASHING.
NOTE: This unit will become warm when used for a long period of time. This is normal and
does not indicate a problem with the unit.
2
Important Safety Information:
Some Do’s and Don’ts on the Safe Use of Equipment
This equipment has been designed and manufactured to meet international safety standards
but, like any electrical equipment, care must be taken if you are to obtain the best results and
safety is to be assured.
DO read the operating instructions before you attempt to use the equipment.
DO ensure that all electrical connections (including the mains plug, extension leads and
inter-connections between the pieces of equipment) are properly made and in accordance with
the manufacturer’s instructions. Switch off and withdraw the mains plug before making or
changing connections.
DO consult your dealer if you are ever in doubt about the installation, operation or safety of
your equipment.
DON’T remove any fixed cover as this may expose dangerous voltages.
DON’T overheat the unit which can cause damage and shorten the life of the equipment.
DON’T allow electrical equipment to be exposed to dripping or splashing, or objects filled with
liquids, such as vases, to be placed on the equipment.
DON’T place hot objects or naked flame sources such as lit candles or nightlights on, or close to
equipment. High temperatures can melt plastic and lead to fires.
DON’T listen to headphones at high volume, as such use can permanently damage your
hearing.
DON’T leave equipment switched on when it is unattended. Switch off using the switch on the
equipment and make sure that your family knows how to do this. Special arrangements may
need to be made for infirm or handicapped people.
DON’T continue to operate the equipment if you are in any doubt about if it’s working
normally or if it’s damaged in any way. Switch it off and withdraw the mains plug and consult
your dealer.
ESD Remark: In case of malfunction due to electrostatic discharge just reset the product
(reconnection of power source may be required) to resume normal operation.
NOTE: Do not open any covers and do not repair yourself. Qualified personnel must carry out
repair work.
3
Table of Contents:
Important Safety Precautions: ...................................................................................................... 2
Important Safety Information: ...................................................................................................... 3
Table of Contents:.......................................................................................................................... 4
Package Contents: ..................................................................................................................... 6
Front Panel Overview: ............................................................................................................... 7
Rear Panel Overview: ................................................................................................................ 8
Internet Radio Quick Start Guide .................................................................................................. 9
What you need before you can use your Internet Radio: .................................................... 9
Chapter 1 - Internet Mode .......................................................................................................... 10
1.1 Turning on ......................................................................................................................... 10
1.2 Setup Wizard ..................................................................................................................... 10
1.3
Access Wireless Network ............................................................................................... 11
1.4 Local Stations ................................................................................................................. 12
1.5
Choose a Station ............................................................................................................ 12
1.6
Selecting a Podcast ........................................................................................................ 13
1.7
Get Access Code and FAQ Solutions .............................................................................. 13
1.8
Station Updates .............................................................................................................. 13
1.9 Adding Internet Radio Stations to ‘My Favourites’ ........................................................ 14
1.10 Adding Stations to ‘My Added Stations’ ...................................................................... 15
1.11 Connecting to Wired Network ..................................................................................... 16
1.12 Shift to Wireless Network ............................................................................................ 16
Chapter 2 - Music Player Mode ................................................................................................... 17
2.1
Setting up a Music Server .............................................................................................. 17
2.2
Sharing Media with Windows Media Player .................................................................. 17
2.3 Play Shared Media ......................................................................................................... 18
Chapter 3 - DAB Mode................................................................................................................. 19
3.1
Shift to DAB Mode ......................................................................................................... 19
3.2
Shift to Another DAB Station ......................................................................................... 19
3.3 Dynamic Label Segment (DLS) ....................................................................................... 19
3.4 Manual Tune .................................................................................................................. 19
3.5 Prune Invalid .................................................................................................................. 20
3.6 DRC (Dynamic Range Control) ....................................................................................... 20
3.7 To Change Station Order ................................................................................................ 20
Chapter 4 - FM Mode .................................................................................................................. 21
4.1
General Operation ......................................................................................................... 21
4.2
Scan Setting.................................................................................................................... 21
4
4.3
How to Scan ................................................................................................................... 21
4.4
Audio Setting.................................................................................................................. 21
Chapter 5 - Aux in ........................................................................................................................ 22
5.1 To switch the unit into Aux in Mode: ............................................................................. 22
Chapter 6 - Gerneration Operations............................................................................................ 23
6.1
Setting Station Presets ................................................................................................... 23
6.2
Selecting a Preset Station .............................................................................................. 23
6.3
Sleep Function ............................................................................................................... 23
6.4
Setting Clock .................................................................................................................. 24
6.5
Setting Alarm ................................................................................................................. 24
Chapter 7 - System settings ......................................................................................................... 25
7.1 Equaliser......................................................................................................................... 25
7.2
Network setup ............................................................................................................... 25
7.3 Language ........................................................................................................................ 26
7.4
Contrast.......................................................................................................................... 26
7.5 Factory Reset.................................................................................................................. 26
7.6
Enter Setup Wizard ........................................................................................................ 27
7.7
Software Update ............................................................................................................ 27
7.8
SW Version and Radio ID................................................................................................ 28
Chapter 8
Specifications ........................................................................................................... 28
WARRANTY CONDITIONS ........................................................................................................ 29
5
Package Contents:
Main unit
and remote
control
Instruction
Manual and
Warranty
Information
6
Front Panel Overview:
Control
Function
- VOLUME +
Press to turn the radio on or off.
Turn to adjust the volume level.
֠ When the alarm is sounding, press to turn off alarm.
Note: to obtain a strong radio signal, please fully extend the antenna
STANDBY/ON
MODE
INFO
found on the rear of the unit, before you turn your radio on.
Press to move to another mode.
Internet, DAB and FM mode use only: Press to browse radio station
information screens.
MENU
Press to enter the main menu and other options.
BACK
Press to go backwards while in settings modes.
Music player, iPod mode:
Press
to previous track, Press
to next track, Press
to
play/pause
Internet, DAB and FM mode:
Press and hold
SCROLL/SELECT
to access to ‘Save Preset’, press to ‘Recall Preset’
Turn to browse options, press to confirm.
FM mode: while frequency is displayed, turn to manually adjust the
frequency 0.05MHz per step, or press to autoscan active station.
While alarm sounds, press to postpone the alarm by 5 minutes.
SNOOZE
Note: in the following chapters, we will shortly name it SELECT.
7
Rear Panel Overview:
Remark:
Fixed antenna for FM amd DAB+ reception
Antenna :
The radio comes with a telescopic antenna. To improve FM, DAB
reception, adjust the antenna position to achieve the best reception.
Headphone socket
For inserting 3.5mm headphones.
AUX IN socket:
For connecting 3.5mm stereo audio cable.
LAN socket:
Power cord socket:
For connecting RJ-45 LAN cable to connect with your wired computer
network.
Fixed AC mains power cord and plug (non removable type).
8
Internet Radio Quick Start Guide
What you need before you can use your Internet Radio:
A broadband Internet connection.
A wireless access point (Wi-Fi) connected to your broadband Internet, preferably via a
router, or;
A wired network with a spare point on your router, switch or hub where you can
connect with a Cat5/6 LAN cable with an RJ-45 connector.
If your wireless network is configured to use Wired Equivalent Privacy (WEP) or Wi-Fi
Protected Access (WPA) data encryption, then you need to know the WEP or WPA
code so you can get the Internet Radio to communicate with your network.
If for security reasons you need to enter the Radio’s MAC address into your wireless
access point, you can find the Radio’s MAC address as follows:
Main menu System settings Network View settings MAC Address.
Before you continue, please ensure that your wireless access point is powered up and
connected to your broadband internet. If you are unsure of how set up your broadband
internet connection, it is highly recommended that you read the instructions that came with
your broadband router or contact your Internet Service Provider for support.
9
Chapter 1 - Internet Mode
1.1 Turning on
1. Connect to the mains power and extend the antenna fully.
2. Press STANDBY/ON to switch on your radio, for initial use, a welcome message will appear,
then ask you to enter the ‘Setup wizard’.
1.2 Setup Wizard
1. Continue above step, press SELECT to confirm ‘YES’ and then turn SELECT to your preferred
‘hour format’, press SELECT to confirm.
2.
Press SELECT to confirm ‘Update from Network’, and then follow your radio’s instruction,
configure the following parameters:
Timezone:
select your local timezone.
Daylight saving: On or Off
Wlan region: Most of Europe/USA/Canada/Spain etc.
SSID: In some cases radio may find more than one network. Turn SELECT to your
expecting one, press SELECT to confirm.
Note: If your network is not configured to
request a password (WEP/WPA), the radio
will automatically connect to the network
and display as in the picture on the left.
10
3. If a WEP/WPA key (password) is required, the radio will ask you to input the WEP/WPA code
and display the password entry screen as follows:
Turn SELECT to cycle through the alphanumeric character list, press SELECT to select an
appointed character.
Note: WEP/WPA pass codes are case-sensitive. If a wrong character has been
input while entering your password, select ‘
Note:
a.
’ to delete that character.
= Backspace.
To select
,
or
anti-clockwise to select
: while the cursor sits at ‘0’ turn the SELECT knob
, then turn the SELECT knob again to select
or
.
b.
c.
Select
to return to the previous screen.
Your radio will automatically save the WEP/WPA key you’ve input, so there will be no
further need to re-enter this code again.
d.
After you select the final character of your password, turn SELECT to
, then
press SELECT to confirm.
1.3 Access Wireless Network
1. After successfully finishing ‘setup wizard’ as pictured above, press SELECT to confirm to exit,
while the cursor points to < Internet radio >, press SELECT to confirm.
2. While cursor points to < Station list >, press SELECT to confirm.
11
3. Then refer to the following section to choose stations. Or if it failed to connect to the
network, please perform the following steps:
a. Check your Router to see if it is working normally.
b. Relocate your radio to a stronger signal position if necessary.
c. Make sure your password is input correctly.
1.4 Local Stations
Make sure your radio connected to the network.
‘Local China’ is the default Country however can be changed according to your current
location. For instance, it can be local Australia, Germany, US, or local UK, etc. Simply,
it’s just an easy way for you to find your local stations.
1. To enter Local stations, press MENU < Station list > < Australia >, then press SELECT to
confirm.
2. Turn SELECT to your favourite item, and then press SELECT to confirm, and then scroll
through the list of stations step by step to the program you desire.
1.5 Choose a Station
Note: if any step is not consistent with this instruction menu, press BACK to move
backward.
1. To access this order, press MENU < Station list > < Stations >, then press SELECT to
confirm.
2. There are five options available for you to choose a station as pictured above.
‘LOCATION’ enables you to choose from the radio stations provided by any country which
you choose from a list.
a. While the cursor points to < Location >, press SELECT to confirm.
b. Turn SELECT to the region you want then press SELECT to confirm.
c. Use the same method to choose your desired station and your radio will begin
loading.
‘GENRE’ enables you to choose stations according to their content, for example, Classic
Rock, Sport, News, etc.
Note: a. Some internet radio stations do not broadcast 24 hours a day, and some stations are not
always on-line.
b. If the station has on-demand content, it may it give the option of listening to old programs which
have previously been broadcast.
12
1.6 Selecting a Podcast
1. To access the list of available Poscasts, press MENU < Station list > < Podcasts >,
press SELECT to confirm, and then Turn SELECT to choose your desired option.
2.
Press SELECT to confirm, and then step by step to your selecting program.
1.7 Get Access Code and FAQ Solutions
1. Whilst in Internet Radio mode, press MENU < Station list > < Help >, then press
SELECT to confirm.
2.
Note: at this step, you can also view the Internet Radio FAQ solutions.
While the cursor points to < Get access code >, press SELECT to confirm and your access
code will be displayed.
1.8 Station Updates
Occasionally the radio will tell you that it is receiving an updated station list. It does this
automatically and periodically to ensure that your radio always has the latest station directory
on-board.
13
1.9 Adding Internet Radio Stations to ‘My Favourites’
1. Visit website: http://www.wifiradio-frontier.com
2. Click on the register link.
3. To create your account, enter the Access code which can be found on the previous
page, section 1.7.
Then provide your email address and your chosen passoword
and your account will be created.
Note: want to member login? Therefore save your registered ‘Email address’ and ‘Password’.
4. You will now able to take advatage of the many additional features and services
offered to you by the Frontier internet Radio Portal, such as customised favourites
lists etc.
5. Once you have created your favourites lists and logged out of the Frontier Silicon
Portal, it may be necessary to turn your radio off for a few minutes for these
settings to take effect.
6. To find your new ‘My Favourites’ list, follow these two steps:
a. Press MENU < Station list > < My favourites >, press SELECT to
confirm.
b.
Turn SELECT to your desired favorites list, and then press SELECT to load.
Note: Your added ‘my favourites’ stations will show up at ‘my favourites’ subdirectory. Doing a ‘factory reset’
cannot erase them.
14
1.10 Adding Stations to ‘My Added Stations’
Even though the Internet radio portal contains thousands of stations, you may want to listen
to stations not listed. You can add your own stations via the portal.
1. Visit website: http://www.wifiradio-frontier.com
2. Login as a member (at previous page, you registered).
3. You will able to take advatage of the various additional features and services offered
by the Frontier internet Radio Portal.
4. Once you have finished creating your new stations and logged out of the Frontier
Silicon Portal, it may be necessary to turn your radio off for a few minutes for these
settings to take effect.
5. How to play ‘My added stations’?
a. Press MENU < Station list > < My added stations >, then press SELECT
to confirm.
b. Turn SELECT to your favorite option, and then press SELECT to loading…
Note: Your added stations will show up at ‘my added stations’’subdirectory. Doing a ‘factory reset’ cannot
erase them.
15
1.11 Connecting to Wired Network
Step 1 – Choose LAN Setting:
Note: make sure your LAN cable is connected to the LAN socket.
1. Press MENU Turn SELECT to < Main Menu >, press SELECT to confirm.
2. Turn SELECT to < System settings >, press SELECT to confirm.
3. Turn SELECT to < Network >, press SELECT to confirm.
4. Turn SELECT to < Manual settings >, press SELECT to confirm.
5. The cursor points to < Wired >, press SELECT to confirm.
6. The cursor points to < DHCP enable >, press SELECT to confirm. The LAN setting is now
active.
Step 2 – Enter Internet Radio mode
Press MENU ’Main menu’, press SELECT to confirm, as the cursor points to ‘Internet
Radio’, press SELECT to confirm. Or, press MODE repeatedly until < Internet Radio > is
displayed then stop pressing.
Step3 – Access Network
Once the above steps are completed, within a few seconds the following screen will be
displayed:
Note: If your radio fails to connect to the wired network,
please try the following:
a. Check your Router to see if it is working normally.
b. Check your LAN cable, make sure it hasn’t been
damaged.
c. Check that the LAN cable plug is inserted into the
LAN socket properly.
1.12 Shift to Wireless Network
1. Refer to the previous step titled ‘choose LAN setting’ steps 1-4, then turn SELECT to
<Wireless >, press SELECT.
2. While cursor point to < DHCP enable >, press SELECT to confirm, and then step by step to
access to wireless network.
16
Chapter 2 - Music Player Mode
2.1 Setting up a Music Server
In order for your radio play music files from a computer, the computer must be set up to
share files or media.
UPnP media sharing allows devices like this radio to play music from a shared media
library, navigating through tag menus such as Artist, Album or Genre.
If you are running a suitable server system such as a PC with Windows Media Player10 or
later (WMP), and your music library is well-tagged, then it is recommended to use media
sharing.
Only the UPnP server needs to be set up.
2.2 Sharing Media with Windows Media Player
The most common UPnP server is Windows Media Player (10 or later). Alternatively, other
UPnP platforms and servers may be used. To set up WMP for media sharing, perform the
following steps:
1.
Ensure that the PC is connected to the network.
2.
Ensure that the radio is powered on and connected to the same network.
3.
In WMP, add to media library about the audio files and folders you want to share with
your radio (Library > Add to Library…).
4.
5.
6.
In WMP, enable media sharing (Library > Media sharing…).
Make sure your radio has accessed to the shared media by selecting it and clicking Allow.
You can also set a name for the shared media in Settings… Click OK to close the dialogue
boxes.
The PC is now ready to stream music to the radio. The WMP UPnP service runs in the
background, there is no need to keep the WMP program running.
17
2.3 Play Shared Media
1.
Press MODE repeatedly until < Music player > is displayed.
2.
Note: Or, enter < Main menu >, and then turn SELECT to < Music player >, press SELECT to confirm.
While the cursor points to < Shared media >, press SELECT to confirm, and then step by
step to your selecting Music. Press
Press
to previous track, Press
to next Track,
to play/pause.
3.
Adjust volume by turning the - VOLUME + knob.
My Playlist
It is a collection of songs added by the user from UPnP, it can be achieved by pressing
MENU, and then turn SELECT to < My playlist >, press SELECT to confirm.
Repeat play mode
Press MENU < Repeat play: Off >, turn SELECT to shift ‘Off’ to ‘On’.
Shuffle play mode
Press MENU < Shuffle play: Off >, turn SELECT to shift ‘Off’ to ‘On’.
Clear My Playlist
Note: sometimes, you msy consider to refresh your media station list, follow below steps.
Press MENU < Clear My playlist >, press SELECT to confirm.
Prune Servers
1. Press MENU < Prune servers >, press SELECT to confirm.
2. Turn SELECT to ‘Yes’ while your radio asks you ‘Prune shared media wake on LAN servers?’,
press SELECT to confirm.
Now Playing Information
1. While a track is playing, the screen shows its track, artist and album if provided. There is
also a progressing bar with figures for elapsed and total track time.
2. To view further information, press INFO repeatedly, the screen will display information
such as Artist, Album, Playback buffer indication bar and Today’s Date etc.
18
Chapter 3 - DAB Mode
3.1 Shift to DAB Mode
1. Press MODE repeatedly to enter DAB function.
Note: a. For initial use, it will conduct a full scan and store all DAB/DAB+ radio stations.
b. In use, a full scan can be conducted by pressing MENU < Scan >, press SELECT to confirm.
2. Once the scanning is completed, the DAB+ stations will be displayed in alphanumeric
order. The first station in the list will be selected.
3. You can move back to the previous screen at any time by pressing BACK.
4. Once the scanning is completed, turn SELECT to cycle through stations list, and then
press SELECT to access the program you want.
Note:
if no DAB+ signal is found in your area, it may be necessary for you to relocate your radio.
3.2 Shift to Another DAB Station
1. Press MENU, and then press SELECT to enter < Station list >.
2. Turn SELECT to cycle through stations list, and then press SELECT to confirm.
3.3 Dynamic Label Segment (DLS)
This is scrolling text information supplied by DAB+ station. It may comprise information
on music title or detail of the program which is provided by the broadcaster.
3.4 Manual Tune
1. Press MENU < Manual tune >, and then press SELECT to confirm.
2. Turn SELECT to step between the channels and press SELECT to select the current channel.
Note: If there is a multiplex corresponding to this channel and frequency, then the display will show a tuning
meter with the signal strength and the multiplex name after a few seconds.
3. Press SELECT again to exit this display.
19
3.5 Prune Invalid
1. Press MENU < Prune invalid >, and then press SELECT to confirm.
2. Turn SELECT to ‘YES’, then press SELECT to confirm.
3.6 DRC (Dynamic Range Control)
You can set the level of the compression of stations to eliminate the differences in dynamic
range or sound level between radio stations.
Note: a. Set DRC to off indicates no compression.
b. set DRC to low indicates little compression.
c. set DRC to high shows maximum compression.
1. Press MENU < DRC >, and then press SELECT to confirm.
2. Turn SELECT to your selecting option, then press SELECT to confirm.
3.7 To Change Station Order
1. Press MENU < Station order >, then press SELECT to confirm.
Note: There are 3 options: Alphanumeric, Ensemble and
Valid. ‘#’ shows before the default of your setting option to
indicate current station order.
STATION ORDER
DESCRIPTION
Alphanumeric
Display all stations in alphanumeric order.
Ensemble
List active broadcasting stations before inactive ones.
Valid
Remove inactive stations from the station list.
2. Turn SELECT to your desired option, and then press SELECT to confirm.
20
Chapter 4 - FM Mode
4.1 General Operation
Press MODE repeatedly until < FM Radio > is displyed.
For initial use, it will start at the beginning of the FM frequency range (87.50MHz).
Otherwise, the last listened FM station will be selected.
Note:
or enter < Main menu >, and then turn SELECT to < FM >, press SELECT to confirm.
4.2 Scan Setting
By default, FM scans stop at any available station. This may result in a poor signal-to-noise
ratio (hiss) from weak stations.
To change the scan settings to stop only at stations with good signal strength, press MENU
< Scan setting > Strong stations only? Yes, press SELECT to confirm.
4.3 How to Scan
1. To manually adjust frequency, while frequency is displayed,turn SELECT to adjust it by
0.05MHz per step, or;
2. To auto-search, while frequency shows up, simply press SELECT.
4.4 Audio Setting
By default, all stereo stations are reproduced in stereo. For weak stations, this may result
in a poor signal-to-noise ratio (hiss).
By selecting FM Mono mode, the level of background noise can be greatly reduced.
To
play weak stations in mono mode press MENU < Audio setting > Listen in mono
only? Yes, press SELECT to confirm.
21
Chapter 5 - Aux in
5.1 To switch the unit into Aux in Mode:
1. Repeatedly press MODE until <AUX IN> is displayed.
Note: Or enter ‘Main menu’, turn SELECT to
<Auxiliary Input >, and then press SELECT to
confirm.
2. Through a line cable connection with 3.5mm stereo plug, your radio can be transformed
into a high quality digital audio speaker system.
3. Connect one end of the audio cable to the headphone (or auxiliary out) socket of your
source device, the other end connect to AUX IN socket on the rear of your radio.
The radio display will show the following:
Note: To gain optimal volume levels, adjusting the
output volume level on both the source device and
on the radio itself is highly recommended.
Note:
AUX IN allows for quick and easy connection of an MP3 player or other external sound sources.
22
Chapter 6 - Gerneration Operations
6.1 Setting Station Presets
Your radio can store up tp 10 Internet Radio, 10 DAB+ and 10 FM station presets.
To store the current station:
1. Press and hold your target PRESET button (Between 1-10) on your remote control untill
your radio shows ‘Preset stored’. Then the corresponding preset icon will appear on the
bottom of the display.
2. Alternatively you can achieve this via the front panel of the unit:
a. Press and hold
until it shows ‘Save Preset’, and then turn SELECT to your
selected location.
b. Press SELECT to confirm, your radio will indicate ‘Preset stored’.
6.2 Selecting a Preset Station
1.
Press MODE to go into relative mode: Internet, DAB or FM mode.
2.
Press your target PRESET button (among 1-10) on your remote control. Or via the front
panel on your radio:
Press
, your radio will show you ‘Recall Preset’, and then turn SELECT to your
selecting one. Press SELECT to confirm.
6.3 Sleep Function
1.
Press SNOOZE/SLEEP on remote control to activate sleep mode. Sleep can also be
activated by pressing MENU < Main menu > <Sleep >, press SELECT to confirm.
2.
Turn SELECT to define the sleep period: Off / 15 / 30 / 45 / 60 minutes.
3.
When your desired period is found, press SELECT to confirm.
Note: The sleep icon will now be displayed, as well as
showing how long the radio will run during sleep mode.
4.
The radio will automatically put itself into standby mode after sleep time has elapsed.
5.
To continue enjoying your program, press STANDBY/ON.
23
6.4 Setting Clock
1. Clock setting mode can be activated by pressing MENU < Main menu > < System settings > < Time/Date >, press SELECT to confirm.
Note: Turn SELECT to see the range of time settings
available, which includes the functionality to set:
<Set Time/date>: Manually set-up both Time and Date
<Auto update>: ‘Update from DAB’, ‘Update from Network’ and ‘No update’
<Set format>: ‘Set 24 hour’ and ‘Set 12 hour’
<Set timezone>: Turn SELECT to your local timezone, and then press SELECT to confirm
<Daylight savings>: Turn SELECT to ‘ON’, and then press SELECT to confirm.
6.5 Setting Alarm
Note: When setting the Alarm, make sure you have set the time first.
1. Press
button on remote control to activate alarm settings, or press MENU < Main menu > < Alarms >, press SELECT to confirm.
2. Turn SELECT to your selecting one, press SELECT to confirm.
3. Configure the following parameters:
Enable: Off, Daily, Once, Weekends or Weekdays
Time:
00:00
Mode:
Buzzer, Internet radio, DAB or FM.
Preset: This option depends on which alarm mode you have selected, this option won’t
be available unless you choose Internet radio, DAB or FM as the alarm source.
Volume: Turn SELECT to your preferred volume level, then press SELECT to confirm.
Note: remember don’t set your radio volume level to zero (Mute), otherwise, when alarm is
activated, the alarm sound cannot be heard.
Save:
Finally, turn SELECT to this option, and press SELECT to make sure the alarm is
saved. The screen shows active alarms with an icon at the bottom left.
24
To check the alarms status, press STANDBY/ON to enter standby mode.
Turn Alarm off : When alarm is sounding, press STANDBY/ON (or press
control) to turn it off.
Activate Snooze Function: Press SELECT (or press SNOOZE/SLEEP on remote control) to
on remote
postpone it, repeatedly press SELECT (or press SNOOZE/SLEEP on remote control), the
SNOOZE time can be 5 / 10 / 15 / 30 minutes in turn.
Note:
While in SNOOZE mode, the relevant alarm will be flashing and will show how much time has elapsed.
During this time you also can press STANDBY/ON to cancel the snooze function then press STANDBY/ON again
to have the radio play normally.
To cancel Alarm: Refer to above steps 1-3, set ‘Alarm Enable status’ to ‘Off’, and then
turn SELECT to ‘Save’, press SELECT to confirm, the radio will shows ‘Alarm saved’.
Chapter 7 - System settings
7.1 Equaliser
Note: If you want to adjust the style of the sound output there are several preset EQ modes available as well
as one user-defined setting:
1. Press MENU to < Main menu > < System settings > < Equaliser >, press SELECT to
confirm.
2. Then you can choose from a variety of preset modes or create your own with EQ profile
with My EQ profile setup, then follow your radio’s demonstration to adjust bass and treble
settings.
7.2 Network setup
Note: Users experienced with networking may find these options useful for diagnosing and fixing network
problems.
1. The path is: press MENU < Main menu > < System settings > < Network >, press
SELECT to confirm.
25
2. Turn SELECT to your selecting network setting option:
Need to access to another Router? Intitiate SetupWizard
Need to set up a WPS encrypted network? PBC Wlan setup
Need to get MAC address, Wlan region, IP address etc? ---------- View settings.
Need to shift to another Wlan region? ---------- Wlan region
Need to view IP settings or Subnet mask ----------- Manual settings
Need to see the list of registered networks or delete some of unwanted networks?
---------- Network profile
3. Press SELECT to confirm to enter the corresponding setting.
7.3 Language
1.
The language section can be found as follows:
< Main menu> < System settings >
<Language>, press SELECT to confirm.
2.
Turn SELECT until your desired language is displayed, then press SELECT to confirm.
7.4 Contrast
While the radio is in use (powered on):
Note: High brightness levesl can make it much easier to view playback information.
It can be activated as follows: < Main menu > < System settings >
< Contrast >
<Power on> <Low/ Medium/ High.
While the radio is in standby mode:
Above setting procedure also works for standby mode. Setting to a low level is
recommended.
7.5 Factory Reset
1. Factory reset is achieved by pressing: MENU < Main menu > < System settings > <Factory Reset> Proceed?
YES or NO.
2. Turn SELECT to ‘Yes’, then press SELECT to confirm.
A factory reset will reset all user settings to default values. Therefore all time, date, and
network configuration and presets are lost.
The radio’s current software version will be maintained, as is registered with the Frontier
Silicon Internet radio portal.
Internet radio favourites can also be kept unless you re-register your radio with another
account on the Frontier Silicon portal website.
26
7.6 Enter Setup Wizard
When this unit is started for the first time, it runs through a setup wizard to
configure settings for date/time and network.
1.
Once this has finished, the system is ready to use.
To run the setup wizard, press MENU Main menu System settings Setup wizard
Yes.
2.
Press SELECT to confirm ‘Yes’, then follow the setup steps.
7.7 Software Update
From time to time your radio may perform automatic software upgrades whenever
new bug fixes and/or additional features are available.
If your radio detects that newer software available, it asks if you want to go ahead
with an update. If you agree, the new software is then downloaded and installed.
After a software upgrade, all user settings are maintained.
C
A
U T
I
O N
Before starting a software upgrade, ensure that your radio is plugged into a stable mains power connection. Disconnecting
power during a software update may permanently damage the unit.
Software Update can be activated from < Main menu > <System settings> < Software
update> <Check now>, then press SELECT to confirm. Or if you want your radio
‘Auto-check’, please follow:
Press MENU < Main menu > System settings Software update Auto-check
setting, press SELECT to confirm.
2.
Turn SELECT to < YES >, press SELECT to confirm.
27
7.8 SW Version and Radio ID
Note: The helpdesk may ask you about the radio info of your product such as Radio sw version, radio ID, radio
name (Friendly Name).
The current software version can be obtained by pressing MENU < Main menu > <System settings > <Info>, Press SELECT to confirm.
Chapter 8
Specifications
ITEMS
SPECIFICATIONS
Description:
Internet, DAB+, FM radio and UPNP Music Player
Power Requirements:
100-240 Vac, 50-60 Hz
FM: 87.5-108MHz
Frequency Range:
DAB+: 174-240MHz
Rated Output Power:
7W rms
Speaker:
4 ohm full range
Dimensions:
250 x 130 x 136mm
This symbol on the product or in the instructions means that your electrical and electronic
equipment should be disposed at the end of its life separately from your household waste.
28
WARRANTY CONDITIONS
(In addition to your other legal rights)
CORD products are engineered and manufactured with pride to provide excellent performance, value and years of trouble free
operation. In the unlikely event that you should have trouble with your CORD product we are pleased to offer this warranty. It is
important that you read the contents of this warranty and be familiar with your rights and obligations.
Our goods come with guarantees that cannot be excluded under the Australian Consumer Law. You are entitled to a replacement or
refund for a major failure and for compensation for any other reasonably foreseeable loss or damage. You are also entitled to have
the goods repaired or replaced if the goods fail to be of acceptable quality and the failure does not amount to a major failure.
The benefits of this warranty are in addition to any rights and remedies imposed by Australian State and Federal legislation that
cannot be excluded, restricted or mofified.
SCOPE OF WARRANTY:
CORD warrants to the original retail purchaser that we will repair or replace, at our option, any CORD product which is found to be
defective in material and/or workmanship for 12 months from the date of purchase. During the warranty period, an authorised CORD
Service Centre will provide both parts and labour free of charge to correct any defect in materials or workmanship, subject to the
warranty terms and conditions.
WARRANTY TERMS AND CONDITIONS
This warranty is valid within Australia and New Zealand for CORD products purchased in Australia or New Zealand for domestic home
use only and where used in accordance with any instructions provided with or on the product.
The warranty shall be void if the serial number is removed, defaced or altered.
You must provide a copy of the original purchase receipt to obtain warranty repairs. We reserve the right to quote for and or charge
for repairs outside the warranty period or where the date of original purchase cannot be verified.
Warranty repairs must be undertaken by an authorised CORD Service Centre. Visit our web site for the location of your nearest CORD
Service Centre.
No person is authorised to make or give any assertions, statements or undertakings whether expressed or implied about other, or
additional to, the terms of this warranty.
We reserve the right to make changes or improvements in design or manufacture without any obligation to change or improve
previously manufactured product.
CORD shall not be responsible for incidental and or consequential damages or loss.
WHAT IS NOT COVERED
The cost of delivery and insurance in transit to the service centre. It is your sole responsibility to arrange for your product to be
forwarded to your nearest CORD Service Centre for repair or replacement.
Time taken to investigate your warranty claim where the product is found to be in good working order. This includes where you
have not followed instructions contained in any manuals provided with the product or where the fault is caused by use with
incompatible equipment and or software.
Warranty repairs where the product has been tampered with, altered, modified or repaired by an unauthorised person.
Misuse, mishandling or abuse to the product including cosmetic imperfections, scratches, Acts of God and or electrical surge.
Normal wear & tear and maintenance, cleaning, periodic check ups or charges for installation, removal or reinstallation of the
product.
Audio or video data stored on your iPod and or other devices used with or connected to your CORD product or media of any type.
WHEN YOU NEED SERVICE
If you should require warranty service please visit our web site for details of any warranty updates and the location your nearest
authorised Service Centre.
Securely pack and send the product to the authorised Service Centre. DO NOT return any accessories with your product unless the
accessory is malfunctioning.
We strongly suggest transit insurance as we cannot be responsible for products lost and or damaged when in transit to the Service
Centre.
Include a clear description of the problem you are experiencing along with your name, address and daytime contact details.
This warranty gives you specific legal rights and you may have other rights which vary from location to location. This limited warranty
does not intend to affect these rights in any way whatsoever.
PROUDLY DISTRIBUTED IN AUSTRALIA BY:
PROUDLY DISTRIBUTED IN NEW ZEALAND BY:
VOLITION AUSTRALIA PTY LTD
THE VOLITION GROUP (NZ) LTD
20 Corporate Boulevard, Bayswater VIC 3153 Australia
PHONE: 03 9729 9300 / FAX: 03 9729 7900
Web: www.cord-av.com
Email: [email protected]
C\- 20 Corporate Boulevard, Bayswater VIC 3153
Australia. PHONE: 0800 865 484 / FAX: 09 925 1124
Web: www.cord-av.com
Email: [email protected]
29