1
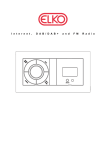
Pinell Supersound II
DAB+ /D AB/ F M/I nt er ne t Ra dio
Ins t r uc tio n M enu
Safety Information
9. Do not defeat the safety purpose of the polarized
or grounding - type plug. a polarized plug has two
blades with one wider than the other. A grounding
type plug has two blades and a third grounding
prong. The wide blade or the third prong are
provided for your safety. If the provided plug does
not fit into your outlet, consult an electrician for
replacement of the obsolete outlet.
The lightning flash with arrowhead symbol
within an equilateral triangle is intended to
alert the user to the presence of uninsulated
"dangerous voltage" within the product's
enclosure that may be of sufficient
magnitude to constitute a risk of electric
shock to persons.
The exclamation point within an equilateral
triangle is intended to alert the user to the
presence of important operating and
maintenance (servicing) instructions in the
literature accompanying the appliance.
10. Protect the power cord from being walked on or
pinched particularly at plugs, convenience
receptacles, and the point where they exit from
the apparatus. If the power cord is damaged, it
must be repaired by a qualified repairer.
11. Only use attachments/accessories specified by
the manufacturer.
12. Use only with the cart, stand, tripod, bracket or
table specified by the manufacturer, or sold with
the apparatus. When a cart is used, use caution
when moving the cart/apparatus combination to
avoid injury from tip-over.
WARNING: TO REDUCE THE RISK OF FIRE OR
ELECTRIC SHOCK, DO NOT EXPOSE THIS
APPLIANCE TO RAIN OR MOISTURE.
IMPORTANT SAFETY INSTRUCTIONS
To reduce the risk of electrical shock, fire, etc.:
1. Read these instructions.
2. Keep these Instructions.
3. Heed all Warnings.
4. Follow all instructions.
5. Do not use this apparatus near water.
6. Clean only with dry cloth. For stubborn stains,
use a soft cloth dampened with a weak solution of
mild detergent and water. Dry the apparatus
immediately afterwards with a clean cloth. Do not
use abrasive clothes, thinners, alcohol, or other
chemical solvents, because they may damage the
finish or remove the panel lettering.
7.Do not block any ventilation openings. The
ventilation shall not be impeded by covering the
ventilation openings with items, such as
newspapers, table clothes, curtains, etc.
8.Do not install near any heat source such as
radiators, heat registers, stoves, or other
apparatus (including amplifiers) that produce heat.
13. Unplug this apparatus during lightning storms or
when unused for long periods of time.
14. Refer all servicing to qualified service personnel.
Servicing is required when the apparatus has
been damaged in any way, such as power-supply
cord or plug is damaged, liquid has been spilled
or objects have fallen into the apparatus, the
apparatus has been exposed to rain or moisture,
does not operate normally, or has been dropped.
15. The apparatus shall not be exposed to dripping or
splashing and no objects filled with liquids, such
as vases, shall be placed on the apparatus.
16. The mains plug or an appliance coupler is used
as the disconnect device, the disconnect device
shall remain readily operable.
17. Please read Rating Labels at the bottom of the
Sender and Receiver for power input and other
safety information.
FCC Information
FCC part 15.19
This device complies with Part 15 of the FCC Rules, Operation is subject to the following two conditions:
(1) this device may not cause harmful interference, and (2) this device must accept any interference
received, including interference that may cause undesired operation.
FCC part 15.21
Warning: Changes or modifications to this unit not expressly approved by the party responsible for
compliance could void the user’s authority to operate the equipment.
FCC part 15.105
NOTE: This equipment has been tested and found to comply with the limits for a Class B digital device,
pursuant to Part 15 of the FCC Rules. These limits are designed to provide reasonable protection against
harmful interference in a residential installation. This equipment generates, uses, and can radiate radio
frequency energy and, if not installed and used in accordance with the instructions, may cause harmful
interference to radio communications. However, there is no guarantee that interference will not occur in a
particular installation. If this equipment does cause harmful interference to radio or television reception,
which can be determined by turning the equipment off and on, the user is encouraged to try to connect the
interference by one or more of the following measures:
Reorient or relocate the receiving antenna.
Increase the separation between the equipment and receiver.
Connect the equipment into an outlet on a circuit different from that to which the receiver is
connected.
Consult the dealer or an experienced radio TV technician for help.
This device complies with Part 15 of the FCC Rules, Operation is subject to the condition that this
device not cause harmful interference.
Contents
Safety Information
2
Package Content
2
Internet Radio Quick start Guide
3
What you need before you can use your Internet Radio ......................................................3
Controls Overview (a) .........................................................................................................4
Controls Overview (b) .........................................................................................................5
Setup Wizard .......................................................................................................................6
Select a station through Podcasts ....................................................................................... 16
Get Access Code ................................................................................................................ 16
Add Station to ‘My favourites’ .......................................................................................... 17
Add Station to ‘My Added Stations’ ................................................................................. 18
Changing the Station Information ...................................................................................... 19
Station Updates .................................................................................................................. 19
Music Player Mode ............................................................................................................ 20
DAB Mode ........................................................................................................................ 21
FM Mode ........................................................................................................................... 24
Setting Station Presets ....................................................................................................... 26
Selecting a Preset station ................................................................................................... 26
AUX IN Mode ................................................................................................................... 27
Sleep Function ................................................................................................................... 28
Setting Clock ..................................................................................................................... 29
Daylight Savings ................................................................................................................ 30
Setting Alarm ..................................................................................................................... 31
General Operation
34
Return to Main Menu......................................................................................................... 34
Adjust Volume level .......................................................................................................... 34
Browse Station Information ............................................................................................... 34
System settings
35
Equaliser ............................................................................................................................ 35
Network setup .................................................................................................................... 36
Language ........................................................................................................................... 36
Factory reset ...................................................................................................................... 37
Software Updates ............................................................................................................... 38
Enter Setup wizard ............................................................................................................. 39
SW Version and Radio ID ................................................................................................. 39
Backlight ............................................................................................................................ 40
Appendix
41
Step 1: Set Up Media Sharing in WMP 11 ........................................................................ 41
Step 2: Play Music on the Internet Radio .......................................................................... 42
Set Up Media Sharing in MAC OS.................................................................................... 43
Troubleshooting
44
Specification
45
Package Content
Main unit
Instruction
Manual
2
Internet Radio Quick start Guide
What you need before you can use your Internet Radio
☺ Thanks for your buying! Before use it, you need to know followings:
LAN Setting:
• Make sure the internet environment is ready and the network settings is available for LAN (ADSL
or Cable Modems is highly recommended).
•
To find the Radio’s LAN MAC address, Please follow:
Main menu System settings Network View settings MAC address
Wireless LAN Setting:
• A broadband Internet connection.
•
A wireless access point (Wi-Fi) connected to your broadband Internet, preferably via a router.
•
If your wireless network is configured to use Wired Equivalent Privacy (WEP) or Wi-Fi Protected
Access (WPA) data encryption then you need to know the WEP or WPA code so you can get the
Internet Radio to communicate with the network.
•
If your wireless network is configured for trusted stations you will need to enter the Radio’s MAC
address into your wireless access point. To find the Radio’s MAC address use menu items as
follows:
Main menu System settings Network View settings MAC address
Before you continue, make sure that your wireless access point is powered up and connected to your
broadband Internet, or your LAN cable is setting well. To get this part of the system working, read the
instructions supplied with the wireless access point and LAN connecting is highly recommending!
3
Controls Overview (a)
Unit Front Overview
Control
STANDBY/ON
Internet
DAB +
FM
Media Player
AUN in
Press to turn on/off Radio
When alarm is coming, press to turn it off.
MODE
Press to convert among Internet, Music player, DAB (DAB+), FM and AUX IN mode in turn.
Note: Media player, AUX in mode use only.
Press
PRESET
to previous track, press
to play/pause, press
to next track
Note: Internet, DAB+ and FM mode use only, for detail please refer page 26.
Press and hold to store preset stations, Press to load the station have been stored.
INFO
Press to display queue information
No function
BACK
Press to goes back
MENU
Press to Main menu or other options
Turn to adjust volume level
a. Turn to browse options, press to confirm
b.
FM mode: press to searching active station
c.
When alarm is coming, press it to postpone alarm between 5-30minutes.
4
Controls Overview (b)
Unit Back Overview
Earphone
socket:
AUX IN
socket:
a.
b.
A 3.5mm Headphone Socket is provided for use with either headphones or an
earpiece.
Inserting a plug automatically mutes the internal loudspeaker.
a.
Connects to the external audio device
5
Setup Wizard
Step 1 - Power up
1. Connect to your Internet Radio adapter and ensure the power LED is lighting up.
2. In use, it can be switched on or off by pressing STANDBY/ON. For initial use, it will ask you ‘Setup
wizard’.
Step 2 – Setup wizard
1.
Continue above, press the SCROLL knob to confirm ‘YES’, and then turn this knob to your ideal
‘hour format’, press it to confirm.
2.
Press the SCROLL knob to confirm ‘Update from Network’.
3.
Turn the SCROLL knob to your local ‘timezone’, and then press it to confirm.
6
4.
Turn the SCROLL knob choose ‘Daylight saving’ status, and then press it to confirm.
5. Turn the SCROLL knob to your local ‘Wlan region’, and then press it to confirm.
6.
Turn the SCROLL knob to your prefer ‘SSID’, press it to confirm. Radio will save it in memory.
Note: In some cases radio may find more than one network. Turn the SCROLL knob to your favorite one, press
it to confirm.
7. If your network is not configured to request a password (WEP/WPA), radio will connect to the network
and display:
8. If a WEP/WPA key (password) is required, radio will ask you to input the WEP/WPA code and display
the password entry screen as follows:
7
Turn the SCROLL knob to cycle through the alpha-numeric character list, press it to select an
appointed character.
Note: WEP/WPA pass codes are case-sensitive.
If you make a mistake while entering your password, select ‘
’ to delete this
character.
Note: a.> The full name of
is Backspace.
b.> The method of select
,
or
: while cursor point to ‘
’, then anti-
clockwise turning the SCROLL knob , you will get it.
c.> Select
will be returned to previous track.
d.> After selecting the final character of your password, turn the SCROLL knob to
, and then
press it to confirm.
e.> Radio will automatically save the WEP/WPA you’ve input, so no bother to re-enter these codes.
9.
Press the SCROLL knob to exit.
The setting is OK now!
8
Access wireless network
1. After successfully ‘Setup wizard’, press the SCROLL knob to enter ‘Internet radio’ mode.
Note: Or, you may also press MODE repeatedly until ‘Internet radio’ shows up, then stop pressing.
Later, it will say:
2. While cursor point to < Station list >, press the SCROLL knob to confirm.
After trying to connect to network, if it says:
Please follow:
a. Check your router, see it working normally or not;
b. Relocate your radio to a stronger signal position is necessary!
c. Make sure your password is correct input.
9
Local stations
Note: make sure your radio already connected to network.
1. While cursor point to < Station list >, press the SCROLL knob to confirm.
2. Turn the SCROLL knob to < Local China >, and then press it to confirm.
Note: ‘Local China’ is, can be changeable according to your current location, for instance, it can be local US,
or local UK, etc. In a word, it’s a very easy way for you to find your local programs.
3. Turn the SCROLL knob to your favourite item, press it to confirm, and then step to step to the program
you desired.
10
Choosing a station
Note: ensure your radio has already connected to network.
1. While cursor point to < Station list >, press the SCROLL knob to confirm.
2. Turn the SCROLL knob to < Stations >, and then press it to confirm.
3. There are five options are available for you to choose a station as above photo show.
‘LOCATION’ enables you to choose from the radio stations provided by any country which you choose from
a list.
a. While cursor point to < Location >, press the SCROLL knob to confirm.
b. Turn the SCROLL knob to the region you wanted, press it to confirm.
c. Using the same method to choose country, station in turn, radio will now loading.
11
GENRE’ enables you to choose radio stations according to their content, for example Classic Rock,
Sport, News, etc.
a. Turn the SCROLL knob to < Genre >, press it to confirm.
b. Turn the SCROLL knob to your favorite type of content, press it to confirm.
c. Turn the SCROLL knob to the station you wanted, press it to confirm.
Note: a. Some radio stations do not broadcast 24 hours per day, and some stations are not always on-line.
b. If this station has on-demand content, that is, it gives an option of listening the old programs which
have already been broadcast.
12
Connecting to wired network
Step 1 – Choose LAN Setting
Note:
a. make sure LAN cable connecting to LAN socket already.
1. Press MENU, and then turn the SCROLL knob to ‘Main Menu’, press it to confirm.
2. Turn the SCROLL knob to < System settings >, press it to confirm.
3. Turn the SCROLL knob to < Network >, press it to confirm.
4. Turn the SCROLL knob to < Manual settings >, press it to confirm.
5. While cursor point to < Wired >, press the SCROLL knob to confirm.
6.
While cursor point to < DHCP enable >, press the SCROLL knob to confirm.
13
Later, it will say:.
☺ The LAN setting is OK now!
Step 2 – Enter Internet Radio mode
1. Press MENU, then turn the SCROLL knob to ’Main menu’, press it to confirm
2. While cursor point to ‘Internet radio’, press the SCROLL knob to confirm.
Or, press MODE repeatedly until < Internet Radio > is showing up, stop pressing.
or
Step3 – Access Network
Continue above steps, few seconds later, and it will say:
or
☺ If this happens, please follow:
a. Check your Router, see it working normally or not.
b. Check your LAN cable, make sure it hasn’t been any damaged.
c. See the port of cable which insert to LAN socket is well.
14
How to shift to wireless network
Note: to make this order works, you can either do a ‘factory reset’, or follow below steps:
1. Refer ‘choose LAN setting’, which you can find at page 13, and then turn the SCROLL knob to <
Wireless >, press it to confirm.
2. While cursor point to < DHCP enable >, press the SCROLL knob to confirm, and then step by step to
enter wireless network.
☺ Now, setting to wireless is OK!
15
Select a station through Podcasts
1. After your radio has successfully connected to network, turn the SCROLL knob to < Podcasts >.
2. Press the SCROLL knob to confirm, and then turn the SCROLL knob to your favorite option.
3. Press the SCROLL knob to confirm, and then step by step to your purpose program.
Get Access Code
1. After your radio connected to network, turn the SCROLL knob to < Help >, and then press it to
confirm.
Note: at this step, you can also listening radio FAQ solutions.
2. While cursor point to < Get access code >, press the SCROLL knob to confirm, then you get it.
16
Add Station to ‘My favourites’
☺ 1. visit website: http://www.wifiradio-frontier.com
☺ 2. Click on the register link.
☺ 3. Create account login, you need an Access code to complete it, which refer to page 16.
Note: want to a member login? Therefore you need to remember your registered ‘Email address’ and
‘Password’.
☺ 4. You will able to take advatage of the various additional features and services offered by
the Frontier internet Radio Portal.
☺ 5. How to play ‘My favourites’? Your need two steps:
a. While cursor point to < My favourites >, press the SCROLL knob to confirm.
b. Turn the SCROLL knob to your favourite station, and then press it to loading…
Note: You added ‘my favourites’ stations will shows up at ‘my favourites’ subdirectory. Doing a ‘factory
reset’ cannot erase them.
17
Add Station to ‘My Added Stations’
☺ 1. Visit website: http://www.wifiradio-frontier.com
☺ 2. Login as a member(at previous page, you registered).
☺ 3. You will able to take advatage of the various additional features and services offered by the
Frontier internet Radio Portal.
☺ 4. How to play ‘My added stations’? Your need two steps:
a. When cursor point to < My added stations >, press the SCROLL knob to confirm.
b. Turn the SCROLL knob to your favourite station, and then press it to loading…
Note: Your added stations will show up at ‘my added stations’’ subdirectory. Doing a ‘factory reset’ cannot
erase them.
18
Changing the Station Information
Just need press INFO repeatedly, you can changing the information that is displaying on the second
line of the display when listening Internet program.
•
Description of Station
This scrolling text information supplied by the Internet station. It
may comprise information on music titles or details of the
programme which is provided by the broadcaster.
•
Location of Station
This is a description of the type of programme provided by
either internet radio station or broadcaster.
•
Reliability of Station
This will show the degree of reliability of station which you are
listening to.
•
Signal Information of Station
This shows the digital bit rate and the signal mode.
•
Playback Buffer of Station
This displays the playback buffer strength of current station.
•
Date of Station
This displays the date which is provided by the broadcaster so
will be accurate.
Station Updates
Occasionally, radio will tell you that it is receiving an updated station list. It does this automatically and
periodically, ensuring your radio always has the latest station directory on-board.
19
Music Player Mode
Note: To play this order, read appendix at first, which at following pages is highly recommending!
A. PLAY SHARED MEDIA
1. Press MODE repeatedly until < Music player > is showing up.
Note: Or, enter < Main menu >, and then turn the SCROLL knob to < Music player >, press it to confirm.
2. While cursor point to < Shared media >, press the SCROLL knob to confirm, and then step by step
to your selecting Music.
3. Press
to previous track, press
to play/pause, press
to next track.
B. Repeat play mode
1.
Press MENU, and then turn the SCROLL knob to < Repeat play: Off >, press it to shift ‘Off’ to ‘On’,
or press it again then ‘Off’.
C. Shuffle play mode
2. Press MENU, and then turn the SCROLL knob to < Shuffle play: Off >, press it to shift ‘Off’ to ‘On’,
or press it again then ‘Off’.
20
DAB Mode
•
Getting Started
1. Press MODE repeatedly until < DAB radio > is shows up. For initial use, it will make a full scan
and store stations list in memory.
Note: a. or press MENU, and then turn the SCROLL knob to < DAB >, press it to access.
b. in use, you can redo a full scan to update stations list: press MENU, and then turn the SCROLL knob
to ‘Full scan’, press it to confirm.
2. Once the scanning is completed, the DAB+, DAB stations will be displayed in alphanumeric order.
The first station in the list will be selected.
Note: if no DAB+, DAB signal is found in your area, it may be necessary for you to relocate your radio.
•
Convert to Another DAB+ Station
1. Continue above step 2, you can move back at any time by press BACK.
3. While cursor point to ‘Station list’, press the SCROLL knob to confirm.
4. Turn the SCROLL knob to cycle through stations list, and then press it to confirm.
Note: if no DAB signal is found in your area, it may be necessary for you to relocate your radio.
Dynamic Label Segment (DLS):
This is scrolling text information supplied by the DAB station. It may comprise information
on music title or detail of the program and is provided by the broadcaster.
21
Manual Tune:
1. Press MENU, and then turn the SCROLL knob to < Manual tune >, press it to confirm.
2. Turn the SCROLL knob step between the channels and press it to select the current channel.
Note: If there is a multiplex corresponding to this channel and frequency, then the display will show a tuning
meter with the signal strength and the multiplex name after a few seconds.
3. Press the SCROLL knob again to exit this order.
Prune invalid:
1. Press MENU, and then turn the SCROLL knob to < Prune invalid >, press it to confirm.
2. Turn the SCROLL knob to ‘YES’, and press it to confirm.
22
DRC (Dynamic Range Control) value
You can set the level of the compression of stations to eliminate the differences in dynamic range or
sound level between radio stations.
Note: a. Set DRC to off indicates no compression.
b. set DRC to low indicates little compression.
c. set DRC to high shows maximum compression.
1. Press MENU, and then turn the SCROLL knob to < DRC >, press it to confirm.
2. Turn the SCROLL knob to your ideal option, press it to confirm.
To change station order
1. Press MENU, and then turn the SCROLL knob to < Station order >, press it to confirm.
Note: There are 3 options: Alphanumeric, Ensemble and Valid. #shows before the default of your setting option
to indicate current station order.
STATION ORDER
DESCRIPTION
Alphanumeric
Display all stations in alphanumeric order.
Ensemble
List active stations [ones that are currently broadcasting] before inactive ones.
Valid
Remove inactive stations from the station list.
2. Turn the SCROLL knob to your ideal option, press it to confirm.
23
FM Mode
A. GENERAL OPERATION
1.
Press MODE repeatedly until < FM Radio > is showing up.
For initial use, it will start at the beginning of the FM frequency range (87.50MHz).
Otherwise, the last listened FM station will be selected.
Note: or enter < Main menu >, and then the SCROLL knob to < FM >, press it to confirm.
3.
Turn the SCROLL knob to increase or decrease the frequency by 0.05MHz per step.
4.
To auto-searching, simply press the SCROLL knob.
Note: a. To ‘auto-searching’ the next active station, repeat step 3.
b. The unit will display the frequency changing until it stops on the next station.
c. After it reached to the end of the frequency range, it will search again from the beginning of range.
B. SCAN SETTING
1.
FM mode, at any step by pressing BACK or MENU to enter it’s setting mode
2.
While cursor point to < Scan setting >, press the SCROLL knob to confirm.
3.
Turn the SCROLL knob to select ‘YES’ or ‘NO’, and then press it to confirm.
24
C. AUDIO SETTING
1.
FM mode, at any step by pressing BACK or MENU to enter it’s setting mode
2.
While cursor point to < Audio setting >, press the SCROLL knob to confirm.
3.
Turn the SCROLL knob to select ‘YES’ or ‘NO’, and then press it to confirm.
25
Setting Station Presets
Your radio can store 10 Internet, 10 DAB+ and 10 FM stations preset.
To store the current station:
1. Press and hold PRESET, and then turn the SCROLL knob to your purpose one.
2. Press the SCROLL knob to confirm. And then it will return to its normal working condition, and
preset icon appeared on display.
Selecting a Preset station
To select a stored Interne station:
1. Press MODE to goes into relative mode.
2. Press PRESET, and then turn the SCROLL knob to your purpose one.
3. Press
to confirm.
26
AUX IN Mode
1. Press MODE repeatedly until < AUX in > is showing up.
Note: Or enter ‘MAIN MENU’, and then turn the SCROLL knob to < AUX in >, press it to confirm.
2. Through a cable connection, your radio can be transformed into a high quality digital audio speaker
system.
3. Connect one end of the audio cable to the headphone (or auxiliary out) socket of your source
device, the other end connect to AUX IN socket on the rear of your radio.
The radio display will show:
4. To gain optimal volume levels, adjust the output volume level on both the source device and on
radio itself is recommended.
Note: AUX IN allows quick and easy connection the MP3 player or other external sound sources.
27
Sleep Function
1. It can be activated from < Main menu > < Sleep >, press the SCROLL knob to confirm.
2. Turn the SCROLL knob to define the sleep period which between 0 – 60 minutes.
3. When your purpose period is appeared, simply stop turning, and it is done!
Note:
a. The interval time is 15 minutes per step.
B. At this step, and sleep icon shows up, as well as shows how long it will be expired.
4. Radio will now automatically put itself into standby mode after it has elapsed.
5. To continue enjoying your program by pressing STANDBY/ON.
28
Setting Clock
Manually setting the Time/Date
1. It can be activated from < Main menu > < System settings > < Time/Date >, press the
SCROLL knob to confirm.
2. While cursor point to < Set Time/Date >, press the SCROLL knob, then turn it to set the date.
3. Using the same method to set month, year, hour and minute in turn, and it is done!
You can also through ‘Auto update’ for setting it
Note: Choose <Auto update>, please ensure your radio is connecting to internet successfully.
1.
Turn the SCROLL knob to < Auto update >, press it to confirm.
2.
You can either choose < Update from DAB > or < Update from Network >, press the SCROLL
knob to confirm, it is done!
29
Set hour format
1.
Turn the SCROLL knob to < Set format >, press it to confirm.
2. Turn the SCROLL knob to your favourable format, press it to confirm.
Set timezone
1. Turn the SCROLL knob to < Set timezone >, press it to confirm.
2. Turn the SCROLL knob to your location timezone, press it to confirm.
Until now, the setting clock is perfect!
Daylight Savings
1. It can be activated from < Main menu > < System settings > < Time/Date > < Daylight
savings >, press the SCROLL knob to confirm.
2. Turn the SCROLL knob to ‘ON’, and then press it to confirm, it is done!
30
Setting Alarm
Note: Setting Alarm, make sure setting time at first.
1. It can be activated from < Main menu > < Alarms >, press the SCROLL knob to confirm.
2. Turn the SCROLL knob to your purpose one, press it to confirm.
3. While cursor point to < Enable: Off >, press the SCROLL knob to confirm.
4.
Turn the SCROLL knob to your ideal alarm frequency, press it to confirm.
5.
Turn the SCROLL knob to < Time: 00:00 >, press it to confirm.
6.
Turn the SCROLL knob to change hours, press it to confirm.
7.
Using the same method setting minutes, and then press it to confirm.
31
8.
Turn the SCROLL knob to < Mode: Internet radio > press it to confirm, and then turn this knob to
your purpose alarm sound mode.
Note: Alternatively, you may also turn the SCROLL knob to < Preset: Last listened > to choice alarm sound.
9. Press the SCROLL knob to confirm, and then turn this knob to < Volume: 12 >, press it to confirm.
10. Turn the SCROLL knob to your like volume level, press it to confirm.
11. Finally, turn the SCROLL knob to < Save >, press it to confirm.
The display will show ‘Alarm Saved’ for 3 seconds, Alarm icon appeared.
To check alarms status, press STANDBY/ON to enter standby mode.
32
•
Turn Alarm off
When alarm is coming, you can either press STANDBY/ON to turn it off, or
•
Play Snooze Function
Press the SCROLL knob to postpone it, repeatedly press this knob, the SNOONZE can be 5/10/15/30
minutes in turn.
Note: a. While in SNOOZE function, the relative alarm should be twinkling, and shows how long it will be
elapsed, during this time, you also can press STANDBY/ON to put the alarm off.
b. After reached SNOOZE time, it should be sound again.
•
To cancel Alarm
There, you need follow steps:
a. Select your purpose Alarm, ALARM 1 or ALARM 2, then press the SCROLL knob to enter its setting
mode.
b. While cursor point to ‘Enable: Daily (or other frequency)’, press the SCROLL knob.
c.
d.
Turn the SCROLL knob to ‘Off ’, press it to confirm.
Turn the SCROLL knob to < Save >, and then press it to confirm your settings.
Alternatively, perform a ‘factory reset’.
33
General Operation
Return to Main Menu
Press MENU, and then turn the SCROLL knob to < Main menu >.
Or, you can move back to radio’s top-line < Main menu >, at any time by pressing BACK repeatedly.
Adjust Volume level
Adjust the volume level by turning
Radio will remember its previous volume level.
.
Browse Station Information
It is possible to view the information that is displayed on the second line of the display when listening
a radio program.
To browse more information, you can by pressing INFO repeatedly.
Note: for this function, ‘AUX in’ mode out of service.
34
System settings
Equaliser
Note:
when you want to adjust timbre, this order will help you to achieve it!
1. Press MENU, and then turn the SCROLL knob to ‘Main Menu’, press it to confirm.
2. Turn the SCROLL knob to < System settings >, press it to confirm.
3. Turn the SCROLL knob to < Equaliser >, press it to confirm.
4. Turn the SCROLL knob to your ideal one, press it to confirm, it is done!
35
Network setup
Note: Familiar this order will allows you:
If you want it access to another Router, then you need --------- internet wizard
If you want get MAC address, Wlan region, IP address etc. then you need ---------- View settings.
If you take it to another region, then you need ---------- Wlan region
If you want convert its connecting way: wireless and wired, then you need ---------- Manual settings
1. It can be activated from < Main menu > < System settings > < Network >, press the
SCROLL knob to confirm.
2. Turn the SCROLL knob to your purpose one, press it to confirm.
Language
1.
It can be activated from < Main menu > < System settings > < Language>, press the
SCROLL knob to confirm.
2.
Turn the SCROLL knob to your purpose one, and then press it to confirm, it is done!
36
Factory reset
Note: running this will completely erase your radio’s memory, clearing all WEP/WPA codes and other user
settings.
1.
It can be activated from < Main menu > < System settings > < Factory reset >.
2.
Press the SCROLL knob to confirm, and then turn this knob to ‘YES’.
3.
Press the SCROLL knob to confirm.
Note: If you do not wish to continue, at step 2, turn the SCROLL knob to select ‘NO’, and then
press it to cancel this order.
37
Software Updates
It can be activated from < Main menu > < System settings > < Software update >, press
1.
the SCROLL knob to confirm.
2.
While cursor point to < Auto- check setting >, press the SCROLL knob to confirm.
3.
Turn the SCROLL knob to < YES >, press it to confirm, then radio shows as above step 2.
4. Turn the SCROLL knob to < Check now >, press it to confirm.
Following is:
It’s completed until now!
Note: software update can take several minutes do not switch Radio off until this procedure has been
completed. Otherwise, may cause permanently damaged.
38
Enter Setup wizard
1.
It can be activated from < Main menu > < System settings > < Setup wizard >, press the
SCROLL knob to confirm.
2. Then step by step to set it.
SW Version and Radio ID
1. It can be activated from < Main menu > < System settings > < Info >.
2. Press the SCROLL knob to confirm.
This information may be requested when dealing with technical support issues
39
Backlight
•
It can be activated from < Main menu > < System settings > < Backlight >, and then press
the SCROLL knob to confirm.
A. Setting Power-On level
1. While cursor point to < Power On >, press the SCROLL knob to confirm.
2. Turn the SCROLL knob to your purpose one, press it to confirm.
B. Setting Standby Level
1. At above step 1, turn the SCROLL knob to < Standby Level>, press it to confirm.
2.
Turn the SCROLL knob to your purpose one, press it to confirm.
40
Appendix
Step 1: Set Up Media Sharing in WMP 11
Note: After you download and install Windows Media Player 11 for Windows XP and connect your Radio to the
network, you need to set up media sharing so that you can share music with your Radio.
The following steps describe how to set up media sharing in Windows Media Player 11.
1. In Windows Media Player 11, click the small arrow below the Library tab, and then click Media
Sharing.
2. In the Media Sharing dialogue box, select the Share my media check box.
41
3. Check the “share my media to” box. In the list, click your Radio *, click Allow, the selected device will
now show a green tick and then click OK.
*
If your device does not appear in the list of devices, perform the following steps;
a. From the "Media Player" menu of your internet radio, select "UPNP Servers", a list of available
computers will appear.
b. Select the required computer.
Your device will now appear in the list. If you want to check that this is your Radio, right click on the
device and select “Properties”: your Radio's MAC address will be shown.
Step 2: Play Music on the Internet Radio
After installing and configuring your Radio and Windows Media Player 11, you are now ready to play
music via a wireless connection.
The following steps describe how to play music with your Radio.
1. Select "UPNP Servers" in the "Media Player" menu.
2. Select the computer you wish to play the music files from.
3. Use the controls to browse according to the following criteria: All Music, Genre, All Artists,
Contributing Artists, Album Artists, Composers, Albums, Playlists, Folders or Star Ratings and then
press the SCROLL knob to confirm.
4. Select the tracks you want to play, and then press the SCROLL knob. Enjoy the music!
42
Set Up Media Sharing in MAC OS
Using the Radio with a MAC will require Windows File Sharing. MAC OS 9 and earlier versions of the OS
will need extra software to use Windows File Sharing, but MAC OS X 10.2 and later versions have
Windows File Sharing built into the OS.
------ Set up Windows File Sharing on a MAC
-
From the 'Dock', click on 'System Preferences'. From the 'System Preferences' window, under the
'Internet & Network' section, click on 'Sharing'.
-
From the 'Sharing' window, do the following:
Under the 'Services' section, enable 'Personal File Sharing' and 'Windows Sharing'. In order to
do this, tick the corresponding boxes or click on 'Start' for each of these services.
Under the 'Firewall' section, switch off the firewall.
Under the 'Internet' section, switch off 'Internet Sharing'.
------ Accounts Setup
-
From the 'System Preferences' window, in the 'System' section, click on 'Accounts'. Select an account
and remember its 'Short Name' and password. This will be used for the Radio to connect to the MAC.
------ Directory Setup
-
From the 'Dock', click on 'Finder'. From 'Finder', click on 'Applications then ‘Utilities'. Click on 'More
Info' for 'Directory Access' and ensure that the 'Read/Write' option is enabled. Double-click on
'Directory Access' and enable the following:
AppleTalk
LDAPv3
SLP
SMB/CIFS
-
For 'SMB/CIFS', click on 'Configure' and select an appropriate workgroup.
-
Copy and paste the mp3 files to 'Documents' in the 'Finder' window.
-
Turn on 'AirPort' (wireless sharing).
-
Wait for a few minutes.
In the 'Media Player’ > ‘Windows Shares' menu, enter the MAC account's short name and password. The
Radio should then be able to connect to the MAC.
43
Troubleshooting
If you experience any trouble with your wireless Internet Radio, then you may find it useful to visit the help
section on our webpage: http://www.wifiRadio-frontier.com
If you have trouble connecting the Radio to your wireless network, these steps may help to resolve the
problem:
1. Confirm that a Wi-Fi connected PC can access the Internet (i.e. can browse the web) using the same
network.
2. Check that a DHCP server is available, or that you have configured a static IP address on the Radio.
You can configure a static IP address on the Radio using the menu item ‘System settings -> Network ->
Manual settings-> Wireless’, and then select ‘DHCP disable’.
3. Check your access point does not restrict connections to particular MAC addresses. You can view the
Radio’s MAC address using the menu item ‘System settings -> Network -> View settings-> MAC address’.
4. If you have an encrypted network, check that you have entered the correct key or password into the
Radio. Remember that text-format keys are case sensitive. If, when attempting to connect to an
encrypted network, your Radio displays: ‘Wireless error’ followed by a 5-digit number, then please ensure
that you enter the correct passphrase for the network. If the problem persists, then you may need to
consult your network configuration.
5. If your Radio can connect to the network successfully, but is unable to play particular stations, it may be
due to one of the following causes:
a. The station is not broadcasting at this time of the day (remember it may be located in a different time
zone).
b. The station has reached the maximum allowed number of simultaneous listeners.
c. The station is not broadcasting anymore.
d. The link on the Radio is out of date.
e. The Internet connection between the server (often located in a different country) and you is slow.
Try using a PC to play back the stream via the broadcaster’s web site.
6. If you can play back the station with a PC, use the form at http://www.wifiRadio-frontier.com to notify us
so that we can change the station data that is used by the Radio.
44
Specification
ITEMS
DESCRIPTION
Specifications:
DAB+, DAB, FM and internet radio
Audio Output:
6Wrms
Speaker:
8 ohm
Headphone Jack:
32 ohm
Frequency Ranges:
FM: 87.5-108MHz
LCD Display:
High resolution display
Power Supply:
AC Power Input: 100-230VAC, 50-60Hz
Dimension:
249mm x 130mm x 130mm
DAB+, DAB: 174 – 240MHz
This symbol on the product or in the instructions means that your electrical and electronic equipment
should be disposed at the end of its life separately from your household waste. There are separate
collection systems for recycling in the EU.
For more information, please contact the local authority or your retailer where you purchased the product.
45