1
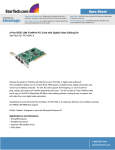
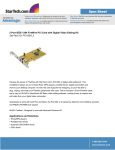
FireWire Card
2 Port IEEE-1394 CardBus Card with Digital Video Editing Kit
3 Port IEEE-1394 CardBus Card with Digital Video Editing Kit
CB1394_2 (2 Port)
CB1394 (3 Port)
Instruction Manual
Actual product may vary from photo
FCC Compliance Statement
This equipment has been tested and found to comply with the limits for a Class B digital
device, pursuant to part 15 of the FCC Rules. These limits are designed to provide
reasonable protection against harmful interference in a residential installation. This
equipment generates, uses and can radiate radio frequency energy and, if not installed
and used in accordance with the instructions, may cause harmful interference to radio
communications. However, there is no guarantee that interference will not occur in a
particular installation. If this equipment does cause harmful interference to radio or
television reception, which can be determined by turning the equipment off and on, the
user is encouraged to try to correct the interference by one or more of the following
measures:
• Reorient or relocate the receiving antenna.
• Increase the separation between the equipment and receiver.
• Connect the equipment into an outlet on a circuit different from that to which the
receiver is connected.
• Consult the dealer or an experienced radio/TV technician for help.
Use of Trademarks, Registered Trademarks, and other
Protected Names and Symbols
This manual may make reference to trademarks, registered trademarks, and other
protected names and/or symbols of third-party companies not related in any way to
StarTech.com. Where they occur these references are for illustrative purposes only and
do not represent an endorsement of a product or service by StarTech.com, or an
endorsement of the product(s) to which this manual applies by the third-party company in
question. Regardless of any direct acknowledgement elsewhere in the body of this
document, StarTech.com hereby acknowledges that all trademarks, registered
trademarks, service marks, and other protected names and/or symbols contained in this
manual and related documents are the property of their respective holders.
Instruction Manual
Table of Contents
Introduction . . . . . . . . . . . . . . . . . . . . . . . . . . . . . . . . . . . . . . . . . . . . . . . . . . . . 1
Before You Begin . . . . . . . . . . . . . . . . . . . . . . . . . . . . . . . . . . . . . . . . . . . . . . . .1
System Requirements . . . . . . . . . . . . . . . . . . . . . . . . . . . . . . . . . . . . . . . . . . .1
Contents . . . . . . . . . . . . . . . . . . . . . . . . . . . . . . . . . . . . . . . . . . . . . . . . . . . . .1
Installation . . . . . . . . . . . . . . . . . . . . . . . . . . . . . . . . . . . . . . . . . . . . . . . . . . . . . 2
Installing the Card . . . . . . . . . . . . . . . . . . . . . . . . . . . . . . . . . . . . . . . . . . . . . .2
Installing the Drivers . . . . . . . . . . . . . . . . . . . . . . . . . . . . . . . . . . . . . . . . . . . .2
Verifying the Installation . . . . . . . . . . . . . . . . . . . . . . . . . . . . . . . . . . . . . . . . .3
Safely Removing the FireWire Card . . . . . . . . . . . . . . . . . . . . . . . . . . . . . . . . .3
Installing and Using the VideoStudio Software . . . . . . . . . . . . . . . . . . . . . . . .4
Specifications . . . . . . . . . . . . . . . . . . . . . . . . . . . . . . . . . . . . . . . . . . . . . . . . . . .4
Technical Support . . . . . . . . . . . . . . . . . . . . . . . . . . . . . . . . . . . . . . . . . . . . . . . .5
Warranty Information . . . . . . . . . . . . . . . . . . . . . . . . . . . . . . . . . . . . . . . . . . . . .5
i
Instruction Manual
Introduction
Thank you for purchasing a StarTech.com FireWire CardBus notebook card. Now you
can instantly link FireWire and i.LINK devices like digital camcorders, portable drives,
scanners, and printers to your notebook computer. The included Ulead VideoStudio
software allows for the easy editing of video sequences.
Features
• Maximum data transfer rate of 400 Mbits/sec.
• Connects or disconnects devices without turning off the notebook through “hot plug”
feature
• Uses dongle-less design to avoid the accidental disconnection of devices
• Compatible with most digital video camcorders including Sony, Canon, Panasonic,
JVC, and Samsung models
• Supports hard disk drives, DVD drives, CD-R/RW drives, printers, and more
• Backed by StarTech.com’s lifetime warranty
Before You Begin
To ensure a quick and easy FireWire CardBus notebook card installation, please read
through this section carefully before attempting to install the card.
System Requirements
• An IBM compatible notebook computer with a Pentium II or higher processor
• One available CardBus slot
• One of the following operating systems: Windows 98SE/ME/2000/XP
• A CD-ROM or compatible optical drive for software installation
Contents
This package should contain:
• 1 x CardBus FireWire card (CB1394_2 or CB1394)
• 1 x 4-6 pin male-to-male IEEE 1394 FireWire cable
• 1 x Ulead VideoStudio software CD
1
Instruction Manual
Installation
This section will guide you through the installation of your FireWire CardBus notebook
card. Please read through the instructions carefully and complete each step in the order
listed.
Installing the Card
1. Make sure your notebook is turned off.
2. Locate an empty CardBus slot on your notebook computer (usually located on the
side).
3. Remove the clear plastic protective film from the back of your notebook card (if
applicable).
4. Gently insert the FireWire CardBus notebook card into the slot until it is well seated.
Installing the Drivers
Once you have connected your FireWire card, the next time you turn on your computer
your notebook will automatically detect that you have installed new hardware. Follow the
instructions below to properly install the required software drivers.
Windows 98SE
1. Windows should automatically detect the new hardware. At the Add New Hardware
Wizard window, click Next.
2. Select Search for the best driver for your devices (Recommended) and click
Next.
3. Insert the Windows 98SE CD-ROM and check the CD-ROM option. Click Next.
4. Choose The Updated Driver (Recommended) and click Next.
5. Click Next again. If prompted for the Windows CD again, type x:\win98 and click
OK (where “x:” is letter of your CD-ROM drive).
6. Click Next, then Finish to complete the driver installation.
Windows ME
1. Windows should automatically detect the new hardware. At the Add New Hardware
Wizard window, click Next.
2. Select Search for the best driver for your devices (Recommended) and click
Next.
3. Insert your Windows ME CD into your notebook’s CD drive. Select CD-ROM
drivers and click Next.
4. Click Finish.
5. Remove the CD and select Yes to restart your computer.
2
Instruction Manual
Windows 2000
Windows 2000 will automatically locate and install the required drivers.
Windows XP
Windows XP will automatically locate and install the required drivers.
Verifying Your Installation
Windows 98SE/ME
1. Go to Start > Settings > Control Panel.
2. Double click System.
3. Click the Hardware tab.
4. If the card does not appear with a red x or yellow exclamation point (!) next to it,
Windows has not detected a problem with the installation and the card should
function normally.
Windows 2000/XP
1. Go to Start > Settings > Control Panel.
2. Double click System.
3. Click the Hardware tab and choose Device Manager.
4. If the card does not appear with a red x or yellow exclamation point (!) next to it,
Windows has not detected a problem with the installation and the card should
function normally.
Safely Removing the FireWire Card
While the card can be removed with the computer running and Windows started (a
process commonly referred to as “hot-plugging”), Windows does offer a “safe removal”
feature that ensures that the card is inactive before it is removed from the CardBus slot.
It is strongly recommended that you follow this procedure when removing the card from a
computer to avoid data loss or equipment damage.
To use the safe removal feature:
1. Locate the hardware ejection icon in the System Tray (next to
the clock).
2. Left click the icon once to activate the device
menu.
3. Highlight OHCI Compliant IEEE 1394 Host
Controller from the list and click it once.
4. After a momentary pause, Windows will display a message informing you the card
can be safely removed.
5. You can now physically remove the card from the slot.
3
Instruction Manual
Installing and Using Your VideoStudio Software
For detailed instructions on the installation and use of the digital editing software, consult
the Ulead VideoStudio manual available on the CD. From My Computer right click the
icon for your CD-ROM or other optical drive and select Explore. Open the Manual
folder and select your language. (Note: To view the manual, you will need Adobe Acrobat
Reader, which is available as a free download from the Adobe Web site,
www.adobe.com.) StarTech.com recommends carefully reading the instructions supplied
by Ulead before attempting to install or use the software.
Specifications
Form Factor/Interface
32-bit CardBus (dongle-less)
Standards Supported
IEEE-1394/IEEE-1394A (FireWire 400)
Maximum Data Transfer Rate
400 Mbits/sec.
Connectors
CB1394_2: 2 x 6-pin FireWire female
CB1394: 3 x 6-pin FireWire female
Cables Included
1 x 6-pin to 4-pin FireWire cable
OS Support
Windows 98SE/ME/2000/XP
Fully plug and play compliant
Software Included
Ulead VideoStudio
Regulatory Certifications
FCC Class B, CE, UL
4
Instruction Manual
Technical Support
StarTech.com’s lifetime technical support is an integral part of our commitment to provide
industry-leading solutions. If you ever need help with your product, visit
www.startech.com/support and access our comprehensive selection of online tools,
documentation, and downloads.
Warranty Information
This product is backed by a lifetime warranty. In addition, StarTech.com warrants its
products against defects in materials and workmanship for the periods noted, following
the initial date of purchase. During this period, the products may be returned for repair, or
replacement with equivalent products at our discretion. The warranty covers parts and
labor costs only. StarTech.com does not warrant its products from defects or damages
arising from misuse, abuse, alteration, or normal wear and tear.
Limitation of Liability
In no event shall the liability of StarTech.com Ltd. and StarTech.com USA LLP (or their
officers, directors, employees or agents) for any damages (whether direct or indirect,
special, punitive, incidental, consequential, or otherwise), loss of profits, loss of business,
or any pecuniary loss, arising out of or related to the use of the product exceed the
actual price paid for the product.
Some states do not allow the exclusion or limitation of incidental or consequential
damages. If such laws apply, the limitations or exclusions contained in this statement
may not apply to you.
5
About StarTech.com
StarTech.com is “The Professionals’ Source for Hard-to-Find Computer
Parts”. Since 1985, we have been providing IT professionals with the
quality products they need to complete their solutions. We offer an
unmatched selection of computer parts, cables, server management
solutions and A/V products and serve a worldwide market through our
locations in the United States, Canada, the United Kingdom and Taiwan.
Revised: 18 August 2004 (Rev. B)