1
FIREWIRE C A R D
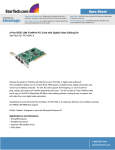
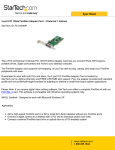
4-Port IEEE 1394 FireWire Card
With Digital Video Editing Kit
PCI1394_4
Instruction Guide
Revised: July 26, 2002
The Professionals’ Source For Hard-to-Find Computer Parts
7
FCC COMPLIANCE STATEMENT
Technical Support
This equipment has been tested and found to comply with the limits for a Class B
digital device, pursuant to part 15 of the FCC Rules. These limits are designed to
provide reasonable protection against harmful interference in a residential installation.
This equipment generates, uses and can radiate radio frequency energy and, if not
installed and used in accordance with the instructions, may cause harmful interference
to radio communications. However, there is no guarantee that interference will not
occur in a particular installation. If this equipment does cause harmful interference to
radio or television reception, which can be determined by turning the equipment off
and on, the user is encouraged to try to correct the interference by one or more of the
following measures:
The following technical resources are available for this StarTech.com product:
• Reorient or relocate the receiving antenna.
• Increase the separation between the equipment and receiver.
• Connect the equipment into an outlet on a circuit different from that to which the
receiver is connected.
• Consult the dealer or an experienced radio/TV technician for help.
On-line help:
We are constantly adding new information to the Tech Support section of our web site. To
access this page, click the Tech support link on our homepage, www.startech.com. In the
tech support section there are a number of options that can provide assistance with this
card.
Knowledge Base - This tool allows you to search for answers to common issues using
key words that describe the product and your issue.
FAQ - This tool provides quick answers to the top questions asked by our customers.
Downloads - This selection takes you to our driver download page where you can
find the latest drivers for this product.
Call StarTech.com tech support for help: 1-519-455-4931
Support hours: Monday to Friday 9:00AM to 5:00PM EST (except holidays)
Warranty Information
This product is backed by a two-year warranty. In addition StarTech.com warrants its
products against defects in materials and workmanship for the periods noted below,
following the initial date of purchase. During this period, the products may be
returned for repair, or replacement with equivalent products at our discretion. The
warranty covers parts and labor costs only. StarTech.com does not warrant its products
from defects or damages arising from misuse, abuse, alteration, or normal wear and
tear.
Limitation of Liability
In no event shall the liability to StarTech.com Ltd. (or its officers, directors, employees or
agents) for any damages (whether direct or indirect, special, punitive incidental,
consequential, or otherwise), loss of profits, loss of business, or any pecuniary loss,
arising out of related to the use of the product exceed the actual price paid for
the product.
Some states do not allow the exclusion or limitation of incidental or consequential
damages. If such laws apply, the limitations or exclusions contained in this statement
may not apply to you.
1
6
Using VideoStudio for the First Time
Table of Contents
1. Make sure that your camcorder is turned on, plugged in to your PCI 1394 port, and
set to playback mode (usually VCR or VTR).
Introduction . . . . . . . . . . . . . . . . . . . . . . . . . . . . . . . . . . . . . . . . . . . . . . . . . . . . . . . .2
2. Run VideoStudio.
Installation . . . . . . . . . . . . . . . . . . . . . . . . . . . . . . . . . . . . . . . . . . . . . . . . . . . . . . . . .3
3. Click on the (G) Global Properties button.
Installing the Drivers . . . . . . . . . . . . . . . . . . . . . . . . . . . . . . . . . . . . . . . . . . . . . . . .4
4. Click on Change Capture Plug-in and select “Ulead Direct Show Capture.” Click OK.
Installing Your VideoStudio Software . . . . . . . . . . . . . . . . . . . . . . . . . . . . . . . . . .5
5. Click on (G) Global Properties again and select Device Control.
Using VideoStudio for the First Time . . . . . . . . . . . . . . . . . . . . . . . . . . . . . . . . . . .6
6. Set the current device to MS 1394. Click OK.
Technical Support . . . . . . . . . . . . . . . . . . . . . . . . . . . . . . . . . . . . . . . . . . . . . . . . . . .7
7. Click on Preferences and turn on the “User Guide” and “Click okay before capture”
functions. These features will help you, as a first time user, understand the different
modes and options available in Ulead VideoStudio. You can also press F1 at any
time to access the help menu.
Warranty Information . . . . . . . . . . . . . . . . . . . . . . . . . . . . . . . . . . . . . . . . . . . . . . . .7
2
5
Introduction
4. Click Next then Finish.
Thank you for purchasing a StarTech.com PCI FireWire card and digital video editing kit.
This four-port card allows you to instantly connect your video camera, image scanner,
digital still camera, or any other IEEE 1394 FireWire device to your PC. And with the
Ulead VideoStudio 5.0 digital editing software included in this kit, you can create and
edit your home movie masterpieces with ease.
5. Remove the diskette and select Yes to restart your computer.
Installation Confirmation
Use the following procedure to ensure that your FireWire card has been installed
correctly.
Features
1. From Control Panel, double-click on System.
• Compatible with most digital video camcorders including Sony, Canon, Panasonic,
JVC, Samsung, and many others
2. Click Device Manager.
• Supports hard disk drives, DVD drives, CD-R/RW drives, printers, etc
3. Double-click 1706 Bus Controller.
• Super-fast 400 Mbps maximum data transfer rate
4. If the device is installed properly, you should see “OHCI Compliant IEEE1394 Host
Controller” listed with no red or yellow symbol beside it.
• Allows easy connection of internal FireWire peripherals
• Backed by StarTech.com’s lifetime warranty
Before You Begin
To ensure a quick and easy PCI FireWire card installation, please read through this
section carefully before attempting to install the card.
Installing Your VideoStudio Software
For detailed instructions on the installation and use of the digital editing software,
consult the Ulead VideoStudio manual available on the CD. From the VideoStudio CD
setup screen click Browse CD then open the Manual folder and select your language
(Note: To view the manual, you will need Adobe Acrobat Reader, which you can
download from the Install Drivers menu on the CD). StarTech.com recommends
carefully reading the instructions supplied by Ulead before attempting to install or use
the software.
System Requirements
• One open PCI slot
1. Insert the Video Studio CD into your computer’s CD drive. The setup screen should
appear automatically. If the screen does not appear, run the CD manually by doubleclicking on My Computer then double-clicking the CD icon.
• One of the following operating systems: Windows 98SE/Me/2000/XP
2. Click on Install Ulead Video Studio 5.0 and follow the installation instructions.
• An IBM-PC compatible computer
WARNING! PCI cards, like all computer equipment, can be severely damaged by static
electricity. Be sure that you are properly grounded before opening your computer case or
touching your PCI card. StarTech.com recommends that you wear an anti-static strap
when installing any computer component. If an anti-static strap is unavailable, discharge
yourself of any static electricity build-up by touching a large grounded metal surface
(such as the computer case) for several seconds. Also be careful to handle the PCI card by
its edges and not the gold connectors.
3. When installation is completed, install the drivers by clicking on Install Drivers then
the driver you want to install. When required, on-screen instructions will assist you.
It is recommended that you install all the drivers.
3
4
4. Gently insert the PCI1394 card into the empty slot, making sure it is firmly seated.
Contents
5. Secure the card in place using the screw you removed in Step 3.
This package should contain:
6. Put the computer case back on.
• 1 x PCI1394 card
• 1 x 6 ft. 4-6 pin IEEE 1394 FireWire cable
Installing the Drivers
• 1 x Ulead VideoStudio 5.0 editing software CD
Once you have connected your FireWire card, the next time you turn on your computer
Windows will automatically detect that you have installed new hardware. Follow the
instructions below to install the required software drivers.
Installation
Windows 98SE
1. Windows should automatically detect the new hardware. At the Add New Hardware
Wizard window, click Next.
2. Select “Search for the best driver for your devices (Recommended)” and click Next.
3. Insert the Windows 98SE CD-ROM and check the “CD-ROM” option. Click Next.
4. Choose “The Updated Driver (Recommended)” and click Next.
5. Click Next again. If prompted for the Windows CD again, type “d:\win98” and click
OK.
6. Click Next, then Finish to complete the driver installation.
Windows Me
This section will guide you through the installation of your PCI FireWire card and Ulead
VideoStudio 5.0 editing software. Please read through the instructions carefully and
complete each step in the order listed.
Installing the Card
1. Make sure that your system is unplugged and you are grounded.
2. Remove the cover of your system (see your computer’s user manual for details, if
necessary) and gently turn your computer onto its side.
3. Locate an empty PCI slot (usually white in colour) and remove the metal plate that
covers the rear bracket. You may need a Phillips screwdriver to perform this step.
Hang on to the screw! You will need it to secure the card later.
1. Windows should automatically detect the new hardware. At the Add New Hardware
Wizard window, click Next.
2. Select “Search for the best driver for your devices (Recommended)” and click Next.
3. Insert your Windows Me CD into your notebook’s CD drive. Select “CD-ROM
drivers” and click Next.
4. Click Finish.
5. Remove the CD and select Yes to restart your computer.
Windows 2000
Windows 2000 will automatically locate and install the required drivers.
Windows XP
1. At the Add New Hardware Wizard window, click Next.
2. Select “Search for the best driver for your devices (Recommended)” and click Next.
3. Select “Specify the location”, type in “C:” and click Next.
PCI
Slots