1
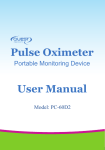
User Manual for Handheld Pulse Oximeter Instructions to User Dear Customer, Thank you for purchasing this quality product. Please read the manual very carefully before using this device. Failure to follow these instructions can cause measuring abnormality or damage to the Oximeter. No part of this manual may be photocopied, reproduced or translated into another language without the prior written consent. We reserve the right to revise and amend it at any time without prior notice. Version of the Manual: Ver 1.2 Issued Date: September 29, 2014 All rights reserved. Notes: z The contents contained in this manual are subject to change without prior notice. z Information furnished by Creative is believed to be accurate and reliable. However, no responsibility is assumed by Creative for its use, or any infringements of patents or other rights of third parties that may result from its use. 3502-2490003 I User Manual for Handheld Pulse Oximeter Instructions for Safe Operation 0 Check the device to make sure that there is no visible damage that may affect user’s safety and measurement performance. It is recommended that the device should be inspected minimally before each use. If there is obvious damage, stop using the device. 0 Necessary service must be performed only by qualified technicians. Users are not permitted to service this device. 0 The oximeter must not be used with the devices and accessories not specified in User Manual. Cautions 0 Explosive hazard—DO NOT use the oximeter in environment with inflammable gas such as some ignitable anesthetic agents. 0 DO NOT use the oximeter while the Patient is under MRI or CT scanning. This device is NOT MRI Compatible. Warnings 0 Discomfortable or pain may occur if using the sensor of this device continuously on the same location for a long time, especially for the patients with poor microcirculation. It is recommended that the Oximeter should not be applied to the same location for longer than 2 hours or less if any abnormal condition is found. Frequently check and re-position the Oximeter. II User Manual for Handheld Pulse Oximeter 0 For the individual patients, there should be a more prudent inspecting in the placing process. The sensor can not be placed on the edema and tender tissue. 0 The local law should be followed when disposing of the expired device or its accessories. Attentions Keep the oximeter away from dust, vibration, corrosive substances, explosive materials, high temperature and moisture. If the Oximeter gets wet, please stop operating it and do not resume operation until it is dry and checked for correct operation. When it is carried from a cold environment to a warm and humid environment, please do not use it immediately. Allow at least 15 minutes for the Oximeter to reach ambient temperature. DO NOT operate the button on the front panel with sharp materials or sharp point. DO NOT use high temperature or high pressure steam disinfection on the oximeter and probes. Refer to related chapter for instructions regarding cleaning and disinfection. The intended use of this device is not for therapy purpose. Declaration of Conformity The manufacturer hereby declares that this device complies with the following standards: IEC 60601-1, ISO 9919:2009, ISO 80601-2-61:2011 III User Manual for Handheld Pulse Oximeter and follows the MDD93/42/EEC. provisions of the council directive Caution: U.S. federal law restricts this device to sale or use by or on the order of a physician. IV User Manual for Handheld Pulse Oximeter Table of Contents 1 Overview.................................................................................. 1 1.1 Appearance....................................................................... 1 1.2 Product Name and Model.................................................. 2 1.3 Structure............................................................................ 3 1.4 Features............................................................................. 3 1.5 Intended Use..................................................................... 3 1.6 Working Environment....................................................... 3 2 Installation of Battery and Holder........................................ 4 3 SpO2 Probe Connection.......................................................... 6 4 Operation................................................................................ 8 4.1 Power on/off the Oximeter................................................ 8 4.2 Default Display Screen..................................................... 8 4.3 Display Screen with PI Value......................................... 10 4.4 Menu Setup..................................................................... 10 4.5 Data Recall...................................................................... 16 5 Technical Specifications....................................................... 20 6 Over-limit Indication............................................................ 22 6.1 Limit settings.................................................................. 22 6.2 Alert sound mute setting................................................. 22 7 Accessories............................................................................. 23 8 Repair and Maintenance...................................................... 24 8.1 Maintenance.................................................................... 24 8.2 Cleaning and Disinfecting Instruction............................. 24 9 Troubleshooting.................................................................... 25 Appendix.................................................................................. 26 V User Manual for Handheld Pulse Oximeter 1 Overview 1.1 Appearance DC power input Data interface Display Key Power/Back Navigation knob Recall/Mute Mode/OK SpO2 probe connector Figure 1-1 1. Display screen: display SpO2 plethysmogram and parameter values. 2. Navigation key: ¿ : Up/Left/Increase 1 User Manual for Handheld Pulse Oximeter Press this key, the default screen can be shifted to display pulse rate (PR) or perfusion index (PI). If on the system setup screen, press it to move the cursor upwards or to the left and adjust parameter values. À : Down/Right/Decrease Its function is similar with the key “¿ : Up/Left/Increase”. 3. (Mode/OK): press this key, the screen can be shifted between default screen display and alternative screen display; longtime press it, the menu screen will be displayed; when you finish parameter setting, press this key to confirm. 4. (Data interface): used for uploading data (Optional function). (DC power input): used for connecting external DC 5. power input for recharging the built-in rechargeable battery. (Power/Back): Power on/off the device by longtime 6. pressing; short time press it to back to the previous level of menu while setting menu operation. 7. (Recall/Mute): Longtime press it to enter SpO2 trend data recall screen; when the device is beeping, short time pressing will mute the indication sound, the mute state will persist for about 90s. After this mute period (90s), then the indication sound will resume. 8. Icon: “SpO2”: SpO2 Probe Connector. 1.2 Product Name and Model Name: Handheld Pulse Oximeter 2 User Manual for Handheld Pulse Oximeter Model: PC-66B 1.3 Structure It consists of the main unit and SpO2 probe. 1.4 Features It is lightweight, small in size and easy to carry Color LCD to display plethysmogram and parameters Monitor SpO2 and Pulse Rate simultaneously PI (Perfusion Index) display is available Up to 384 hours storage and recall of SpO2 and PR data. Audible and visual alert function is available Data transmission to PC for view and analysis (Optional) Power saving mode is available 1.5 Intended Use This Handheld Pulse Oximeter is intended for measuring and recording the pulse rate and functional oxygen saturation (SpO2). It is applicable for monitoring SpO2 and pulse rate of adult and pediatric patients in clinical institutions and homes. 1.6 Working Environment Operating temperature: 5~40℃ Operating humidity: 30~80% Atmospheric pressure: 70kPa~106kPa 3 User Manual for Handheld Pulse Oximeter 2 Installation of Battery and Holder 1)Open the rear panel with coin or an ordinary flat screwdriver, as shown in Figure 2-1. Figure 2-1 2)AA Alkaline batteries or Lithium battery (optional): ① If AA alkaline batteries (non-chargeable) are provided, then according to the polarity mark, insert three AA batteries into battery house, as shown in Figure 2-2. Figure 2-2 Figure 2-3 Fixing Holder 4 User Manual for Handheld Pulse Oximeter ② If Lithium battery (rechargeable) is provided, place the lithium battery into the battery house, and insert its terminal header into the corresponding connector in the battery compartment. 3)Close the battery cover and lock it. 4)Fixing Holder, as shown in figure 2-3. Notes: ① When the device is provided with AA alkaline batteries and it shows low battery, the user should replace the batteries in time. ② When the device is provided with lithium battery and it shows low battery, the user should recharge the battery in time. That is, connect one end of the charging cable to the device's DC power input, and connect the other end to the USB power (from PC or DC adapter). When the display screen appears the rolling icon " ", it means the battery is charging; When the screen shows icon " ", it means the battery is fully charged. Pulling out the charging cable, then the above icon will disappear. 0 Safety instruction for operation: Do not throw the battery into the water, liquid and fire. 0 Keep the battery out of the reach of the child. 0 Do not disassemble the battery. Please remove the battery and put it to specified condition if the device will not be used for a long time. If the battery is damaged, please replace it with the same model AA alkaline battery or lithium battery provided by the same manufacturer. 5 User Manual for Handheld Pulse Oximeter In order to prolong the lithium battery's using life, please pay attention to the battery maintenance. 3 SpO2 Probe Connection Connect the SpO2 probe to the connector labeled “SpO2” at the right side of the Oximeter. After starting up the Oximeter, insert one finger (index finger, middle finger or ring finger with proper nail length) into the probe according to the demonstration shown in the following figure. Figure 3-1 Demonstration for Using SpO2 probe (finger clip) Instructions of Operation 1. The finger should be put in properly and correctly. 2. Do not shake the finger and keep at ease during measurement. 3. Do not put wet finger directly into sensor. 4. Avoid placing the sensor on the same limb which is wrapped with a cuff for blood pressure measurement or during venous infusion. 6 User Manual for Handheld Pulse Oximeter 5. Do not let anything block the emitting light from the sensor. 6. Vigorous exercise and electrosurgical device interference may affect the measuring accuracy. 7. Using enamel or other makeup on the nail may affect the measuring accuracy. 8. If the first reading appears with poor waveform (irregular or not smooth), then the reading is unlikely true, the more stable value is expected by waiting for a while, or a re-inserting finger is needed when necessary. 7 User Manual for Handheld Pulse Oximeter 4 Operation 4.1 Power on/off the Oximeter ¾ When the device is off, press“ ”power/back key for 2 seconds to power up the Oximeter, then it will enter into measurement display screen. ¾ If the Oximeter is working, longtime press “ ” power/back key to power it off. ¾ During measurement, if the "probe off" is detected for longer than one minute, then the device will power off automatically. ¾ If not in the measurement state and there is no any key operation for 1 minute, the device will power off automatically as well. 4.2 Default Display Screen Press “ ”power key for 2 seconds to start up the Oximeter, then insert the finger into the rubber cushions of the probe, the screen will display the default screen, as shown in Figure 4-1. 8 User Manual for Handheld Pulse Oximeter Figure 4-1 Default Screen Description: “ ”: Memory full icon; if the memory is full, the memory full icon " " appears on the screen. No display of this icon means the current storing space is not full. If the memory is full, the data storing will continue in such way the new record will overwrite the oldest record, so that it's recommended to upload the stored data into the computer in time. During the measurement, short time press recall/mute " " key to turn off (or resume) the pulse beep sound, while the pulse symbol " " still blinks. For alert sound mute function, refer to Section 6.2 for detail. Note: The pitch tone of pulse beep (dididi...) is modulated by the SpO2 value, that means the pitch tone changes when the measured SpO2 changes. The higher the SpO2 value is, the 9 User Manual for Handheld Pulse Oximeter higher the tone frequency of pulse beep (sound becomes sharper); The lower the SpO2 value is, the lower the tone frequency of pulse beep (sound becomes flatter). 4.3 Display Screen with PI Value On the default display screen, press “ ¿ / À ” Navigation key to shift screens between default screen and display screen with PI value. The display screen with PI value is shown below. Figure 4-2 Display Screen with PI Value 4.4 Menu Setup On the above mentioned screens, longtime press “ ” key for entering into setup menu screen (as shown in Figure 4-3). 10 User Manual for Handheld Pulse Oximeter Figure 4-3 Setup Menu Screen Screen Description ¾ “Setting”: set parameter values, refer to Chapter 4.4.1 for details. ¾ “Upload data”: enter into data uploading state, refer to Chapter 4.4.2 for details. ¾ "Default": enter into the factory default setting, refer to Chapter 4.4.3 for details. ¾ "简体中文": this Oximeter provides the display with two languages: English and "简体中文"(Simplified Chinese). ¾ “Version”: for viewing version number of the software, refer to Chapter 4.4.5 for details. 4.4.1 Setting On the menu screen, select “Setting” and then press “ ” key for entering into system setup screen. The setup screen is as shown in the following figures. 11 User Manual for Handheld Pulse Oximeter Figure 4-4 System Setup Screen Operation Instructions: ¾ Patient: according to the type of SpO2 probe, the matched patient type should be selected, there are two options:"ADU " for adult, and "NEO " for neonate. ¾ SpO2 Lo-Limit: SpO2 low limit setting; range: 50%~99%, the step is 1%. The factory default value for adult is 90% and 85% for neonate. ¾ PR Hi-Limit: High limit setting of pulse rate; range: 100~240bpm. From 100 to 150, the step is 1bpm, and from 150 to 240, the step is 5bpm. The factory default value for adult is 120bpm and 160bpm for neonate. ¾ PR Lo-Limit: Low limit setting of pulse rate; range: 30~99bpm, and the step is 1bpm. The factory default 12 User Manual for Handheld Pulse Oximeter value for adult is 50bpm and 60bpm for neonate. ¾ Date: Date setting 1) When cursor stays on the Year of the date, press “ ” (Mode/OK) key to active Year option, the cursor flashes on the Year of the date; 2) Press ¿/À (Navigation key) to adjust year. 3) Press “ ” (Power/back) key or “ confirm and exit from date setting. ” (Mode/OK) key to 4) The procedures of adjusting Month value and Day value are the same with Year adjustment. Date Format: yy-mm-dd Note: The setting operations of other parameters (such as TIME, PATIENT, RECORDING INTERVAL, POWER SAVING etc.) are the same with date setting. ¾ Time: Time setting ¾ Recording: Time interval for recording data (SpO2 & PR), there are five options: “1s, 2s, 4s, 8s” and “OFF”. 1) "1s": the least length of data record is set to 30 seconds, and the maximal length for one record is limited to 1 hour. The total storage time is up to 48 hours. 2) "2s": the least length of data record is set to 60 seconds, and the maximal length for one record is limited to 2 hours. The total storage time is up to 96 hours. 3) "4s": the least length of data record is set to 120 seconds, 13 User Manual for Handheld Pulse Oximeter and the maximal length for one record is limited to 4 hours. The total storage time is up to 192 hours. 4) "8s": the least length of data record is set to 240 seconds, and the maximal length for one record is limited to 8 hours. The total storage time is up to 384 hours. 5) When the option is set to “OFF”, the device will not store the measuring data. ¾ Power saving: power saving setting; two options: "on" and "off". The factory default setting is "on". If the power saving mode is on during measurement, and there is no key operation for 2 minutes, the screen display will be dim for power saving. The display brightness will resume to normal condition by pressing any key. ¾ Volume (optional): 3 levels setting: "1", "2" and "3", corresponding to the speaker volume icons of " ", " " and " " respectively. The speaker volume icon indicates the volume of any sound generated by the device for key clicks, over-limit alerting, pulse beep and audible probe-off indication etc.. 4.4.2 Upload Data On the menu screen, select “UPLOAD DATA” and then press “ ” key for entering into connecting status (as shown in Figure 4-5). Note: Make sure the provided USB data cable is well connected between the device and PC before uploading data. 14 User Manual for Handheld Pulse Oximeter When you transmit data (SpO2 and PR values) to your computer, please let the oximeter stay in connecting status. Do the following operation by the instruction in “Oximeter Data Manager User Manual”. The data uploading will be activated. Figure 4-5 Connecting Status Screen 4.4.3 Default On the menu screen, select "Default " and then short time press " "key for entering into default setting screen (as shown in Figure 4-6). Press the Navigation " " key to choose "Yes" or "No", and press " " mode/OK key to confirm or exit. Short time press " " power/back key to return to the previous menu screen. Figure 4-6 Default Setting Screen 15 User Manual for Handheld Pulse Oximeter 4.4.4 Language Selection ¾ In Simplified Chinese version: on main menu screen, select "English" and then short time press " " key, the display language changes to English. ¾ In English version: on main menu screen, select "Simplified Chinese" and then short time press " " key, the display language changes to Simplified Chinese. 4.4.5 Version On the menu screen, select “VERSION” and then press “ key for entering into version screen (as shown in Figure 4-7). ” Figure 4-7 4.5 Data Recall On the default display screen, longtime press “ key to enter into record list display screen. 16 ” ( Recall/mute) User Manual for Handheld Pulse Oximeter Figure 4-8 Record List 17 User Manual for Handheld Pulse Oximeter 4.5.1 Data Recall Choose record in the record list, then press “ ”(mode/OK) key, the display screen will display trend graph, as shown in Figure 4-9A. Figure 4-9A Trend Graph Display Screen Operation Instructions: ” mode/OK key to shift the trend graph z Short time press “ screens (as shown in Figure 4-9A , Figure 4-9B and Figure 4-9C) z Short time press " screen. " power/back key to return to record list Figure 4-9B Trend Graph Display Screen 18 User Manual for Handheld Pulse Oximeter Figure 4-9C Trend Graph Display Screen 4.5.2 Data Deletion On the menu screen, longtime press “ ” key and the records list will appear. At this time, longtime pressing “ ” key again, an message “Are you sure to delete all?” prompts on the screen, as shown in Figure 4-10. Figure 4-10 At this time, press "" navigation key to select “Yes” or "No", and press “ ” mode/OK key to confirm or exit. Or short time press " " power/back key to return to record list screen. 19 User Manual for Handheld Pulse Oximeter 5 Technical Specifications A. Display Mode: Color dot-matrix LCD; B. Power Supply: Supply voltage: d.c. 4.5V(3 AA alkaline batteries), or d.c. 3.6V (Lithium rechargeable battery) Operating current: ≤180mA C. SpO2 Measurement Transducer: dual-wavelength LED sensor with wavelength: Red light: 663 nm, Infrared light: 890 nm. Maximal optical output power: < 2mW maximum average Measuring range: 35~100% Measuring accuracy: Not greater than 3% for SpO2 range from 70% to 100% *NOTE: Accuracy defined as root-mean-square value of deviation according to ISO 9919. Low limit setting range: 50%~99% (Default setting: 90%). D. Pulse Rate Measurement Measuring range: 30bpm~240bpm Accuracy: ±2bpm or ±2% (whichever is greater) Over-limit setting range: 25bpm~250bpm Default setting limit: High -- 120bpm, Low -- 50bpm E. Perfusion Index Display Range: 0.2%~20% 20 User Manual for Handheld Pulse Oximeter F. Data Update 8 beats moving average for both SpO2 and pulse rate readings G. Data Storage Recording SpO2 and pulse rate data every 1/2/4/8 second(s), up to 384–hour records can be stored. H. Low Perfusion Performance The accuracy of SpO2 and PR measurement still meet the precision described above when the modulation amplitude is as low as 0.5%. I. Resistance to interference of surrounding light: The difference between the SpO2 value measured in the condition of indoor natural light and that of darkroom is less than ±1%. J. Dimensions: 145 mm (L) × 74 mm (W) × 29 mm (H) Net Weight: 210g (including batteries) K. Classification Type of protection against electric shock: Internally powered equipment Degree of protection: Type BF applied parts. Degree of protection against harmful ingress of liquids: Ordinary equipment without protection against ingress of water. Electro-Magnetic Compatibility: Group I, Class B 21 User Manual for Handheld Pulse Oximeter 6 Over-limit Indication 6.1 Limit settings ¾ ¾ SpO2 low limit setting range: 50% ~ 99%. Pulse Rate limits setting range: High: 100bpm--240bpm Low: 30bpm--99bpm During the measurement, if the measured value exceeds the preset value, the alert beeping sound will be activated, the value that is over-limit will blink at the same time. 6.2 Alert sound mute setting ¾ During the measurement, if the alert sound is set to on, short time press " " recall/mute key, then the alert sound will mute for 90 seconds, but the over-limited value still keeps blinking. At this moment, the speaker volume icon becomes " ". If this alert event persists over 90 seconds, then the alert sound will be activated again. ¾ During the measurement, if the probe is off or disconnected, the message "Check Probe" shows on the display screen. The alert sound starts (interval is 5 seconds) and lasts for about 1 minute. If the probe is still off, the Oximeter will power off automatically. 22 User Manual for Handheld Pulse Oximeter 7 Accessories 1. A probe 2. A holder 3. Battery(AA)× 3 4. Charging cable (optional) 5. User Manual 6. Quality Inspection Certificate 7. A data cable (optional) 8. Oximeter Data Manager software (optional) Note: The accessories are subject to change. See the Packing List for detailed items and quantity. 23 User Manual for Handheld Pulse Oximeter 8 Repair and Maintenance 8.1 Maintenance The expected service life(not a warranty) of this device is 5 years. In order to ensure its long service life, please pay attention to the maintenance; y Please change the batteries when the low-voltage indicator appears. y Please take out the batteries if the oximeter will not be used for a long time. y The recommended storage environment of the device: Ambient temperature: -20ºC ~60ºC Relative humidity 10%~95% Atmospheric pressure: 50kPa~107.4kPa y The oximeter is calibrated in the factory before sale, there is no need to calibrate it during its life cycle. However, if it is necessary to verify its accuracy routinely, the user can do the verification by means of SpO2 simulator, or it can be done by the local third party test house. 8.2 Cleaning and Disinfecting Instruction y Surface-clean sensor with a soft cloth by wetting with a solution such as 75% isopropyl alcohol, if low-level disinfection is required, use a 1:10 bleach solution. y Then surface-clean by a dampened cloth and let it air dry or wipe it with a cloth. High-pressure disinfection cannot be used on the device. Do not immerse the device in liquid. 24 User Manual for Handheld Pulse Oximeter 9 Troubleshooting Trouble Possible Reason Solution Unstable SpO2 and Pulse Rate display 1. The finger is not placed far enough inside. 2. The finger is shaking or the patient is moving. 1. Place the finger correctly inside and try again. 2. Reduce patient movement. Device will not switch on 1. The batteries are drained or almost drained. 2. The batteries are not inserted properly. 3. The device is malfunctioning. 1. Change batteries. 2. Reinstall batteries. 3. Please contact the local service center. No Display 1. The device will power off automatically when there is no signal 1. Normal. and no operation for 2. Change batteries. 1 minute. 2. The batteries are almost drained. 25 User Manual for Handheld Pulse Oximeter Appendix Key of Symbols Description Symbol %SpO2 Symbols PI% The oxygen saturation Perfusion Index Pulse rate (Unit: beats per minute) on the Low battery voltage screen Battery fully charged icon Speaker mute icon / / Speaker volume icon Memory full / (Neonate/Adult) Patient type 26 User Manual for Handheld Pulse Oximeter Symbol SpO2 Description SpO2 probe connector Power/Back Key Mode/OK Key Symbols on the panels Recall/Mute Key ¿/À Navigation Key Data Interface CE mark Serial number Date of manufacture Authorised representative in the European community Manufacturer (including address) With Type BF applied part See User Manual Disposal of this device according to WEEE regulations 27 User Manual for Handheld Pulse Oximeter Common Knowledge 1 Meaning of SpO2 SpO2 is the saturation percentage of oxygen in the blood, so called O2 concentration in the blood; it is defined by the percentage of oxyhemoglobin (HbO2) in the total hemoglobin of the arterial blood. SpO2 is an important physiological parameter to reflect the respiration function; it is calculated by the following method: SpO2 = HbO2/ (HbO2 +Hb)×100% HbO2 are the oxyhemoglobins (oxygenized hemoglobin), Hb are those hemoglobins which release oxygen. 2 Principle of Measurement Based on Lamber-Beer law, the light absorbance of a given substance is directly proportional with its density or concentration. When the light with certain wavelength emits on human tissue, the measured intensity of light after absorption, reflecting and attenuation in tissue can reflect the structure character of the tissue by which the light passes. Due to that oxygenated hemoglobin (HbO2) and deoxygenated hemoglobin (Hb) have different absorption character in the spectrum range from red to infrared light (600nm~1000nm wavelength), by using these 28 User Manual for Handheld Pulse Oximeter characteristics, SpO2 can be determined. SpO2 measured by this oximeter is the functional oxygen saturation -- a percentage of the hemoglobin that can transport oxygen. In contrast, hemoximeters report fractional oxygen saturation – a percentage of all measured hemoglobin, including dysfunctional hemoglobin, such as carboxyhemoglobin or metahemoglobin. Clinical application of pulse oximeters: SpO2 is an important physiological parameter to reflect the respiration and ventilation function, so SpO2 monitoring used in clinical becomes more popularly, such as monitoring the patient with serious respiratory disease, the patient under anesthesia during operation, premature and neonate. The status of SpO2 can be determined in time by measurement and find the hypoxemia patient earlier, thereby preventing or reducing accidental death caused by hypoxia effectively. 3 Normal SpO2 Range and Default Low Limit In campagna area, healthy people’s SpO2 value is greater than 94%, so the values below 94% are determined as hypoxia. SpO2<90% is considered as the default threshold for determining anoxia by most researchers, so SpO2 low limit of the oximeter is set as 90% generally. 4 Factors affecting SpO2 accuracy (interference reason) Intravascular dyes such as indocyanine green or methylene blue Exposure to excessive illumination, such as surgical 29 User Manual for Handheld Pulse Oximeter lamps, bilirubin lamps, fluorescent lights, infrared heating lamps, or direct sunlight. Vascular dyes or external used color-up product such as nail enamel or color skin care Excessive patient movement Placement of a sensor on an extremity with a blood pressure cuff, arterial catheter, or intravascular line Exposure to the chamber with High pressure oxygen There is an arterial occlusion proximal to the sensor Blood vessel contraction caused by peripheral vessel hyperkinesias or body temperature decreasing 5 Factors causing low SpO2 value (pathology reason) Hypoxemia disease, functional lack of HbO2 Pigmentation or abnormal oxyhemoglobin level Abnormal oxyhemoglobin variation Methemoglobin disease Sulfhemoglobinemia or arterial occlusion exists near sensor Obvious venous pulsations Peripheral arterial pulsation becomes weak Peripheral blood supply is not enough 30