1
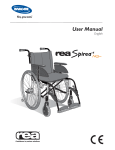
BRUGSANVISNING · USER MANUAL XXL-Rehab Minimaxx – Manuel kørestol XXL-Rehab Minimaxx – Folding Wheelchair MAX 325 KG Kan med fordel anvendes til: - Bariatriske brugere. -Plejeboliger. -Hospitaler. -Hjemmet. Ideal use for: - Bariatric users. - Nursing homes. -Hospitals. -Home. BRUGSANVISNING · BRUGSANVISNING · BRUGSANVISNING · BRUGSANVISNING · BRUGSANVISNING · Brugsanvisning for XXL-Rehab Minimaxx – Manuel kørestol ADVARSEL ADVARSEL – Dette produkt må ikke anvendes uden grundig instruktion fra uddannet personale. – Bruges produktet til personer, der vejer mere end den maksimale brugervægt, er der risiko for at beskadige produktet. – XXL-Rehab påtager sig intet ansvar for eventuelle skader på produktet eller personskader forårsaget af forkert installation, forkert montering eller forkert anvendelse af dette produkt. – Hvis dele er beskadiget eller mangler, kontakt XXL-Rehab med det samme. Brug IKKE erstatnings reservedele. – XXL-Rehab kan ikke holdes ansvarlig for fejl eller ulykker, der opstår efter reparationer uden skriftlig tilladelse fra XXL-Rehab. For at sikre korrekt brug af XXL-Rehab Minimaxx kørestol skal brugsanvisningen læses grundigt før brug. Der skal rettes opmærksomhed specielt mod advarslerne mærket med . Desuden må stolen kun betjenes af uddannet personale eller af personer, der har fået instruktion i dens brug, da der ellers er fare for, at brugeren kan komme til skade. Brugervægt max. Total bredde Total højde Total længde uden benstøtter Sædebredde 70 cm 56 / 61 / 66 / 71 cm 46 cm Sædehøjde 43 cm Ryghøjde 51 cm Rygvinkel indstillelig Nej Armlænshøjde indstillelig Nej Armlæn svingbare og aftagelige Ja Benstøtter højdejusterbare Ja Benstøtter svingbare og aftagelige Vægt Betjening Brandhæmmende betræk Farve betræk Ja Ca. 27 kg Manuel Ja Sort Sølvmetallic Skubbehåndtag højdejusterbare Ja Drivhjul quick release Ja XXL-Rehab Minimaxx er en kørestol med et robust design. Den er beregnet til brugere op til 325 kg. Den er velegnet til brugere med forskellige diagnoser. Balancepunkt indstilleligt Ja Sammenklappelig Ja Kørestolens drivhjul kan indstilles, så de bærer det meste af brugerens vægt, hvilket gør kørestolen lettere at køre. Fast sæde ANVENDELSE Skubbehåndtagene er designet, så hjælperen lettere kan bruge sin krop til at dreje og skubbe kørestolen. Ryglænshøjde indstillelig Stel Drivhjul Ja Nej Pulverlakeret krom molybdæn stål 24” alu med massive PU dæk Svinghjul 125 mm nylon/PU Benstøtterne er designet, så de kan bære 100 kg hver. Benstøtterne er sideværts justerbare, så de kan bruges af brugere med samlede eller spredte ben. Sæde/ryg Polyester/nylon XXL-Rehab Minimaxx kørestolen kan benyttes ude og inde. Det anbefales at bruge kørestolen i temperaturer mellem – 5 grader og + 40 grader celsius, da materialet ellers kan føles mindre behageligt. Fodplader SPECIELLE HENVISNINGER ADVARSEL og BEMÆRK henviser til, at hvis ikke man er opmærksom på disse forhold eller retter sig efter dem, kan personskade eller tingsskade opstå. Transport af bruger fastspændt i kørestol i motoriseret køretøj. XXL-Rehab Minimaxx – Manuel kørestol 103 cm Sædedybde Farve stel 2 325 kg Sædebredde +22 cm XXL-Rehab anbefaler, at kørestolsbrugere ikke transporteres i motoriseret køretøj fastspændt i XXL-Rehab Minimaxx kørestolen, idet denne ikke er crash-testet. Armlæn ISO - klassifikation Polyuretan Rustfrit stål med gummibelægning ISO 12 23 12 - 02 · BRUGSANVISNING · BRUGSANVISNING · BRUGSANVISNING · BRUGSANVISNING · BRUGSANVISNING Ryglæn med stropryg og rygbetræk Skubbehåndtag Quick release split Aftageligt armlæn Drivhjul med drivring Siddeplade Foldemekanisme Kørestolens ramme Hjulbremse Anti-tipstøtter Akselhjul – for placering af baghjulets placering Benstøtte Scan koden og få flere produktinformationer. XXL-Rehab Minimaxx – Manuel kørestol Svinghjul 3 BRUGSANVISNING · BRUGSANVISNING · BRUGSANVISNING · BRUGSANVISNING · BRUGSANVISNING · SIKKERHEDSVEJLEDNINGER Advarsler Når kørestolen tages i brug første gang, bør brugeren sammen med terapeut eller lign. personale udføre række-, fremadbøjnings- og forflytningsøvelser, for at forstå sikkerhedsgrænserne for kørestolen. FORSØG IKKE at nå ting, hvis det kræver at brugeren flytter sig fremad i sædet. FORSØG IKKE at samle ting op fra gulvet, hvis det betyder at brugeren skal række ned mellem sine knæ. FORSØG IKKE at nå ting ved at læne hen over ryggen på ryglænet for at nå ting bagved. BRUGEREN MÅ IKKE FORSØGE at flytte sin vægt / siddeposition i den retning brugeren rækker, da kørestolen KAN tippe. BRUG ALDRIG en rulletrappe til at få kørestolen fra én etage til en anden. FORSØG IKKE at stoppe en kørestol i bevægelse ved at bruge hjulbremserne. LÅS ALTID begge hjul ved forflytning fra/til kørestolen. FORSØG IKKE at forcere ramper eller lign med en hældning større end 9°. FORSØG IKKE at komme op ad en rampe eller lign. hvis denne er belagt med is, olie eller vand. FORSØG IKKE at forcere forhindringer, meget ujævne flader etc. Dette XXL-Rehab Minimaxx – Manuel kørestol kan resultere i at kørestolen vælter og derved også medfører skade på brugeren. BRUG ALDRIG uautoriserede dele, tilbehør eller lign. idet al garanti vil bortfalde. LØFT ALDRIG kørestolen i dele der kan tages af (armlæn, hjul, ryg, benstøtter eller lign.). AFMONTÈR ALDRIG anti-tipstøtter. BRUG IKKE benstøtterne som platform til at træde på under ind – og udstigning af kørestolen. FORSØG IKKE at tippe kørestolen uden assistance. STÅ ALDRIG på kørestolens ramme. 4 Vægttræning XXL-Rehab Minimaxx kørestolen er ikke designet eller testet til brug under vægttræning. Hvis brugeren benytter XXL-Rehab Minimaxx kørestolen under vægttræningsaktivitet, kan XXL-Rehab ikke holdes ansvarlig for nogen som helst skade på brugeren, og al garanti bortfalder øjeblikkelig. Sikker håndtering af XXL-Rehab Minimaxx kørestol At kunne håndtere XXL-Rehab Minimaxx kørestolen sikkert, kræver at både bruger og assisterende person er opmærksomme på brugsanvisningens vejledninger. Bruger og terapeut bør sammen analysere de teknikker der skal bruges for at komme ind og ud af kørestolen, række efter ting etc. På denne måde bliver bruger klar over muligheder og ”forbud”. Det er vigtig at indøve forflytningsteknikker, indtil bruger føler sig sikker, og derved kan omgås de mest almindelige arkitektoniske barrierer. Stabilitet og balance For at kørestolen kan være så stabil som mulig, skal bruger altid opretholde sin balance. Kørestolen er designet til at forblive opret under almindelige dagligdags aktiviteter, så længe bruger ikke bevæger sig ud over tyngdepunktet. Stort set alle aktiviteter i en kørestol medfører at tyngdepunktet flyttes. Mange aktiviteter kræver at brugeren rækker, bøjer sig frem eller forflytter sig ind og ud af kørestolen. Disse bevægelser vil bevirke en ændring af den normale balance, tyngepunkt og vægtdistribution i kørestolen. For at fastslå brugerens sikkerhedsgrænser bør fremadlæning, rækning og forflytningsaktiviteter øves og indlæres sammen med en kvalificeret hjælper / terapeut, før den aktive brug af kørestolen. LÆN IKKE længere frem end armlænene på stolen. Kontrollér, at svinghjulene peger fremad, når bruger læner sig frem. Dette gøres ved at køre stolen lidt frem og derefter lidt tilbage i en lige linje. ADVARSEL: Bruger bør aldrig vippe kørestolen bagover uden assistance. Brug altid antitip-støtter! · BRUGSANVISNING · BRUGSANVISNING · BRUGSANVISNING · BRUGSANVISNING · BRUGSANVISNING CHECK-LISTE TIL UDPAKNING TILPASNING TIL BRUGER Ved modtagelse og åbning af kassen check da, om der skulle være sket en eventuel transportskade, og kontakt evt. transportfirmaet. De følgende instruktioner er beregnet til at kunne foretage justeringer af XXL-Rehab Minimaxx kørestolen. Når justeringerne er foretaget, er det vigtigt at kontrollere, at alle dele er forsvarligt fæstnet. Efter åbning af kassen med XXL-Rehab Minimaxx kørestol, tjek at den indeholder følgende standardudstyr: 1 XXL-Rehab Minimaxx kørestolsramme monteret med hjullås og to hjul 2 To drivhjul med drivringe 3 To anti-tipstøtter 4 To Quick release armlæn Montering 1. Tag alle delene ud af kassen og læg dem på gulvet. 2. Isæt drivhjulene ved at aktivere quick release-knappen på ydersiden af hjulet, og skub akslen ind i akselbøsningen. ADVARSEL – Kontroller at den lille tap er fuldt udløst, og at de to låsekugler i modsatte ende er helt ude, før kørestolen tages i brug. – Låsekuglerne SKAL komme frem på indersiden af akselhullet, da Værktøj Sekskantstiftnøgler (Unbrakonøgler): 5 mm (2 stk.), 6 mm, 8 mm Gaffelnøgler: 10 mm, 13 mm, 20 mm, 30 mm Benstøtter Længden af benstøtten justeres med bruger i kørestolen. Løsn bolten bagpå benstøtterøret og træk den ud. Skub benstøtten op eller ned alt efter behov, til den ønskede højde er nået. Stik bolten ind igennem benstøtterøret igen, og spænd den. Benstøtten bør være mindst 6 cm fra jorden. Benstøtten justeres sideværts med brugerens fod på benstøtten. Løsn fingerskruen under benstøtterne og skub benstøtten ud mod siden eller ind med midten og spænd fingerskruen. BEMÆRK: Fingerskruerne under benstøtterne skal altid være korrekt monteret i hullerne i benstøtteholderne. Fingerskruerne må ikke spændes på benstøtteholderen uden for hullerne. BEMÆRK: Benstøtten skal justeres, så der ikke lægges for stort et pres på brugerens ben ved forkanten af kørestolen, da dette kan resultere i skade på brugeren. hjulet ellers ikke sidder fast. – Vip kørestolen til siden, så drivhjulene går fri af underlaget, og 3. Isæt de to anti-tipstøtter i rørene bagest på kørestolen. Montér boltene i huller, så anti-tipstøtterne sikrer kørestolen mod at tippe bagover. OBS: Tip kørestolen bagud, og kontrollér, at anti-tipstøtterne forhindrer køre stolen i at tippe bagover. For justering af anti-tipstøtter, se afsnittet Anti-tipstøtter under Tilpas ning til bruger. Hvis anti-tipstøtterne er forkert indstillet, kan det resultere i, at brugeren falder og kommer til skade. 4. Isæt armlænene ved at aktivere quick release-knappen bagest på armlænene og stik tappen i armlænsholderne i hver side af ryglænet. Sørg for, at styretappen forrest på undersiden af armlænet bliver anbragt i det tilsvarende hul på kørestolsrammen. OBS: Træk opad i armlænene for at sikre, at de er korrekt monteret. 5. Montér benstøtterne på hver side af kørestolens forramme og justér evt. i længden. OBS: Låseboltene bagpå benstøtterne skal altid være korrekt monteret i hul lerne. Låseboltene må ikke spændes på benstøtten uden for hullerne. For justering i højde og bredde, se afsnittet Benstøtter under Tilpasning til bruger. ADVARSEL – FORSØG IKKE AT STÅ PÅ BENSTØTTERNE. Hvis brugeren står på benstøtterne, kan det resultere i fremadtipning af kørestolen, hvilket kan resultere i, at brugeren falder og kommer til skade. – FORSØG IKKE at løfte stolen ved at tage fat i benstøtterne. Disse er designet til at kunne tages af eller svinge væk fra kørestolen. – BENSTØTTEN bør svinges helt væk under forflytning ind og ud af stolen. Stropryg Stropryggen kan tilpasses brugeren ved at løsne eller stramme de tværgående stropper bag på ryglænet. Løsn rygbetrækket bagpå ryglænet og løsn stropperne, - mest for neden. Anbring brugeren i stolen så vel langt tilbage, at de øverste stropper støtter den øvre del af ryggen. Spænd derefter stropperne ind, så der opnås støtte i den nedre del af ryggen. For brugere med en voluminøs bagdel er det en stor fordel at indstille stolen på denne måde, da brugeren vil opnå en reel støtte i lændedelen. Sæt rygbetrækket fast med velcroen efter justeringen. Skubbehåndtag Skubbehåndtagene kan tilpasses hjælperen ved at justere dem op eller ned. Løsn skruerne på rygrøret under skubbehåndtaget og tag dem ud. Flyt skubbehåndtaget op eller ned alt efter behov og isæt skruerne. Sørg for, at skruen med indvendigt gevind kommer helt igennem rygrøret. Spænd skruerne. Sørg for at skruerne er korrekt spændte. XXL-Rehab Minimaxx – Manuel kørestol træk udad i hjulene for at sikre, at de er korrekt monteret. – Sørg altid for at holde tap og låsekugler frie for snavs. 5 BRUGSANVISNING · BRUGSANVISNING · BRUGSANVISNING · BRUGSANVISNING · BRUGSANVISNING · Hjulbremse Hjulbremsen aktiveres ved at skubbe bremsehåndtaget frem. Bremsen er trinløs justerbar. Løsn skruerne på bremsebeslaget og skub bremsen så langt tilbage eller frem, at bremsen presses 3 – 5 mm ind i dækket, når den er aktiveret. Sørg for at skruerne er korrekt spændte, så bremsen holdes i den korrekte position. Afprøv kørestolen før brug, så der er sikkerhed for at stolen bremses korrekt. Hvis hjulbremsen bliver slidt eller beskadiget, SKAL den straks udskiftes. BEMÆRK: Hvis tyngdepunktet korrigeres, så skal hjulbremserne også korrigeres. BEMÆRK: Ved forflytning ind og ud af XXL-Rehab Minimaxx kørestolen skal BEGGE hjulbremser være aktiveret. Drivhjul XXL-Rehab Minimaxx kørestolen er som standard forsynet med 24” drivhjul med massive dæk. Justering af tyngdepunkt Drivhjulenes position kan justeres i forhold til brugerens tyngdepunkt, så kørestolen bliver lettere at køre. Demontér drivhjulet. Fjern møtrikkerne på indersiden af akselbøsningen og placér akselbøsningen i den ønskede position i rammen. Spænd møtrikkerne på indersiden. Flyt bremsen tilsvarende fremad eller bagud. Montér drivhjulene, og justér bremserne som angivet i afsnittet Hjulbremse. Justér anti-tipstøtter som angivet i afsnittet Anti-tipstøtter. VEDLIGEHOLDELSE OG RENGØRING Rengøring Regelmæssig rengøring af alle overflader vil forlænge kørestolens pæne udseende samt levetid. Alle overflader kan rengøres med en mild sæbevands opløsning. Hvis nødvendigt kan stolen oversprøjtes med VIRKON og aftørres efter brugsanvisningen på stoffet. BRUG IKKE opløsningsmidler overhovedet. Stolen kan også aftørres med sprit. ADVARSEL: Vask og gennemfugtning af rygbetrækket vil reducere den flammehæmmende virkning. Vedligeholdelsesprocedure 1. Check at bolte og skruer er fastspændte før brug af XXL-Rehab Minimaxx kørestolen. Check alle dele for slid og brud, og erstat delene hvor det er nødvendigt. Check at kørestolen er indstillet til bruger. 2. Hold akslerne frie for skidt og ”nullermænd”, så mekanismen kan låses korrekt og hjulene kan dreje frit. 3. Sørg for at oliere akslerne mindst 1 gang om måneden (brug 3-i-1 olie eller lignende). 4. Hjul og dæk bør kontrolleres regelmæssigt for revner og slid, og bør udskiftes hvis nødvendigt. 5. Check regelmæssigt at drivringene er fastspændt korrekt til hjulet. GENERELLE BEMÆRKNINGER ADVARSEL – Justering af tyngdepunkt bør kun foretages af uddannet personale. – Når tyngdepunktet er ændret, SKAL ANTI-TIPSTØTTERNE JUSTERES, SÅ DE FORHINDRER KØRESTOLEN I AT TIPPE BAGOVER. – Hvis anti-tipstøtterne er forkert indstillet, kan det resultere i, at brugeren falder og kommer til skade. XXL-Rehab Minimaxx – Manuel kørestol Justering af anti-tipstøtter Anti-tipstøtternes position kan justeres i forhold til drivhjulenes position, så kørestolen sikres mod at tippe bagover. Anti-tipstøtternes position justeres, uden at brugeren sidder i kørestolen. Løsn skruerne på kørestolens ramme over anti-tipstøtten og tag dem ud. Flyt anti-tipstøtten op eller ned alt efter behov og isæt skruerne. Sørg for, at skruen med indvendigt gevind kommer helt igennem rygrøret. Spænd skruerne. Vip kørestolen bagover og check, at anti-tipstøtterne forhindrer kørestolen i at tippe bagover. 6 Ved tvivlsspørgsmål kan forhandleren altid kontaktes. I visse tilfælde er det nødvendigt at XXL-Rehab Minimaxx kørestolen tilses af forhandleren. Det er specielt ved: - revner eller brud på rammen - revne eller brud på en svejsning Kontakt altid forhandleren før en XXL-Rehab Minimaxx kørestol eller dele deraf sendes tilbage. Det er vigtigt i tilfælde af returnering at kørestolen pakkes i en kasse og spændes fast til pallen. XXL-Rehab er ikke ansvarlig for transportskade på ting, der sendes tilbage til XXL-Rehab. · BRUGSANVISNING · BRUGSANVISNING · BRUGSANVISNING · BRUGSANVISNING · BRUGSANVISNING CHECK-LISTE FOR SIKKERHEDSINSPEKTION Emne Straks Generelt Kørestolen ruller lige X Hjul bremser Forhindrer ikke hjulet i at rulle Omdrejningspunkterne ikke løse og slidte Hjulbremserne er faste men nemme at aktivere X X X Stropryg Se efter flænger eller ødelagte stropper Check fastgøringen af rygstropperne X X Drivhjul Quick–release akslen låser som den skal. Når hjulet drejes rundt frit i luften må det ikke exe eller have anden sidelæns vandring. Svinghjul Check for modstand ved at dreje hjulet rundt; hjulet bør stoppe gradvist Hjulfælgene bør være rene og frie for olie Advarsel: Hjul og dæk bør med jævne mellemrum checkes for revner og slid, og bør udskiftes hvis nødvendigt. X X X X Dæk Check for slid Advarsel: Hjul og dæk bør med jævne mellemrum checkes for revner og slid, og bør udskiftes hvis nødvendigt. Rengøring Rene armlæn og ryglæn X GARANTI PRODUCENT Garantiperioden for XXL-Rehab Minimaxx er 1 år fra købsdato, på materiale og arbejde. Fakturaen er ”garantibevis”. På selve kørestolsrammen (underrammen) følger en 5 års garanti fra faktureringsdatoen. XXL-Rehab Fuglebækvej 1D DK-2770 Kastrup Danmark Tlf.: +45 70 25 25 22 Fax: +45 70 25 25 44 www.xxl-rehab.com Produkter, der er blevet anvendt til andre formål end den tilsigtede anvendelse; eller som har været genstand for forsømmelighed, misbrug, forkert opbevaring eller håndtering, fejlbetjening, uautoriserede modifikationer eller skader uden normal slitage, som er afgjort af XXL-Rehab, er ikke omfattet af denne garanti. Inspicer/juster ugentligt Inspicer/juster månedligt Inspicer/juster periodisk X X X X X X X X X X X X X X X X X Hvis max brugervægt kapaciteten overskrides, vil garantien blive annulleret. XXL-Rehab Minimaxx er fremstillet og prøvet i overensstemmelse med international standard DS/EN ISO 12183:2009. 07/2014/JP XXL-Rehab Minimaxx – Manuel kørestol Enhver uautoriseret reparation af produktet / del af produktet, samt manipulation med nogle af komponenterne, vil ugyldiggøre garantien. 7 USER MANUAL · USER MANUAL · USER MANUAL · USER MANUAL · USER MANUAL · USER MANUAL · Instructions for XXL-Rehab Minimaxx – Folding Wheelchair CAUTION CAUTION – This product should not be used without proper instruction from a healthcare professional. – Using the product for individuals weighing more than the maximum weightbearing capacity may pose a risk for damaging the product. – XXL-Rehab assumes no responsibility for any damage or injury caused by improper installation, assembly or use of this product. – If components are damaged or missing, contact XXL-Rehab immediately. Do NOT use substitute parts. – XXL-Rehab cannot be held liable for faults or accidents occurring after repairs by service staff without written authorisation from XXL-Rehab. To ensure proper use of the XXL-Rehab Minimaxx, please read these instructions thoroughly before using the product. In doing so, pay particular attention to the warning notes marked with . Also remember that in order to prevent the risk of injury to the user, the wheelchair may be operated only by trained caregivers or aides or by individuals who have been instructed in its proper use. USE Seat width +22 cm Total height 103 cm Total length without footrests 70 cm Seat width 56 / 61 / 66 / 71 cm Seat depth 46 cm Seat height 43 cm Backrest height 51 cm Backrest angel adjustable No Armrest height adjustable No Armrests swing-away and removable Yes Footrests height adjustable Yes Footrests swing-away and removable Weight Operation Flame-retardant cover Yes Approx. 27 kg Manual Yes Color cover Black Color frame Silver metallic Yes The XXL-Rehab Minimaxx is a wheelchair with a rugged design, intended for users weighing up to 325 kg and suitable for users with a variety of diagnoses. Quick release on rear wheels Yes Balance point adjustable Yes Foldable Yes The wheelchair’s rear wheels can be adjusted to carry most of your weight, making the wheelchair easier to drive. Fixed seat Yes Backrest height adjustable Frame Rear wheels Casters The leg supports are designed to carry 100 kg each. The footrests may be adjusted sideways, enabling you to use them with your legs together or apart. Seat / backrest The XXL-Rehab Minimaxx is suitable for both indoor and outdoor use. It is recommended to use the wheelchair in ambient temperatures between -5 and +40°C, as otherwise the material may feel slightly uncomfortable. ISO – classification SPECIAL NOTES Transporting a user secured in the wheelchair onboard a motorised vehicle. XXL-Rehab do not recommend to transport wheelchair users secured in the XXL-Rehab Minimaxx wheelchair onboard a motorised vehicle, as the wheelchair has not been crash tested. XXL-Rehab Minimaxx - Folding Wheelchair 325 kg Total width Push handles height adjustable The push handles are designed to make it easier for an aide to utilise his or her body weight to turn and push the wheelchair. 8 Maximum weight capacity is No Powder-lacquered chromium molybdenum steel 24” solid PU tires 125 mm nylon with PU Polyester / nylon Armrests Polyurethane Footrests Stainless steel with rubber coating ISO 12 22 03 - 08 · USER MANUAL · USER MANUAL · USER MANUAL · USER MANUAL · USER MANUAL · USER MANUAL Backrest with backrest upholstery Push handle Quick release split pin Removable armrest Rear wheel with handrim Seat pan Folding mechanism Wheelchair frame Wheel lock Anti-tippers Axle socket – centre of gravity adjustment Footrest XXL-Rehab Minimaxx - Folding Wheelchair Caster 9 USER MANUAL · USER MANUAL · USER MANUAL · USER MANUAL · USER MANUAL · USER MANUAL · SAFETY NOTES WARNINGS During your first use of the wheelchair, perform a number of exercises – together with your therapist or other health professional – in order to train your ability to safely reach, lean forward and transfer in or out of the wheelchair and become familiar with its safety limits. DO NOT ATTEMPT to reach objects if you have to move forward in the seat. DO NOT ATTEMPT to pick up objects from the floor if you have to reach down between your knees. DO NOT ATTEMPT to reach for an object behind the wheelchair by leaning backwards over the backrest. DO NOT ATTEMPT to shift your weight / sitting position in the direction XXL-Rehab Minimaxx - Folding Wheelchair of reach, as this COULD cause the wheelchair to tip over. NEVER USE an escalator to move the wheelchair between floors. DO NOT ATTEMPT to stop a moving wheelchair with the wheel locks. ALWAYS ENGAGE THE LOCKS on both wheels when transferring to or from the wheelchair. DO NOT ATTEMPT to negotiate ramps or slopes steeper than 9°. DO NOT ATTEMPT to negotiate ramps or slopes covered with ice, oil, or water. DO NOT ATTEMPT to drive over obstacles, very uneven surfaces, etc. This could cause the wheelchair to tip over, potentially causing personal injury. NEVER USE unauthorised parts, accessories, etc., as this will void all warranties. NEVER LIFT the wheelchair by any detachable parts (armrests, wheels, backrest, leg supports, etc.). NEVER REMOVE the anti-tippers. DO NOT USE the footrests as a platform when getting in or out of the wheelchair. DO NOT ATTEMPT to tilt the wheelchair without assistance. NEVER STAND on the frame of the wheelchair. 10 Weight training The XXL-Rehab Minimaxx wheelchair is not designed or tested for use during weight training. If the XXL-Rehab Minimaxx wheelchair is used during weight training activities, XXL-Rehab shall not be liable for any personal injury whatsoever, and all warranties will immediately be voided. Safe operation of the XXL-Rehab Minimaxx wheelchair Safe operation of the XXL-Rehab Minimaxx wheelchair will require both you and your aide to be familiar with the instructions in this manual. Together with your therapist, analyse the techniques required to get in and out of the wheelchair, reach for objects, etc. This will familiarise you with the “DOs” and “DON’Ts” of using the wheelchair. It is important to practice all transfer techniques until you feel completely safe, which will enable you to negotiate the most common architectural obstacles. Stability and balance To keep the wheelchair as stable as possible at all times, always maintain proper balance. The wheelchair is designed to stay upright during normal everyday activities, provided you do not move beyond the centre of gravity Almost all activities in a wheelchair will cause the centre of gravity to shift. Many activities will require you to reach, lean or transfer in and out of the wheelchair. These movements will cause a change to the normal balance, centre of gravity and weight distribution of the wheelchair. To establish your particular safety limits, practice all leaning, reaching and transfer activities with the assistance of a qualified aide/therapist before attempting active use of the wheelchair. DO NOT LEAN further forward than the chair’s armrests. Make sure that the casters are pointing forward when you lean forward. This can be ensured by first moving the chair slightly forward and then slightly backward in a straight line. WARNING: Never tilt the wheelchair backwards without assistance. Always use the anti-tippers! · USER MANUAL · USER MANUAL · USER MANUAL · USER MANUAL · USER MANUAL · USER MANUAL UNPACKING CHECKLIST USER CUSTOMISATION On receiving and opening the box, inspect the contents for evident transport damage. If any damage is found, contact the carrier. The following instructions explain how to adjust the XXL-Rehab Minimaxx wheelchair. After making adjustments, it is very important to check that all parts are properly secured. Assembly 1. Remove all the parts from the box and put them on the floor. 2. Install the rear wheels by pressing the little stud on the axle on the outside of the wheel, and push the axle into the socket on the wheelchair frame. WARNING – Check that the little stud has been fully released, and that the two locking pins at the opposite end are fully out, before using the wheelchair. - The locking pins MUST protrude on the inside of the axle socket, as otherwise the wheel is not properly secured. - Tilt the wheelchair to clear the rear wheels off the ground, and pull on the wheels to ensure that they are securely fitted. - Always keep the stud and locking pins free from dirt. 3. Insert the two anti-tippers on the back of the wheelchair in a hole which matches the location of the rear wheels. Refer to the section on Anti-tippers. 4. Insert the armrests in their sockets by activating the Quick-release button on the metal split pin in the hole on either side of the backrest. Make sure that the guide spindle at the front underneath the armrest is inserted in the corresponding hole on the wheelchair frame. PLEASE NOTE: Pull up on the armrests to verify that they are securely fitted. 5. Install the leg supports on either side of the wheelchair front. For information on height and width adjustment, please refer to the section Leg supports and footrests. Tools Allen keys: 5 mm (2 pieces), 6 mm, 8 mm Fork wrenches: 10 mm, 13 mm, 20 mm, 30 mm Leg supports and footrests The length of the leg support should be adjusted while you are sitting in the wheelchair. Unscrew the bolt on the back of the leg support tube and pull it out. Move the footrest up or down to the desired height. Reinsert the bolt through the tube and fasten it. The footrest should be at least 6 cm from the ground. The footrest should be adjusted sideways with your foot resting on it. Loosen the thumbscrew beneath the footrest and push the footrest towards the side or towards the centre as required, and then retighten the thumbscrew. NOTE: The lock bolts beneath the foot rests must always be properly mounted in the leg support sockets. The lock bolts must not be tightened on the leg support outside the holes. NOTE: Adjustment of the leg support and footrest is required to prevent excessive pressure on your legs at the front edge of the wheelchair, which could harm you. WARNINGS – DO NOT ATTEMPT TO STAND ON THE FOOTRESTS. If you stand on the footrests, the wheelchair may tip forward, causing a fall accident and potentially resulting in injury. – DO NOT ATTEMPT to lift the chair by grabbing the leg supports. These are designed to be detachable or swing away from the wheelchair. – THE LEG SUPPORT should be swung completely out of the way during transfers in and out of the chair. Backrest upholstery Adjust the upholstery by loosening the straps stretching across the back of the backrest. Loosen the backrest upholstery on the back of the backrest and loosen the straps – especially the lower part. Sit in the wheelchair so close to the backrest that the upper straps support the upper part of your back. Then tighten the straps to provide support also to the lower part of the back. Users with voluminous posteriors will find it beneficial to adjust the chair in this way, as this will ensure effective support of the lumbar region. Push handles The position of the push handles can be adjusted up or down to suit the aide. Unscrew the screws on the backrest tube below the push handles, and remove them. Move the push handle up or down as required and reinsert the screws. Make sure that the screw with the inside thread protrudes completely from the backrest tube. Tighten the screws properly. XXL-Rehab Minimaxx - Folding Wheelchair After opening the box with the XXL-Rehab Minimaxx wheelchair, check that it contains the following standard items: 1 XXL-Rehab Minimaxx wheelchair frame fitted with wheel locks and two casters 2 Two rear wheels with handrims 3 Two anti-tippers 4 Two Quick-release armrests. 11 USER MANUAL · USER MANUAL · USER MANUAL · USER MANUAL · USER MANUAL · USER MANUAL · Wheel lock Engage the wheel lock by pushing the lever forward. The lock is infinitely adjustable. To adjust the lock, loosen the screws on the bracket and push back the lock far enough to ensure that the lock shoe presses 3-5 mm into the tyre when the lock is engaged. Ensure that the screws are tightened properly to keep the bracket in the correct position. Test the wheelchair before use to verify that the locks are working correctly. If a wheel lock becomes worn or damaged, it MUST be replaced immediately NOTE: If you adjust the centre of gravity, the wheel locks must be adjusted as well. NOTE: When transferring in and out of the XXL-Rehab Minimaxx wheelchair, BOTH wheel locks must be engaged. Rear wheels By default, the XXL-Rehab Minimaxx wheelchair is fitted with solid 24” rear wheels. Adjusting the centre of gravity It is possible to adjust the rear wheels’ position in relation to your centre of gravity to make it easier to drive the wheelchair. Remove the rear wheels by loosening the axle on the outside of the wheel and pulling the wheel away from the wheelchair frame. Remove the nut on the inside of the axle socket, and place the axle socket in the desired position on the frame. Move the lock forward or backward accordingly. Retighten the nut on the inside, and install the wheels as instructed in the Assembly section. Finally, adjust the wheel locks as instructed in the Wheel lock section. MAINTENANCE AND CLEANING Cleaning Regular cleaning of all surfaces will preserve the wheelchair’s appearance and extend its service life. All surfaces may be cleaned with a mild soap solution. If required, spray the chair with VIRKON and wipe the fabric according to the instructions for use. NEVER USE ANY solvents. You can also clean the chair by wiping it with spirit. NOTE: washing and soaking the backrest upholstery will reduce the flame retarding effect. Maintenance procedure 1. Check that all nuts and bolts are tight before using the XXL-Rehab Minimaxx wheelchair. Check all parts for wear and damage, and replace parts where required. Check that the wheelchair is properly adjusted to fit the user. 2. Keep the axles free from dirt and fluff to ensure that the mechanism locks correctly and that the wheels can turn freely. 3. Remember to lubricate the axles at least once a month (use a 3-in-1 oil or a similar product). 4. Periodically check the wheels and tyres for cracks and wear, and replace as required. 5. Periodically check that the handrims are securely attached to the wheel. GENERAL NOTES In case of doubt, you can always contact the supplier. WARNING – Adjusting the center of gravity should only be undertaken by trained caregivers. – When the center of gravity is changed, THE ANTI-TIPPERS MUST BE ADJUSTED TO PREVENT THE WHEELCHAIR FROM TIPPING BACKWARD. – If the anti-tippers are set incorrectly, it could potentially cause personal injury. XXL-Rehab Minimaxx - Folding Wheelchair Adjusting the anti-tippers The position of the anti-tippers can be adjusted in relation to your centre of gravity to prevent any potential risk of the wheelchair tipping backwards. Adjust the position of the anti-tippers only when the wheelchair is empty. Unscrew the screws on the wheelchair frame above the anti-tippers and remove them. Move the anti-tipper up or down as required and reinsert the screws. Make sure that the screw with the inside thread protrudes completely from the backrest tube. Retighten the screws. Attempt to tip the wheelchair backwards to check that the anti-tippers prevent the wheelchair from tipping over backwards. 12 In certain cases the XXL-Rehab Minimaxx wheelchair must be inspected by the supplier. This applies especially in case of: - cracks or damage to the frame. - cracks or damage to a welding. Always contact the supplier before returning a XXL-Rehab Minimaxx wheelchair or any part of it. When returning the wheelchair, it is important to pack it in a box which is secured to the pallet. XXL-Rehab does not accept liability for transport damage to items returned to XXL-Rehab. · USER MANUAL · USER MANUAL · USER MANUAL · USER MANUAL · USER MANUAL · USER MANUAL CHECK-LISTE FOR SIKKERHEDSINSPEKTION Item Initially General The wheelchair rolls straight X Wheel locks Do not interfere with tires rolling Pivot points are free of wear and slack Wheel locks are firm but easy to engage X X X Backrest upholstery Check for tears or damaged straps Ensure backrest upholstery is properly fastened X X Rear wheels Axles lock correctly When the wheel spins freely in the air, no bending or side movement is visible. Front casters Check for resistance by spinning the wheel; the wheel should stop gradually The caster rims should be clean and free from oil Note: Wheels and tyres should be periodically checked for cracks and wear and should be replaced when required. Inspect/adjust weekly X X X X Tyres Check for wear Note: Wheels and tyres should be periodically checked for cracks and wear and should be replaced when required. Cleaning Clean armrests and backrest X WARRANTY MANUFACTURER The XXL-Rehab Minimaxx is covered by one year warranty from the invoice date for materials and workmanship. The wheelchair frame proper (lower frame) is covered by a five-year warranty from the invoice date. XXL-Rehab Fuglebækvej 1D DK-2770 Kastrup Denmark Tel.: +45 70 25 25 22 Fax: +45 70 25 25 44 www.xxl-rehab.com Products which have been used for purposes other than the intended use; or which have been subject to negligence, abuse, improper storage or handling, improper operation, unauthorized modifications or damages beyond normal wear and tear as determined by XXL-Rehab, are not covered by this warranty. Inspect/adjust monthly Inspect/adjust periodically X X X X X X X X X X X X X X X X X If weight capacity is exceeded, the warranty will be void. XXL-Rehab Minimaxx has been manufactured and tested in accordance with international standard DS/EN ISO 12183:2009. 07/2014/JP XXL-Rehab Minimaxx - Folding Wheelchair Any unauthorized repairs to product / part, as well as tampering with any components, will void the warranty. 13 Strongly engineered and functionally designed exclusively for bariatric users! 14 XXL-Rehab Minimaxx XXL-Rehab Minimaxx Push Motor XXL-Rehab Manual Wheelchair - The Eclipse XXL-Rehab Manual Wheelchair - The Eclipse Tilt XXL-Rehab HD Electric Wheelchair XXL-Rehab Wheelchair Cushions XXL-Rehab Shower Bench XXL-Rehab Bedside commode XXL-Rehab Shower Commode XXL-Rehab Shower Commode Wheeler XXL-Rehab Shower Commode Rise N Recline XXL-Rehab Shower Commode Tilt XXL-Rehab Barton Transferstol XXL-Rehab Patient/Dinner chair XXL-Rehab Rollator King XXL-Rehab Rollator Support XXL-Rehab Stand Tall XXL-Rehab Canes XXL-Rehab Multifunktional Scale XXL-Rehab Lift and Slings XXL-Rehab 400 bariatric hospital bed XXL-Rehab Home Care Bed XXL-Rehab Floor raiser XXL-Rehab Comfort Foam Mattress XXL-Rehab Low Air Loss mattress XXL-Rehab Alternating mattress XXL-Rehab Bariatric walking frame XXL-Rehab Bariatric suit 15 mauryathome.dk 07-2014 XXL-Rehab Minimaxx – Manuel kørestol / XXL-Rehab Minimaxx - Folding Wheelchair BRUGSANVISNING · USER MANUAL XXL-Rehab · Fuglebækvej 1D · DK-2770 Kastrup · Denmark Telephone: +45 7025 2522 · Fax: +45 7025 2544 [email protected] · www.xxl-rehab.com