1
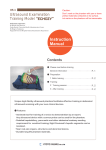
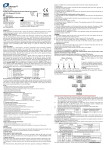
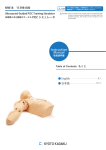
MW12
EARⅡ Examination Simulator
Caution Do not mark on the model and other components
with pen nor leave printed materials contacted
on surface.
Ink marks on the models cannot be removed.
Instruction
Manual
Table of Contents
●
Introduction
Manufacturer’s Note
●
P. 1
Before You Start
DOs and DON’Ts
P. 2
Set Includes
P. 3
●
Preparation
P. 4
●
Training Sessions
P. 5
●
Training Sessions
After Training
P. 6
Introduction
Manufacturer’s Note
Manufacturer’s Note
Please read the instruction carefully before use.
●
Before Use
MW12 EAR Examination II has been developed for the training of medical professionals only.
Any other use, or any use not in accordance with the enclosed instructions, is strongly discouraged.
The manufacturer assume no responsibility for any accident or damage resulting from such use.
Should you have any questions on this simulator, please feel free to contact our distributor in your
area or KYOTO KAGAKU at any time. (Our contact address is on the back cover of this manual)
●
Product Features
The New Ear examination Simulator II is designed to acquire safe and reliable skills in the
examination of the external acoustic meatus and tympanic membrane with a direct otoscope.
The model warns against painful insertion.
Skills to be learned includes: safe use of an otoscope, differentiation of typical ear problems
and earwax/foreign body removal.
-Warning against painful insertion with or without beep
- self-learning mode (with a beep)
- instructor mode (silent)
-Major 9 cases are prepared (includes 1 normal)
-Quick switching between cases
-2 sizes of ear canals (normal and stenosis)
-Anatomically correct soft ear model that allows training in straightening the auditory canal
by pulling the auricle
-Training with a real otoscope
-The manikin neck can be tilted
-Training is possible with both left and right ears
1
Before You Start
DOs and DON Ts
DOs and DON’Ts
DOs
DON’Ts
Handle With Care
-Do not insert an otoscope too deep, as this may
cause damage to the eardrum.
-The materials for the models are a special
composition of soft resin. Please handle
with the utmost care.
-Do not rotate the switch dial too quickly, as this may
cause mechanical trouble in the system.
-Use a specular of recommended size: Size 4.
-Do not ever wipe the simulator with thinner or
organic solvent.
-Ensure the direction of the batteries.
-Store the simulator in the case at room
temperature. Keep away from heat, moisture,
and direct sunlight.
-Do not mark on the simulator models with
pen or leave any printed materials in contacted
with the surface. Ink marks on the models will
not be removable.
-For cleaning, wipe the mannequin with a
soft cloth which has been moistened with
water or alcohol. After drying the manikin,
please dust the head with baby powder.
2
Before You Start
Set includes
Set Includes
Before your first use, ensure all components listed below are included in the unit.
Set includes
1 manikin head and shoulder
4 types of ear units – 1 pair each
-Exam Ear (normal)
-Exam Ear (stenosis)
-FB Ear (normal)
-FB Ear (stenosis)
1 set of foreign body removal kit
-simulated ear wax, small toy, small
sponge fragments and a spoon
2 AA batteries
A
BB
Specifications
manikin size: approx. 42×21×38cm, 1.5kg
*Type of the ear is marked on the rear surface of each ear lobe.
Type
-Exam Ear (normal)
-Exam Ear (stenosis)
-FB Ear (normal)
-FB Ear (stenosis)
Mark
L/R 1
L/R 2
L/R 3
L/R 4
Replacement Parts
11391-010 accessories for MW12
4 types of ear units – 1 pair each
-Exam Ear (normal)
-Exam Ear (stenosis)
-FB Ear (normal)
-FB Ear (stenosis)
1 set of foreign body removal kit
-simulated ear wax, small toy, small sponge fragments
and a spoon
3
Preparation
Preparation
Setting of the ears
Choose a pair of external ears that fits the
intended training scenario.
Insert the ear into the opening as shown in the
photo below.
Ensure to orient the ear so that the sliding guides
on the ear unit and the wall of the opening
match together.
To detach the ear, please grasp gently around
the base of the pinna and pull straightout,
perpendicularly to the head.
Please
note
Please note: Do not mix-up the different types of ears for different trainings:
Examination with an otoscope: Use "Exam Ear"s (mark 1 or 2).
Foreign body removal: Use "FB Ear"s (mark 3 or 4).
Setting of the batteries
The battery box is at the back of the shoulder unit.
Push the tab at the right side of the lid to the left and then
pull it to open the lid.
Set two size AA batteries in the box. Ensure the direction of
the batteries. The position of positive or negative electrodes
is indicated in the box.
After setting the batteries, replace the lid. Put the two small
tabs to the indents at the left side of the battery box then
push the lid to close.
Turn on the power switch when training session begins.
power switch
Please note: Use size AA batteries and ensure direction of them.
4
Training Sessions
Training Sessions
Set the case for training
The cases can be switched over by the switch dial.
The number appears in the window indicates the
chosen case. Refer the table on the quick manual.
To practice foreign body removal, set the dial to
"FB" and set the "FB Ear" type of external ears.
Otherwise, you may damage the ear drum images.
Warning against painful insertion
The tip of the instrument is localized by sensors
and harmful insertion is warned by a beep
(self-learning mode), or lamps (instructor mode).
-When the tip of the instrument passes bony
part of the ear canal:
yellow warning lamp and intermittent beep
-When the tip of the instrument reaches eardrum:
red warning lamp and a continuous beep
*To stop the continuous beep, turn off the power
switch.
Set the training mode
Training mode can be set by the mode change
switch on the back of the shoulder part.
1. Self-learning mode: warning with sounds
2. Instructor/examination mode: warning with
lamps only
Power swich
Mode change swich
Trouble shooting:
If the tip of the instrument is clearly in the "warning" zone, and no warning indicator works, 1)
ensure that the power switch is on, then if necessary 2) replace the batteries with new ones.
5
Training Sessions
After the training
Training Sessions
Flexible neck and ear
The neck can be tilted to simulate positioning
of patient's head.
The soft and supple ear allows training in
straightening the canal by pulling the ear lobe.
Be sure to use "FB" type external ears.
Put the included ear wax, small toy or a sponge
in the ear canal by a small spoon.
Then set the ears to the head.
Ensure to switch the case switching dial
to "FB".
After Training
After use:
Remove all the simulated ear wax, small toys and sponges from the FB Ear.
Remove the batteries from the box and store them separately.
For cleaning, wipe the surface of the manikin and ear models with soft cloth moistened with
water or alcohol. Dry the manikin naturally and dust the surface with talcum powder.
Do not expose the manikin and accessories to high temperature and high humidity.
6
Caution
Don’t mark on the model and other components with pen or leave printed
materials contacted on their surface.
Ink marks on the models will be irremovable.
For inquiries and service, please contact your distributor or KYOTO KAGAKU CO., LTD.
■ Nine sets of cases and setting number
■ 9 セットの症例と設定番号
1.normal
2.serious otitis
media(SOM)
3.mucoid otitis
media(MOM)
4.chronic otitis media 5.acute suppurative
with perforation
otitis media(AOM)
1. 正常鼓膜
2. 中耳炎(漿液性)
3. 中耳炎(粘液性)
4. 中耳炎(慢性穿孔性)
6.cholesteatoma
7.tympanosclerosis
8.traumatic perforations 9.cerumen block
6. 真珠腫
7. 鼓室硬化症
8. 外傷性鼓膜穿孔
URL http://www.kyotokagaku.com
●
5. 中耳炎(急性化膿性)
9. 耳垢閉塞
e-mail [email protected]
●
■ Main Office and Factory
■ LA Office ( for North and South American customers )
15 Kitanekoya-cho Fushimi-ku Kyoto 612-8388, Japan
Telephone : 81-75-605-2510
Facsimile : 81-75-605-2519
3109 Lomita Boulevard, Torrance, CA 90505 ,USA
Telephone : 1-310-325-8860
Facsimile : 1-310-325-8867
URL http://www.kyotokagaku.com
●
■本社・工場
e-mail [email protected]
〒612 - 8388 京都市伏見区北寝小屋町15番地
TEL:075 - 605 - 2510(直通)
FAX:075 - 605 - 2519 ●
■東京支店
〒113-0033 東京都文京区本郷三丁目26番6号
NREG本郷三丁目ビル2階
TEL:03-3817-8071(直通)
FAX:03-3817-8075 The contents of the instruction manual are subject to change without prior notice.
No part of this instruction manual may be reproduced or transmitted in any form without permission from the manufacturer.
Please contact manufacturer for extra copies of this manual which may contain important updates and revisions.
Please contact manufacturer with any discrepancies in this manual or product feedback. Your cooperation is greatly appreciated.
2013.11