1
For Rabbit Semiconductor Microprocessors
Integrated C Development System
User’s Manual
019-0071 • 020813 - R
SE and Premier Editions
This manual (or an even more up-to-date revision) is available for free
download at the Z-World website: www.zworld.com
ii
Table of Contents
1
Branching ........................................32
4.19 Function Chaining..............................34
4.20 Global Initialization ...........................35
4.21 Libraries .............................................36
4.22 Headers ..............................................37
4.23 Modules .............................................37
The Key...........................................37
The Header......................................38
The Body.........................................38
Function Description Headers.........40
4.24 Support Files ......................................40
Installing Dynamic C ................................1
1.1 Requirements ........................................1
1.2 Assumptions .........................................1
2
Introduction to Dynamic C .....................3
2.1 The Nature of Dynamic C ....................3
Speed ................................................3
2.2 Dynamic C Enhancements and
Differences............................................4
2.3 Dynamic C Differences Between Rabbit
and Z180 ...............................................6
3
Quick Tutorial .............................................7
3.1 Run DEMO1.C .....................................7
Single Stepping .................................9
Watch Expression..............................9
Breakpoint.........................................9
Editing the Program ..........................9
3.2 Run DEMO2.C ...................................10
Watching Variables Dynamically ....10
3.3 Run DEMO3.C ...................................10
Cooperative Multitasking................10
3.4 Summary of Features..........................12
4
Language ....................................................13
4.1 C Language Elements .........................13
4.2 Punctuation and Tokens......................14
4.3 Data.....................................................15
Data Type Limits.............................15
4.4 Names .................................................16
4.5 Macros ................................................17
Restrictions......................................19
4.6 Numbers..............................................19
4.7 Strings and Character Data .................20
String Concatenation.......................20
Character Constants ........................21
4.8 Statements...........................................21
4.9 Declarations ........................................22
4.10 Functions............................................22
4.11 Prototypes...........................................23
4.12 Type Definitions.................................23
4.13 Aggregate Data Types........................25
Array ..............................................25
Structure ..........................................25
Union ..............................................26
Composites......................................26
4.14 Storage Classes ..................................26
4.15 Pointers ..............................................27
4.16 Pointers to Functions, Indirect Calls..28
4.17 Argument Passing ..............................29
4.18 Program Flow ....................................30
Loops ..............................................30
Continue and Break.........................31
Dynamic C User’s Manual
5
Multitasking with Dynamic C..............43
5.1 Cooperative Multitasking ...................43
5.2 A Real-Time Problem.........................45
Solving the Real-Time Problem
with a State Machine ...................45
5.3 Costatements.......................................46
Solving the Real-Time Problem
with Costatements .......................46
Costatement Syntax.........................47
Control Statements ..........................48
5.4 Advanced Costatement Topics ...........48
The CoData Structure......................48
CoData Fields..................................49
Pointer to CoData Structure ............50
Functions for Use With Named
Costatements ...............................50
Firsttime Functions .........................51
Shared Global Variables..................51
5.5 Cofunctions.........................................52
Syntax..............................................52
Calling Restrictions.........................53
CoData Structure.............................53
Firsttime Functions .........................53
Types of Cofunctions ......................54
Types of Cofunction Calls...............55
Special Code Blocks .......................56
Solving the Real-Time Problem
with Cofunctions .........................57
5.6 Patterns of Cooperative Multitasking .57
5.7 Timing Considerations........................58
waitfor Accuracy Limits .................59
5.8 Overview of Preemptive Multitasking59
5.9 Slice Statements..................................59
Syntax..............................................59
Usage ..............................................60
Restrictions......................................60
Slice Data Structure ........................61
Slice Internals..................................61
5.10 Summary............................................63
iii
6
The Virtual Driver ................................... 65
6.1
6.2
6.3
6.4
Default Operation............................... 65
Calling _GLOBAL_INIT() ................ 65
Global Timer Variables ...................... 66
Watchdog Timers ............................... 67
Hardware Watchdog ....................... 67
Virtual Watchdogs .......................... 67
6.5 Preemptive Multitasking Drivers ....... 67
7
The Slave Port Driver ............................ 69
7.1 Slave Port Driver Protocol ................. 69
Overview ........................................ 69
Registers on the Slave .................... 69
Polling and Interrupts ..................... 71
Communication Channels .............. 71
7.2 Functions ............................................ 71
7.3 Examples ............................................ 74
Status Handler ................................ 74
Serial Port Handler ......................... 75
Byte Stream Handler ...................... 85
8
Run-Time Errors ...................................... 91
8.1 Run-Time Error Handling .................. 91
Error Code Ranges ......................... 91
Fatal Error Codes............................ 92
8.2 User-Defined Error Handler............... 93
Replacing the Default Handler ....... 93
8.3 Run-Time Error Logging ................... 94
Error Log Buffer............................. 94
Initialization and Defaults .............. 95
Configuration Macros..................... 95
Error Logging Functions ................ 96
Examples of Error Log Use............ 96
9
Memory Management ............................ 97
9.1 Memory Map...................................... 97
Memory Mapping Control.............. 98
9.2 Extended Memory Functions ............. 98
Code Placement in Memory ........... 98
10 The Flash File System ........................... 99
10.1 General Usage ................................... 99
Maximum File Size ...................... 100
Using SRAM ................................ 100
Wear Leveling............................... 100
Low-Level Implementation .......... 100
Multitasking and the File System . 100
10.2 Application Requirements............... 101
FS1 Requirements ........................ 101
FS1 and Use of the First Flash ..... 101
FS2 Requirements ........................ 102
FS2 Configuration Macros ........... 103
FS2 and Use of the First Flash ..... 104
10.3 Functions ......................................... 105
FS1 API ........................................ 105
FS2 API ........................................ 106
iv
10.4 Setting up and Partitioning the File
System.............................................. 107
Initial Formatting.......................... 107
Logical Extents (LX).................... 108
Logical Sector Size....................... 109
10.5 File Identifiers ................................. 110
File Numbers ................................ 110
File Names.................................... 110
10.6 Skeleton Program Using FS1 .......... 112
10.7 Skeleton Program Using FS2 .......... 113
11 Using Assembly Language ................ 115
11.1 Mixing Assembly and C.................. 115
Embedded Assembly Syntax........ 115
Embedded C Syntax ..................... 116
Setting Breakpoints in Assembly . 116
11.2 Assembler and Preprocessor ........... 117
Comments..................................... 117
Defining Constants ....................... 117
Multiline Macros .......................... 118
Labels ........................................... 119
Special Symbols ........................... 119
C Variables ................................... 119
11.3 Stand-Alone Assembly Code .......... 120
Stand-Alone Assembly Code in
Extended Memory..................... 121
Example of Stand-Alone Assembly
Code .......................................... 121
11.4 Embedded Assembly Code ............. 122
The Stack Frame........................... 122
Embedded Assembly Example..... 124
Local Variable Access .................. 126
11.5 C Calling Assembly......................... 127
Passing Parameters ....................... 127
Location of Return Results........... 127
11.6 Assembly Calling C......................... 129
11.7 Interrupt Routines in Assembly....... 130
Steps Followed by an ISR ............ 130
Modifying Interrupt Vectors ......... 131
11.8 Common Problems .......................... 136
12 Keywords ................................................. 137
abandon ........................................ 137
abort.............................................. 137
align .............................................. 138
always_on ..................................... 138
anymem ........................................ 138
asm................................................ 139
auto ............................................... 139
bbram............................................ 139
break ............................................. 139
c .................................................... 140
case ............................................... 140
char ............................................... 140
const.............................................. 141
Dynamic C User’s Manual
continue.........................................142
costate............................................142
debug .............................................142
default............................................143
do...................................................143
else ................................................143
enum..............................................144
extern.............................................144
firsttime .........................................145
float ...............................................145
for ..................................................145
goto................................................146
if ....................................................146
init_on ...........................................147
int ..................................................147
interrupt.........................................147
interrupt_vector .............................148
long................................................148
main...............................................149
nodebug .........................................149
norst...............................................149
nouseix ..........................................149
NULL ............................................149
protected........................................150
return .............................................150
root ................................................151
segchain.........................................151
shared ............................................151
short...............................................152
size ................................................152
sizeof .............................................152
speed..............................................152
static ..............................................153
struct..............................................153
switch ............................................154
typedef...........................................154
union..............................................155
unsigned ........................................155
useix ..............................................155
waitfor ...........................................155
waitfordone
(wfd).......................................156
while..............................................156
xdata ..............................................157
xmem.............................................157
xstring............................................157
yield...............................................158
12.1 Compiler Directives.........................159
#asm ..............................................159
#class .............................................159
#debug
#nodebug................................159
#define...........................................160
#endasm ........................................160
Dynamic C User’s Manual
#fatal..............................................160
#GLOBAL_INIT ..........................160
#error.............................................161
#funcchain.....................................161
#if
#elif
#else
#endif .....................................161
#ifdef .............................................162
#ifndef ...........................................162
#interleave
#nointerleave..........................162
#KILL............................................162
#makechain ...................................162
#memmap......................................162
#precompile...................................163
#undef............................................163
#use ...............................................163
#useix
#nouseix .................................163
#warns ...........................................164
#warnt............................................164
#ximport ........................................164
13 Operators ..................................................165
13.1 Arithmetic Operators .......................166
+ ....................................................166
–.....................................................166
*.....................................................167
/......................................................167
++ ..................................................168
––...................................................168
% ...................................................168
13.2 Assignment Operators......................169
= ....................................................169
+= ..................................................169
-= ...................................................169
*= ..................................................169
/= ...................................................169
%= .................................................169
<<=................................................169
>>=................................................169
&= .................................................170
^= ..................................................170
|=....................................................170
13.3 Bitwise Operators ............................170
<< ..................................................170
>> ..................................................170
&....................................................170
^.....................................................171
|......................................................171
~ ....................................................171
13.4 Relational Operators ........................171
< ....................................................171
v
<=.................................................. 171
>.................................................... 172
>=.................................................. 172
13.5 Equality Operators........................... 172
==.................................................. 172
!= .................................................. 172
13.6 Logical Operators............................ 173
&&................................................ 173
|| .................................................... 173
!..................................................... 173
13.7 Postfix Expressions ......................... 173
( ) .................................................. 173
[ ] .................................................. 173
. (dot) ............................................ 174
-> .................................................. 174
13.8 Reference/Dereference Operators ... 174
& ................................................... 174
* .................................................... 175
13.9 Conditional Operators ..................... 175
? : .................................................. 175
13.10 Other Operators ............................. 176
(type)............................................. 176
sizeof............................................. 176
, ..................................................... 177
14 Graphical User Interface ..................... 179
14.1 Editing ............................................. 179
14.2 Menus .............................................. 180
File Menu...................................... 180
Edit Menu ..................................... 182
Compile Menu .............................. 185
Run Menu ..................................... 186
Inspect Menu ................................ 189
Options Menu ............................... 192
Editor ........................................ 192
Compiler ................................... 193
Debugger .................................. 197
Display...................................... 198
Communications....................... 199
Define Target Configuration .... 201
Other Menu Choices................. 202
Window Menu .............................. 202
Help Menu .................................... 205
15 Command Line Interface ................... 209
15.1 Default States .................................. 209
15.2 User Input........................................ 209
15.3 Saving Output to a File.................... 209
15.4 Command Line Switches ................ 210
Switches Without Parameters ....... 210
Switches Requiring a Parameter... 219
15.5 Examples ......................................... 226
Example 1..................................... 226
Example 2..................................... 226
Example 3..................................... 226
vi
16 Project Files ............................................ 227
16.1 Project File Names .......................... 227
Active Project ............................... 227
16.2 Updating a Project File.................... 228
16.3 Menu Selections .............................. 228
16.4 Command Line Usage..................... 229
17 Hints and Tips ........................................ 231
17.1 Efficiency ........................................ 231
Nodebug Keyword ....................... 231
Static Variables ............................. 232
17.2 Run-time Storage of Data................ 232
User Block .................................... 233
Flash File System ......................... 233
WriteFlash2 .................................. 233
Battery Backed RAM ................... 233
17.3 Root Memory Reduction Tips......... 234
Increasing Root Code Space......... 234
Increasing Root Data Space ......... 236
18 µC/OS-II .................................................. 239
18.1 Changes to µC/OS-II....................... 239
Ticks per Second .......................... 239
Task Creation................................ 240
Restrictions ................................... 241
18.2 Tasking Aware Interrupt Service
Routines (TA-ISR) ........................... 241
Interrupt Priority Levels ............... 241
Possible ISR Scenarios ................. 242
General Layout of a TA-ISR ........ 243
18.3 Library Reentrancy.......................... 247
18.4 How to Get a µC/OS-II Application
Running............................................ 248
Default Configuration................... 248
Custom Configuration .................. 249
Examples ...................................... 250
18.5 Compatibility with TCP/IP ............. 253
Socket Locks ................................ 253
18.6 Debugging Tips ............................... 254
A Macros and Global Variables............. 257
Compiler-Defined Macros ..................
Global Variables .................................
Exception Types..................................
Rabbit 2000/3000 Internal registers ...
257
259
260
260
B Map File Generation ............................ 261
Grammar ............................................. 261
C Utility Programs .................................... 263
Font and Bitmap Converter Utility ..... 263
Library File Encryption Utility........... 263
Rabbit Field Utility ............................. 264
Index.......................................................... 271
Dynamic C User’s Manual
1. Installing Dynamic C
Insert the installation disk or CD in the appropriate disk drive on your PC. The installation should
begin automatically. If it doesn’t, issue the Windows “Run...” command and type the following
command.
‹disk›:\SETUP
The installation program will begin and guide you through the installation process.
1.1 Requirements
Your IBM-compatible PC should have at least one free COM port and be running one of the following.
•
•
•
•
•
Windows 95
Windows 98
Windows 2000
Windows Me
Windows NT
1.2 Assumptions
It is assumed that the reader has a working knowledge of:
• the basics of operating a software program and editing files under Windows on a PC.
• programming in a high-level language.
• assembly language and architecture for controllers.
For a full treatment of C, refer to one or both of the following texts:
• The C Programming Language by Kernighan and Ritchie (published by Prentice-Hall).
• C: A Reference Manual by Harbison and Steel (published by Prentice-Hall).
Chapter 1: Installing Dynamic C
1
2
Dynamic C User’s Manual
2. Introduction to Dynamic C
Dynamic C is an integrated development system for writing embedded software. It is designed for
use with Z-World controllers and other controllers based on the Rabbit microprocessor. The Rabbit 2000 and the Rabbit 3000 are high-performance 8-bit microprocessors that can handle C language applications of approximately 50,000 C+ statements or 1 MB.
2.1 The Nature of Dynamic C
Dynamic C integrates the following development functions:
•
•
•
•
•
Editing
Compiling
Linking
Loading
Debugging
into one program. In fact, compiling, linking and loading are one function. Dynamic C has an
easy-to-use built-in text editor. Programs can be executed and debugged interactively at the
source-code or machine-code level. Pull-down menus and keyboard shortcuts for most commands
make Dynamic C easy to use.
Dynamic C also supports assembly language programming. It is not necessary to leave C or the
development system to write assembly language code. C and assembly language may be mixed
together.
Debugging under Dynamic C includes the ability to use printf commands, watch expressions,
breakpoints and other advanced debugging features. Watch expressions can be used to compute C
expressions involving the target’s program variables or functions. Watch expressions can be evaluated while stopped at a breakpoint or while the target is running its program.
Dynamic C provides extensions to the C language (such as shared and protected variables, costatements and cofunctions) that support real-world embedded system development. Dynamic C
supports cooperative and preemptive multi-tasking.
Dynamic C comes with many function libraries, all in source code. These libraries support realtime programming, machine level I/O, and provide standard string and math functions.
2.1.1 Speed
Dynamic C compiles directly to memory. Functions and libraries are compiled and linked and
downloaded on-the-fly. On a fast PC, Dynamic C might load 30,000 bytes of code in 5 seconds at
a baud rate of 115,200 bps.
Chapter 2: Introduction to Dynamic C
3
2.2 Dynamic C Enhancements and Differences
Dynamic C differs from a traditional C programming system running on a PC or under UNIX. The
reason? To be better help customers write the most reliable embedded control software possible. It
is not possible to use standard C in an embedded environment without making adaptations. Standard C makes many assumptions that do not apply to embedded systems. For example, standard C
implicitly assumes that an operating system is present and that a program starts with a clean slate,
whereas embedded systems may have battery-backed memory and may retain data through power
cycles. Z-World has extended the C language in a number of areas.
2.2.1 Dynamic C Enhancements
Many enhancements have been added to Dynamic C. Some of these are listed below.
• Function chaining, a concept unique to Dynamic C, allows special segments of code to be
embedded within one or more functions. When a named function chain executes, all the segments belonging to that chain execute. Function chains allow software to perform initialization, data recovery, or other kinds of tasks on request.
• Costatements allow concurrent parallel processes to be simulated in a single program.
• Cofunctions allow cooperative processes to be simulated in a single program.
• Slice statements allow preemptive processes in a single program.
• The interrupt keyword in Dynamic C allows the programmer to write interrupt service routines
in C.
• Dynamic C supports embedded assembly code and stand-alone assembly code.
• Dynamic C has shared and protected keywords that help protect data shared between different
contexts or stored in battery-backed memory.
• Dynamic C has a set of features that allow the programmer to make fullest use of extended
memory. Dynamic C supports the 1 MB address space of the microprocessor. The address space
is segmented by a memory management unit (MMU). Normally, Dynamic C takes care of
memory management, but there are instances where the programmer will want to take control
of it. Dynamic C has keywords and directives to help put code and data in the proper place. The
keyword root selects root memory (addresses within the 64 KB physical address space). The
keyword xmem selects extended memory, which means anywhere in the 1024 KB or 1 MB
code space. root and xmem are semantically meaningful in function prototypes and more efficient code is generated when they are used. Their use must match between the prototype and
the function definition. The directive #memmap allows further control. See “Memory Management” on page 97, for further details on memory.
4
Dynamic C User’s Manual
2.2.2 Dynamic C Differences
The main differences in Dynamic C are summarized here and discussed in detail in chapters “Language” on page 13 and “Keywords” on page 137.
• If a variable is explicitly initialized in a declaration (e.g., int x = 0;), it is stored in Flash
Memory (EEPROM) and cannot be changed by an assignment statement. Starting with
Dynamic C 7.x such declaration will generate a warning that may be suppressed using the
const keyword: const int x = 0; To initialize static variables in Static RAM (SRAM)
use #GLOBAL_INIT sections. Note that other C compilers will automatically initialize all
static variables to zero that are not explicitly initialized before entering the main function.
Dynamic C programs do not do this because in an embedded system you may wish to preserve
the data in battery-backed RAM on reset
• The default storage class is static, not auto. This avoids numerous bugs encountered in
embedded systems due to the use of auto variables. Starting with Dynamic C 7.x, the default
class can changed to auto by the compiler directive #class auto.
• The numerous include files found in typical C programs are not used because Dynamic C has a
library system that automatically provides function prototypes and similar header information
to the compiler before the user’s program is compiled. This is done via the #use directive.
This is an important topic for users who are writing their own libraries. Those users should refer
to the Modules section of the language chapter. It is important to note that the #use directive is
a replacement for the #include directive, and the #include directive is not supported.
• When declaring pointers to functions, arguments should not be used in the declaration. Arguments may be used when calling functions indirectly via pointer, but the compiler will not
check the argument list in the call for correctness.
• Bit fields are not supported.
• Separate compilation of different parts of the program is not supported or needed.
• There are minor differences involving extern and register keywords.
Chapter 2: Introduction to Dynamic C
5
2.3 Dynamic C Differences Between Rabbit and Z180
A major difference in the way Dynamic C interacts with a Rabbit-based board compared to a Z180
or 386EX board is that Dynamic C expects no BIOS kernel to be present on the target when it
starts up. Dynamic C stores the BIOS kernel as a C source file. Dynamic C compiles and loads it
to the Rabbit target when it starts. This is accomplished using the Rabbit CPU’s bootstrap mode
and a special programming cable provided in all Rabbit product development kits. This method
has numerous advantages.
• A socketed flash is no longer needed. BIOS updates can be made without a flash-EPROM
burner since Dynamic C can communicate with a target that has a blank flash EPROM. Blank
flash EPROM can be surface-mounted onto boards, reducing manufacturing costs for both ZWorld and other board developers. BIOS updates can then be made available on the Web.
• Advanced users can see and modify the BIOS kernel directly.
• Board Developers can design Dynamic C compatible boards around the Rabbit CPU by simply
following a few simple design guidelines and using a “skeleton” BIOS provided by Z-World.
• A major new feature introduced in Dynamic C 7.x is the ability to program and debug over the
Internet or local Ethernet. This requires the use of a RabbitLink board, available alone or as an
option with Rabbit-based development kits.
6
Dynamic C User’s Manual
3. Quick Tutorial
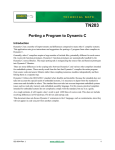
Sample programs are provided in the Dynamic C Samples folder similar to the one shown
below.
The subfolders contain sample programs that illustrate the use of the various Dynamic C libraries. The subfolder named Cofunc, for example, contains sample programs illustrating the use of
COFUNC.LIB. The sample program Pong.c demonstrates output to the STDIO window.
Each sample program has comments that describe its purpose and function.
3.1 Run DEMO1.C
This sample program will be used to illustrate some of the functions of Dynamic C. Open the file
Samples/DEMO1.C. The program will appear in a window, as shown in Figure 1 below (minus
some comments). Use the mouse to place the cursor on the function name printf in the program
and press <Ctrl-H>. This brings up a documentation box for the function printf. You can do this
with all functions in the Dynamic C libraries, including libraries you write yourself.
Chapter 3: Quick Tutorial
7
C programs begin with main
main(){
int i, j;
Initialize a counter
i = 0;
Start an endless loop
while (1) {
Increment counter
i++;
for (j=0; j<20000; j++);
Delay by counting to 20,000
printf("i = %d\n", i);
Print out counter
} // end of while
End of the endless loop
} // end of main
Figure 1. Sample Program DEMO1.C
To run the program DEMO1.C, open it with the File menu, compile it using the Compile menu,
and then run it by selecting Run in the Run menu. The value of the counter should be printed
repeatedly to the STDIO window if everything went well. If this doesn’t work, review the following points:
• The target should be ready, indicated by the message “BIOS successfully compiled...” If you
did not receive this message or you get a communication error, recompile the BIOS by typing
<Ctrl-Y> or select Recompile BIOS from the Compile menu.
• A message reports “No Rabbit Processor Detected” in cases where the wall transformer is not
connected or not plugged in.
• The programming cable must be connected to the controller. (The colored wire on the programming cable is closest to pin 1 on the programming header on the controller). The other end of
the programming cable must be connected to the PC serial port. The COM port specified in the
Dynamic C Options menu must be the same as the one the programming cable is connected to.
• To check if you have the correct serial port, select Compile, then Compile BIOS, or press
<Ctrl-Y>. If the “BIOS successfully compiled …” message does not display, try a different
serial port using the Dynamic C Options menu until you find the serial port you are plugged
into. Don’t change anything in this menu except the COM number. The baud rate should be
115,200 bps and the stop bits should be 1.
8
Dynamic C User’s Manual
3.1.1 Single Stepping
Compile DEMO1.C by clicking the Compile button on the task bar. The program will compile and
the screen will come up with a highlighted character (green) at the first executable statement of the
program. Use the F8 key to single step. Each time the F8 key is pressed, the cursor will advance
one statement. When you get to the statement: for(j=0, j< ... , it becomes impractical to
single step further because you would have to press F8 thousands of times. We will use this statement to illustrate watch expressions.
3.1.2 Watch Expression
Press <Ctrl-W> or choose Add/Del Watch Expression in the Inspect menu. A box will come up.
Type the lower case letter j and click on Add to top, then Close. Now continue single stepping by
pressing F8. Each time you step, the watch expression (j) will be evaluated and printed in the
watch window. Note how the value of j advances when the statement j++ is executed.
3.1.3 Breakpoint
Move the cursor to the start of the statement:
for (j=0; j<20000; j++);
To set a breakpoint on this statement, press F2 or select Breakpoint from the Run menu. A red
highlight appears on the first character of the statement. To get the program running at full speed,
press F9 or select Run on the Run menu. The program will advance until it hits the breakpoint.
The breakpoint will start flashing both red and green colors.
To remove the breakpoint, press F2 or select Toggle Breakpoint on the Run menu. To continue
program execution, press F9 or select Run from the Run menu. Now the counter should be printing out regularly in the STDIO window.
You can set breakpoints while the program is running by positioning the cursor to a statement and
using the F2 key. If the execution thread hits the breakpoint, a breakpoint will take place. You can
toggle the breakpoint with the F2 key and continue execution with the F9 key.
3.1.4 Editing the Program
Click on the Edit box on the task bar. This will put Dynamic C into edit mode so that you can
change the program. Use the Save as choice on the File menu to save the file with a new name so
as not to change the demo program. Save the file as MYTEST.C. Now change the number 20000
in the for (.. statement to 10000. Then use the F9 key to recompile and run the program. The
counter displays twice as quickly as before because you reduced the value in the delay loop.
Chapter 3: Quick Tutorial
9
3.2 Run DEMO2.C
Go back to edit mode and load the program DEMO2.C using the File menu Open command. This
program is the same as the first program, except that a variable k has been added along with a
statement to increment k by the value of i each time around the endless loop. The statement
runwatch();
has been added as well. This is a debugging statement to view variables while the program is running. Use the F9 key to compile and run DEMO2.C.
3.2.1 Watching Variables Dynamically
Press <Ctrl-W> to open the watch window and add the watch expression k to the top of the list of
watch expressions. Now press <Ctrl-U>. Each time you press <Ctrl-U>, you will see the current
value of k.
As an experiment, add another expression to the watch window:
k*5
Then press <Ctrl-U> several times to observe the watch expressions k and k*5.
3.3 Run DEMO3.C
The example below, sample program DEMO3.C, uses costatements. A costatement is a way to
perform a sequence of operations that involve pauses or waits for some external event to take
place.
3.3.1 Cooperative Multitasking
Cooperative multitasking is a way to perform several different tasks at virtually the same time. An
example would be to step a machine through a sequence of tasks and at the same time carry on a
dialog with the operator via a keyboard interface. Each separate task voluntarily surrenders its
compute time when it does not need to perform any more immediate activity. In preemptive multitasking control is forcibly removed from the task via an interrupt.
Dynamic C has language extensions to support both types of multitasking. For cooperative multitasking the language extensions are costatements and cofunctions. Preemptive multitasking is
accomplished with slicing or by using the µC/OS-II real-time kernel that comes with Dynamic C
Premier.
Advantages of Cooperative Multitasking
Unlike preemptive multitasking, in cooperative multitasking variables can be shared between different tasks without taking elaborate precautions. Cooperative multitasking also takes advantage
of the natural delays that occur in most tasks to more efficiently use the available processor time.
The DEMO3.C sample program has two independent tasks. The first task prints out a message to
STDIO once per second. The second task watches to see if the keyboard has been pressed and
prints out which key was entered.
10
Dynamic C User’s Manual
main() {
int secs;
secs = 0;
(1) while (1) {
// seconds counter
// initialize counter
// endless loop
// First task will print the seconds elapsed.
(2)
(3)
(4)
costate {
secs++;
// increment counter
waitfor( DelayMs(1000) );
// wait one second
printf("%d seconds\n", secs); // print elapsed seconds
}
// Second task will check if any keys have been pressed.
(5)
costate {
if ( !kbhit() ) abort;
// key been pressed?
printf(" key pressed = %c\n", getchar() );
}
(6) }
}
// end of while loop
// end of main
The numbers in the left margin are reference indicators and not part of the code. Load and run the
program. The elapsed time is printed to the STDIO window once per second. Push several keys
and note how they are reported.
The elapsed time message is printed by the costatement starting at the line marked (2). Costatements need to be executed regularly, often at least every 25 ms. To accomplish this, the costatements are enclosed in a while loop. The while loop starts at (1) and ends at (6). The statement
at (3) waits for a time delay, in this case 1000 ms (one second). The costatement executes each
pass through the while loop. When a waitfor condition is encountered the first time, the current value of MS_TIMER is saved and then on each subsequent pass the saved value is compared
to the current value. If a waitfor condition is not encountered, then a jump is made to the end of
the costatement (4), and on the next pass of the loop, when the execution thread reaches the beginning of the costatement, execution passes directly to the waitfor statement. Once 1000 ms has
passed, the statement after the waitfor is executed. A costatement can wait for a long period of
time, but not use a lot of execution time. Each costatement is a little program with its own statement pointer that advances in response to conditions. On each pass through the while loop as
few as one statement in the costatement executes, starting at the current position of the costatement’s statement pointer. Consult Chapter 5 "Multitasking with Dynamic C" for more details.
The second costatement in the program checks to see if a key has been pressed and, if one has,
prints out that key. The abort statement is illustrated at (5). If the abort statement is executed, the internal statement pointer is set back to the first statement in the costatement, and a
jump is made to the closing brace of the costatement.
To illustrate the use of snooping, use the watch window to observe secs while the program is
running. Add the variable secs to the list of watch expressions, then press <Ctrl-U> repeatedly
to observe as secs increases.
Chapter 3: Quick Tutorial
11
3.4 Summary of Features
This chapter provided a quick look at the intuitive interface of Dynamic C and some of the powerful options available for embedded systems programming.
Development Functions
When you load a program it appears in an edit window. You compile by clicking Compile on the
task bar or from the Compile menu. The program is compiled into machine language and downloaded to the target over the serial port. The execution proceeds to the first statement of main,
where it pauses, waiting to run. Press the F9 key or select Run on the Run menu. If want to compile and run the program with one keystroke, use F9, the run command; if the program is not
already compiled, the run command compiles it.
Single Stepping
This is done with the F8 key. The F7 key can also be used for single stepping. If the F7 key is
used, then descent into subroutines will take place. With the F8 key the subroutine is executed at
full speed when the statement that calls it is stepped over.
Setting Breakpoints
The F2 key is used to toggle a breakpoint at the cursor position if the program has already been
compiled. You can set a breakpoint if the program is paused at a breakpoint. You can also set a
breakpoint in a program that is running at full speed. This will cause the program to break if the
execution thread hits your breakpoint.
Watch Expressions
A watch expression is a C expression that is evaluated on command in the watch window. An
expression is basically any type of C formula that can include operators, variables and function
calls, but not statements that require multiple lines such as for or switch. You can have a list of
watch expressions in the watch window. If you are single stepping, then they are all evaluated on
each step. You can also command the watch expression to be evaluated by using the <Ctrl-U>
command. When a watch expression is evaluated at a breakpoint, it is evaluated as if the statement
was at the beginning of the function where you are single stepping. If your program is running you
can also evaluate watch expressions with a <Ctrl-U> if your program has a runwatch() command that is frequently executed. In this case, only expressions involving global variables can be
evaluated, and the expression is evaluated as if it were in a separate function with no local variables.
Costatements
A costatement is a Dynamic C extension that allows cooperative multitasking to be programmed
by the user. Keywords, like abort and waitfor, are available to control multitasking operation
from within costatements.
12
Dynamic C User’s Manual
4. Language
Dynamic C is based on the C language. The programmer is expected to know programming methodologies and the basic principles of the C language. Dynamic C has its own set of libraries,
which include user-callable functions. Please see the Dynamic C Function Reference Manual for
detailed descriptions of these API functions. Dynamic C libraries are in source code, allowing the
creation of customized libraries.
Before starting on your application, read through the rest of this chapter to review C-language features and understand the differences between standard C and Dynamic C.
4.1 C Language Elements
A Dynamic C program is a set of files consisting of one file with a .c extension and the requested
library files. Each file is a stream of characters that compose statements in the C language. The
language has grammar and syntax, that is, rules for making statements. Syntactic elements—often
called tokens—form the basic elements of the C language. Some of these elements are listed in the
table below.
Table 4-1. C Language Elements
punctuation
Symbols used to mark beginnings and endings
names
Words used to name data and functions
numbers
Literal numeric values
strings
Literal character values enclosed in quotes
directives
Words that start with # and control compilation
keywords
Words used as instructions to Dynamic C
operators
Symbols used to perform arithmetic operations
Chapter 4: Language
13
4.2 Punctuation and Tokens
Punctuation marks serve as boundaries in C programs. The table below lists the punctuation marks
and tokens.
Table 4-2. Punctuation Marks and Tokens
Symbol
Description
:
Terminates a statement label.
;
Terminates a simple statement or a do loop. C requires
these!
,
Separates items in a list, such as an argument list,
declaration list, initialization list, or expression list.
( )
Encloses argument or parameter lists. Function calls
always require parentheses. Macros with parameters
also require parentheses. Also used for arithmetic and
logical sub expressions.
{ }
Begins and ends a compound statement, a function
body, a structure or union body, or encloses a function
chain segment.
//
Indicates that the rest of the line is a comment and is not
compiled
/* ... */ Comments are nested between the /* and */ tokens.
14
Dynamic C User’s Manual
4.3 Data
Data (variables and constants) have type, size, structure, and storage class. Basic, or primitive,
data types are shown below.
Table 4-3. Dynamic C Basic Data Types
Type
Description
char
8-bit unsigned integer. Range: 0 to 255 (0xFF)
int
16-bit signed integer. Range: -32,768 to +32,767
unsigned int
16-bit unsigned integer. Range: 0 to +65,535
long
32-bit signed integer. Range: -2,147,483,648 to
+2,147,483,647
unsigned long
32-bit unsigned integer. Range 0 to 232 - 1
float
32-bit IEEE floating-point value. The sign bit is 1 for
negative values. The exponent has 8 bits, giving exponents
from -127 to +128. The mantissa has 24 bits. Only the 23
least significant bits are stored; the high bit is 1 implicitly.
(Rabbit controllers do not have floating-point hardware.)
Range: 1.18 x 10-38 to 3.40 x 1038
enum
Defines a list of named integer constants. The integer
constants are signed and in the range: -32,768 to +32,767.
This keyword is available starting with Dynamic C version
7.20.
4.3.1 Data Type Limits
The symbolic names for the hardcoded limits of the data types are defined in limits.h and are
shown here.
#define
#define
#define
#define
#define
CHAR_BIT
UCHAR_MAX
CHAR_MIN
CHAR_MAX
MB_LEN_MAX
#define SHRT_MIN
#define SHRT_MAX
#define USHRT_MAX
#define
#define
#define
#define
#define
#define
INT_MIN
INT_MAX
UINT_MAX
LONG_MIN
LONG_MAX
ULONG_MAX
Chapter 4: Language
8
255
0
255
1
-32768
32767
65535
-32767
32767
65535
-2147483647
2147483647
4294967295
15
4.4 Names
Names identify variables, certain constants, arrays, structures, unions, functions, and abstract data
types. Names must begin with a letter or an underscore (_), and thereafter must be letters, digits,
or an underscore. Names may not contain any other symbols, especially operators. Names are distinct up to 32 characters, but may be longer. Prior to Dynamic C version 6.19, names were distinct
up to 16 characters, but could be longer. Names may not be the same as any keyword. Names are
case-sensitive.
Examples
my_function
_block
test32
// ok
// ok
// ok
jumper3270type
// not ok, uses a minus sign
// not ok, begins with digit
Cleanup_the_data_now
Cleanup_the_data_later
// These names are
// not distinct!
References to structure and union elements require compound names. The simple names in a compound name are joined with the dot operator (period).
cursor.loc.x = 10;
// set structure element to 10
Use the #define directive to create names for constants. These can be viewed as symbolic constants. See Section 4.5, “Macros.”
#define
#define
#define
#define
#define
#define
READ
10
WRITE 20
ABS
0
REL
1
READ_ABS
READ_REL
READ + ABS
READ + REL
The term READ_ABS is the same as 10 + 0 or 10, and READ_REL is the same as 10 + 1 or 11.
Note that Dynamic C does not allow anything to be assigned to a constant expression.
READ_ABS = 27;
16
// produces compiler error
Dynamic C User’s Manual
4.5 Macros
Macros may be defined in Dynamic C by using #define. A macro is a name replacement feature. Dynamic C has a text preprocessor that expands macros before the program text is compiled.
The programmer assigns a name, up to 31 characters, to a fragment of text. Dynamic C then
replaces the macro name with the text fragment wherever the name appears in the program. In this
example,
#define OFFSET 12
#define SCALE 72
int i, x;
i = x * SCALE + OFFSET;
the variable i gets the value x * 72 + 12. Macros can have parameters such as in the following example.
#define word( a, b ) (a<<8 | b)
char c;
int i, j;
i = word( j, c );
// same as i = (j<<8|c)
The compiler removes the surrounding white space (comments, tabs and spaces) and collapses
each sequence of white space in the macro definition into one space. It places a \ before any " or
\ to preserve their original meaning within the definition.
Dynamic C implements the # and ## macro operators.
The # operator forces the compiler to interpret the parameter immediately following it as a string
literal. For example, if a macro is defined
#define report(value,fmt)\
printf( #value "=" #fmt "\n", value )
then the macro in
report( string, %s );
will expand to
printf( "string" "=" "%s" "\n", string );
and because C always concatenates adjacent strings, the final result of expansion will be
printf( "string=%s\n", string );
The ## operator concatenates the preceding character sequence with the following character
sequence, deleting any white space in between. For example, given the macro
#define set(x,y,z) x ## z ## _ ## y()
the macro in
set( AASC, FN, 6 );
will expand to
AASC6_FN();
For parameters immediately adjacent to the ## operator, the corresponding argument is not
expanded before substitution, but appears as it does in the macro call.
Chapter 4: Language
17
Generally speaking, Dynamic C expands macro calls recursively until they can expand no more.
Another way of stating this is that macro definitions can be nested.
The exceptions to this rule are
1. Arguments to the # and ## operators are not expanded.
2. To prevent infinite recursion, a macro does not expand within its own expansion.
The following complex example illustrates this.
#define
#define
#define
#define
#define
#define
#define
printf(
A B
B C
uint unsigned int
M(x) M ## x
MM(x,y,z) x = y ## z
string something
write( value, fmt )\
#value "=" #fmt "\n", value )
The code
uint z;
M (M) (A,A,B);
write(string, %s);
will expand first to
unsigned int z;
// simple expansion
MM (A,A,B);
// M(M) does not expand recursively
printf( "string" "=" "%s" "\n", string );
// #value → "string" #fmt → "%s"
then to
unsigned int z;
A = AB;
// from A = A ## B
printf( "string" "=" "%s" "\n", something );
// string → something
then to
unsigned int z;
B = AB;
printf( "string=%s\n", something );
// A → B
// concatenation
and finally to
unsigned int z;
C = AB;
printf("string = %s\n", something);
18
// B → C
Dynamic C User’s Manual
4.5.1 Restrictions
The number of arguments in a macro call must match the number of parameters in the macro definition. An empty parameter list is allowed, but the macro call must have an empty argument list.
Macros are restricted to 32 parameters and 126 nested calls. A macro or parameter name must
conform to the same requirements as any other C name. The C language does not perform macro
replacement inside string literals or character constants, comments, or within a #define directive.
A macro definition remains in effect unless removed by an #undef directive. If an attempt is
made to redefine a macro without using #undef, a warning will appear and the original definition will remain in effect.
4.6 Numbers
Numbers are constant values and are formed from digits, possibly a decimal point, and possibly
the letters U, L, X, or A–F, or their lower case equivalents. A decimal point or the presence of
the letter E or F indicates that a number is real (has a floating-point representation).
Integers have several forms of representation. The normal decimal form is the most common.
10
–327
1000
0
An integer is long (32-bit) if its magnitude exceeds the 16-bit range (-32768 to +32767) or if it has
the letter L appended.
0L
-32L
45000
32767L
An integer is unsigned if it has the letter U appended. It is long if it also has L appended or if its
magnitude exceeds the 16-bit range.
0U
4294967294U
32767U
1700UL
An integer is hexadecimal if preceded by 0x.
0x7E
0xE000
0xFFFFFFFA
It may contain digits and the letters a–f or A–F.
An integer is octal if begins with zero and contains only the digits 0–7.
0177
020000
000000630
A real number can be expressed in a variety of ways.
4.5 means 4.5
4f means 4.0
0.3125 means 0.3125
456e-31 means 456 × 10–31
0.3141592e1 means 3.141592
Chapter 4: Language
19
4.7 Strings and Character Data
A string is a group of characters enclosed in double quotes ("").
"Press any key when ready..."
Strings in C have a terminating null byte appended by the compiler. Although C does not have a
string data type, it does have character arrays that serve the purpose. C does not have string operators, such as concatenate, but library functions strcat() and strncat() are available.
Strings are multibyte objects, and as such they are always referenced by their starting address, and
usually by a char* variable. More precisely, arrays are always passed by address. Passing a
pointer to a string is the same as passing the string. Refer to Section 4.15 for more information on
pointers.
The following example illustrates typical use of strings.
const char* select = "Select option\n";
char start[32];
strcpy(start,"Press any key when ready...\n");
printf( select );
// pass pointer to string
...
printf( start );
// pass string
4.7.1 String Concatenation
Two or more string literals are concatenated when placed next to each other. For example:
"Rabbits" "like carrots."
becomes
"Rabbits like carrots."
during compilation.
If the strings are on multiple lines, the macro continuation character must be used. For example:
"Rabbits"\
"don’t like line dancing."
becomes
"Rabbits don’t like line dancing."
during compilation.
20
Dynamic C User’s Manual
4.7.2 Character Constants
Character constants have a slightly different meaning. They are not strings. A character constant is
enclosed in single quotes (' ') and is a representation of an 8-bit integer value.
'a'
'\n'
'\x1B'
Any character can be represented by an alternate form, whether in a character constant or in a
string. Thus, nonprinting characters and characters that cannot be typed may be used.
A character can be written using its numeric value preceded by a backslash.
\x41
\101
\B10000001
// the hex value 41
// the octal value 101, a leading zero is optional
// the binary value 10000001
There are also several “special” forms preceded by a backslash.
\a
\f
\r
\v
\\
\’
bell
formfeed
carriage return
vertical tab
backslash
single quote
\b
\n
\t
\0
\c
\”
backspace
newline
tab
null character
the actual character c
double quote
Examples
"He said \"Hello.\""
// embedded double quotes
const char j = 'Z';
// character constant
const char* MSG = "Put your disk in the A drive.\n";
// embedded new line at end
printf( MSG );
// print MSG
char* default = "";
// empty string: a single Null byte
4.8 Statements
Except for comments, everything in a C program is a statement. Almost all statements end with a
semicolon. A C program is treated as a stream of characters where line boundaries are (generally)
not meaningful. Any C statement may be written on as many lines as needed. Comments (the
/*...*/ kind) may occur almost anywhere, even in the middle of a statement, as long as they
begin with /* and end with */.
A statement can be many things. A declaration of variables is a statement. An assignment is a
statement. A while or for loop is a statement. A compound statement is a group of statements
enclosed in braces { and }.
Chapter 4: Language
21
4.9 Declarations
A variable must be declared before it can be used. That means the variable must have a name and
a type, and perhaps its storage class could be specified. If an array is declared, its size must be
given. Root data arrays are limited to a total of 32,767 elements.
static int thing, array[12];
// static integer variable &
// static integer array
auto float matrix[3][3];
// auto float array with 2 dimensions
char *message="Press any key...” // initialized pointer to char array
If an aggregate type (struct or union) is being declared, its internal structure has to be
described as shown below.
struct {
char flags;
struct {
int x;
int y;
} loc;
} cursor;
...
int a;
a = cursor.loc.x;
// description of structure
// a nested structure here
// use of structure element here
4.10 Functions
The basic unit of a C application program is a function. Most functions accept parameters—or
arguments—and return results, but there are exceptions. All C functions have a return type that
specifies what kind of result, if any, it returns. A function with a void return type returns no
result. If a function is declared without specifying a return type, the compiler assumes that it is to
return an int (integer) value.
A function may call another function, including itself (a recursive call). The main function is
called automatically after the program compiles or when the controller powers up. The beginning
of the main function is the entry point to the entire program.
22
Dynamic C User’s Manual
4.11 Prototypes
A function may be declared with a prototype. This is so that:
1. Functions that have not been compiled may be called.
2. Recursive functions may be written.
3. The compiler may perform type-checking on the parameters to make sure that calls to the function receive arguments of the expected type.
A function prototype describes how to call the function and is nearly identical to the function’s initial code.
/* This is a function prototype.*/
long tick_count ( char clock_id );
/* This is the function’s definition.*/
long tick_count ( char clock_id ){
...
}
It is not necessary to provide parameter names in a prototype, but the parameter type is required,
and all parameters must be included. (If the function accepts a variable number of arguments, as
printf does , use an ellipsis.)
/* This prototype is as good as the one above. */
long tick_count ( char );
/* This is a prototype that uses ellipsis. */
int startup ( device id, ... );
4.12 Type Definitions
Both types and variables may be defined. One virtue of high-level languages such as C and Pascal
is that abstract data types can be defined. Once defined, the data types can be used as easily as
simple data types like int, char, and float. Consider this example.
typedef int MILES;
// a basic type named MILES
typedef struct {
float re;
float im;
} COMPLEX;
//
//
//
//
MILES distance;
COMPLEX z, *zp;
// declare variable of type MILES
// declare variable of & pointer to type COMPLEX .
Chapter 4: Language
a structure type...
...
...
...named COMPLEX
23
Use typedef to create a meaningful name for a class of data. Consider this example.
typedef unsigned int node;
void NodeInit( node );
void NodeInit( unsigned int );
// type name is informative
// not very informative
This example shows many of the basic C constructs.
/* Put descriptive information in your program code using this form of comment,
which can be inserted anywhere and can span lines. The double slash comment
(shown below) may be placed at the end of a line.*/
#define SIZE 12
int g, h;
float sumSquare( int, int );
void init();
// A symbolic constant defined.
// Declare global integers.
// Prototypes for
//
functions below.
main(){
float x;
init();
x = sumSquare( g, h );
printf(“x = %f”,x);
}
void init(){
g = 10;
h = SIZE;
}
float sumSquare( int a, int b ){
float temp;
temp = a*a + b*b;
return( temp );
}
//
//
//
//
//
Program starts here.
x is local to main.
Call a void function.
x gets sumSquare value.
printf is a standard function.
//
//
//
//
//
//
//
//
Void functions do things but
they return no value.
Here, it uses the symbolic
constant defined above.
Integer arguments.
Local variables.
Arithmetic statement.
Return value.
/* and here is the end of the program */
The program above calculates the sum of squares of two numbers, g and h, which are initialized
to 10 and 12, respectively. The main function calls the init function to give values to the global
variables g and h. Then it uses the sumSquare function to perform the calculation and assign
the result of the calculation to the variable x. It prints the result using the library function
printf, which includes a formatting string as the first argument.
Notice that all functions have { and } enclosing their contents, and all variables are declared
before use. The functions init() and sumSquare() were defined before use, but there are
alternatives to this. The “Prototypes” section explained this.
24
Dynamic C User’s Manual
4.13 Aggregate Data Types
Simple data types can be grouped into more complex aggregate forms.
4.13.1 Array
A data type, whether it is simple or complex, can be replicated in an array. The declaration
// An array of 10 integers.
int item[10];
represents a contiguous group of 10 integers. Array elements are referenced by their subscript.
j = item[n];
// The nth element of item.
Array subscripts count up from 0. Thus, item[7] above is the eighth item in the array. Notice
the [ and ] enclosing both array dimensions and array subscripts. Arrays can be “nested.” The following doubly dimensioned array, or “array of arrays.”
int matrix[7][3];
is referenced in a similar way.
scale = matrix[i][j];
The first dimension of an array does not have to be specified as long as an initialization list is
specified.
int x[][2] = { {1, 2}, {3, 4}, {5, 6} };
char string[] = "abcdefg";
4.13.2 Structure
Variables may be grouped together in structures (struct in C) or in arrays. Structures may be
nested.
struct {
char flags;
struct {
int x;
int y;
} loc;
} cursor;
Structures can be nested. Structure members—the variables within a structure—are referenced
using the dot operator.
j = cursor.loc.x
The size of a structure is the sum of the sizes of its components.
Chapter 4: Language
25
4.13.3 Union
A union overlays simple or complex data. That is, all the union members have the same address.
The size of the union is the size of the largest member.
union {
int ival;
long jval;
float xval;
} u;
Unions can be nested. Union members—the variables within a union—are referenced, like structure elements, using the dot operator.
j = u.ival
4.13.4 Composites
Composites of structures, arrays, unions, and primitive data may be formed. This example shows
an array of structures that have arrays as structure elements.
typedef struct {
int *x;
int c[32];
} node;
node list[12];
// array in structure
// array of structures
Refer to an element of array c (above) as shown here.
z = list[n].c[m];
...
list[0].c[22] = 0xFF37;
4.14 Storage Classes
Variable storage can be auto or static. The default storage class is static, but can be
changed by using #class auto. The default storage class can be superseded by the use of the
keyword auto or static in a variable declaration.
These terms apply to local variables, that is, variables defined within a function. If a variable does
not belong to a function, it is called a global variable—available anywhere in the program—but
there is no keyword in C to represent this fact. Global variables always have static storage
The term static means the data occupies a permanent fixed location for the life of the program.
The term auto refers to variables that are placed on the system stack for the life of a function call.
26
Dynamic C User’s Manual
4.15 Pointers
A pointer is a variable that holds the 16-bit logical address of another variable, a structure, or a
function. Dynamic C does not currently support long pointers. The indirection operator (*) is used
to declare a variable as a pointer. The address operator (&) is used to set the pointer to the address
of a variable.
int *ptr_to_i;
int i;
ptr_to_i = &i;
i = 10:
j = *ptr_to_i;
// set pointer equal to the address of i
// assign a value to i
// this sets j equal to the value in i
In this example, the variable ptr_to_i is a pointer to an integer. The statement j =
*ptr_to_i; references the value of the integer by the use of the asterisk. Using correct pointer
terminology, the statement dereferences the pointer ptr_to_i. Then *ptr_to_i and i have
identical values.
Note that ptr_to_i and i do not have the same values because ptr_to_i is a pointer and i is
an int. Note also that * has two meanings (not counting its use as a multiplier in others contexts)
in a variable declaration such as int *ptr_to_i; the * means that the variable will be a
pointer type, and in an executable statement j = *ptr_to_i; means “the value stored at the
address contained in ptr_to_i.”
Pointers may point to other pointers.
int *ptr_to_i;
int **ptr_to_ptr_to_i;
int i,j;
ptr_to_i = &i;
ptr_to_ptr_to_i = &ptr_to_i;
i = 10;
j = **ptr_to_ptr_to_i;
//
//
//
//
//
Set pointer equal to the address of i
Set a pointer to the pointer
to the address of i
Assign a value to i
This sets j equal to the value in i.
It is possible to do pointer arithmetic, but this is slightly different from ordinary integer arithmetic.
Here are some examples.
float f[10], *p, *q;
p = &f;
q = p+5;
q++;
p = p + q;
//
//
//
//
//
an array and some ptrs
point p to array element 0
point q to array element 5
point q to array element 6
illegal!
Because the float is a 4-byte storage element, the statement q = p+5 sets the actual value of q
to p+20. The statement q++ adds 4 to the actual value of q. If f were an array of 1-byte characters, the statement q++ adds 1 to q.
Chapter 4: Language
27
Beware of using uninitialized pointers. Uninitialized pointers can reference ANY location in
memory. Storing data using an uninitialized pointer can overwrite code or cause a crash.
A common mistake is to declare and use a pointer to char, thinking there is a string. But an uninitialized pointer is all there is.
char* string;
...
strcpy( string, "hello" );
printf( string );
// Invalid!
// Invalid!
Pointer checking is a run-time option in Dynamic C. Use the compiler options command in the
Options menu. Pointer checking will catch attempts to dereference a pointer to un allocated memory. However, if an uninitialized pointer happens to contain the address of a memory location that
the compiler has already allocated, pointer checking will not catch this logic error. Because pointer
checking is a run-time option, pointer checking adds instructions to code when pointer checking is
used.
4.16 Pointers to Functions, Indirect Calls
Pointers to functions may be declared. When a function is called using a pointer to it, instead of
directly, we call this an indirect call.
The syntax for declaring a pointer to a function is different than for ordinary pointers, and
Dynamic C syntax for this is slightly different than the standard C syntax. Standard syntax for a
pointer to a function is:
returntype (*name)( [argument list] );
for example:
int (*func1)(int a, int b);
void (*func2)(char*);
Dynamic C doesn’t recognize the argument list in function pointer declarations. The correct
Dynamic syntax for the above examples would be:
int (*func1)();
void (*func2)();
28
Dynamic C User’s Manual
You can pass arguments to functions that are called indirectly by pointers, but the compiler will
not check them for correctness. The following program shows some examples of using function
pointers.
typedef int (*fnptr)();
// create pointer to function that returns an integer
main(){
int x,y;
int (*fnc1)();
fnptr fp2;
fnc1 = intfunc;
fp2 = intfunc;
//
//
//
//
x = (*fnc1)(1,2);
y = (*fp2)(3,4);
declare var fnc1 as a pointer to an int function.
declare var fp2 as pointer to an int function
initialize fnc1 to point to intfunc()
initialize fp2 to point to the same function.
// call intfunc() via fnc1
// call intfunc() via fp2
printf("%d\n", x);
printf("%d\n", y);
}
int intfunc(int x, int y){
return x+y;
}
4.17 Argument Passing
In C, function arguments are generally passed by value. That is, arguments passed to a C function
are generally copies—on the program stack—of the variables or expressions specified by the
caller. Changes made to these copies do not affect the original values in the calling program.
In Dynamic C and most other C compilers, however, arrays are always passed by address. This
policy includes strings (which are character arrays).
Dynamic C passes structs by value—on the stack. Passing a large struct takes a long time
and can easily cause a program to run out of memory. Pass pointers to large structs if such
problems occur.
For a function to modify the original value of a parameter, pass the address of, or a pointer to, the
parameter and then design the function to accept the address of the item.
Chapter 4: Language
29
4.18 Program Flow
Three terms describe the flow of execution of a C program: sequencing, branching and looping.
Sequencing is simply the execution of one statement after another. Looping is the repetition of a
group of statements. Branching is the choice of groups of statements. Program flow is altered by
calling a function, that is transferring control to the function. Control is passed back to the calling
function when the called function returns.
4.18.1 Loops
A while loop tests a condition at the start of the loop. As long as expression is true (non-zero),
the loop body (some statement(s)) will execute. If expression is initially false (zero), the loop body
will not execute. The curly braces are necessary if there is more than one statement in the loop
body.
while( expression ){
some statement(s)
}
A do loop tests a condition at the end of the loop. As long as expression is true (non-zero) the loop
body (some statement(s)) will execute. A do loop executes at least once before its test. Unlike
other controls, the do loop requires a semicolon at the end.
do{
some statements
}while( expression );
The for loop is more complex: it sets an initial condition (exp1), evaluates a terminating condition (exp2), and provides a stepping expression (exp3) that is evaluated at the end of each iteration.
Each of the three expressions is optional.
for( exp1 ; exp2 ; exp3 ){
some statements
}
If the end condition is initially false, a for loop body will not execute at all. A typical use of the
for loop is to count n times.
sum = 0;
for( i = 0; i < n; i++ ){
sum = sum + array[i];
}
This loop initially sets i to 0, continues as long as i is less than n (stops when i equals n), and
increments i at each pass.
Another use for the for loop is the infinite loop, which is useful in control systems.
for(;;){some statement(s)}
30
Dynamic C User’s Manual
Here, there is no initial condition, no end condition, and no stepping expression. The loop body
(some statement(s)) continues to execute endlessly. An endless loop can also be achieved with a
while loop. This method is slightly less efficient than the for loop.
while(1)
{ some statement(s) }
4.18.2 Continue and Break
Two keywords are available to help in the construction of loops: continue and break.
The continue statement causes the program control to skip unconditionally to the next pass of
the loop. In the example below, if bad is true, more statements will not execute; control will pass
back to the top of the while loop.
get_char();
while( ! EOF ){
some statements
if( bad ) continue;
more statements
}
The break statement causes the program control to jump unconditionally out of a loop. In the
example below, if cond_RED is true, more statements will not be executed and control will pass
to the next statement after the ending curly brace of the for loop
for( i=0;i<n;i++ ){
some statements
if( cond_RED ) break;
more statements
}
The break keyword also applies to the switch/case statement described in the next section.
The break statement jumps out of the innermost control structure (loop or switch statement)
only.
Chapter 4: Language
31
There will be times when break is insufficient. The program will need to either jump out more
than one level of nesting or there will be a choice of destinations when jumping out. Use a goto
statement in such cases. For example,
while( some statements ){
for( i=0;i<n;i++ ){
some statements
if( cond_RED ) goto yyy;
some statements
if( code_BLUE ) goto zzz;
more statements
}
}
yyy:
handle cond_RED
zzz:
handle code_BLUE
4.18.3 Branching
The goto statement is the simplest form of a branching statement. Coupled with a statement
label, it simply transfers program control to the labeled statement.
some statements
abc:
other statements
goto abc;
...
more statements
goto def;
...
def:
more statements
The colon at the end of the labels is required. In general, the use of the goto statement is discouraged in structured programming.
The next simplest form of branching is the if statement. The simple form of the if statement
tests a condition and executes a statement or compound statement if the condition expression is
true (non-zero). The program will ignore the if body when the condition is false (zero).
if( expression ){
some statement(s)
}
32
Dynamic C User’s Manual
A more complex form of the if statement tests the condition and executes certain statements if
the expression is true, and executes another group of statements when the expression is false.
if( expression ){
some statement(s)
}else{
some statement(s)
}
// if true
// if false
The fullest form of the if statements produces a succession of tests.
if( expr1 ){
some statements
}else if( expr2 ){
some statements
}else if( expr3 ){
some statements
...
}else{
some statements
}
The program evaluates the first expression (expr1). If that proves false, it tries the second expression (expr2), and continues testing until it finds a true expression, an else clause, or the end of
the if statement. An else clause is optional. Without an else clause, an if/else if statement that finds no true condition will execute none of the controlled statements.
The switch statement, the most complex branching statement, allows the programmer to phrase
a “multiple choice” branch differently.
switch( expression ){
case const1 :
statements1
break:
case const2 :
statements2
break:
case const3 :
statements3
break:
...
default:
statementsDEFAULT
}
First the switch expression is evaluated. It must have an integer value. If one of the constN
values matches the switch expression, the sequence of statements identified by the constN
Chapter 4: Language
33
expression is executed. If there is no match, the sequence of statements identified by the
default label is executed. (The default part is optional.) Unless the break keyword is
included at the end of the case’s statements, the program will “fall through” and execute the statements for any number of other cases. The break keyword causes the program to exit the
switch/case statement.
The colons (:) after break, case and default are required.
4.19 Function Chaining
Function chaining allows special segments of code to be distributed in one or more functions.
When a named function chain executes, all the segments belonging to that chain execute. Function
chains allow the software to perform initialization, data recovery, and other kinds of tasks on
request. There are two directives, #makechain and #funcchain, and one keyword, segchain that create and control function chains:
#makechain chain_name
Creates a function chain. When a program executes the named function chain, all of the functions or chain segments belonging to that chain execute. (No particular order of execution can
be guaranteed.)
#funcchain chain_name name
Adds a function, or another function chain, to a function chain.
segchain chain_name { statements }
Defines a program segment (enclosed in curly braces) and attaches it to the named function
chain.
Function chain segments defined with segchain must appear in a function directly after data
declarations and before executable statements, as shown below.
my_function(){
/* data declarations */
segchain chain_x{
/* some statements which execute under chain_x */
}
segchain chain_y{
/* some statements which execute under chain_y */
}
/* function body which executes when my_function is called */
}
A program will call a function chain as it would an ordinary void function that has no parameters.
The following example shows how to call a function chain that is named recover.
#makechain recover
...
recover();
34
Dynamic C User’s Manual
4.20 Global Initialization
Various hardware devices in a system need to be initialized not only by setting variables and control registers, but often by complex initialization procedures. Dynamic C provides a specific function chain, _GLOBAL_INIT, for this purpose.
Your program can initialize variables and take initialization action with global initialization. This
is done by adding segments to the _GLOBAL_INIT function chain, as shown in the example
below.
long my_func( char j );
main(){
my_func(100);
}
long my_func(char j){
int i;
long array[256];
// The GLOBAL_INIT section is automatically run once when the program starts up
#GLOBAL_INIT{
for( i = 0; i < 100; i++ ){
array[i] = i*i;
}
}
return array[j];
// only this code runs when the function is called
}
The special directive #GLOBAL_INIT{ } tells the compiler to add the code in the block
enclosed in braces to the _GLOBAL_INIT function chain. The _GLOBAL_INIT function chain
is always called when your program starts up, so there is nothing special to do to invoke it. It may
be called at anytime in an application program, but do this with caution. When it is called, all costatements and cofunctions will be initialized. See “Calling _GLOBAL_INIT()” on page 65 for
more information.
Any number of #GLOBAL_INIT sections may be used in your code. The order in which the
#GLOBAL_INIT sections are called is indeterminate since it depends on the order in which they
were compiled.
Chapter 4: Language
35
4.21 Libraries
Dynamic C includes many libraries—files of useful functions in source code form. They are
located in the LIB subdirectory where Dynamic C was installed. The default library file extension
is .LIB. Dynamic C uses functions and data from library files and compiles them with an application program that is then downloaded to a controller or saved to a .bin file.
An application program (the default file extension is .c) consists of a source code file that contains a main function (called main) and usually other user-defined functions. Any additional
source files are considered to be libraries (though they may have a .c extension if desired) and are
treated as such. The minimum application program is one source file, containing only
main(){
}
Libraries (both user defined and Z-World defined) are “linked” with the application through the
#use directive. The #use directive identifies a file from which functions and data may be
extracted. Files identified by #use directives are nestable, as shown below. The #use directive is
a replacement for the #include directive, which is not supported in Dynamic C. Any library
that is to be used in a Dynamic C program must be listed in the file LIB.DIR, or another *.DIR
file specified by the user. (Starting with version Dynamic C 7.05, a different *.DIR file may be
specified by the user in the Compiler Options dialog to facilitate working on multiple projects.)
Application
...
#use x.lib
...
main(){
...
}
...
#use z.lib
...
X.LIB
...
#use y.lib
...
function
...
function
...
function
...
#use z.lib
...
Y.LIB
...
......
...
.....
..
....
BIOS
Z.LIB
...
......
...
.....
..
....
Figure 2. Nesting Files in Dynamic C
Most libraries needed by Dynamic C programs are #use’d in the file lib\default.h.
The “Modules” section later in this chapter explains how Dynamic C knows which functions and
global variables in a library to use.
36
Dynamic C User’s Manual
4.22 Headers
The following table describes two kinds of headers used in Dynamic C libraries.
Table 4-4. Dynamic C Library Headers
Header Name
Description
Module headers
Makes functions and global variables in the library known
to Dynamic C.
Function Description
headers
Describe functions. Function headers form the basis for
function lookup help.
You may also notice some “Library Description” headers at the top of library files. These have no
special meaning to Dynamic C, they are simply comment blocks.
4.23 Modules
To write a custom source library, modules must be understood because they provide Dynamic C
with the ability to know which functions and global variables in a library to use. It is important to
note that the #use directive is a replacement for the #include directive, and the #include
directive is not supported.
A library file contains a group of modules. A module has three parts: the key, the header, and a
body of code (functions and data).
A module in a library has a structure like this one.
/*** BeginHeader func1, var2, .... */
prototype for func1
declaration for var2
/*** EndHeader */
definition of func1 and
possibly other functions and data
4.23.1 The Key
The line (a specially-formatted comment)
/*** BeginHeader [name1, name2, ....] */
begins the header of a module and contains the module key. The key is a list of names (of functions and data). The key tells the compiler what functions and data in the module are available for
reference. It is important to format this comment properly. Otherwise, Dynamic C cannot identify
the module correctly.
If there are many names after BeginHeader, the list of names can continue on subsequent lines.
All names must be separated by commas. A key can have no names in it and it’s associated header
will still be parsed by the precompiler and compiler.
Chapter 4: Language
37
4.23.2 The Header
Every line between the comments containing BeginHeader and EndHeader belongs to the
header of the module. When an application #uses a library, Dynamic C compiles every header,
and just the headers, in the library. The purpose of a header is to make certain names defined in a
module known to the application. With proper function prototypes and variable declarations, a
module header ensures proper type checking throughout the application program. Prototypes, variables, structures, typedefs and macros declared in a header section will always be parsed by the
compiler if the library is used, and will have global scope. It is even permissible to put function
bodies in header sections, but this is not recommended. Variables declared in a header section will
be allocated memory space unless the declaration is preceded with extern .
4.23.3 The Body
Every line of code after the EndHeader comment belongs to the body of the module until (1)
end-of-file or (2) the BeginHeader comment of another module. Dynamic C compiles the
entire body of a module if any of the names in the key are referenced (used) anywhere in the application. For this reason, it is not wise to put many functions in one module regardless of whether
they are actually going to be used by the program.
To minimize waste, it is recommended that a module header contain only prototypes and extern
declarations. (Prototypes and extern declarations do not generate any code by themselves.)
Define code and data only in the body of a module. That way, the compiler will generate code or
allocate data only if the module is used by the application program. Programmers who create their
own libraries must write modules following the guideline in this section. Remember that the
library must be included in LIB.DIR (or a user defined replacement for LIB.DIR) and a #use
directive for the library must be placed somewhere in the code.
It should be noted that there is no way to define file scope variables other than having a file consist
of a single module (which would mean that all data and functions in the file would be compiled
whenever a function specified in the header is compiled).
38
Dynamic C User’s Manual
Example
/*** BeginHeader ticks */
extern unsigned long ticks;
/*** EndHeader */
unsigned long ticks;
/*** BeginHeader Get_Ticks */
unsigned long Get_Ticks();
/*** EndHeader */
unsigned long Get_Ticks(){
...
}
/*** BeginHeader Inc_Ticks */
void Inc_Ticks( int i );
/*** EndHeader */
#asm
Inc_Ticks::
or
a
ipset 1
...
ipres
ret
#endasm
There are three modules defined in this code. The first one is responsible for the variable ticks,
the second and third modules define functions Get_Ticks() and Inc_Ticks that access the
variable. Although Inc_Ticks is an assembly language routine, it has a function prototype in
the module header, allowing the compiler to check calls to it.
If the application program calls Inc_Ticks or Get_Ticks() (or both), the module bodies
corresponding to the called routines will be compiled. The compilation of these routines further
triggers compilation of the module body corresponding to ticks because the functions use the
variable ticks.
Chapter 4: Language
39
4.23.4 Function Description Headers
Each user-callable function in a Z-World library has a descriptive header preceding the function to
describe the function. Function headers are extracted by Dynamic C to provide on-line help messages.
The header is a specially formatted comment, such as the following example.
/* START FUNCTION DESCRIPTION **********************
WrIOport
<IO.LIB>
SYNTAX: void WrIOport(int portaddr, int value);
DESCRIPTION:
Writes data to the specified I/O port.
PARAMETER1: portaddr - register address of the port.
PARAMETER2: value - data to be written to the port.
RETURN VALUE: None
KEY WORDS: parallel port
SEE ALSO: RdIOport
END DESCRIPTION ***********************************/
If this format is followed, user-created library functions will show up in the Function
Lookup/Insert facility. Note that these sections are scanned in only when Dynamic C starts.
4.24 Support Files
Dynamic C has several support files that are necessary in building an application. These files are
listed below.
Table 4-5. Dynamic C Support Files
File Name
Purpose of File
DCW.CFG
Contains configuration data for the target controller.
DC.HH
Contains prototypes, basic type definitions, #define, and default modes
for Dynamic C. This file can be modified by the programmer.
DEFAULT.H
Contains a set of #use directives for each control product that Z-World
ships. This file can be modified.
LIB.DIR
Contains pathnames for all libraries that are to be known to Dynamic C.
The programmer can add to, or remove libraries from this list. The factory
default is for this file to contain all the libraries on the Dynamic C distribution disk. Any library that is to be used in a Dynamic C program must be
listed in the file LIB.DIR, or another *.DIR file specified by the user.
(Starting with version Dynamic C 7.05, a different *.DIR file may be
specified by the user in the Compiler Options dialog to facilitate working
on multiple projects.)
PROJECT.DCP
DEFAULT.DCP
These files hold the default compilation environment that is shipped from
the factory. DEFAULT.DCP may be modified, but not PROJECT.DCP.
See Chapter 16 for details on project files.
40
Dynamic C User’s Manual
Chapter 4: Language
41
42
Dynamic C User’s Manual
5. Multitasking with Dynamic C
A task is an ordered list of operations to perform. In a multitasking environment, more than one
task (each representing a sequence of operations) can appear to execute in parallel. In reality, a
single processor can only execute one instruction at a time. If an application has multiple tasks to
perform, multitasking software can usually take advantage of natural delays in each task to
increase the overall performance of the system. Each task can do some of its work while the other
tasks are waiting for an event, or for something to do. In this way, the tasks execute almost in parallel.
There are two types of multitasking available for developing applications in Dynamic C: preemptive and cooperative. In a cooperative multitasking environment, each well-behaved task voluntarily gives up control when it is waiting, allowing other tasks to execute. Dynamic C has language
extensions, costatements and cofunctions, to support cooperative multitasking. Preemptive multitasking is supported by the slice statement, which allows a computation to be divided into small
slices of a few milliseconds each, and by the µC/OS-II real-time kernel.
5.1 Cooperative Multitasking
In the absence of a preemptive multitasking kernel or operating system, a programmer given a
real-time programming problem that involves running separate tasks on different time scales will
often come up with a solution that can be described as a big loop driving state machines.
Top of loop
State machine
State machine
State machine
Figure 1. Big Loop
Chapter 5: Multitasking with Dynamic C
43
This means that the program consists of a large, endless loop—a big loop. Within the loop, tasks
are accomplished by small fragments of a program that cycle through a series of states. The state is
typically encoded as numerical values in C variables.
State machines can become quite complicated, involving a large number of state variables and a
large number of states. The advantage of the state machine is that it avoids busy waiting, which is
waiting in a loop until a condition is satisfied. In this way, one big loop can service a large number
of state machines, each performing its own task, and no one is busy waiting.
The cooperative multitasking language extensions added to Dynamic C use the big loop and state
machine concept, but C code is used to implement the state machine rather than C variables. The
state of a task is remembered by a statement pointer that records the place where execution of the
block of statements has been paused to wait for an event.
To multitask using Dynamic C language extensions, most application programs will have some
flavor of this simple structure:
main() {
int i;
while(1) {
costate {
. . .
}
costate {
...
}
}
}
44
// endless loop for multitasking framework
// task 1
// body of costatement
// task 2
// body of costatement
Dynamic C User’s Manual
5.2 A Real-Time Problem
The following sequence of events is common in real-time programming.
Start:
1. Wait for a pushbutton to be pressed.
2. Turn on the first device.
3. Wait 60 seconds.
4. Turn on the second device.
5. Wait 60 seconds.
6. Turn off both devices.
7. Go back to the start.
The most rudimentary way to perform this function is to idle (“busy wait”) in a tight loop at each
of the steps where waiting is specified. But most of the computer time will used waiting for the
task, leaving no execution time for other tasks.
5.2.1 Solving the Real-Time Problem with a State Machine
Here is what a state machine solution might look like.
task1state = 1;
while(1){
switch(task1state){
// initialization:
case 1:
if( buttonpushed() ){
task1state=2;
turnondevice1();
timer1 = time;
// time incremented every second
}
break;
case 2:
if( (time-timer1) >= 60L){
task1state=3;
turnondevice2();
timer2=time;
}
break;
case 3:
if( (time-timer2) >= 60L){
task1state=1;
turnoffdevice1();
turnoffdevice2();
}
break;
}
/* other tasks or state machines */
}
Chapter 5: Multitasking with Dynamic C
45
If there are other tasks to be run, this control problem can be solved better by creating a loop that
processes a number of tasks. Now each task can relinquish control when it is waiting, thereby
allowing other tasks to proceed. Each task then does its work in the idle time of the other tasks.
5.3 Costatements
Costatements are Dynamic C extensions to the C language which simplify implementation of state
machines. Costatements are cooperative because their execution can be voluntarily suspended and
later resumed. The body of a costatement is an ordered list of operations to perform -- a task. Each
costatement has its own statement pointer to keep track of which item on the list will be performed
when the costatement is given a chance to run. As part of the startup initialization, the pointer is
set to point to the first statement of the costatement.
The statement pointer is effectively a state variable for the costatement or cofunction. It specifies
the statement where execution is to begin when the program execution thread hits the start of the
costatement.
All costatements in the program, except those that use pointers as their names, are initialized when
the function chain _GLOBAL_INIT is called. _GLOBAL_INIT is called automatically by premain before main is called. Calling _GLOBAL_INIT from an application program will cause
reinitialization of anything that was initialized in the call made by premain.
5.3.1 Solving the Real-Time Problem with Costatements
The Dynamic C costatement provides an easier way to control the tasks. It is relatively easy to add
a task that checks for the use of an emergency stop button and then behaves accordingly.
while(1){
costate{ ... }
// task 1
costate{
waitfor( buttonpushed() );
turnondevice1();
waitfor( DelaySec(60L) );
turnondevice2();
waitfor( DelaySec(60L) );
turnoffdevice1();
turnoffdevice2();
}
// task 2
costate{ ... }
// task n
}
The solution is elegant and simple. Note that the second costatement looks much like the original
description of the problem. All the branching, nesting and variables within the task are hidden in
the implementation of the costatement and its waitfor statements.
46
Dynamic C User’s Manual
5.3.2 Costatement Syntax
costate [ name [state] ] { [ statement | yield; | abort; |
waitfor( expression ); ] . . .}
The keyword costate identifies the statements enclosed in the curly braces that follow as a costatement.
name can be one of the following:
• A valid C name not previously used. This results in the creation of a structure of type
CoData of the same name.
• The name of a local or global CoData structure that has already been defined
• A pointer to an existing structure of type CoData
Costatements can be named or unnamed. If name is absent the compiler creates an “unnamed”
structure of type CoData for the costatement.
state can be one of the following:
• always_on
The costatement is always active. This means the costatement will execute every time it is
encountered in the execution thread, unless it is made inactive by CoPause(). It may be
made active again by CoResume().
• init_on
The costatement is initially active and will automatically execute the first time it is
encountered in the execution thread. The costatement becomes inactive after it completes
(or aborts). The costatement can be made inactive by CoPause().
If state is absent, a named costatement is initialized in a paused init_on condition. This
means that the costatement will not execute until CoBegin() or CoResume() is executed. It
will then execute once and become inactive again.
Unnamed costatements are always_on. You cannot specify init_on without specifying
name.
Chapter 5: Multitasking with Dynamic C
47
5.3.3 Control Statements
waitfor ( expression );
The keyword waitfor indicates a special waitfor statement and not a function call. The
expression is computed each time waitfor is executed. If true (non-zero), execution proceeds to the next statement, otherwise a jump is made to the closing brace of the costatement or
cofunction, with the statement pointer continuing to point to the waitfor statement. Any
valid C function that returns a value can be used in a waitfor statement.
yield
The yield statement makes an unconditional exit from a costatement or a cofunction. Execution continues at the statement following yield the next time the costatement or cofunction is
encountered.
abort
The abort statement causes the costatement or cofunction to terminate execution. If a costatement is always_on, the next time the program reaches it, it will restart from the top. If
the costatement is not always_on, it becomes inactive and will not execute again until
turned on by some other software.
A costatement can have as many C statements, including abort, yield, and waitfor statements, as needed. Costatements can be nested.
5.4 Advanced Costatement Topics
Each costatement has a structure of type CoData. This structure contains state and timing information. It also contains the address inside the costatement that will execute the next time the program thread reaches the costatement. A value of zero in the address location indicates the
beginning of the costatement.
5.4.1 The CoData Structure
typedef struct {
char CSState;
unsigned int lastlocADDR;
char lastlocCBR;
char ChkSum;
char firsttime;
union{
unsigned long ul;
struct {
unsigned int u1;
unsigned int u2;
} us;
} content;
char ChkSum2;
} CoData;
48
Dynamic C User’s Manual
5.4.2 CoData Fields
CSState
The CSState field contains two flags, STOPPED and INIT. The possible flag values and their
meaning are in the table below.
Table 5-6. Flags that specify the run status of a costatement
STOPPED
INIT
State of Costatement
yes
yes
Done, or has been initialized to run, but set to
inactive. Set by CoReset().
yes
no
Paused, waiting to resume. Set by CoPause().
no
yes
Initialized to run. Set by CoBegin().
no
no
Running. CoResume() will return the flags to
this state.
The function isCoDone() returns true (1) if both the STOPPED and INIT flags are set.
The function isCoRunning() returns true (1) if the STOPPED flag is not set.
The CSState field applies only if the costatement has a name The CSState flag has no
meaning for unnamed costatements or cofunctions.
Last Location
The two fields lastlocADDR and lastlocCBR represent the 24-bit address of the location at
which to resume execution of the costatement. If lastlocADDR is zero (as it is when initialized), the costatement executes from the beginning, subject to the CSState flag. If lastlocADDR is nonzero, the costatement resumes at the 24-bit address represented by
lastlocADDR and lastlocCBR.
These fields are zeroed whenever one of the following is true:
• the CoData structure is initialized by a call to _GLOBAL_INIT, CoBegin or CoReset
• the costatement is executed to completion
• the costatement is aborted.
Check Sum
The ChkSum field is a one-byte check sum of the address. (It is the exclusive-or result of the
bytes in lastlocADDR and lastlocCBR.) If ChkSum is not consistent with the address, the
program will generate a run-time error and reset. The check sum is maintained automatically. It is
initialized by _GLOBAL_INIT, CoBegin and CoReset.
First Time
The firsttime field is a flag that is used by a waitfor, or waitfordone statement. It is
set to 1 before the statement is evaluated the first time. This aids in calculating elapsed time for the
functions DelayMs, DelaySec, DelayTicks, IntervalTick, IntervalMs, and
IntervalSec.
Chapter 5: Multitasking with Dynamic C
49
Content
The content field (a union) is used by the costatement or cofunction delay routines to store a
delay count.
Check Sum 2
The ChkSum2 field is currently unused.
5.4.3 Pointer to CoData Structure
To obtain a pointer to a named costatement’s CoData structure, do the following:
CoData
CoData
cost1;
*pcost1;
pcost1 = &cost1;
...
CoBegin (pcost1);
costate pcost1 {
...
}
// allocate memory for a CoData struct
// get pointer to the CoData struct
// initialize CoData struct
// pcost1 is the costatement name and also a
//
pointer to its CoData structure.
5.4.4 Functions for Use With Named Costatements
For detailed function descriptions, please see the Dynamic C Function Reference Manual or select
Function Lookup/Insert from Dynamic C’s Help menu (keyboard shortcut is <Ctrl-H>).
All of these functions are in COSTATE.LIB. Each one takes a pointer to a CoData struct as its
only parameter.
isCoDone
int isCoDone(CoData* p);
This function returns true if the costatement pointed to by p has completed.
isCoRunning
int isCoRunning(CoData* p);
This function returns true if the costatement pointed to by p will run if given a continuation call.
CoBegin
void CoBegin(CoData* p);
This function initializes a costatement’s CoData structure so that the costatement will
be executed next time it is encountered.
50
Dynamic C User’s Manual
CoPause
void CoPause(CoData* p);
This function will change CoData so that the associated costatement is paused. When
a costatement is called in this state it does an implicit yield until it is released by a call
from CoResume or CoBegin.
CoReset
void CoReset(CoData* p);
This function initializes a costatement’s CoData structure so that the costatement will
not be executed the next time it is encountered (unless the costatement is declared
always_on.)
CoResume
void CoResume(CoData* p);
This function unpauses a paused costatement. The costatement will resume the next time
it is called.
5.4.5 Firsttime Functions
In a function definition, the keyword firsttime causes the function to have an implicit first
parameter: a pointer to the CoData structure of the costatement that calls it.
The following firsttime functions are defined in COSTATE.LIB. For more information see
the Dynamic C Function Reference Manual. These functions should be called inside a waitfor
statement because they do not yield while waiting for the desired time to elapse, but instead return
0 to indicate that the desired time has not yet elapsed.
DelayMs
IntervalMs
DelaySec
IntervalSec
DelayTicks
IntervalTick
User-defined firsttime functions are allowed.
5.4.6 Shared Global Variables
The variables SEC_TIMER, MS_TIMER and TICK_TIMER are shared, making them atomic
when being updated. They are defined and initialized in VDRIVER.LIB. They are updated by the
periodic interrupt and are used by firsttime functions. They should not be modified by an
application program. Costatements and cofunctions depend on these timer variables being valid
for use in waitfor statements that call functions that read them. E.g. the following statement
will access SEC_TIMER.
waitfor(DelaySec(3));
Chapter 5: Multitasking with Dynamic C
51
5.5 Cofunctions
Cofunctions, like costatements, are used to implement cooperative multitasking. But, unlike costatements, they have a form similar to functions in that arguments can be passed to them and a
value can be returned (but not a structure).
The default storage class for a cofunction’s variables is Instance. An instance variable
behaves like a static variable, i.e., its value persists between function calls. Each instance of an
Indexed Cofunction has its own set of instance variables. The compiler directive #class does
not change the default storage class for a cofunction’s variables.
All cofunctions in the program are initialized when the function chain _GLOBAL_INIT is called.
This call is made by premain.
5.5.1 Syntax
A cofunction definition is similar to the definition of a C function.
cofunc|scofunc type [name][[dim]]([type arg1, ..., type argN])
{ [ statement | yield; | abort; | waitfor(expression);] ... }
cofunc, scofunc
The keywords cofunc or scofunc (a single-user cofunction) identify the statements
enclosed in curly braces that follow as a cofunction.
type
Whichever keyword (cofunc or scofunc) is used is followed by the data type returned
(void, int, etc.).
name
A name can be any valid C name not previously used. This results in the creation of a structure
of type CoData of the same name.
dim
The cofunction name may be followed by a dimension if an indexed cofunction is being
defined.
cofunction arguments (arg1, . . ., argN)
As with other Dynamic C functions, cofunction arguments are passed by value.
cofunction body
A cofunction can have as many C statements, including abort, yield, waitfor, and
waitfordone statements, as needed. Cofunctions can contain calls to other cofunctions.
52
Dynamic C User’s Manual
5.5.2 Calling Restrictions
You cannot assign a cofunction to a function pointer then call it via the pointer.
Cofunctions are called using a waitfordone statement. Cofunctions and the waitfordone
statement may return an argument value as in the following example.
int j,k,x,y,z;
j = waitfordone x = Cofunc1;
k = waitfordone{ y=Cofunc2(...); z=Cofunc3(...); }
The keyword waitfordone (can be abbreviated to the keyword wfd) must be inside a costatement or cofunction. Since a cofunction must be called from inside a wfd statement, ultimately a
wfd statement must be inside a costatement.
If only one cofunction is being called by wfd the curly braces are not needed.
The wfd statement executes cofunctions and firsttime functions. When all the cofunctions
and firsttime functions listed in the wfd statement are complete (or one of them aborts), execution proceeds to the statement following wfd. Otherwise a jump is made to the ending brace of
the costatement or cofunction where the wfd statement appears and when the execution thread
comes around again control is given back to wfd.
In the example above, x, y and z must be set by return statements inside the called cofunctions. Executing a return statement in a cofunction has the same effect as executing the end brace.
In the example above, the variable k is a status variable that is set according to the following
scheme. If no abort has taken place in any cofunction, k is set to 1, 2, ..., n to indicate which
cofunction inside the braces finished executing last. If an abort takes place, k is set to -1, -2, ..., -n
to indicate which cofunction caused the abort.
5.5.2.1 Using the IX Register
Functions called from within a cofunction may use the IX register if they restore it before the
cofunction is exited, which includes an exit via an incomplete waitfordone statement.
In the case of an application that uses the #useix directive, the IX register will be corrupted when
any stack-variable using function is called from within a cofunction, or if a stack-variable using
function contains a call to a cofunction.
5.5.3 CoData Structure
The CoData structure discussed in Section 5.4.1 applies to cofunctions; each cofunction has an
associated CoData structure.
5.5.4 Firsttime Functions
The firsttime functions discussed in “Firsttime Functions” on page 51 can also be used inside
cofunctions. They should be called inside a waitfor statement. If you call these functions from
inside a wfd statement, no compiler error is generated, but, since these delay functions do not
yield while waiting for the desired time to elapse, but instead return 0 to indicate that the desired
time has not yet elapsed, the wfd statement will consider a return value to be completion of the
firsttime function and control will pass to the statement following the wfd.
Chapter 5: Multitasking with Dynamic C
53
5.5.5 Types of Cofunctions
There are three types of cofunctions: simple, indexed and single-user. Which one to use depends
on the problem that is being solved. A single-user, indexed cofunction is not valid.
5.5.5.1 Simple Cofunction
A simple cofunction has only one instance and is similar to a regular function with a costate taking
up most of the function’s body.
5.5.5.2 Indexed Cofunction
An indexed cofunction allows the body of a cofunction to be called more than once with different
parameters and local variables. The parameters and the local variable that are not declared static
have a special lifetime that begins at a first time call of a cofunction instance and ends when the
last curly brace of the cofunction is reached or when an abort or return is encountered.
The indexed cofunction call is a cross between an array access and a normal function call, where
the array access selects the specific instance to be run.
Typically this type of cofunction is used in a situation where N identical units need to be controlled by the same algorithm. For example, a program to control the door latches in a building
could use indexed cofunctions. The same cofunction code would read the key pad at each door,
compare the passcode to the approved list, and operate the door latch. If there are 25 doors in the
building, then the indexed cofunction would use an index ranging from 0 to 24 to keep track of
which door is currently being tested. An indexed cofunction has an index similar to an array index.
waitfordone{ ICofunc[n](...); ICofunc2[m](...); }
The value between the square brackets must be positive and less than the maximum number of
instances for that cofunction. There is no runtime checking on the instance selected, so, like
arrays, the programmer is responsible for keeping this value in the proper range.
5.5.5.2.1 Indexed Cofunction Restrictions
Costatements are not supported inside indexed cofunctions. Single user cofunctions can not be
indexed.
5.5.5.3 Single User Cofunction
Since cofunctions are executing in parallel, the same cofunction normally cannot be called at the
same time from two places in the same big loop. For example, the following statement containing
two simple cofunctions will generally cause a fatal error.
waitfordone{ cofunc_nameA(); cofunc_nameA();}
This is because the same cofunction is being called from the second location after it has already
started, but not completed, execution for the call from the first location. The cofunction is a state
machine and it has an internal statement pointer that cannot point to two statements at the same
time.
54
Dynamic C User’s Manual
Single-user cofunctions can be used instead. They can be called simultaneously because the second and additional callers are made to wait until the first call completes. The following statement,
which contains two single-user cofunctions, is okay.
waitfordone( scofunc_nameA(); scofunc_nameA();}
loopinit()
This function should be called in the beginning of a program that uses single-user cofunctions. It
initializes internal data structures that are used by loophead().
loophead()
This function should be called within the "big loop" in your program. It is necessary for proper
single-user cofunction abandonment handling.
Example
// echoes characters
main() {
int c;
serXopen(19200);
loopinit();
while (1) {
loophead();
wfd c = cof_serAgetc();
wfd cof_serAputc(c);
}
serAclose();
}
5.5.6 Types of Cofunction Calls
A wfd statement makes one of three types of calls to a cofunction.
5.5.6.1 First Time Call
A first time call happens when a wfd statement calls a cofunction for the first time in that statement. After the first time, only the original wfd statement can give this cofunction instance continuation calls until either the instance is complete or until the instance is given another first time
call from a different statement.
5.5.6.2 Continuation Call
A continuation call is when a cofunction that has previously yielded is given another chance to run
by the enclosing wfd statement. These statements can only call the cofunction if it was the last
statement to give the cofunction a first time call or a continuation call.
5.5.6.3 Terminal Call
A terminal call ends with a cofunction returning to its wfd statement without yielding to another
cofunction. This can happen when it reaches the end of the cofunction and does an implicit return,
when the cofunction does an explicit return, or when the cofunction aborts.
Chapter 5: Multitasking with Dynamic C
55
5.5.6.4 Lifetime of a Cofunction Instance
This stretches from a first time call until its terminal call or until its next first time call.
5.5.7 Special Code Blocks
The following special code blocks can appear inside a cofunction.
everytime { statements }
This must be the first statement in the cofunction. It will be executed every time program execution passes to the cofunction no matter where the statement pointer is pointing. After the
everytime statements are executed, control will pass to the statement pointed to by the
cofunction’s statement pointer.
abandon { statements }
This keyword applies to single-user cofunctions only and must be the first statement in the
body of the cofunction. The statements inside the curly braces will be executed if the singleuser cofunction is forcibly abandoned. A call to loophead() (defined in COFUNC.LIB) is
necessary for abandon statements to execute.
Example
SAMPLES/COFUNC/ COFABAND.C illustrates the use of abandon.
scofunc SCofTest(int i){
abandon {
printf("CofTest was abandoned\n");
}
while(i>0) {
printf("CofTest(%d)\n",i);
yield;
}
}
main(){
int x;
for(x=0;x<=10;x++) {
loophead();
if(x<5) {
costate {
wfd SCofTest(1);
}
}
costate {
wfd SCofTest(2);
}
}
}
// first caller
// second caller
In this example two tasks in main are requesting access to SCofTest. The first request is honored and the second request is held. When loophead notices that the first caller is not being
called each time around the loop, it cancels the request, calls the abandonment code and allows the
second caller in.
56
Dynamic C User’s Manual
5.5.8 Solving the Real-Time Problem with Cofunctions
for(;;){
costate{
wfd emergencystop();
for (i=0; i<MAX_DEVICES; i++)
wfd turnoffdevice(i);
}
costate{
wfd x = buttonpushed();
wfd turnondevice(x);
waitfor( DelaySec(60L) );
wfd turnoffdevice(x);
}
...
costate{ ... }
// task 1
// task 2
// task n
}
Cofunctions, with their ability to receive arguments and return values, provide more flexibility and
specificity than our previous solutions. Using cofunctions, new machines can be added with only
trivial code changes. Making buttonpushed() a cofunction allows more specificity because
the value returned can indicate a particular button in an array of buttons. Then that value can be
passed as an argument to the cofunctions turnondevice and turnoffdevice.
5.6 Patterns of Cooperative Multitasking
Sometimes a task may be something that has a beginning and an end. For example, a cofunction to
transmit a string of characters via the serial port begins when the cofunction is first called, and
continues during successive calls as control cycles around the big loop. The end occurs after the
last character has been sent and the waitfordone condition is satisified. This type of a call to a
cofunctions might look like this:
waitfordone{ SendSerial("string of characters"); }
[ next statement ]
The next statement will execute after the last character is sent.
Chapter 5: Multitasking with Dynamic C
57
Some tasks may not have an end. They are endless loops. For example, a task to control a servo
loop may run continuously to regulate the temperature in an oven. If there are a a number of tasks
that need to run continuously, then they can be called using a single waitfordone statement as
shown below.
costate {
waitfordone { Task1(); Task2(); Task3(); Task4(); }
[ to come here is an error ]
}
Each task will receive some execution time and, assuming none of the tasks is completed, they
will continue to be called. If one of the cofunctions should abort, then the waitfordone statement will abort, and corrective action can be taken.
5.7 Timing Considerations
In most instances, costatements and cofunctions are grouped as periodically executed tasks. They
can be part of a real-time task, which executes every n milliseconds as shown below using costatements.
Figure 2. Costatement as Part of Real-Time Task
If all goes well, the first costatement will be executed at the periodic rate. The second costatement
will, however, be delayed by the first costatement. The third will be delayed by the second, and so
on. The frequency of the routine and the time it takes to execute comprise the granularity of the
routine.
If the routine executes every 25 milliseconds and the entire group of costatements executes in 5 to
10 milliseconds, then the granularity is 30 to 35 milliseconds. Therefore, the delay between the
occurrence of a waitfor event and the statement following the waitfor can be as much as the
granularity, 30 to 35 ms. The routine may also be interrupted by higher priority tasks or interrupt
routines, increasing the variation in delay.
The consequences of such variations in the time between steps depends on the program’s objective. Suppose that the typical delay between an event and the controller’s response to the event is
58
Dynamic C User’s Manual
25 ms, but under unusual circumstances the delay may reach 50 ms. An occasional slow response
may have no consequences whatsoever. If a delay is added between the steps of a process where
the time scale is measured in seconds, then the result may be a very slight reduction in throughput.
If there is a delay between sensing a defective product on a moving belt and activating the reject
solenoid that pushes the object into the reject bin, the delay could be serious. If a critical delay
cannot exceed 40 ms, then a system will sometimes fail if its worst-case delay is 50 ms.
5.7.1 waitfor Accuracy Limits
If an idle loop is used to implement a delay, the processor continues to execute statements almost
immediately (within nanoseconds) after the delay has expired. In other words, idle loops give precise delays. Such precision cannot be achieved with waitfor delays.
A particular application may not need very precise delay timing. Suppose the application requires
a 60-second delay with only 100 ms of delay accuracy; that is, an actual delay of 60.1 seconds is
considered acceptable. Then, if the processor guarantees to check the delay every 50 ms, the delay
would be at most 60.05 seconds, and the accuracy requirement is satisfied.
5.8 Overview of Preemptive Multitasking
In a preemptive multitasking environment, tasks do not voluntarily relinquish control. Tasks are
scheduled to run by priority level and/or by being given a certain amount of time.
There are two ways to accomplish preemptive multitasking using Dynamic C. The first way is
µC/OS-II, a real-time, preemptive kernel that runs on the Rabbit microprocessor and is fully supported by Dynamic C. For more information see Chapter 18, “µC/OS-II.” The other way is to use
slice statements.
5.9 Slice Statements
The slice statement, based on the costatement language construct, allows the programmer to
run a block of code for a specific amount of time.
5.9.1 Syntax
slice ([context_buffer,] context_buffer_size, time_slice)
[name]{[statement|yield;|abort;|waitfor(expression);]}
context_buffer_size
This value must evaluate to a constant integer. The value specifies the number of bytes for the
buffer context_buffer. It needs to be large enough for worst-case stack usage by the
user program and interrupt routines.
time_slice
The amount of time in ticks for the slice to run. One tick = 1/1024 second.
Chapter 5: Multitasking with Dynamic C
59
name
When defining a named slice statement, you supply a context buffer as the first argument.
When you define an unnamed slice statement, this structure is allocated by the compiler.
[statement | yield; | abort; | waitfor(expression);]
The body of a slice statement may contain:
•
•
•
•
Regular C statements
yield statements to make an unconditional exit.
abort statements to make an execution jump to the very end of the statement.
waitfor statements to suspend progress of the slice statement pending some condition
indicated by the expression.
5.9.2 Usage
The slice statement can run both cooperatively and preemptively all in the same framework. A
slice statements, like costatements and cofunctions, can suspend its execution with an abort,
yield, or waitfor as with costatements and cofunctions, or with an implicit yield determined by the time_slice parameter that was passed to it.
A routine called from the periodic interrupt forms the basis for scheduling slice statements. It
counts down the ticks and changes the slice statement’s context.
5.9.3 Restrictions
Since a slice statement has its own stack, local auto variables and parameters cannot be
accessed while in the context of a slice statement. Any functions called from the slice statement
function normally.
Only one slice statement can be active at any time, which eliminates the possibility of nesting
slice statements or using a slice statement inside a function that is either directly or indirectly called from a slice statement. The only methods supported for leaving a slice statement are completely executing the last statement in the slice, or executing an abort, yield
or waitfor statement.
The return, continue, break, and goto statements are not supported.
Slice statements cannot be used with µC/OS-II or DCRTCP.LIB.
60
Dynamic C User’s Manual
5.9.4 Slice Data Structure
Internally, the slice statement uses two structures to operate. When defining a named slice
statement, you supply a context buffer as the first argument. When you define an unnamed slice
statement, this structure is allocated by the compiler. Internally, the context buffer is represented
by the SliceBuffer structure below.
struct SliceData {
int time_out;
void* my_sp;
void* caller_sp;
CoData codata;
}
struct SliceBuffer {
SliceData slice_data;
char stack[];
};
// fills rest of the slice buffer
5.9.5 Slice Internals
When a slice statement is given control, it saves the current context and switches to a context
associated with the slice statement. After that, the driving force behind the slice statement is
the timer interrupt. Each time the timer interrupt is called, it checks to see if a slice statement is
active. If a slice statement is active, the timer interrupt decrements the time_out field in the
slice’s SliceData. When the field is decremented to zero, the timer interrupt saves the
slice statement’s context into the SliceBuffer and restores the previous context. Once the
timer interrupt completes, the flow of control is passed to the statement directly following the
slice statement. A similar set of events takes place when the slice statement does an explicit
yield/abort/waitfor.
Chapter 5: Multitasking with Dynamic C
61
5.9.5.1 Example 1
Two slice statements and a costatement will appear to run in parallel. Each block will run independently, but the slice statement blocks will suspend their operation after 20 ticks for
slice_a and 40 ticks for slice_b. Costate a will not release control until it either explicitly
yields, aborts, or completes. In contrast, slice_a will run for at most 20 ticks, then slice_b
will begin running. Costate a will get its next opportunity to run about 60 ticks after it relinquishes
control.
main () {
int x, y, z;
...
for (;;) {
costate a {
...
}
slice(500, 20) {
...
}
slice(500, 40) {
...
}
}
}
// slice_a
// slice_b
5.9.5.2 Example 2
This code guarantees that the first slice starts on TICK_TIMER evenly divisible by 80 and the
second starts on TICK_TIMER evenly divisible by 105.
main() {
for(;;) {
costate {
slice(500,20) {
waitfor(IntervalTick(80));
...
}
slice(500,50) {
waitfor(IntervalTick(105);
...
}
}
}
}
62
// slice_a
// slice_b
Dynamic C User’s Manual
5.9.5.3 Example 3
This approach is more complicated, but will allow you to spend the idle time doing a low-priority
background task.
main() {
int time_left;
long start_time;
for(;;) {
start_time = TICK_TIMER;
slice(500,20) {
waitfor(IntervalTick(80));
...
}
slice(500,50) {
waitfor(IntervalTick(105));
...
}
time_left = 75-(TICK_TIMER-start_time);
if(time_left>0) {
slice(500,75-(TICK_TIMER-start_time)) {
...
}
}
}
// slice_a
// slice_b
// slice_c
}
5.10 Summary
Although multitasking may actually decrease processor throughput slightly, it is an important concept. A controller is often connected to more than one external device. A multitasking approach
makes it possible to write a program controlling multiple devices without having to think about all
the devices at the same time. In other words, multitasking is an easier way to think about the system.
Chapter 5: Multitasking with Dynamic C
63
64
Dynamic C User’s Manual
6. The Virtual Driver
Virtual Driver is the name given to some initialization services and a group of services performed
by a periodic interrupt. These services are:
Initialization Services
• Call _GLOBAL_INIT()
• Initialize the global timer variables
• Start the Virtual Driver periodic interrupt
Periodic Interrupt Services
• Decrement software (virtual) watchdog timers
• Hitting the hardware watchdog timer
• Increment the global timer variables
• Drive uC/OS-II preemptive multitasking
• Drive slice statement preemptive multitasking
6.1 Default Operation
The user should be aware that by default the Virtual Driver starts and runs in a Dynamic C program without the user doing anything. This happens because before main() is called, a function
called premain() is called by the Rabbit kernel (BIOS) that actually calls main(). Before
premain() calls main(), it calls a function named VdInit() that performs the initialization services, including starting the periodic interrupt. If the user were to disable the Virtual Driver
by commenting out the call to VdInit() in premain(), then none of the services performed
by the periodic interrupt would be available. Unless the Virtual Driver is incompatible with some
very tight timing requirements of a program and none of the services performed by the Virtual
Driver are needed, it is recommended that the user not disable it.
6.2 Calling _GLOBAL_INIT()
VdInit() calls _GLOBAL_INIT() which runs all #GLOBAL_INIT sections in a program.
_GLOBAL_INIT() also initializes all of the CoData structures needed by costatements and
cofunctions. If VdInit() is not called, users could still use costatements and cofunctions if the
call to VdInit() was replaced by a call to _GLOBAL_INIT(), but the DelaySec() and
DelayMs() functions often used with costatements and cofunctions in waitfor statements
would not work because those functions depend on timer variables which are maintained by the
periodic interrupt.
Chapter 6: The Virtual Driver
65
6.3 Global Timer Variables
SEC_TIMER, MS_TIMER and TICK_TIMER are global variables defined as shared
unsigned long. These variables should never be changed by an application program. Among
other things, the TCP/IP stack depends on the validity of the timer variables.
On initialization, SEC_TIMER is synchronized with the real-time clock. The date and time can be
accessed more quickly by reading SEC_TIMER than by reading the real-time clock.
The periodic interrupt updates SEC_TIMER every second, MS_TIMER every millisecond, and
TICK_TIMER 1024 times per second (the frequency of the periodic interrupt). These variables
are used by the DelaySec, DelayMS and DelayTicks functions, but are also convenient for
application programs to use for timing purposes. The following sample shows the use of
MS_TIMER to measure the execution time in microseconds of a Dynamic C integer add. The
work is done in a nodebug function so that debugging does not affect timing. For more information on the nodebug keyword, please see “nodebug” on page 149.
#define N 10000
main(){ timeit(); }
nodebug timeit(){
unsigned long int T0;
float T2,T1;
int x,y;
int i;
T0 = MS_TIMER;
for(i=0;i<N;i++) { }
// T1 gives empty loop time
T1=(MS_TIMER-T0);
T0 = MS_TIMER;
for(i=0;i<N;i++){ x+y;}
// T2 gives test code execution time
T2=(MS_TIMER-T0);
// subtract empty loop time and convert to time for single pass
T2=(T2-T1)/(float)N;
// multiply by 1000 to convert ms. to us.
printf("time to execute test code = %f us\n",T2*1000.0);
}
66
Dynamic C User’s Manual
6.4 Watchdog Timers
Watchdog timers limit the amount of time your system will be in an unknown state.
6.4.1 Hardware Watchdog
The Rabbit CPU has one built-in hardware watchdog timer (WDT). The Virtual Driver hits this
watchdog periodically. The following code fragment could be used to disable this WDT:
#asm
ld a,0x51
ioi ld (WDTTR),a
ld a,0x54
ioi ld (WDTTR),a
#endasm
However, it is recommended that the watchdog not be disabled. This prevents the target from
entering an endless loop in software due to coding errors or hardware problems. If the Virtual
Driver is not used, the user code should periodically call hitwd().
When debugging a program, if the program is stopped at a breakpoint because the breakpoint was
explicitly set, or because the user is single stepping, then the debug kernel hits the hardware
watchdog periodically.
6.4.2 Virtual Watchdogs
There are 10 virtual WDTs available; they are maintained by the Virtual Driver. Virtual watchdogs, like the hardware watchdog, limit the amount of time a system is in an unknown state. They
also narrow down the problem area to assist in debugging.
The function VdGetFreeW(count) allocates and initializes a virtual watchdog. The return
value of this function is the ID of the virtual watchdog. If an attempt is made to allocate more than
10 virtual WDTs, a fatal error occurs. In debug mode, this fatal error will cause the program to
return with error code 250. The default run-time error behavior is to reset the board.
The ID returned by VdGetFreeW is used as the argument when calling VdHitWd(ID) or
VdReleaseWd(ID) to hit or deallocate a virtual watchdog
The Virtual Driver counts down watchdogs every 62.5 ms. If a virtual watchdog reaches 0, this is
fatal error code 247. Once a virtual watchdog is active, it should be reset periodically with a call
to VdHitWd(ID) to prevent this. If count = 2 for a particular WDT, then VdHitWd(ID) will
need to be called within 62.5 ms for that WDT. If count = 255, VdHitWd(ID) will need to be
called within 15.94 seconds.
The Virtual Driver does not count down any virtual WDTs if the user is debugging with Dynamic
C and stopped at a breakpoint.
6.5 Preemptive Multitasking Drivers
A simple scheduler for Dynamic C’s preemptive slice statement is serviced by the Virtual Driver.
The scheduling for µC/OS-II a more traditional full-featured real-time kernel, is also done by the
Virtual Driver.
These two scheduling methods are mutually exclusive—slicing and µC/OS-II must not be
used in the same program.
Chapter 6: The Virtual Driver
67
68
Dynamic C User’s Manual
7. The Slave Port Driver
The Rabbit 2000 and the Rabbit 3000 have hardware for a slave port, allowing a master controller
to read and write certain internal registers on the Rabbit. The library, Slaveport.lib, implements a complete master/slave protocol for the Rabbit slave port. Sample libraries,
Master_serial.lib and Sp_stream.lib provide serial port and stream-based communication handlers using the slave port protocol.
7.1 Slave Port Driver Protocol
Given the variety of embedded system implementations, the protocol for the slave port driver was
designed to make the software for the master controller as simple as possible. Each interaction
between the master and the slave is initiated by the master. The master has complete control over
when data transfers occur and can expect single, immediate responses from the slave.
7.1.1 Overview
1. Master writes to the command register after setting the address register and, optionally, the data
register. These registers are internal to the slave.
2. Slave reads the registers that were written by the master.
3. Slave writes to command response register after optionally setting the data register. This also
causes the SLAVEATTN line on the Rabbit slave to be pulled low.
4. Master reads response and data registers.
5. Master writes to the slave port status register to clear interrupt line from the slave.
7.1.2 Registers on the Slave
From the point of view of the master, the slave is an I/O device with four register addresses.
Table 7-7.
The slave registers that are accessible by the master
Address of
Internal
Register From
Register
Address of
Master’s
Name
Register
Perspective
Register Use
SPD0R
0x20
0
Command and response register
SPD1R
0x21
1
Address register
SPD2R
0x22
2
Optional data register
SPSR
0x23
3
Slave port status register. In this protocol the only bit
used is for checking the command response register.
Bit 3 is set if the slave has written to SPD0R. It is
cleared when the master writes to SPSR, which also
deasserts the SLAVEATTN line.
Chapter 7: The Slave Port Driver
69
Accessing the same address (0, 1 or 2) uses two different registers, depending on whether the
access was a read or a write. In other words, when writing to address 0, the master accesses a different location than when the it reads address 0.
Table 7-8.
What happens when the master accesses a slave register
Register
Address
Read
Write
0
Gets command response from
slave
Sends command to slave, triggers
slave response
1
Not used
Sets channel address to send
command to
2
Gets returned data from slave
Sets data byte to send to slave
3
Gets slave port status (see
below)
Clears slave response bit (see
below)
The status port is a bit field showing which slave port registers have been updated. For the purposes of this protocol. Only bit 3 needs to be examined. After sending a command, the master can
check bit 3, which is set when the slave writes to the response register. At this point the response
and returned data are valid and should be read before sending a new command. Performing a
dummy write to the status register will clear this bit, so that it can be set by the next response.
Pin assignments for both the Rabbit 2000 and the Rabbit 3000 acting as a slave are as follows:
Table 7-9.
Pin assignments for the Rabbit acting as a slave
Pin
Function
PE7
/SCS chip select (active low to read/write slave port)
PB2
/SWR slave write (assert for write cycle)
PB3
/SRD slave read (assert for read cycle)
PB4
SA0 low address bit for slave port registers
PB5
SA1 high address bit for slave registers
PB7
/SLVATTN asserted by slave when it responds to a command. cleared
by master write to status register
PA0-PA7
slave port data bus
For more details and read/write signal timing see the Rabbit 2000 Microprocessor User’s Manual
or the Rabbit 3000 Microprocessor User’s Manual.
70
Dynamic C User’s Manual
7.1.3 Polling and Interrupts
Both the slave and the master can use interrupt or polling for the slave. The parameter passed to
SPinit() determines which one is used. In interrupt mode, the developer can indicate whether
the handler functions for the channels are interruptible or non-interruptible.
7.1.4 Communication Channels
The Rabbit slave has 256 configurable channels available for communication. The developer must
provide a handler function for each channel that is used. Some basic handlers are available in the
library Slave_Port.lib. These handlers will be discussed later in this chapter.
When the slave port driver is initialized, a callback table of handler functions is set up. Handler
functions are added to the callback table by SPsetHandler().
7.2 Functions
Slave_port.lib provides the following functions:
SPinit
int SPinit ( int mode );
DESCRIPTION
This function initializes the slave port driver. It sets up the callback tables for the different
channels. The slave port driver can be run in either polling mode where SPtick() must
be called periodically, or in interrupt mode where an ISR is triggered every time the master sends a command. There are two version of interrupt mode. In the first, interrupts are
reenabled while the handler function is executing. In the other, the handler function will
execute at the same interrupt priority as the driver ISR.
PARAMETERS
mode
0: For polling
1: For interrupt driven (interruptible handler functions)
2: For interrupt driven (non-interruptible handler functions)
RETURN VALUE
1: Success
0: Failure
LIBRARY
SLAVE_PORT.LIB
Chapter 7: The Slave Port Driver
71
SPsetHandler
int SPsetHandler ( char address, int (*handler)(), void
*handler_params);
DESCRIPTION
This function sets up a handler function to process incoming commands from the master
for a particular slave port address.
PARAMETERS
address
The 8-bit slave port address of the channel that corresponds to
the handler function.
handler
Pointer to the handler function. This function must have a particular form, which is described by the function description
for MyHandler() shown below. Setting this parameter to
NULL unloads the current handler.
handler_params
Pointer that will be saved and passed to the handler function
each time it is called. This allows the handler function to be
parameterized for multiple cases.
RETURN VALUE
1: Success, the handler was set.
0: Failure.
LIBRARY
SLAVE_PORT.LIB
72
Dynamic C User’s Manual
MyHandler
int MyHandler ( char command, char data_in, void *params );
DESCRIPTION
This function is a developer-supplied function and can have any valid Dynamic C name.
Its purpose is to handle incoming commands from a master to one of the 256 channels on
the slave port. A handler function must be supplied for every channel that is being used
on the slave port.
PARAMETERS
command
This is the received command byte.
data_in
The optional data byte
params
The optional parameters pointer.
RETURN VALUE
This function must return an integer. The low byte must contains the response code and
the high byte contains the returned data, if there is any.
LIBRARY
This is a developer-supplied function.
Chapter 7: The Slave Port Driver
73
SPtick
void SPtick ( void );
DESCRIPTION
This function must be called periodically when the slave port is used in polling mode.
LIBRARY
SLAVE_PORT.LIB
SPclose
void SPclose( void );
DESCRIPTION
This function disables the slave port driver and unloads the ISR if one was used.
LIBRARY
SLAVE_PORT.LIB
7.3 Examples
The rest of the chapter describes some useful handlers.
7.3.1 Status Handler
SPstatusHandler(), available in Slave_port.lib, is an example of a simple handler to
report the status of the slave. To set up the function as a handler on slave port address 12, do the
following:
SPsetHandler (12, SPstatusHandler, &status_char);
Sending any command to this handler will cause it to respond with a 1 in the response register and
the current value of status_char in the data return register.
74
Dynamic C User’s Manual
7.3.2 Serial Port Handler
Slave_port.lib contains handlers for all four serial ports on the slave.
Master_serial.lib contains code for a master using the slave’s serial port handler. This
library illustrates the general case of implementing the master side of the master/slave protocol.
7.3.2.1 Commands to the Slave
Table 7-10.
Commands that the master can send to the slave
Command
Command Description
1
Transmit byte. Byte value is in data register. Slave responds with 1 if the
byte was processed or 0 if it was not.
2
Receive byte. Slave responds with 2 if has put a new received byte into the
data return register or 0 if there were no bytes to receive.
3
Combined transmit/receive—a combination of the transmit and receive
commands. The response will also be a logical OR of the two command
responses.
4
Set baud factor, byte 1 (LSB). The actual baud rate is the baud factor
multiplied by 300.
5
Set baud factor, byte 2 (MSB). The actual baud rate is the baud factor
multiplied by 300.
6
Set port configuration bits
7
Open port
8
Close port
9
Get errors. Slave responds with 1 if the port is open and can return an error
bitfield. The error bits are the same as for the function serAgetErrors() and
are put in the data return register by the slave.
10, 11
Returns count of free bytes in the serial port write buffer. The two
commands return the LSB and the MSB of the count respectively. The
LSB(10) should be read first to latch the count.
12, 13
Returns count of free bytes in the serial port read buffer. The two
commands return the LSB and the MSB of the count respectively. The
LSB(12) should be read first to latch the count.
14, 15
Returns count of bytes currently in the serial port write buffer. The two
commands return the LSB and the MSB of the count respectively. The
LSB(14) should be read first to latch the count.
16, 17
Returns count of bytes currently in the serial port write buffer. The two
commands return the LSB and the MSB of the count respectively. The
LSB(16) should be read first to latch the count.
Chapter 7: The Slave Port Driver
75
7.3.2.2 Slave Side of Protocol
To set up the serial port handler to connect serial port A to channel 5 , do the following:
SPsetHandler (5, SPserAhandler, NULL);
7.3.2.3 Master Side of Protocol
The following functions are in Master_serial.lib. They are for a master using a serial port
handler on a slave.
cof_MSgetc
int cof_MSgetc(char address);
DESCRIPTION
Yields to other tasks until a byte is received from the serial port on the slave.
PARAMETERS
address
Slave channel address of the serial handler.
RETURN VALUE
Value of the received character on success.
-1: Failure.
LIBRARY
MASTER_SERIAL.LIB
cof_MSputc
void cof_MSputc(char address, char ch);
DESCRIPTION
Sends a character to the serial port. Yields until character is sent.
PARAMETERS
address
Slave channel address of serial handler.
ch
Character to send.
RETURN VALUE
0: Success, character was sent.
-1: Failure, character was not sent.
LIBRARY
MASTER_SERIAL.LIB
76
Dynamic C User’s Manual
cof_MSread
int cof_MSread(char address, char *buffer, int length, unsigned
long timeout);
DESCRIPTION
Reads bytes from the serial port on the slave into the provided buffer. Waits until at least
one character has been read. Returns after buffer is full, or timeout has expired between reading bytes. Yields to other tasks while waiting for data.
PARAMETERS
address
Slave channel address of serial handler.
buffer
Buffer to store received bytes.
length
Size of buffer.
timeout
Time to wait between bytes before giving up on receiving anymore.
RETURN VALUE
>0: Bytes read.
-1: Failure.
LIBRARY
MASTER_SERIAL.LIB
cof_MSwrite
int cof_MSwrite(char address, char *data, int length);
DESCRIPTION
Transmits an array of bytes from the serial port on the slave. Yields to other tasks while
waiting for write buffer to clear.
PARAMETERS
address
Slave channel address of serial handler.
data
Array to be transmitted.
length
Size of array.
RETURN VALUE
Number of bytes actually written or -1 if error.
LIBRARY
MASTER_SERIAL.LIB
Chapter 7: The Slave Port Driver
77
MSclose
int MSclose(char address);
DESCRIPTION
Closes a serial port on the slave.
PARAMETERS
address
Slave channel address of serial handler.
RETURN VALUE
0: Success.
-1: Failure.
LIBRARY
MASTER_SERIAL.LIB
MSgetc
int MSgetc(char address);
DESCRIPTION
Receives a character from the serial port.
PARAMETERS
address
Slave channel address of serial handler.
RETURN VALUE
Value of received character.
-1: No character available.
LIBRARY
MASTER_SERIAL.LIB
78
Dynamic C User’s Manual
MSgetError
int MSgetError(char address);
DESCRIPTION
Gets bitfield with any current error from the specified serial port on the slave. Error codes
are:
SER_PARITY_ERROR 0x01
SER_OVERRUN_ERROR 0x02
PARAMETERS
address
Slave channel address of serial handler.
RETURN VALUE
Number of bytes free: Success.
-1: Failure.
LIBRARY
MASTER_SERIAL.LIB
MSinit
int MSinit(int io_bank);
DESCRIPTION
Sets up the connection to the slave.
PARAMETERS
io_bank
The IO bank and chip select pin number for the slave device.
This is a number from 0 to 7 inclusive.
RETURN VALUE
1: Success.
LIBRARY
MASTER_SERIAL.LIB
Chapter 7: The Slave Port Driver
79
MSopen
int MSopen(char address, unsigned long baud);
DESCRIPTION
Opens a serial port on the slave, given that there is a serial handler at the specified address on the slave.
PARAMETERS
address
Slave channel address of serial handler.
baud
Baud rate for the serial port on the slave.
RETURN VALUE
1: Baud rate used matches the argument.
0: Different baud rate is being used.
-1: Slave port comm error occurred.
LIBRARY
MASTER_SERIAL.LIB
MSputc
int MSputc(char address, char ch);
DESCRIPTION
Transmits a single character through the serial port.
PARAMETERS
address
Slave channel address of serial handler.
ch
Character to send.
RETURN VALUE
1: Character sent.
0: Transmit buffer is full or locked.
LIBRARY
MASTER_SERIAL.LIB
80
Dynamic C User’s Manual
MSrdFree
int MSrdFree(char address);
DESCRIPTION
Gets the number of bytes available in the specified serial port read buffer on the slave.
PARAMETERS
address
Slave channel address of serial handler.
RETURN VALUE
Number of bytes free: Success.
-1: Failure.
LIBRARY
MASTER_SERIAL.LIB
MSsendCommand
int MSsendCommand(char address, char command, char data, char
*data_returned, unsigned long timeout);
DESCRIPTION
Sends a single command to the slave and gets a response. This function also serves as a
general example of how to implement the master side of the slave protocol.
PARAMETERS
address
Slave channel address to send command to.
command
Command to be sent to the slave (see Section 7.3.2.1).
data
Data byte to be sent to the slave.
data_returned
Address of variable to place data returned by the slave.
timeout
Time to wait before giving up on slave response.
RETURN VALUE
≥0: Response code.
-1: Timeout occured before response.
-2: Nothing at that address (response = 0xff).
LIBRARY
MASTER_SERIAL.LIB
Chapter 7: The Slave Port Driver
81
MSread
int MSread(char address, char *buffer, int size, unsigned long
timeout);
DESCRIPTION
Receives bytes from the serial port on the slave.
PARAMETERS
address
Slave channel address of serial handler.
buffer
Array to put received data into.
size
Size of array (max bytes to be read).
timeout
Time to wait between characters before giving up on receiving any
more.
RETURN VALUE
The number of bytes read into the buffer (behaves like serXread()).
LIBRARY
MASTER_SERIAL.LIB
MSwrFree
int MSwrFree(char address)
DESCRIPTION
Gets the number of bytes available in the specified serial port write buffer on the slave.
PARAMETERS
address
Slave channel address of serial handler.
RETURN VALUE
Number of bytes free: Success.
-1: Failure.
LIBRARY
MASTER_SERIAL.LIB
82
Dynamic C User’s Manual
MSwrite
int MSwrite(char address, char *data, int length);
DESCRIPTION
Sends an array of bytes out the serial port on the slave (behaves like serXwrite()).
PARAMETERS
address
Slave channel address of serial handler.
data
Array of bytes to send.
length
Size of array.
RETURN VALUE
Number of bytes actually sent.
LIBRARY
MASTER_SERIAL.LIB
Chapter 7: The Slave Port Driver
83
7.3.2.4 Sample Program for Master
This sample program, /Samples/SlavePort/master_demo.c, treats the slave like a
serial port.
#use "master_serial.lib"
#define SP_CHANNEL 0x42
char* const test_str = "Hello There";
main(){
char buffer[100];
int read_length;
MSinit(0);
// comment this line out if talking to a stream handler
printf("open returned:0x%x\n", MSopen(SP_CHANNEL, 9600));
while(1)
{
costate
{
wfd{cof_MSwrite(SP_CHANNEL, test_str, strlen(test_str));}
wfd{cof_MSwrite(SP_CHANNEL, test_str, strlen(test_str));}
}
costate
{
wfd{ read_length = cof_MSread(SP_CHANNEL, buffer, 99, 10); }
if(read_length > 0)
{
buffer[read_length] = 0; //null terminator
printf("Read:%s\n", buffer);
}
else if(read_length < 0)
{
printf("Got read error: %d\n", read_length);
}
printf("wrfree = %d\n", MSwrFree(SP_CHANNEL));
}
}
}
84
Dynamic C User’s Manual
7.3.3 Byte Stream Handler
The library, SP_STREAM.LIB, implements a byte stream over the slave port. If the master is a
Rabbit, the functions in MASTER_SERIAL.LIB can be used to access the stream as though it
came from a serial port on the slave.
7.3.3.1 Slave Side of Stream Channel
To set up the function SPShandler() as the byte stream handler, do the following:
SPsetHandler (10, SPShandler, stream_ptr);
This sets up the stream to use channel 10 on the slave.
A sample program in Section 7.3.3.2 shows how to set up and initialize the circular buffers. An
internal data structure, SPStream, keeps track of the buffers and a pointer to it is passed to
SPsetHandler() and some of the auxiliary functions that supports the byte stream handler.
This is also shown in the sample program.
7.3.3.1.1 Functions
These are the auxiliary functions that support the stream handler function, SPShandler().
cbuf_init
void cbuf_init(char *circularBuffer, int dataSize);
DESCRIPTION
This function initializes a circular buffer.
PARAMETERS
circularBuffer
The circular buffer to initialize.
dataSize
Size available to data. The size must be 9 bytes more than the
number of bytes needed for data. This is for internal bookkeeping.
LIBRARY
RS232.LIB
Chapter 7: The Slave Port Driver
85
cof_SPSread
int cof_SPSread(SPStream *stream, void *data, int length,
unsigned long tmout);
DESCRIPTION
Reads length bytes from the slave port input buffer or until tmout milliseconds transpires between bytes after the first byte is read. It will yield to other tasks while waiting
for data. This function is non-reentrant.
PARAMETERS
stream
Pointer to the stream state structure.
data
Structure to read from slave port buffer.
length
Number of bytes to read.
tmout
Maximum wait in milliseconds for any byte from previous one.
RETURN VALUE
The number of bytes read from the buffer.
LIBRARY
SP_STREAM.LIB
cof_SPSwrite
int cof_SPSwrite(SPStream *stream, void *data, int length);
DESCRIPTION
Transmits length bytes to slave port output buffer.This function is non-reentrant.
PARAMETERS
stream
Pointer to the stream state structure.
data
Structure to write to slave port buffer.
length
Number of bytes to write.
RETURN VALUE
The number of bytes successfully written to slave port.
LIBRARY
SP_STREAM.LIB
86
Dynamic C User’s Manual
SPSinit
void SPSinit( void );
DESCRIPTION
Initializes the circular buffers used by the stream handler.
LIBRARY
SP_STREAM.LIB
SPSread
int SPSread(SPStream *stream, void *data, int length, unsigned
long tmout);
DESCRIPTION
Reads length bytes from the slave port input buffer or until tmout milliseconds transpires between bytes. If no data is available when this function is called, it will return immediately. This function will call SPtick() if the slave port is in polling mode.
This function is non-reentrant.
PARAMETERS
stream
Pointer to the stream state structure.
data
Buffer to read received data into.
length
Maximum number of bytes to read.
tmout
Time to wait between received bytes before returning.
RETURN VALUE
Number of bytes read into the data buffer
LIBRARY
SP_STREAM.LIB
Chapter 7: The Slave Port Driver
87
SPSwrite
int SPSwrite(SPSream *stream, void *data, int length)
DESCRIPTION
This function transmits length bytes to slave port output buffer. If the slave port is in polling mode, this function will call SPtick() while waiting for the output buffer to empty.
This function is non-reentrant.
PARAMETERS
stream
Pointer to the stream state structure.
data
Bytes to write to stream.
length
Size of write buffer.
RETURN VALUE
Number of bytes written into the data buffer.
LIBRARY
SP_STREAM.LIB
SPSwrFree
int SPSwrFree();
DESCRIPTION
Returns number of free bytes in the stream write buffer.
RETURN VALUE
Space available in the stream write buffer.
LIBRARY
SP_STREAM.LIB
88
Dynamic C User’s Manual
SPSrdFree
int SPSrdFree();
DESCRIPTION
Returns the number of free bytes in the stream read buffer.
RETURN VALUE
Space available in the stream read buffer.
LIBRARY
SP_STREAM.LIB
SPSwrUsed
int SPSwrUsed();
DESCRIPTION
Returns the number of bytes currently in the stream write buffer.
RETURN VALUE
Number of bytes currently in the stream write buffer.
LIBRARY
SP_STREAM.LIB
SPSrdUsed
int SPSrdUsed();
DESCRIPTION
Returns the number of bytes currently in the stream read buffer.
RETURN VALUE
Number of bytes currently in the stream read buffer.
LIBRARY
SP_STREAM.LIB
Chapter 7: The Slave Port Driver
89
7.3.3.2 Byte Stream Sample Program
This program, /Samples/SlavePort/Slave_Demo.c, runs on a slave and implements a
byte stream over the slave port.
#class auto
#use "slave_port.lib"
#use "sp_stream.lib"
#define STREAM_BUFFER_SIZE 31
main()
{
char buffer[10];
int bytes_read;
SPStream stream;
// Circular buffers need 9 bytes for bookkeeping.
char stream_inbuf[STREAM_BUFFER_SIZE + 9];
char stream_outbuf[STREAM_BUFFER_SIZE + 9];
SPStream *stream_ptr;
// setup buffers
cbuf_init(stream_inbuf, STREAM_BUFFER_SIZE);
stream.inbuf = stream_inbuf;
cbuf_init(stream_outbuf, STREAM_BUFFER_SIZE);
stream.outbuf = stream_outbuf;
stream_ptr = &stream;
SPinit(1);
SPsetHandler(0x42, SPShandler, stream_ptr);
while(1)
{
bytes_read = SPSread(stream_ptr, buffer, 10, 10);
if(bytes_read)
{
SPSwrite(stream_ptr, buffer, bytes_read);
}
}
}
90
Dynamic C User’s Manual
8. Run-Time Errors
Compiled code generated by Dynamic C calls an exception handling routine for run-time errors.
The exception handler supplied with Dynamic C prints internally defined error messages to a Windows message box when run-time errors are detected during a debugging session. When software
runs stand-alone (disconnected from Dynamic C), such a run-time error will cause a watchdog
timeout and reset. Starting with Dynamic C 7.05, run-time error logging is available for Rabbitbased target systems with battery-backed RAM.
8.1 Run-Time Error Handling
When a run-time error occurs, a call is made to exception(). The run-time error type is passed
to exception(), which then pushes various parameters on the stack, and calls the installed
error handler. The default error handler places information on the stack, disables interrupts, and
enters an endless loop by calling the _xexit function in the BIOS. Dynamic C notices this and
halts execution, reporting a run-time error to the user.
8.1.1 Error Code Ranges
The table below shows the range of error codes used by Dynamic C and the range available for a
custom error handler to use. Please see section 8.2 on page 93 for more information on replacing
the default error handler with a custom one.
Table 8-11. Dynamic C Error Types Ranges
Error Type
Meaning
0–127
Reserved for user-defined error codes.
128–255
Reserved for use by Dynamic C.
Chapter 8: Run-Time Errors
91
8.1.2 Fatal Error Codes
This table lists the fatal errors generated by Dynamic C.
Table 8-12. Dynamic C Fatal Errors
Error Type
Meaning
127 - 227
not used
228
Pointer store out of bounds
229
Array index out of bounds
230 - 233
not used
234
Domain error (for example, acos(2))
235
Range error (for example, tan(pi/2))
236
Floating point overflow
237
Long divide by zero
238
Long modulus, modulus zero
239
not used
240
Integer divide by zero
241
Unexpected interrupt
242
not used
243
Codata structure corrupted
244
Virtual watchdog timeout
245
XMEM allocation failed (xalloc call)
246
Stack allocation failed
247
Stack deallocation failed
248
not used
249
Xmem allocation initialization failed
250
No virtual watchdog timers available
251
No valid MAC address for board
252
Invalid cofunction instance
253
Socket passed as auto variable while running µC/OS-II
254
not used
255
92
Dynamic C User’s Manual
8.2 User-Defined Error Handler
Dynamic C allows replacement of the default error handler with a custom error handler. This is
needed to add run-time error handling that would require treatment not supported by the default
handler.
A custom error handler can also be used to change how existing run-time errors are handled. For
example, the floating-point math libraries included with Dynamic C are written to allow for execution to continue after a domain or range error, but the default error handler halts with a run-time
error if that state occurs. If continued execution is desired (the function in question would return a
value of INF or whatever value is appropriate), then a simple error handler could be written to pass
execution back to the program when a domain or range error occurs, and pass any other run-time
errors to Dynamic C.
8.2.1 Replacing the Default Handler
To tell the BIOS to use a custom error handler, call this function:
void defineErrorHandler(void *errfcn)
This function sets the BIOS function pointer for run-time errors to the one passed to it.
When a run-time error occurs, exception() pushes onto the stack the information detailed in
the table below.
.
Table 8-13. Stack setup for run-time errors
Address
Data at address
SP+0
Return address for error handler
SP+2
Error code
SP+4
Additional data (user-defined)
SP+6
XPC when exception() was called (upper
byte)
SP+8
Address where exception() was called from
Then exception() calls the installed error handler. If the error handler passes the run-time
error to Dynamic C (i.e. it is a fatal error and the system needs to be halted or reset), then registers
must be loaded appropriately before calling the _xexit function.
Dynamic C expects the following values to be loaded:
Table 8-14. Register contents loaded by error handler before passing the error to Dynamic C
Register
Expected Value
H
XPC when exception() was called
L
Run-time error code
HL’
Chapter 8: Run-Time Errors
Address where exception() was called from
93
8.3 Run-Time Error Logging
Starting with Dynamic C 7.05, error logging is available as a BIOS enhancement for storing runtime exception history. It can be useful diagnosing problems in deployed Rabbit targets. To support error logging, the target must have battery-backed RAM.
8.3.1 Error Log Buffer
A circular buffer in extended RAM will be filled with the following information for each run-time
error that occurs:
• The value of SEC_TIMER at the time of the error. This variable contains the number of
seconds since 00:00:00 on January 1st 1980 if the real-time clock has been set correctly.
This variable is updated by the periodic timer which is enabled by default. Z-World sets the
real-time clock in the factory. When the BIOS starts on boards with batteries, it initializes
SEC_TIMER to the value in the real-time clock.
• The address where the exception was called from. This can be traced to a particular function using the MAP file generated when a Dynamic C program is compiled.
• The exception type. Please see Table 8-12 on page 92 for a list of exception types.
• The value of all registers. This includes alternate registers, SP and XPC. This is a global
option that is enabled by default.
• An 8 byte message. This is a global option that is disabled by default. The default error
handler does nothing with this.
• A user-definable length of stack dump. This is a global option that is enabled by default.
• A one byte checksum of the entry.
8.3.1.1 Error Log Buffer Size
The size of the error log buffer is determined by the number of entries, the size of an entry, and the
header information at the beginning of the buffer. The number of entries is determined by the
macro ERRLOG_NUM_ENTRIES (default is 78). The size of each entry is dependent on the settings of the global options for stack dump, register dump and error message. The default size of
the buffer is about 4K in extended RAM.
94
Dynamic C User’s Manual
8.3.2 Initialization and Defaults
An initialization of the error log occurs when the BIOS is compiled, when cloning takes place or
when the BIOS is loaded via the Rabbit Field Utility (RFU). By default, error logging is enabled
with messages turned off, stack and register dumps turned on, and an error log buffer big enough
for 78 entries.
The error log buffer contains header information as well as an entry for each run-time error. A
debug start-up will zero out this header structure, but the run-time error entries can still be examined from Dynamic C using the static information in flash. The header is at the start of the error
log buffer and contains:
• A status byte
•
•
•
•
•
•
The number of errors since deployment
The index of the last error
The number of hardware resets since deployment
The number of watchdog time-outs since deployment
The number of software resets since deployment
A checksum byte.
“Deployment” is defined as the first power up without the programming cable attached. Reprogramming the board through the programming cable, RFU, or RabbitLink and starting the program again without the programming cable attached is a new deployment.
8.3.3 Configuration Macros
These macros are defined at the top of Bios/RabbitBios.c.
ENABLE_ERROR_LOGGING
Default: 0. Disables error logging. Changing this to one in the BIOS enables error logging.
ERRLOG_USE_REG_DUMP
Default: 1. Include a register dump in log entries. Changing this to zero in the BIOS excludes
the register dump in log entries.
ERRLOG_STACKDUMP_SIZE
Default: 16. Include a stack dump of size ERRLOG_STACKDUMP_SIZE in log entries.
Changing this to zero in the BIOS excludes the stack dump in log entries.
ERRLOG_NUM_ENTRIES
Default: 78. This is the number of entries allowed in the log buffer.
ERRLOG_USE_MESSAGE
Default: 0. Exclude error messages from log entries. Changing this to one in the BIOS
includes error messages in log entries The default error handler makes no use of this feature.
Chapter 8: Run-Time Errors
95
8.3.4 Error Logging Functions
The run-time error logging API consists of the following functions:
errlogGetHeaderInfo
Reads error log header and formats output.
errlogGetNthEntry
Loads errLogEntry structure with the Nth entry
from the error log buffer. errLogEntry is a pre-allocated global structure.
errlogGetMessage
Returns a NULL-terminated string containing the 8 byte
error message in errLogEntry.
errlogFormatEntry
Returns a NULL-terminated string containing basic
information in errLogEntry.
errlogFormatRegDump
Returns a NULL-terminated string containing the register dump in errLogEntry.
errlogFormatStackDump
Returns a NULL-terminated string containing the stack
dump in errLogEntry.
errlogReadHeader
Reads error log header into the structure errlogInfo.
ResetErrorLog
Resets the exception and restart type counts in the error
log buffer header.
8.3.5 Examples of Error Log Use
To try error logging, follow the instructions at the top of the sample programs:
samples\ErrorHandling\Generate_runtime_errors.c
and
samples\ErrorHandling\Display_errorlog.c
96
Dynamic C User’s Manual
9. Memory Management
Processor instructions can specify 16-bit addresses, giving a logical address space of 64K (65,536
bytes). Dynamic C supports a 1M physical address space (20-bit addresses).
An on-chip memory management unit (MMU) translates 16-bit addresses to 20-bit memory
addresses. Four MMU registers (SEGSIZE, STACKSEG, DATASEG and XPC ) divide and maintain the logical sections and map each section onto physical memory.
9.1 Memory Map
A typical Dynamic C memory mapping of logical and physical address space is shown in the figure below.
A0000
RAM
80000
FFFF
Xmem Code
D000
Internal Interrupt
Vectors
E000
Stack
CF00
D000
C600
External Interrupt
Vectors
CE00
Root Data
Watch Data
20000
CA00
6000
Xmem Code
Watch Code
Root Code
C600
Bios
0000
Root Code
00000
Logical Address Space
Physical Address Space
Figure 3. Dynamic C Memory Mapping
Chapter 9: Memory Management
97
Figure 3 illustrates how the logical address space is divided and where code resides in physical
memory. Both the static RAM and the flash memory are 128K in the diagram. Physical memory
starts at address 0x00000 and flash memory is usually mapped to the same address. SRAM typically begins at address 0x80000.
If BIOS code runs from flash memory, the BIOS code starts in the root code section at address
0x00000 and fills upward. The rest of the root code will continue to fill upward immediately following the BIOS code. If the BIOS code runs from SRAM, the root code section, along with root
data and stack sections, will start at address 0x80000.
9.1.1 Memory Mapping Control
The advanced user of Dynamic C can control how Dynamic C allocates and maps memory. For
details on memory mapping, refer to the Rabbit 2000 Microprocessor User’s Manual or the Rabbit
3000 Microprocessor User’s Manual.
9.2 Extended Memory Functions
A program can use many pages of extended memory. Under normal execution, code in extended
memory maps to the logical address region E000H to FFFFH.
Extended memory addresses are 20-bit physical addresses (the lower 20 bits of a long integer).
Pointers, on the other hand, are 16-bit machine addresses. They are not interchangeable. However,
there are library functions to convert address formats.
To access xmem data, use function calls to exchange data between xmem and root memory. Use
the Dynamic C functions root2xmem(), xmem2root() and xmem2xmem()to move blocks
of data between logical memory and physical memory.
9.2.1 Code Placement in Memory
Code runs just as quickly in extended memory as it does in root memory, but calls to and returns
from the functions in extended memory take a few extra machine cycles. Code placement in memory can be changed by the keywords xmem and root, depending on the type of code:
Pure Assembly Routines
Pure assembly functions may be placed in root memory or extended memory. Prior to Dynamic C
v 7.10 pure assembly routines had to be in root memory.
C Functions
C functions may be placed in root memory or extended memory. Access to variables in C statements is not affected by the placement of the function. Dynamic C will automatically place C
functions in extended memory as root memory fills. Short, frequently used functions may be
declared with the root keyword to force Dynamic C to load them in root memory.
Inline Assembly in C Functions
Inline assembly code may be written in any C function, regardless of whether it is compiled to
extended memory or root memory.
All static variables, even those local to extended memory functions, are placed in root memory.
Keep this in mind if the functions have many variables or large arrays. Root memory can fill up
quickly.
98
Dynamic C User’s Manual
10. The Flash File System
Dynamic C 7.0 introduced a simple file system that can be used with a second flash memory or in
SRAM. Dynamic C 7.05 introduced an improved file system with more features:
•
•
•
•
•
•
The ability to overwrite parts of a file.
The simultaneous use of multiple device types.
The ability to partition devices.
Efficient support for byte-writable devices.
Better performance tuning.
High degree of backwards compatibility with its predecessor.
This file system, known as the filesystem mk II or simply as FS2, uses the same API as the first
file system, with some additional functions. Initialization is performed slightly differently, and the
data format is not compatible. Z-World recommends that FS2 be used for all new applications.
The first file system, which we will refer to as FS1, will be maintained but enhancements will only
be implemented for FS2.
The Dynamic C file system supports a total of 255 files. Unlike FS1, it is not possible to reserve a
range of file numbers for system use with FS2. Equivalent functionality is available via partitioning of devices.
The low-level flash memory access functions should not be used in the same area of the flash
where the flash file system exists.
10.1 General Usage
The recommended use of a flash file system is for infrequently changing data or data rates that
have writes on the order of tens of minutes instead of seconds. Rapidly writing data to the flash
could result in using up its write cycles too quickly. For example, consider a 256K flash with 64
blocks of 4K each. Using a flash with a maximum recommendation of 10,000 write cycles means
a limit of 640,000 writes to the file system. If you are performing one write to the flash per second,
in a little over a week you will use up its recommended lifetime.
Increase the useful lifetime and performance of the flash by buffering data before writing it to the
flash. Accumulating 1000 single byte writes into one can extend the life of the flash by an average
of 750 times. FS2 does not currently perform any in-memory buffering. If you write a single byte
to a file, that byte will cause write activity on the device. This ensures that data is written to nonvolatile storage as soon as possible. Buffering may be implemented within the application if possible loss of data is tolerable.
NOTE: The use of USE_2NDFLASH_CODE is not compatible with the flash
file system.
Chapter 10: The Flash File System
99
10.1.1 Maximum File Size
The maximum file size for an individual file depends on the total file system size and the number
of files present. Each file requires at least two sectors: at least one for data and always one for
metadata (for information used internally). There also needs to be two free sectors to allow for
moving data around. It is not recommended to use the flash file system to store a large number of
small files. It is much more efficient to have a few large ones.
10.1.2 Using SRAM
The flash file system can be used with battery-backed SRAM. Internally, RAM is treated like a
flash device, except that there is no write-cycle limitation, and access is much faster. The file system will work without the battery backup, but would, of course, lose all data when the power went
off.
Currently, the maximum size file system supported in RAM is about 200k. This limitation holds
true even on boards with a 512k RAM chip. The limitation involves the placement of BIOS control blocks in the upper part of the lower 256k portion of RAM.
To obtain more RAM memory, xalloc() may be used. If xalloc() is called first thing in the
program, the same memory addresses will always be returned. This can be used to store non-volatile data is so desired (if the RAM is battery-backed), however, it is not possible to manage this
area using the file system.
When using FS1, since only one device type is allowed at a time, the entire file system would have
to be in SRAM. This is recommended for debugging purposes only. Using FS2 increases flexibility, with its capacity to use multiple device types simultaneously. Since RAM is usually a scarce
resource, it can be used together with flash memory devices to obtain the best balance of speed,
performance and capacity.
10.1.3 Wear Leveling
The current code has a rudimentary form of wear leveling. When you write into an existing block
it selects a free block with the least number of writes. The file system routines copy the old block
into the new block adding in the users new data. This has the effect of evening the wear if there is
a reasonable turnover in the flash files.
10.1.4 Low-Level Implementation
For information on the low-level implementation of the flash file system, refer to the beginning of
the library files FS2.LIB and FS_DEV.LIB if using FS2, or library file FILESYSTEM.LIB,
if using FS1.
10.1.5 Multitasking and the File System
Neither FS1 nor FS2 are re-entrant. If using preemptive multitasking, ensure that only one thread
performs calls to the file system, or implement locking around each call.
100
Dynamic C User’s Manual
10.2 Application Requirements
The application requirements for FS1 and FS2 are slightly different. This section covers both sets
of requirements, including:
•
•
•
•
which library to use
which drivers to use
defaults and descriptions for configuration macros
detailed instructions for using the first flash
10.2.1 FS1 Requirements
To use the file system, a macro that determines which low-level driver is loaded must be defined
in the application program.
#define FS_FLASH
#define FS_RAM
// use 2nd flash for file system
// use SRAM (supported for debug purposes)
The file system library must be compiled with the application.
#use “FILESYSTEM.LIB”
10.2.2 FS1 and Use of the First Flash
To use FS1 in the first flash, a low-level driver must be used:
#define FS_FLASH_SINGLE
Because this particular low-level driver must share the first flash with the program code, the file
system must be carefully placed such that the two do not collide. Also, it should be noted that any
time the first flash is written to during runtime, interrupts will be shut off for the duration of the
write. This could have serious implications for real-time systems.
To reserve space in the first flash, such that Dynamic C will not clobber the file system, a minor
BIOS modification is necessary. The macro XMEM_RESERVE_SIZE in the BIOS is currently set
to 0x0000. Increasing this value will reserve that much space between the end of xmem code that
Dynamic C is building, and the System ID block at the end of memory. Unfortunately, the file system needs to start on a FS_BLOCK_SIZE boundary, which is normally 4096 bytes. Therefore,
slightly more space than is needed should be allocated, to allow for the System ID block and that
the end of xmem space might not lie on a 4096 byte boundary.
Chapter 10: The Flash File System
101
After this space has been allocated, the beginning of the file system can be found. The end of
where Dynamic C will touch the flash is stored in the macro END_OF_XMEMORY, and the file
system may start at the next 4096 byte boundary after that point. The following code computes
what to pass to fs_format().
// where to start the file system
long fs_start;
// start at the end of xmem
fs_start = END_OF_XMEMORY;
// divide out the blocksize, to meet requirements for fs_format
fs_start = fs_start / FS_BLOCK_SIZE;
if((fs_start * FS_BLOCK_SIZE) != END_OF_XMEMORY)
{
// rounding error: move up 1 block so end of xmem is not clobbered
fs_start++;
}
fs_format(fs_start, NUM_BLOCKS, 0);
After this point, the file system should act normally.
If the 4096 byte block size is too large, given the limited room in the first flash, that can be overwritten with the macro:
#define FS_BLOCK_SIZE 512
See the sample program, 1stflash.c, for an example of using the first flash with FS1.
10.2.3 FS2 Requirements
The file system library must be compiled with the application:
#use “FS2.LIB”
For the simplest applications, this is all that is necessary for configuration. For more complex
applications, there are several other macro definitions that may be used before the inclusion of
FS2.LIB. These are:
#define FS_MAX_DEVICES
#define FS_MAX_LX
#define FS_MAX_FILES
3
4
10
These specify certain static array sizes that allow control over the amount of root data space taken
by FS2. If you are using only one flash device (and possibly battery-backed RAM), and are not
using partitions, then there is no need to set FS_MAX_DEVICES or FS_MAX_LX.
For more information on partitioning, please see section 10.4, “Setting up and Partitioning the File
System,” on page 107.
102
Dynamic C User’s Manual
10.2.4 FS2 Configuration Macros
FS_MAX_DEVICES
This macro defines the maximum physical media. If it is not defined in the program code,
FS_MAX_DEVICES will default to 1, 2, or 3, depending on the values of
FS2_USE_PROGRAM_FLASH, XMEM_RESERVE_SIZE and
FS2_RAM_RESERVE.
FS_MAX_LX
This macro defines the maximum logical extents. You must increase this value by 1 for
each new partition your application creates. It this is not defined in the program code it
will default to FS_MAX_DEVICES.
For a description of logical extents please see section 10.4.2, “Logical Extents (LX),” on
page 108.
FS_MAX_FILES
This macro is used to specify the maximum number of files that are allowed to coexist in
the entire file system. Most applications will have a fixed number of files defined, so this
parameter can be set to that number to avoid wasting root data memory. The default is 6
files. The maximum value for this parameter is 255.
FS2_RAM_RESERVE
This BIOS-defined macro determines the amount of space used for FS2 in RAM. If some
battery-backed RAM is to be used by FS2, then this macro must be modified to specify
the amount of RAM to reserve. The memory is reserved near the top of RAM. Note that
this RAM will be reserved whether or not the application actually uses FS2.
Prior to Dynamic C 7.06 this macro was defined as the number of bytes to reserve and
had to be a multiple of 4096. It is now defined as the number of blocks to reserve, with
each block being 4096 bytes.
FS2_USE_PROGRAM_FLASH
The number of kilobytes reserved in the first flash for use by FS2. The default is zero. The
actual amount of flash used by FS2 is determined by the minimum of this macro and
XMEM_RESERVE_SIZE.
The first flash may be used in FS1as well. See section 10.2.2 for details.
XMEM_RESERVE_SIZE
This BIOS-defined macro is the number of bytes (which must be a multiple of 4096)
reserved in the first flash for use by FS2 and possibly other customer-defined purposes.
This is defined in the BIOS as 0x0000. Memory set aside with XMEM_RESERVE_SIZE
will NOT be available for xmem code.
Chapter 10: The Flash File System
103
10.2.5 FS2 and Use of the First Flash
To use the first flash in FS2, follow these steps:
1. Define XMEM_RESERVE_SIZE (currently set to 0x0000 in the BIOS) to the number of
bytes to allocate in the first flash for the file system.
2. Define FS2_USE_PROGRAM_FLASH to the number of KB (1024 bytes) to allocate in the
first flash for the file system. Do this in the application code before #use "fs2.lib".
3. Obtain the LX number of the first flash: Call fs_get_other_lx()when there are two
flash memories; call fs_get_flash_lx() when there is only one.
4. If desired, create additional logical extents by calling the FS2 function fs_setup() to
further partition the device. This function can also change the logical sector sizes of an
extent. Please see the function description for fs_setup() in the Dynamic C Function
Reference Manual for more information.
10.2.5.1 Example Code Using First Flash in FS2
If the target board has two flash memories, the following code will cause the file system to use the
first flash:
FSLXnum flash1;
File f;
// logical extent number
// struct for file information
flash1 = fs_get_other_lx();
if (flash1) {
fs_set_lx(flash1, flash1);
fcreate(&f, 10);
. . .
}
To obtain the logical extent number for a one flash board, fs_get_flash_lx() must be
called instead of fs_get_other_lx().
104
Dynamic C User’s Manual
10.3 Functions
For backwards compatibility FS2 uses the same function names as FS1. Some functions have
enhanced semantics when using FS2. For example fwrite() will allow writing over existing
parts of the file rather than just appending.
10.3.1 FS1 API
These functions are the file system API for FS1. They are defined in FILESYSTEM.LIB. For a
complete description of these functions please see the Dynamic C Function Reference Manual.
Table 10-15. FS1 API
Command
Description
fs_init (FS1)
Initialize the internal data structures for the file system.
fs_format (FS1)
Initialize the flash memory and the internal data structures.
fs_reserve_blocks
(FS1)
Reserves blocks for privileged files.
fsck (FS1)
Verifies data integrity of files.
fcreate (FS1)
Creates a file and open it for writing.
fcreate_unused
(FS1)
Creates a file with an unused file number.
fopen_rd (FS1)
Opens a file for reading.
fopen_wr (FS1)
Opens a file for writing (also opens it for reading.)
fshift
Removes specified number of bytes from file.
fwrite (FS1)
Writes to the end of a file.
fread (FS1)
Reads from the current file pointer.
fseek (FS1)
Moves the read pointer.
ftell (FS1)
Returns the current offset of the file pointer.
fclose
Closes a file.
fdelete (FS1)
Deletes a file.
10.3.1.1 FS1 API Details
The functions fs_init and fs_format are similar, in that they both start the file system. Use
fs_format() to erase all blocks in the file system. This function’s third parameter, wearlevel, should be 1 for a new flash memory; otherwise it should be 0 to use the current wear leveling.
Use fs_init() to preserve blocks that are in use and to do an integrity check of them. In case
of loss of power, fs_init() will delete any blocks that may be partially written and will substitute the last known good block for that file. This means that any changes to the file that occurred
between the last write and the power outage would be lost.
Chapter 10: The Flash File System
105
10.3.2 FS2 API
The API for FS2 is defined in FS2.LIB. For more information please see the Dynamic C
Function Reference Manual.
Table 10-16. FS2 API
Command
Description
fs_setup (FS2)
Alters the initial default configuration.
fs_init (FS2)
Initialize the internal data structures for the file system.
fs_format (FS2)
Initialize flash and the internal data structures.
lx_format
Formats a specified logical extent (LX).
fs_set_lx (FS2)
Sets the default LX numbers for file creation.
fs_get_lx (FS2)
Returns the current LX number for file creation.
fcreate (FS2)
Creates a file and open it for writing.
fcreate_unused (FS2)
Creates a file with an unused file number.
fopen_rd (FS2)
Opens a file for reading.
fopen_wr (FS2)
Opens a file for writing (and reading).
fshift
Removes specified number of bytes from file.
fwrite (FS2)
Writes to a file starting at “current position.”
fread (FS2)
Reads from the current file pointer.
fseek (FS2)
Moves the read/write pointer.
ftell (FS2)
Returns the current offset of the file pointer.
fs_sync (FS2)
Flushes any buffers retained in RAM to the underlying
hardware device.
fflush (FS2)
Flushes buffers retained in RAM and associated with the
specified file to the underlying hardware device.
fs_get_flash_lx (FS2)
Returns the LX number of the preferred flash device (the
2nd flash if available).
fs_get_lx_size (FS2)
Returns the number of bytes of the specified LX.
fs_get_other_lx (FS2)
Returns LX # of the non-preferred flash (usually the first
flash).
fs_get_ram_lx (FS2)
Return the LX number of the RAM file system device.
fclose
Closes a file.
fdelete (FS2)
Deletes a file.
106
Dynamic C User’s Manual
10.3.2.1 FS2 API Details
The functions fs_init and fs_format are used in a slightly different manner than in FS1.
fs_init() does not use its two parameters (reserveblocks and numblocks) since it
computes appropriate values internally. fs_format() should only be called after
fs_init(), if necessary. This function’s first parameter, reserveblocks, must be 0; anything else returns an error. This is one of the few cases of incompatibility between FS1 and FS2.
The third parameter, wearlevel, should be 1 for a new flash memory; otherwise it should be 0
to use the current wear leveling.
The fsck() function is not available and is not needed in FS2; fs_init() always completely
checks for internal consistency.
Refer to \Samples\FileSystem\FS2DEMO1.C for more details.
10.3.2.2 FS2 API Error Codes
When an API function returns an error, it may also return an error code in the global variable
errno. The error codes are defined in the library file ERRNO.LIB.
10.4 Setting up and Partitioning the File System
FS2 can be more complex to initialize than FS1. This is because multiple device types can be used
in the same application. For example, if the target board contains both battery-backed SRAM and
a second flash chip, then both types of storage may be used for their respective advantages. The
SRAM might be used for a small application configuration file that changes frequently, and the
flash used for a large log file.
FS2 automatically detects the second flash device (if any) and will also use any SRAM set aside
for the file system (if FS2_RAM_RESERVE is set).
10.4.1 Initial Formatting
The filesystem must be formatted when it is first used. The only exception is when a flash memory
device is known to be completely erased, which is the normal condition on receipt from the factory. If the device contains random data, then formatting is required to avoid the possibility of
some sectors being permanently locked out of use.
Formatting is also required if any of the logical extent parameters are changed, such as changing
the logical sector size or re-partitioning. This would normally happen only during application
development.
Chapter 10: The Flash File System
107
The question for application developers is how to code the application so that it formats the filesystem only the first time it is run. There are several approaches that may be taken:
• A special program that is loaded and run once in the factory, before the application is
loaded. The special program prepares the filesystem and formats it. The application never
formats; it expects the filesystem to be in a proper state.
• The application can perform some sort of consistency check. If it determines an inconsistency, it calls format. The consistency check could include testing for a file that should
exist, or by checking some sort of "signature" that would be unlikely to occur by chance.
• Have the application prompt the end-user, if some form of interaction is possible.
• A combination of one or more of the above.
• Rely on a flash device being erased. This would be OK for a production run, but not suitable if battery-backed SRAM was being used for part of the filesystem.
10.4.2 Logical Extents (LX)
In FS2, the presence of both “devices” causes an initial default configuration of two logical extents
to be set up. An LX is analogous to disk partitions used in other operating systems. It represents a
contiguous area of the device set aside for file system operations. An LX contains sectors that are
all the same size, and all contiguously addressable within the one device. Thus a flash device with
three different sector sizes would necessitate at least three logical extents, and more if the samesized sectors were not adjacent.
FS1 does not allow mixing of devices; it supports only one LX as defined in this document.
Files stored by the file system are comprised of two parts: one part contains the actual application
data, and the other is a fixed size area used to contain data controlled by the file system in order to
track the file status. This second area, called metadata, is analogous to a “directory entry” of other
operating systems. The metadata consumes one sector per file.
The data and metadata for a file are usually stored in the same LX, however they may be separated
for performance reasons. Since the metadata needs to be updated for each write operation, it is
often advantageous to store the metadata in battery-backed SRAM with the bulk of the data on a
flash device.
10.4.2.1 Specifying Logical Extents
When a file is created, the logical extent(s) to use for the file are defined. This association remains
until the file is deleted. The default LX for both data and metadata is the flash device (LX #1) if it
exists; otherwise the RAM LX. If both flash and RAM are available, LX #1 is the flash device and
LX #2 is the RAM.
When creating a file, the associated logical extents for the data and the metadata can be changed
from the default by calling fs_set_lx(). This functions takes two parameters, one to specify
the LX for the metadata and the other to specify the LX for the data. Thereafter, all created files
are associated with the specified LXs until a new call to fs_set_lx() is made. Typically, there
will be a call to fs_set_lx() before each file is created, in order to ensure that the new file
gets created with the desired associations. The file creation function, fcreate(), may be used
to specify the LX for the metadata by providing a valid LX number in the high byte of the func-
108
Dynamic C User’s Manual
tion’s second parameter. This will override any LX number set for the metadata in
fs_set_lx().
10.4.2.1.1 Further Partitioning
FS2 allows the initial default logical extents to be divided further. This must be done before calling fs_init(). The function to create sub-partitions is called fs_setup(). This function
takes an existing LX number, divides that LX according to the given parameters, and returns a
newly created LX number. The original partition still exists, but is smaller because of the division.
For example, in a system with LX#1 as a flash device of 256K and LX#2 as 4K of RAM, an initial
call to fs_setup() might be made to partition LX#1 into two equal sized extents of 128K each.
LX#1 would then be 128K (the first half of the flash) and LX#3 would be 128K (the other half).
LX#2 is untouched.
Having partitioned once, fs_setup() may be called again to perform further subdivision. This
may be done on any of the original or new extents. Each call to fs_setup() in partitioning
mode increases the total number of logical extents. You will need to make sure that FS_MAX_LX
is defined to a high enough value that the LX array size is not exceeded.
While developing an application, you might need to adjust partitioning parameters. If any parameter is changed, FS2 will probably not recognize data written using the previous parameters. This
problem is common to most operating systems. The “solution” is to save any desired files to outside the file system before changing its organization; then after the change, force a format of the
file system.
Note that in particular, files written by FS1 are not readable by FS2 since the two file systems are
incompatible at the device level.
10.4.3 Logical Sector Size
fs_setup() can also be used to specify non-default logical sector (LS) sizes and other parameters. FS1 uses fixed logical sectors (i.e. “blocks”) of 4096 bytes. FS2 allows any LS size between
64 and 8192 bytes, providing the LS size is an exact power of 2. Each LX, including sub-partitions, can have a different LS size. This allows some performance optimization. Small LSs are better for a RAM LX, since it minimizes wasted space without incurring a performance penalty.
Larger LSs are better for bulk data such as logs. If the flash physical sector size (i.e. the actual
hardware sector size) is large, it is better to use a correspondingly large LS size. This is especially
the case for byte-writable devices. Large LSs should also be used for large LXs. This minimizes
the amount of time needed to initialize the file system and access large files. As a rule of thumb,
there should be no more than 1024 LSs in any LX. The ideal LS size for RAM (which is the
default) is 128 bytes. 256 or 512 can also be reasonable values for some applications that have a
lot of spare RAM.
Sector-writable flash devices require: LS size ≥ PS size. Byte-writable devices, however, may use
any allowable logical sector size, regardless of the physical sector size.
Sample program Samples\FileSystem\FS2DEMO2 illustrates use of fs_setup(). This
sample also allows you to experiment with various file system settings to obtain the best performance.
FS2 has been designed to be extensible in order to work with future flash and other non-volatile
storage devices. Writing and installing custom low-level device drivers is beyond the scope of this
document, however see FS2.LIB and FS_DEV.LIB for hints.
Chapter 10: The Flash File System
109
10.5 File Identifiers
There are two ways to identify a particular file in the file system: file numbers and file names.
10.5.1 File Numbers
The file number uniquely identifies a file within a logical extent. File numbers must be unique
within the entire file system. FS2 accepts file numbers in word format rather than the byte format
of FS1:
typedef word FileNumber
The low-order byte specifies the file number and the high-order byte specifies the LX number of
the metadata (1 through number of LXs). If the high-order byte is zero, then a suitable “default”
LX will be located by the file system. The default LX will default to 1, but will be settable via a
#define, for file creation. For existing files, a high-order byte of zero will cause the file system
to search for the LX that contains the file. This will require no or minimal changes to existing customer code.
Only the metadata LX may be specified in the file number. This is called a “fully-qualified” file
number (FQFN). The LX number always applies to the file metadata. The data can reside on a different LX, however this is always determined by FS2 once the file has been created.
10.5.2 File Names
There are several functions in ZSERVER.LIB that can be used to associate a descriptive name
with a file. The file must exist in the flash file system before using the auxiliary functions listed in
the following table. These functions were originally intended for use with an HTTP or FTP server,
so some of them take a parameter called servermask. To use these functions for file naming
purposes only, this parameter should be SERVER_USER.
For a detailed description of these functions please refer to the Dynamic C’s TCP/IP User’s Manual, or use <Ctrl-H> in Dynamic C to use the Library Lookup feature.
Table 10-17. Flash File System Auxiliary Functions
Command
Description
sspec_addfsfile
Associate a name with the flash file system file number. The return
value is an index into an array of structures associated with the
named files.
sspec_readfile
Read a file represented by the return value of
sspec_addfsfile into a buffer.
sspec_getlength
Get the length (number of bytes) of the file.
sspec_getfileloc
Get the file system file number (1- 255). Cast return value to
FILENUMBER.
sspec_findname
Find the index into the array of structures associated with named
files of the file that has the specified name.
sspec_getfiletype
Get file type. For flash file system files this value will be
SSPEC_FSFILE.
110
Dynamic C User’s Manual
Table 10-17. Flash File System Auxiliary Functions
Command
Description
sspec_findnextfile
Find the next named file in the flash file system, at or following the
specified index, and return the index of the file.
sspec_remove
Remove the file name association.
sspec_save
Saves to the flash file system the array of structures that reference
the named files in the flash file system.
sspec_restore
Restores the array of structures that reference the named files in the
flash file system.
Chapter 10: The Flash File System
111
10.6 Skeleton Program Using FS1
The following program uses many of the file system commands. It writes several strings into a
file, reads the file back and prints the contents to the STDIO window. The macro RESERVE
should be 0 when the file system is in SRAM. When the file system is in flash memory you can
adjust where it starts by defining RESERVE to be 0 or a multiple of the block size.
#define FS_FLASH
#use "FILESYSTEM.LIB"
#define
#define
#define
#define
FORMAT
RESERVE 0L
BLOCKS 64
TESTFILE 1
main()
{
File file;
static char buffer[256];
#ifdef FORMAT
fs_format(RESERVE,BLOCKS,1);
if(fcreate(&file,TESTFILE)) {
printf("error creating TESTFILE\n");
return -1;
}
#else
fs_init(RESERVE,BLOCKS);
if(fopen_wr(&file,TESTFILE) {
printf("error opening TESTFILE\n");
return -1;
}
#endif
fwrite(&file,"hello",6);
fwrite(&file,"12345",6);
fwrite(&file,"67890",6);
while(fread(&file,buffer,6)>0) {
printf("%s\n",buffer);
}
fclose(&file);
}
After running this program at least once, comment out “#define FORMAT.” You will see that it
runs in a similar fashion, but now the file is appended using fopen_wr() instead of being
erased by fs_format() and then recreated with fcreate().
For a more robust program, more error checking should be included.
112
Dynamic C User’s Manual
10.7 Skeleton Program Using FS2
The following program uses some of the FS2 API. It writes several strings into a file, reads the file
back and prints the contents to the STDIO window.
#use "FS2.LIB"
#define TESTFILE 1
main()
{
File file;
static char buffer[256];
fs_init(0, 0);
if (!fcreate(&file, TESTFILE) && fopen_wr(&file,TESTFILE))
{
printf("error opening TESTFILE %d\n", errno);
return -1;
}
fseek(&file, 0, SEEK_END);
fwrite(&file,"hello",6);
fwrite(&file,"12345",6);
fwrite(&file,"67890",6);
fseek(&file, 0, SEEK_SET);
while(fread(&file,buffer,6)>0) {
printf("%s\n",buffer);
}
fclose(&file);
}
For a more robust program, more error checking should be included. See the sample programs in
the \SAMPLES\FILESYSTEM folder for more complex examples which include error checking,
formatting, partitioning and other new features.
FS2 returns more information in the case of errors than FS1. The library ERRNO.LIB contains a
list of all possible error codes returnable by the FS2 API. These error codes mostly conform to
POSIX standards. If the return value of an FS2 API indicates an error, then the errno variable may
be examined to determine a more specific reason for the failure. The possible errno codes returned
from each function are documented with the function.
Chapter 10: The Flash File System
113
114
Dynamic C User’s Manual
11. Using Assembly Language
This chapter gives the rules for mixing assembly language with Dynamic C code. A reference
guide to the Rabbit Instruction Set is available from the Help menu of Dynamic C and is also documented in the Rabbit 2000/3000 Microprocessor Instruction Reference Manual.
11.1 Mixing Assembly and C
Dynamic C permits assembly language statements to be embedded in C functions and/or entire
functions to be written in assembly language. C statements may also be embedded in assembly
code. C-language variables may be accessed by the assembly code.
11.1.1 Embedded Assembly Syntax
Use the #asm and #endasm directives to place assembly code in Dynamic C programs. For
example, the following function will add two 64-bit numbers together. The same program could be
written in C, but it would be many times slower because C does not provide an add-with-carry
operation (adc).
void eightadd( char *ch1, char *ch2 ){
#asm
ld
hl,(sp+ch2)
; get source pointer
ex
de,hl
; save in register DE
ld
hl,(sp+ch1)
; get destination pointer
ld
b,8
; number of bytes
xor a
; clear carry
loop:
ld
a,(de)
; ch2 source byte
adc a,(hl)
; add ch1 byte
ld
(hl),a
; store result to ch1 address
inc hl
; increment ch1 pointer
inc de
; increment ch2 pointer
djnz loop
; do 8 bytes
; ch1 now points to 64 bit result
#endasm
}
The keywords debug and nodebug can be placed on the same line as #asm. Assembly code
blocks are nodebug by default. This saves space and unnecessary calls to the debugger kernel.
All blocks of assembly code within a C function are assembled in nodebug mode. The only exception to this is when a block of assembly code is explicitly marked with debug. Any blocks
marked debug will be assembled in debug mode even if the enclosing C function is marked
nodebug.
Chapter 11: Using Assembly Language
115
11.1.2 Embedded C Syntax
A C statement may be placed within assembly code by placing a “c” in column 1. Note that whichever registers are used in the embedded C statement will be changed.
#asm
InitValues::
c start_time = 0;
c counter = 256;
ret
#endasm
11.1.3 Setting Breakpoints in Assembly
Starting with Dynamic C version 7.20, there are two ways to enable breakpoint support in a block
of assembly code.
One way is to explicitly mark the assembly block as debug (the default condition is nodebug).
This causes the insertion of “rst 0x28” instructions between each assembly instruction. These rst
0x28 instructions may cause jump relative (i.e., jr) instructions to go out of range, but this problem can be solved by changing the relative jump (jr) to an absolute jump (jp).
The other way to enable breakpoint support in a block of assembly code is to add a C statement
before the desired assembly instruction. Note that the assembly code must be contained in a debug
C function in order to enable C code debugging. Below is an example.
debug dummyfunction() {
#asm
function::
...
label:
...
c ;
// add line of C code to permit a breakpoint before jump relative
jr nc, label
ret
#endasm
}
NOTE: Single stepping through assembly code is always allowed if the assembly
window is open.
116
Dynamic C User’s Manual
11.2 Assembler and Preprocessor
The assembler parses most C language constant expressions. A C language constant expression is one
whose value is known at compile time. All operators except the following are supported:
Table 11-18. Operators Not Supported By The Assembler
Operator Symbol Operator Description
?:
conditional
[ ]
array index
.
dot
->
points to
*
dereference
11.2.1 Comments
C-style comments are allowed in embedded assembly code. The assembler will ignore comments
beginning with
; — text from the semicolon to the end of line is ignored.
// — text from the double forward slashes to the end of line is ignored.
/* ... */ — text between slash-asterisk and asterisk-slash is ignored.
11.2.2 Defining Constants
Constants may be created and defined in assembly code with the assembly language keyword db
(define byte). db should be followed immediately by numerical values and strings separated by
commas. For example, each of the following lines all define the string "ABC."
db 'A', 'B', 'C'
db "ABC"
db 0x41, 0x42, 0x43
The numerical values and characters in strings are used to initialize sequential byte locations.
If separate I&D space is enabled, assembly constants should either be put in their own assembly
block with the const keyword or be done in C.
#asm const
myrootconstants::
db 0x40, 0x41, 0x42
#endasm
or
const char myrootconstants[] = {‘\x40’, ‘\x41’, ‘\x42’}
Chapter 11: Using Assembly Language
117
If separate I&D space is enabled, db places bytes in the base segment of the data space when it is
used with const. If the const keyword is absent, i.e.,
#asm
myrootconstants::
db 0x40, 0x41, 0x42
#endasm
the bytes are placed somewhere in the instruction space. If separate I&D space is disabled (the
default condition), the bytes are placed in the base segment (aka, root segment) interspersed with
code.
The assembly language keyword dw defines 16-bit words, least significant byte first. The keyword
dw should be followed immediately by numerical values:
dw 0x0123, 0xFFFF, xyz
This example defines three constants. The first two constants are literals, and the third constant is
the address of variable xyz.
The numerical values initialize sequential word locations, starting at the current code address.
11.2.3 Multiline Macros
The Dynamic C preprocessor has a special feature to allow multiline macros in assembly code.
The preprocessor expands macros before the assembler parses any text. Putting a $\ at the end of
a line inserts a new line in the text. This only works in assembly code. Labels and comments are
not allowed in multiline macros.
#define
ld
push
pop
SAVEFLAG
a,b $\
af $\
bc
$\
#asm
...
ld b,0x32
SAVEFLAG
...
#endasm
118
Dynamic C User’s Manual
11.2.4 Labels
A label is a name followed by one or two colons. A label followed by a single colon is local,
whereas one followed by two colons is global. A local label is not visible to the code out of the
current embedded assembly segment (i.e., code before the #asm or after the #endasm directive).
Unless it is followed immediately by the assembly language keyword equ, the label identifies the
current code segment address. If the label is followed by equ, the label “equates” to the value of
the expression after the keyword equ.
Because C preprocessor macros are expanded in embedded assembly code, Z-World recommends
that preprocessor macros be used instead of equ whenever possible.
11.2.5 Special Symbols
This table lists special symbols that can be used in an assembly language expression.
Table 11-19. Special Assembly-Language Symbols
Symbol
Description
@SP
Indicates the amount of stack space (in bytes) used for stackbased variables. This does not include arguments.
@RETVAL
Evaluates the offset from the frame reference point to the
stack space reserved for the struct function returns. See
Section 11.4.1.1 on page 123 for more information.
@LENGTH
Determines the next reference address of a variable plus it
size.
11.2.6 C Variables
C variable names may be used in assembly language. What a variable name represents (the value
associated with the name) depends on the variable. For a global or static local variable, the name
represents the address of the variable in root memory. For an auto variable or formal argument,
the variable name represents its own offset from the frame reference point.
The name of a structure element represents the offset of the element from the beginning of the
structure. In the following structure, for example,
struct
int
int
int
};
s {
x;
y;
z;
the embedded assembly expression s+x evaluates to 0, s+y evaluates to 2, and s+z evaluates to
4, regardless of where structure s may be.
The following list of processor register names are reserved and may not be used as C variable
names in assembly: A, B, C, D, E, F, H, L, AF, HL, DE, BC, IX, IY, SP, PC, XPC, IP IIR and EIR.
Both upper and lower case instances are reserved.
Chapter 11: Using Assembly Language
119
In nested structures, offsets can be composite, as shown here.
struct s {
int x;
struct a{
int b;
int c;
};
};
//
//
//
//
s+x=0
s+a=2
a+b=0s+a+b=2
a+c=2s+a+c=4
11.3 Stand-Alone Assembly Code
A stand-alone assembly function is one that is defined outside the context of a C language function. Before Dynamic C version 7.25, stand-alone assembly functions were always placed in root
memory.
A stand-alone assembly function has no auto variables and no formal parameters. It can, however, have arguments passed to it by the calling function. When a program calls a function from C,
it puts the first argument into a primary register. If the first argument has one or two bytes (int,
unsigned int, char, pointer), the primary register is HL (with register H containing
the most significant byte). If the first argument has four bytes (long, unsigned long,
float), the primary register is BC:DE (with register B containing the most significant byte).
Assembly-language code can use the first argument very efficiently. Only the first argument is put
into the primary register, while all arguments—including the first, pushed last—are pushed on the
stack.
C function values return in the primary register, if they have four or fewer bytes, either in HL or
BC:DE.
Assembly language allows assumptions to be made about arguments passed on the stack, and auto
variables can be defined by reserving locations on the stack for them. However, the offsets of such
implicit arguments and variables must be kept track of. If a function expects arguments or needs to
use stack-based variables, Z-World recommends using the embedded assembly techniques
described in the next section.
120
Dynamic C User’s Manual
11.3.1 Stand-Alone Assembly Code in Extended Memory
Starting with Dynamic C 7.25, stand-alone assembly functions may be placed in extended memory
by adding the xmem keyword as a qualifier to #asm, as shown below. Care needs be taken to
make sure that branch instructions do not jump beyond the current xmem window. To help prevent
such bad jumps, the compiler limits xmem assembly blocks to 4096 bytes. Code that branches to
other assembly blocks in xmem should always use ljp or lcall.
#asm xmem
main::
...
lcall fcn_in_xmem
...
lret
#endasm
#asm xmem
fcn_in_xmem::
...
lret
#endasm
11.3.2 Example of Stand-Alone Assembly Code
The stand-alone assembly function foo() can be called from a Dynamic C function.
int foo ( int );
// A function prototype can be declared for stand-alone
// assembly functions, which will cause the compiler
// to perform the appropriate type-checking.
main(){
int i,j;
i=1;
j=foo(i);
}
#asm
foo::
...
ld hl,2
ret
#endasm
// The return value expected by main() is put
// in HL just before foo() returns
The entire program can be written in assembly.
#asm
main::
...
ret
#endasm
Chapter 11: Using Assembly Language
121
11.4 Embedded Assembly Code
When embedded in a C function, assembly code can access arguments and local variables (either
auto or static) by name. Furthermore, the assembly code does not need to manipulate the
stack because the functions prolog and epilog already do so.
11.4.1 The Stack Frame
The purpose and structure of a stack frame should be understood before writing embedded assembly code. A stack frame is a run-time structure on the stack that provides the storage for all auto
variables, function arguments and the return address for a particular function. If the IX register is
used for a frame reference pointer, the previous value of IX is also kept in the stack frame. The following figure shows the general appearance of a stack frame.
Stack Frame
Last Auto Variable
SP
Optional
First Auto Variable
Optional
IX Register
Frame Reference
Point
Return Address
First Parameter
(pushed last)
Optional
Last Parameter
(pushed first)
Optional
Structure Return
Space
Lower Addresses
(stack grows down)
Higher Addresses
Figure 4. General Appearance of Assembly Code Stack Frame
The return address is always necessary. The presence of auto variables depends on the function
definition. The presence of arguments and structure return space depends on the function call.
(The stack pointer may actually point lower than the indicated mark temporarily because of temporary information pushed on the stack.)
The shaded area in the stack frame is the stack storage allocated for auto variables. The assembler symbol @SP represents the size of this area.
122
Dynamic C User’s Manual
11.4.1.1 The Frame Reference Point
The frame reference point is a location in the stack frame that immediately follows the function’s
return address. The IX register may be used as a pointer to this location by putting the keyword
useix before the function, or the request can be specified globally by the compiler directive
#useix. The default is #nouseix. If the IX register is used as a frame reference pointer, its previous value is pushed on the stack after the function’s return address. The frame reference point
moves to encompass the saved IX value.
Chapter 11: Using Assembly Language
123
11.4.2 Embedded Assembly Example
The purpose of the following sample program, asm1.c, is to show the different ways to access
stack-based variables from assembly code.
void func(char ch, int i, long lg);
main(){
char ch;
int i;
long lg;
ch = 0x11;
i = 0x2233;
lg = 0x44556677L;
func(ch,i,lg);
}
void func(char ch, int i, long lg){
auto int x;
auto int z;
x = 0x8888;
z = 0x9999;
#asm
// @SP+i gives the offset of i from the stack frame on entry.
// On the Z180, this is how HL is loaded with the value in i.
// (The assembler combines i and @SP into one constant.)
ld
hl,@SP+i
add hl,sp
ld
hl,(hl)
// On the Rabbit, this code does the same:
ld
hl,(sp+@SP+i)
// This works if func() is useix, however, if the IX register
// has been changed by the user code, this code will fail.
ld
hl,(ix+i)
// This method works in either case because the assembler
// adjusts the constant @SP, so changing the function to
// nouseix with the keyword nouseix, or the compiler
// directive #nouseix will not break the code. But, if SP has
// been changed by user code, (e.g. a push) it won't work.
ld
hl,(sp+@SP+lg+2)
ld
b,h
ld
c,L
ld
hl,(sp+@SP+lg)
ex
de,hl
#endasm
}
124
Dynamic C User’s Manual
11.4.2.1 The Disassembled Code Window
A program may be debugged at the assembly level by clicking the Assemb radio button on
Dynamic C’s toolbar to open the Disassembled Code window. Single stepping and breakpoints are
supported in this window. When the Disassembled Code window is open, single stepping occurs
instruction by instruction rather than statement by statement. The figure below shows the Registers, Stack and Disassembled Code windows for the example code, asm1.c, just before the function call.
Figure 5. Registers, Stack and Disassembled Code Windows
Chapter 11: Using Assembly Language
125
11.4.2.2 Instruction Cycle Time
The Disassembled Code window shows the memory address on the far left, followed by the code
bytes for the instruction at the address, followed by the mnemonics for the instruction. The last
column shows the number of cycles for the instruction, assuming no wait states. The total cycle
time for a block of instructions will be shown at the lowest row in the block in the cycle-time column, if that block is selected and highlighted with the mouse. The total assumes one execution per
instruction, so the user must take looping and branching into consideration when evaluating execution times.
11.4.3 Local Variable Access
Accessing static local variables is simple because the symbol evaluates to the address directly. The
following code shows, for example, how to load static variable y into HL.
ld hl,(y)
; load hl with contents of y
11.4.3.1 Using the IX Register
Access to stack-based local variables is fairly inefficient. The efficiency improves if IX is used as
a frame pointer. The arguments will have slightly different offsets because of the additional two
bytes for the saved IX register value.
Now, access to stack variables is easier. Consider, for example, how to load ch into register A.
ld
a,(ix+ch)
; a ← ch
The IX+offset load instruction takes 9 clock cycles and opcode is three bytes. If the program needs
to load a four-byte variable such as lg, the IX+offset instructions are as follows.
ld
ld
ld
ld
ex
hl,(ix+lg+2)
b,h
c,L
hl,(ix+lg)
de,hl
; load LSB of lg
; longs are normally stored in BC:DE
; load MSB of lg
This takes a total of 24 cycles.
The offset from IX is a signed 8-bit integer. To use IX+offset, the variable must be within +127 or
–128 bytes of the frame reference point. The @SP method is the only method for accessing variables out of this range. The @SP symbol may be used even if IX is the frame reference pointer.
126
Dynamic C User’s Manual
11.4.3.2 Functions in Extended Memory
If the xmem keyword is present, Dynamic C compiles the function to extended memory. Otherwise,
Dynamic C determines where to compile the function. Functions compiled to extended memory have a 3byte return address instead of a 2-byte return address.
Because the compiler maintains the offsets automatically, there is no need to worry about the
change of offsets. The @SP approach discussed previously as a means of accessing stack-based
variables works whether a function is compiled to extended memory or not, as long as the C-language names of local variables and arguments are used.
A function compiled to extended memory can use IX as a frame reference pointer as well. This
adds an additional two bytes to argument offsets because of the saved IX value. Again, the IX+offset approach discussed previously can be used because the compiler maintains the offsets automatically.
11.5 C Calling Assembly
Dynamic C does not assume that registers are preserved in function calls. In other words, the function being called need not save and restore registers.
11.5.1 Passing Parameters
When a program calls a function from C, it puts the first argument into HL (if it has one or two
bytes) with register H containing the most significant byte. If the first argument has four bytes, it
goes in BC:DE (with register B containing the most significant byte). Only the first argument is
put into the primary register, while all arguments—including the first, pushed last—are pushed on
the stack.
11.5.2 Location of Return Results
If a C-callable assembly function is expected to return a result (of primitive type), the function
must pass the result in the “primary register.” If the result is an int, unsigned int, char,
or a pointer, return the result in HL (register H contains the most significant byte). If the result is a
long, unsigned long, or float, return the result in BCDE (register B contains the most
significant byte). A C function containing embedded assembly code may, of course, use a C
return statement to return a value. A stand-alone assembly routine, however, must load the primary register with the return value before the ret instruction.
Chapter 11: Using Assembly Language
127
11.5.2.1 Returning a Structure
In contrast, if a function returns a structure (of any size), the calling function reserves space on the
stack for the return value before pushing the last argument (if any). Dynamic C functions containing embedded assembly code may use a C return statement to return a value. A stand-alone
assembly routine, however, must store the return value in the structure return space on the stack
before returning.
Inline assembly code may access the stack area reserved for structure return values by the symbol
@RETVAL, which is an offset from the frame reference point.
The following code shows how to clear field f1 of a structure (as a returned value) of type
struct s.
typedef struct ss {
int f0;
// first field
char f1;
// second field
} xyz;
xyz my_struct;
...
my_struct = func();
...
xyz func(){
#asm
...
xor a
; clear register A.
ld hl,@SP+@RETVAL+ss+f1
; hl ← the offset from SP to the
; f1 field of the returned structure.
add hl,sp
; hl now points to f1.
ld (hl),a
; load a (now 0) to f1.
...
#endasm
}
It is crucial that @SP be added to @RETVAL because @RETVAL is an offset from the frame reference point, not from the current SP.
128
Dynamic C User’s Manual
11.6 Assembly Calling C
A program may call a C function from assembly code. To make this happen, set up part of the
stack frame prior to the call and “unwind” the stack after the call. The procedure to set up the stack
frame is described here.
1. Save all registers that the calling function wants to preserve. A called C function may change
the value of any register. (Pushing registers values on the stack is a good way to save their values.)
2. If the function return is a struct, reserve space on the stack for the returned structure. Most
functions do not return structures.
3. Compute and push the last argument, if any.
4. Compute and push the second to last argument, if any.
5. Continue to push arguments, if there are more.
6. Compute and push the first argument, if any. Also load the first argument into the primary register (HL for int, unsigned int, char, and pointers, or BCDE for long,
unsigned long, and float) if it is of a primitive type.
7. Issue the call instruction.
The caller must unwind the stack after the function returns.
1. Recover the stack storage allocated to arguments. With no more than 6 bytes of arguments, the
program may pop data (2 bytes at time) from the stack. Otherwise, it is more efficient to compute a new SP instead. The following code demonstrates how to unwind arguments totaling
36 bytes of stack storage.
; Note that HL is changed by this code!
; Use ex de,hl to save HL if HL has the return value
;;;ex de,hl
; save HL (if required)
ld hl,36
; want to pop 36 bytes
add hl,sp
; compute new SP value
ld sp,hl
; put value back to SP
;;;ex de,hl
; restore HL (if required)
2. If the function returns a struct, unload the returned structure.
3. Restore registers previously saved. Pop them off if they were stored on the stack.
4. If the function return was not a struct, obtain the returned value from HL or BCDE.
Chapter 11: Using Assembly Language
129
11.7 Interrupt Routines in Assembly
Interrupt Service Routines (ISRs) may be written in Dynamic C (declared with the keyword
interrupt). But since an assembly routine may be more efficient than the equivalent C function, assembly is more suitable for an ISR. Even if the execution time of an ISR is not critical, the
latency of one ISR may affect the latency of other ISRs.
Either stand-alone assembly code or embedded assembly code may be used for ISRs. The benefit
of embedding assembly code in a C-language ISR is that there is no need to worry about saving
and restoring registers or reenabling interrupts. The drawback is that the C interrupt function does
save all registers, which takes some amount of time. A stand-alone assembly routine needs to save
and restore only the registers it uses.
11.7.1 Steps Followed by an ISR
The CPU loads the IP register with the priority of the interrupt before the ISR is called. This effectively turns off interrupts that are of the same or lower priority. Generally, the ISR performs the
following actions:
1. Save all registers that will be used, i.e. push them on the stack. Interrupt routines written in C
save all registers automatically. Stand-alone assembly routines must push the registers explicitly.
2. Determine the cause of the interrupt. Some devices map multiple causes to the same interrupt
vector. An interrupt handler must determine what actually caused the interrupt.
3. Remove the cause of the interrupt.
4. If an interrupt has more than one possible cause, check for all the causes and remove all the
causes at the same time.
5. When finished, restore registers saved on the stack. Naturally, this code must match the code
that saved the registers. Interrupt routines written in C perform this automatically. Stand-alone
assembly routines must pop the registers explicitly.
6. Restore the interrupt priority level so that other interrupts can get the attention of the CPU.
ISRs written in C restore the interrupt priority level automatically when the function returns.
However, stand-alone assembly ISRs must restore the interrupt priority level explicitly by calling ipres.
The interrupt priority level must be restored immediately before the return instructions ret or
reti. If the interrupts are enabled earlier, the system can stack up the interrupts. This may or
may not be acceptable because there is the potential to overflow the stack.
7. Return. There are three types of interrupt returns: ret, reti, and retn.
130
Dynamic C User’s Manual
11.7.2 Modifying Interrupt Vectors
Prior to Dynamic C 7.30, interrupt vector code could be modified directly. By reading the internal
and external interrupt registers, IIR and EIR, the location of the vector could be calculated and
then written to because it was located in RAM. This method will not work if separate I&D space is
enabled because the vectors must be located in flash. To accommodate separate I&D space, the
way interrupt vectors are set up and modified has changed slightly. Please see the Rabbit 3000
Designer’s Handbook for detailed information about how the interrupt vectors are set up. This section will discuss how to modify the interrupt vectors after they have been set up.
For backwards compatibility, “modifiable” vector relays are provided in RAM. In C, they can be
accessed through the SetVectIntern and SetVectExtern functions. In assembly, they are accessed
through INTVEC_BASE + <vector offset> or XINTVEC_BASE + <vector offset>. The values for
<vector offset> are defined in sysio.lib, and are listed here for convenience.
Table 11-20. Internal Interrupts and their offset from INTVEC_BASE
PERIODIC_OFS
SERA_OFS
RST10_OFS
SERB_OFS
RST18_OFS
SERC_OFS
RST20_OFS
SERD_OFS
RST28_OFS
SERE_OFS
RST38_OFS
SERF_OFS
SLAVE_OFS
QUAD_OFS
TIMERA_OFS
INPUTCAP_OFS
TIMERB_OFS
Table 11-21. External Interrupts and their offset from XINTVEC_BASE
EXT0_OFS
EXT1_OFS
Chapter 11: Using Assembly Language
131
The following example from RS232.LIB illustrates the new I&D space compatible way of modifying interrupt vectors.
The following code fragment to set up the interrupt service routine for the periodic interrupt from
Dynamic C 7.25 is not compatible with separate I&D space:
#asm xmem
;*** Old method ***
ld a,iir
ld h,a
ld l,0x00
ld iy,hl
ld (iy),0c3h
inc iy
ld hl,periodic_isr
ld (iy),hl
#endasm
; get the offset of interrupt table
; jp instruction entry
; set service routine
The following code fragment shows an I&D space compatible method for setting up the ISR for
the periodic interrupt in Dynamic C 7.30:
#asm xmem
;*** New method ***
ld a, 0xc3
;jp instruction entry
ld hl, periodic_isr
;set service routine
ld (INTVEC_BASE+PERIODIC_OFS), a ;write to the interrupt table
ld (INTVEC_BASE+PERIODIC_OFS+1), hl
#endasm
When separate I&D space is enabled, INTVEC_BASE points to a proxy interrupt vector table in
RAM that is modifiable. The code above assumes that the actual interrupt vector table pointed to
by the IIR is set up to point to the proxy vector. When separate I&D space is disabled,
INTVEC_BASE and the IIR point to the same location. The code above is an example only, the
default configration for the periodic interrupt is not modifiable.
132
Dynamic C User’s Manual
The following example from RS232.LIB illustrates the new I&D space compatible way of modifying interrupt vectors.
The following function serAclose() from Dynamic C 7.25, is not compatible with separate
I&D space:
#asm xmem
serAclose::
ld a,iir
ld h,a
ld l,0xc0
ld a,0xc9
ipset 1
ld (hl),a
ld a,0x00
ld (SACRShadow), a
ioi ld (SACR), a
ipres
lret
; hl=spaisr_start, de={iir,0xe0}
; ret in first byte
; disable interrupts for port
#endasm
This version of serAclose() in Dynamic C 7.30 is compatible with separate I&D space:
#asm xmem
serAclose::
ld a, 0xc9
ipset 1
ld (INTVEC_BASE + SERA_OFS), a
ld a, 0x00
ld (SACRShadow),a
ioi ld (SACR),a
ipres
lret
; ret in first byte of spaisr_start
; disable interrupts for port
#endasm
Chapter 11: Using Assembly Language
133
If separate I&D space is enabled, using the modifiable interrupt vector proxy in RAM adds about
80 clock cycles of overhead to the execution time of the ISR. To avoid that, the preferred way to
set up interrupt vectors is to use the new keyword, interrupt_vector, to set up the vector
location at compile time.
When compiling with separate I&D space, modify applications that use SetVectIntern(),
SetVectExtern2000() or SetVectExtern3000() to use interrupt_vector
instead.
The following code, from /Samples/TIMERB/TIMER_B.C, illustrates the change that should
be made.
void main()
{
. . .
#if __SEPARATE_INST_DATA__
interrupt_vector timerb_intvec timerb_isr;
#else
SetVectIntern(0x0B, timerb_isr);
// set up ISR
#endif
. . .
}
If interrupt_vector is used multiple times for the same interrupt vector, the last one
encountered by the compiler will override all previous ones.
interrupt_vector is syntactic sugar for using the origin directives and assembly code. For
example, the line:
interrupt_vector timerb_intvec timerb_isr;
is equivalent to:
#rcodorg timerb_intvec apply
#asm
jp timerb_isr
#endasm
#rcodorg rootcode resume
134
Dynamic C User’s Manual
The following table lists the defined interrupt vector names that may be used with
interrupt_keyword, as well as their corresponding ISRs.
Table 12. Interrupt Vector and ISR Names
Interrupt Vector Name
ISR Name
Default Condition
periodic_intvec
periodic_isr
Fast and nonmodifiable
rst10_intvec
User defined name
User defined
rst18_intvec
rst20_intvec
These interrupt vectors and their ISRs should never be altered
by the user because they are reserved for the debug kernel.
rst28_intvec
rst38_intvec
User defined name
User defined
slave_intvec
slave_isr
Fast and nonmodifiable
timera_intvec
User defined name
User defined
timerb_intvec
User defined name
User defined
DevMateSerialISR
Fast and nonmodifiable
spa_isr
User defined
sera_intveca
serb_intvec
spb_isr
serc_intvec
spc_isr
serd_intvec
spd_isr
sere_intvec
spe_isr
serf_intvec
spf_isr
inputcap_intvec
User defined name
quad_intvec
qd_isr
ext0_intvec
User defined name
ext1_intvec
User defined name
User defined
a. Please note that this ISR shares the same interrupt vector as DevMateSerialISR. Using
spa_isr precludes Dynamic C from communicating with the target.
Chapter 11: Using Assembly Language
135
11.8 Common Problems
Unbalanced stack. Ensure the stack is “balanced” when a routine returns. In other words, the SP
must be same on exit as it was on entry. From the caller’s point of view, the SP register must be
identical before and after the call instruction.
Using the @SP approach after pushing temporary information on the stack. The @SP
approach for inline assembly code assumes that SP points to the low boundary of the stack frame.
This might not be the case if the routine pushes temporary information onto the stack. The space
taken by temporary information on the stack must be compensated for.
The following code illustrates the concept.
; SP still points to the low boundary of the call frame
push hl
; save HL
; SP now two bytes below the stack frame!
...
ld hl,@SP+x+2
; Add 2 to compensate for altered SP
add hl,sp
; compute as normal
ld a,(hl)
; get the content
...
pop hl
; restore HL
; SP again points to the low boundary of the call frame
Registers not preserved. In Dynamic C, the caller is responsible for saving and restoring all registers. An assembly routine that calls a C function must assume that all registers will be changed.
Unpreserved registers in interrupt routines cause unpredictable and unrepeatable problems. In contrast to normal functions, interrupt functions are responsible for saving and restoring all registers
themselves.
136
Dynamic C User’s Manual
12. Keywords
A keyword is a reserved word in C that represents a basic C construct. It cannot be used for any
other purpose. There are many keywords, and they are summarized in the following pages.
abandon
Used in single-user cofunctions, abandon{} must be the first statement in the body of the cofunction. The statements inside the curly braces will be executed only if the cofunction is forcibly abandoned and if a call to loophead() is made in main() before calling the singleuser cofunction. See Samples\Cofunc\Cofaband.c for an example of abandonment
handling.
abort
Jumps out of a costatement.
for(;;){
costate {
...
if( condition ) abort;
}
...
}
Chapter 12: Keywords
137
align
Used in assembly blocks, the align keyword outputs a padding of nops so that the next instruction to be compiled is placed at the boundary based on VALUE.
#asm
...
align <VALUE>
...
#endasm
VALUE can have any (positive) integer expression or the special operands even and odd. The
operand even aligns the instruction on an even address, and odd on an odd address. Integer
expressions align on multiples of the value of the expression.
Some examples:
align
align
align
align
align
odd ; This aligns on the next odd address
2
; Aligns on a 16-bit (2-byte) boundary
4
; Aligns on a 32-bit (4-byte) boundary
100h ; Aligns the code to the next address that is evenly divisible by 0x100
sizeof(int)+4 ; Complex expression, involving sizeof and integer constant
Note that integer expressions are treated the same way as operand expressions for other asm operators, so variable labels are resolved to their addresses, not their values.
always_on
The costatement is always active. (Unnamed costatements are always on.)
anymem
Allows the compiler to determine in which part of memory a function will be placed.
anymem int func(){
...
}
#memmap anymem
#asm anymem
...
#endasm
138
Dynamic C User’s Manual
asm
Use in Dynamic C code to insert one assembly language instruction. If more than one assembly
instruction is desired use the compiler directive #asm instead.
int func() {
int x,y,z;
asm ld hl,0x3333
...
}
auto
A functions’s local variable is located on the system stack and exists as long as the function call
does.
int func(){
auto float x;
...
}
bbram
Identifies a variable to be placed into a second data area reserved for battery-backed RAM. Generally, the battery-backed RAM is attached to CS1 due to the low-power requirements. In the
case of a reset or power failure, the value of a bbram variable is preserved, but not atomically
like with protected variables. No software check is possible to ensure that the RAM is battery-backed. This requirement must be enforced by the user.
If interested, please see the Rabbit 3000 Microprocessor Designer’s Handbook for information
on how the second data area is reserved.
break
Jumps out of a loop, if, or case statement.
while( expression ){
...
if( condition ) break;
}
switch( expression ){
...
case 3:
...
break;
...
}
Chapter 12: Keywords
139
c
Use in assembly block to insert one Dynamic C instruction.
#asm
InitValues::
c start_time = 0;
c counter = 256;
ld
hl,0xa0;
ret
#endasm
case
Identifies the next case in a switch statement.
switch( expression ){
case const:
...
case const:
...
case const:
...
...
}
char
Declares a variable or array element as an unsigned 8-bit character.
char c, x, *string = "hello";
int i;
...
c = (char)i;
// type casting operator
140
Dynamic C User’s Manual
const
This keyword declares that a value will be stored in flash, thus making it unavailable for modification. const is a type qualifier and may be used with any static or global type specifier
(char, int, struct, etc.). The const qualifier appears before the type unless it is modifying a pointer. When modifying a pointer, the const keyword appears after the ‘*’.
In each of the following examples, if const was missing the compiler would generate a trivial
warning. Warnings for const can be turned off by changing the compiler options to report serious warnings only. Note that const is not currently permitted with return types, automatic
locals or parameters and does not change the default storage class for cofunctions.
Example 1:
// ptr_to_x is a constant pointer to an integer
int x;
int * const cptr_to_x = &x;
Example 2:
// cptr_to_i is a constant pointer to a constant integer
const int i = 3;
const int * const cptr_to_i = &i;
Example 3:
// ax is a constant 2 dimensional integer array
const int ax[2][2] = {{2,3}, {1,2}};
Example 4:
struct rec {
int a;
char b[10];
};
// zed is a constant struct
const struct rec zed = {5, “abc”};
Example 5:
// cptr is a constant pointer to an integer
typedef int * ptr_to_int;
const ptr_to_int cptr = &i;
// this declaration is equivalent to the previous one
int * const cptr = &i;
Chapter 12: Keywords
141
continue
Skip to the next iteration of a loop.
while( expression ){
if( nothing to do ) continue;
...
}
costate
Indicates the beginning of a costatement.
costate [ name [ state ] ] {
...
}
Name can be absent. If name is present, state can be always_on or init_on. If state
is absent, the costatement is initially off.
debug
Indicates a function is to be compiled in debug mode. This is the default case for Dynamic C
functions with the exception of pure assembly language functions.
Library functions compiled in debug mode can be single stepped into, and breakpoints can be
set in them.
debug int func(){
...
}
#asm debug
...
#endasm
142
Dynamic C User’s Manual
default
Identifies the default case in a switch statement. The default case is optional. It executes only
when the switch expression does not match any other case.
switch( expression ){
case const1:
...
case const2:
...
default:
...
}
do
Indicates the beginning of a do loop. A do loops tests at the end and executes at least once.
do
...
while( expression );
The statement must have a semicolon at the end.
else
Indicates a false branch of an if statement
if( expression )
statement
else
statement
Chapter 12: Keywords
// executes when expression is true
// executes when expression is false
143
enum
Defines a list of named integer constants:
enum foo {
white,
black,
brown,
spotted = -2,
striped,
};
//
//
//
//
//
default is 0 for the first item
will be 1
will be 2
will be -2
will be -3
An enum can be declared in local or global scope. The tag foo is optional; but it allows further
declarations:
enum foo rabbits;
This keyword is available starting with Dynamic C version 7.20. To see a colorful sample, run
/samples/enum.c.
extern
Indicates that a variable is defined in the BIOS, later in a library file, or in another library file.
Its main use is in module headers.
/*** BeginHeader ..., var */
extern int var;
/*** EndHeader
*/
int var;
...
144
Dynamic C User’s Manual
firsttime
firsttime in front of a function body declares the function to have an implicit *CoData
parameter as the first parameter. This parameter should not be specified in the call or the prototype, but only in the function body parameter list. The compiler generates the code to automatically pass the pointer to the CoData structure associated with the costatement from which the
call is made. A firstime function can only be called from inside of a costatement, cofunction, or slice statement. The DelayTick function from COSTATE.LIB below is an example
of a firsttime function.
firsttime nodebug int DelayTicks(CoData *pfb, unsigned int
ticks){
if(ticks==0) return 1;
if(pfb->firsttime){
fb->firsttime=0;
/* save current ticker */
fb->content.ul=(unsigned long)TICK_TIMER;
}
else if (TICK_TIMER - pfb->content.ul >= ticks)
return 1;
return 0;
}
float
Declares variables, function return values, or arrays, as 32-bit IEEE floating point.
int func(){
float x, y, *p;
float PI = 3.14159265;
...
}
float func( float par ){
...
}
for
Indicates the beginning of a for loop. A for loop has an initializing expression, a limiting expression, and a stepping expression. Each expression can be empty.
for(;;) {
...
}
for( i = 0; i < n; i++ ) {
...
}
Chapter 12: Keywords
// an endless loop
// counting loop
145
goto
Causes a program to go to a labeled section of code.
...
if( condition ) goto RED;
...
RED:
Use goto to jump forward or backward in a program. Never use goto to jump into a loop body
or a switch case. The results are unpredictable. However, it is possible to jump out of a loop
body or switch case.
if
Indicates the beginning of an if statement.
if( tank_full ) shut_off_water();
if( expression ){
statements
}else if( expression ){
statements
}else if( expression ){
statements
}else if( expression ){
statements
...
}else{
statements
}
If one of the expressions is true (they are evaluated in order), the statements controlled by that
expression are executed.
An if statement can have zero or more else if parts. The else is optional and executes only
when none of the if or else if expressions are true (non-zero).
146
Dynamic C User’s Manual
init_on
The costatement is initially on and will automatically execute the first time it is encountered in
the execution thread. The costatement becomes inactive after it completes (or aborts).
int
Declares variables, function return values, or array elements to be 16-bit integers. If nothing else
is specified, int implies a 16-bit signed integer.
int i, j, *k;
unsigned int x;
long int z;
unsigned long int w;
int funct ( int arg ){
...
}
//
//
//
//
16-bit signed
16-bit unsigned
32-bit signed
32-bit unsigned
interrupt
Indicates that a function is an interrupt service routine. All registers, including alternates, are
saved when an interrupt function is called and restored when the interrupt function returns.
Writing ISRs in C is not recommended when timing is critical.
interrupt isr (){
...
}
An interrupt service routine returns no value and takes no arguments.
Chapter 12: Keywords
147
interrupt_vector
Sets up an interrupt vector at compile time. This keyword is available starting with Dynamic C
version 7.30. It is intended for use with separate I&D space.
interrupt_vector <INT_VECTOR_NAME> <ISR_NAME>
// Set up an Interrupt Service Routine for Timer B
#asm
timerb_isr::
; ISR code
...
ret
#endasm
main() {
// Variables
...
// Set up ISR
interrupt_vector timerb_intvec timerb_isr; // Compile time setup
// Code
...
}
interrupt_vector overrides run time setup. For run time setup, you would replace the
interrupt_vector statement above with:
#rcodorg <INT_VEC_NAME> apply
#asm
INTVEC_RELAY_SETUP(timerb_intvec + TIMERB_OFS)
#endasm
#rcodorg rootcode resume
This results in a slower interrupt (80 clock cycles are added), but a interrupt vector can be modified at run time. Interrupt vectors that are set up using interrupt_vector are fast, but
can’t be modified at run time since they are set at compile time.
long
Declares variables, function return values, or array elements to be 32-bit integers. If nothing else
is specified, long implies a signed integer.
long i, j, *k;
unsigned long int w;
long funct ( long arg ){
...
}
148
// 32-bit signed
// 32-bit unsigned
Dynamic C User’s Manual
main
Identifies the main function. All programs start at the beginning of the main function. (main
is actually not a keyword, but is a function name.)
nodebug
Indicates a function is not compiled in debug mode. This is the default for assembly blocks.
nodebug int func(){
...
}
#asm nodebug
...
#endasm
See also debug and directives #debug #nodebug.
norst
Indicates that a function does not use the RST instruction for breakpoints.
norst void func(){
...
}
nouseix
Indicates a function does not use the IX register as a stack frame reference pointer. This is the
default case.
nouseix void func(){
...
}
NULL
The null pointer. (This is actually a macro, not a keyword.) Same as (void *)0.
Chapter 12: Keywords
149
protected
An important feature of Dynamic C is the ability to declare variables as protected. Such a variable is protected against loss in case of a power failure or other system reset because the compiler generates code that creates a backup copy of a protected variable before the variable is
modified. If the system resets while the protected variable is being modified, the variable’s value can be restored when the system restarts. Battery-backed RAM is required for this operation.
A system that shares data among different tasks or among interrupt routines can find its shared
data corrupted if an interrupt occurs in the middle of a write to a multibyte variable (such as type
int or float). The variable might be only partially written at its next use.
Declaring a multibyte variable shared means that changes to the variable are atomic, i.e., interrupts are disabled while the variable is being changed.
Declaring a variable to be “protected” guards against system failure. This means that a copy of
the variable is made before it is modified. If a transient effect such as power failure occurs when
the variable is being changed, the system will restore the variable from the copy.
main(){
protected int state1, state2, state3;
...
_sysIsSoftReset();
// restore any protected variables
}
The call to _sysIsSoftReset checks to see if the previous board reset was due to the compiler restarting the program (i.e. a “soft” reset). If so, then it initializes the protected variable
flags and calls sysResetChain(), a function chain that can be used to initialize any protected variables or do other initialization. If the reset was due to a power failure or watchdog timeout, then any protected variables that were being written when the reset occurred are restored.
return
Explicit return from a function. For functions that return values, this will return the function result.
void func (){
...
if( expression ) return;
...
}
float func (int x){
...
float temp;
...
return ( temp * 10 + 1 );
}
150
Dynamic C User’s Manual
root
Indicates a function is to be placed in root memory. This keyword is semantically meaningful
in function prototypes and produces more efficient code when used. Its use must be consistent
between the prototype and the function definition.
root int func(){
...
}
#memmap root
#asm root
...
#endasm
segchain
Identifies a function chain segment (within a function).
int func ( int arg ){
...
int vec[10];
...
segchain _GLOBAL_INIT{
for( i = 0; i<10; i++ ){ vec[i] = 0; }
}
...
}
This example adds a segment to the function chain _GLOBAL_INIT. Using segchain is
equivalent to using the #GLOBAL_INIT directive. When this function chain executes, this and
perhaps other segments elsewhere execute. The effect in this example is to (re)initialize vec.
shared
Indicates that changes to a multi-byte variable (such as a float) are atomic. Interrupts are disabled when the variable is being changed. Local variables cannot be shared.
shared float x, y, z;
shared int j;
...
main(){
...
}
If i is a shared variable, expressions of the form i++ (or i = i+ 1) constitute two atomic
references to variable i, a read and a write. Be careful because i++ is not an atomic operation.
Chapter 12: Keywords
151
short
Declares that a variable or array is short integer (16 bits). If nothing else is specified, short implies a 16-bit signed integer.
short i, j, *k;
unsigned short int w;
short funct ( short arg ){
...
}
// 16-bit, signed
// 16-bit, unsigned
size
Declares a function to be optimized for size (as opposed to speed).
size int func (){
...
}
sizeof
A built-in function that returns the size in bytes of a variable, array, structure, union, or of a data
type. Starting with Dynamic C 7.05, sizeof() can be used inside of assembly blocks.
int list[] = { 10, 99, 33, 2, -7, 63, 217 };
...
x = sizeof(list);
// x will be assigned 14
speed
Declares a function to be optimized for speed (as opposed to size).
speed int func (){
...
}
152
Dynamic C User’s Manual
static
Declares a local variable to have a permanent fixed location in memory, as opposed to auto,
where the variable exists on the system stack. Global variables are by definition static. Local variables are static by default, unlike standard C.
int func (){
...
int i;
static float x;
...
}
// static by default
// explicitly static
struct
This keyword introduces a structure declaration, which defines a type.
struct {
...
int x;
int y;
int z;
} thing1;
// defines the variable thing1 to be a struct
struct
int
int
int
};
// declares a struct type named speed
speed{
x;
y;
z;
struct speed thing2;
speed
// defines the variable thing2 to be of type
Structure declarations can be nested.
struct {
struct speed slow;
struct speed slower;
} tortoise;
// defines the variable tortoise to be a nested struct
struct rabbit {
struct speed fast;
struct speed faster;
};
// declares a nested struct type named rabbit
struct rabbit chips;
Chapter 12: Keywords
// defines the variable chips to be of type rabbit
153
switch
Indicates the start of a switch statement.
switch( expression ){
case const1:
...
break;
case const2:
...
break;
case const3:
...
break
default :
...
}
The switch statement may contain any number of cases. The constants of the case statements
are compared with expression. If there is a match, the statements for that case execute. The
default case, if it is present, executes if none of the constants of the case statements match
expression.
If the statements for a case do not include a break, return, continue, or some means of
exiting the switch statement, the cases following the selected case will also execute, regardless of whether their constants match the switch expression.
typedef
This keyword provides a way to create new names for existing data types.
154
typedef struct {
int x;
int y;
} xyz;
// defines a struct type...
xyz thing;
// ...and a thing of type xyz
typedef uint node;
node master, slave1, slave2;
// meaningful type name
Dynamic C User’s Manual
union
Identifies a variable that can contain objects of different types and sizes at different times. Items
in a union have the same address. The size of a union is that of its largest member.
union {
int x;
float y;
} abc;
// overlays a float and an int
unsigned
Declares a variable or array to be unsigned. If nothing else is specified in a declaration,
unsigned means 16-bit unsigned integer.
unsigned
unsigned
unsigned
unsigned
...
}
i, j, *k;
int x;
long w;
funct ( unsigned arg ){
// 16-bit, unsigned
// 16-bit, unsigned
// 32-bit, unsigned
Values in a 16-bit unsigned integer range from 0 to 65,535 instead of –32768 to +32767. Values
in an unsigned long integer range from 0 to 232 – 1.
useix
Indicates that a function uses the IX register as a stack frame pointer.
useix void func(){
...
}
See also nouseix and directives #useix #nouseix.
waitfor
Used in a costatement, this keyword identifies a point of suspension pending the outcome of a
condition, completion of an event, or some other delay.
for(;;){
costate {
waitfor ( input(1) == HIGH );
...
}
...
}
Chapter 12: Keywords
155
waitfordone
(wfd)
The waitfordone keyword can be abbreviated as wfd. It is part of Dynamic C’s cooperative
multitasking constructs. Used inside a costatement or a cofunction, it executes cofunctions and
firsttime functions. When all the cofunctions and firsttime functions in the wfd statement are complete, or one of them aborts, execution proceeds to the statement following wfd.
Otherwise a jump is made to the ending brace of the costatement or cofunction where the wfd
statement appears; when the execution thread comes around again, control is given back to the
wfd statement.
The wfd statements below are from Samples\cofunc\cofterm.c
x=wfd login();
// wfd with one cofunction
wfd {
clrscr();
putat(5,5,"name:");
putat(5,6,"password:");
echoon();
}
// wfd with several cofunctions
As shown, wfd may return an argument.
while
Identifies the beginning of a while loop. A while loop tests at the beginning and may execute zero or more times.
while( expression ){
...
}
156
Dynamic C User’s Manual
xdata
Declares a block of data in extended flash memory.
xdata name { value_1, ... value_n };
The 20-bit physical address of the block is assigned to name by the compiler as an unsigned
long variable. The amount of memory allocated depends on the data type. Each char is allocated one byte, and each int is allocated two bytes. If an integer fits into one byte, it is still
allocated two bytes. Each float and long cause four bytes to be allocated.
The value list may include constant expressions of type int, float, unsigned int, long,
unsigned long, char, and (quoted) strings. For example:
xdata name1
{'\x46','\x47','\x48','\x49','\x4A','\x20','\x20'};
xdata name2 {'R','a','b','b','i','t'};
xdata name3 {" Rules! "};
xdata name4 {1.0,2.0,(float)3,40e-01,5e00,.6e1};
The data can be viewed directly in the dump window by doing a physical memory dump using
the 20-bit address of the xdata block. See Samples\Xmem\xdata.c for more information.
xmem
Indicates that a function is to be placed in extended memory. This keyword is semantically
meaningful in function prototypes. Its use must be consistent between the prototype and the
function definition.
xmem int func(){
...
}
#memmap xmem
xstring
Declares a table of strings in extended memory. The strings are allocated in flash memory at
compile time which means they can not be rewritten directly.
The table entries are 20-bit physical addresses. The name of the table represents the 20-bit
physical address of the table; this address is assigned to name by the compiler.
xstring name { “string_1”, . . . “string_n” };
Chapter 12: Keywords
157
yield
Used in a costatement, this keyword causes the costatement to pause temporarily, allowing other
costatements to execute. The yield statement does not alter program logic, but merely postpones it.
for(;;){
costate {
...
yield;
...
}
...
}
158
Dynamic C User’s Manual
12.1 Compiler Directives
Compiler directives are special keywords prefixed with the symbol #. They tell the compiler how
to proceed. Only one directive per line is allowed, but a directive may span more than one line if a
backslash (\) is placed at the end of the line(s).
#asm
Syntax: #asm options
Begins a block of assembly code. The available options are:
• debug: Enables debug code during assembly.
• nodebug: Disables debug code during assembly. This is the default condition. It
is still possible to single step through assembly code as long as the assembly window is open.
• xmem: Places a block of code in extended memory, overriding any previous memory directives. The block is limited to 4KB. If the #asm block is unmarked, it will
be compiled to root.
#class
Syntax: #class options
Controls the storage class for local variables. The available options are:
• auto: Place local variables on the stack.
• static: Place local variables in permanent, fixed storage.
The default storage class is static.
#debug
#nodebug
Enables or disables debug code compilation. #debug is the default condition. These directives override the debug and nodebug keywords used on function declarations or assembly
blocks. #nodebug prevents RST 28h instructions from being inserted between C statements
and assembly instructions.
Chapter 12: Keywords
159
#define
Syntax: #define name text or #define name (parameters . . . ) text
Defines a macro with or without parameters according to ANSI standard. A macro without parameters may be considered a symbolic constant. Supports the # and ## macro operators. Macros can have up to 32 parameters and can be nested to 126 levels.
#endasm
Ends a block of assembly code.
#fatal
Syntax: #fatal “...”
Instructs the compiler to act as if a fatal error. The string in quotes following the directive is the
message to be printed
#GLOBAL_INIT
Syntax: #GLOBAL_INIT { variables }
#GLOBAL_INIT sections are blocks of code that are run once before main() is called. They
should appear in functions after variable declarations and before the first executable code. If a
local static variable must be initialized once only before the program runs, it should be done in
a #GLOBAL_INIT section, but other inititialization may also be done. For example:
// This function outputs and returns the number of times it has been called.
int foo(){
char count;
#GLOBAL_INIT{
// initialize count
count = 1;
// make port A output
WrPortI(SPCR,SPCRShadow,0x84);
}
// output count
WrPortI(PADR,NULL,count);
// increment and return count
return ++count;
}
160
Dynamic C User’s Manual
#error
Syntax: #error "…"
Instructs the compiler to act as if an error was issued. The string in quotes following the directive is the message to be printed
#funcchain
Syntax: #funcchain chainname name
Adds a function, or another function chain, to a function chain.
#if
#elif
#else
#endif
Syntax: #if constant_expression
#elif constant_expression
#else
#endif
These directives control conditional compilation. Combined, they form a multiple-choice if.
When the condition of one of the choices is met, the Dynamic C code selected by the choice is
compiled. Code belonging to the other choices is ignored.
main(){
#if BOARD_TYPE == 1
#define product "Ferrari"
#elif BOARD_TYPE == 2
#define product "Maserati"
#elif BOARD_TYPE == 3
#define product "Lamborghini"
#else
#define product "Chevy"
#endif
...
}
The #elif and #else directives are optional. Any code between an #else and an #endif
is compiled if all values for constant_expression are false.
Chapter 12: Keywords
161
#ifdef
Syntax: #ifdef name
This directive enables code compilation if name has been defined with a #define directive.
This directive must have a matching #endif.
#ifndef
Syntax: #ifndef name
This directive enables code compilation if name has not been defined with a #define directive. This directive must have a matching #endif.
#interleave
#nointerleave
Controls whether Dynamic C will intersperse library functions with the program’s functions
during compilation. #nointerleave forces the user-written functions to be compiled first.
#KILL
Syntax: #KILL name
To redefine a symbol found in the BIOS of a controller, first KILL the prior name.
#makechain
Syntax: #makechain chainname
Creates a function chain. When a program executes the function chain named in this directive,
all of the functions or segments belonging to the function chain execute.
#memmap
Syntax: #memmap options
Controls the default memory area for functions. The following options are available.
• anymem NNNN: When code comes within NNNN bytes of the end of root code
space, start putting it in xmem. Default memory usage is #memmap anymem
0x2000.
• root: All functions not declared as xmem go to root memory.
• xmem: All C functions not declared as root go to extended memory. Assembly
blocks not marked as xmem go to root memory.
162
Dynamic C User’s Manual
#precompile
Allows library functions in a comma separated list to be compiled immediately after the BIOS.
The #precompile directive is useful for decreasing the download time when developing
your program. Precompiled functions will be compiled and downloaded with the BIOS, instead
of each time you compile and download your program. The following limitations exist:
• Precompile functions must be defined nodebug.
• Any functions to be precompiled must be in a library, and that library must be included either in the BIOS using a #use, or recursively included by those libraries.
• Internal BIOS functions will precompile, but will not result in any improvement.
• Libraries that require the user to define parameters before being used can only be
precompiled if those parameters are defined before the #precompile statement. An example of this is included in precompile.lib.
• Function chains and functions using segment chains cannot be precompiled.
• Precompiled functions will be placed in extended memory, unless specifically
marked root.
• All dependencies must be resolved (Macros, variables, other functions, etc.) before a function can be precompiled. This may require precompiling other functions
first.
See precompile.lib for more information and examples.
#undef
Syntax: #undef identifier
Removes (undefines) a defined macro.
#use
Syntax: #use pathname
Activates a library named in lib.dir so modules in the library can be linked with the application program. This directive immediately reads in all the headers in the library unless they
have already been read.
Chapter 12: Keywords
163
#useix
#nouseix
Controls whether functions use the IX register as a stack frame reference pointer or the SP (stack
pointer) register. #nouseix is the default.
Note that the IX register is corrupted when any stack-variable using function is called from
within a cofunction, or if a stack-variable using function contains a call to a cofunction.
#warns
Syntax: #warns “...”
Instructs the compiler to act as if a serious warning was issued. The string in quotes following
the directive is the message to be printed.
#warnt
Syntax: #warnt “...”
Instructs the compiler to act as if a trivial warning was issued. The string in quotes following
the directive is the message to be printed.
#ximport
Syntax: #ximport “filename” symbol
This compiler directive places the length of filename (stored as a long) and its binary contents at the next available place in xmem flash. filename is assumed to be either relative to
the Dynamic C installation directory or a fully qualified path. symbol is a compiler generated
macro that gives the physical address where the length and contents were stored.
The sample program ximport.c illustrates the use of this compiler directive.
164
Dynamic C User’s Manual
13. Operators
An operator is a symbol such as +, –, or & that expresses some kind of operation on data. Most
operators are binary—they have two operands.
a + 10
// two operands with binary operator "add"
Some operators are unary—they have a single operand,
-amount
// single operand with unary “minus”
although, like the minus sign, some unary operators can also be used for binary operations.
There are many kinds of operators with operator precedence. Precedence governs which operations are performed before other operations, when there is a choice.
For example, given the expression
a = b + c * 10;
will the + or the * be performed first? Since * has higher precedence than +, it will be performed
first. The expression is equivalent to
a = b + (c * 10);
Parentheses can be used to force any order of evaluation. The expression
a = (b + c) * 10;
uses parentheses to circumvent the normal order of evaluation.
Associativity governs the execution order of operators of equal precedence. Again, parentheses
can circumvent the normal associativity of operators. For example,
a =
a =
int
int
b + c + d;
b + (c + d);
*a();
(*a)();
//
//
//
//
(b+c) performed first
now c+d is performed first
function returning ptr to int
ptr to function returning int
Unary operators and assignment operators associate from right to left. Most other operators associate from left to right.
Certain operators, namely *, &, (), [], -> and . (dot), can be used on the left side of an
assignment to construct what is called an lvalue. For example,
float x;
*(char*)&x = 0x17;
Chapter 13: Operators
// low byte of x gets value
165
When the data types for an operation are mixed, the resulting type is the more precise.
float x, y, z;
int i, j, k;
char c;
z = i / x;
j = k + c;
// same as (float)i / x
// same as k + (int)c
By placing a type name in parentheses in front of a variable, the program will perform type casting
or type conversion. In the example above, the term (float)i means the “the value of i converted to floating point.”
The operators are summarized in the following pages.
13.1 Arithmetic Operators
+
Unary plus, or binary addition. (Standard C does not have unary plus.) Unary plus does not really
do anything.
a = b + 10.5;
z = +y;
// binary addition
// just for emphasis!
–
Unary minus, or binary subtraction.
a = b - 10.5;
z = -y;
166
// binary subtraction
// z gets the negative of y
Dynamic C User’s Manual
*
Indirection, or multiplication. As a unary operator, it indicates indirection. When used in a declaration, * indicates that the following item is a pointer. When used as an indirection operator in an
expression, * provides the value at the address specified by a pointer.
int *p;
const int j = 45;
p = &j;
k = *p;
*p = 25;
// p is a pointer to an integer
//
//
//
//
//
p now points to j.
k gets the value to which
p points, namely 45.
The integer to which p points gets 25.
Same as j = 25, since p points to j.
Beware of using uninitialized pointers. Also, the indirection operator can be
used in complex ways.
int *list[10]
int (*list)[10]
float** y;
z = **y;
typedef char **stp;
stp my_stuff;
//
//
//
//
array of 10 pointers to integers
pointer to array of 10 integers
pointer to a pointer to a float
z gets the value of y
// my_stuff is typed char**
As a binary operator, the * indicates multiplication.
a = b * c;
// a gets the product of b and c
/
Divide is a binary operator. Integer division truncates; floating-point division does not.
const int i = 18, const j = 7, k; float x;
k = i / j;
x = (float)i / j;
Chapter 13: Operators
// result is 2;
// result is 2.591...
167
++
Pre- or post-increment is a unary operator designed primarily for convenience. If the ++ precedes
an operand, the operand is incremented before use. If the ++ operator follows an operand, the
operand is incremented after use.
int i, a[12];
i = 0;
q = a[i++];
r = a[i++];
s = ++i;
i++;
//
//
//
//
q
r
i
i
gets a[0], then i becomes 1
gets a[1], then i becomes 2
becomes 3, then s = i
becomes 4
If the ++ operator is used with a pointer, the value of the pointer increments by the size of the
object (in bytes) to which it points. With operands other than pointers, the value increments by 1.
––
Pre- or post-decrement. If the –– precedes an operand, the operand is decremented before use. If
the –– operator follows an operand, the operand is decremented after use.
int j, a[12];
j = 12;
q = a[––j];
r = a[––j];
s = j––;
j––;
//
//
//
//
j
j
s
j
becomes 11, then q gets a[11]
becomes 10, then r gets a[10]
= 10, then j becomes 9
becomes 8
If the –– operator is used with a pointer, the value of the pointer decrements by the size of the
object (in bytes) to which it points. With operands other than pointers, the value decrements by 1.
%
Modulus. This is a binary operator. The result is the remainder of the left-hand operand divided by
the right-hand operand.
const
j = i
const
j = k
168
int i = 13;
% 10;
int k = -11;
% 7;
// j gets i mod 10 or 3
// j gets k mod 7 or -4
Dynamic C User’s Manual
13.2 Assignment Operators
=
Assignment. This binary operator causes the value of the right operand to be assigned to the left
operand. Assignments can be “cascaded” as shown in this example.
a = 10 * b + c;
// a gets the result of the calculation
a = b = 0;
// b gets 0 and a gets 0
+=
Addition assignment.
a += 5;
// Add 5 to a. Same as a = a + 5
-=
Subtraction assignment.
a -= 5;
// Subtract 5 from a. Same as a = a - 5
*=
Multiplication assignment.
a *= 5;
// Multiply a by 5. Same as a = a * 5
/=
Division assignment.
a /= 5;
// Divide a by 5. Same as a = a / 5
%=
Modulo assignment.
a %= 5;
// a mod 5. Same as a = a % 5
<<=
Left shift assignment.
a <<= 5;
// Shift a left 5 bits. Same as a = a << 5
>>=
Right shift assignment.
a >>= 5;
Chapter 13: Operators
// Shift a right 5 bits. Same as a = a >> 5
169
&=
Bitwise AND assignment.
a &= b;
// AND a with b. Same as a = a & b
^=
Bitwise XOR assignment.
a ^= b;
// XOR a with b. Same as a = a ^ b
|=
Bitwise OR assignment.
a |= b;
// OR a with b. Same as a = a | b
13.3 Bitwise Operators
<<
Shift left. This is a binary operator. The result is the value of the left operand shifted by the number of bits specified by the right operand.
int i = 0xF00F;
j = i << 4;
// j gets 0x00F0
The most significant bits of the operand are lost; the vacated bits become zero.
>>
Shift right. This is a binary operator. The result is the value of the left operand shifted by the number of bits specified by the right operand:
int i = 0xF00F;
j = i >> 4;
// j gets 0xFF00
The least significant bits of the operand are lost; the vacated bits become zero for unsigned variables and are sign-extended for signed variables.
&
Address operator, or bitwise AND. As a unary operator, this provides the address of a variable:
int x;
z = &x;
// z gets the address of x
As a binary operator, this performs the bitwise AND of two integer (char, int, or long) values.
int i = 0xFFF0;
int j = 0x0FFF;
z = i & j;
170
// z gets 0x0FF0
Dynamic C User’s Manual
^
Bitwise exclusive OR. A binary operator, this performs the bitwise XOR of two integer (8-bit, 16bit or 32-bit) values.
int i = 0xFFF0;
int j = 0x0FFF;
z = i ^ j;
// z gets 0xF00F
|
Bitwise inclusive OR. A binary operator, this performs the bitwise OR of two integer (8-bit, 16-bit
or 32-bit) values.
int i = 0xFF00;
int j = 0x0FF0;
z = i | j;
// z gets 0xFFF0
~
Bitwise complement. This is a unary operator. Bits in a char, int, or long value are inverted:
int switches;
switches = 0xFFF0;
j = ~switches;
// j becomes 0x000F
13.4 Relational Operators
<
Less than. This binary (relational) operator yields a Boolean value. The result is 1 if the left operand is less than the right operand, and 0 otherwise.
if( i < j ){
body
}
// executes if i < j
OK = a < b;
// true when a < b
<=
Less than or equal. This binary (relational) operator yields a boolean value. The result is 1 if the
left operand is less than or equal to the right operand, and 0 otherwise.
if( i <= j ){
body
}
OK = a <= b;
Chapter 13: Operators
// executes if i <= j
// true when a <= b
171
>
Greater than. This binary (relational) operator yields a Boolean value. The result is 1 if the left
operand is greater than the right operand, and 0 otherwise.
if( i > j ){
body
// executes if i > j
}
OK = a > b;
// true when a > b
>=
Greater than or equal. This binary (relational) operator yields a Boolean value. The result is 1 if
the left operand is greater than or equal to the right operand, and 0 otherwise.
if( i >= j ){
body
}
OK = a >= b;
// executes if i >= j
// true when a >= b
13.5 Equality Operators
==
Equal. This binary (relational) operator yields a Boolean value. The result is 1 if the left operand
equals the right operand, and 0 otherwise.
if( i == j ){
body
}
// executes if i = j
OK = a == b;
// true when a = b
Note that the == operator is not the same as the assignment operator (=). A common mistake is to
write
if( i = j ){
body
}
Here, i gets the value of j, and the if condition is true when i is non-zero, not when i equals j.
!=
Not equal. This binary (relational) operator yields a Boolean value. The result is 1 if the left operand is not equal to the right operand, and 0 otherwise.
172
if( i != j ){
body
}
// executes if i != j
OK = a != b;
// true when a != b
Dynamic C User’s Manual
13.6 Logical Operators
&&
Logical AND. This is a binary operator that performs the Boolean AND of two values. If either
operand is 0, the result is 0 (FALSE). Otherwise, the result is 1 (TRUE).
||
Logical OR. This is a binary operator that performs the Boolean OR of two values. If either operand is non-zero, the result is 1 (TRUE). Otherwise, the result is 0 (FALSE).
!
Logical NOT. This is a unary operator. Observe that C does not provide a Boolean data type. In C,
logical false is equivalent to 0. Logical true is equivalent to non-zero. The NOT operator result is 1
if the operand is 0. The result is 0 otherwise.
test = get_input(...);
if( !test ){
...
}
13.7 Postfix Expressions
( )
Grouping. Expressions enclosed in parentheses are performed first. Parentheses also enclose function arguments. In the expression
a = (b + c) * 10;
the term b + c is evaluated first.
[ ]
Array subscripts or dimension. All array subscripts count from 0.
int a[12];
j = a[i];
Chapter 13: Operators
// array dimension is 12
// references the ith element
173
. (dot)
The dot operator joins structure (or union) names and subnames in a reference to a structure (or
union) element.
struct {
int x;
int y;
} coord;
m = coord.x;
->
Right arrow. Used with pointers to structures and unions, instead of the dot operator.
typedef struct{
int x;
int y;
} coord;
coord *p;
// p is a pointer to structure
...
m = p->x;
// reference to structure element
13.8 Reference/Dereference Operators
&
Address operator, or bitwise AND. As a unary operator, this provides the address of a variable:
int x;
z = &x;
// z gets the address of x
As a binary operator, this performs the bitwise AND of two integer (char, int, or long) values.
int i = 0xFFF0;
int j = 0x0FFF;
z = i & j;
174
// z gets 0x0FF0
Dynamic C User’s Manual
*
Indirection, or multiplication. As a unary operator, it indicates indirection. When used in a declaration, * indicates that the following item is a pointer. When used as an indirection operator in an
expression, * provides the value at the address specified by a pointer.
int
int
p =
k =
*p;
j = 45;
&j;
*p;
*p = 25;
// p is a pointer to an integer
p now points to j.
k gets the value to which
p points, namely 45.
The integer to which p
points gets 25. Same as j = 25,
since p points to j.
//
//
//
//
//
//
Beware of using uninitialized pointers. Also, the indirection operator can be
used in complex ways.
int *list[10]
int (*list)[10]
float** y;
z = **y;
typedef char **stp;
stp my_stuff;
//
//
//
//
array of 10 ptrs to int
ptr to array of 10 ints
ptr to a ptr to a float
z gets the value of y
// my_stuff is typed char**
As a binary operator, the * indicates multiplication.
a = b * c;
// a gets the product of b and c
13.9 Conditional Operators
Conditional operators are a three-part operation unique to the C language. The operation has three
operands and the two operator symbols ? and :.
?
:
If the first operand evaluates true (non-zero), then the result of the operation is the second operand.
Otherwise, the result is the third operand.
int i, j, k;
...
i = j < k ? j : k;
The ? : operator is for convenience. The above statement is equivalent to the following.
if( j < k )
i = j;
else
i = k;
If the second and third operands are of different type, the result of this operation is returned at the
higher precision.
Chapter 13: Operators
175
13.10 Other Operators
(type )
The cast operator converts one data type to another. A floating-point value is truncated when
converted to integer. The bit patterns of character and integer data are not changed with the cast
operator, although high-order bits will be lost if the receiving value is not large enough to hold the
converted value.
unsigned i; float x = 10.5; char c;
i = (unsigned)x;
// i gets 10;
c = *(char*)&x;
// c gets the low byte of x
typedef ... typeA;
typedef ... typeB;
typeA item1;
typeB item2;
...
item2 = (typeB)item1;
// forces item1 to be treated as a
typeB
sizeof
The sizeof operator is a unary operator that returns the size (in bytes) of a variable, structure,
array, or union. It operates at compile time as if it were a built-in function, taking an object or a
type as a parameter.
typedef struct{
int x;
char y;
float z;
} record;
record array[100];
int a, b, c, d;
char cc[] = "Fourscore and seven";
char *list[] = { "ABC", "DEFG", "HI" };
#define array_size sizeof(record)*100
a = sizeof(record);
b = array_size;
c = sizeof(cc);
d = sizeof(list);
//
//
//
//
//
number of bytes in array
7
700
20
6
Why is sizeof(list) equal to 6? list is an array of 3 pointers (to char) and pointers have
two bytes.
Why is sizeof(cc) equal to 20 and not 19? C strings have a terminating null byte appended by
the compiler.
176
Dynamic C User’s Manual
,
Comma operator. This operator, unique to the C language, is a convenience. It takes two operands:
the left operand—typically an expression—is evaluated, producing some effect, and then discarded. The right-hand expression is then evaluated and becomes the result of the operation.
This example shows somewhat complex initialization and stepping in a for statement.
for( i=0,j=strlen(s)-1; i<j; i++,j—){
...
}
Because of the comma operator, the initialization has two parts: (1) set i to 0 and (2) get the
length of string s. The stepping expression also has two parts: increment i and decrement j.
The comma operator exists to allow multiple expressions in loop or if conditions.
The table below shows the operator precedence, from highest to lowest. All operators grouped
together have equal precedence.
Table 13-1. Operator Precedence
Operators
Associativity
Function
left to right
member
right to left
unary
left to right
multiplicative
left to right
additive
left to right
bitwise
left to right
relational
left to right
equality
&
left to right
bitwise
^
left to right
bitwise
|
left to right
bitwise
&&
left to right
logical
||
left to right
logical
? :
right to left
conditional
= *= /= %= += -=
<<= >>= &= ^= |=
right to left
assignment
, (comma)
left to right
series
()
[]
->
.
! ~ ++ -(type) * &
*
/
+
-
<<
<
==
sizeof
%
>>
<=
>
>=
!=
Chapter 13: Operators
177
178
Dynamic C User’s Manual
14. Graphical User Interface
Dynamic C can be used to edit source files, compile and run programs, and choose options for
these activities using pull-down menus or keyboard shortcuts. There are two modes: edit mode and
run mode, which is also known as debug mode. Various debugging windows can be viewed in run
mode. Programs can compile directly to a target controller for debugging in RAM or flash. Programs can also be compiled to a .bin file, with or without a controller connected to the PC.
To debug a program, a controller must be connected to the PC, either directly via a programming
cable or indirectly via an Ethernet connection and a RabbitLink board. Multiple instances of
Dynamic C can be run simultaneously. This means multiple debugging sessions are possible over
different serial ports. This is useful for debugging boards that are communicating among themselves.
14.1 Editing
Once a file has been created or has been opened for editing, the file is displayed in a text window.
It is possible to open or create more than one file and one file can have several windows. Dynamic
C supports normal Windows text editing operations.
Use the mouse (or other pointing device) to position the text cursor, select text, or extend a text
selection. Scroll bars may be used to position text in a window. Dynamic C will, however, work
perfectly well without a mouse, although it may be a bit tedious.
It is also possible to scroll up or down through the text using the arrow keys or the PageUp and
PageDown keys or the Home and End keys. The left and right arrow keys allow scrolling left and
right.
14.1.0.1 Arrow Keys
Use the up, down, left and right arrow keys to move the cursor in the corresponding direction.
The Ctrl key works in conjunction with the arrow keys this way.
Ctrl-Left
Ctrl-Right
Ctrl-Up
Ctrl-Down
Move to previous word
Move to next word
Scroll up one line (text moves down)
Scroll down one line
14.1.0.2 Home
Moves the cursor backward in the text to the start of the line.
Home
Ctrl-Home
Shift-Home
Shift-Ctrl-Home
Move to beginning of line
Move to beginning of file
Select to beginning of line
Select to beginning of file
Chapter 14: Graphical User Interface
179
14.1.0.3 End
Moves the cursor forward in the text.
End
Ctrl-End
Shift-End
Shift-Ctrl-End
Move to end of line
Move to end of file
Select to end of line
Select to end of file
Sections of the program text can be cut and pasted or new text may be typed in directly. New text
is inserted at the present cursor position or replaces the current text selection.
The Replace command in the EDIT menu is used to perform search and replace operations either
forwards or backwards.
14.2 Menus
Dynamic C has eight command menus, as well as the standard Windows system menus. An available command can be executed from a menu by clicking the menu and then clicking the command,
or by (1) pressing the Alt key to activate the menu bar, (2) using the left and right arrow keys to
select a menu, (3) and using the up or down arrow keys to select a command, and (4) pressing
Enter. It is usually more convenient to type keyboard shortcuts (such as <Ctrl-H> for HELP) once
they are known. Pressing the Esc key will make any visible menu disappear. A menu can be activated by holding the Alt key down while pressing the underlined letter of the menu name. For
example, press <Alt-F> to activate the FILE menu.
14.2.1 File Menu
Click the menu title or press <Alt-F> to select the FILE menu. Prior to Dynamic C 8.x, there is a
10,000 line limit on the size of a single source file. If your source code is that big, split up some of
it into libraries.
180
Dynamic C User’s Manual
New
Creates a new, blank, untitled program in a new window.
Open
Presents a dialog in which to specify the name of a file to open. Unless there is a problem,
Dynamic C will present the contents of the file in a text window. The program can then be
edited or compiled.
To select a file, type in the desired file name, or select one from the list. The file’s directory
may also be specified.
Save
The Save command updates an open file to reflect the latest changes. If the file has not been
saved before (that is. the file is a new untitled file), the Save As dialog will appear.
Use the Save command often while editing to protect against loss during power failures or
system crashes.
Save As
Allows a new name to be entered for a file and saves the file under the new name.
Close
Closes the active window. The active window may also be closed by pressing <Ctrl-F4> or by
double-clicking on its system menu. If there is an attempt to close a file before it has been
saved, Dynamic C will present a dialog similar to one of these two dialogs.
The file is saved when Yes (or type “y”) is clicked. If the file is untitled, there will be a prompt
for a file name in the Save As dialog. Any changes to the document will be discarded if No is
clicked or “n” is typed. Cancel results in a return to Dynamic C, with no action taken.
Project
Allows a project file to be opened, saved, saved as a different name and closed. See Chapter
16 for more information.
Print Preview
Shows approximately what printed text will look like. Dynamic C switches to preview mode
when this command is selected, and allows the programmer to navigate through images of the
printed pages.
Print
Text can be printed from any Dynamic C window. There is no restriction to printing source
code. For example, the contents of the assembly window or the watch window can be printed.
Dynamic C displays the a standard print dialog box when the Print command is selected.
As many copies of the text as needed may be printed. If more than one copy is requested, the
pages may be collated or uncollated.
If the Print to File option is selected, Dynamic C creates a file (it will ask for a pathname) in
the format suitable to send to the specified printer. (If the selected printer is a PostScript
printer, the file will contain PostScript.)
To choose a printer, click the Setup button in the Print dialog, or choose the Print Setup..
command from the FILE menu.
Chapter 14: Graphical User Interface
181
Print Setup
Allows choice of which printers to use and to set them up to print text.
There is a choice between using the computer system’s default printer or selecting a specific
printer. Depending on the printer selected, it may be possible to specify paper orientation (portrait or tall, vs. landscape or wide), and paper size. Most printers have these options. A specific
printer may or may not have more than one paper source.
The Options button allows the print options dialog to be displayed for a specific printer. The
Network button allows printers to be added or removed from the list of printers.
Exit
To exit Dynamic C. When this is done, Windows will either return to the Windows Program
Manager or to another application. The keyboard shortcut is <Alt-F4>.
14.2.2 Edit Menu
Click the menu title or press <Alt-E> to select the EDIT menu.
Undo
This option undoes recent changes in the active edit window. The command may be repeated
several times to undo multiple changes. The amount of editing that may be undone will vary
with the type of operations performed, but should suffice for a few large cut and paste operations or many lines of typing. Dynamic C discards all undo information for an edit window
when the file is saved. The keyboard shortcut is <Alt-Backspace>.
Redo
Redoes modifications recently undone. This command only works immediately after one or
more Undo operations. The keyboard shortcut is <Alt-Shift-Backspace>.
182
Dynamic C User’s Manual
Cut
Removes selected text from a source file. A copy of the text is saved on the clipboard. The
contents of the clipboard may be pasted virtually anywhere, repeatedly, in the same or other
source files, or even in word processing or graphics program documents. The keyboard shortcut is <Ctrl-X>.
Copy
Makes a copy of selected text in a file or in one of the debugging windows. The copy of the
text is saved on the “clipboard.” The contents of the clipboard may be pasted virtually anywhere. The keyboard shortcut is <Ctrl-C>.
Paste
Pastes text on the clipboard as a result of a copy or cut (in Dynamic C or some other Windows
application). The paste command places the text at the current insertion point. Note that nothing can be pasted in a debugging window. It is possible to paste the same text repeatedly until
something else is copied or cut. The keyboard shortcut is <Ctrl-V>.
Find
Finds specified text. Enter the text to be found in the Find box. The Find command (and the
Find Next command) will find occurrences of the entered text. If Case sensitive is clicked,
the search will find occurrences that match exactly. Otherwise, the search will find matches
having upper- and lower-case letters. For example, “switch,” “Switch,” and “SWITCH” would
all match. If Reverse is clicked the search will proceed toward the beginning of the file, rather
than toward the end of the file. Use the From cursor checkbox to choose whether to search
the entire file or to begin at the cursor location. The keyboard shortcut is <Ctrl F>.
Replace
Replaces specified text. Type the text to be found in the Find text box (there is a pulldown list
of previously entered strings). Then type the text to substitute in the Change to text box. If
Case sensitive is selected, the search will find an occurrence that matches exactly. Otherwise, the search will find a match having upper- and lower-case letters. For example, “reg7”
“REG7” and “Reg7” all match.
If Reverse is clicked, the search will occur in reverse, that is, the search will proceed toward
the beginning of the file, rather than toward the end of the file. The entire file may be searched
from the current cursor location by clicking the From cursor box, or the search may begin at
the current cursor location.
The Selection only box allows the substitution to be performed only within the currently
selected text. Use this in conjunction with the Change All button. This box is disabled if no
text is selected.
Normally, Dynamic C will find the search text, then prompts for whether to make the change.
This is an important safeguard, particularly if the Change All button is clicked. If No prompt
is clicked, Dynamic C will make the change (or changes) without prompting.
The keyboard shortcut for Replace is <F6>.
Chapter 14: Graphical User Interface
183
Find Next
Once search text has been specified with the Find or Replace commands, the Find Next command (F3 for short) will find the next occurrence of the same text, searching forward or in
reverse, case sensitive or not, as specified with the previous Find or Replace command. If the
previous command was Replace, the operation will be a replace.
Goto
Positions the insertion point at the start of the specified line.
Type the line number (or approximate line number) to go to. That line, and lines in the vicinity, will be displayed in the source window.
Previous Error
Locates the previous compilation error in the source code. Any errors will be displayed in a
list in the message window after a program is compiled. Dynamic C selects the previous error
in the list and positions the offending line of code in the text window when the Previous
Error command (<Ctrl-P> for short) is made. Use the keyboard shortcuts to locate errors
quickly.
Next Error
Locates the next compilation error in the source code. Any errors will be displayed in a list in
the message window after a program is compiled. Dynamic C selects the next error in the list
and positions the offending line of code in the source window when the Next Error command
(<Ctrl-N> for short) is made. Use the keyboard shortcuts to locate errors quickly.
Edit Mode
Switches Dynamic C back to edit mode from run mode (also called debug mode). After a program has been compiled or executed, Dynamic C will not allow any modification to the program unless the Edit Mode is selected. The keyboard shortcut is F4.
184
Dynamic C User’s Manual
14.2.3 Compile Menu
Click the menu title or press <Alt-C> to select the COMPILE menu.
Compile to Target
Compiles a program and loads it in the target controller’s memory. The keyboard shortcut is
F5.
Dynamic C determines whether to compile to RAM or flash based on the current compiler
options (set with the Options menu). Any compilation errors are listed in the automatically
activated message window. Hit <F1> to obtain a more descriptive message for any error message that is high-lighted in this window.
Compile to .bin file
Compiles a program and writes the image to a .bin file. The .bin file can then be used with
a device programmer to program multiple chips; or the Rabbit Field Utility can load the .bin
files to the target. In most cases, the Include BIOS option is checked. This causes the BIOS, as
well as the user program, to be included in the .bin file. If you are creating special program
such as a cold loader that starts at address 0x0000, then this option should be unchecked.
When compiling to a .bin file, choose Use attached target to use the parameters of the controller connected to your system. (Some versions of Dynamic C do not support this menu
option.) If there is no connected controller, or if there is but you want to use a different configuration, choose Compile with defined target configuration. To define a target configuration,
access the Configure Targetless Compilation dialog box. It has been relocated to Options |
Define target configuration and the Compile | Compile to a .bin file menu selection now
compiles with those parameters upon acceptance of a confirmation prompt.
Reset Target/Compile BIOS
This option reloads the BIOS to RAM or flash, depending on the BIOS memory setting chosen in Options | Compiler dialog box. The default option is flash.
The following box will appear upon successful compilation and loading of BIOS code.
Chapter 14: Graphical User Interface
185
Include Debug Code/RST 28 Instructions
If this is checked, debug code will be included in the program even if #nodebug precedes
the main function in the program. Debug code consists mainly of RST 28h instructions
inserted after every C statement. At an RST 28h instruction, program execution is transferred to the debug kernel where communication between Dynamic C and the target is tended
to before returning to the user program. There are certain loop optimizations that are not generated when code is compiled as debug. This option also controls the definition of a compilerdefined macro symbol, DEBUG_RST. If the menu item is checked then DEBUG_RST is set to
1, otherwise it is 0.
If the option is not checked, the compiler marks all code as nodebug and debugging is not
possible. The only reason to check this option if debugging is finished and the program is
ready to be deployed is to allow some current (or planned) diagnostic capability of the Rabbit
Field Utility (RFU) to work in a deployed system. This option effects both code compiled to
.bin files and code compiled to the target . In order to run the program after compiling to the
target with this option, disconnect the target from the programming port and reset the target
CPU.
14.2.4 Run Menu
Click the menu title or press <Alt-R> to select the RUN menu.
Run
Starts program execution from the current breakpoint. Registers are restored, including interrupt status, before execution begins. The keyboard shortcut is F9.
Run w/ No Polling
This command is identical to the Run command, with an important exception. When running
in polling mode (F9), the development PC polls or interrupts the target system every 100 ms to
obtain or send information about target breakpoints, watch lines, keyboard-entered target
input, and target output from printf statements. Polling creates interrupt overhead in the
186
Dynamic C User’s Manual
target, which can be undesirable in programs with tight loops. The Run w/ No Polling command allows the program to run without polling and its overhead. (Any printf calls in the
program will cause execution to pause until polling is resumed. Running without polling also
prevents debugging until polling is resumed.) The keyboard shortcut for this command is
<Alt-F9>.
Stop
The Stop command places a hard breakpoint at the point of current program execution. Usually, the compiler cannot stop within ROM code or in nodebug code. On the other hand, the
target can be stopped at the RST 028h instruction if RST 028h assembly code is inserted as
inline assembly code in nodebug code. However, the debugger will never be able to find and
place the execution cursor in nodebug code. The keyboard shortcut is <Ctrl-Z>.
Reset Program
Resets program to its initial state. The execution cursor is positioned at the start of the main
function, prior to any global initialization and variable initialization. (Memory locations not
covered by normal program initialization may not be reset.) The keyboard shortcut is
<Ctrl-F2>.
The initial state includes only the execution point (program counter), memory map registers,
and the stack pointer. The Reset Program command will not reload the program if the previous execution overwrites the code segment. That is, if your code is corrupted, the reset will not
be enough; you will have to reload the program to the target.
Trace into
Executes one C statement (or one assembly language instruction if the assembly window is
displayed) with descent into functions. Execution will not descend into functions stored in
ROM because Dynamic C cannot insert the required breakpoints in the machine code. If
nodebug is in effect, execution continues until code compiled without the nodebug keyword is encountered. The keyboard shortcut is F7.
Step over
Executes one C statement (or one assembly language instruction if the assembly window is
displayed) without descending into functions. The keyboard shortcut is F8.
Source Trace into
Executes one C statement with descent into functions when the assembly window is open.
Execution will not descend into functions stored in ROM because Dynamic C cannot insert
the required breakpoints in the machine code. If nodebug is in effect, execution continues
until code compiled without the nodebug keyword is encountered. The keyboard shortcut is
<Alt-F7>.
Source Step over
Executes one C statement without descending into functions when the assembly window is
open. The keyboard shortcut is <Alt-F8>.
Toggle Breakpoint
Toggles a regular (“soft”) breakpoint at the location of the execution cursor. Soft breakpoints
do not affect the interrupt state at the time the breakpoint is encountered, whereas hard breakpoints do. The keyboard shortcut is F2.
Chapter 14: Graphical User Interface
187
Toggle Hard Breakpoint
Toggles a hard breakpoint at the location of the execution cursor. A hard breakpoint differs
from a soft breakpoint in that interrupts are disabled when the hard breakpoint is reached. The
keyboard shortcut is <Alt-F2>.
Clear All Breakpoints
Self explanatory. The keyboard shortcut is <Ctrl-A>.
Toggle Interrupt Flag
Toggles interrupt state. The keyboard shortcut is <Ctrl-I>.
Toggle Polling (Prior to DC 7.30)
Toggles polling mode. When this option is chosen, polling will be toggled until the next
debugger operation. If the program is currently running and Dynamic C is polling the target,
you may choose Toggle Polling to stop Dynamic C from polling the target. However, as soon
as the program stops executing, or Dynamic C sets a breakpoint, or a watch expression is
added, etc., Dynamic C will reenable polling.
When running in polling mode (F9), the development PC polls or interrupts the target system
every 100 ms to obtain or send information regarding target breakpoints, watch lines, keyboard-entered target input, and target output from printf statements. Starting with Dynamic
C 7.10, the polling is done every 3 seconds instead of every 100 ms.
Polling creates interrupt overhead in the target, which can be undesirable in programs with
tight loops. This command is useful to switch modes while a program is running. The keyboard shortcut is <Ctrl-O>.
Poll Target (Starting with DC 7.30)
This menu option used to be named Toggle Polling (see above). A check mark indicates that
Dynamic C will poll the target. The absence of a check mark indicates that Dynamic C will
not poll the target. This differs from Toggle Polling in that Dynamic C will not restart polling
without the user explicitly requesting it. The keyboard shortcut is <Ctrl-O>.
Reset Target
Tells the target system to perform a software reset including system initializations. Resetting a
target always brings Dynamic C back to edit mode. The keyboard shortcut is <Ctrl-Y>.
Close Serial Port
Disconnects the programming serial port between PC and target so that the target serial port is
accessible to other applications.
188
Dynamic C User’s Manual
14.2.5 Inspect Menu
Click the menu title or press <Alt-I> to select the INSPECT menu.
The INSPECT menu provides commands to manipulate watch expressions, view disassembled
code, and produce hexadecimal memory dumps. The INSPECT menu commands and their functions are described here.
Add/Del Watch Expression
This command provokes Dynamic C to display the following dialog.
This dialog works in conjunction with the Watch window. The text box at the top is the current
expression. An expression may have been typed here or it was selected in the source code.
This expression may be evaluated immediately by clicking the Evaluate button or it can be
added to the expression list by clicking the Add to top button. Expressions in this list are evaluated, and the results are displayed in the Watch window, every time the Watch window is
updated. Items are deleted from the expression list by clicking the Del from top button.
Chapter 14: Graphical User Interface
189
An example of the results displayed in the Watch window appears below.
Clear Watch Window
Removes entries from the Watch dialog and removes report text from the Watch window.
There is no keyboard shortcut.
Update Watch Window
Forces expressions in the Watch Expression list to be evaluated and displayed in the Watch
window only when the function runwatch() is called from the application program. runwatch() monitors for watch update requests and should be called periodically if watch
expressions are used. Normally the Watch window is updated every time the execution cursor
is changed, that is when a single step, a breakpoint, or a stop occurs in the program. The keyboard shortcut is <Ctrl-U>.
Disassemble at Cursor
Loads, disassembles and displays the code at the current editor cursor. This command does not
work in user application code declared as nodebug. Also, this command does not stop the
execution on the target. The keyboard shortcut is <Ctrl-F10>.
Disassemble at Address
Loads, disassembles and displays the code at the specified address. This command produces a
dialog box that asks for the address at which disassembling should begin. Addresses may be
entered in two formats: a 4-digit hexadecimal number that specifies any location in the root
space, or a 2-digit page number followed by a colon followed by a 4-digit logical address,
from 00 to FF. The keyboard shortcut is <Alt-F10>.
Dump at Address
Allows blocks of raw values in any memory location (except the BIOS 0–2000H) to be looked
at. Values can be displayed on the screen or written to a file. If separate I&D space is enabled,
you can choose which logical space to examine.
190
Dynamic C User’s Manual
When writing to a file, the option Dump to File requires a file pathname and the number of
bytes to dump. The option Save Entire Flash to File requires a file pathname. If you are running in RAM, then it will be RAM that is saved to a file, not Flash, because this option simply
starts dumping physical memory at address 0.
When displaying to the screen, the Memory Dump window is opened. A typical screen display
appears below.
The Memory Dump window may be scrolled. Scrolling causes the contents of other memory
addresses to appear in the window. Hotkeys ArrowUp, ArrowDown, PageUp, PageDown are
active in the Memory Dump window. The window always displays 128 bytes and their ASCII
equivalent. Values in the Dump window are updated only when Dynamic C stops, or comes to
a breakpoint.
Chapter 14: Graphical User Interface
191
14.2.6 Options Menu
Click the menu title or press <Alt-O> to select the OPTIONS menu.
14.2.6.1 Editor
The Editor command gets Dynamic C to display the following dialog.
Use this dialog box to change the behavior of the Dynamic C editor. By default, tab stops are set
every three characters, but may be set to any value greater than zero. Auto-Indent causes the editor to indent new lines to match the indentation of previous lines. Remove Trailing Whitespace
causes the editor to remove extra space or tab characters from the end of a line.
192
Dynamic C User’s Manual
14.2.6.2 Compiler
The Compiler command gets Dynamic C to display the following dialog, which allows compiler
operations to be changed.
Run-Time Checking
These options, if checked, can allow a fatal error at run-time. They also increase the amount of
code and cause slower execution, but they can be valuable debugging tools.
• Array Indices—Check array bounds. This feature adds code for every array reference.
• Pointers—Check for invalid pointer assignments. A pointer assignment is invalid if
the code attempts to write to a location marked as not writable. Locations marked not
writable include the entire root code segment. This feature adds code for every pointer
reference.
Chapter 14: Graphical User Interface
193
BIOS Memory Setting
A single, default BIOS source file that is defined in the system registry when installing
Dynamic C is used for both compiling to RAM and compiling to flash. Dynamic C defines a
preprocessor macro, _FLASH_, _RAM_ or _FAST_RAM_ depending on which of the following options is selected. This macro is used to determine the relevant sections of code to
compile for the corresponding memory type.
• Code and BIOS in Flash—If you select this option, the compiler will load the BIOS to
flash when cold-booting, and will compile the user program to flash where it will normally reside.
• Code and BIOS in RAM—If you select this option, the compiler will load the BIOS to
RAM on cold-booting and compile the user program to RAM. This option is useful if
you want to use breakpoints while you are debugging your application, but you don’t
want interrupts disabled while the debugger writes a breakpoint to flash (this can take
10 ms to 20 ms or more, depending on the flash type used). Note that when you single
step through code, the debugger is writing breakpoints at the next point in code you
will step to. It is also possible to have a target that only has RAM for use as a slave processor, but this requires more than checking this option because hardware changes are
necessary that in turn require a special BIOS and coldloader.
• Code and BIOS in Flash, Run in RAM—If you select this option, the compiler will
load the BIOS to flash when cold-booting, compile the user program to flash, and then
the BIOS will copy the flash image to the fast RAM attached to CS2. This option supports a CPU running at a high clock speed (anything above 29 MHz).
This is the same as the command line compiler -mfr option.
User Defined BIOS File
Use this option to change from the default BIOS to a user-specified file. Enter or select the file
using the browse button/text box underneath this option. The check box labeled use must be
selected or else the default file BIOS defined in the system registry will be used. Note that a
single BIOS file can be made for compiling both to RAM and flash by using the preprocessor
macros _FLASH_ or _RAM_. These two macros are defined by the compiler based on the
currently selected radio button in the BIOS Memory Setting group box.
User Defined Lib Directory File
The Library Lookup information retrieved with <Ctrl-H> is parsed from the libraries found in
the lib.dir file, which is part of the Dynamic C installation. Checking the Use box for
User Defined Libraries File, allows the parsing of a user-defined replacement for lib.dir
when Dynamic C starts. Library files must be listed in lib.dir (or its replacement) to be
available to a program.
If the function description headers are formatted correctly ( See “Function Description Headers” on page 40.), the functions in the libraries listed in the user-defined replacement for
lib.dir will be available with <Ctrl-H> just like the user-callable functions that come with
Dynamic C.
This is the same as the command line compiler -lf option.
194
Dynamic C User’s Manual
Watch Expressions
Allow any expressions in watch expressions. This option causes any compilation of a user
program to pull in all the utility functions used for expression evaluation.
Restricting watch expressions (may save root code space) Choosing this option means
only utility code already used in the application program will be compiled.
Separate I&D Space
When checked, this option enables separate instruction and data space, doubling the amount of
root code and root data space available.
Please note that if you are compiling to a 128K RAM, there is only about 12K available for
user code when separate I&D space is enabled.
Type Checking
This menu item allows the following choices:
• Prototypes—Performs strict type checking of arguments of function calls against the
function prototype. The number of arguments passed must match the number of parameters in the prototype. In addition, the types of arguments must match those defined in
the prototype. Z-World recommends prototype checking because it identifies likely
run-time problems. To use this feature fully, all functions should have prototypes
(including functions implemented in assembly).
• Demotion—Detects demotion. A demotion automatically converts the value of a larger
or more complex type to the value of a smaller or less complex type. The increasing
order of complexity of scalar types is:
char
unsigned int
int
unsigned long
long
float
A demotion deserves a warning because information may be lost in the conversion. For
example, when a long variable whose value is 0x10000 is converted to an int value,
the resulting value is 0. The high-order 16 bits are lost. An explicit type casting can
eliminate demotion warnings. All demotion warnings are considered non-serious as far
as warning reports are concerned.
• Pointer—Generates warnings if pointers to different types are intermixed without type
casting. While type casting has no effect in straightforward pointer assignments of different types, type casting does affect pointer arithmetic and pointer dereferences. All
pointer warnings are considered non-serious as far as warning reports are concerned.
Warning Reports
This tells the compiler whether to report all warnings, no warnings or serious warnings only. It
is advisable to let the compiler report all warnings because each warning is a potential runtime bug. Demotions (such as converting a long to an int) are considered non-serious with
regard to warning reports.
Chapter 14: Graphical User Interface
195
Optimize For
Allows for optimization of the program for size or speed. When the compiler knows more than
one sequence of instructions that perform the same action, it selects either the smallest or the
fastest sequence, depending on the programmer’s choice for optimization.
The difference made by this option is less obvious in the user application (where most code is
not marked nodebug). The speed gain by optimizing for speed is most obvious for functions
that are marked nodebug and have no auto local (stack-based) variables.
Max Shown
This limits the number of error and warning messages displayed after compilation.
Defines
The Defines button brings up a dialog box with a window for entering (or modifying) a list of
defines that are global to any source file programs that are compiled and run. The macros that
are defined here are seen by the BIOS during its compilation.
The syntax expected is a semi-colon separated list of defined constants with optional values
given with an equal sign. This is the same as the command line compiler -d option, except that
the CLC expects a single defined expression to follow each -d:
dccl_cmp mysourcefile.c -d DEF1 -d MAXN=10 -d DEF2
while the GUI window expects a semi-colon separated list
DEF1;MAXN=10;DEF2
The end result is the same as if every file compiled and run were prepended with:
#define DEF1
#define MAXN 10
#define DEF2
196
Dynamic C User’s Manual
14.2.6.3 Debugger
Choosing the Debugger menu item from the Options dialog box displays the following:
The options in the Debugger dialog box may be helpful when debugging programs. In particular,
they allow printf statements and other STDIO output to be logged to a file. (Starting with
Dynamic C version 7.25, the macro STDIO_DEBUG_SERIAL may be defined to redirect STDIO
output to a designated serial port—A, B, C or D. For more information, please see the sample program Samples/STDIO_SERIAL.C.)
Check the box labeled Log STDOUT to send a copy of all standard output to the named log file.
For a file that already exists, check Append Log unless you want to overwrite instead. Dynamic C
automatically opens the STDIO window when a program first attempts to print to it if a check
appears in the checkbox labeled Auto Open STDIO Window.
The last three checkboxes allow the user to control the size and capabilities of the debug kernel.
The debug kernel has grown significantly in size, so if there are tight code space requirements
parts of the debug kernel can be disabled to save room. The three checkboxes are:
Enable Breakpoints
If this box is checked, the debug kernel will be able to toggle breakpoints on and off and will
be able to stop at set breakpoints. Using the scroll bar to the right of Max breakpoints, one
may enter up to the maximum amount of breakpoints the debug kernel will support. The
debug kernel uses a small amount of root ram for each breakpoint, so reducing the number of
breakpoints will slightly reduce the amount of root ram used.
If this box is unchecked, the debug kernel will be compiled without breakpoint support and the
user will receive an error message if they attempt to add a breakpoint.
Chapter 14: Graphical User Interface
197
Enable Watch Expressions
If this is checked, watch expressions will be enabled. Using the scroll bar to the right of
Max watch expressions, enter up to the maximum amount of watch expressions the debug
kernel will support. The debug kernel uses a small amount of root ram for evaluating each
watch expression, so reducing the amount of watches will slightly reduce the amount of root
ram used.
With it unchecked, the debug kernel will be compiled without watch expressions support and
the user will receive an error message if they attempt to add a watch expression.
Enable Instruction Level Single Stepping
If this is checked when the assembly window is open, single stepping will be by instruction
rather than by C statement. Unchecking this box will disable instruction level single stepping
on the target and, if the assembly window is open, the debug kernel will step by C statement.
14.2.6.4 Display
The Display command gets Dynamic C to display the following dialog.
Use the Display Options dialog box to change the appearance of Dynamic C windows. First
choose the window from the window list. Then select an attribute from the attribute list and click
the change button. Another dialog box will appear to make the changes. Note that Dynamic C
allows only fixed-pitch fonts and solid colors (if a dithered color is selected, Dynamic C will use
the closest solid color).
The Editor window attributes affect all text windows, except two special cases. After an attempt is
made to compile a program, Dynamic C will either display a list of errors in the message window
(compilation failed), or Dynamic C will switch to run mode (compilation succeeded). In the case
of a failed compile, the editor will take on the Error Editor attributes. In the case of a successful
compile, the editor will take on the Debug Editor attributes.
198
Dynamic C User’s Manual
14.2.6.5 Communications
The Options | Communications menu item displays the following dialog box. Use it to tell
Dynamic C how to communicate with the target controller.
TCP/IP Options
In order to program and debug a controller across a TCP/IP connection, the Network Address
field must have the IP address of either the Z-World RabbitLink board that is attached to the
controller, or the IP address of a controller that has its own Ethernet interface.
To accept control commands from Dynamic C, the Control Port field must be set to the port
used by the ethernet-enabled controller. The Controller Name is for informational purposes
only. The Discover button makes Dynamic C broadcast a query to any RabbitLinks attached
to the network. Any RabbitLinks that respond to the broadcast can be selected and their information will be placed in the appropriate fields.
Chapter 14: Graphical User Interface
199
Serial Options
The following options are available when the Use Serial Connection radio button is selected.
Port - This is the COM port of the PC that is connected to the target. It defaults to COM1.
Debug Baud Rate - This defaults to 115200 bps. It is the baud rate used for target communi-
cations after the program has been downloaded.
Max Download Baud Rate - When baud negotiation is enabled, the compiler will start out at
the selected baud rate and work downwards until it reaches one both the compiler and target
can handle. Prior to Dynamic C 7.26, this value was accessible in the registry instead of the
GUI.
Stop Bits - The number of stop bits used by the serial drivers. Defaults to 1.
Enable Processor Verification - Processor detection is enabled by default. The connection is
normally checked with a test using the Data Set Ready (DSR) line of the PC serial connection.
If the DSR line is not used as expected, a false error message will be generated in response to
the connection check.
To bypass the connection check, uncheck the Enable Processor Verification checkbox. This
allows custom designed systems to not connect the STATUS pin to the programming port.
Also disabling the connection check allows non-standard PC ports or USB converters which
might not implement the DSR line to work.
Use USB to Serial Converter - Check this checkbox if a USB to serial converter cable is
being used. Dynamic C will then attempt to compensate for abnormalities in USB converter
drivers. This mode makes the communications more USB/RS232 converter friendly by allowing higher download baud rates and introducing short delays at key points in the loading process. Checking this box may also help non-standard PC ports to work properly with
Dynamic C.
Disable Baud Negotiation - Since Dynamic C version 7.25, the compiler negotiates a baud
rate for program download. (This helps with USB or anyone who happens to have a highspeed serial port.) This default behavior may be disabled by checking the Disable Baud
Negotiation checkbox. When baud negotiation is disabled, the program will download at
115k baud or 56k baud only. When enabled, it will download at speeds up to 460k baud, as
specified by Max Download Baud Rate.
200
Dynamic C User’s Manual
14.2.6.6 Define Target Configuration
The Define target configuration menu option displays the following dialog box:
There are three options available in this dialog box for choosing the board parameters that will be
used in the compile. Select Board Type is the default choice and activates the Board ID pulldown menu, a list of all known board configurations. Specify Board Parameters, when checked,
brings up a dialog box to enter data for a new board configuration. The name specified in the dialog box for the new board configuration will be automatically included in the Board ID pull-down
menu. Use Target Information File, when checked, will prompt for a Remote Target Information
(RTI) file. Any target configuration can be saved as a .rti file by clicking the Save as RTI button at the bottom of the dialog box.
The baud rate, set in the Base Frequency (MHz) pulldown menu, only applies to debugging. The
fastest baud rate for downloading is negotiated between the PC and the target.
Chapter 14: Graphical User Interface
201
14.2.6.7 Other Menu Choices
Show Tool Bar
The Show Tool Bar command toggles the display of the tool bar. Dynamic C remembers the
toolbar setting on exit.
Save Environment
The Save Environment command gets Dynamic C to update the registry and DCW.CFG initialization files immediately with the current options settings. Dynamic C always updates
these files on exit. Saving them while working provides an extra measure of security against
Windows crashes.
14.2.7 Window Menu
Click the menu title or press <Alt-W> to select the Window menu.
The first group of items is a set of standard Windows commands that allow the application windows to be arranged in an orderly way.
The second group of items presents the various Dynamic C debugging windows. Click on one of
these to activate or deactivate the particular window. It is possible to scroll these windows to view
larger portions of data, or copy information from these windows and paste the information as text
anywhere. The contents of these windows can be printed.
The third group is a list of current windows, including source code windows. Click on one of these
items to bring that window to the front.
Message
Click the Message command to activate or deactivate the Message window. A compilation
with errors also activates the message window because the message window displays compilation errors.
202
Dynamic C User’s Manual
Watch
The Watch menu option activates or deactivates the watch window. The Add/Del Items command on the INSPECT menu will do this too. The watch window displays the results whenever Dynamic C evaluates watch expressions.
Stdio
Click the Stdio command to activate or deactivate the Stdio window. The Stdio window displays output from calls to printf. If the program calls printf, Dynamic C will activate
the Stdio window automatically, unless another request was made by the programmer. (See the
Debugger Options under the OPTIONS menu.)
Assembly
Click the Assembly command to activate or deactivate the Assembly window. The Assembly
window displays machine code generated by the compiler in assembly language format.
The Disassemble at Cursor or Disassemble at Address commands also activate the
Assembly window.
The Assembly window shows the memory address on the far left, followed by the code bytes
for the instruction at the address, followed by the mnemonics for the instruction. The last column shows the number of cycles for the instruction, assuming no wait states. The total cycle
time for a block of instructions will be shown at the lowest row in the block in the cycle-time
column, if that block is selected and highlighted with the mouse. The total assumes one execution per instruction, so the user must take looping and branching into consideration when evaluating execution times.
Use the mouse to select several lines in the Assembly window, and the total cycle time for the
instructions that were selected will be displayed to the lower right of the selection. If the total
includes an asterisk, that means an instruction such as ldir or ret nz with an indeterminate cycle time was selected.
Chapter 14: Graphical User Interface
203
Registers
Click the Registers command to activate or deactivate the Register window. The Register
window displays the processor register set, including the status register. Letter codes indicate
the bits of the status register (F register). The window also shows the source-code line and column at which the snapshot of the register was taken. It is possible to scroll back to see the progression of successive register snapshots. Registers may be changed when program execution
is stopped by clicking the right mouse button over the name or value of the register to be
changed. Registers PC, XPC, and SP may not be edited as this can adversely effect program
flow and debugging.
Stack
Click the Stack command to activate or deactivate the Stack window. The Stack window displays the top 8 bytes of the run-time stack. It also shows the line and column at which the
stack “snapshot” was taken. It is possible to scroll back to see the progression of successive
stack snapshots.
204
Dynamic C User’s Manual
Information
Click the Information menu option to activate the Information window.
The Information window displays how the memory is partitioned and how well the compilation went.
14.2.8 Help Menu
Click the menu title or press <Alt-H> to select the HELP menu. The choices are given below:
Online Documentation
Opens a browser page and displays a file with links to other manuals. When installing
Dynamic C from CD, this menu item points to the hard disk; after a Web upgrade of Dynamic
C, this menu item optionally points to the Web.
Keywords
Opens a browser page and displays an HTML file of Dynamic C keywords, with links to their
descriptions in this manual.
Operators
Opens a browser page and displays an HTML file of Dynamic C operators, with links to their
descriptions in this manual.
HTML Function Reference
Opens a browser page and displays an HTML file that has two links, one to Dynamic C functions listed alphabetically, the other to the functions listed by functional group. Each function
listed is linked to its description in the Dynamic C Function Reference Manual.
Chapter 14: Graphical User Interface
205
Function Lookup/Insert
Displays descriptions for library functions. The function is chosen in the Library Lookup dialog box by clicking on its name and then clicking OK.
This dialog box is also displayed when the keyboard shortcut <Ctrl-H> is used anywhere in the
source code. If a Dynamic C function is selected at the time <Ctrl-H> is pressed, then the
dialog box is skipped and the Function Lookup/Insert screen displays the function description.
206
Dynamic C User’s Manual
Although this may be sufficient for most purposes, the Insert Call button can be clicked to
invoke a “function assistant.” This is only useful if the Function Lookup/Insert dialog box was
displayed in response to selecting a function in source code. Otherwise the function assistant
will only restate the function description information.
The function assistant will place a call to the function displayed at the insertion point in the
source code. The function call will be prototypical if OK is clicked; the call needs to be edited
for it to make sense in the context of the code.
Each parameter can be specified, one-by-one, to the function assistant. The function assistant
will return the name and data type of the parameter. When parameter expressions are specified
in this dialog, the function assistant will use those expressions when placing the function call.
If the text cursor is placed on a valid C function call (and one that is known to the function
assistant), the function assistant will analyze the function call, and will copy the actual parameters to the function lookup dialog. Compare the function parameters in the Expr. in Call box
in the dialog with the expected function call arguments.
Consider, for example, the following code.
...
x = strcpy( comment, "Lower tray needs paper.");
...
If the text cursor is placed on strcpy and the Function Lookup/Insert command is issued,
the function assistant will show the comment as parameter 1 and “Lower tray needs paper.” as
parameter 2. The arguments can then be compared with the expected parameters, and the arguments in the dialog can then be modified.
Chapter 14: Graphical User Interface
207
Instruction Set Reference
Invokes an on-line help system and displays the alphabetical list of instructions for the Rabbit
2000 microprocessor and the Rabbit 3000 microprocessor.
Keystrokes
Invokes an on-line help system and displays the keystrokes page. Although a mouse or other
pointing device may be convenient, Dynamic C also supports operation entirely from the keyboard.
Contents
Invokes an on-line help system and displays the contents page. From here view explanations
of various features of Dynamic C.
Tech Support Bulletin Board
Opens a browser window to a Z-World/Rabbit Semiconductor forum for products based on the
Rabbit 2000 and the Rabbit 3000.
Tip of the Day
Brings up a window displaying some useful information about Dynamic C. There is an option
to scroll to another screen of Dynamic C information and an option to disable the feature. This
is the same window that is displayed when Dynamic C initializes.
About
The About command displays the Dynamic C version number and the copyright notice.
208
Dynamic C User’s Manual
15. Command Line Interface
The Dynamic C command line compiler (dccl_cmp.exe) performs the same compilation and
program execution as its GUI counterpart (dcrabxx.exe), but is invoked as a console application from a DOS window. It is called with a single source file program pathname as the first
parameter, followed by optional case-insensitive switches that alter the default conditions under
which the program is run. The results of the compilation and execution, all errors, warnings and
program output, are directed to the console window and are optionally written or appended to a
text file.
15.1 Default States
With versions of Dynamic C prior to 7.10, the default states of Dynamic C environment variables
are used each time dccl_cmp is called. If a sequence of calls is written into a batch file, variations from the defaults must be repeated for each call. For instance, if a change is made to the
serial parameters
dccl_cmp myProgram.c -s 2:115200:1:0
the next call will revert to the default settings of 1:115200:1:0 unless the switch is used with that
next call as well.
Starting with Dynamic C v 7.10, the command line compiler uses the values of the environment
variables that are in the project file indicated by the -pf switch, or if the -pf switch is not used, the
values are taken from default.dcp. For more information, please see Chapter 16, “Project
Files” on page 227.
15.2 User Input
Applications requiring user input must be called with the -i option:
dccl_cmp myProgram.c -i myProgramInputs.txt
where myProgramInputs.txt is a text file containing the inputs as separate lines, in the
order in which myProgram.c expects them.
15.3 Saving Output to a File
The output consists of all program printf’s as well as all error and warning messages.
Output to a file can be accomplished with the -o option
dccl_cmp myProgram.c -i myProgramInputs.txt -o myOutputs.txt
where myOutputs.txt is overwritten if it exists or is created if it does not exist.
If the -oa option is used, myOutputs.txt is appended if it exists or is created if it does not.
Chapter 15: Command Line Interface
209
15.4 Command Line Switches
Each switch must be separated from the others on the command line with at least one space or tab.
Extra spaces or tabs are ignored. The parameter(s) required by some switches must be added as
separate text immediately following the switch. Any of the parameters requiring a pathname,
including the source file pathname, can have imbedded spaces by enclosing the pathname in
quotes.
15.4.1 Switches Without Parameters
-b
Description:
Compile to .bin file using attached target. The resulting file is created or
overwritten with the same pathname as the source file, but with a .bin
extension. This switch is available only in Dynamic C v 7.05 and 7.06.
Default:
Compilation is written only to the target and not to a file.
GUI Equivalent: Select the Compile | Compile to .bin file | Use attached target menu
option.
-bf- (Available starting with Dynamic C v 7.10)
Description:
Undo user-defined BIOS file specification.
Factory Default: None.
GUI Equivalent: Uncheck the Options | Compiler | User defined BIOS file | Use dialog
box option.
-h
Description:
Print program header information. This switch is available only in
Dynamic C v 7.05 and 7.06.
Default:
No header information will be printed.
GUI Equivalent: None.
Example:
dccl_cmp samples\demo1.c -h -o myoutputs.txt
Header text preceding output of program:
********************************************************
4/5/01 2:47:16 PM
dccl_cmp.exe, Version 7.05P - English
samples\demo1.c
Options: -h -o myoutputs.txt
Program outputs:
Note: Version information refers to dcwd.exe with the same compiler
core.
210
Dynamic C User’s Manual
-h+ (Available starting with Dynamic C v 7.10)
Description:
Print program header information.
Factory Default: No header information will be printed.
GUI Equivalent: None.
Example:
dccl_cmp samples\demo1.c -h -o myoutputs.txt
Header text preceding output of program:
********************************************************
4/5/01 2:47:16 PM
dccl_cmp.exe, Version 7.10P - English
samples\demo1.c
Options: -h+ -o myoutputs.txt
Program outputs:
Note: Version information refers to dcwd.exe with the same compiler
core.
-h- (Available starting with Dynamic C v 7.10)
Description:
Disable printing of program header information.
Factory Default: No header information will be printed.
GUI Equivalent: None.
-id+ (Available starting with Dynamic C v 7.30)
Description:
Enable separate instruction and data space.
Factory Default: Separate I&D space is disabled.
GUI Equivalent: Check Separate I&D Space in the Options | Compiler dialog box.
-id- (Available starting with Dynamic C v 7.30)
Description:
Disable separate instruction and data space.
Factory Default: Separate I&D space is disabled.
GUI Equivalent: Uncheck Separate I&D Space in the Options | Compiler dialog box.
Chapter 15: Command Line Interface
211
-lf- (Available starting with Dynamic C v 7.10)
Description:
Undo Library Directory file specification.
Factory Default: No Library Directory file is specified.
GUI Equivalent: Uncheck the Options | Compiler | User Defined Libraries File | Use
menu dialog box option.
-mf
Description:
Memory BIOS setting: Flash.
Default:
Memory BIOS setting: Flash.
GUI Equivalent: Select the Options | Compiler | Code and BIOS in Flash menu dialog box
option.
-mfr
Description:
The BIOS and code are compiled to flash, and then the BIOS copies the
flash image to RAM to run the code.
Default:
Memory BIOS setting: Flash
GUI Equivalent: Uncheck the Options | Compiler | Code and BIOS in Flash, Run in RAM
menu dialog box option.
-mr
Description:
Memory BIOS setting: RAM.
Default:
Memory BIOS setting: Flash.
GUI Equivalent: Select the Options | Compiler | Code and BIOS in RAM menu dialog box
option.
-n (Available starting with Dynamic C v 7.25)
Description:
Null compile for errors and warnings without running the program. The
program will be downloaded to the target.
Default:
Program is run.
GUI Equivalent: Select Run | Run menu option.
212
Dynamic C User’s Manual
-rb
Description:
Do not include BIOS when compiling to a file. This option is ignored if not
compiling to a file. This switch is available only in Dynamic C v 7.05 and
7.06.
Default:
BIOS is included if Compile to .bin file is selected.
GUI Equivalent: Uncheck the Compile | Compile to .bin file | Include BIOS menu option.
-rb+ (Available starting with Dynamic C v 7.10)
Description:
Include BIOS when compiling to a file.
Default:
BIOS is included if Compile to .bin file is selected.
GUI Equivalent: Check the Compile | Compile to .bin file | Include BIOS menu option.
-rb- (Available starting with Dynamic C v 7.10)
Description:
Do not include BIOS when compiling to a file.
Default:
BIOS is included if Compile to .bin file is selected.
GUI Equivalent: Uncheck the Compile | Compile to .bin file | Include BIOS menu option.
-rd
Description:
Do not include debug (RST 28) code when compiling to a file. This option
is ignored if not compiling to a file. This switch is available only in
Dynamic C v 7.05 and 7.06.
Default:
RST 28 is included if Compile to file is selected.
GUI Equivalent: Uncheck the Compile | Compile to .bin file | Include debug code/RST 28
instructions menu option.
-rd+ (Available starting with Dynamic C v 7.10)
Description:
Include debug code when compiling to a file.
Default:
RST 28 instructions are included
GUI Equivalent: Check the Compile | Compile to .bin file | Include debug code/RST 28
instructions menu option.
Chapter 15: Command Line Interface
213
-rd- (Available starting with Dynamic C v 7.10)
Description:
Do not include debug code when compiling to a file. This option is ignored
if not compiling to a file.
Default:
RST 28 instructions are included.
GUI Equivalent: Uncheck the Compile | Compile to .bin file | Include debug code/RST 28
instructions menu option.
-rf- (Available starting with Dynamic C v 7.10)
Description:
Undo RTI file specification.
Default:
None.
GUI Equivalent: Select the Compile | Compile to Target menu option.
-ri
Description:
Disable runtime checking of array indices.
This switch is available only in Dynamic C v 7.05 and 7.06.
Default:
Runtime checking of array indices is performed.
GUI Equivalent: Uncheck the Options | Compiler | Array Indices menu option.
-ri+ (Available starting with Dynamic C v 7.10)
Description:
Enable runtime checking of array indices.
Default:
Runtime checking of array indices is performed.
GUI Equivalent: Check the Options | Compiler | Array Indices menu option.
-ri- (Available starting with Dynamic C v 7.10)
Description:
Disable runtime checking of array indices.
Default:
Runtime checking of array indices is performed.
GUI Equivalent: Uncheck the Options | Compiler | Array Indices menu option.
-rp
Description:
Disable runtime checking of pointers.
This switch is available only in Dynamic C v 7.05 and 7.06.
Default:
Runtime checking of pointers is performed.
GUI Equivalent: Uncheck the Options | Compiler | Pointers menu option.
214
Dynamic C User’s Manual
-rp+ (Available starting with Dynamic C v 7.10)
Description:
Enable runtime checking of pointers.
Default:
Runtime checking of pointers is performed.
GUI Equivalent: Uncheck the Options | Compiler | Pointers menu option.
-rp- (Available starting with Dynamic C v 7.10)
Description:
Disable runtime checking of pointers.
Default:
Runtime checking of pointers is performed.
GUI Equivalent: Uncheck the Options | Compiler | Pointers menu option.
-rw
Description:
Restrict watch expressions—may save root code space.
This switch is available only in Dynamic C v 7.05 and 7.06.
Default:
Allow any expressions in watch expressions.
GUI Equivalent: Select the Options | Compiler | Restrict watch expressions menu dialog
box option.
-rw+ (Available starting with Dynamic C v 7.10)
Description:
Restrict watch expressions—may save root code space.
Default:
Allow any expressions in watch expressions.
GUI Equivalent: Select the Options | Compiler | Restrict watch expressions menu dialog
box option.
-rw- (Available starting with Dynamic C v 7.10)
Description:
Don’t restrict watch expressions.
Default:
Allow any expressions in watch expressions.
GUI Equivalent: Select Options | Compiler | Allow any expressions ... menu dialog box
option.
-sp
Description:
Optimize code generation for speed.
Default:
Optimize for speed.
GUI Equivalent: Select the Options | Compiler | Speed menu dialog box option.
Chapter 15: Command Line Interface
215
-sz
Description:
Optimize code generation for size.
Default:
Optimize for speed.
GUI Equivalent: Select the Options | Compiler | Size menu dialog box option.
-td
Description:
Disable type demotion checking. This switch is available only in
Dynamic C v 7.05 and 7.06.
Default:
Type demotion checking is performed.
GUI Equivalent: Uncheck the Options | Compiler | Demotion menu dialog box option.
-td+ (Available starting with Dynamic C v 7.10)
Description:
Enable type demotion checking.
Default:
Type demotion checking is performed.
GUI Equivalent: Check the Options | Compiler | Demotion menu dialog box option.
-td- (Available starting with Dynamic C v 7.10)
Description:
Disable type demotion checking.
Default:
Type demotion checking is performed.
GUI Equivalent: Uncheck the Options | Compiler | Demotion menu dialog box option.
-tp
Description:
Disable type checking of pointers.
This switch is available only in Dynamic C v 7.05 and 7.06.
Default:
Type checking of pointers is performed.
GUI Equivalent: Uncheck the Options | Compiler | Pointer menu dialog box option.
-tp+ (Available starting with Dynamic C v 7.10)
Description:
Enable type checking of pointers.
Default:
Type checking of pointers is performed.
GUI Equivalent: Check the Options | Compiler | Pointer menu dialog box option.
216
Dynamic C User’s Manual
-tp- (Available starting with Dynamic C v 7.10)
Description:
Disable type checking of pointers.
Default:
Type checking of pointers is performed.
GUI Equivalent: Uncheck the Options | Compiler | Pointer menu dialog box option.
-tt
Description:
Disable type checking of prototypes.
This switch is available only in Dynamic C v 7.05 and 7.06.
Default:
Type checking of prototypes is performed.
GUI Equivalent: Uncheck the Options | Compiler | Prototype menu dialog box option.
-tt+ (Available starting with Dynamic C v 7.10)
Description:
Enable type checking of prototypes.
Default:
Type checking of prototypes is performed.
GUI Equivalent: Check the Options | Compiler | Prototype menu dialog box option.
-tt- (Available starting with Dynamic C v 7.10)
Description:
Disable type checking of prototypes.
Default:
Type checking of prototypes is performed.
GUI Equivalent: Uncheck the Options | Compiler | Prototype menu dialog box option.
-vp+ (Available starting with Dynamic C v 7.20)
Description:
Verify the processor by enabling a DSR check. This should be disabled if a
check of the DSR line is incompatible on your system for any reason.
Default:
Processor verification is enabled.
GUI Equivalent: Check the Options | Communications | Enable DSR verification box.
-vp- (Available starting with Dynamic C v 7.20)
Description:
Assume a valid processor is connected.
Default:
Processor verification is enabled.
GUI Equivalent: Uncheck the Options | Communications | Enable DSR verification box.
Chapter 15: Command Line Interface
217
-wa
Description:
Report all warnings.
Default:
All warnings reported.
GUI Equivalent: Select the Options | Compiler | All menu dialog box option.
-wn
Description:
Report no warnings.
Default:
All warnings reported.
GUI Equivalent: Select the Options | Compiler | None menu dialog box option.
-ws
Description:
Report only serious warnings.
Default:
All warnings reported.
GUI Equivalent: Select the Options | Compiler | Serious menu dialog box option.
218
Dynamic C User’s Manual
15.4.2 Switches Requiring a Parameter
-bf BIOSFilePathname
Description:
Compile using a BIOS file found in BIOSFilePathname.
Default:
\Bios\RabbitBios.c
GUI Equivalent: Select the Options | Compiler | User Defined BIOS File | Use | ... menu
dialog box option.
Example:
dccl_cmp myProgram.c -bf MyPath\MyBIOS.lib
-d MacroDefinition
Description:
Define macros and optionally equate to values.
The following rules apply and are shown here with examples and equivalent #define form:
Separate macros with semicolons.
dccl_cmp myProgram.c -d DEF1;DEF2
#define DEF1
#define DEF2
A defined macro may be equated to text by separating the defined macro
from the text with an equal sign (=).
dccl_cmp myProgram.c -d DEF1=20;DEF2
#define DEF1 20
#define DEF2
Macro definitions enclosed in quotation marks will be interpreted as a single command line parameter.
dccl_cmp myProgram.c -d “DEF1=text with spaces;DEF2”
#define DEF1 text with spaces
#define DEF2
A backslash proceeding a character will be kept except for semicolon, quote
and backslash, which keep only the character following the backslash. An
escaped semicolon will not be interpreted as a macro separator and an
escaped quote will not be interpreted as the quote defining the end of a
command line parameter of text.
dccl_cmp myProgram.c -d DEF1=statement\;;ESCQUOTE=\\\”
#define DEF1 statement;
#define ESCQUOTE \”
dccl_cmp myProg.c -d “FSTR = \”Temp = %6.2F DEGREES C\n\””
#define FSTR “Temp = %6.2f degrees C\n”
Default:
None.
GUI Equivalent: Select the Options | Compiler menu option, then select the Defines button.
Chapter 15: Command Line Interface
219
-d- MacroToUndefine (Available starting with Dynamic C v 7.10)
Description:
Undefines a macro that might have been defined in the project file. If a
macro is defined in the project file read by the command line compiler and
the same macro name is redefined on the command line, the command line
definition will generate a warning. A macro previously defined must be
undefined with the -d- switch before redefining it. Undefining a macro that
has not been defined has no consequence and so is always safe although
possibly unnecessary. In the example, all compilation settings are taken
from the project file specified except that now the macro MAXCHARS was
first undefined before being redefined.
Default:
None.
GUI Equivalent: None.
Example:
dccl_cmp myProgram.c -pf myproject -d- MAXCHARS -d
MAXCHARS=512
-eto EthernetResponseTimeout (Available starting with Dynamic C v 7.10)
Description:
Time in milliseconds Dynamic C waits for a response from the target on
any retry while trying to establish ethernet communication.
Default:
8000 milliseconds.
GUI Equivalent: None.
Example:
dccl_cmp myProgram.c -eto 6000
-i InputsFilePathname
Description:
Execute a program that requires user input by supplying the input in a text
file. Each input required should be entered into the text file exactly as it
would be when entered into the Stdio Window in dcwd.exe. Extra input
is ignored and missing input causes dccl_cmp to wait for keyboard input
at the command line.
Default:
None.
GUI Equivalent: Using -i is like entering inputs into the Stdio Window in dcwd.exe.
Example
220
dccl_cmp myProgram.c -i MyInputs.txt
Dynamic C User’s Manual
-lf LibrariesFilePathname
Description:
Compile using a file found in LibrariesFilePathname which lists all libraries
to be made available to your programs.
Default:
Lib.dir.
GUI Equivalent: Select Options | Compiler | User Defined Libraries File | Use | ... from
the menu dialog box.
Example
dccl_cmp myProgram.c -lf MyPath\MyLibs.txt
-ne maxNumberOfErrors
Description:
Change the maximum number of errors reported.
Default:
A maximum of 10 errors are reported.
GUI Equivalent: Enter the maximum errors reported in the Options | Compiler | Errors
menu dialog box option.
Example:
Allows up to 25 errors to be reported:
dccl_cmp myProgram.c -ne 25
-nw maxNumberOfWarnings
Description:
Change the maximum number of warnings reported.
Default:
A maximum of 10 warnings are reported.
GUI Equivalent: Enter the maximum warnings reported in the Options | Compiler |
Warnings menu dialog box option.
Example:
Allows up to 50 warnings to be reported:
dccl_cmp myProgram.c -nw 50
-o OutputFilePathname
Description:
Write header information (if specified with -h) and all program errors,
warnings and outputs to a text file. If the text file does not exist it will be
created, otherwise it will be overwritten.
Default:
None.
GUI Equivalent: Select Options | Debugger | Log STDOUT | Log file menu dialog box
option.
Example
dccl_cmp myProgram.c -o MyOutput.txt
dccl_cmp myProgram.c -o MyOutput.txt -h
dccl_cmp myProgram.c -h -o MyOutput.txt
Chapter 15: Command Line Interface
221
-oa OutputFilePathname
Description:
Append header information (if specified with -h) and all program errors,
warnings and outputs to a text file. If the text file does not exist it will be
created, otherwise it will be appended.
Default:
None.
GUI Equivalent: Select the Options | Debugger | Log STDOUT | Log file, Append Log
menu dialog box option.
Example
dccl_cmp myProgram.c -oa MyOutput.txt
-pf projectFilePathname (Available starting with Dynamic C v 7.10)
Description:
Specify a project file to read before the command line switches are read.
The environment settings are taken from the project file specified with -pf,
or default.dcp if no other project file is specified. Any switches on the
command line, regardless of their position relative to the -pf switch, will
override the settings from the project file.
Default:
The project file default.dcp.
GUI Equivalent: Select the File | Project | Open... menu dialog box option.
Example
dccl_cmp myProgram.c -ne 25 -pf myProject.dcp
dccl_cmp myProgram.c -ne 25 -pf myProject
Note: The project file extension, .dcp, may be omitted.
-pw TCPPassPhrase
Description:
Enter the passphrase required for your TCP/IP connection. If no passphrase
is required this option need not be used.
Default:
No passphrase.
GUI Equivalent: Enter the passphrase required at the dialog prompt when compiling over a
TCP/IP connection
Example:
222
dccl_cmp myProgram.c -pw “My passphrase”
Dynamic C User’s Manual
-ret Retries (Available starting with Dynamic C v 7.10)
Description:
The number of times Dynamic C attempts to establish communication if the
given timeout period expires.
Default:
3
GUI Equivalent: None.
Example:
dccl_cmp myProgram.c -ret 5
-rf RTIFilePathname
Description:
Compile to a .bin file using targetless compilation parameters found in RTIFilePathname. The resulting compiled file will have the same pathname as
the source (.c) file being compiled, but with a .bin extension.
Default:
None.
GUI Equivalent: For Dynamic C v 7.05 and 7.06, select the Compile | Compile to .bin file |
Define target information | Use Target Information File menu option.
For Dynamic C v 7.10 and later, select the Options | Define target
configuration | Use Target Information File menu option
Example:
dccl_cmp myProgram.c -rf MyTCparameters.rti
dccl_cmp myProgram.c -rf “My Long Pathname\MyTCparameters.rti”
Chapter 15: Command Line Interface
223
-rti BoardID:CpuID:CrystalSpeed:RAMSize:FlashSize
Description:
Compile to a .bin file using parameters defined in a colon separated format of BoardID:CpuID:CrystalSpeed:RAMSize:FlashSize. The resulting
compiled file will have the same pathname as the source (.c) file being
compiled, but with a .bin extension.
BoardID: Hex integer
CpuID: Decimal integer
CrystalSpeed: Decimal floating point, in MHz
RAMSize: Decimal, in KBytes
FlashSize: Decimal, in KBytes.
Default:
None.
GUI Equivalent: For Dynamic C v 7.05 and 7.06, select the Compile | Compile to .bin file |
Define target information | Specify Board Parameters menu option.
For Dynamic C v 7.10 and later, select the Options | Define target
configuration | Specify Board Parameters menu option.
Example:
dccl_cmp myProgram.c -rti
0x0101:2000:29.4912:128:256
-s Port:Baud:Stopbits:BackgroundTx
Description:
Use serial transmission with parameters defined in a colon separated format
of Port:Baud:Stopbits:BackgroundTx.
Port: 1, 2, 3, 4, 5, 6, 7, 8
Baud: 110, 150, 300, 600, 1200, 2400, 4800, 9600, 12800, 14400,
19200, 28800, 38400, 57600, 115200, 128000, 230400, 256000
Stopbits: 1, 2
BackgroundTx: 0: None, 1: Sync, 2: Full Speed
Include all serial parameters in the prescribed format even if only one is
being changed.
Starting with Dynamic C v 7.10, the last parameter is ignored and therefore
may be dropped from the command line without consequence.
Default:
1:115200:1:0
GUI Equivalent: Select the Options | Communications Serial dialog box options.
Example:
Changing port from default of 1 to 2:
dccl_cmp myProgram.c -s 2:115200:1:0
224
Dynamic C User’s Manual
-sto SerialResponseTimeout (Available starting with Dynamic C v 7.10)
Description:
Time in milliseconds Dynamic C waits for a response from the target on
any retry while trying to establish serial communication.
Default:
300 ms.
GUI Equivalent: None.
Example:
dccl_cmp myProgram.c -sto 400
-t NetAddress:TcpName:TcpPort
Description:
Use TCP with parameters defined in a contiguous colon separated format of
NetAddress:TcpName:TcpPort. Include all parameters even if only one is
being changed.
netAddress: n.n.n.n
tcpName: Text name of TCP port
tcpPort: decimal number of TCP port
Default:
None.
GUI Equivalent: Select the Options | Communications | Use TCP/IP Connection dialog
box options.
Example:
dccl_cmp myProgram.c -t 10.10.6.138:TCPName:4244
Chapter 15: Command Line Interface
225
15.5 Examples
The following examples illustrate using multiple command line switches at the same time. If the
switches on the command line are contradictory, such as -mr and -mf, the last switch (read left to
right) will be used.
15.5.1 Example 1
In this example, all current settings of default.dcp are used for the compile.
dccl_cmp samples\timerb\timerb.c
15.5.2 Example 2
In this example, all settings of myproject.dcp are used, except timer_b.c is compiled to
timer_b.bin instead of to the target and warnings or errors are written to myouputs.txt.
dccl_cmp samples\timerb\timer_b.c -o myoutputs.txt -b -pf
myproject
15.5.3 Example 3
These examples will compile and run myProgram.c with the current settings in
default.dcp but using different defines, displaying up to 50 warnings and capture all output to
one file with a header for each run.
dccl_cmp myProgram.c -d MAXCOUNT=99 -nw 50 -h -o myOutput.txt
dccl_cmp myProgram.c -d MAXCOUNT=15 -nw 50 -h -oa myOutput.txt
dccl_cmp myProgram.c -d MAXCOUNT=15 -d DEF1 -nw 50 -h -oa
myOutput.txt
The first run could have used the -oa option if myOutput.txt were known to not initially
exist. myProgram.c presumably uses a constant MAXCOUNT and contains one or more compiler directives that react to whether or not DEF1 is defined.
226
Dynamic C User’s Manual
16. Project Files
In Dynamic C, a project is an environment that consists of opened source files, a BIOS file, available libraries, and the conditions under which the source files will be compiled. Projects allow different compilation environments to be separately maintained.
Projects are available in Dynamic C starting with version 7.10.
16.1 Project File Names
A project maintains a compilation environment in a file with the extension .dcp.
16.1.1 Factory.dcp
The environment originally shipped from the factory is kept in a project file named
factory.dcp. If Dynamic C cannot find this file, it will be recreated automatically in the
Dynamic C exe path. The factory project can be opened at any time and the environment changed
and saved to another project name, but factory.dcp will not be changed by Dynamic C.
16.1.2 Default.dcp
This default project file is originally a copy of factory.dcp and will be automatically recreated as such in the exe path if it cannot be found when Dynamic C opens. The default project will
automatically become the active project with File | Project... | Close.
The default project is special in that the command line compiler will use it for default values
unless another project file is specified with the -pf switch, in which case the settings from the indicated project will be used.
Please see chapter 15, “Command Line Interface” starting on page 209 for more details on using
the command line compiler.
16.1.3 Active Project
Whenever a project is selected, the current project related data is saved to the closing project file,
the new project settings become active, and the (possibly new) BIOS will automatically be recompiled prior to compiling a source file in the new environment.
The active project can be factory.dcp, default.dcp or any project you create with
File | Project... | Save As... When Dynamic C opens, it retrieves the last used project, or the
default project if being opened for the first time or if the last used project cannot be found.
If a project is closed with the File | Projects... | Close menu option, the default project,
default.dcp, becomes the active project.
The active project file name, without path or extension, is always shown in the leftmost panel of
the status bar at the bottom of the Dynamic C main window and is prepended to the Dynamic C
version in the title bar except when the active project is the default project.
Chapter 16: Project Files
227
Changes made to the compilation environment of Dynamic C are automatically updated to the
active project, unless the active project is factory.dcp.
16.2 Updating a Project File
Unless the active project is factory.dcp, changes made to any of the following Dynamic C
menu selections will cause the active project file to be updated immediately:
•
•
•
•
•
the "Options | Compiler..." dialog box
the "Options | Communication..." dialog box
the "Options | Define target configuration..." dialog box
the "Compile | Include debug code/RST 28 instructions" setting
the "Compile | Compile to .bin file | Include BIOS" setting
Opening or closing files will not immediately update the active project file. The project file state
of the recently used files appearing at the bottom of the File menu selection and any opened files
in edit windows will only by updated when the project closes or when File | Projects... | Save is
selected. The Message, Assembly, Memory Dump, Registers and Stack debug windows are not
edit windows and will not be saved in the project file if you exit Dynamic C while debugging.
16.3 Menu Selections
The menu selections for project files are available in the File menu. The choices are the familiar
ones: Open..., Save, Save As... and Close.
Choosing File | Project | Open... will bring up a dialog box to select an existing project filename
to become the active project. The environment of the previous project is saved to its project file
before it is replaced (unless the previous project is factory.dcp). The BIOS will automatically
be recompiled prior to the compilation of a source file within the new environment, which may
have a different library directory file and/or a different BIOS file.
Choosing File | Project... | Save will save the state of the environment to the active project file,
including the state of the recently used filelist and any files open in edit windows. This selection is
greyed out if the active project is factory.dcp. This option is of limited use since any project
changes will be updated immediately to the file and the state of the recently used filelist and open
edit windows will be updated when the project is closed for any reason.
Choosing File | Project... | Save as... will bring up a dialog box to select a project file name. The
file will be created or, if it exists, it will be overwritten with the current environment settings. This
environment will also be saved to the active project file before it is closed and its copy (the newly
created or overwritten project file) will become active.
Choosing File | Project... | Close first saves the environment to the active project file (unless the
active project is factory.dcp) and then loads the Dynamic C default project, default.dcp,
as the active project. As with Open..., the BIOS will automatically be recompiled prior to the
compilation of a source file within the new environment. The new environment may have a different library directory file and/or a different BIOS file.
228
Dynamic C User’s Manual
16.4 Command Line Usage
When using the command line compiler, dccl_cmp.exe, a project file is always read. The
default project, default.dcp, is used automatically unless the project file switch, -pf, specifies
another project file to use. The project settings are read by the command line compiler first even if
a -pf switch comes after the use of other switches, and then all other switches used in the command line are read, which may modify any of the settings specified by the project file.
The default behavior given for each switch in the command line documentation is with reference
to the factory.dcp settings, so the user must be aware of the default state the command line
compiler will actually use. The settings of default.dcp can be shown by entering dccl_cmp
alone on the command line. The defaults for any other project file can be shown by following
dccl_cmp by a the project file switch without a source file.
dccl_cmp
shows the current state of all default.dcp settings
dccl_cmp -pf myProject
shows the current state of all myProject.dcp settings
dccl_cmp myProgram.c -ne 25 -pf myProject
reads myProject.dcp then compiles and runs myProgram.c but with 25 errors maximum
shown.
The command line compiler, unlike Dynamic C, never updates the project file it uses. Any
changes desired to a project file to be used by the command line compiler can be made within
Dynamic C or changed by hand with an editor.
Making changes by hand should be done with caution, using an editor which does not introduce
carriage returns or line feeds with wordwrap, which may be a problem if the global defines or any
file pathnames are lengthy strings. Be careful when changing by hand not to change any of the
section names in brackets or any of the key phrases up to and including the '='.
If a macro is defined on the command line with the -d switch, any value that may have been
defined within the project file used will be overwritten without warning or error. Undefining a
macro with the -d- switch has no consequence if it was not previously defined.
Chapter 16: Project Files
229
230
Dynamic C User’s Manual
17. Hints and Tips
This chapter offers hints on how to speed up an application and how to store persistent data at run
time.
17.1 Efficiency
There are a number of methods that can be used to reduce the size of a program, or to increase its
speed. Let’s look at the events that occur when a program enters a function.
• The function saves IX on the stack and makes IX the stack frame reference pointer (if the
program is in the useix mode).
• The function creates stack space for auto variables.
• The function sets up stack corruption checks if stack checking is enabled (on).
• The program notifies Dynamic C of the entry to the function so that single stepping modes
can be resolved (if in debug mode).
The last two consume significant execution time and are eliminated when stack checking is disabled or if the debug mode is off.
17.1.1 Nodebug Keyword
When the PC is connected to a target controller with Dynamic C running, the normal code and
debugging features are enabled. Dynamic C places an RST 28H instruction at the beginning of
each C statement to provide locations for breakpoints. This allows the programmer to single step
through the program or to set breakpoints. (It is possible to single step through assembly code at
any time.) During debugging there is additional overhead for entry and exit bookkeeping, and for
checking array bounds, stack corruption, and pointer stores. These “jumps” to the debugger consume one byte of code space and also require execution time for each statement.
At some point, the Dynamic C program will be debugged and can run on the target controller
without the Dynamic C debugger. This saves on overhead when the program is executing. The
nodebug keyword is used in the function declaration to remove the extra debugging instructions
and checks.
nodebug int myfunc( int x, int z ){
...
}
If programs are executing on the target controller with the debugging instructions present, but
without Dynamic C attached, the function that handles RST 28H instructions will be replaced by a
simple ret instruction. The target controller will work, but its performance will not be as good as
when the nodebug keyword is used.
If the nodebug option is used for the main function, the program will begin to execute as soon
as it finishes compiling (as long as the program is not compiling to a file).
Chapter 17: Hints and Tips
231
Use the directive #nodebug anywhere within the program to enable nodebug for all statements
following the directive. The #debug directive has the opposite effect.
Assembly code blocks are nodebug by default, even when they occur inside C functions that are
marked debug, therefore using the nodebug keyword with the #asm directive is usually unnecessary.
17.1.2 Static Variables
Using static variables with nodebug functions will greatly increase the program speed. Stack
checking is disabled by default.
When there are more than 128 bytes of auto variables declared in a function, the first 128 bytes are
more easily accessed than later declarations because of the limited 8-bit range of IX and SP register addressing. This makes performance slower for bytes above 128.
The shared and the protected keywords in data declarations cause slower fetches and stores,
except for one-byte items and some two-byte items.
17.2 Run-time Storage of Data
Data that will never change in a program can be put in flash by initializing it in the declarations.
The compiler will put this data in flash. See the description of the const, xdata, and xstring
keywords for more information.
If data must be stored at run-time and persist between power cycles, there are several ways to do
this using Dynamic C functions:
• User Block - Recommended method for storing non-file data. This is where calibration
constants for boards with analog I/O are stored in the factory. Space here is limited to as
small as 8K-sizeof(SysIDBlock) bytes, or less if there are calibration constants.
• Flash File System - The file system is best for storing data that must be organized into
files, or data that won’t fit in the User block. It is best used on a second flash chip. It is not
possible to use a second flash for both extra program code that doesn’t fit into the first flash,
and the file system. The macro USE_2NDFLASH_CODE must be uncommented in the
BIOS to allow programs to grow into the second flash; this precludes the use of the file system.
• WriteFlash2 - This function is provided for writing arbitrary amounts of data directly to
arbitrary addresses in the second flash.
• Battery-Backed RAM - Storing data here is as easy as assigning values to global variables
or local static variables. The file system can also be configured to use RAM. The important
question is, what will you do when your battery runs out?
232
Dynamic C User’s Manual
17.2.1 User Block
The User block is an area near the top of flash reserved for run-time storage of persistent data and
calibration constants. The size of the User block can be read in the global structure member
SysIDBlock.userBlockSize. The functions readUserBlock() and writeUserBlock() are used to access the User block. These function take an offset into the block as a
parameter. The highest offset available to the user in the User block will be
SysIDBlock.userBlockSize-1
if there are no calibration constants, or
DAC_CALIB_ADDR-1
if there are.
See the Rabbit 3000 Designer’s Handbook or the Rabbit 2000 Designer’s Handbook for more
details about the User block.
17.2.2 Flash File System
For a complete discussion of the file system, please see “The Flash File System” on page 99.
17.2.3 WriteFlash2
See the Dynamic C Function Reference Manual for a complete description.
NOTE: There is a WriteFlash() function available for writing to the first
flash, but its use is highly discouraged for reasons of forward source and binary
compatibility should flash sector configuration change drastically in a product.
See Technical Notes 216 and 217 for more information on flash compatibility
issues.
17.2.4 Battery Backed RAM
Static variables and global variables will always be located at the same addresses between power
cycles and can only change locations via recompilation. The file system can be configured to use
RAM also. While there may applications where storing persistent in RAM is acceptable, for example a data logger where the data gets retrieved and the battery checked periodically, keep in mind
that a programming error such as an uninitialized pointer could cause RAM data to be corrupted.
xalloc() will allocate blocks of RAM in extended memory. It will allocate the blocks consistently from the same physical address if done at the beginning of the program and the program is
not recompiled.
Chapter 17: Hints and Tips
233
17.3 Root Memory Reduction Tips
Customers with programs that are near the limits of root code and/or root data space usage will be
interested in these tips for saving root space. The usage of root code and data by the BIOS in
Dynamic C 7.20 increased from previous versions. A follow-on release will reduce BIOS root
space usage, but probably not to the level of usage in previous versions.
17.3.1 Increasing Root Code Space
Increasing the available amount of root code space may be done in the following ways:
• Use #memmap xmem
This will cause C functions that are not explicitly declared as “root” to be placed in
xmem. Note that the only reason to locate a C function in root is because it modifies the
XPC register (in embedded assembly code), or it is an ISR. The only performance difference in running code in xmem is in getting there and returning. It takes a total of 12
additional machine cycles because of the differences between call/lcall, and ret/lret.
• Increase DATAORG
Root code space can be increased by increasing DATAORG in RabbitBios.c in
increments of 0x1000. Unfortunately, this comes at the expense of root data space, but
there are ways of reducing that too.
• Reduce usage of root constants and string literals
Shortening literal strings and reusing them will save root space. The compiler, starting
with version 7.20, automatically reuses identical string literals.
These two statements :
printf (“This is a literal string”);
sprintf (buf, “This is a literal string”);
will share the same literal string space whereas:
sprintf (buf, “this is a literal string”);
will use its own space since the string is different.
234
Dynamic C User’s Manual
• Use xdata to declare large tables of initialized data
If you have large tables of initialized data, consider using the keyword xdata to
declare them. The disadvantage is that data cannot be accessed directly with pointers.
The function xmem2root() allows xdata to be copied to a root buffer when needed.
// This uses root code space
const int root_tbl[8]={300,301,302,103,304,305,306,307};
// This does not
xdata xdata_table {300,301,302,103,304,305,306,307};
main(){
// this only uses temporary stack space
auto int table[8];
xmem2root(table, xdata_table, 16);
// now the xmem data can be accessed via a 16 bit pointer into the table
}
Both methods, const and xdata, create initialized data in flash at compile time, so
the data cannot be rewritten directly.
• Use xstring to declare a table of strings
The keyword xstring declares a table of strings in extended flash memory. The disadvantage is that the strings cannot be accessed directly with pointers, since the table
entries are 20-bit physical addresses. As illustrated above, the function xmem2root()
may be used to store the table in temporary stack space.
// This uses root code space
const char * name[] = {“string_1”, . . . “string_n”};
// This does not
xstring name {“string_1”, . . . “string_n”};
Both methods, const and xstring, create initialized data in flash at compile time,
so the data cannot be rewritten directly.
• Turn off selected debugging features
In Dynamic C 7.20 , watch expressions, breakpoints, and single stepping can be selectively disabled in the Options | Debugging dialog to save some root code space.
Chapter 17: Hints and Tips
235
• Place assembly language code into xmem
Pure assembly language code functions can go into xmem starting with Dynamic C
7.20:
#asm
foo_root::
[some instructions]
ret
#endasm
The same function in xmem:
#asm xmem
foo_xmem::
[some instructions]
lret
; use lret instead of ret
#endasm
The correct calls are call foo_root and lcall foo_xmem. If the assembly
function modifies the XPC register with
LD XPC, A
it should not be placed in xmem. If it accesses data on the stack directly, the data will be
one byte away from where it would be with a root function because lcall pushes the
value of XPC onto the stack.
17.3.2 Increasing Root Data Space
Increasing the available amount of root data space may be done in the following ways:
• Decrease DATAORG
Root data space can be increased by decreasing DATAORG in RabbitBios.c in
increments of 0x1000. This comes at the expense of root code space.
• Use #class auto
The default storage class of Dynamic C is static. This can be changed to auto using the
directive #class auto. This will make local variables with no explicit storage class
specified in functions default to auto. If you need the value in a local function to be
retained between calls, it should be static. The default program stack size is 2048
(0x800) bytes if not using µC/OS-II. This could be increased to 0x1000 at most. It
already is increased if the TCP/IP stack is used. The code to change it is in program.lib:
#ifndef MCOS
#define DEFAULTSTACKSIZE 0x1000
#else
#define DEFAULTSTACKSIZE 0x200
#endif
; increased from 0x800
Deeply nested calls with a lot of local auto arrays could exceed this limit, but 0x1000
should ordinarily be plenty of space. Using more temporary stack space for variables
frees up static root data space for global and local static variables.
236
Dynamic C User’s Manual
• Use xmem for large RAM buffers
xalloc() can be used to allocate chunks of RAM in extended memory. The memory
cannot be accessed by a 16 bit pointer, so using it can be more difficult. The functions
xmem2root() and root2xmem() are available for moving from root to xmem and
xmem to root. Large buffers used by Dynamic C libraries are already allocated from
RAM in extended memory.
Chapter 17: Hints and Tips
237
238
Dynamic C User’s Manual
18. µC/OS-II
Not available with SE versions of Dynamic C.
µC/OS-II is a simple, clean, efficient, easy-to-use real-time operating system that runs on the Rabbit microprocessor and is fully supported by the Dynamic C development environment. µC/OS-II
is capable of intertask communication and synchronization via the use of semaphores, mailboxes,
and queues. User-definable system hooks are supplied for added system and configuration control
during task creation, task deletion, context switches, and time ticks.
For more information on µC/OS-II, please refer to Jean J. Labrosse’s book, MicroC/OS-II, The
Real-Time Kernel (ISBN: 0-87930-543-6). The data structures (e.g. Event Control Block) referenced in the Dynamic C µC/OS-II function descriptions are fully explained in Labrosse’s book. It
can be purchased at the Z-World store, www.zworld.com/store/home.html, or at http://www.ucosii.com/.
Starting with Dynamic C version 7.21, the Rabbit version of µC/OS-II includes the new features
and API changes available in version 2.51 of µC/OS-II. The documentation for these changes is
included with Dynamic C in Samples/UCos-II. The file Newv251.pdf contains all of the
features added since version 2.00 and Relv251.pdf contains release notes for version 2.51.
18.1 Changes to µC/OS-II
To take full advantage of services provided by Dynamic C, minor changes have been made to
µC/OS-II.
18.1.1 Ticks per Second
In most implementations of µC/OS-II, OS_TICKS_PER_SEC informs the operating system of
the rate at which OSTimeTick is called; this macro is used as a constant to match the rate of the
periodic interrupt. In µC/OS-II for the Rabbit, however, changing this macro will change the tick
rate of the operating system set up during OSInit. Usually, a real-time operating system has a
tick rate of 10 Hz to 100 Hz, or 10–100 ticks per second. Since the periodic interrupt on the Rabbit
occurs at a rate of 2 kHz, it is recommended that the tick rate be a power of 2 (e.g., 16, 32, or 64).
Keep in mind that the higher the tick rate, the more overhead the system will incur.
In the Rabbit version of µC/OS-II, the number of ticks per second defaults to 64. The actual number of ticks per second may be slightly different than the desired ticks per second if
TicksPerSec does not evenly divide 2048.
Changing the default tick rate is done by simply defining OS_TICKS_PER_SEC to the desired
tick rate before calling OSInit(). E.g. to change the tick rate to 32 ticks per second:
#define OS_TICKS_PER_SEC 32
...
OSInit();
...
OSStart();
Chapter 18: µC/OS-II
239
18.1.2 Task Creation
In a µC/OS-II application, stacks are declared as static arrays, and the address of either the top or
bottom (depending on the CPU) of the stack is passed to OSTaskCreate. In a Rabbit-based
system, the Dynamic C development environment provides a superior stack allocation mechanism
that µC/OS-II incorporates. Rather than declaring stacks as static arrays, the number of stacks of
particular sizes are declared, and when a task is created using either OSTaskCreate or
OSTaskCreateExt, only the size of the stack is passed, not the memory address. This mechanism allows a large number of stacks to be defined without using up root RAM.
There are five macros located in ucos2.lib that define the number of stacks needed of five different
sizes. In order to have three 256 byte stacks, one 512 byte stack, two 1024 byte stacks, one 2048
byte stack, and no 4096 byte stacks, the following macro definitions would be used:
#define
#define
#define
#define
#define
STACK_CNT_256
STACK_CNT_512
STACK_CNT_1K
STACK_CNT_2K
STACK_CNT_4K
3
1
2
1
0
//
//
//
//
//
number of 256 byte stacks
number of 512 byte stacks
number of 1K stacks
number of 2K stacks
number of 4K stacks
These macros can be placed into each µC/OS-II application so that the number of each size stack
can be customized based on the needs of the application. Suppose that an application needs 5
tasks, and each task has a consecutively larger stack. The macros and calls to OSTaskCreate
would look as follows
#define
#define
#define
#define
#define
STACK_CNT_256
STACK_CNT_512
STACK_CNT_1K
STACK_CNT_2K
STACK_CNT_4K
OSTaskCreate(task1,
OSTaskCreate(task2,
OSTaskCreate(task3,
OSTaskCreate(task4,
OSTaskCreate(task5,
NULL,
NULL,
NULL,
NULL,
NULL,
2
2
1
1
1
//
//
//
//
//
number of 256 byte stacks
number of 512 byte stacks
number of 1K stacks
number of 2K stacks
number of 4K stacks
256, 0);
512, 1);
1024, 2);
2048, 3);
4096, 4);
Note that the macro STACK_CNT_256 is set to 2 instead of 1. µC/OS-II always creates an idle
task which runs when no other tasks are in the ready state. Note also that there are two 512 byte
stacks instead of one. This is because the program is given a 512 byte stack. If the application utilizes the µC/OS-II statistics task, then the number of 512 byte stacks would have to be set to 3.
(Statistic task creation can be enabled and disabled via the macro OS_TASK_STAT_EN which is
located in ucos2.lib). If only 6 stacks were declared, one of the calls to OSTaskCreate
would fail.
240
Dynamic C User’s Manual
If an application uses OSTaskCreateExt, which enables stack checking and allows an extension of the Task Control Block, fewer parameters are needed in the Rabbit version of µC/OS-II.
Using the macros in the example above, the tasks would be created as follows:
OSTaskCreateExt(task1, NULL, 0, 0, 256, NULL, OS_TASK_OPT_STK_CHK |
OS_TASK_OPT_STK_CLR);
OSTaskCreateExt(task2, NULL, 1, 1, 512, NULL, OS_TASK_OPT_STK_CHK |
OS_TASK_OPT_STK_CLR);
OSTaskCreateExt(task3, NULL, 2, 2, 1024, NULL, OS_TASK_OPT_STK_CHK |
OS_TASK_OPT_STK_CLR);
OSTaskCreateExt(task4, NULL, 3, 3, 2048, NULL, OS_TASK_OPT_STK_CHK |
OS_TASK_OPT_STK_CLR);
OSTaskCreateExt(task5, NULL, 4, 4, 4096, NULL, OS_TASK_OPT_STK_CHK |
OS_TASK_OPT_STK_CLR);
18.1.3 Restrictions
At the time of this writing, µC/OS-II for Dynamic C is not compatible with the use of slice statements. Also, see the function description for OSTimeTickHook() for important information
about preserving registers if that stub function is replaced by a user-defined function.
Due to Dynamic C's stack allocation scheme, special care should be used when posting messages
to either a mailbox or a queue. A message is simply a void pointer, allowing the application to
determine its meaning. Since tasks can have their stacks in different segments, auto pointers
declared on the stack of the task posting the message should not be used since the pointer may be
invalid in another task with a different stack segment.
18.2 Tasking Aware Interrupt Service Routines (TA-ISR)
Special care must be taken when writing an interrupt service routine (ISR) that will be used in conjunction with µC/OS-II so that µC/OS-II scheduling will be performed at the proper time.
18.2.1 Interrupt Priority Levels
µC/OS-II for the Rabbit reserves interrupt priority levels 2 and 3 for interrupts outside of the kernel. Since the kernel is unaware of interrupts above priority level 1, interrupt service routines for
interrupts that occur at interrupt priority levels 2 and 3 should not be written to be tasking aware.
Also, a µC/OS-II application should only disable interrupts by setting the interrupt priority level to
1, and should never raise the interrupt priority level above 1.
Chapter 18: µC/OS-II
241
18.2.2 Possible ISR Scenarios
There are several different scenarios that must be considered when writing an ISR for use with
µC/OS-II. Depending on the use of the ISR, it may or may not have to be written so that it is tasking aware. Consider the scenario in the Figure below. In this situation, the ISR for Interrupt X does
not have to be tasking aware since it does not re-enable interrupts before completion and it does
not post to a semaphore, mailbox, or queue.
Task 1
Interrupt X
Interrupt X ISR
ipres
Task 1
Figure 6. Type 1 ISR
If, however, an ISR needs to signal a task to the ready state, then the ISR must be tasking aware. In
the example in the Figure below, the TA-ISR increments the interrupt nesting counter, does the
work necessary for the ISR, readies a higher priority task, decrements the nesting count, and
returns to the higher priority task.
Task 2
Interrupt X
Interrupt X TA-ISR
Nesting = 1
Task 1 is readied
Nesting = 0
ipres
Task 1
Figure 7. Type 2 ISR
242
Dynamic C User’s Manual
It may seem as though the ISR in this Figure does not have to increment and decrement the nesting
count. This is, however, very important. If the ISR for Interrupt X is called during an ISR that reenables interrupts before completion, scheduling should not be performed when Interrupt X completes; scheduling should instead be deferred until the least nested ISR completes. The next Figure
shows an example of this situation.
Task 2
Interrupt Z
Interrupt Z TA-ISR
Nesting = 1
Do critical code
ipres
Interrupt X
Interrupt X TA-ISR
Nesting = 2
Task 1 is readied
Nesting = 1
ipres
Finish ISR
Nesting = 0
Task 1
Figure 8. Type 2 ISR Nested Inside Type 3 ISR
As can be seen here, although the ISR for interrupt Z does not signal any tasks by posting to a
semaphore, mailbox, or queue, it must increment and decrement the interrupt nesting count since it
re-enables interrupts (ipres) prior to finishing all of its work.
18.2.3 General Layout of a TA-ISR
A TA-ISR is just like a standard ISR except that it does some extra checking and house-keeping.
The following table summarizes when to use a TA-ISR.
Table 18-2. Use of TA-ISR
µC/OS-II Application
TA-ISR Required?
Type 11
Type 22
Type 33
No
Yes
Yes
1. Type 1—Leaves interrupts disabled and does not signal task to ready state
2. Type 2—Leaves interrupts disabled and signals task to ready state
3. Type 3—Reenables interrupts before completion
Chapter 18: µC/OS-II
243
The following Figure shows the logical flow of a TA-ISR.
Save registers used by TA-ISR
Clear interrupt source
Increment nesting count
Do work necessary for interrupt
Reenable interrupts (optional)
Call OSIntExit
Decrement Nesting Count
Is Nesting == 0 ?
Yes
Is switch pending ?
No
No
Yes
Restore Registers used by TA-ISR
Switch to new task
Return from interrupt
Figure 9. Logical Flow of a TA-ISR
244
Dynamic C User’s Manual
18.2.3.1 Sample Code for a TA-ISR
Fortunately, the Rabbit BIOS and libraries provide all of the necessary flags to make TA-ISRs
work. With the code found in Listing 1, minimal work is needed to make a TA-ISR function
correctly with µC/OS-II. TA-ISRs allow µC/OS-II the ability to have ISRs that communicate with
tasks as well as the ability to let ISRs nest, thereby reducing interrupt latency.
Just like a standard ISR, the first thing a TA-ISR does is to save the registers that it is going to use
(1). Once the registers are saved, the interrupt source is cleared (2) and the nesting counter is
incremented (3). Note that bios_intnesting is a global interrupt nesting counter provided in
the Dynamic C libraries specifically for tracking the interrupt nesting level. If an ipres instruction is executed (4) other interrupts can occur before this ISR is completed, making it necessary
for this ISR to be a TA-ISR. If it is possible for the ISR to execute before µC/OS-II has been fully
initialized and started multi-tasking, a check should be made (5) to insure that µC/OS-II is in a
known state, especially if the TA-ISR signals a task to the ready state (6). After the TA-ISR has
done its necessary work (which may include making a higher priority task than is currently running ready to run), OSIntExit must be called (7). This µC/OS-II function determines the highest priority task ready to run, sets it as the currently running task, and sets the global flag
bios_swpend if a context switch needs to take place. Interrupts are disabled since a context
switch is treated as a critical section (8). If the TA-ISR decrements the nesting counter and the
count does not go to zero, then the nesting level is saved in bios_intnesting (9), the registers used by the TA-ISR are restored, interrupts are re-enabled (if not already done in (4)), and the
TA-ISR returns (12). However, if decrementing the nesting counter in (9) causes the counter to
become zero, then bios_swpend must be checked to see if a context switch needs to occur (10).
If a context switch is not pending, then the nesting level is set (9) and the TA-ISR exits (12). If a
context switch is pending, then the remaining context of the previous task is saved and a long call,
which insures that the xpc is saved and restored properly, is made to bios_intexit (11).
bios_intexit is responsible for switching to the stack of the task that is now ready to run and
executing a long call to switch to the new task. The remainder of (11) is executed when a previously preempted task is allowed to run again.
Listing 1
#asm
taskaware_isr::
push
af
push
hl
ld
hl,bios_intnesting
inc
(hl)
; ipres (optional)
; do processing necessary for interrupt
ld
a,(OSRunning)
or
a
jr
z,taisr_decnesting
; possibly signal task to become ready
call
OSIntExit
Chapter 18: µC/OS-II
;push regs needed by isr
(1)
;clear interrupt source
(2)
;increase the nesting count (3)
(4)
;MCOS multitasking yet?
(5)
(6)
;sets bios_swpend if higher
; prio ready
(7)
245
taisr_decnesting:
push
ip
ipset 1
(8)
ld
dec
jr
hl,bios_intnesting
(hl)
nz,taisr_noswitch
; nesting counter == 1?
ld
or
jr
a,(bios_swpend)
a
z,taisr_noswitch
; switch pending?
push
push
ex
push
exx
push
push
push
push
de
bc
af,af’
af
lcall
bios_intexit
pop
pop
pop
pop
exx
pop
ex
pop
pop
iy
bc
de
hl
(9)
(10)
(11)
hl
de
bc
iy
af
af,af’
bc
de
taisr_noswitch:
pop
ip
taisr_done:
pop
hl
pop
af
ipres
ret
#endasm
246
(12)
Dynamic C User’s Manual
18.3 Library Reentrancy
When writing a µC/OS-II application, it is important to know which Dynamic C library functions
are non-reentrant. If a function is non-reentrant, then only one task may access the function at a
time, and access to the function should be controlled with a µC/OS-II semaphore. The following is
a list of Dynamic C functions that are non-reentrant.
Library
Non-reentrant Functions
MATH.LIB
randg, randb, rand
RS232.LIB
All
RTCLOCK.LIB
write_rtc, tm_wr
STDIO.LIB
kbhit, getchar, gets, getswf, selectkey
STRING.LIB
atof1, atoi1, strtok
SYS.LIB
clockDoublerOn, clockDoublerOff, useMainOsc,
useClockDivider, use32kHzOsc
VDRIVER.LIB
VdGetFreeWd, VdReleaseWd
XMEM.LIB
WriteFlash
JRIO.LIB
digOut, digOn, digOff, jrioInit, anaIn, anaOut, cof_anaIn
JR485.LIB
All
1. reentrant but sets the global _xtoxErr flag
The serial port functions (RS232.LIB functions) should be used in a restricted manner with
µC/OS-II. Two tasks can use the same port as long as both are not reading, or both are not writing;
i.e., one task can read from serial port X and another task can write to serial port X at the same
time without conflict.
Chapter 18: µC/OS-II
247
18.4 How to Get a µC/OS-II Application Running
µC/OS-II is a highly configureable, real-time operating system. It can be customized using as
many or as few of the operating system’s features as needed. This section outlines:
• The configuration constants used in µC/OS-II
• How to override the default configuration supplied in UCOS2.LIB
• The necessary steps to get an application running
It is assumed that the reader has a familiarity with µC/OS-II or has a µC/OS-II reference
(MicroC/OS-II, The Real-Time Kernel by Jean J. Labrosse is highly recommended).
18.4.1 Default Configuration
µC/OS-II usually relies on the include file os_cfg.h to get values for the configuration constants. In the Dynamic C implementation of µC/OS-II, these constants, along with their default
values, are in os_cfg.lib. A default stack configuration is also supplied in os_cfg.lib.
µC/OS-II for the Rabbit uses a more intelligent stack allocation scheme than other µC/OS-II
implementations to take better advantage of unused memory.
The default configuration allows up to 10 normally created application tasks running at 64 ticks
per second. Each task has a 512-byte stack. There are 2 queues specified, and 10 events. An event
is a queue, mailbox or semaphore. You can define any combination of these three for a total of 10.
If you want more than 2 queues, however, you must change the default value of OS_MAX_QS.
Some of the default configuration constants are:
// Maximum number of events (semaphores, queues, mailboxes)
#define OS_MAX_EVENTS 10
// Maximum number of tasks (less stat and idle tasks)
#define OS_MAX_TASKS 10
// Maximum number of queues in system
#define OS_MAX_QS 2
// Maximum number of memory partitions
#define OS_MAX_MEM_PART 1
// Enable normal task creation
#define OS_TASK_CREATE_EN 1
// Disable extended task creation
#defineOS_TASK_CREATE_EXT_EN 0
// Disable task deletion
#define OS_TASK_DEL_EN 0
// Disable statistics task creation
#define OS_TASK_STAT_EN 0
// Enable queue usage
#define OS_Q_EN 1
// Disable memory manager
#define OS_MEM_EN 0
// Enable mailboxes
#define OS_MBOX_EN 1
248
Dynamic C User’s Manual
// Enable semaphores
#define OS_SEM_EN 1
// number of ticks in one second
#define OS_TICKS_PER_SEC 64
// number of 256 byte stacks (idle task stack)
#define STACK_CNT_256 1
// number of 512-byte stacks (task stacks + initial program stack)
#define STACK_CNT_512 OS_MAX_TASKS+1
If a particular portion of µC/OS-II is disabled, the code for that portion will not be compiled, making the overall size of the operating system smaller. Take advantage of this feature by customizing
µC/OS-II based on the needs of each application.
18.4.2 Custom Configuration
In order to customize µC/OS-II by enabling and disabling components of the operating system,
simply redefine the configuration constants as necessary for the application.
#define
#define
#define
#define
#define
#define
#define
#define
#define
OS_MAX_EVENTS
OS_MAX_TASKS
OS_MAX_QS
OS_MAX_MEM_PART
OS_TASK_STAT_EN
OS_Q_EN
OS_MEM_EN
OS_MBOX_EN
OS_TICKS_PER_SEC
2
20
1
15
1
0
1
0
64
If a custom stack configuration is needed also, define the necessary macros for the counts of the
different stack sizes needed by the application.
#define
#define
#define
#define
STACK_CNT_256 1
STACK_CNT_512 2
STACK_CNT_1K 10
STACK_CNT_2K 10
//
//
//
//
idle task stack
initial program + stat task stack
task stacks
number of 2K stacks
In the application code, follow the µC/OS-II and stack configuration constants with a #use
“ucos2.lib” statement. This ensures that the definitions supplied outside of the library are
used, rather than the defaults in the library.
This configuration uses 20 tasks, two semaphores, up to 15 memory partitions that the memory
manager will control, and makes use of the statistics task. Note that the configuration constants for
task creation, task deletion, and semaphores are not defined, as the library defaults will suffice.
Also note that 10 of the application tasks will each have a 1024 byte stack, 10 will each have a
2048 byte stack, and an extra stack is declared for the statistics task.
Chapter 18: µC/OS-II
249
18.4.3 Examples
The following sample programs demonstrate the use of the default configuration supplied in
UCOS2.LIB and a custom configuration which overrides the defaults.
Example 1
In this application, ten tasks are created and one semaphore is created. Each task pends on the
semaphore, gets a random number, posts to the semaphore, displays its random number, and
finally delays itself for three seconds.
Looking at the code for this short application, there are several things to note. First, since µC/OSII and slice statements are mutually exclusive (both rely on the periodic interrupt for a “heartbeat”), #use “ucos2.lib” must be included in every µC/OS-II application (1). In order for
each of the tasks to have access to the random number generator semaphore, it is declared as a global variable (2). In most cases, all mailboxes, queues, and semaphores will be declared with global
scope. Next, OSInit() must be called before any other µC/OS-II function to ensure that the
operating system is properly initialized (3). Before µC/OS-II can begin running, at least one application task must be created. In this application, all tasks are created before the operating system
begins running (4). It is perfectly acceptable for tasks to create other tasks. Next, the semaphore
each task uses is created (5). Once all of the initialization is done, OSStart() is called to start
µC/OS-II running (6). In the code that each of the tasks run, it is important to note the variable
declarations. The default storage class in Dynamic C is static, so to ensure that the task code is
reentrant, all are declared auto (7). Each task runs as an infinite loop and once this application is
started, µC/OS-II will run indefinitely.
250
Dynamic C User’s Manual
// 1. Explicitly use uC/OS-II library
#use "ucos2.lib"
void RandomNumberTask(void *pdata);
// 2. Declare semaphore global so all tasks have access
OS_EVENT* RandomSem;
void main()
{
int i;
// 3. Initialize OS internals
OSInit();
for(i = 0; i < OS_MAX_TASKS; i++)
// 4. Create each of the system tasks
OSTaskCreate(RandomNumberTask, NULL, 512, i);
// 5. semaphore to control access to random number generator
RandomSem = OSSemCreate(1);
// 6. Begin multitasking
OSStart();
}
void RandomNumberTask(void *pdata)
{
// 7. Declare as auto to ensure reentrancy.
auto OS_TCB data;
auto INT8U err;
auto INT16U RNum;
OSTaskQuery(OS_PRIO_SELF, &data);
while(1)
{
// Rand is not reentrant, so access must be controlled via a semaphore.
OSSemPend(RandomSem, 0, &err);
RNum = (int)(rand() * 100);
OSSemPost(RandomSem);
printf("Task%d's random #: %d\n",data.OSTCBPrio,RNum);
// Wait 3 seconds in order to view output from each task.
OSTimeDlySec(3);
}
}
Chapter 18: µC/OS-II
251
Example 2
This application runs exactly the same code as Example 1, except that each of the tasks are created
with 1024 byte stacks. The main difference between the two is the configuration of µC/OS-II.
First, each configuration constant that differs from the library default is defined. The configuration
in this example differs from the default in that it allows only two events (the minimum needed
when using only one semaphore), 20 tasks, no queues, no mailboxes, and the system tick rate is set
to 32 ticks per second (1). Next, since this application uses tasks with 1024 byte stacks, it is necessary to define the configuration constants differently than the library default (2). Notice that one
512 byte stack is declared. Every Dynamic C program starts with an initial stack, and defining
STACK_CNT_512 is crucial to ensure that the application has a stack to use during initialization
and before multi-tasking begins. Finally ucos2.lib is explicitly used (3). This ensures that the
definitions in (1 and 2) are used rather than the library defaults. The last step in initialization is to
set the number of ticks per second via OSSetTicksPerSec (4).
The rest of this application is identical to example 1 and is explained in the previous section.
// 1. Define necessary configuration constants for uC/OS-II
#define OS_MAX_EVENTS
2
#define OS_MAX_TASKS
20
#define OS_MAX_QS
0
#define OS_Q_EN
0
#define OS_MBOX_EN
0
#define OS_TICKS_PER_SEC
32
// 2. Define necessary stack configuration constants
#define STACK_CNT_512 1
// initial program stack
#define STACK_CNT_1K OS_MAX_TASKS
// task stacks
// 3. This ensures that the above definitions are used
#use "ucos2.lib"
void RandomNumberTask(void *pdata);
// Declare semaphore global so all tasks have access
OS_EVENT* RandomSem;
void main(){
int i;
// Initialize OS internals
OSInit();
for(i = 0; i < OS_MAX_TASKS; i++){
// Create each of the system tasks
OSTaskCreate(RandomNumberTask, NULL, 1024, i);
}
// semaphore to control access to random number generator
RandomSem = OSSemCreate(1);
// 4. Set number of system ticks per second
OSSetTicksPerSec(OS_TICKS_PER_SEC);
// Begin multi-tasking
OSStart();
}
252
Dynamic C User’s Manual
void RandomNumberTask(void *pdata)
{
// Declare as auto to ensure reentrancy.
auto OS_TCB data;
auto INT8U err;
auto INT16U RNum;
OSTaskQuery(OS_PRIO_SELF, &data);
while(1)
{
// Rand is not reentrant, so access must be controlled via a semaphore.
OSSemPend(RandomSem, 0, &err);
RNum = (int)(rand() * 100);
OSSemPost(RandomSem);
printf("Task%02d's random #: %d\n",data.OSTCBPrio,RNum);
// Wait 3 seconds in order to view output from each task.
OSTimeDlySec(3);
}
}
18.5 Compatibility with TCP/IP
The TCP/IP stack is reentrant and may be used with the µC/OS real-time kernel. The line
#use ucos2.lib
must appear before the line
#use dcrtcp.lib
A call to OSInit() must be made before calling sock_init().
18.5.1 Socket Locks
Each socket used in a µC/OS-II application program has an associated socket lock. Each socket
lock uses one semaphore of type OS_EVENT. Therefore, the macro MAX_OS_EVENTS must take
into account each of the socket locks, plus any events that the application program may be using
(semaphores, queues, mailboxes, event flags, or mutexes).
Determining OS_MAX_EVENTS may get a little tricky, but it isn't too bad if you know what your
program is doing. Since MAX_SOCKET_LOCKS is defined as:
#define MAX_SOCKET_LOCKS (MAX_TCP_SOCKET_BUFFERS +
MAX_UDP_SOCKET_BUFFERS)
OS_MAX_EVENTS may be defined as:
#define OS_MAX_EVENTS MAX_TCP_SOCKET_BUFFERS +
MAX_UDP_SOCKET_BUFFERS + 2 + z
The constant “2” is included for the two global locks used by TCP/IP, and z is the number of
OS_EVENTS (semaphores, queues, mailboxes, event flags, or mutexes) required by the program.
Chapter 18: µC/OS-II
253
If either MAX_TCP_SOCKET_BUFFERS or MAX_UDP_SOCKET_BUFFERS is not defined by
the application program prior to the #use statements for ucos.lib and dcrtcp.lib default
values will be assigned.
If MAX_TCP_SOCKET_BUFFERS is not defined in the application program, it will be defined as
MAX_SOCKETS. If, however, MAX_SOCKETS is not defined in the application program,
MAX_TCP_SOCKET_BUFFERS will be 4.
If MAX_UDP_SOCKET_BUFFERS is not defined in the application program, it will be defined as
1 if USE_DHCP is defined, or 0 otherwise.
For more information regarding TCP/IP, please see the Dynamic C TCP/IP User’s Manual, available online at zworld.com or rabbitsemiconductor.com.
18.6 Debugging Tips
Dynamic C version 7.20 introduced more control when single stepping through a µC/OS-II program. Prior to 7.20, single stepping occurred in whichever task was currently running. It was not
possible to limit the single stepping to one task.
Starting with Dynamic C 7.20, single stepping may be limited to the currently running task by
using F8 (Step over). If the task is suspended, single stepping will also be suspended. When the
task is put back in a running state, single stepping will continue at the statement following the
statement that suspended execution of the task.
Hitting F7 (Trace into) at a statement that suspends execution of the current task will cause the
program to step into the next active task that has debug information. It may be useful to put a
watch on the global variable OSPrioCur to see which task is currently running.
For example, if the current task is going to call OSSemPend() on a semaphore that is not in the
signaled state, the task will be suspended and other tasks will run. If F8 is pressed at the statement
that calls OSSemPend(), the debugger will not single step in the other running tasks that have
debug information; single stepping will continue at the statement following the call to
OSSemPend(). If F7 is pressed at the statement that calls OSSemPend() instead of F8, the
debugger will single step in the next task with debug information that is put into the running state.
254
Dynamic C User’s Manual
Dynamic C User’s Manual
Part Number 019-0071 • 020813–R • Printed in U.S.A.
©2001 Z-World Inc. • All rights reserved.
Z-World reserves the right to make changes and
improvements to its products without providing notice.
Notice to Users
Z-WORLD PRODUCTS ARE NOT AUTHORIZED FOR USE AS
CRITICAL COMPONENTS IN LIFE-SUPPORT DEVICES OR SYSTEMS UNLESS A SPECIFIC WRITTEN AGREEMENT REGARDING SUCH INTENDED USE IS ENTERED INTO BETWEEN THE
CUSTOMER AND Z-WORLD PRIOR TO USE. Life-support devices or
systems are devices or systems intended for surgical implantation into the
body or to sustain life, and whose failure to perform, when properly used
in accordance with instructions for use provided in the labeling and user’s
manual, can be reasonably expected to result in significant injury.
No complex software or hardware system is perfect. Bugs are always
present in a system of any size. In order to prevent danger to life or property, it is the responsibility of the system designer to incorporate redundant protective mechanisms appropriate to the risk involved.
Trademarks
®
Dynamic C is a registered trademark of Z-World Inc.
Windows® is a registered trademark of Microsoft Corporation
Z-World, Inc.
2900 Spafford Street
Davis, California 95616-6800
USA
Telephone: (530) 757-3737
Fax: (530) 757-3792
www.zworld.com
256
Appendix A: Macros and Global
Variables
This appendix contains many macros and global variables that may be of interest. This is not an
exhaustive list of the macros and global variables that are available.
A.1 Compiler-Defined Macros
The macros in the following table are defined internally. Where applicable, default values are
given, as well as directions for changing values.
Table A-3. Macros Defined by the Compiler
Macro Name
Definition and Default
_BIOSBAUD_
This macro was introduced in Dynamic C 7.25. It is the debug
baud rate. The baud rate can be changed in the Options |
Communications menu.
_BOARD_TYPE_
This is read from the System ID block or defaulted to 0x100
(the BL1810 JackRabbit board) if no System ID block is
present. This can be used for conditional compilation based on
board type. Board types are listed in boardtypes.lib.
_CPU_ID_
This macro identifies the CPU type, e.g. R3000 is the Rabbit
3000 microprocessor.
CC_VER
Gives the Dynamic C version in hex, i.e. version 7.05 is
0x0705.
DC_CRC_PTR
Reserved.
__DATE__
The compiler substitutes this macro with the date that the file
was compiled (either the BIOS or the .c file). The character
string literal is of the form Mmm dd yyyy. The days of the
month are as follows: "Jan," "Feb," "Mar," "Apr," "May," "Jun,"
"Jul," "Aug," "Sep," "Oct," "Nov," "Dec." There is a space as the
first character of dd if the value is less than 10.
DEBUG_RST
In the Compile pull-down menu, check “Include Debug
Code/RST 28 Instructions” to set DEBUG_RST to 1. Debug
code will be included even if #nodebug precedes the main
function in the program.
__FILE__
The compiler substitutes this macro with the current source
code file name as a character string literal.
Dynamic C User’s Manual
257
Table A-3. Macros Defined by the Compiler
Macro Name
Definition and Default
_FAST_RAM_
These are used for conditional compilation of the BIOS to
distinguish between the three options:
• compiling to flash and running in RAM (available starting
with Dynamic C 7.30)
• compiling to and running in flash
• compiling to and running in RAM
The compile mode choice is made in the Options | Compiler
dialog box. The default is compiling to and running in flash.
Starting with Dynamic C version 7.26, the BIOS defines
FAST_RAM_COMPILE, FLASH_COMPILE and
RAM_COMPILE. These macros are defined to 0 or 1 as
opposed to the corresponding compiler-defined macros which
are either defined or not defined. This difference makes
possible statements such as:
#if FLASH_COMPILE || FAST_RAM_COMPILE
_FLASH_
_RAM_
_FLASH_SIZE_
_RAM_SIZE_
These are used to set the MMU registers and code and data
sizes available to the compiler. The values of the macros are
the number of 4K blocks of memory available.
__LINE__
The compiler substitutes this macro with the current source code
line number as a decimal constant.
NO_BIOS
Boolean value. Tells the compiler whether or not to include the
BIOS when compiling to a .bin file. This is set in the Compile
menu
_SECTOR_SIZE_
In all versions prior to Dynamic C 7.02, this macro (near the
top of LIB\BIOSLIB\FLASHWR.LIB) needs to be hardcoded to the sector size of the first flash in bytes.
_TARGETLESS_COMPILE_
Boolean value. This is set in the Compile menu. It defaults
to 0.
__TIME__
The compiler substitutes this macro with the time that the file
(BIOS or .c) was compiled. The character string literal is of the
form hh:mm:ss.
_USE115KBAUD_
Boolean value. Tells BIOS to use 115k baud if value is 1. This
macro is not available starting with Dynamic C version 7.25. It
was replaced with _BIOSBAUD_. The baud rate can be
changed in the Options | Communications menu.
258
Dynamic C User’s Manual
A.2 Global Variables
These variables may be read by any Dynamic C application program.
dc_timestamp
This internally-defined long is the number of seconds that have passed since 00:00:00 January 1,
1980, Greenwich Mean Time (GMT) adjusted by the current time zone and daylight savings of the
PC on which the program was compiled. The recorded time indicates when the program finished
compiling.
printf("The date and time: %lx\n", dc_timestamp);
OPMODE
This is a char. It can have the following values:
• 0x88 = debug mode
• 0x80 = run mode
SEC_TIMER
This unsigned long variable is initialized to the value of the real-time clock (RTC). If the RTC is
set correctly, this is the number of seconds that have elapsed since the reference date of January 1,
1980. The periodic interrupt updates SEC_TIMER every second. This variable is initialized by the
Virtual Driver when a program starts.
MS_TIMER
This unsigned long variable is initialized to zero. The periodic interrupt updates MS_TIMER every
millisecond. This variable is initialized by the Virtual Driver when a program starts.
TICK_TIMER
This unsigned long variable is initialized to zero. The periodic interrupt updates TICK_TIMER
1024 times per second. This variable is initialized by the Virtual Driver when a program starts.
Dynamic C User’s Manual
259
A.3 Exception Types
These macros are defined in errors.lib:
#define
#define
#define
#define
#define
#define
#define
#define
#define
#define
#define
#define
#define
#define
#define
#define
#define
#define
#define
ERR_BADPOINTER
ERR_BADARRAYINDEX
ERR_DOMAIN
ERR_RANGE
ERR_FLOATOVERFLOW
ERR_LONGDIVBYZERO
ERR_LONGZEROMODULUS
ERR_BADPARAMETER
ERR_INTDIVBYZERO
ERR_UNEXPECTEDINTRPT
ERR_CORRUPTEDCODATA
ERR_VIRTWDOGTIMEOUT
ERR_BADXALLOC
ERR_BADSTACKALLOC
ERR_BADSTACKDEALLOC
ERR_BADXALLOCINIT
ERR_NOVIRTWDOGAVAIL
ERR_INVALIDMACADDR
ERR_INVALIDCOFUNC
228
229
234
235
236
237
238
239
240
241
243
244
245
246
247
249
250
251
252
A.4 Rabbit 2000/3000 Internal registers
Macros are defined for all of the Rabbit’s I/O registers. A listing of these register macros can be
found in the Rabbit 2000 Microprocessor User’s Manual and the Rabbit 3000 MIcroprocessor
User’s Manual.
A.4.1 Shadow Registers
Shadow registers exist for many of the I/O registers. They are character variables defined in the
BIOS. The naming convention for shadow registers is to append the word Shadow to the name of
the register. For example, the global control status register, GCSR, has a corresponding shadow
register named GCSRShadow.
The purpose of the shadow registers is to allow the program to reference the last value programmed to the actual register. This is needed because a number of the registers are write only.
260
Dynamic C User’s Manual
Appendix B: Map File Generation
Starting with Dynamic C 7.05, all symbol information is put into a single file. The map file has
three sections: a memory map section, a function section, and a globals section.
The map file format is designed to be easy to read, but with parsing in mind for use in program
down-loaders and in other possible future utilities (for example, an independent debugger). Also,
the memory map, as defined by the #org statements, will be saved into the map file.
Map files are generated in the same directory as the file that is compiled. If compilation is not successful, the contents of the map file are not reliable.
B.1 Grammar
<mapfile>: <memmap section> <function section> <global section>
<memmap section>: <memmapreg>+
<memmapreg>: <register var> = <8-bit const>
<register var>: XPC|SEGSIZE|DATASEG
<function section>: <function descripton>+
<function description>: <identifier> <address> <size>
<address>: <logical address> | <physical address>
<logical address>: <16-bit constant>
<physical address: <8-bit constant>:<16-bit constant>
<size>: <20-bit constant>
<global section>: <global description>+
<global description>: <scoped name> <address>
<scoped name>: <global>| <local static>
<global>: <identifier>
<local static>: <identifier>:<identifier>
Comments are C++ style (// only).
Dynamic C User’s Manual
261
262
Dynamic C User’s Manual
Appendix C: Utility Programs
This appendix documents the utility programs available from Z-World. All of these utilities are
easy to use. The file encryption utility may be obtained by calling our technical support staff at
(530) 757-3737. The other utilities are bundled with Dynamic C.
C.1 Font and Bitmap Converter Utility
The Font and Bitmap Converter converts Windows fonts and monochrome bitmaps to a library file
format compatible with Z-World’s Dynamic C applications and graphical displays. Non-Roman
characters may also be converted by applying the monochrome bitmap converter to their bitmaps.
Double-click on the fmbcnvtr.exe file in the Dynamic C directory. Select and convert existing
fonts or bitmaps. Complete instructions are available by clicking on the Help button within the
utility.
When complete, the converted file is displayed in the editing window. Editing may be done, but
probably won’t be necessary. Save the file as whatever.lib: the name of your choice.
Add the file to applications with the statement:
#use whatever.lib
// remember to add this filename to lib.dir
or by cut and pasting from whatever.lib directly into the application file.
C.2 Library File Encryption Utility
The Library File Encryption Utility allows distribution of sensitive runtime library files.
Encrypt.exe may be obtained by calling technical support at Z-World. Complete instructions
are available by clicking on the Help button within the utility. Context-sensitive help is accessed
by positioning the cursor over the desired subject and hitting <F1>.
The encrypted library files compile normally, but cannot be read with an editor. The files will be
automatically decrypted during Dynamic C compilation, but users of Dynamic C will not be able
to see any of the decrypted contents except for function descriptions for which a public interface is
given. An optional user-defined copyright notice is put at the beginning of an encrypted file.
Dynamic C User’s Manual
263
C.3 Rabbit Field Utility
The Rabbit Field Utility (RFU) will load a .bin file created by Dynamic C to a Rabbit-based controller. It can be used to load a program to a controller without Dynamic C present on the host
computer, and without recompiling the program each time it is loaded to a controller.
The Dynamic C installation created a desktop icon for the RFU. The executable file, rfu.exe,
can be found in the directory where Dynamic C was installed. Complete instructions are available
by clicking on the Help button within the utility. The Help document details setup information, the
file menu options and BIOS requirements.
A command line version of the RFU is new for DC 7.20. On the command line specify:
clRFU SourceFilePathName [options]
where SourceFilePathName is the path name of the .bin file to load to the connected target. The options are as follows:
-s port:baudrate
Description: Select the comm port and baud rate for the serial connection.
Default:
COM1 and 115,200 bps
RFU GUI
Equivalent:
From the Setup | Communications dialog box, choose values from the Baud
Rate and Comm Port drop-down menus.
Example:
clRFU myProgram.bin -s 2:115200
-t ipAddress:tcpPort
Description: Select the IP address and port.
Default:
Serial Connection
RFU GUI
Equivalent:
From the Setup | Communications dialog box, click on “Use TCP/IP Connection”, then type in the IP address and port for the controller that is
receiving the .bin file or use the “Discover” radio button.
Example:
clRFU myProgram.bin -t 10.10.1.100:4244
-v
Description: Causes the RFU version number and additional status information to be displayed.
Default:
Only error messages are displayed.
RFU GUI
Equivalent:
Status information is displayed by default and there is no option to turn it
off.
Example:
clRFU myProgram.bin -v
264
Dynamic C User’s Manual
-cl ColdLoaderPathName
Description: Select a new initial loader.
Default:
\bios\coldload.bin
RFU GUI
Equivalent:
From the Setup | Boot Strap Loaders dialog box, type in a pathname or click
on the ellipses radio button to browse for a file.
Example:
clRFU myProgram.bin -cl myInitialLoader.c
-pb PilotBiosPathName
Description: Select a new secondary loader.
Default:
\bios\pilot.bin
RFU GUI
Equivalent:
From the Setup | Boot Strap Loaders dialog box, type in a pathname or click
on the ellipses radio button to browse for a file.
Example:
clRFU myProgram.bin -pb mySecondaryLoader.c
-d
Description: Run Ethernet discovery. Don’t load the .bin file. This option is for information gathering and must appear by itself with no other options and no
binary image file name.
RFU GUI
Equivalent:
From the Setup | Communications dialog box, click on the “Use TCP/IP
Connection” radio button, then on the “Discover” button.
Example:
clRFU -d
Dynamic C User’s Manual
265
266
Dynamic C User’s Manual
Z-WORLD SOFTWARE END USER LICENSE
AGREEMENT
IMPORTANT-READ CAREFULLY: BY INSTALLING, COPYING OR OTHERWISE USING
THE ENCLOSED Z-WORLD,INC. ("Z-WORLD") DYNAMIC C SOFTWARE, WHICH
INCLUDES COMPUTER SOFTWARE ("SOFTWARE") AND MAY INCLUDE ASSOCIATED
MEDIA, PRINTED MATERIALS, AND "ONLINE" OR ELECTRONIC DOCUMENTATION
("DOCUMENTATION"), YOU (ON BEHALF OF YOURSELF OR AS AN AUTHORIZED
REPRESENTATIVE ON BEHALF OF AN ENTITY) AGREE TO ALL THE TERMS OF THIS
END USER LICENSE AGREEMENT ("LICENSE") REGARDING YOUR USE OF THE
SOFTWARE. IF YOU DO NOT AGREE WITH ALL OF THE TERMS OF THIS LICENSE, DO
NOT INSTALL, COPY OR OTHERWISE USE THE SOFTWARE AND IMMEDIATELY CONTACT Z-WORLD FOR RETURN OF THE SOFTWARE AND A REFUND OF THE PURCHASE PRICE FOR THE SOFTWARE.
We are sorry about the formality of the language below, which our lawyers tell us we need to
include to protect our legal rights. If You have any questions, write or call Z-World at (530) 7574616, 2900 Spafford Street, Davis, California 95616.
1. Definitions. In addition to the definitions stated in the first paragraph of this document, capitalized words used in this License shall have the following meanings:
1.1 "Qualified Applications" means an application program developed using the Software and
that links with the development libraries of the Software.
1.1.1 "Qualified Applications" is amended to include application programs developed using
the Softools WinIDE program for Rabbit processors available from Softools, Inc.
1.1.2 The MicroC/OS-II (µC/OS-II) library and sample code and the Point-to-Point Protocol
(PPP) library are not included in this amendment.
1.1.3 Excluding the exceptions in 1.1.2, library and sample code provided with the Software
may be modified for use with the Softools WinIDE program in Qualified Systems as
defined in 1.2. All other Restrictions specified by this license agreement remain in force.
1.2 "Qualified Systems" means a microprocessor-based computer system which is either (i)
manufactured by, for or under license from Z-WORLD, or (ii) based on the Rabbit 2000
microprocessor or the Rabbit 3000 microprocessor. Qualified Systems may not be (a)
designed or intended to be re-programmable by your customer using the Software, or (b)
competitive with Z-WORLD products, except as otherwise stated in a written agreement
between Z-World and the system manufacturer. Such written agreement may require an
end user to pay run time royalties to Z-World.
Dynamic C User’s Manual
267
2. License. Z-WORLD grants to You a nonexclusive, nontransferable license to (i) use and reproduce the Software, solely for internal purposes and only for the number of users for which You
have purchased licenses for (the "Users") and not for redistribution or resale; (ii) use and reproduce the Software solely to develop the Qualified Applications; and (iii) use, reproduce and
distribute, the Qualified Applications, in object code only, to end users solely for use on Qualified Systems; provided, however, any agreement entered into between You and such end users
with respect to a Qualified Application is no less protective of Z-Worlds intellectual property
rights than the terms and conditions of this License. (iv) use and distribute with Qualified
Applications and Qualified Systems the program files distributed with Dynamic C named
RFU.EXE, PILOT.BIN, and COLDLOAD.BIN in their unaltered forms.
3. Restrictions. Except as otherwise stated, You may not, nor permit anyone else to, decompile,
reverse engineer, disassemble or otherwise attempt to reconstruct or discover the source code
of the Software, alter, merge, modify, translate, adapt in any way, prepare any derivative work
based upon the Software, rent, lease network, loan, distribute or otherwise transfer the Software
or any copy thereof. You shall not make copies of the copyrighted Software and/or documentation without the prior written permission of Z-WORLD; provided that, You may make one (1)
hard copy of such documentation for each User and a reasonable number of back-up copies for
Your own archival purposes. You may not use copies of the Software as part of a benchmark or
comparison test against other similar products in order to produce results strictly for purposes
of comparison. The Software contains copyrighted material, trade secrets and other proprietary
material of Z-WORLD and/or its licensors and You must reproduce, on each copy of the Software, all copyright notices and any other proprietary legends that appear on or in the original
copy of the Software. Except for the limited license granted above, Z-WORLD retains all right,
title and interest in and to all intellectual property rights embodied in the Software, including
but not limited to, patents, copyrights and trade secrets.
4. Export Law Assurances. You agree and certify that neither the Software nor any other technical data received from Z-WORLD, nor the direct product thereof, will be exported outside the
United States or re-exported except as authorized and as permitted by the laws and regulations
of the United States and/or the laws and regulations of the jurisdiction, (if other than the United
States) in which You rightfully obtained the Software. The Software may not be exported to
any of the following countries: Cuba, Iran, Iraq, Libya, North Korea, Sudan, or Syria.
5. Government End Users. If You are acquiring the Software on behalf of any unit or agency of
the United States Government, the following provisions apply. The Government agrees: (i) if
the Software is supplied to the Department of Defense ("DOD"), the Software is classified as
"Commercial Computer Software" and the Government is acquiring only "restricted rights" in
the Software and its documentation as that term is defined in Clause 252.227-7013(c)(1) of the
DFARS; and (ii) if the Software is supplied to any unit or agency of the United States Government other than DOD, the Government's rights in the Software and its documentation will be as
defined in Clause 52.227-19(c)(2) of the FAR or, in the case of NASA, in Clause 18-52.22786(d) of the NASA Supplement to the FAR.
268
Dynamic C User’s Manual
6. Disclaimer of Warranty. You expressly acknowledge and agree that the use of the Software
and its documentation is at Your sole risk. THE SOFTWARE, DOCUMENTATION, AND
TECHNICAL SUPPORT ARE PROVIDED ON AN "AS IS" BASIS AND WITHOUT WARRANTY OF ANY KIND. Information regarding any third party services included in this package is provided as a convenience only, without any warranty by Z-WORLD, and will be
governed solely by the terms agreed upon between You and the third party providing such services. Z-WORLD AND ITS LICENSORS EXPRESSLY DISCLAIM ALL WARRANTIES,
EXPRESS, IMPLIED, STATUTORY OR OTHERWISE, INCLUDING BUT NOT LIMITED
TO THE IMPLIED WARRANTIES OF MERCHANTABILITY, FITNESS FOR A PARTICULAR PURPOSE AND NON-INFRINGEMENT OF THIRD PARTY RIGHTS. Z-WORLD
DOES NOT WARRANT THAT THE FUNCTIONS CONTAINED IN THE SOFTWARE
WILL MEET YOUR REQUIREMENTS, OR THAT THE OPERATION OF THE SOFTWARE WILL BE UNINTERRUPTED OR ERROR-FREE, OR THAT DEFECTS IN THE
SOFTWARE WILL BE CORRECTED. FURTHERMORE, Z-WORLD DOES NOT WARRANT OR MAKE ANY REPRESENTATIONS REGARDING THE USE OR THE RESULTS
OF THE SOFTWARE IN TERMS OF ITS CORRECTNESS, ACCURACY, RELIABILITY
OR OTHERWISE. NO ORAL OR WRITTEN INFORMATION OR ADVICE GIVEN BY ZWORLD OR ITS AUTHORIZED REPRESENTATIVES SHALL CREATE A WARRANTY
OR IN ANY WAY INCREASE THE SCOPE OF THIS WARRANTY. SOME JURISDICTIONS DO NOT ALLOW THE EXCLUSION OF IMPLIED WARRANTIES, SO THE
ABOVE EXCLUSION MAY NOT APPLY TO YOU.
7. Limitation of Liability. YOU AGREE THAT UNDER NO CIRCUMSTANCES, INCLUDING NEGLIGENCE, SHALL Z-WORLD BE LIABLE FOR ANY INCIDENTAL, SPECIAL
OR CONSEQUENTIAL DAMAGES (INCLUDING DAMAGES FOR LOSS OF BUSINESS
PROFITS, BUSINESS INTERRUPTION, LOSS OF BUSINESS INFORMATION AND THE
LIKE) ARISING OUT OF THE USE AND/OR INABILITY TO USE THE SOFTWARE,
EVEN IF Z-WORLD OR ITS AUTHORIZED REPRESENTATIVE HAS BEEN ADVISED
OF THE POSSIBILITY OF SUCH DAMAGES. SOME JURISDICTIONS DO NOT ALLOW
THE LIMITATION OR EXCLUSION OF LIABILITY FOR INCIDENTAL OR CONSEQUENTIAL DAMAGES SO THE ABOVE LIMITATION OR EXCLUSION MAY NOT
APPLY TO YOU. IN NO EVENT SHALL Z-WORLDS TOTAL LIABILITY TO YOU FOR
ALL DAMAGES, LOSSES, AND CAUSES OF ACTION (WHETHER IN CONTRACT,
TORT, INCLUDING NEGLIGENCE, OR OTHERWISE) EXCEED THE AMOUNT PAID
BY YOU FOR THE SOFTWARE.
8. Termination. This License is effective for the duration of the copyright in the Software unless
terminated. You may terminate this License at any time by destroying all copies of the Software
and its documentation. This License will terminate immediately without notice from ZWORLD if You fail to comply with any provision of this License. Upon termination, You must
destroy all copies of the Software and its documentation. Except for Section 2 ("License"), all
Sections of this Agreement shall survive any expiration or termination of this License.
Dynamic C User’s Manual
269
9. General Provisions. No delay or failure to take action under this License will constitute a
waiver unless expressly waived in writing, signed by a duly authorized representative of ZWORLD, and no single waiver will constitute a continuing or subsequent waiver. This License
may not be assigned, sublicensed or otherwise transferred by You, by operation of law or otherwise, without Z-WORLD's prior written consent. This License shall be governed by and construed in accordance with the laws of the United States and the State of California, exclusive of
the conflicts of laws principles. The United Nations Convention on Contracts for the International Sale of Goods shall not apply to this License. If for any reason a court of competent
jurisdiction finds any provision of this License, or portion thereof, to be unenforceable, that
provision of the License shall be enforced to the maximum extent permissible so as to affect the
intent of the parties, and the remainder of this License shall continue in full force and effect.
This License constitutes the entire agreement between the parties with respect to the use of the
Software and its documentation, and supersedes all prior or contemporaneous understandings
or agreements, written or oral, regarding such subject matter. There shall be no contract for purchase or sale of the Software except upon the terms and conditions specified herein. Any additional or different terms or conditions proposed by You or contained in any purchase order are
hereby rejected and shall be of no force and effect unless expressly agreed to in writing by ZWORLD. No amendment to or modification of this License will be binding unless in writing
and signed by a duly authorized representative of Z-WORLD.
Copyright 2000 Z-World, Inc. All rights reserved.
270
Dynamic C User’s Manual
Index
Symbols
# and ## (operators) ...............17
#asm .....................115, 159, 232
#debug ..................149, 159, 232
#define .....................16, 17, 160
#elif ......................................161
#else .....................................161
#endasm ...............115, 119, 160
#endif ...................................161
#error ....................................161
#fatal ....................................160
#funcchain ......................34, 161
#if .........................................161
#ifdef ....................................162
#ifndef ..................................162
#include
absence of ..........................36
#interleave ............................162
#KILL ..................................162
#makechain ....................34, 162
#memmap ................4, 162, 234
#nodebug ......149, 159, 186, 232
#nointerleave ........................162
#nouseix ...............................163
#undef ....................................19
#use ..........................36, 38, 163
#useix ...................................163
#warns ..................................164
#warnt ..................................164
#ximport ...............................164
@RETVAL ..........................128
@SP .....122, 126, 127, 128, 136
_GLOBAL_INIT .................151
{ } curly braces ......................21
A
abort .....................................137
about Dynamic C .................208
abstract data types ............23, 24
adc (add-with-carry) ............115
address space .....................4, 97
addresses in assembly ..........119
aggregate data types ...............25
align .....................................138
ALT key
See keystrokes
always_on ............................138
anymem ................................138
argument passing ..29, 122, 128,
129
modifying value .................29
Dynamic C User’s Manual
arrange icons ........................202
arrays .........................25, 26, 29
characters ...........................20
subscripts ...........................25
arrow keys ....................179, 180
asm .......................................139
assembly ..........3, 115–136, 187
blocks in xmem ................121
embedding C statements ..116
stand-alone .......................120
window .............125, 202, 203
assignment operators ...........169
associativity .........................165
auto ......119, 120, 122, 139, 231
storage of variables ..........122
Auto Open STDIO Window 197
B
backslash (\)
character literals ...........17, 21
continuation in directives .159
basic unit of a C program ......22
baud rate ........................75, 200
BCDE ...................120, 127, 129
BeginHeader ....................37, 38
binary operators ...................165
BIOS ........................................6
_xexit .................................91
calling premain() ................65
command line compiler ..210,
213, 219
compilation environments 227
compile option .................258
configuration macros .95, 103
control blocks ...................100
include in .bin file ............185
macro definitions .............196
memory location ........98, 190
memory settings ...............194
redefine a symbol in .........162
reserving memory ............101
root memory usage ...........234
variable defined in ...........144
board type ............................201
branching .........................32, 33
break ............................139, 154
example ..............................31
keyword .............................31
limitations ..........................32
out of a loop .......................31
out of a switch statement ...31
breakpoints ..125, 149, 187, 190,
231
hard ..................................188
interrupt status .........187, 188
soft ...........................187, 188
buttons, toolbar ....................202
C
C language ....3, 4, 5, 13, 20, 23,
29, 34, 117, 120
calling assembly ...............127
embedded in assembly .....116
variables in assembly .......119
cascaded windows ...............202
case ........................33, 140, 143
char ........................23, 140, 157
characters
arrays ..................................20
embedded quotes ...............21
nonprinting values .............21
special values .....................21
clipboard ..............................183
closing a file .........................181
CoData Structure ...................48
pointer to ............................50
cofunctions .......................52–57
abandon ..............................56
calling restrictions ..............53
everytime ...........................56
firsttime ............................145
indexed ...............................54
single user ..........................54
syntax .................................52
cold loader ...........................185
COM port .............................199
communication
serial .................................199
TCP/IP .............................199
compile ................................185
BIOS ................................185
command line ...........209–226
errors ................................184
menu ................................185
options ..............................193
speed ....................................3
status ................................205
targetless ..........................185
to file ........................179, 185
to flash .............................185
to RAM ............................185
to target ....................179, 185
compiler directives ..........4, 159
#asm .................115, 159, 232
options ..........................159
#class ................................159
options ..........................159
#debug ..............149, 159, 232
271
#define ....................... 17, 160
#elif .................................. 161
#else ................................. 161
#endasm ........... 115, 119, 160
#endif ............................... 161
#error ............................... 161
#fatal ................................ 160
#funcchain ................. 34, 161
#GLOBAL_INIT ............. 160
#if .................................... 161
#ifdef ............................... 162
#ifndef ............................. 162
#interleave ....................... 162
#KILL .............................. 162
#makechain ................ 34, 162
#memmap ........................ 162
options ......................... 162
#nodebug . 149, 159, 186, 232
#nointerleave ................... 162
#nouseix .......................... 163
#precompile ..................... 163
#undef ........................ 19, 163
#use ...................... 36, 38, 163
#useix .............................. 163
#warns ............................. 164
#warnt .............................. 164
#ximport .......................... 164
line continuation .............. 159
compound
names ................................. 16
statements .......................... 21
concatenation of strings ........ 20
configuration ....................... 201
const .................................... 141
continue ................. 31, 142, 154
example ............................. 31
copying text ................. 182, 183
costate .................................. 142
costatements .................... 46–51
abort ................................. 137
firsttime ........................... 145
keyword ........................... 142
suspend ............................ 155
syntax ................................ 47
yield ................................. 158
curly braces { } ..................... 21
cursor
execution ................. 187, 188
positioning ............... 179, 184
text ................................... 207
cutting text ........................... 183
D
data structure
272
composites ......................... 26
keyword ............................. 22
nesting ............................... 25
offset of element .............. 119
pass by value ..................... 29
returned by function ........ 128
union .................................. 26
data types ............................... 25
aggregate ........................... 25
primitive ............................ 15
DATAORG ................. 234, 236
DATASEG ............................ 97
date and time ......................... 66
db ......................................... 117
DCW.CFG ........................... 202
DCW.INI ............................. 202
debug ................................... 231
dialog box ........................ 197
disassemble at address ..... 190
disassembled code ........... 190
editor ............................... 198
keyword ........................... 142
memory dump ................. 190
mode ................................ 231
prevention ........................ 186
run-time errors ................... 91
step over .......................... 187
switching modes .............. 184
trace into .......................... 187
update watch expressions 190
watchdog timers ................ 67
declarations ..................... 22, 37
default ............................ 33, 143
demotion .............................. 195
disassemble
at address ................. 190, 203
at cursor ................... 190, 203
display
options ............................. 198
do loop ................................... 30
dot operator ..................... 16, 25
downloading ............................ 3
dump window ...................... 191
dw ........................................ 118
Dynamic C .............................. 3
differences ................. 4, 5, 34
exit ........................... 182, 202
installation ........................... 6
support files ....................... 40
dynamic storage allocation .... 26
E
Edit menu ............................ 182
edit mode ............. 179, 184, 188
editor ....................................... 3
options ............................. 192
EEPROM ................................ 5
else ...................................... 143
embedded assembly 3, 122, 127,
128
embedded quotes ................... 21
End key ............................... 179
EndHeader ....................... 37, 38
enum .................................... 144
EPROM ................................... 4
equ ....................................... 119
errors
editor ............................... 198
error code ranges ............... 91
locating ............................ 184
run-time ..................... 91, 193
ESC key
to close menu ................... 180
examples
break .................................. 31
continue ............................. 31
for loop .............................. 30
modules ............................. 39
of array .............................. 25
union .................................. 26
exit Dynamic C ................... 182
extended memory .... 4, 127, 157
asm blocks ....................... 121
extern ....................... 38, 39, 144
F
file
commands ....................... 181
menu ................................ 180
print ................................. 181
size ................................... 180
file system ..................... 99–113
in primary flash ....... 101, 104
in RAM ............................ 100
multitasking ..................... 100
Find Next <F3> ................... 184
firsttime ............................... 145
float ....................... 23, 145, 157
values ................................. 19
for loop .......................... 30, 145
frame
reference point ................. 128
reference pointer ..... 126, 127,
149, 231
function ................................. 22
assistant ........................... 207
auto variables .................. 139
calls ........... 22, 122, 127, 128
Dynamic C User’s Manual
calls from assembly .........129
chains .........................34, 151
check parameters ..............207
create chains .....................162
entry and exit ...................231
execution time ..................231
headers ...............................40
help .....................................40
libraries ..........................3, 37
prototypes ...............23, 24, 37
returns ..............127, 128, 129
saving registers ................136
stack space .......................231
transferring control ............30
unbalanced stack ..............136
function lookup <CTRL-H> ......
206, 207
G
Global Initialization ...............35
global variables ......................26
goto ........................32, 146, 184
H
hard breakpoints ...................188
header
function ..............................40
module ...................37, 38, 39
Help menu ............................205
hexadecimal integer ...............19
HL ................120, 126, 127, 129
Home key .............................179
horizontal tiling ....................202
I
icons
arranged ...........................202
IEEE floating point ..............145
if ...........................................143
multichoice .........................33
simple .................................32
with else .............................33
information window .....202, 205
init_on ..................................147
insertion point ..............183, 184
Inspect menu ................189, 203
installation
Dynamic C ...........................6
Instruction Set Reference .....208
int ...........................23, 147, 157
integers ...................................19
interrupts ......................130, 136
breakpoints .......................187
Dynamic C User’s Manual
keyword for ISR ...............147
latency ..............................130
toggle state .......................188
vectors ..............................148
ISR ...............................130, 234
IX (index register) 53, 126, 127,
149, 155, 232
K
key module ............................37
keystrokes
<ALT-Backspace>
undoing changes ...........182
<ALT-C>
select Compile menu ....185
<ALT-F>
select File menu ...........180
<ALT-F10>
Disassemble at Address 190
<ALT-F2>
Toggle Hard Breakpoint .....
188
<ALT-F4>
quitting Dynamic C ......182
<ALT-F9>
Run w/ No Polling ........186
<ALT-H>
select Help menu ..........205
<ALT-O>
select Options menu .....192
<ALT-SHIFT-backspace>
redoing changes ............182
<ALT-W>
select Window menu ....202
<CTRL-F10>
Disassemble at Cursor ..190
<CTRL-F2>
Reset Program ..............187
<CTRL-G>
Goto ..............................184
<CTRL-H>
Library Help lookup .....206
<CTRL-I>
Toggle Interrupt Flag ...188
<CTRL-N>
next error ......................184
<CTRL-O>
Poll Target ....................188
Toggle polling ..............188
<CTRL-P>
previous error ...............184
<CTRL-U>
Update Watch window .190
<CTRL-V>
pasting text ...................183
<CTRL-W>
Add/Del Items ..............190
<CTRL-X>
cutting text ...................183
<CTRL-Y>
Reset target ...........185, 188
<CTRL-Z>
Stop ..............................187
<F10>
Assembly window ........202
<F2>
Toggle Breakpoint ........187
<F3>
Find Next .....................184
<F5>
Compile to Target ........185
<F7>
Trace into .....................187
<F8>
Step over ......................187
<F9>
Run ...............................186
keywords .....127, 137, 149, 151,
232
abort .................................137
align .................................138
always_on ........................138
anymem ............................138
asm ...................................139
auto ..................................139
bbram ...............................139
break ................................139
c ........................................140
case ..................................140
char ..................................140
continue ............................142
costate ..............................142
debug ................................142
default ..............................143
do .....................................143
else ...................................143
enum ................................144
extern ...............................144
firsttime ............................145
float ..................................145
for .....................................145
goto ..................................146
if .......................................146
init_on ..............................147
int .....................................147
interrupt ............................147
interrupt_vector ................148
long ..................................148
273
nodebug ........................... 149
norst ................................. 149
nouseix ............................ 149
NULL .............................. 149
protected .......................... 150
return ............................... 150
root .................................. 151
segchain ........................... 151
shared .............................. 151
short ................................. 152
size ................................... 152
sizeof ............................... 152
speed ................................ 152
static ................................ 153
struct ................................ 153
switch .............................. 154
typedef ............................. 154
union ................................ 155
unsigned .......................... 155
useix ................................ 155
waitfor ............................. 155
waitfordone ...................... 156
while ................................ 156
xdata ................................ 157
xmem ............................... 157
xstring .............................. 157
yield ................................. 158
L
language elements .... 13, 16, 20,
137
operators .......................... 165
LIB.DIR ........................ 38, 163
libraries .............................. 3, 36
linking ................................ 36
modules ............................. 37
real-time programming ........ 3
writing your own ............... 37
Library Help lookup ..... 40, 206,
207
linking ..................................... 3
locating errors ..................... 184
long
integer ................................ 19
keyword ........................... 148
lookup function ........... 206, 207
loops ................................ 30, 31
breaking out of .................. 31
do ..................................... 143
for .................................... 145
skipping to next pass ......... 31
M
macros ........... 17, 118, 119, 160
274
restrictions ......................... 19
with parameters ................. 17
main function .. 22, 36, 149, 231
memory
address space ..................... 97
DATAORG ............. 234, 236
dump ................................ 189
dump at address ............... 190
dump flash ....................... 191
dump to file ..................... 191
extended .............. 4, 127, 157
management ............ 138, 151
map .................................... 97
random access ..................... 4
read-only ............................. 4
root .... 98, 119, 120, 151, 234
root keyword ....................... 4
memory management unit . 4, 97
menus
close all open ................... 180
Compile ........................... 185
Edit .................................. 182
File ................................... 180
Help ................................. 205
Inspect ..................... 189, 203
Options ............................ 192
Run .................................. 186
Window ........................... 202
message window ......... 184, 202
metadata .............................. 108
MMU ................................. 4, 97
modes
debug ............... 184, 186, 231
edit ........................... 184, 188
preview ............................ 181
run ........................... 184, 186
modules ..................... 36, 37, 39
body ....................... 37, 38, 39
custom libraries ................. 37
example ............................. 39
header ............ 37, 38, 39, 144
key ..................................... 37
library ................................ 37
mouse .................................. 179
multitasking
cooperative ........................ 43
preemptive ......................... 59
N
names .................................... 16
#define ............................... 16
Next error <CTRL-N> ........ 184
nodebug ...... 115, 149, 187, 190,
196, 231, 232
norst ..................................... 149
nouseix ................................ 149
NULL .................................. 149
O
octal integer ........................... 19
offsets in assembly ..... 119, 126,
127
online help ..................... 40, 208
operators .............................. 165
# and ## (macros) .............. 17
arithmetic operators ......... 166
decrement (--) .............. 168
division (/) ................... 167
increment (++) ............. 168
indirection (*) .............. 167
minus (-) ...................... 166
modulus (%) ................ 168
multiplication (*) ......... 167
plus (+) ........................ 166
pointers ........................ 167
post-decrement (--) ...... 168
post-increment (++) ..... 168
pre-decrement (--) ........ 168
pre-increment (++) ...... 168
assignment operators ....... 169
add assign (+=) ............ 169
AND assign (&=) ........ 170
assign (=) ..................... 169
divide assign (/=) ......... 169
modulo assign (%=) ..... 169
multiply assign (*=) ..... 169
OR assign (|=) .............. 170
shift left (<<=) ............. 169
shift right (>>=) ........... 169
subtract assign (-=) ...... 169
XOR assign (^=) .......... 170
associativity ..................... 165
binary ............................... 165
bitwise operators
address (&) .................. 170
bitwise AND (&) ......... 170
bitwise exclusive OR (^) ...
171
bitwise inclusive OR (|) 171
complement (~) ........... 171
pointers ........................ 170
shift left (<<) ............... 170
shift right (>>) ............. 170
comma ............................. 177
conditional operators (? :) 175
equality operators ............ 172
equal (==) .................... 172
not equal (!=) ............... 172
Dynamic C User’s Manual
in assembly ......................117
logical operators ...............173
logical AND (&&) .......173
logical NOT (!) .............173
logical OR (| |) ..............173
operator precedence .........177
postfix expressions ...........173
( ) parentheses ..............173
[ ] array indices ............173
dot (.) ............................174
parentheses ( ) ..............173
right arrow (->) .............174
precedence .......................165
reference/dereference operators ...............................174
address (&) ...................174
bitwise AND (&) ..........174
indirection (*) ...............175
multiplication (*) ..........175
relational operators ..........171
greater than (>) .............172
greater than or equal (>=) ...
172
less than (<) ..................171
less than or equal (<=) ..171
sizeof ................................176
unary ................................165
optimize size or speed ..........196
options
communications ...............199
compiler ...........................193
debugger ...........................197
display ..............................198
editor ................................192
menu .................................192
precompile ...........................163
precompiler ............................37
preserving registers ......129, 136
Previous error <CTRL-P> ...184
primary register ....120, 127, 129
primitive data types ...............15
print
choosing a printer .....181, 182
print file ...............................181
print preview ........................181
printf 21, 24, 186, 187, 188, 197,
203
program
example ..............................24
flow ....................................30
optimize ...........................196
reset ..................................187
spanning 2 flash .........99, 232
speed ................................232
programmable ROM ................4
project files ..........181, 227–229
promotion .............................166
protected
keyword ...........................150
variables ...............3, 150, 232
prototypes
checking ...........................195
function ..................23, 24, 37
in headers ...........................37
punctuation ............................14
P
Rabbit restart
protected variables ...........150
RAM
static .....................................4
read-only memory ....................4
real-time
programming ........................3
redoing changes ...................182
registers
saving and restoring .........130
shadow .............................260
snapshots ..........................204
variables .............................27
window .....................202, 204
reset
program ............................187
software ............................188
target ................................188
ret .................................127, 130
PageDown key .....................179
PageUp key ..........................179
partitioning ...........................107
passing arguments .29, 122, 127,
128, 129
pasting text ...........................183
periodic interrupt ......51, 60, 65,
239, 250, 259
pointer checking .....................28
pointers ......................20, 27, 29
uninitialized .......................28
poll target .............................188
polling ..........................186, 188
ports
serial .................................199
positioning text ....................184
power failure ........................150
Dynamic C User’s Manual
Q
quitting Dynamic C .............182
R
reti ........................................130
retn .......................................130
return ............127, 128, 150, 154
return address .......................122
ROM ....................................187
programmable ......................4
root memory
assembly functions ...........120
file system usage ..............102
keyword .......................4, 151
memory map ......................97
static variables ...................98
variable address ...............119
RST 28H ......................187, 231
run
menu ................................186
mode ........................184, 186
no polling .........................186
S
sample programs
basic C constructs ..............24
save environment .................202
saving a file ..........................181
search text ............................183
segchain .........................34, 151
SEGSIZE ...............................97
separate I&D space .....117, 190,
195
serial
communication ................199
options ..............................200
shadow registers ..................260
shared ...................................151
shared variables .......3, 150, 232
short .....................................152
show tool bar .......................202
single stepping .....125, 190, 231
with descent .....................187
without descent ................187
size ...............................152, 196
sizeof ....................................152
skipping to next loop pass .....31
slave port ................................69
slice statements ......................59
soft breakpoints ............187, 188
software
libraries ........................36, 37
reset ..................................188
source window .....................202
SP (stack pointer) 122, 128, 129,
136, 163
special characters ...................21
special symbols
275
in assembly ...................... 119
speed .................... 152, 196, 232
stack ..... 29, 126, 128, 129, 130,
136, 139, 149, 231
checking .................. 231, 232
frame ........ 122, 128, 129, 136
frame reference point ...... 128
frame reference pointer .. 126,
127, 149, 231
pointer (SP) .... 122, 128, 129,
136, 163
snapshots ......................... 204
window ............................ 204
STACKSEG .......................... 97
state machine
example ............................. 45
statements .............................. 21
static .................................... 153
RAM .................................... 4
variables .............. 5, 119, 122
status register (F) ................. 204
Stdio window ...... 197, 202, 203
STDIO_DEBUG_SERIAL . 197
step over .............................. 187
stop bits ............................... 199
stop program execution ....... 187
storage class .......................... 22
auto .................................... 26
default .................................. 5
register ......................... 26, 27
static .................................. 26
strcpy ................................... 207
strings ............................ 20, 157
concatenation ..................... 20
functions ............................ 20
terminating null byte ......... 20
struct keyword ..................... 153
structure
composites ......................... 26
keyword ............................. 22
nesting ............................... 25
offset of element .............. 119
pass by value ..................... 29
return space ..... 122, 128, 129
returned by function ........ 128
union .................................. 26
subscripts
array ................................... 25
support files ........................... 40
switch .................... 33, 143, 154
breaking out of .................. 31
case .................................. 154
switching to edit mode ........ 184
symbolic constant ................ 160
276
T
target
communications .............. 199
configuration ................... 201
targetless compilation ......... 185
TCP/IP ................................. 199
text cursor ............................ 207
text editing ........................... 182
text search ........................... 183
tiling windows ..................... 202
toggle
breakpoint ................ 187, 188
interrupt flag .................... 188
polling ............................. 188
toggle polling ...................... 188
toolbar ................................. 202
trace into .............................. 187
type
casting ............................. 166
checking .................... 23, 195
definitions .................... 23, 24
typedef ..................... 23, 24, 154
U
unary operators .................... 165
unbalanced stack ................. 136
undoing changes .................. 182
uninitialized
pointers .............................. 28
union ........................ 22, 26, 155
unpreserved registers ... 129, 136
unsigned .............................. 155
unsigned integer .................... 19
untitled files ......................... 181
USB ..................................... 200
USE_2NDFLASH_CODE ... 99,
232
useix .................... 126, 155, 231
Utility Programs
Font/ Bitmap Converter ... 263
Library File Encryption ... 263
Rabbit Field Utility ......... 264
warning reports ................... 195
watch expressions
add or delete .................... 189
evaluate button ................ 189
watch menu option .......... 203
watch window ................. 190
window ............................ 202
wfd ...................................... 156
while ........................ 21, 30, 156
Window menu ..................... 202
windows
assembly .......... 125, 202, 203
cascaded .......................... 202
information .............. 202, 205
message ........................... 202
register ..................... 202, 204
stack ......................... 202, 204
Stdio ................ 197, 202, 203
tiled horizontally ............. 202
tiled vertically .................. 202
watch ............... 190, 202, 203
X
xdata .................................... 157
xmem ........................... 127, 157
asm blocks ....................... 121
XPC ............................... 97, 234
xstring .................................. 157
Y
yield ..................................... 158
V
variables
auto .................................. 139
global ................................. 26
static ................................ 153
vertical tiling ....................... 202
W
waitfor ................................. 155
waitfordone ......................... 156
Dynamic C User’s Manual