1
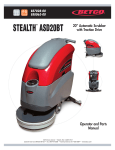
E29961-00
E29962-00
E29963-00
STEALTH DRS21BT
™
21” MicroRider
Automatic Scrubber
Operator Manual
1001 Brown Avenue • Toledo, Ohio 43607-0127
Customer Service: 888-GO-BETCO • Fax: 800-445-5056 • Technical Service: 877-856-5954 • www.betco.com
1
TABLE OF CONTENTS
RECEIVING THE MACHINE............................................. 3
TECHNICAL SPECIFICATIONS......................................... 4
GENERAL SAFETY REGULATIONS.................................. 5
MACHINE PREPARATION.........................................6 - 14
OPERATION...........................................................15 - 16
AT END OF WORK......................................................... 17
DAILY MAINTENANCE............................................18 - 19
WEEKLY MAINTENANCE............................................... 20
IRREGULAR MAINTENANCE......................................... 21
TROUBLESHOOTING.................................................... 22
CHOOSING AND USING THE BRUSHES....................... 23
STEALTH BRUSH OPTIONS AND COMMON PARTS..... 23
WARRANTY.................................................................. 24
2
RECEIVING THE MACHINE
Immediately check, when receiving the machine, that all the materials indicated on delivery documents have been received and
also that the machine has not been damaged in transit. If it has been damaged, this damage must be immediately reported to
the shipper and also to our customer service department. Only acting promptly in this manner will make it possible to receive
missing material and to be compensated for damage.
INTRODUCTION
Serial # Plate
This is an automatic scrubber which, via the mechanical action of the
rotating brush and the chemical action of a water/detergent solution,
can clean many types of hard flooring. As it advances, it also collects
the dirt removed and the detergent solution not absorbed by the
floor.
The machine must be used only for this purpose. Even the best
machines will only work well if used correctly and kept in good working order. We therefore suggest you read this instruction booklet
carefully and re-read it whenever difficulties arise while using the
machine. Please contact our technical service department or your
dealer if you have any questions about the machine.
SYMBOLS USED ON THE MACHINE
Main Key Switch Symbol. Used on the
control panel to indicate the key switch
position for ON or OFF.
Solution Flow Control Symbol. Used on
the steering column to indicate the knobs
for adjusting the amount of water distributed to the brush deck.
ECO Mode Button. Indicates button that
activates the ECO mode of the machine.
Recovery Tank Discharge. Indicates location of the recovery tank drain hose.
Brush Uncoupling Button. Indicates button used to uncouple the brush.
Gradient Symbol. Indicates the maximum
operating gradient.
Forward/Reverse Button. Indicates button
to engage the reverse gear.
Solution Tank Discharge. Indicates location of the solution tank drain hose.
Horn Symbol. Symbol denoting the audible
horn button.
3
TECHNICAL DESCRIPTION Measurement Unit
Stealth™ DRS21BT MicroRider
Working Width
Inches
21
Rear Squeegee Width
Inches
28
Sq. Ft. / Hour
31,000
Brush & Pad (diameter)
Inches
21
Brush Speed
RPM
140
Brush Pressure
Lbs.
35
V / HP
24 / 0.6
Work Capacity
Brush Motor
Drive Type
Automatic
Vacuum Motor
V / HP
24 / 0.42
Vacuum Motor Suction
mbar
700
Solution Tank Capacity
Gallons (L)
17 (65)
Recovery Tank Capacity
Gallons (L)
20 (75)
Weight of Machine (excluding batteries)
Lbs.
240
Batteries
V / A
12 / 130 (2) or 12 / 110 (2)
Charger
V / A
24 / 12
Inches
52 / 26 / 47
dBA
54
Machine Dimensions (Length/Width/Height)
Noise Level
4
GENERAL SAFETY REGULATIONS
The regulations below must be carefully followed in order to avoid harm to the operator and damage to the machine.
• Read all labels on the machine carefully. Do not cover them for any reason and replace them immediately if they become
damaged.
• The machine must be used exclusively by authorized and trained personnel.
• When operating the machine be careful of other people.
• The machine is not designed for cleaning carpets.
• The power cable outlet must be provided with a proper ground.
• Avoid damaging the power cable of the battery charger by crushing, bending, cutting or stressing it.
• Whenever the power cable of the battery charger is damaged, immediately contact a BETCO service center.
• Do not mix different types of detergent as this may produce harmful gases.
• Do not set containers on the machine.
• Machine storage temperature is between -10°F and 130°F, never store outside under humid conditions.
• Operating conditions: room temperature between 33°F and 100°F with relative humidity between 30% to 95%.
• Only use the machine in closed areas and do not expose it directly to rain.
• Never use the machine in an explosive environment.
• Do not use the machine as a means of transport.
• Never use acidic chemicals which could damage the machine.
• Avoid running the brushes with the machine stopped; this could damage the floor.
• Never vacuum up flammable liquids.
• Never use the machine to gather dangerous powders.
• Use a powder fire extinguisher in case of fire. Do not use water.
• Do not hit against shelving or scaffolding. The operator must always be equipped with the appropriate safety device
(gloves, shoes, helmet, glasses, etc.)
• Do not use the machine on surfaces with an inclination greater than the one shown on the serial plate.
• The machine is designed to wash and dry floors simultaneously. Signal the presence of wet floors with suitable signs.
• If the machine does not work properly, perform routine maintenance. Otherwise, request the assistance of the BETCO technical service.
• When replacing parts ask for ORIGINAL spare parts from your Authorized BETCO Dealer and/or Retailer.
• Always turn off the machine and disconnect the battery connector whenever maintenance is performed.
• Never remove guards that require tools for removal.
• Never wash the machine with direct or pressurized jets of water or with corrosive substances.
• Have your BETCO service center check the machine once a year.
• To prevent the formation of scale in the solution tank filter, do not store the machine with detergent solution in the tanks.
• Before using the machine make sure that all doors and covers are positioned as shown in this operating and maintenance
manual.
• When your BETCO machine is ready to be retired, the machine must be disposed of properly. It contain oils and electronic
components. The machine was built using totally recyclable materials.
• Use only brushes furnished with the machine or those specified in the user's manual. Use of other brushes can compromise safety.
• When removing the battery, unplug the battery connection, unplug the charger and disconnect the battery terminals.
• Before recycling the machine, remove the battery.
5
MACHINE PREPARATION
1. HANDLING THE PACKED MACHINE
The machine is contained in specific packaging with a pallet for handling with
fork trucks. The packages cannot be placed on top of each other. The dimensions of the packaging is as follows:
A: 47”
B: 26”
C: 52”
• Remove the outer package.
• The machine is fixed to the pallet with wedges which block the wheels.
• Disengage the electronic brake, turn the lever (1) (on the rear right-hand
side of the machine) clockwise.
• Remove the wedges.
• Use a ramp to get the machine down from the pallet, pushing it backward.
• Do not assemble the rear squeegee before unloading the machine, and avoid
violently jolting the brush head. To assemble the squeegee, read the “ASSEMBLING THE SQUEEGEE” paragraph.
• Keep the pallet for any future transport needs.
WARNING: During this operation, check there are no people or
objects near the machine.
2. HOW TO MOVE THE MACHINE
• Check the solution tank and recovery tank are empty; if necessary, empty
them.
• Check that the brush head and squeegee are in the raised position.
• Place it on a pallet using a ramp.
• Check that the key switch is in the "0" position and remove the key.
• Secure the machine to the pallet using wooden wedges.
• Engage the electronic brake.
6
MACHINE PREPARATION
3. HOW TO TRANSPORT THE MACHINE
The instrument panel components are identified as follows:
1. Level indicator for battery/hour meter
2. Horn button
3. Reverse button
4. Brush coupling/uncoupling button
5. "ECO" function button
4. STEERING COLUMN ELEMENTS
The elements on the left side of the steering column are:
6. Squeegee body lifting lever
7. Brush head body lifting lever
8. Detergent solution adjustment lever
9. Main key switch
5. FOOTBOARD ELEMENTS
The components on the front right part of the footboard are:
10. Drive pedal
7
MACHINE PREPARATION
The components on the rear part of the footboard are:
11. Emergency button
12. Detergent solution level tube
13. Recovery tank release button
6. SIDE MACHINE ELEMENTS
The elements on the left-hand side of the machine are:
14.Solution Sink Fill Hose
15.Measuring Cup Filling Port
7. REAR MACHINE ELEMENTS
The elements on the rear of the machine are:
16.Recovery tank cover
17.Blinking light (optional)
18.Recovery tank drain pipe
19.Squeegee vacuum tube
8
MACHINE PREPARATION
8. FRONT MACHINE ELEMENTS
20.Solution Filter
21.Solution Tank Drain Port
9. TYPE OF BATTERY
To power the machine you can use:
• Wet batteries
• AGM batteries
• Gel batteries
OTHER TYPES MUST NOT BE USED.
The maximum dimensions and the weight are:
Width 6.7 in (171 mm)
Length 12.9 in (329 mm)
Height 9.6 in (245 mm)
Weight 68 lb. (31 kg)
WARNING: Your charger must be set according to the type of battery you install. Call BETCO customer service to ensure correct
charger setting after replacement batteries are installed.
• The batteries must be handled using lifting and transportation means suitable
for the weight and dimensions.
• They must be lifted by the handles on the upper part.
• They must be connected together in series, to obtain an overall voltage of
24V on the lugs.
• The electrical connection operations must be carried out by certified trained
personnel.
9
MACHINE PREPARATION
10. BATTERY CONNECTION AND BATTERY CONNECTORS
1. Open the battery compartment by pressing the lock device.
2. Connect the battery cable (2) to the machine connector (1)
3. Lock the seat back into position.
WARNING: All installation and maintenance operations must be
carried out by trained personnel.
11. BATTERY CHARGER CONNECTION
To prevent permanent damage to the batteries, it is essential to avoid their
complete discharge. Recharge the batteries within a few minutes of seeing the
"discharged batteries" blinking light.
WARNING: Never leave the batteries completely discharged, even
if the machine is not being used. Check the battery charger is
suitable for the batteries installed, in terms of both capacity and
type.
To connect the battery charger you must:
1. Move the machine near to the battery charger.
2. Make sure the recovery tank is empty, otherwise empty it completely.
3. Check the key switch is on “0”; if this is not the case, turn the key of the
main switch counterclockwise to “0”.
4. Press the button (1) to release and rotate the recovery tank.
5. Tilt the recovery tank all the way back.
6. Disconnect the battery connections to the machine.
7. Connect the battery charger cable to the battery connector.
8. Close the recovery tank until the gas spring (2) is resting on the solution
tank.
WARNING: Keep the recovery tank open for the duration of the battery recharging cycle to allow gas fumes to escape.
WARNING: Danger of gas exhalation and leakage of corrosive
liquids.
WARNING: Danger of fire, do not go near flames.
10
MACHINE PREPARATION
12. BATTERY CHARGE LEVEL INDICATOR
On the instrument panel of the machine there is a monitor (1) indicating
(amongst other things) the battery charge status. If the lower line contains ten
light indicators, the battery charge level is 100%. If the battery charge percentage is at 00% and flashing, this means the batteries are discharged.
WARNING: A few seconds after the battery charge level reaches
20%, the brush motor switches off automatically. With the remaining charge it is still possible, however, to complete the drying
process before recharging.
WARNING: A few seconds after the battery charge level reaches
10%, the vacuum motor switches off automatically. With the remaining charge, it is still possible, however, to move the machine
to the location designated for its recharging.
13. HOUR METER
On the machine's instrument panel there is a display (1) indicating the total
machine usage time. The top line shows the hours and minutes of functioning.
The flashing “:” symbol Indicates that the hour meter is counting the machine
functioning time.
14. FORWARD WORK SPEED
This machine is equipped with electronic traction control. To move the machine,
turn the key to “ON - I” then press the drive pedal (1), adjusting the speed by
altering the amount of pressure on the pedal.
To move the machine backwards, press the button (2) on the instrument panel,
then immediately press the pedal (1). Adjust the speed by altering the degree of
pressure on the pedal.
WARNING! The reverse speed is lower than the forward speed to
comply with current health and safety standards.
15. SOLUTION TANK
The recovery tank must be completely empty each time the solution tank is
filled. Remove the inlet cap (1) located on the left side of the machine.
WARNING: The recovery tank must be completely empty each time
the solution tank is filled.
Check that the solution filter cap (2), under the solution tank in the front right of
the machine, is properly closed.
Check that the solution tank drainage tap (3) (under the solution tank in the right
part of the brush head body) is well closed.
11
MACHINE PREPARATION
16. FILLING THE SOLUTION TANK
The solution tank can be filled in two different ways:
1. Remove the measuring cup (1) and filling with a hose.
2. Using the sink fill hose (2) attached to any standard sink fixture.
Remove the measuring cup (1) and fill with clean water at a temperature no
greater than 120 degrees F. The amount of water inside the tank can be seen
through the sight level gauge on the front left of the seat. The solution tank has
a maximum capacity of 17 gallons. Add liquid detergent to the tank in the concentration indicated by the manufacturer. The formation of excess foam could
damage the vacuum motor, so use only the minimum amount of detergent that
is necessary.
WARNING: Only use Betco detergents suitable for scrubbing machines. Do not use acid or alkaline products or solvents without
this indication. pH values between four and ten are acceptable
as long as the detergent does not contain oxidizing agents, chlorine, bromine, formaldehyde, or mineral solvents.
WARNING: Protective gloves should always be worn before handling detergents or acidic or alkaline solutions to avoid serious
injury to hands.
WARNING: Always use low foam detergent. To avoid the production of foam, before starting to clean, put a minimum quantity of
anti-foam liquid into the recovery tank. Do not use pure acids.
17. SOLUTION FLOW ADJUSTMENT
First, fully open the solution valve using the lever (1) on the steering column.
During the first few feet of operation, check that the amount of solution is sufficient to wet the floor. The amount of solution flow can be adjusted using the
lever (1). Moving the lever downward will increase solution flow and moving
the lever upward will decrease solution flow. The correct amount of solution
depends on the nature of the floor, degree of dirt, and forward speed.
18. RECOVERY TANK
Make sure the recovery tank is empty, otherwise empty it completely.
Check the cap of the drainage tube (2) (on the rear of the machine) is correctly
closed.
19. ASSEMBLING THE SQUEEGEE
For packaging reasons, the squeegee comes disassembled from the machine
and must be installed prior to use.
1. Lift the squeegee, turning the left-hand lever (3) to move it clockwise.
2. Turn the main switch key counterclockwise to the "0" position.
12
MACHINE PREPARATION
3. Remove the key from the instrument panel.
4. Loosen the knobs (2) and (3) in the squeegee pre-assembly.
5. Insert the left-hand squeegee pin in the left-hand slit of the squeegee connection, then tighten the knob (2), making sure the washer and spring adhere in
the upper part of the squeegee support.
6. Insert the right-hand squeegee pin in the right-hand slit of the squeegee connection, then tighten the knob (3), making sure the washer and spring adhere
in the upper part of the squeegee support.
7. Insert the vacuum hose (4) in the squeegee sleeve.
WARNING: The pedal must be released and unlocked before lifting
the base into transport mode.
20. ADJUSTING THE SQUEEGEE INCLINATION
During working operation, the rear rubber is slightly tilted backwards (by about
5mm) in a uniform way for its whole length. If you need to increase the bend
of the rubber in the central part, you must tilt the squeegee unit. To do this,
proceed as follows:
1. Loosen the locknut (1).
2. Turn the screw (2) clockwise to increase the bend of the rubber in the central
part of the squeegee.
3. When fully adjusted, fix the locknut (1).
21. ADJUSTING THE SQUEEGEE HEIGHT
The height of the squeegee assembly must be adjusted according to the wear on
the squeegee blades.
Carry out the following operations for adjustment:
1. Unscrew the locking nut.
2. Raise or lower the wheel (5) by sliding it on the slot of the support.
3. Block it by tightening the locking nut once the required height is reached.
For proper operation, completely lower the squeegee and put a 1/8" spacer under
the wheel. Then tighten the wheel in position.
22. ASSEMBLING THE BRUSHES
To assemble the brushes of the brush head body, proceed as follows:
1. Lift the base by turning the right lever (6) to move the base counterclockwise
2. Turn the main switch key clockwise to the "1" position
WARNING: During this operation, check there are no people or
objects near the brush.
13
MACHINE PREPARATION
3. Position the brush on the floor, near the machine brush head.
4. Lower the brush head, turning the right-hand lever (6) to move it clockwise.
5. Press the brush release button (2) intermittently.
WARNING: During this operation, check there are no people or
objects near the brush.
WARNING: Check the brush is correctly inserted. If this is not the
case, the machine could move in an irregular, sudden manner.
23. BLINKING LIGHT (OPTIONAL)
The machine can be equipped with a blinking light that turns on automatically
when the key in the main switch is turned on.
14
MACHINE OPERATION
24. PREPARING TO WORK
Before beginning to work, it is necessary to:
1. Make sure the recovery tank is empty, otherwise empty it completely.
2. Check the key switch (3) is on “0”; if this is not the case, turn the key of the
main switch counterclockwise to “0”.
3. Connect the battery connector (2) to the electric system connector (1).
4. Check the electronic brake (4) is engaged.
5. Sit on the driver’s seat.
6. Turn the key of the main switch a quarter of a rotation clockwise (to position
ON). The display on the instrument panel will immediately come on.
7. When the machine is turned on, three consecutive screens are displayed on
the digital panel. The first screen shows the machine name on the top line
and the program release number is shown on the bottom line.
8. The second screen will show the total run time on the top line and the bottom line will see what type of battery the machine has been set for, in this
case it is gel batteries.
9. The third and last screen will display the battery charge status and the total
run time of the machine. When the batteries are fully charged, the bottom
line contains ten light indicators. As the batteries discharge, the indicator bars will go out and when the batteries are fully discharged the battery
outline will begin flashing.
10. Move the solution control lever (5) downward to adjust the desired amount
of solution flow.
11. Lower the brush head by turning the right lever (6) clockwise, then lower the
squeegee turning the left lever (7) counterclockwise.
WARNING: As soon as the forward movement pedal is activated
with the brush head in its work position, the solenoid valve will
start working and will begin dispensing detergent solution. As
soon as the squeegee is in its work position, the vacuum motor
will switch on and being working.
12. Press the accelerator pedal (8) to start moving the machine.
WARNING: To stop the machine, remove your foot from the accelerator (8). The machine will begin to stop.
15
MACHINE OPERATION
13. To drive the machine in reverse, press the arrow button (9) on the steering
wheel. Once finished traveling in reverse, press the arrow button (9) again
to switch the drive gear into forward.
WARNING: During reverse movements, the squeegee must be lifted
off the floor.
During the first few feet of operation, check to see that there is sufficient solution and that the squeegee is drying well.
25. "ECO" DEVICE
The machine is equipped with an "ECO MODE" function which reduces the
energy consumption of the machine and increases capacity. Press the "ECO
MODE" button (1) on the steering wheel to activate this function. The battery
display will show the word "ECO". When this function is activated, power to the
vacuum motor and brush motor is reduced, thereby reducing the noise level
of the machine. Just press the button (1) again to deactivate the "ECO MODE"
function.
26. OVERFLOW DEVICE
There is a mechanical float device that shuts off air to the vacuum motor when
the recovery tank is full. The sound of the vacuum motor will be deeper when
this happens. In this case, raise the brush deck and squeegee off the floor using
the levers on the steering column. Then empty the recovery tank using the drain
hose (1). It is good practice to always drain the recovery tank when refilling the
solution tank.
27. EMERGENCY BUTTON
If there are any problems while you are working, press the emergency stop button (1) beneath the seat. This will interrupt the electric circuit between the batteries and the machine so the machine stops and the electric brake is triggered.
To resume work, witch off the key (2), pull out the emergency stop button (1),
and then switch the key back on again (2).
16
AT THE END OF WORK
28. END OF WORK
At the end of the work, and before carrying out any type of maintenance, perform the following operations:
1. Close the solution valve by moving the knob (1) upward.
2. Lift the brush head by turning the right lever (2) counterclockwise, then
lift the squeegee turning the left lever (3) clockwise. The vacuum motor
switches off after a few seconds.
WARNING: If you raise the brush head in ECO mode, the vacuum
motor will return to standard mode to ensure the floor is properly
dried.
3. Bring the machine to the place provided for draining the water.
4. Turn the machine off by turning the key one quarter turn counterclockwise
and remove it from the panel.
WARNING: Before performing any maintenance, remove the keys
from the panel and disconnect the battery connector of the machine.
5. Disconnect the drain hose (4) from its carriage and unscrew the cap to
empty the recovery tank.
WARNING: Always wear gloves when doing this operation to protect yourself from contact with hazardous chemicals.
Remove the vacuum hose from the squeegee shoe (5).
Remove the squeegee from the carriage by unscrewing the hand wheels (7).
Clean the squeegee body and rubber blades with a jet of water.
After cleaning the squeegee assembly, replace the squeegee on the carriage.
First insert the left of the squeegee assembly to the left slot on the carriage,
the insert the right pin in the same manner. Be sure to keep the spring and
washer on top of the squeegee carriage plate. Tighten the hand wheels to
lock the squeegee in place.
10. Finally, reattach the vacuum hose to the squeegee shoe (5).
6. 7. 8. 9. 11. If you need to empty the solution tank, move the solution lever (1) downward.
12. Lower the brush deck using the lever on the steering column.
13. Move the drain hose (8) outside of the brush deck.
14. Rotate the valve (8) counterclockwise and wait until the solution tank is
empty.
15. Close the valve (8) and place the hose back on top of the brush deck.
16. Raise the brush deck using the lever on the steering column.
17
DAILY MAINTENANCE
PERFORM ALL MAINTENANCE OPERATIONS IN SEQUENCE
29. CLEANING THE RECOVERY TANK
1. Remover the recovery drain hose (1) from its carriage and empty the recovery tank.
2. Press the release button (2) to raise the recovery tank.
WARNING: Before performing any maintenance, remove the keys
from the panel and disconnect the battery connector of the machine.
WARNING: Always wear gloves when doing this operation to protect yourself from contact with hazardous chemicals.
3. Lift the recovery tank until the piston is resting on the solution tank.
4. Remove the recovery tank lid (3) and place it on the rear part of the machine
for storage.
5. Rinse the recovery tank with clean water.
6. Replace the cap on the drain hose and then replace the recovery tank lid.
7. Press down to lock the solution tank back into place.
WARNING: Be careful not to spray water directly on to the shut off
float as this would allow water to enter the vacuum motor.
30. CLEANING THE RECOVERY TANK FLOAT
1. Press the release button (1) to raise the recovery tank.
2. Lift the recovery tank until the piston is resting on the solution tank.
3. Remove the recovery tank lid (3) and place it on the rear part of the machine
for storage.
4. Remove the float pre-assembly (3) by rotating it counterclockwise.
5. Remove the float cover (4).
6. Remove the vacuum filter (5) from the float body.
7. Clean the filter and float body with a jet of water.
8. Reassemble all the elements.
18
DAILY MAINTENANCE
31. CLEANING THE SQUEEGEE
Careful cleaning of the vacuum system ensures better drying and cleaning of the
floor. Proceed as follows for cleaning:
1. Remove the vacuum hose from the squeegee shoe (1).
2. Remove the squeegee assembly from the carriage by unscrewing the hand
wheels (3).
3. Use a damp cloth to clean the squeegee blades and also clean the inside of
the squeegee body.
WARNING: Always wear gloves when doing this operation to protect yourself from contact with hazardous chemicals.
4. Check the wear of the squeegee blades. If the end of the blade is worn or
damaged, it can be rotated to use all four edges. To remove the wiping
blade, turn the wing nuts (4) to horizontal position. Remove the plastic
retaining blade (5) and then remove the squeegee blade to turn it over or
replace it.
5. Clean the squeegee shoe. To do this, remove it from the squeegee body by
turning the knobs (8) counterclockwise.
6. Reassemble the squeegee shoe on the vacuum body.
7. After cleaning the squeegee assembly, replace the squeegee on the carriage.
First insert the left of the squeegee assembly to the left slot on the carriage,
the insert the right pin in the same manner. Be sure to keep the spring and
washer on top of the squeegee carriage plate. Tighten the hand wheels to
lock the squeegee in place.
8. Finally, reattach the vacuum hose to the squeegee shoe (5).
32. CLEANING THE SOLUTION TANK FILTER
Cleaning of the solution tank filter will ensure proper solution dispensing. Proceed as follows for cleaning:
1. Turn the main key switch to "0".
2. Open the filling cap (1).
WARNING: Before performing any maintenance, remove the keys
from the panel and disconnect the battery connector of the machine.
WARNING: Always wear gloves when doing this operation to protect yourself from contact with hazardous chemicals.
2. Close the solution valve by moving the solution control knob upward.
4. Remove the filter cap (2) from the front of the machine.
5. Remove the internal filter cartridge and rinse everything thoroughly with
clean water.
6. Reassemble all of the components.
19
WEEKLY MAINTENANCE
33. CLEANING THE VACUUM HOSE
Whenever the vacuum seems to be unsatisfactory, check that the vacuum hose
is not obstructed. If necessary, clean with a jet of water as follows:
1. Make sure the recovery tank is empty, otherwise empty it completely
2. Make sure the main key switch is on "0"
3. Disconnect the vacuum hose from the squeegee shoe (1).
WARNING: Always wear gloves when doing this operation to protect yourself from contact with hazardous chemicals.
4. Disconnect the vacuum hose from the seat on the recovery tank (2)
5. Clean the hose with a jet of water from the end that was connected to the
tank.
6. Reassembly all of the components.
20
IRREGULAR MAINTENANCE
34. REPLACING THE FRONT SQUEEGEE BLADE
Vacuum will be poor and the machine will not dry well if the front squeegee rubber
is worn. To replace:
1. Check that the main key switch is on "0".
2. Disconnect the squeegee assembly by loosening the hand wheels (1).
WARNING: Before performing any maintenance, remove the keys
from the panel and disconnect the battery connector.
3. Turn the wing nuts (2) to a horizontal position.
4. Remove the plastic retaining blade (3).
5. Remove the front squeegee blade (4) and replace it.
6. Reassemble all of the components.
WARNING: Always wear gloves when doing this operation to protect
yourself from contact with hazardous chemicals.
35. REPLACING THE REAR SQUEEGEE BLADE
If the rear wiping squeegee blade is worn and does not dry well, it is possible to
flip the blade over to use one of the four other edges. This can be done with the
squeegee assembly removed, proceeding as follows:
1. Check that the main key switch is on "0".
2. Remove the squeegee assembly by loosening the hand wheels (1).
WARNING: Before performing any maintenance, remove the keys
from the panel and disconnect the battery connector.
3. Turn the wing nuts to a horizontal position (2).
4. Remove the plastic retaining blade (3).
5. Remove the rear squeegee blade to turn it over or replace it.
6. Reassemble all of the components.
7. Adjust the height of the squeegee (see "Adjusting Height Of The Squeegee").
WARNING: Always wear gloves when doing this operation to protect
yourself from contact with hazardous chemicals.
21
TROUBLESHOOTING GUIDE
36. THE MACHINE DOES NOT START
1. Check that batteries are charged.
2. Make sure the electric system connector is connected to the battery connector.
3. Check the key switch is ON/I.
37. INSUFFICIENT WATER ON THE BRUSHES
1. Check there is water in the solution tank.
2. Check that the solution flow adjustment knob is open (1).
3. Clean the solution filter (2) located at the front of the machine.
38. THE SQUEEGEE DOES NOT DRY PERFECTLY
1. Check the squeegee body is clean.
2. Check the squeegee setting (see "Machine Preparation").
3. Check the entire vacuum unit (see "Weekly Maintenance").
4. Replace the squeegee blades, if worn.
39. THE MACHINE DOES NOT CLEAN WELL
1. Check the state of wear and tear on the brushes or pad, and if necessary,
replace them. If using brushes, they should be replaced when the bristles are
about 5/8" long. Working with worn brushes or pads may cause damage to
the floor.
2. Use a more aggressive brush or pad for cleaning. For cleaning floors where
the dirt is particularly resistant, a specific Betco detergent will help with cleaning.
40. EXCESSIVE FOAM PRODUCTION
1. Verify that low foam detergent is being used
2. Verify that the detergent is being diluted at the proper ratio
3. If necessary, add a small quantity of de-foaming liquid to the recovery tank.
4. When the floor is not very dirty, more foam will be generated. In this case, the
detergent may need to be diluted to a lower concentration.
41. THE VACUUM MOTOR DOES NOT FUNCTION
1. Check that the recovery tank is not full, if necessary, empty it.
2. Check the float shut off system (see "Daily Maintenance").
41. THE BRUSH MOTOR DOES NOT FUNCTION
NOTE: To avoid damaging the floor, the brush motor only starts up
when the machine is moving forward.
1. Check that the brush deck is lowered.
2. Verify that the operator is properly positioned in the operator seat.
3. Check the correct connection of the motor to the terminal under the footboards.
22
CHOOSING AND USING THE BRUSHES
POLYPROPYLENE BRUSH
Used on all types of floors. Good resistance to wear and hot temperatures (no greater than 140° F). The polypropylene brush is nonhygroscopic and therefore retains it characteristics in wet working conditions.
NYLON BRUSH
Used on all types of floors. Excellent resistance to wear and hot temperatures (no greater than 140° F). The nylon brush is hygroscopic and tends to lose its characteristics over time when working in wet conditions.
ABRASIVE BRUSH
The bristles of this type of brush contain highly aggressive abrasives. It is used to clean very dirty floors. To avoid floor damage,
work only with the brush pressure that is necessary.
THICKNESS OF THE BRISTLES
Thicker bristles are more rigid and are therefore used on smooth floors or floors with very shallow joints. On uneven floors, or those
with deep joints, it is advised to use softer bristles which can flex to enter the joints more easily. Remember that when the bristles are
worn and too short, they will become more rigid and will no longer penetrate into the deep joints.
PAD DRIVER
The pad holder is recommended for cleaning shiny surfaces. There are two types of pad holder:
1. The traditional pad holder is fitted with a series of pad gripping points that hold the pad in place and drag the pad along as it works.
2. The center-lock pad holder not only has the gripping points, but also has a center locking device that hold the pad in place and
prevent it from becoming detached during use. The center lock style pad holder is recommended for all machines that use more
than one pad.
23
BETCO US WARRANTY POLICY
10 year coverage
3 Year Coverage
1 Year Coverage
Subject to the conditions stated below,
Betco warrants parts and labor on
rotationally molded polyethylene tanks/
housings and injection molded vacuum
head assemblies to be free from defects
in materials and workmanship for
a period of ten years to the original
purchaser.
Subject to the conditions stated below,
Betco warrants parts and labor on all
other Betco components to be free from
defects in materials and workmanship
for a period of three years to the original purchaser.
Subject to the conditions stated below,
Betco offers a limited warranty on parts
and labor on the following equipment:
parts and accessories to be free from
defects in materials and workmanship
for a period of one year to the original
purchaser.
• PowerUp™ 14 Upright Vacuum: #E29990-00
• Bac Pac Lite Vacuum: #85903-00
• FiberPRO® Floor Dryer: #85507-00
• WORKMAN™ Series Vacuums:
#85024-00, #85025-00, #83012-00,
#85027-00
• All Tools and Accessories
• All Battery Chargers
• All Batteries are pro-rated for 1 year
Allowable Travel Time Warranty Reimbursement:
Eligible equipment: All battery and propane powered equipment products. Warranty period: 90 days from date of sale to the
original purchaser. A maximum 180 mile round trip at 50 cents per mile will be allowed for warranty consideration.
Propane Machine Warranty:
Kawasaki engines are warranted by Kawasaki for a period of 2 years against manufacturer defects. All other components
(except wear items)* are warranted by Betco for a period of 3 years.
*Wear Items exempt from Warranty consideration include but may not be limited to: power cords, transport wheels,
vacuum bags, belts, squeegee blades, pad drivers, clutch plates, handle grips, filters, screens, throttle cables, brushes
and carbon brushes.
Subject to the conditions and exceptions stated in this warranty, Betco warrants the Betco products to be free from defects in
material and workmanship, under normal use and service, for the periods listed under the warranty policy to the original purchaser. At any time during the warranty period, Betco will furnish replacement parts for the Betco parts to the original purchaser. Such parts will be furnished and charged including transportation costs, to the original owner through any Betco authorized
Service Distributor. If the original part is returned within the warranty policy period from date of delivery for inspection by
Betco and is found to be defective the owner will be credited for the cost of replacement parts plus shipping and handling.
Replacement parts that have become defective through wear or abuse are not included in this warranty.
This warranty does not apply to damage or defect caused by accident, misuse. Negligence, fire, or to any Betco product which
has been serviced or repaired by other than an authorized Betco Service Distributor or Betco factory personnel. This warranty
is void if products are used for any purpose other than that which was intended. There are no other warranties expressed or
implied. In no event shall Betco be liable for incidental or consequential damages or any damage to person or property. (Please
note some states do not allow the exclusion or limitations for incidental and consequential damages).
24
1001 Brown Avenue • Toledo, Ohio 43607-0127
Customer Service: 888-GO-BETCO • Fax: 800-445-5056 • Technical Service: 877-856-5954 • www.betco.com
92163-92 Nov15B