Download INSTRUCTION MANUAL LT-80
Transcript
MAINTENANCE
TIP REPLACEMENT AND DRESSING
Tip can be changed or replaced simply by unscrewing the knurled nut barrel assembly.
Tip station must be switched off and allowed to cool before this operation as damage may
result if the system is left on without the tip inserted.
After removing the tip, blow out any oxide dust that may have formed in the tip retaining area
of the barrel. Be careful to avoid getting dust in your eyes. Replace the tip and screw back
the knurled nut barrel assembly using only firm hand pressure to tighten. Pliers should only
be used to tighten the nut to avoid burning your fingers, but care should be taken not to
overtighten as this would damage the element..
GENERAL CLEANING
The outer cover of the iron and station may be cleaned with a damp cloth using small
amounts of liquid detergent. Never submerse the unit in liquid or allow any liquid to enter the
case of the station. Never use any solvent to clean the case.
SERVICE
If the iron or station should become faulty or, for some reason not operate normally, the
system should be returned to the service department of your authorized dealer or agent.
WARNING: Keep out of the reach of children.
WARNING: Do not inhale solder fumes.
WARNING: Keep tip and heating element away from the body and clothes while in
operation.
INSTRUCTION
MANUAL
LT-80
REPLACEMENT TIPS:
HIGH - POWER
44-240603A
44-240613
ACCESSORY:
460A Tip cleaner stand w iron holder . Cleaning brush P/N#459
TEMPERATURE CONTROLLED
SOLDERING STATION
PRODUCT DESCRIPTION
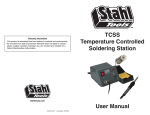
The LT-80 electronically temperature controlled soldering station has been designed to
meet the present and future soldering needs of the electronic production industry, hobbyist
and students.
The Model LT-80 rated current is 230Vac, 50Hz and 120Vac, 60Hz. Both incorporate
electronic circuitry which enables the user to adjust the temperature from 250℃ (500℉ )
through 500℃ (900℉ ) without changing
The tip. The temperature is maintained to within ±5℃(9℉ ) of its idling temperature through
the use of its PTC characteristic.
The electronic “ZERO VOLTAGE“ switching protects voltage and current sensitive
components, such as “CMOS” devices, against transient voltage spikes that can be
caused by switching the power or heater on/off or other environmental conditions.
The ergonomic and slender soldering iron design with a comfortable rubber grip that
prevents operator fatigue. The soldering iron is attached to the base unit using a nonburning silicone rubber cord.
The tip is grounded through the power unit to ensure leakage of less than 0.4 milivolts, and
a wide selection of long-lasting, iron clad, nickel/chrome plated and pre-tinned tips are
available to meet all your soldering needs.
OPERATING INSTRUCTIONS
1. Insert the iron holder into the slot at the top of the housing.
2. Plug in the power cord (make sure voltages match) and slide the switch to the ON
position then LED lamp will be ON.
3. Rotate the temperature control knob to the desired temperature.
4. The L.E.D. Lamp will keep flashing when the temperature has reached the desired setting
temperature as the control way is so called PWM (Pulse Width Modulation) control
5. To extend the life of the heater and tip, turn the control knob to the lowest setting when
temporarily not in use.
Caution: Ensure that the working voltage matches your power supply before plugging in
the station.
WORKING TEMPERATURE
A low iron temperature will slow the rate of flow of the solder. A high temperature will burn
the flux in the solder, which in turn will emit a heavy white smoke resulting in a dry joint, or
damage to the P.C.B. When the tip working temperature is set to the correct temperature
parameters suited to the particular solder being used, a good joint is assured.
The most common solder alloy used in the electronic industry is 60% tin, 40% lead
(Sn60/Pb40),but to meet RoHS requirements, the Sn60/Pb40 solder alloys are not allowed
in the production process for RoHS compliant products. Lead free solder alloys require a
working temperature about 30℃ (86℉ ) higher than previous generation electrical
soldering.
Below are listed the common temperature for the specific job with Sn60/Pb40 solder alloy.
Melting point
Normal operation
Production line operation
215°C (419°F)
320°C (608°F)
380°C (716°F)
Desoldering operation for smaller joint
Desoldering operation for larger joint
320°C (608°F)
400°C (752°F)
The temperature above 410℃ (770℉ ) is not recommended for normal soldering functions,
but for short periods when excessive heat is necessary.
NEW TIP
Used according to the following procedures if a new tip were installed at any time, it will give
the tip much longer life.
1. Set temperature to minimum, then move the main power switch to the ON position.
2. Flood the tinned surfaces with resin-core solder when temperature reaches 250℃ (392℉ ).
3. Set at desired temperature after warming for few minutes.
4. The iron will be ready for use once it reaches the preset temperature.
IMPORTANT - Remove and clean the tip daily. If a new tip is installed, remove any loose
build up in the barrel assembly, otherwise tip may fuse to the heating element or retaining
barrel.
COMMON CAUSES OF TIP UNWETTING
1. Tip temperature higher than 410°C (770°F) .
2. Working surfaces not well tinned during idling periods.
3. Lack of flux in soldering, wicking, repairing, and touch-up, etc operation.
4. Wiping tip on high sulphur content sponge, dirty or tip cleaner and/or rage.
5. Touching with organic, such as plastic resins, silicone grease and other
chemicals.
6. Impurities in solder and low tin content.
CARE OF TIPS
IMPORTANT - Remove the tip and clean after every usage or at least once a week, and
remove
any loose build up in the barrel.
The tips supplied are iron clad pure copper and if used properly will give a long life.
1. Always keep tips tinned before returning to the holder, switching off or storing for any
period of time. Wipe only before using.
2. Don>t keep iron set at high temperature for long periods of time as this will break down
the surfaces of the tip.
3. Don>t give any excessive pressure on a tip or rub a tip on a joint. It does not improve the
heat transfer but only damages the tip.
4. Never clean the tip with abrasive materials or a file.
5. Don>t use a flux containing chloride or acid, use only rosin or activated resin fluxes.
6. If any oxide does form, it can be cleaned by lightly rubbing with a 600-800 grit emery
cloth, isopropyl alcohol or equivalent, then wrap rosin-core solder around the newly


