1
CONSOLE TYPE AIR CONDITIONERS
(MONOSPLIT SYSTEMS, AIR-TO-AIR, HEAT PUMP)
USER'S MANUAL
"Commercial DC Inverter" Models
HFII 351 XR
HFII 531 XR
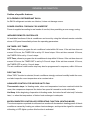
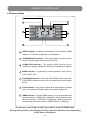
SET
AU
CO TO
O
DR L
HE Y
AT
TEM
PER
ATU
R
E
O
A
C)
10
R4
FA
HIG N
ME H
LO D
W
TE
MP
.
MO
DE
ON
/OF
SW
ING
F
EC
FAN
ON
AIR
RE
SE
DIR
EC
TIO
N
TL
OM
IC T
IM
ER
OC
K TIM
ER
SPE
ED
ON
OF
F
POW
ERFU
L
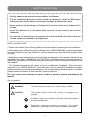
WARNING!
PLEASE READ CAREFULLY THIS MANUAL BEFORE OPERATING YOUR NEW AIR CONDITIONER.
-1-
Table of Contents
GENERAL INFORMATION ...................................................................................................... 3
SAFETY PRECAUTIONS......................................................................................................... 6
OUTLINE OF INDOOR & OUTDOOR UNITS .........................................................................11
LED INDICATORS ON INDOOR UNIT .................................................................................. 12
IR REMOTE CONTROLLER .................................................................................................. 13
HEAT, COOL, FAN MODES ................................................................................................... 17
DRY MODE ............................................................................................................................ 18
AUTO MODE .......................................................................................................................... 19
TIMER FUNCTION ................................................................................................................. 20
"ECO" (ENERGY SAVING) MODE ........................................................................................ 23
"POWERFUL" MODE ............................................................................................................. 24
SELECTING THE AIR OUTLET DIRECTION ........................................................................ 25
ADJUSTING THE AIRFLOW DIRECTION ............................................................................. 27
EMERGENCY OPERATION & TEST SWITCH ...................................................................... 29
ORDINARY MAINTENANCE AND ADVICE FOR USE .......................................................... 30
TROUBLESHOOTING ........................................................................................................... 36
AUTOMATIC RESTART AFTER A POWER FAILURE ........................................................... 39
-2-
GENERAL INFORMATION
Outline of specific features
ECO-FRIENDLY REFRIGERANT R410A
As R410A refrigerant contains no chlorine, it does not damage ozone.
POWER CONTROL THROUGH "DC INVERTER"
Power is supplied according to real needs of comfort, thus permitting a sure energy saving.
INFRARED REMOTE CONTROLLER
All available functions of the air conditioner can be set by using the infrared remote controller,
whose LCD panel immediately shows the operating parameters.
ON TIMER / OFF TIMER
ON Timer, allows to program the air conditioner's start within 24 hours. If the set time does not
exceed 10 hours, the TIMER ON is set by 0.5 hours' steps. If the set time exceeds 10 hours,
the TIMER ON is set by 1 hour's steps.
OFF Timer, allows to program the air conditioner's stop within 24 hours. If the set time does not
exceed 10 hours, the TIMER OFF is set by 0.5 hours' steps. If the set time exceeds 10 hours,
the TIMER OFF is set by 1 hour's steps.
The air conditioner's start and/or stop may also be programmed in sequence, within 24 hours.
DRY FUNCTION
When "DRY" function is selected, the air conditioner strongly reduces humidity inside the room,
and also keeps the room temperature at a constant value.
ADVANCED CONTROL FOR INDOOR UNIT'S FAN
Thermostatic stops. In Heating mode, when set temperature has been reached inside the
room, the compressor stops and the indoor fan speed is lowered to avoid cold drafts.
Hot Keep. At the beginning of operation in Heating mode, the indoor fan will start only 5 minutes
later, i.e. when the temperature of indoor heat exchanger is adequate.
MICROCOMPUTER CONTROLLED DEFROSTING FUNCTION (HEATING MODE)
The microcomputer on printed circuit board can monitor all decreases in heating power of the air
conditioner caused by frosting on outdoor heat exchanger, and inputs the signal for automatic
defrosting; a LED lights up when this function is activated.
-3-
GENERAL INFORMATION
THERMOSTAT UNDER MICROCOMPUTER CONTROL
The thermostat being controlled by microcomputer allows remarkable energy saving and provides
more comfort, as the room temperature is checked with the greatest precision.
INDOOR FAN AUTOMATIC SPEED CONTROL
The airflow from the Indoor Unit can be controlled step by step, on the basis of the difference
between the room temperature and the set temperature. This allows to reduce the lapse of
time needed to reach the desired temperature both in Cooling and Heating mode, by treating
the appropriate air volumes.
MOTORIZED LOUVERS FOR AIRFLOW DIRECTION
The flaps can be controlled directly by the remote controller so as to reach your desired
position.
• By pressing "AIR DIRECTION" button, you can select your desired angle for vertical airflow
louver. Once the angle has been selected, the position is memorized by the inner electronics
for next start of the air conditioner.
• If you press "SWING" button, the flaps move up and down continuously, thus increasing air
circulation inside the room.
AUTORESTART AFTER A POWER FAILURE
• When a power failure occurs during operation, the air conditioner immediately stops.
• When power is restored, "OPERATION" lamp starts blinking. In particular, the air conditioner
will automatically restart after 3 minutes have elapsed since power is restored. This means that
it is not required to press "ON/OFF" button on the remote controller. The settings will be the
same as before the blackout.
DIAGNOSTIC & PROTECTIVE FUNCTIONS
Shown by codifed flashing of LED indicators on the Indoor Unit, they allow to diagnose in a quite
procise way the main malfunctions which may concern the air conditioner.
3-minutes' delay protection: there is a protective control of the Outdoor Unit, to prevent
compressor's damages after stops. This control is effective in case of malfunction, power failure,
turning off the system, etc. and it does not allow Outdoor Unit to restart before 3 minutes have
elapsed since the Unit stopped. During this time, Indoor Unit cannot run.
-4-
GENERAL INFORMATION
Recommended operating conditions
In order to obtain the Unit's best performances, it is recommended its use under the following
conditions:
Outdoor temperature:
HFII 351XR Model:
HFII 531XR Model:
Room temperaure:
COOLING OPERATION
HEATING OPERATION
DRY OPERATION
0°C to 43°C
-15°C to 43°C
17°C to 32°C
CAUTION:
Room relative humidity should be less than 80%. If the air conditioner operates
beyond this limit, the surface of the heat exchanger could get covered with frost.
Outdoor temperature:
Room temperature:
Outdoor temperature:
Room temperature:
-15°C to 21°C
0°C to 30°C
11°C to 43°C
17°C to 30°C
Use of air conditioner out of the above mentioned temperature ranges could cause the intervention
of built-in protective functions consequently stopping the system operation.
NOTE: If the Units operates in rooms which are satured with oil vapors or volatile matters,
harmful substances could coat and clog the Indoor Unit's heat exchanger. Besides, scalings of
saltness could form on the Outdoor Units installed in sea-surroundings; if not removed, they will
damage the Units in a very short time. In both cases, contact the Authorized Technical Service
to require frequent maintenance.
-5-
SAFETY PRECAUTIONS
Before starting the air conditioner, please read carefully the information in this "USER'S MANUAL".
The User's Manual contains very important suggestions relatied to installation, operation and
maintenance of the air conditioner and concerning your personal safety.
The Manufacturer accept no responsibility for the damages that may arise due to nonobservance of the instructions listed in this "USER'S MANUAL".
Disposal of an old air conditioner
Before disposing an old air conditioner, please
make sure it is inoperative and carry out the
disposal by adopting all safety precautions.
Unplug it from the power line in order to avoid
risks of electric shock.
Disposal of the packaging of your new air
conditioner
All the packaging materials used in the package
of your new air conditioner can be disposed
without any danger for the environment.
The cardboard may be broken or cut into
small pieces and given to a Waste Paper
Disposal Service. The wrapping bag made of
polyethylene and the polyethylene goam pads
contain no fluorochloric hydrocarbon.
Please remember that an air conditioner
contains refrigerant fluid, requiring specialized
waste disposal.
The valuable materials contained in the air
conditioner can be recycled. Contact your local
Waste Disposal Center for adequate disposal or
contact your Dealer for any question.
All these valuable materials may be taken to a
Wastw Collecting Center and used again after
adequate recycling.
Please make sure that piping of your air
conditioner does not get damaged before
being picked up by the relevant Waste Disposal
Center. You can contribute to the protection of
the environment by adopting an appropriate
anti-pollution method of disposal.
Consult your local Authorities for the name
and address of the Waste Materials Collecting
Centers and Waste Paper Disposal Services
nearest to your house.
General warnings for safety
• Do not operate damaged air conditioners. In case of doubt, contact your Dealer.
• Use of air conditioner must be carried out in strict compliance with the instructions listed futher
on.
• Do not damage any parts of the air conditioner that carry refrigerant by piercing or perforating the
piping with sharp or pointed objects, by crushing or twisting the tubes or scraping off the surfaces'
coatings. If the refrigerant spurts out and gets into eyes, this may result in serious injuries.
• Do not obstruct or cover the ventilation grille of the air conditioner. Do not put fingers nor insert
objects into the inlet/outlet vent or into the motorized louver.
• Do not allow children to play with the air conditioner. Children should be never allowed to sit on
the Oudoor Unit.
• The appliance is not intended for children and disabled people. They must not operate the air
conditioner without supervision.
• Electrical works must be carried out according to the local laws. If the power cable is damaged, it
must be replaced by the Manufacturer or by qualified Personnel. Size of power cables and connecting
wires must be adequate to the characteristics of the air conditioner (current values and power input
values).
• If fuses on the PCB are blown, they must be replaced with new fuses of the same type and size.
• After installation, power plug should be properly disposed.
• Exhausted batteries (infrared remote controller) should be properly disposed.
• Always remember to unplug the air conditioner before opening the inlet grille. Never try to unplug
the air conditioner by pulling off the power cable. Always grip the power plug firmly and pull it straight
out of the power socket.
-6-
SAFETY PRECAUTIONS
• Strictly observe the instructions provided in this Manual.
• The air conditioning system contains inside its refrigerant circuit the R410A gas
under pressure. Never disconnect refrigerant pipes or connection joints.
• Never perform any handling on Outdoor Unit service valves or on Indoor Unit’s
unions.
• Keep this Manual in a safe place easy to reach at any time for convenient
reference.
• In case the air conditioner is transferred and reinstalled, this User’s Manual
should always be attached to the appliance.
SAFETY INSTRUCTIONS
• Please read carefully the following Safety Instructions before operating the air conditioner.
• A strict observance of the instructions indicated in this "USER'S MANUAL" will prevent personal
hurt and incidents to the User. Moreover, correct operation and long life of the system will be
ensured.
• Depending on the seriousness of potential risks and damages, the reported Instructions are
classified in two types: "WARNING" and "CAUTION". A strict observance of the Instructions is
required to guarantee your personal safety and the safety of the environments where the Units
are installed.
• The following Instructions are related to the air conditioner's installation. They have been
reported in this "USER'S MANUAL" just to allow the User to check that installation has been
properly carried out. If an improper installation - not corresponding to the Instructions - is verified,
please contact the Dealer or the Authorized Technical Service.
The User must never attempt to repair, install or perform special maintenance by
himself.
Key to symbols
!
WARNING
This symbol points out the risk of serious injury or death.
!
CAUTION
This symbol points out the risk of injury or damage to the
property.
Prohibition. Action or procedure not allowed, with serious effects
on objects and people.
!
Obligation. Compulsory action or procedure. The missed
observance could bring serious effects on objects and people.
-7-
SAFETY PRECAUTIONS
Installation
Never try to install this Unit by yourself, i.e. without the support of Tachnical Personnel. Never try to reapir
the Unit by yourself. The Unit's components can be reached only by opening or removing the covering
panels, and this involves exposure to high voltage. Even by disconnecting power supply, it is not always
possible to avoid the risk of electric shocks.
!
WARNING
• Please always contact the Dealer or the Authorized Service Center for installation.
Never attempt to install the air conditioner by yourself, because improper installation
could cause electric shock, injuries, water leakage or fire.
!
• Please always contact the Dealer or the Authorized Service Center for any servicing
operation or special maintenance.
Never try to repair or carry out special maintenance by yourself. Improper repair or
maintenance could cause electric shock, injuries, water leakage or fire.
!
Please confirm that installation has been carried out according to the following prescriptions:
!
CAUTION
• When instaling, all possible countermeasures must be taken to avoid refrigerant
leaks. If there is a high concentration of refrigerant gas in the room, oxygen lack may
occur.
!
• Do not install the air conditioner near burners, heat sources or flammable gas. This
is to avoid the risk of malfunctioning, fire or explosion.
• Ensure that a circuit breaker has been installed on the power supply line of the air
conditioner, to avoid the risk of electric shocks.
• When installing in a small room, countermeasures should be taken in case of a
refrigerant leak exceeds the proper range. Otherwise, it will cause asphyxia.
!
!
!
CAUTION
• Ensure that drain hose and drain pipe installation has been carried out correctly.
Incorrect installation or maintenance will cause water leakage.
!
• Ensure that Indoor and Outdoor Units have been properly grounded.
Defective grounding could cause electric shock.
!
• This kind of appliance needs a specific circuit breaker with proper
protective devices against overcurrents and short circuits (fuses or
automatic switches).
-8-
Circuit
breaker
(specific)
!
SAFETY PRECAUTIONS
Always observe the operating precautions listed in the following tables. In this way, correct operation and
safeguard of people, animals and objects inside the air-conditioned room will be ensured.
!
WARNING
Use the correct voltage and frequency for power
supply.
220~230V, 50Hz
Do not insert the air conditioner's plug into multiple
sockets or into sockets to which other appliances
are connected. Do not use plug adapters.
!
Fully insert the plug into the power socket and
make sure the connection is secure and without
play. Otherwise, sparks and fire may occur.
Do not put heavy objects on the power supply
cord. Take care not to damage it. Do not use
supply cords which are faulty or damaged.
!
Do not pull the plug out of the power socket
by drawing the power cord. Damaging to the
power cord, to the plug or to the socket may
occur, and this could result in electric shock or
fire generation..
Never turn off the air conditioner by pulling the
power supply plug out of the socket. Thsi could
cause electric shock or fire.
Always press the "ON/OFF" button on remote
controller.
Do not use extension cords. Do not use rolled
power supply cords.
Never touch switches, sockets or power supply
plugs with wet hands. This could cause electric
shock.
If you smell soething burning, immediately turn
off the air conditioner, switch the circuit breaker
to "OFF" or "0", and contact the Authorized
Technical Service.
Do not insert any objects into the air inlet or
outlet of Indoor and Outdoor Units. Even if fans
are stopped, they could automatically start all at
once.
SET TEMPERATURE
AUTO
COOL
DRY
HEAT
O
C)
FAN
HIGH
MED
LOW
TEMP.
MODE
ON/OFF FAN SPEED
SWING ECONOMIC TIMER ON
RESET LOCKTIMER OFF
AIR DIRECTION
POWERFUL
!
You should avoid to expose your body directly
to cool air for a long time. This may you cause
health problems to you.
Do not direct the airflows towards infants, aged
or disabled people.
-9-
SAFETY PRECAUTIONS
!
CAUTION
Ventilation should be operated when using
at the same time the air conditioner and gas
burners.Insufficient ventilation may cause lack
of oxygen.
Do not use sprayers near the air conditioner and
do not spray anything towards the appliance.
!
Do not place burners near the airflow of air
conditioner.
Do not expose plants or animals to the direct
airflow of the air conditioner.
To avoid the risk of electric shock, do not sprinkle
water nor other liquid on Indoor Unit. Do not
clean the air conditioner by water spurts.
Ventilate the room regularly while the air conditioner
is operating. Fail to follow this advice could result
in lack of oxygen inside the room.
!
Do not expose food, plants, animals, precision
devices or works of art to the direct airflow of
the air conditioner.
For proper performance, operate the air conditioner
under the recommended temperature and
humidity range. If the Unit operates beyond these
conditions, malfunctions may occur or dew may
drip out of the Indoor Unit.
!
When necessary, replace fuses with new ones
of the same type and size. Never use a piece
of iron or copper instead of the proper fuse,
as it could result in a malfunction or in a fire
accident.
Do not place anything in front of the air conditioner
nor obstruct the air outlet.
!
Do not put any object on the air conditioner. On the appliance's
upper part there is an air grille that must not be obstructed. Besides,
a heavy object may cause the air conditioner's fall.
Do not touch the heat exchangers' metal flaps on Indoor and Outdoor Units. This could
cause hurts due to the sharp shape of the flaps. Take care of this especially when
removing the air inlet panel and the air filters.
- 10 -
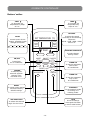
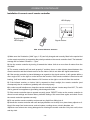
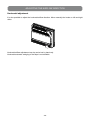
OUTLINE OF INDOOR & OUTDOOR UNITS
3
1
5
INDOOR UNIT
2
1
7
6
4
7
8
OUTDOOR UNIT
9
INDOOR UNIT
OUTDOOR UNIT
1
2
3
4
5
6
7
8
9
Air flow louver (at air outlet)
Air inlet (with air filter in it)
Installation part
Connecting pipe
Air inlet
Air outlet
IR Remote Controller
Display panel
Drain pipe
NOTE: The Figure has the only purpose to show the User how to operate for a correct use of the appliance.
Therefore, the real aspect of the Product may be lightly different.
- 11 -
LED INDICATORS ON INDOOR UNIT
The electronics of the air conditioner is able to diagnose eventual malfunctions which can be interpreted
by the 3 LED indicators on the Indoor Unit's frontal panel. According to the state of each indicator (ON,
flashing, OFF), the Authorized Technical Service is able to detect the common type of anomalies.
1
2
3
4
5
1
Signal receiver
It permits to receive signals from the remote controller.
2
OPERATION LED
When connecting the Unit to the power source, the LED starts flashing. During the air conditioner's
operation, it stops flashing and lights up.
3
TIMER LED
It lights up when TIMER function is selected (air conditioner's programmed start and/or stop).
4
PRE-DEF (DEFROST/PREHEATING) LED
• In Heating mode, if a layer of frost forms on the outdoor heat exchanger, defrosting automatically
starts and the LED lights up.
• The LED also lights up whenb indoor heat exchanger's Preheating function is activated. This
occurs in Heating mode, in order to avoid the emission of air at low temperature (prevention
function anti-cold drafts).
5
Emergency button
To start the air conditioner when the remote controller is not available, and to start the Test mode
in Cooling operation.
- 12 -
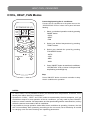
IR REMOTE CONTROLLER
Buttons' outline
TEMP
TEMP
To decrease set
temperature by steps
of 1°C.
To increase set
temperature by
steps of 1°C.
FAN SPEED
MODE
At each press of this
button, operation mode
changes as follows:
AUTO
COOL
DRY
HEAT
FAN
SET TEMPERATURE
AUTO
COOL
DRY
HEAT
O
C)
FAN
HIGH
MED
LOW
TEMP.
To select fan speed
according to the following
sequence:
AUTO - LOW - MED - HIGH
and so on.
ECONOMIC OPERATION
To select Energy
Saving mode.
ON/OFF
To start/stop
the air conditioner.
MODE
ON/OFF FAN SPEED
SWING ECONOMIC TIMER ON
RESET LOCKTIMER OFF
TIMER ON
To set the automatic
start of the
air conditioner.
SWING
To start/stop the
automatic up/down
swinging of the
motorized louver.
AIR DIRECTION
POWERFUL
TIMER OFF
To set the automatic
stop of the
air conditioner.
RESET
To cancel current settings
and restore factory
default’s settings.
POWERFUL
To set powerful mode
in Cooling or in
Heating mode.
LOCK
AIR DIRECTION
To lock all settings.
Press again this button
to cancel LOCK function.
To select the desired
angle for the louver.
- 13 -
IR REMOTE CONTROLLER
LCD panel outline
1
3
4
2
AUTO
4
~
~
~
~
COOL
HIGH
DRY
HEAT
FAN
F
h
TIMER ON/OFF
6
MED
5
LOW
7
1
DIGITAL Display: It displays set temperature, and eventually TIMER
settings. In FAN mode, temperature is not displayed.
2
TRANSMISSION Indicator: This symbol lights up each time the
remote controller sends signals to the Indoor Unit.
3
OPERATION Indicator: This symbols lights up when the air
conditioner is started. It disappears when the air conditioner is stopped.
4
MODE Indicator: It indicates the current operation mode: AUTO,
COOL, HEAT, FAN.
5
FAN SPEED Indicator: Each time FAN SPEED button is pressed,
FAN SPEED Indicator moves to the corresponding selected speed
for fan.
6
LOCK Indicator: The symbol is shown when LOCK button is pressed
once. If you press LOCK button again, the symbols disappears.
7
TIMER Indicator: It shows TIMER settings. If only programmed start
has been selected, “TIMER ON” is displayed. If only programmed stop
has been selected, “TIMER OFF” is displayed. If both programmed
start and stop have been selected, “TIMER ON/OFF” is displayed.
All Indicators are shown in the Figure above only for explanation.
During real operation, the display will only show the Indicators corresponding
to the User’s selections.
- 14 -
IR REMOTE CONTROLLER
Installation & correct use of remote controller
LED Display
Signal receiver &
LED Display
SET
AU
CO TO
OL
DR
HE Y
AT
TEM
PER
ATU
RE
O
C)
FA
HIGHN
ME
LO D
W
TE
MP.
MOD
E
ON
/OFF
SW
ING
FAN
EC
ON
OM
AIR
T LO
N
Signal receiver
D
MER
SE
CTIO
SPEE
IC TI
RE
DIRE
CK TI
MER
OF
ON
F
POWE
RFUL
Max. allowed distance: 8 metres
1) Make sure the 2 batteries (“AAA” type, 1.5V) are fully charged and correctly fitted in the special slot
on the remote controller, by respecting the polarity marked on the remote controller itself. The batteries'
average life is of about 6 months ~ 1 year.
2) Use the remote controller by turning it towards the Indoor Unit at no more than 8 metres from the
Unit itself.
3) The remote controller will not work properly if curtains, doors or other objects placed between the
remote controller and the infrared receiver on the Indoor Unit do not allow the signal transmission.
4) If the remote controller is placed sideways as regards to the signal receiver, it will operate within a
max. angle of 30° on the right or on the left from the receiver. If the remote controller is fixed on its wall
bearing, it will work within a side distance of 0.5 metres on the right or on the left from the receiver.
5) If the infrared receiver on Indoor Unit is exposed to direct sunlight, the remote controller (and
consequently the air conditioner) probably will not work properly.
6) In order to avoid interferences, keep the remote controller at least 1 metre away from Hi-Fi, TV, radio
and in general from appliances generating electromagnetic fields.
7) If the remote controller stops to operate correctly, press “RESET” button on the remote controller to
cancel current settings and restore factory defaults' settings. Set current time again, and check if now
the remote controller operates correctly.
8) Do not wet the remote controller and prevent any liquid from falling into it.
9) Handle the remote controller with care and pay attention not to drop it nor place heavy objects on it.
Keep it far away from heat sources such as heaters, cooking stoves, electric blankets, etc.
10) Never use solvents nor strong detergents for cleaning the remote controller. Only use a soft, clean
and dry cloth.
- 15 -
IR REMOTE CONTROLLER
Batteries' replacement
If after the transmission of a signal by remote controller the confirmation sound emitted by the Indoor
Unit's buzzer is no more heard, or the indicator on remote controller's display does not light up, batteries
must be replaced.
To open the battery case, see the Figure below.
CAUTION!
If after replacing batteries the remote controler does not work, remove batteries and reinsert
them after a few minutes, or press the inner button "RESET" on remote controller.
• Always insert two new batteries of
AAA type
(1.5V) type of the same brand (never insert one
new battery and one old battery, as this may cause
a malfunction).
Batteries’ replacement
1
Slide the cover and remove it.
• Please observe the batteries' polarity ("+" / "-")
Push the cover
in the arrow’s
direction.
marked on the battery case and on the batteries
themselves.
• Before closing the battery case's cover, check if
the remote controller displays "0:00" with flashing
2
Insert batteries.
3
Reinstall the cover of the battery case.
colon.
Pay attention
to the polarities
+ and - .
• Remove batteries from remote controller if you
foresee not to use it for several weeks. A leakage of
acid may damage the remote controller.
• Normal average life of a battery set is of about 6
months ~ 1 year.
- 16 -
HEAT, COOL, FAN MODES
COOL, HEAT, FAN Modes
Connecting/operating the air conditioner
SET TEMPERATURE
AUTO
COOL
DRY
HEAT
O
Connect the air conditioner to the power source: the
“OPERATION” LED on Indoor Unit’s panel will start
flashing.
C)
FAN
HIGH
MED
LOW
1. Select your desired operation mode by pressing
“MODE” button:
• COOL
TEMP.
2
• HEAT
• FAN
2
MODE
1
2. Select your desired temperature by pressing
“TEMP” buttons.
ON/OFF FAN SPEED
3
4
TIMER ON
SWING ECONOMIC
RESET LOCKTIMER OFF
AIR DIRECTION
3. Select your desired fan speed by pressing
“FAN SPEED” button:
- AUTO
- LOW
POWERFUL
- MED
- HIGH
4. Press “ON/OFF” button to start the air conditioner:
“OPERATION” LED on Indoor Unit’s panel will
stop flashing and will light up.
Stop
Press “ON/OFF” button on remote controller to stop
the air conditioner’s operation.
NOTES:
1. In “FAN” mode, it is not possible to select your desired room temperature. Therefore, move
directly from above item No.1 to item No.3.
2. Operation in “COOL”, “HEAT” and “FAN” modes is memorized by the microcomputer, so if you
would like to keep it for next operation of the air conditioner, you only need to press “ON/OFF”
button on remote controller. Set temperature and fan speed settings will be memorized too, so they
will be the same at next restart of the air conditioner.
3. It is possible to change operation mode while the air conditioner is operating. However, the Unit
will not immediately start operarting according to the new mode, but a little delay is needed
for carrying out a test and choosing new operating parameters.
- 17 -
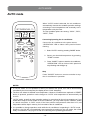
DRY MODE
DRY Mode
SET TEMPERATURE
AUTO
COOL
DRY
HEAT
O
C)
FAN
HIGH
MED
LOW
Connecting/operating the air conditioner
TEMP.
2
2
MODE
1
“DRY” mode is a Cooling mode with low fan speed, in
which the refrigerant flow through indoor heat exchanger
is compatible with low fan speed, so as to permit the
condensation of room humidity without changing of air
temperature.
Operation in “DRY” mode dries the air.
ON/OFF FAN SPEED
Connect the air conditioner to the power source:
“OPERATION” LED on Indoor Unit’a panel will start
flashing.
3
TIMER ON
SWING ECONOMIC
1. Select “DRY” mode by pressing “MODE” button.
RESET LOCKTIMER OFF
2. Select your desired temperature by pressing
“TEMP” buttons.
AIR DIRECTION
POWERFUL
3. Press “ON/OFF” button to start the air conditioner:
“OPERATION” LED on Indoor Unit’s panel will
stop flashing and will light up.
Stop
Press "ON/OFF" button on remote controller to stop
the air conditioner’s operation.
NOTES:
1. In “DRY” mode, it is not possible to select your desired fan speed, as it will be automatically
controlled by the microcomputer (the display shows “LOW” indication).
2. The User can select his desired room temperature. However, if batteries are replaced or “RESET”
button is pressed, operation mode changes to “AUTO” and temperature is automatically set
to 24°C.
3. “DRY” mode, as well as other operation modes, is memorized by the microcomputer, so if you would
like to keep it at next restart of the air conditioner, you only need to press “ON/OFF” button on remote
controller. In “DRY” mode, if the User selects a temperature other than 24°C, set temperature will
be kept in memory for nrxt restart of the air conditioner.
4. It is possible to change operation mode while the air conditioner is operating in “DRY” mode.
However, the Unit will not immediately start operarting according to the new mode, but a little
delay is needed for carrying out a test and choosing new operating parameters.
- 18 -
AUTO MODE
AUTO mode
SET TEMPERATURE
AUTO
COOL
DRY
HEAT
O
C)
FAN
HIGH
MED
LOW
Connecting/operating the air conditioner
TEMP.
2
2
MODE
1
When “AUTO” mode is selected, the air conditioner
automatically chooses the suitable operation settings
according to room temperature and eventually to the
temperature set by the User.
The four possible options are among: “COOL”, “DRY”,
“HEAT”, “FAN”.
ON/OFF FAN SPEED
Connect the air conditioner to the power source:
“OPERATION” LED on Indoor Unit’s panel will start
flashing.
3
TIMER ON
SWING ECONOMIC
1. Select “AUTO” mode by pressing “MODE” button.
RESET LOCKTIMER OFF
2. Select your desired temperature by pressing
“TEMP” buttons.
AIR DIRECTION
POWERFUL
3. Press “ON/OFF” button to start the air conditioner:
“OPERATION” LED on Indoor Unit’s panel will
stop flashing and will light up.
Stop
Press “ON/OFF” button on remote controller to stop
the air conditioner’s operation.
NOTES:
1. In “AUTO” mode, it is not possible to select your desired fan speed, as it will be automatically
controlled by the microcomputer (the display shows “LOW” indication).
2. The User can select his desired room temperature. However, if batteries are replaced or “RESET”
button is pressed, operation mode changes to “AUTO” and temperature is automatically set
to 24°C.
3. “AUTO” mode, as well as other operation modes, is memorized by the microcomputer, so if you
would like to keep it at next restart of the air conditioner, you only need to press “ON/OFF” button
on remote controller. In “DRY” mode, if the User selects a temperature other than 24°C, set
temperature will be kept in memory for nrxt restart of the air conditioner.
4. It is possible to change operation mode while the air conditioner is operating in “AUTO” mode.
However, the Unit will not immediately start operarting according to the new mode, but a little
delay is needed for carrying out a test and choosing new operating parameters.
- 19 -
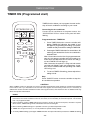
TIMER FUNCTION
TIMER ON (Programmed start)
TIMER function allows you to program the start and/or
stop of the air conditioner according to your needs.
SET TEMPERATURE
AUTO
COOL
DRY
HEAT
O
C)
Connecting the air conditioner
FAN
HIGH
MED
LOW
Programmed start - TIMER ON
TEMP.
MODE
1. Press TIMER ON button: remote controller will
display “TIMER ON” indication, the symbol “h” and
the digits for programming the setting. The remote
controller is ready to receive the setting for TIMER ON.
ON/OFF FAN SPEED
SWING ECONOMIC TIMER ON
1
RESET LOCKTIMER OFF
AIR DIRECTION
Connect the air conditioner to the power source: the
“OPERATION” LED on Indoor Unit’s panel will start
flashing.
POWERFUL
2. Press again TIMER ON button for several times, till
reaching your desired time for the air conditioner’s
automatic start.
After 0.5 seconds since the time for programmed start
was set, the remote controller will send settings to
Indoor Unit. OPERATION LED on Indoor Unit will go
out and TIMER LED will light up.
After 2 seconds, the symbol “h” will go out and remote
controller will display again set temperature. At set
time, the air conditioner will start operating and TIMER
LED will go out.
3. To cancel TIMER ON setting, please adjust time
setting to 0:00.
Stop
Press “ON/OFF” button on remote controller to stop the
air conditioner’s operation.
CAUTION !
When “TIMER” function is selected, the remote controller automatically sends signals for programmed start/stop
to the Indoor Unit. If you would like to be sure that these signals are received by Indoor Unit, it is necessary to
address the remote controller towards the Indoor Unit’s signal receiver, and check there are no obstacles that may
affect the impulses’ transmission.
NOTES:
1. Time increases and decreases are 30-minutes’ steps till 10 subsequent hours, and 60-minutes’ steps from 10
to 24 hours. The remote controller’s Timer is not a clock, so it is necessary to set the time period - not the exact
time - for programmed start.
2. Unlike operation modes, TIMER settings are not kept in memory by the microcomputer, therefore if a power
failure occurs, TIMER settings will be cancelled and need to be set again.
3. Before selecting TIMER settings, it is possible to choose your desired operation mode.
4. TIMER max. range is 24 hours, i.e. it is not possible to operate weekly settings.
5. To modify TIMER settings, press again TIMER ON button and repeat the above procedure for TIMER ON setting.
- 20 -
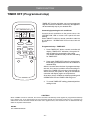
TIMER FUNCTION
TIMER OFF (Programmed stop)
TIMER OFF function will allow you to set programmed
stop time for the air conditioner. In this way, the appliance
will automatically stop at your desired time.
SET TEMPERATURE
AUTO
COOL
DRY
HEAT
O
C)
Connecting/operating the air conditioner
FAN
HIGH
MED
LOW
TEMP.
MODE
Programmed stop - TIMER OFF
ON/OFF FAN SPEED
SWING ECONOMIC TIMER ON
RESET LOCKTIMER OFF
AIR DIRECTION
Connect the air conditioner to the power source: the
“OPERATION” LED on Indoor Unit’s panel will start
flashing.
Press “ON/OFF” button on remote controller to start the
air conditioner : “OPERATION” LED on Indoor Unit will
light on.
1
1. Press TIMER OFF button: remote controller will
display “TIMER OFF” indication, the symbol “h”
and the digits for programming the setting.
The remote controller is ready to receive the setting
for TIMER OFF.
POWERFUL
2. Press again TIMER OFF button for several times,
till reaching your desired time for the air conditioner’s
automatic stop.
After 0.5 seconds since the time for programmed stop
was set, the remote controller will send settings to
Indoor Unit. TIMER LED on Indoor Unit will light up.
After 2 seconds, the symbol “h” will go out and remote
controller will display again set temperature.
At set time, the air conditioner will stop operating and
OPERATION LED and TIMER LED will go out.
3. To cancel TIMER OFF setting, please adjust time
setting to 0:00.
CAUTION !
When “TIMER” function is selected, the remote controller automatically sends signals for programmed start/stop
to the Indoor Unit. If you would like to be sure that these signals are received by Indoor Unit, it is necessary to
address the remote controller towards the Indoor Unit’s signal receiver, and check there are no obstacles that may
affect the impulses’ transmission.
NOTES:
See “TIMER ON Mode".
- 21 -
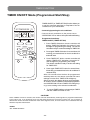
TIMER FUNCTION
TIMER ON/OFF Mode (Programmed Start/Stop)
TIMER ON/OFF (or TIMER OFF/ON) function allows you
to set the automatic start/stop or stop/start of the air
conditioner at your desired time.
SET TEMPERATURE
AUTO
COOL
DRY
HEAT
O
C)
Connecting/operating the air conditioner
FAN
HIGH
MED
LOW
Programmed start/stop
TIMER ON/OFF (TIMER OFF/ON)
TEMP.
MODE
ON/OFF FAN SPEED
SWING ECONOMIC TIMER ON
1-2
RESET LOCKTIMER OFF
AIR DIRECTION
Connect the air conditioner to the power source:
“OPERATION” LED on Indoor Unit’s panel will start flashing.
3-4
POWERFUL
1. Press TIMER ON button: remote controller will
display “TIMER ON” indication, the symbol “h” and
the digits for programming the setting. The remote
controller is ready to receive the setting for TIMER ON.
2. Press again TIMER ON button for several times, till
reaching your desired time for the air conditioner’s
automatic start.
3. Press TIMER OFF button: remote controller will
display “TIMER OFF” indication, the symbol “h”
and the digits for programming the setting.
The remote controller is ready to receive the setting
for TIMER OFF.
4. Press again TIMER OFF button for several times,
till reaching your desired time for the air conditioner’s
automatic stop.
After 0.5 seconds since the time for programmed
start/stop was set, the remote controller will send
settings to Indoor Unit. TIMER LED will light up.
After 2 seconds, the display will show set temperature.
At set time, the air conditioner will start/stop operation
and OPERATION LED and TIMER LED will light up
or go out according to the selected combination.
5. To cancel TIMER settings, please adjust TIMER
ON and TIMER OFF time to 0:00.
CAUTION !
When “TIMER” function is selected, the remote controller automatically sends signals for programmed start/stop
to the Indoor Unit. If you would like to be sure that these signals are received by Indoor Unit, it is necessary to
address the remote controller towards the Indoor Unit’s signal receiver, and check there are no obstacles that may
affect the impulses’ transmission.
NOTES:
See “TIMER ON Mode".
- 22 -
"ECO" (ENERGY SAVING) MODE
ECONOMIC Mode
Connecting/operating the air conditioner
SET TEMPERATURE
AUTO
COOL
DRY
HEAT
O
C)
FAN
HIGH
MED
LOW
Connect the air conditioner to the power source:
“OPERATION” LED on Indoor Unit’s panel will start
flashing.
1. Select your desired operation mode by pressing
“MODE” button:
TEMP.
2
• AUTO
• COOL
2
MODE
1
• HEAT
• FAN
ON/OFF FAN SPEED
3
SWING ECONOMIC TIMER ON
4
RESET LOCKTIMER OFF
AIR DIRECTION
POWERFUL
2. Select your desired temperature by pressing
“TEMP” button.
3. Press “ON/OFF” button on remote controller to
start the air conditioner: “OPERATION” LED on
Indoor Unit’s panel will stop flashing and will
light up.
4. Press “ECONOMIC” button.
To cancel Energy Saving function:
Press “ECONOMIC” button again.
Stop
Press “ON/OFF” button on remote controller to stop
the air conditioner’s operation.
By selecting “ECO” mode, fan will work at “LOW” speed.
Fan speed is automatically selected, so it is not possible to change it.
- 23 -
"POWERFUL" MODE
POWERFUL “Mode”
Outline of “Powerful” mode
SET TEMPERATURE
AUTO
COOL
DRY
HEAT
O
“Powerful” function allows you to reach your desired
temperature in a short time.
“POWERFUL” button on remote controller, corresponding
to this function, is active only in “COOL” and “HEAT”
modes.
C)
FAN
HIGH
MED
LOW
Connect the air conditioner to the power source:
“OPERATION” LED on Indoor Unit’s panel will start
flashing.
TEMP.
2
Connecting/operating the air conditioner
2
MODE
1
ON/OFF FAN SPEED
1. Press “MODE” button and select your desired
operation mode, between:
3
• COOL
• HEAT
SWING ECONOMIC TIMER ON
RESET LOCKTIMER OFF
AIR DIRECTION
POWERFUL
4
2. Select your desired temperature by pressing
“TEMP” buttons.
3. Press "ON/OFF" button to start the air conditioner:
“OPERATION” LED on Indoor Unit’s panel will
stop flashing and will light up.
4. Press “POWERFUL” button.
To cancel “POWERFUL” function:
Press “POWERFUL” button again.
Stop
Press “ON/OFF” button on remote controller to stop
the air conditioner’s operation.
NOTES:
• When the air conditioner is operating in “Powerful” mode, unevenness of room air temperature
may occur due to intensive operation in a short time.
• Anyway, operation in “Powerful” mode does not last more than 15 minutes, then regular operation
is automatically restored.
- 24 -
SELECTING THE AIR OUTLET DIRECTION
Air outlet selector
Air outlet selector allows you to choose the air outlet direction.
To reach the selector, you need to open the Indoor Unit's frontal panel.
!
WARNING
Before opening the frontal panel, switch off the air conditioner and disconnect it
from the power source. il pannello frontale. Never touch the metallic components
inside the Unit, to avoid injuries.
Open the frontal panel by following the instructions in Figure 1:
Air outlet
selector
Fig. 1
Fig. 2
Factory default (recommended):
The Unit automatically adjusts the airflow
direction on the basis of the operation conditions
and settings carried out by the User.
Alternative optional setting:
The Unit emits air from the upper outlet only.
- 25 -
SELECTING THE AIR OUTLET DIRECTION
Airflow supply with standard setting of outlet selector:
Operation
Dry mode
Circumstance
Description
Always
Air is supplied through the uppper
outlet only.
When set
temperature has
been reached, or if
1 hour has elapsed
since the start in
Cooling operation.
Air is supplied through the uppper
outlet only.
During the operation
start, or when set
temperature has
not already been
reached.
Air is supplied through both outlets.
During the operation
start, or when room
temperature is low.
Air is supplied through the uppper
outlet only.
In all other cases.
Air is supplied through both outlets.
Cooling mode
Heating mode
Air supply with alternative optional setting of outlet selector:
• In whatever circumstance and operation mode, air is supplied through the upper outlet only.
• Use this setting when you would like to reduce the air volume supplied by the Unit (for example,
during the night rest).
- 26 -
ADJUSTING THE AIRFLOW DIRECTION
Vertical adjustment
By pressing "AIR DIRECTION" button, it is possible to select and fix the position of air outlet louver.
The recommended positions for the different operation modes are shown by the following Figures:
Heat mode
Cool / Dry modes
In "HEAT" mode, it is recommended
to adjust the louver vertically.
In "COOL" and "DRY" modes, it is
recommended to adjust the louver
horizontally.
Press "AIR DIRECTION" button several times till reaching your desired angle for the air outlet louver.
This position will be memorized for next restart of the air conditioner.
Automatic swinging
Press "SWING" button once: the motorized louver will automatically start swinging up and down
continuously:
!
CAUTION
Air supply flaps must always be adjusted by pressing the relevant button on remote controller.
Never move the louver by hand, so as not to damage the adjustment mechanism.
Set temperature value adjustment must always be carrried out with the supervision of experienced
people.
If the louver does not move properly, try to turn off the air conditioner and then turn it on again: now
normal operation should be restored.
- 27 -
ADJUSTING THE AIRFLOW DIRECTION
Horizontal adjustment
it is also possible to adjust the horizontal airflow direction. Move manually the knobs on left and right
sides:
Horizontal airflow adjustement can be carried out by hand only.
Horizontal automatic swinging of the flaps is not available.
- 28 -
EMERGENCY OPERATION & TEST SWITCH
"MANUAL" button
OPERATION IN EMERGENCY MODE:
If you have lost the remote controller or its batteries are exhausted, the air conditioner can be started by
pressing once "MANUAL" button on the Indoor Unit's frontal panel. The air conditioner will start operating
in the Emergency running "AUTO" mode.
During Emergency running, signals transmitted by the remote controller can be received by Indoor
Unit.
TESTING THE AIR CONDITIONER IN FORCED COOLING MODE
Press "MANUAL" button twice. "OPERATION" LED starts flashing. The air conditioner will start operating
in forced "COOL" mode at "LOW" fan speed for 30 minutes. Then, operation will switch to "AUTO"
mode.
During the Test, signals transmitted by the remote controller cannot be received by Indoor Unit.
NOTE: Do not use Test mode for normal operation.
End of operation in Emergency mode or in forced Cooling mode
Press "MANUAL" button twice during Emergency operation, or press "MANUAL" button once during
Test mode: the air conditioner will stop.
Normal operation can be restored by the remote controller as usual.
- 29 -
ORDINARY MAINTENANCE AND ADVICE FOR USE
Indoor Unit's cleaning
!
WARNING
Before starting any kind of ordinary maintenance:
1 - Stop the appliance by pressing "ON/OFF" button on remote controller;
2 - Move the circuit breaker to "OFF" or "0" position;
3 - Pull the plug out of the power socket;
4 - To reach the Unit, please use a stepladder or other appropriate bearing strong enough to
ensure your safety.
Cleaning the remote controller
SET
AU
CO TO
O
DR L
HE Y
AT
MO
Cleaning the Indoor Unit
TEM
PER
ATU
TE
MP
.
RE
O
C)
FA
HIG N
MED H
LO
W
DE
ON
/OFF
SW
ING
FAN
EC
SPEE
ON
OM
D
IC TI
RE
ME
SE
AIR
RO
T LO
DIRE
N
CK TI
CTIO
ME
N
RO
FF
POWE
RFUL
Do not use water, but a dry cloth. Do not use
products for glass cleaning, nor soaked in
detergents.
Use a dry and soft cloth. In case of need,
dampen the cloth in water and neutral
detergent, then wring well.
Never use any of the following products for cleaning
Benzine, paint solvents, polishing products,
by-products of oil in general, etc. may damage
the outside surfaces of Unit and cause
deformations and scratches on the appliance
and on the remote controller.
The use of very hot water (over 40°C) may
discolour and/or deform the plastic parts.
NOTES:
• If the appliance or the inlet grille are very dirty, clean them with a cloth soaked in tepid water and neutral
detergent. Rinse in clean watrer and dry well. The presency of humidity on the inlet grille may cause
electric shocks.
• Never use any abrasive sponge for cleaning, to avoid scratching the Unit's surfaces.
• If the grille is open or has been removed, do not touch the metallic flaps of the heat exchanger, as the
flaps are sharp and may hurt you.
• Do not expose the grille or the Unit to direct sunlight, to avoid discolouring or deforming them.
Outdoor Unit's cleaning
• Check regularly that the air inlet and outlet are not obstructed by dust or dirt in general.
• For any other cleaning or maintenance of Outdoor Unit, always contact the Authorized Technical
Service.
- 30 -
ORDINARY MAINTENANCE AND ADVICE FOR USE
Removing and cleaning the air filters
1
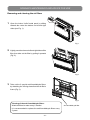
Open the Indoor Unit's frontal panel by sliding
towards the centre the buttons on left and right
sides (see Fig. 1).
Fig.1
2
Lightly press the claws on left and right sides of the
filter, then take out the filter by pulling it upwards
(Fig. 2).
Fig.2
3
Take out the 2 special anti-formaldehyde filters.
by detaching the 4 fixing claws from the air filter's
frame (Fig. 3).
Fig.3
Cleaning of the anti-formaldehyde filters:
Anti-formaldehyde filter
Wash the filters in water every 6 months.
It is recommended to replace the anti-formaldehyde filters every
3 years.
- 31 -
ORDINARY MAINTENANCE AND ADVICE FOR USE
Cleaning of the air filter:
Filter's outside
part
Clean the air filter by using a vacuum cleaner, or
wash it with water. If the dust accumulation is too
heavy, please use a soft brush and mild detergent
to clean it. In case of washing with water, dry the
fiter in the shade and not under the rays of sunlight
Fig.4
or by other heat sources.
• If the cleaning is carried out with a vacuum cleaner,
Filter's inside
part
the filter's outside part must be oriented towards
you (Fig. 4).
• If the cleaning is carried out with water, the
filter's inside part must be oriented towards you
(Fig. 5).
Fig.5
4
Reinstall the anti-formaldehyde filters, by re-attaching correctly the claws on the air filter's
frame.
Reinstall correctly the air filter on the Indoor Unit.
5
Close the Indoor Unit's panel.
!
CAUTION
Never operate the Unit without the filters.
CLEAN THE AIR FILTER EVERY 2 WEEKS.
NOTES:
• The filters must always be clean: if they are clogged with dust or other solid particles in general, the cooling and
heating capacity of the air conditioner will be reduced. Moreover, the appliance will be noisier and consume more
electricity.
• Normally, it is not necessary to replace the filters: you only have to clean them at regular intervals. Replace the
filters when the accumulated dirt is too hard to be removed.
• In case the air filters are damaged and need to be replaced, it is necessary to order them as spare parts: please
contact your Retailer or the Authorized Technical Service.
• IMPORTANT: Never reinstall the filters on Indoor Unit in case they are damaged.
Normally, the cleaning must be carried out every 2 weeks.
However, if the air conditioner is used for many hours a day in a dusty environment, it must be cleaned more often
than other air conditioners used in less heavy conditions.
- 32 -
ORDINARY MAINTENANCE AND ADVICE FOR USE
At the beginning of season
When restarting the air conditioner after a long time, or at the beginning of the season, please carry out
the following procedure:
1
Do not obstruct the air inlet and outlet
Check if any objects obstruct the airflow at the air inlet and outlet on Indoor and Outdoor
Units.
2
Check the Unit's fixing
Check the condition of fixing devices on Indoor and Outdoor Units, especially those
mande of iron on Outdoor Units which are more subject to corrosion, so as to avoid their
possible collapse.
3
Earth cable
Check if there are no false electric contacts and especially if the earth cable is not
interrupted and well connected.
!
CAUTION
An incorrect or inexistent earth connection may cause the danger of electric shocks.
4
Air filters
Check if there are the filters on Indoor Unit. The filters must be clean. In case there is no
filter or the filters are dirty, reinsert or clean them.
5
Remote controller's batteries
Insert batteries in the remote controller's battery case.
6
Unit's start
The Outdoor Unit must be connected to the power
line 12 hours before its start. Insert the plug into the
power socket and move the circuit breaker to "ON":
"OPERATION" LED on Indoor Unit will start flashing
once per second.
Start the Indoor Unit by pressing "ON/OFF" button on
remote controller only 12 hours after the Outdoor Unit
has been powered.
- 33 -
1
2
3
SET TEMPERATURE
AUTO
COOL
DRY
HEAT
O
C)
FAN
HIGH
MED
LOW
TEMP.
MODE
ON/OFF FAN SPEED
SWING ECONOMIC TIMER ON
RESET LOCKTIMER OFF
AIR DIRECTION
POWERFUL
ORDINARY MAINTENANCE AND ADVICE FOR USE
At the end of season
At the end of the season or in case you foresee not to use the air conditioner for a long time, please
carry out the following procedure:
1 Dry the Unit
Operate the air conditioner in "COOL" mode for about half a day
~ 6 hours
by setting a temperature of 30°C, or operate the appliance in
"FAN" mode for half a day by setting a "HIGH" fan speed.
This is for drying the Unit and preventing the forming of moulds
Cool operation / 30°C
and/or bad smells.
Fan operation /
HIGH (fan speed)
2 Disconnect the appliance from the power supply
Stop the air conditioner by pressing "ON/OFF" button on remote
controller, move the circuit breaker to "OFF" or "0" and pull the plug
out of the power socket.
This is necessary as the appliance consumes a little quantity of
electricity even if it is stopped.
1
2
SET TEMPERATURE
!
AUTO
COOL
DRY
HEAT
O
C)
FAN
HIGH
MED
LOW
TEMP.
MODE
ON/OFF FAN SPEED
SWING ECONOMIC TIMER ON
RESET LOCKTIMER OFF
AIR DIRECTION
POWERFUL
3 Clean and reinstall the air filters
4 Clean the body or the panel of the Unit
5 Remove batteries from the remote controller
- 34 -
3
ORDINARY MAINTENANCE AND ADVICE FOR USE
Suggestions for economical use
Select a suitable temperature value
• In Heating mode, avoid to set too high temperature
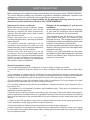
SET
AU
CO TO
OL
DR
HE Y
AT
TE
MOD
E
ON
SW
ING
AIR
RE
SE
DIRE
CTIO
N
EC
ON
/OFF
TEM
PERA
TURE
OM
IC TI
MER
T LO
ON
CK TI
MER
OF
F
POWE
RFUL
C)
°C
FA
HIGHN
ME
LO D
W
MP.
FAN
SP
O
EED
value.
• In Cooling mode, avoid to set too low temperature
values.
Often clean the air filters
• To obtain the air conditioner's best performance, it is
necessary to clean the filters on Indoor Unit at least every
2 weeks, as already described. If dust accumulates on the
filter, the air conditioner's performance decreases.
Close the doors
and the windows!
Do not keep doors or windows open
• This decreases the air conditioner's performance and causes
an increase in electricity consumption. Moreover, in case of
thermal overload, the automatic protective functions may
intervene, and the air conditioner will stop operation.
Reduce the exposure to sunlight
• In Cool mode, protect the window panes by curtains or
shutters. In this way, you can obtain more comfort and a
reduction in electricity consumption.
Use TIMER function moderately
• Do not select operating intervals higher than real comfort
SE
T TE
MP
ER
UR
AT
TO
AU OL
CO Y
DR AT
HE
E
O
C)
N
ON
ER
TIM
CK
LO
TIO
ER
TIM
ED
EC
IC
T
SE
SPE
DIR
OM
RE
FAN
ON
AIR
EC
FF
/O
ON
G
IN
SW
N
FA H
HIG D
ME W
LO
DE
MO
P.
M
TE
L
RFU
WE
PO
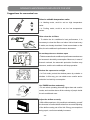
F
OF
needs, and consider above all the real stay of people inside
the air-conditioned room.
Adjust the airflow correctly
• With a little experience, it is possible to estimate by yourself
the increase in comfort which arises from a correct adjusting
of the airflow coming out of the Unit. Energy consumptions
being equal, comfort remarkably increases.
- 35 -
TROUBLESHOOTING
Following symptoms are not air conditioner's troubles
The following table shows a series of seeming malfunctions.
Please check the following items before calling the Authorized Technical Service.
WHAT HAPPENS
REASON
After a stop, the air conditioner
does not restarts immediately.
• If "OPERATION" LED on Indoor Unit lights up, it is normal that the
system does not immediately restart. A protective function (3-minutes'
delay) is active for preventing damages to the compressor every time
the operation restarts after a stop.
• If both "OPERATION" and "PRE-DEF" lamps light up, this is not a
malfunction: the compressor does not immediately restarts because of
the intervention of the anti-cold drafts protection.
Change into the "FAN" mode
during "COOL" mode.
• In order to prevent the frosting of indoor heat exchanger, the system
chenges into "FAN" mode automatically, and restores to the "COOL"
mode after soon.
• When the room temperature value drops to the set temperature value,
compressor stops and the Indoor Unit changes to "FAN" mode. When
temperature rises up, the compressor starts again. It is the same in
"HEAT" mode.
White mist comes out of the
Indoor Unit.
• If during operation in "COOL" mode, humidity is high and the Indoor
Unit's inside is very dirty, temperature distribution inside the room
becomes uneven. It is necessary to clean the Indoor Unit: please call
the Authorized Technical Service.
White mist comes out of the
Outdoor Unit.
• During operation in "HEAT" mode. This is because the Outdoot Unit
is carrying out the automatic defrosting.
Noise from the Indoor Unit or from
the Outdoor Unit
• When the system stops after heating operation, the Indoor Unit emits
a creaking sound. This is normal: expansion and contraction of plastic
parts caused by temperature changes make this noise.
• During the start in "COOL" mode or after the stop of "HEAT" operation,
you may hear a gurgling sound or a hissing sound. This is the sound of
refrigerant gas flowing through both Indoor and Outdoor Units.
• When operation mode is switched from "COOL" to "HEAT", you may
hear a hissing sound coming from the refrigerant circuit. This is the noise
of refrigerant caused by flow stop or flow change.
• The tone of operating noise changes. This noise is caused by the
change of frequency.
Dust comes out of the Indoor Unit.
• This happens if the Unit is used again after a long time. During this
time, dust has got inside the Unit.
The Indoor Unit gives off bad
smells.
• The Unit can absorb the smell of rooms, furniture, cigarettes, etc.,
and then emits it again.
The Outdoor Unit's fan does not
spin.
• This happens during the system's operation. The speed of the fan
is controlled in order to optimize product operation.
- 36 -
TROUBLESHOOTING
Problems deriving from the remote controller
Before starting troubleshooting, please perform the following checks:
It is not possible to change the settings while the air conditioner is operating
WHAT HAPPENS
The User cannot change the
indoor fan speed.
CHECK
POSSIBLE REASON
Check if "AUTO" mode is displayed
on remote controller.
When operating in "AUTO" mode, the
indoor fan speed is automatically set
by the electronics.
Check if "DRY" mode is displayed
on remote controller.
When operating in "DRY" mode, the
indoor fan speed is automatically set
by the electronics.
The transmission indicator on the remote controller does not light up
WHAT HAPPENS
CHECK
POSSIBLE REASON
Signals from the remote controller
are transmitted only when "ON/
OFF" button is pressed.
Check if TIMER function is
active.
Signals from remote controller cannot
be transmitted because the appliance
is stopped.
Set point temperature is not displayed on remote controller
WHAT HAPPENS
CHECK
POSSIBLE REASON
Set point temperature is not
displayed on remote controller.
Check if "FAN" mode has been
selected.
Set temperature cannot be set when
operating mode is "FAN".
"TIMER" indications displayed on remote controller go off
WHAT HAPPENS
CHECK
POSSIBLE REASON
After a lapse of time, "TIMER
OFF" indication disappears from
the display.
Check if TIMER OFF function has
been set.
The air conditioner automatically stops
at set time, and TIMER indication on
remote controller goes off.
After a lapse of time, "TIMER
ON" indication disappears from
the display.
Check if TIMER ON function has
been set.
As soon as set time for start has been
reached, the air conditioner starts and
the displayed time goes off.
The signal receiving tone from Indoor Unit is no more heard
WHAT HAPPENS
CHECK
POSSIBLE REASON
When pressing "ON/OFF" button
on remote controller, no receiving
tone is heard from Indoor Unit.
Check if remote controller is actually
turned to the receiver on the Indoor
Unit, and that no obstacles are
placed between them.
Turn the remote controller to the
receiver on the Indoor Unit, then push
"ON/OFF" button.
Remote controlller's buttons are
not active.
Press "RESET" button.
NOTE: Sometimes, the remote controller may stop operating correctly because of interferences or
electromagnetic noise. In this case, it is necessary to remove batteries from the remote controller,
possibly eliminate the noise's reason, wait a few minutes and reinsert the batteries in their case. Now
operation should be normal.
- 37 -
TROUBLESHOOTING
Problems and possible solutions
The following table shows a series of problems and their possible reasons and solutions.
Compiere le verifiche descritte prima di richiedere l’intervento dell’Assistenza Tecnica.
PROBLEM
Unit does not start.
Air flowing normally, but
completely cannot cooling.
REASONS
• Power failure.
• Power switch is off.
• Fuse of power switch may have
burned.
• Batteries of remote controller exhausted
or other problem of controller.
SOLUTIONS
• Wait for the comeback of power.
• Switch on the power.
• Replace the fuse.
• Replace the batteries or check the
controller.
• Temperature is not set correctly.
• Set the temperature properly.
• The 3-minutes' delay protection for • Wait 3 minutes, then the compressor
compressor is active.
will restart and the Unit will restarts
cooling.
• Refrigerant is too little or too much.
Unit starts and stops
frequently.
Low cooling effect.
• Check leakage, and rightly recharge
refrigerant.
• Presence of air or insufficient refrigerant • Vacuumize and rightly recharge
gas in the refrigerating circuit.
refrigerant.
• Compressor's malfunction.
• Repair or replace compressor.
• Voltage is too high or too low.
• Install a manostat.
• System circuit is blocked.
• Find reasons and solution.
• Heat exchanger on Indoor and
Outdoor Units is dirty.
• Air filter is dirty.
• Air inlets and outlets on Indoor/
Outdoor Units are obstructed.
• Doors and/or windows are open.
• Sunlight directly shines.
• There are too much heat sources.
• Outdoor temperature is too high.
• Leakage or lack of refrigerant.
Low heating effect.
• Clean the heat exchanger.
• Clean the air filter.
• Eliminate all dirties on the air inlets/
outlets.
• Close doors and/or windows.
• Install curtains in order to shelter the
Unit from sunshine.
• Reduce heat sources.
• AC cooling capacity is reduced (this
is normal).
• Check leakage and rightly recharge
refrigerant.
• Outdoor temperature is lower than • Install further heating devices.
7°C.
• Doors and/or windows are not • Close the doors and/or the windows.
completely closed.
• Leakage or lack of refrigerant.
• Check leakage and rightly recharge
refrigerant.
- 38 -
TROUBLESHOOTING
Table of Error Codes on Indoor Unit
OPERATION
LED
TIMER
LED
PRE-DEF
LED
Malfunction of HFII 351 XR
Indoor Unit
Malfunction of HFII 531 XR
Indoor Unit
Room temperature sensor
is abnormal
Room temperature sensor
is abnormal
Evaporator sensor
is abnormal
Evaporator sensor
is abnormal
Condenser sensor
is abnormal
Indoor Unit’s
malfunction
Indoor Unit’s
malfunction
Outdoor Unit’s
malfunction
Extinguish,
Flash at 5Hz,
Flash at 0.5Hz)
CAUTION:
Never try to repair the Air Conditioner by yourself
if one of the following malfunctions occur, immediately stop operation, turn off the main switch and contact
the Authorized Technical Service:
• You smell something burning.
• "OPERATION" LED on Indoor Unit is flashing rapidly (5Hz). This lamp is still flashing rapidly after turning
off the power and turn on again.
• Remote controller is malfunctioning, or its buttons do not work well.
• A safety device such as a fuse or a breaker frequently actuates.
• Obstacles or water enter the Unit.
• Water leaks from Indoor Unit.
• Other malfunctions are observed.
AUTOMATIC RESTART AFTER A POWER FAILURE
• When a power failure occurs during operation, the air conditioner stops immediately.
• When power is restored, the "OPERATION" lamp on the Indoor Unit starts blinking.
• In particular, the air conditioner will restart automatically after 3 minutes have elapsed since
power is restored. This means that it is not required to press the "ON/OFF" button on the remote
control.
The settings will be the same as before the blackout.
However, it is necessary to program TIMER again, as in case of a blackout, TIMER settings for
automatic start/stop of the air conditioner are cancelled.
- 39 -
EC DECLARATION OF CONFORMITY
We TERMAL Srl - 14, Via della Salute - 40132 Bologna - Italy
DECLARE
under our sole responisibility that HOKKAIDO products
Indoor Units:
• HFII 351 XR • HFII 531 XR
Outdoor Units:
• HCKI 351 XR • HCKI 531 XR
conform with the following directives:
• EMC Directive 89/336/EEC and its following 92/31 EEC by L.D. No. 476 dated Decdmber 4th, 1992.
• LV Directive 73/23 EEC and applied Standards EN 60335-2-40.
NOTES
NOTES
NOTES
TERMAL Srl
14, Via della Salute
40132 Bologna - Italy
Tel. +39.051.41.33.111
Fax +39.051.41.33.112
www.termalgroup.com
Due to on-going technological development of the products by the Manufacturer, we
reserve the right to vary the technical specifications at any time without notice.