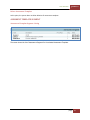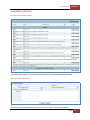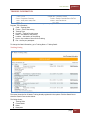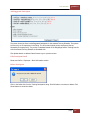
1
goTNA User Manual HUMAN RESOURCE ACCESS For goTNA Version 1.0 March 2011 User Manual goTNA 1.0 CONTENTS 1. Before You Begin ................................................................................................................................. 11 Trademark and Licenses ......................................................................................................................... 11 2. System Access Mode........................................................................................................................... 11 3. Introduction to goTNA Cycle ............................................................................................................... 12 4. System Navigation .............................................................................................................................. 14 HR Access Mode...................................................................................................................................... 14 User Information ................................................................................................................................. 14 Top Menu ............................................................................................................................................ 14 Bottom Menu ...................................................................................................................................... 14 Left Menu – Home .............................................................................................................................. 14 Left Menu – Profile ............................................................................................................................. 15 Left Menu – TNA ................................................................................................................................. 15 Left Menu – Report ............................................................................................................................. 16 Left Menu – Admin ............................................................................................................................. 16 Change Theme Menu .......................................................................................................................... 16 Submenu – Employee Menu ............................................................................................................... 17 Submenu – Division Menu .................................................................................................................. 17 Submenu – Department Menu ........................................................................................................... 17 Submenu – Team Menu ...................................................................................................................... 17 Submenu – KRA Menu ........................................................................................................................ 17 Submenu – KPI Menu .......................................................................................................................... 18 Submenu – Job Designation Menu ..................................................................................................... 18 Submenu – JD Category Menu ............................................................................................................ 18 Submenu – Job Description Menu ...................................................................................................... 18 Submenu – Assessment Template Menu ........................................................................................... 18 Submenu – Assessment Menu ............................................................................................................ 19 Submenu – Training Menu .................................................................................................................. 19 Submenu – Training Area Menu ......................................................................................................... 19 Submenu – Training Provider Menu ................................................................................................... 19 5. Common Screen .................................................................................................................................. 20 Pop-up Employee .................................................................................................................................... 20 Pop-up Calendar ..................................................................................................................................... 20 6. Employee ............................................................................................................................................ 21 Employee Menu ...................................................................................................................................... 21 Employee Information ............................................................................................................................ 21 Search...................................................................................................................................................... 21 Employee Listing ................................................................................................................................. 22 Search Employee................................................................................................................................. 22 Add Employee ......................................................................................................................................... 23 Add Employee ..................................................................................................................................... 23 Delete Employee ..................................................................................................................................... 24 Update Employee.................................................................................................................................... 24 Edit Employee ..................................................................................................................................... 25 Employment ............................................................................................................................................ 25 Employement History ......................................................................................................................... 26 | Page 2 User Manual goTNA 1.0 Add Employment History .................................................................................................................... 26 Edit Employment History .................................................................................................................... 26 Delete Employment History ................................................................................................................ 27 Upload Employment Documents ........................................................................................................ 27 Edit Employment Document ............................................................................................................... 27 View Employment Document ............................................................................................................. 27 Delete Employment Document .......................................................................................................... 27 Education ................................................................................................................................................ 27 Educational History ............................................................................................................................. 28 Add Education History ........................................................................................................................ 28 Edit Education History......................................................................................................................... 28 Delete Education History .................................................................................................................... 29 Upload Education Documents ............................................................................................................ 29 Edit Education Document ................................................................................................................... 29 View Education Document.................................................................................................................. 29 Delete Education Document ............................................................................................................... 29 Resume ................................................................................................................................................... 29 Resume................................................................................................................................................ 29 Upload Resume ................................................................................................................................... 29 Edit Resume ........................................................................................................................................ 30 View Resume....................................................................................................................................... 30 Delete Resume .................................................................................................................................... 30 Document................................................................................................................................................ 30 Document Listing ................................................................................................................................ 30 Upload Document ............................................................................................................................... 30 Edit Document .................................................................................................................................... 31 View Document................................................................................................................................... 31 Delete Document ................................................................................................................................ 32 Training History ....................................................................................................................................... 32 Training History Listing........................................................................................................................ 32 Add Training History ........................................................................................................................... 33 Edit Training History............................................................................................................................ 33 Delete Training History ....................................................................................................................... 34 Training List ............................................................................................................................................. 34 Training List ......................................................................................................................................... 34 Add Training ........................................................................................................................................ 35 Edit Training ........................................................................................................................................ 35 Delete Training .................................................................................................................................... 35 Training Calendar .................................................................................................................................... 35 Training Calendar ................................................................................................................................ 36 Add Training ........................................................................................................................................ 36 Edit Training ........................................................................................................................................ 37 Training Request ..................................................................................................................................... 37 Training Request Listing ...................................................................................................................... 37 Edit Training Request .......................................................................................................................... 38 Inbox ....................................................................................................................................................... 39 Inbox Listing ........................................................................................................................................ 39 Taking Assessment .............................................................................................................................. 40 | Page 3 User Manual goTNA 1.0 Delete Assessment .............................................................................................................................. 40 Subordinate............................................................................................................................................. 41 Subordinate Listing ............................................................................................................................. 41 Peer ......................................................................................................................................................... 41 Peer Listing .......................................................................................................................................... 41 Add Peers ............................................................................................................................................ 42 Edit Peer Information.......................................................................................................................... 42 Delete Peer.......................................................................................................................................... 42 Assessment Result .................................................................................................................................. 42 Assessment Result List ........................................................................................................................ 43 Assessment Result .............................................................................................................................. 43 Print Assessment Result ...................................................................................................................... 44 Job Description........................................................................................................................................ 45 Job Description Listing ........................................................................................................................ 45 Key Result Area ....................................................................................................................................... 45 Key Result Area Listing ........................................................................................................................ 45 Key Performance Indicator ..................................................................................................................... 46 Key Performance Indicator Listing ...................................................................................................... 46 Suspend/Terminate ................................................................................................................................ 46 Suspend/Terminate ............................................................................................................................ 46 Reset Password ....................................................................................................................................... 47 Reset Password ................................................................................................................................... 47 Login History ........................................................................................................................................... 47 Login History ....................................................................................................................................... 47 Transaction History ................................................................................................................................. 48 Transaction History ............................................................................................................................. 48 7. Division ................................................................................................................................................ 49 DIVISION Menu ....................................................................................................................................... 49 DIVISION Information ............................................................................................................................. 49 Search...................................................................................................................................................... 50 Division Listing .................................................................................................................................... 50 Search Division .................................................................................................................................... 50 Add DIVISION .......................................................................................................................................... 51 Delete DIVISION ...................................................................................................................................... 51 Update Division ....................................................................................................................................... 51 Employee Association ............................................................................................................................. 52 Employee Detail .................................................................................................................................. 52 8. Department ......................................................................................................................................... 53 Department Menu .................................................................................................................................. 53 Department Information ........................................................................................................................ 53 Search...................................................................................................................................................... 54 Department Listing ............................................................................................................................. 54 Search Department ............................................................................................................................. 54 Add Department ..................................................................................................................................... 55 Delete Department ................................................................................................................................. 55 Update Department ................................................................................................................................ 55 Employee Association ............................................................................................................................. 56 Employee Detail .................................................................................................................................. 56 | Page 4 User Manual goTNA 1.0 9. Team ................................................................................................................................................... 57 Team Menu ............................................................................................................................................. 57 Team Information ................................................................................................................................... 57 Search...................................................................................................................................................... 58 Team Listing ........................................................................................................................................ 58 Search Team........................................................................................................................................ 58 Add Team ................................................................................................................................................ 59 Delete Team ............................................................................................................................................ 59 Update Team........................................................................................................................................... 59 Team Member ........................................................................................................................................ 60 Team Member..................................................................................................................................... 60 Add Team Member ............................................................................................................................. 60 Delete Team Member ......................................................................................................................... 60 Employee Detail .................................................................................................................................. 61 Key Result Area ....................................................................................................................................... 61 Key Performance Indicator ..................................................................................................................... 61 10. Key Result Area ............................................................................................................................... 62 KRA Menu ............................................................................................................................................... 62 KRA Information...................................................................................................................................... 62 Search...................................................................................................................................................... 63 Key Result Area Listing ........................................................................................................................ 63 Search Key Result Area ....................................................................................................................... 63 Add Key Result Area ................................................................................................................................ 64 Delete Key Result Area............................................................................................................................ 64 Update Key Result Area .......................................................................................................................... 64 KRA Component ...................................................................................................................................... 65 KRA Component .................................................................................................................................. 65 Add KRA Component........................................................................................................................... 65 Edit KRA Component ........................................................................................................................... 66 Delete KRA Component ...................................................................................................................... 66 KRA Value ................................................................................................................................................ 66 KRA Value ............................................................................................................................................ 66 Add KRA Value .................................................................................................................................... 67 Edit KRA Value ..................................................................................................................................... 67 Delete KRA Value ................................................................................................................................ 67 KRA Element............................................................................................................................................ 67 KRA Element........................................................................................................................................ 68 Add KRA Element ................................................................................................................................ 68 Edit KRA Element ................................................................................................................................ 68 Delete KRA Element ............................................................................................................................ 69 KRA Associated Employee....................................................................................................................... 69 KRA Associated Employee ................................................................................................................... 69 Employee Detail .................................................................................................................................. 69 11. Key Performance Indicator ............................................................................................................. 70 KPI Menu ................................................................................................................................................. 70 KPI Information ....................................................................................................................................... 70 Search...................................................................................................................................................... 71 Key Performance Listing ..................................................................................................................... 71 | Page 5 User Manual goTNA 1.0 Search Key Result Area ....................................................................................................................... 71 Add Key Performance Indicator .............................................................................................................. 72 Delete Key Performance Indicator .......................................................................................................... 72 Update Key Performance Indicator ........................................................................................................ 72 KPI Group ................................................................................................................................................ 73 KPI Group ............................................................................................................................................ 73 Add KPI Group ..................................................................................................................................... 73 Edit KPI Group ..................................................................................................................................... 74 Delete KPI Group ................................................................................................................................. 74 KPI Item ................................................................................................................................................... 74 KPI Item ............................................................................................................................................... 75 Add KPI Item........................................................................................................................................ 75 Edit KPI Item ........................................................................................................................................ 75 Delete KPI Item ................................................................................................................................... 76 KPI Associated Employee ........................................................................................................................ 76 KPI Associated Employee .................................................................................................................... 76 Employee Detail .................................................................................................................................. 76 12. Job Description................................................................................................................................ 77 Job Designation ....................................................................................................................................... 77 Job Designation Menu ............................................................................................................................ 77 Job Designation Information................................................................................................................... 77 Job Designation Listing........................................................................................................................ 78 Job Designation Search ....................................................................................................................... 78 New Job Designation........................................................................................................................... 79 Edit Job Designation ............................................................................................................................ 79 Delete Job Designation ....................................................................................................................... 79 Job Description.................................................................................................................................... 80 JD Associated Employee ..................................................................................................................... 80 Job Description........................................................................................................................................ 80 Job Description Menu ............................................................................................................................. 80 Job Description Information ................................................................................................................... 81 Job Description Listing ........................................................................................................................ 81 Job Description Search ........................................................................................................................ 81 Add Job Description ............................................................................................................................ 82 Edit Job Description ............................................................................................................................ 82 Delete Job Description ........................................................................................................................ 83 Job Designation Association................................................................................................................ 83 Employee Association ......................................................................................................................... 83 Job Description Category ........................................................................................................................ 83 Job Description Category Menu.............................................................................................................. 83 Job Description Category Information .................................................................................................... 84 Job Description Category Listing ......................................................................................................... 84 Job Description Category Search ........................................................................................................ 84 Add Job Description Category ............................................................................................................. 85 Edit Job Description Category ............................................................................................................. 85 Delete Job Description Category......................................................................................................... 86 Job Description Association ................................................................................................................ 86 13. Assessment ..................................................................................................................................... 87 | Page 6 User Manual goTNA 1.0 Assessment Template ............................................................................................................................. 87 Assessment Template Menu................................................................................................................... 87 Assessment Template Information ......................................................................................................... 88 Assessment Template Listing .............................................................................................................. 88 Assessment Template Search ............................................................................................................. 89 New Assessment Template ................................................................................................................. 89 Edit Assessment Template .................................................................................................................. 90 Delete Assessment Template.............................................................................................................. 91 Asessment Template Segment ............................................................................................................... 91 Assessment Template Segment Listing .............................................................................................. 91 Add Assessment Template Segment................................................................................................... 92 Edit Assessment Template Segment ................................................................................................... 93 Delete Assessment Template Segment .............................................................................................. 93 Assessment Template Question ............................................................................................................. 94 Assessment Template Question Listing .............................................................................................. 94 Add Assessment Template Question .................................................................................................. 94 Edit Assessment Template Question .................................................................................................. 95 Delete Assessment Template Question .............................................................................................. 95 Assessment Schedule .............................................................................................................................. 96 Assessment Schedule Listing.............................................................................................................. 96 Add Assessment Schedule .................................................................................................................. 96 Edit Assessment Schedule................................................................................................................... 97 Delete Assessment Schedule .............................................................................................................. 97 Assessment ............................................................................................................................................. 97 Assessment Menu ................................................................................................................................... 98 Assessment Information ......................................................................................................................... 98 Assessment Listing .............................................................................................................................. 98 Assessment Search.............................................................................................................................. 99 New Assessment ................................................................................................................................. 99 Edit Schedule Details........................................................................................................................... 99 Edit Assessment Details .................................................................................................................... 100 Delete Assessment ............................................................................................................................ 100 Asessment Segment .............................................................................................................................. 100 Asessment Segment Listing.............................................................................................................. 101 Add Asessment Segment .................................................................................................................. 101 Edit Asessment Segment................................................................................................................... 102 Delete Asessment Segment .............................................................................................................. 102 Assessment Question............................................................................................................................ 103 Assessment Question Listing ............................................................................................................ 103 Add Assessment Question ................................................................................................................ 103 Edit Assessment Question................................................................................................................. 104 Delete Assessment Question ............................................................................................................ 104 Participant & Target .............................................................................................................................. 105 Participant & Target Listing............................................................................................................... 105 Add Target Employee ........................................................................................................................ 105 Edit Participant Detail ....................................................................................................................... 105 Edit Target Detail .............................................................................................................................. 105 Print Assessment............................................................................................................................... 106 | Page 7 User Manual goTNA 1.0 Delete Participant & Target .............................................................................................................. 106 Notification ........................................................................................................................................... 107 Notification Listing ............................................................................................................................ 107 Add Notification ................................................................................................................................ 107 View Notification Detail .................................................................................................................... 108 Result .................................................................................................................................................... 108 Result Listing ..................................................................................................................................... 108 Result Detail ...................................................................................................................................... 109 Print Result ........................................................................................................................................ 110 14. Training Program........................................................................................................................... 111 Training Program .................................................................................................................................. 111 Training Menu ....................................................................................................................................... 111 Training Information ............................................................................................................................. 112 Training Listing .................................................................................................................................. 112 Training Calendar .............................................................................................................................. 113 Add Training ...................................................................................................................................... 114 Edit Training ...................................................................................................................................... 115 Delete Training .................................................................................................................................. 115 Training Participant ............................................................................................................................... 116 Participant Listing.............................................................................................................................. 116 Add Participant ................................................................................................................................. 116 Add Suggested Participant ................................................................................................................ 117 Edit Participant Detail ....................................................................................................................... 117 Delete Participant ............................................................................................................................. 117 Course Material..................................................................................................................................... 118 Course Material Listing ..................................................................................................................... 118 Add Training Material ....................................................................................................................... 118 View Training Material ...................................................................................................................... 119 Delete Training Material ................................................................................................................... 119 Notification ........................................................................................................................................... 120 Notification Listing ............................................................................................................................ 120 Add Notification ................................................................................................................................ 120 View Notification Detail .................................................................................................................... 121 15. Training Request ........................................................................................................................... 122 Training Request ................................................................................................................................... 122 Training Request Listing .................................................................................................................... 122 Edit Employee Information ............................................................................................................... 123 Edit Training Request ........................................................................................................................ 123 16. Training Area Map......................................................................................................................... 124 Training Area Map ................................................................................................................................ 124 Training Area Map Menu ...................................................................................................................... 124 Training Area Map Information ............................................................................................................ 124 Training Area Map Listing ................................................................................................................. 125 Add Training Area Map ..................................................................................................................... 126 Edit Training Area Map ..................................................................................................................... 126 Delete Training Area Map ................................................................................................................. 127 Training Program Association ........................................................................................................... 127 Add Training Association................................................................................................................... 127 | Page 8 User Manual goTNA 1.0 Delete Training Program Association................................................................................................ 127 JD Association ................................................................................................................................... 127 Add JD Association ............................................................................................................................ 128 Delete JD Association ........................................................................................................................ 128 KRA Association................................................................................................................................. 128 Add KRA Association ......................................................................................................................... 128 Delete KRA Association ..................................................................................................................... 128 KPI Association .................................................................................................................................. 128 Add KPI Association........................................................................................................................... 128 Delete KPI Association ...................................................................................................................... 128 Assessment Association .................................................................................................................... 129 Add Assessment Association............................................................................................................. 129 Delete Assessment Association ........................................................................................................ 129 17. Training Provider ........................................................................................................................... 130 Training Provider................................................................................................................................... 130 Training Provider Menu ........................................................................................................................ 130 Training Provider Information .............................................................................................................. 130 Training Provider Listing ................................................................................................................... 131 Add Training Provider ....................................................................................................................... 132 Edit Training Provider........................................................................................................................ 133 Delete Training Provider ................................................................................................................... 133 Trainer ................................................................................................................................................... 133 Trainer Listing.................................................................................................................................... 133 Add Trainer ....................................................................................................................................... 134 Edit Trainer........................................................................................................................................ 134 Delete Trainer ................................................................................................................................... 135 Course Offering ..................................................................................................................................... 135 Course Offering Listing ...................................................................................................................... 135 Add Course Offering.......................................................................................................................... 136 Edit Course Offering .......................................................................................................................... 136 Schedule Course Offering ................................................................................................................. 136 Delete Course Offering ..................................................................................................................... 137 Suspend/Terminate .............................................................................................................................. 137 Reset Password ..................................................................................................................................... 137 Login History ......................................................................................................................................... 138 Transaction History ............................................................................................................................... 138 18. Report Listing ................................................................................................................................ 139 Report ................................................................................................................................................... 139 Report Listing ........................................................................................................................................ 139 Report Setting ................................................................................................................................... 140 Save Report ....................................................................................................................................... 140 Output To Excel ................................................................................................................................. 140 Print ................................................................................................................................................... 141 19. Change Password .......................................................................................................................... 142 Password ............................................................................................................................................... 142 20. System Configuration .................................................................................................................... 143 Administration ...................................................................................................................................... 143 System Configuration ............................................................................................................................ 143 | Page 9 User Manual goTNA 1.0 Configuration Listing ......................................................................................................................... 143 Code Listing ....................................................................................................................................... 144 Add Item............................................................................................................................................ 144 Edit Item ............................................................................................................................................ 145 Delete Item ....................................................................................................................................... 145 User Group Access ................................................................................................................................ 146 System Setting ...................................................................................................................................... 147 21. Change Theme .............................................................................................................................. 148 Change Theme ...................................................................................................................................... 148 Gold Theme ....................................................................................................................................... 148 Purple Theme .................................................................................................................................... 148 Black & White Theme........................................................................................................................ 149 Blue Theme ....................................................................................................................................... 149 Shade Theme .................................................................................................................................... 149 | Page 10 User Manual goTNA 1.0 1. BEFORE YOU BEGIN TRADEMARK AND LICENSES goTNA is a registered trademark and you may use this product subject to the terms and conditions by Strategic Corporate Alliance Sdn Bhd. The goTNA software included within this product is subject to Software End User License Agreement (EULA) which is signed upon purchase of the software. Please visit our website at www.gotna.com or contact our commercial representative for further information. 2. SYSTEM ACCESS MODE The system is accessible through three different modes: No 1. 2. 3. Mode HR Access Suggested link: http://www.website.com/hr Note: the actual link may be different depending on the installation. Remark This access is limited to HR only. Each user that can have access to this mode should be assigned with unique Username to access the system. Employee Access Suggested link: http://www.website.com/staff Note: the actual link may be different depending on the installation. Training Provider Access Suggested link: http://www.website.com/trainer Note: the actual link may be different depending on the installation. This access is dedicated to all employees in the organization. Each employee that can have access to this mode should be assigned with unique Username to access the system. However, HR may at its own discretion create user access to non-HR employees for the purpose of delegating tasks. The HR access however is not designed to be accessible by non-HR employees. This access is dedicated to all registered training providers for the organization. Each training provider that can have access to this mode should be assigned with unique Username to access the system. | Page 11 User Manual goTNA 1.0 3. INTRODUCTION TO GOTNA CYCLE Stages in goTNA Identify Monitor Execute Analyze Design goTNA comprises of five TNA cycles. Each cycle will have its own features and function and the cycles are dependent on each other. The cycles are as follow: Identify Analyze Design Execute Monitor Identify Stage The identify stage is where every employee is defined and developed in the system. This stage will allow organizations to acquire, gather and keep a comprehensive information about an employee. Analyze Stage The analyze stage is where organization can gather information for the purpose of making analysis. Some portion of the gathering information for the purpose of analysis is already been done in the identify stage. This analysis can then be used to determine what the most relevant trainings for each employee are. Design Stage The design stage is where a training need is accessed and identified. Each employee will then be assigned with relevant training program based on their competency level as well as organization’s direction at any given period. The most important outcome in this stage is Training Calendar. Execute Stage Execute stage is where each training program which was planned earlier. All the pre-training activities and immediate post-training activities are carried out during this stage. Monitor Stage Monitor stage is where the effectiveness and level of the competencies of the affected employees are monitored and assessed. This will give room to prepare for further development of each employee. | Page 12 User Manual goTNA 1.0 Our solution – the goTNA system is designed and built around the Training Need Analysis environment which addresses employee competency development. The highlights of these components are: 1. Employee Profile – this will include Employment Information, Employment History, Education History and Training History 2. Employment Expectation – the ability to track how employee should perform using any combination of Key Result Area (KRA), Key Performance Indicator (KPI) and/or Job Description (JD) 3. Employee Assessment – The ability to perform assessment based on existing Employee Expectation on-the-fly or using custom built assessment questionnaire targeted to Self, Peer, Superior and Subordinate 4. Performance Gap Analysis – The ability to evaluate and analyze Performance Gap based on Expected Performance and Actual Performance 5. Training Area – A mechanism used by the system to systematically and automatically suggest specific training program whenever an employee encounter specific performance problem which will allow any organization to develop training calendar tailored to specific employee. 6. Suggested Remediation – the ability to automatically suggest the specific training program for any performance problem. 7. Training Efficiency – the ability to track and monitor efficiency of training program based on Training Assessment on Participant, Content, Trainer and Training Material. | Page 13 User Manual goTNA 1.0 4. SYSTEM NAVIGATION HR ACCESS MODE User Information This information will be shown once an user login to the system. Top Menu The Top Menu is the main navigation for this system. The item in this area will be shown based on the access level for the user. Click any of the menu will change the item in the Left Menu. Bottom Menu The Bottom Menu is the same as the Top Menu. However, there are additional links at the Bottom Menu which is reserved by Strategic Corporate Alliance. Left Menu – Home This is the default Left Menu. Click Home Top Menu will show this Left Menu. | Page 14 User Manual goTNA 1.0 Left Menu – Profile This menu is dedicated to Profile related features. Click Profile Top Menu will show this Left Menu. Left Menu – TNA This menu is dedicated to TNA related features. Click TNA Top Menu will show this Left Menu. | Page 15 User Manual goTNA 1.0 Left Menu – Report This menu is dedicated to Report related features. Click Report Top Menu will show this Left Menu. Left Menu – Admin This menu is dedicated to Admin related features. Click Admin Top Menu will show this Left Menu. Change Theme Menu Theme can be changed at any point by selecting any one of the drop-down option. See the Change Theme section at the end of this document for further information. | Page 16 User Manual goTNA 1.0 Submenu – Employee Menu Employee Menu will be shown when the system displays information related to selected employee. With this, user can then navigate to other information or function related to the selected employee. Submenu – Division Menu Division Menu will be shown when the system displays information related to selected division. With this, user can then navigate to other information or function related to the selected division. Submenu – Department Menu Department Menu will be shown when the system displays information related to selected department. With this, user can then navigate to other information or function related to the selected department. Submenu – Team Menu Team Menu will be shown when the system displays information related to selected team. With this, user can then navigate to other information or function related to the selected team. Submenu – KRA Menu KRA Menu will be shown when the system displays information related to selected KRA. With this, user can then navigate to other information or function related to the selected KRA. | Page 17 User Manual goTNA 1.0 Submenu – KPI Menu KPI Menu will be shown when the system displays information related to selected KPI. With this, user can then navigate to other information or function related to the selected KPI. Submenu – Job Designation Menu Job Designation Menu will be shown when the system displays information related to selected Job Designation. With this, user can then navigate to other information or function related to the selected Job Designation. Submenu – JD Category Menu JD Category Menu will be shown when the system displays information related to selected JD Category. With this, user can then navigate to other information or function related to the selected JD Category. Submenu – Job Description Menu Job Description Menu will be shown when the system displays information related to selected Job Description. With this, user can then navigate to other information or function related to the selected Job Description. Submenu – Assessment Template Menu Assessment Template Menu will be shown when the system displays information related to selected Assessment Template. With this, user can then navigate to other information or function related to the selected Assessment Template. | Page 18 User Manual goTNA 1.0 Submenu – Assessment Menu Assessment Menu will be shown when the system displays information related to selected Assessment. With this, user can then navigate to other information or function related to the selected Assessment. Submenu – Training Menu Training Menu will be shown when the system displays information related to selected Training. With this, user can then navigate to other information or function related to the selected Training. Submenu – Training Area Menu Training Area Menu will be shown when the system displays information related to selected Training Area. With this, user can then navigate to other information or function related to the selected Training Area. Submenu – Training Provider Menu Training Provider Menu will be shown when the system displays information related to selected Training Provider. With this, user can then navigate to other information or function related to the selected Training Provider. | Page 19 User Manual goTNA 1.0 5. COMMON SCREEN POP-UP EMPLOYEE The pop-up employee is shown whenever the button is clicked. The screen shows the pop-up to search and select existing employee. Enter the following information to search: Employee ID – enter partial or complete Full Name – enter partial of complete Dept – enter partial or complete Department Code Click go or press Enter to search. Once the target employee is found click on the employee link to make the selection. POP-UP CALENDAR The pop-up calendar is shown whenever the button is clicked. The above screen shows the Calendar pop-up. Jump through the calendar using the navigation available at the top. Once the desired date is found, click on the date to make selection. | Page 20 User Manual goTNA 1.0 6. EMPLOYEE Employee is the heart of Training Need Analysis. The system provides comprehensive information and function regarding employee. EMPLOYEE MENU Employee Menu will be shown when the system displays information related to selected employee. With this, user can then navigate to other information or function related to the selected employee. EMPLOYEE INFORMATION The Employee Information will be shown when the system displays information related to selected employee. The information: Name – Employee Full Name Employee ID – The Employee ID Title – Employee Title Division – Employee Division Designation – Employee Job Designation Department – Employee Department KRA – Employee KRA Report To – Employee Superior KPI – Employee KPI Team – The Team that the employee belongs to. One employee can belong to more than one team Mobile – Employee Mobile Number Email – Employee Email ID Gender – Employee Gender Ethnic – Employee Ethnic To change the listed information, go to Employee Menu > Basic Information. SEARCH | Page 21 User Manual goTNA 1.0 Access Point Profile > Employee Employee Listing The screen show the list of employees already registered in the system. Click the Search Bar to show the Search Form as show below. The listing shows: Full Name Employee ID Report To Department Email Search Employee The screen show the Search Form to search employee. The search can be done by using either one or combination of the following fields: Employee ID – enter partial or full Employee ID Employee Name – enter partial or full Employee Name New IC No – enter partial or full New IC No Department – select either one or leave unselected Job Group – select either one or leave unselected # of records – change to desired number of records or leave as default value – 100 records Click Search button to show the search result. Refer to Employee Listing section for search result. | Page 22 User Manual goTNA 1.0 ADD EMPLOYEE Access Point Profile > Employee > Add Employee Add Employee The screen show the add employee form. Enter the following information: Report To – click the button to search existing employee. A pop-up will be displayed to search and select existing employee. Refer below. Once an employee is selected, the appropriate Full Name and Employee ID will be displayed. Division – Select existing Division or leave unselected. Department – Select existing Department or leave unselected. KRA – Select existing KRA or leave unselected. Once KRA is assigned, the Employee Key Result Area will be visible. Refer to Employee Menu > Key Result Area. Department – Select existing Department or leave unselected. KPI – Select existing KPI or leave unselected. Once KPI is assigned, the Employee Key Performance Indicator will be visible. Refer to Employee Menu > Key Performance Indicator. Job Designation – Select existing Job Designation or leave unselected. Once Job Designation is assigned, the Employee Job Description will be visible. Refer to Employee Menu > Job Description. Employee ID – enter a unique Employee ID Password – the default password will be shown and can be reset later Full Name – enter Full Name of the employee | Page 23 User Manual goTNA 1.0 User Name – enter unique User Name for the employee which will be used as authentication during login New IC Number – enter a unique New IC Number Old IC Number – enter Old IC Number or leave blank Title – select the existing Title or leave unselected Ethnicity – select the existing Ethnicity or leave unselected Nationality – select the existing Nationality or leave unselected Gender – select the existing Gender or leave unselected Birthdate – click on the button to show the Calendar Pop-up and to make date selection Email – enter Email address or leave blank Mobile Phone Number – enter Mobile Phone Number or leave blank Home Phone Number – enter Home Phone Number or leave blank Office Phone – enter Office Phone or leave blank Fax – enter Fax or leave blank Home Address and Correspondance Address – enter Home Address and Correspondance Address or leave blank. Use the same as home button to make the Correspondance Address same as Home Address. State and Country – select the State and Country or leave unselected Click the Add button to add the employee and click the Cancel button to go back to previous screen. DELETE EMPLOYEE Please note that the employee is not allowed to be deleted. UPDATE EMPLOYEE Access Point Profile > Employee > Employee Name Employee Menu > Basic Information | Page 24 User Manual goTNA 1.0 Edit Employee Refer to the Add Employee function for reference of the field. Click the Update button to update the employee information or Cancel button to go to previous screen. EMPLOYMENT Employment History provides a comprehensive reference on the employee’s employment history. Access Point Employee Menu > Employment Employee Menu > Employment > Add Employment History Employee Menu > Employment > Upload Employment Documents Employee Menu > Employment > Employer Name Employee Menu > Employment > Delete Employment History Employee Menu > Employment > Delete Document Employee Menu > Employment > Document Name | Page 25 User Manual goTNA 1.0 Employement History The screen shows the list of employment history. It also shows the list of the uploaded documents related to the employment. Add Employment History The screen shows the Add Employment History form. Enter the following information: Employer – enter the full name of the employer and this is usually a company name Start Date – click on the button to show the Calendar Pop-up and to make date selection Duration – enter the duration of the employment with the employer Experience – enter the detail of the experience during employment Click the Create button to create the employment history or Cancel button to go to the previous screen. Edit Employment History | Page 26 User Manual goTNA 1.0 Refer to the Add Employment History function for reference of the field. Click the Update button to update the employment information or Cancel button to go to previous screen. Delete Employment History Click on the Delete link from the Employment History Listing. Click OK button to continue to delete. Click Cancel button to cancel the delete. Upload Employment Documents Refer to Employee Menu > Document > Upload Document section for further information. Edit Employment Document Refer to Employee Menu > Document > Edit Document section for further information. View Employment Document Refer to Employee Menu > Document > View Document section for further information. Delete Employment Document Refer to Employee Menu > Document > Delete section for further information. EDUCATION Education History provides a comprehensive reference on the employee’s education history. Access Point Employee Menu > Education Employee Menu > Education > Add Employment History Employee Menu > Education > Upload Employment Documents Employee Menu > Education > Employer Name Employee Menu > Education > Delete Employment History Employee Menu > Education > Delete Document Employee Menu > Education > Document Name | Page 27 User Manual goTNA 1.0 Educational History The screen shows the list of education history. It also shows the list of the uploaded documents related to the education. Add Education History The screen shows the Add Education History form. Enter the following information: Education Center – enter the Education Center for the employee. This usually is the school, college or university. Start Year – enter the year the employee started entering the Education Center Score/Grade/Result – enter the final result upon exiting the Education Center Remark – enter more information or leave it blank Click the Create button to create the education history or Cancel button to go to the previous screen. Edit Education History | Page 28 User Manual goTNA 1.0 Refer to the Add Education History function for reference of the field. Click the Update button to update the education information or Cancel button to go to previous screen. Delete Education History Click on the Delete link from the Education History Listing. Click OK button to continue to delete. Click Cancel button to cancel the delete. Upload Education Documents Refer to Employee Menu > Document > Upload Document section for further information. Edit Education Document Refer to Employee Menu > Document > Edit Document section for further information. View Education Document Refer to Employee Menu > Document > View Document section for further information. Delete Education Document Refer to Employee Menu > Document > Delete section for further information. RESUME Access Point Employee Menu > Resume Employee Menu > Resume > Upload Resume Employee Menu > Resume > Delete Employee Menu > Resume > Document Name Resume The list shows the uploaded document related to resume. Refer to Employee Menu > Document section for further information. Upload Resume Refer to Employee Menu > Document > Upload Document section for further information. | Page 29 User Manual goTNA 1.0 Edit Resume Refer to Employee Menu > Document > Edit Document section for further information. View Resume Refer to Employee Menu > Document > View Document section for further information. Delete Resume Refer to Employee Menu > Document > Delete section for further information. DOCUMENT Access Point Employee Menu > Document Employee Menu > Document > Upload Documents Employee Menu > Document > Delete Employee Menu > Document > Document Name Document Listing The screen shows the list of documents for selected employee. Upload Document The screen shows the the Upload Document form. Enter the following information: File – Click on the Browse button and a pop-up window will be shown to browse and select a file to upload | Page 30 User Manual goTNA 1.0 Category – select either Employment, Education, Resume, Profile Photo or Training. If the upload is coming from employment section, the Employment is pre-selected. If the upload is coming from education section, Education is pre-selected. If the upload is coming from resume section, Resume is pre-selected. To change the profile photo of the employee, select Profile Photo. Name – enter the document name as reference Remark – enter remark or leave blank Click Upload button to upload the document or Cancel button to go back to previous screen. The screen shows the Browse function to browse for a file to upload. Once the file is found, click on the file name and click Open button to select and close the window. Edit Document The document is not allowed to be updated. However, the document can be deleted and the latest version can be uploaded. View Document Click on the document name from the Document Listing and the system will prompt to save or view the document. For some clients, the system will not ask for confirmation and the document will be opened automatically. | Page 31 User Manual goTNA 1.0 Delete Document Click on the delete link in the file listing to delete the file. A pop-up window will be shown as above to confirm the delete process. Click OK button to confirm the delete and Cancel button to cancel the delete. TRAINING HISTORY Training History provides a mechanism to maintain the historical training records. Ideally, the historical training records are: The trainings that was attended in prior employment The trainings that is kept as a reference only Access Point Employee Menu > Training History Employee Menu > Training History > Add Training History Employee Menu > Training History > Edit Training History Employee Menu > Training History > Delete Training History Training History Listing The screen shows the list of training history. | Page 32 User Manual goTNA 1.0 Add Training History The screen shows the Add Training History form. Enter the following information: Course Code – enter the Course Code as provided by the Training Provider Course Title – enter the title of the training Start Date and End Date – click on the button to select the appropriate Start Date and End Date Certification – enter the Certification Name if any or leave blank Location – enter the location of the training Provider – enter the Training Provider name Fee – enter the Fee Amount Training Hours – enter the number of hours for the training (1 day equals to 8 hours) Course Description – enter the Course Description if any or leave blank Click the Create button to create the training history or Cancel button to go back to previous screen. Edit Training History Refer to the Add Training History function for reference of the field. Click the Update button to update the training information or Cancel button to go to previous screen. | Page 33 User Manual goTNA 1.0 Delete Training History Click on the Delete link in the Training History Listing and the system will prompt to confirm the delete process. Click OK button to delete the record or Cancel to cancel the delete process. TRAINING LIST Training list indicates the list of training programs for which the selected employee become participant. Access Point Employee Menu > Training List Employee Menu > Training List > Add Training Employee Menu > Training List > Edit Training Employee Menu > Training List > Delete Training Training List The screen shows the list of training programs the selected employee is the participant. Click and select from the year dropdown to switch to desired year. | Page 34 User Manual goTNA 1.0 Add Training The screen shows the Add Training form. Select the following: Training Program – select the list of confirmed training program Click Create button to register selected employee as participant for the training program. Click Cancel button to go to previous screen. Edit Training Please refer to Training Menu > Training Detail section. Delete Training Click on the Delete link in the Training List and the system will prompt to confirm the delete process. Click OK button to delete the record or Cancel to cancel the delete process. TRAINING CALENDAR Training calendar indicates the list of training programs in calendar format for which the selected employee become participant. Access Point Employee Menu > Training Calendar Employee Menu > Training Calendar > Add Training Employee Menu > Training Calendar > Edit Training | Page 35 User Manual goTNA 1.0 Training Calendar The screen shows the list of training programs the selected employee is the participant. Click and select from the year dropdown, month dropdown or Today button to switch to desired date. The top part of the calendar shows the monthly number of trainings. Click on the month to display the training program charted on the daily view of the calendar. Mouse-over to the training code for more information of the training program. Add Training The screen shows the Add Training form. Select the following: Training Program – select the list of confirmed training program | Page 36 User Manual goTNA 1.0 Click Create button to register selected employee as participant for the training program. Click Cancel button to go to previous screen. Edit Training Please refer to Training Menu > Training Detail section. TRAINING REQUEST Training Request is the training the selected employee requested. Access Point Employee Menu > Training Request Employee Menu > Training Request > Add Training Employee Menu > Training Request > Edit Training Training Request Listing The screen shows the list of training the selected employee requested. | Page 37 User Manual goTNA 1.0 Edit Training Request The above screen shows the Training Request submitted by the selected employee. Depending on the Course Type, the following are the actions: Course Type = NEW o Update – click Update button to update the Training Request. Enter the following information to update: Course Code – enter the Course Code as provided by the training provider Course Title – enter the course title Start Date and End Date – click on the button to select the appropriate Start Date and End Date Start Time and End Time – select the time from the dropdown Certification – enter the certification name or leave blank Location – specify the location of the course Provider – specify the Training Provider for the course Course Fee – specify how much is the fee per participant Training Hours – specify the number of training hours – 1 day = 8 hours Justification - specify in detail the reason why HR should approve the training request o Decline – click Decline button to reject the request o Import – click the Import button to create master training calendar using the Training Request details and automatically register the employee as the participant o Cancel – click Cancel button to return to the previous screen Course Type = EXISTING o Update – refer to the Update section above o Decline – refer to the Decline section above | Page 38 User Manual o o goTNA 1.0 Register – click Register button to register the employee as participant to the requested training program Cancel – refer to the Cancel section above INBOX The Inbox is the location where tasks that the employee need to perform are listed. Access Point Employee Menu > Inbox Employee Menu > Inbox > Assessment Name Employee Menu > Inbox > Delete Inbox Listing The screen shows the list of tasks to be performed. | Page 39 User Manual goTNA 1.0 Taking Assessment The screen shows the assessment to be taken upon clicking the link in the Inbox. HR can take the assessment on behalf of the employee. Answer all questions based on the instruction provided. Once all questions are answered, click Submit button to submit the response. Click Reset button to reset the answer. The Status will remain OPEN until all questions are answered. Delete Assessment Click on the Delete link in the Inbox and the system will prompt to confirm the delete process. Click OK button to delete the record or Cancel to cancel the delete process. | Page 40 User Manual goTNA 1.0 SUBORDINATE Subordinate is a employee viewer based on their reporting structure. Access Point Employee Menu > Subordinate Employee Menu > Subordinate > Employee ID Subordinate Listing The screen shows the list of subordinates or employee reporting to selected employee. The list is shown in two levels: First level shows the employee reporting to selected employee Second level shows the employee reporting to the first level Click on the Employee ID to switch to the selected employee. Click on the Reporting Line (if any) to go back to the top level employee. PEER Peer is the list of employees associated with target employee for the purpose of peer assessment. Peer definition is required in order to schedule peer assessment for selected employee. Peer can be defined by any superior for their subordinate or by the HR. Access Point Employee Menu > Peer Employee Menu > Peer > Add Peers Employee Menu > Peer > Employee ID Employee Menu > Peer > Delete Peer Peer Listing | Page 41 User Manual goTNA 1.0 The screen shows the list of peers for selected employee. Only a superior can define peers for the subordinate. An employee cannot define his own peer. Add Peers The screen shows the form to add peers for selected employee. Up to five peers can be added per form. Click on the to select target employee. Edit Peer Information Please refer to the Employee Menu > Basic Information Section. Delete Peer Click on the Delete link in the Peer listing and the system will prompt to confirm the delete process. Click OK button to delete the record or Cancel to cancel the delete process. ASSESSMENT RESULT The assessment result shows all the results for the assessments that are already completed. Access Point Employee Menu > Assessment Result Employee Menu > Assessment Result > Assessment Name Employee Menu > Assessment Result > Print | Page 42 User Manual goTNA 1.0 Assessment Result List The screen show the list of assessments that are already completed. Assessment Result The screen shows the result of the assessment. The format of the Result is very similar to the assessment when it was taken. The difference is that it show the answer with some analysis including the Response, Gap and Weight. Weight or Weightage will contribute how system calculates the Suggested Training Participant. What this means is that the more an employee cumulate weight for specific Training Area, the highly likely the employee will be suggested to become participant for Training Program in the specific Training Area. | Page 43 User Manual goTNA 1.0 Weight is measured as either 0, 1 or 2. Ideally, the more weight will indicate performance or competency problem and should be sent to appropriate training to address the competency. Print Assessment Result The screen shows the Assessment Result in a Pop-up window where it shows the printable assessment result. | Page 44 User Manual goTNA 1.0 JOB DESCRIPTION Access Point Employee Menu > Job Description Job Description Listing The screen shows the list of Job Descriptions or JD for the selected employee. Refer to Employee Menu > Basic Information to assign a different Job Description for the employee. KEY RESULT AREA Access Point Employee Menu > Key Result Area Key Result Area Listing The screen shows the list of Key Result Area or KRA for the selected employee. Refer to Employee Menu > Basic Information to assign a different KRA for the employee. | Page 45 User Manual goTNA 1.0 KEY PERFORMANCE INDICATOR Access Point Employee Menu > Key Performance Indicator Key Performance Indicator Listing The screen shows the list of Key Performance Indicator or KPI for the selected employee. Refer to Employee Menu > Basic Information to assign a different KPI for the employee. SUSPEND/TERMINATE This feature is used to control the ability of the employee to access the system. Access Point Employee Menu > Suspend/Terminate Suspend/Terminate The screen shows the Suspend/Terminate form. Enter the following information: | Page 46 User Manual goTNA 1.0 Status – select current status of the employee. Only Active status will allow employee to login to the system. Other status will not allow employee login to the system. Remark – use Remark to enter the reason for the operation Click Update button to proceed with the process or Cancel button to return to the previous screen. The screen also shows the list of previous operations for reference. RESET PASSWORD This feature is used to reset employee password without knowing existing password. Access Point Employee Menu > Reset Password Reset Password The screen shows the reset password form. Enter the new password twice to the form. Click Reset button to reset the password or Cancel button to return to the previous screen. LOGIN HISTORY This feature is to provide a detail login history for the selected employee. Access Point Employee Menu > Login History Login History The screen shows the list of logins sorted by login date. | Page 47 User Manual goTNA 1.0 TRANSACTION HISTORY This feature provides the detailed transaction history for the selected employee throughout the lifespan in the system. Access Point Employee Menu > Transaction History Transaction History The screen shows the list of detailed transaction sorted by transaction date. | Page 48 User Manual goTNA 1.0 7. DIVISION Division the a mechanism to group employees. Access Point Profile > Division Profile > Division > Add Division Profile > Division > Delete Profile > Division > Division Name Division Menu > Division Detail Division Menu > Employee Association DIVISION MENU Division Menu will be shown when the system displays information related to selected division. With this, user can then navigate to other information or function related to the selected division. DIVISION INFORMATION The Division Information will be shown when the system displays information related to selected division. The information: Code – Division Code Name – Division Name To change the listed information, go to Division Menu > Division Detail. | Page 49 User Manual goTNA 1.0 SEARCH Division Listing The screen show the list of division already registered in the system. Click the Search Bar to show the Search Form as show below. The listing shows: Division Code Division name Remark Search Division The screen show the Search Form to search division. The search can be done by using either one or combination of the following fields: Division Code – enter partial or full Division Code Division Name – enter partial or full Division Name # of records – change to desired number of records or leave as default value – 100 records Click Search button to show the search result. Refer to Division Listing section for search result. | Page 50 User Manual goTNA 1.0 ADD DIVISION The screen show the add division form. Enter the following information: Code – enter the Division Code Name – enter the Division Name Remark – enter any information about the division or leave blank Click the Add button to add the division and click the Cancel button to go back to previous screen. DELETE DIVISION Click on the Delete link from the Division Listing. Click OK button to continue to delete. Click Cancel button to cancel the delete. UPDATE DIVISION Refer to the Add Division function for reference of the field. Click the Update button to update the division information or Cancel button to go to previous screen. | Page 51 User Manual goTNA 1.0 EMPLOYEE ASSOCIATION The screen show the list of employees that belongs to the selected division. Employee Detail Please refer to the Employee Profile > Employee Detail section. | Page 52 User Manual goTNA 1.0 8. DEPARTMENT Department the a mechanism to group employees. Access Point Profile > Department Profile > Department > Add Department Profile > Department > Delete Profile > Department > Department Name Department Menu > Department Detail Department Menu > Employee Association DEPARTMENT MENU Department Menu will be shown when the system displays information related to selected department. With this, user can then navigate to other information or function related to the selected department. DEPARTMENT INFORMATION The Department Information will be shown when the system displays information related to selected department. The information: Code – Department Code Name – Department Name To change the listed information, go to Department Menu > Department Detail. | Page 53 User Manual goTNA 1.0 SEARCH Department Listing The screen show the list of department already registered in the system. Click the Search Bar to show the Search Form as show below. The listing shows: Department Code Department name Remark Search Department The screen show the Search Form to search department. The search can be done by using either one or combination of the following fields: Department Code – enter partial or full Department Code Department Name – enter partial or full Department Name # of records – change to desired number of records or leave as default value – 100 records Click Search button to show the search result. Refer to Department Listing section for search result. | Page 54 User Manual goTNA 1.0 ADD DEPARTMENT The screen show the add department form. Enter the following information: Code – enter the Department Code Name – enter the Department Name Remark – enter any information about the department or leave blank Click the Add button to add the department and click the Cancel button to go back to previous screen. DELETE DEPARTMENT Click on the Delete link from the Department Listing. Click OK button to continue to delete. Click Cancel button to cancel the delete. UPDATE DEPARTMENT Refer to the Add Department function for reference of the field. Click the Update button to update the department information or Cancel button to go to previous screen. | Page 55 User Manual goTNA 1.0 EMPLOYEE ASSOCIATION The screen show the list of employees that belongs to the selected department. Employee Detail Please refer to the Employee Profile > Employee Detail section. | Page 56 User Manual goTNA 1.0 9. TEAM Team the a mechanism to group employees. Access Point Profile > Team Profile > Team > Add Team Profile > Team > Delete Profile > Team > Team Name Team Menu > Team Detail Team Menu > Team Member Team Menu > Key Result Area Team Menu > Key Performance Indicator TEAM MENU Team Menu will be shown when the system displays information related to selected team. With this, user can then navigate to other information or function related to the selected team. TEAM INFORMATION The Team Information will be shown when the system displays information related to selected team. The information: Code – Team Code Name – Team Name KPI – Key Performance Indicator for the Team KRA – Key Result Area for the Team To change the listed information, go to Team Menu > Team Detail. | Page 57 User Manual goTNA 1.0 SEARCH Team Listing The screen show the list of team already registered in the system. Click the Search Bar to show the Search Form as show below. The listing shows: Team Code Team name Remark Search Team The screen show the Search Form to search team. The search can be done by using either one or combination of the following fields: Team Code – enter partial or full Team Code Team Name – enter partial or full Team Name # of records – change to desired number of records or leave as default value – 100 records Click Search button to show the search result. Refer to Team Listing section for search result. | Page 58 User Manual goTNA 1.0 ADD TEAM The screen show the add team form. Enter the following information: Code – enter the Team Code Name – enter the Team Name KPI – select from the KPI dropdown or leave unselected KRA – select from the KRA dropdown or leave unselected Remark – enter any information about the team or leave blank Click the Add button to add the team and click the Cancel button to go back to previous screen. DELETE TEAM Click on the Delete link from the Team Listing. Click OK button to continue to delete. Click Cancel button to cancel the delete. UPDATE TEAM Refer to the Add Team function for reference of the field. Click the Update button to update the team information or Cancel button to go to previous screen. | Page 59 User Manual goTNA 1.0 TEAM MEMBER Team Member The screen shows the list of employees for the selected Team. Add Team Member The screen shows the Add Team Member form. Click the button to select existing employee. The system allows up to ten new team member per form. Click on the Update button to add the selected employees as the team member or Cancel button to return to previous screen. Delete Team Member | Page 60 User Manual goTNA 1.0 Click on the Delete link from the Team Member Listing. Click OK button to continue to delete. Click Cancel button to cancel the delete. Employee Detail Please refer to the Employee Profile > Employee Detail section. KEY RESULT AREA The screen shows the list of Key Result Area items for the selected Team. KEY PERFORMANCE INDICATOR The screen shows the list of Key Performance Indicator items for the selected Team. | Page 61 User Manual goTNA 1.0 10. KEY RESULT AREA Key Result Area or KRA is a mechanism to set expectation towards employee. If KRA is being used, KRA will also becomes the basis for assessing employee’s performance and competency. Access Point TNA > Key Result Area TNA > Key Result Area > Add KRA TNA > Key Result Area > Delete TNA > Key Result Area > KRA Name KRA Menu > KRA Details KRA MENU KRA Menu will be shown when the system displays information related to selected KRA. With this, user can then navigate to other information or function related to the selected KRA. KRA INFORMATION The KRA Information will be shown when the system displays information related to selected KRA. The information: Code – KRA Code Name – KRA Name Target Group – the information with regards to target group Description – additional information about the KRA To change the listed information, go to KRA Menu > KRA Detail. | Page 62 User Manual goTNA 1.0 SEARCH Key Result Area Listing The screen show the list of KRA already registered in the system. Click the Search Bar to show the Search Form as show below. The listing shows: KRA Code KRA name KRA Info KRA Target Group Search Key Result Area The screen show the Search Form to search KRA. The search can be done by using either one or combination of the following fields: Code – enter partial or full KRA Code Name – enter partial or full KRA Name Item – enter partial or full KRA Item Target – enter partial or full KRA Target # of records – change to desired number of records or leave as default value – 100 records | Page 63 User Manual goTNA 1.0 Click Search button to show the search result. Refer to KRA Listing section for search result. ADD KEY RESULT AREA The screen shows the add Key Result Area form. Enter the following information: Code – enter the KRA Code Name – enter the KRA Name Target Group – enter any information about the target group or leave blank Remark – enter any information about the KRA or leave blank Click the Add button to add the KRA and click the Cancel button to go back to previous screen. DELETE KEY RESULT AREA Click on the Delete link from the KRA Listing. Click OK button to continue to delete. Click Cancel button to cancel the delete. UPDATE KEY RESULT AREA | Page 64 User Manual goTNA 1.0 Refer to the Add KRA function for reference of the field. Click the Update button to update the KRA information or Cancel button to go to previous screen. KRA COMPONENT Access Point KRA Menu > KRA Component KRA Menu > KRA Component > Add KRA Component KRA Menu > KRA Component > KRA Component Code KRA Menu > KRA Component > Edit KRA Menu > KRA Component > Delete KRA Component The screen shows the list of KRA Component for the selected KRA. Add KRA Component The screen show the add KRA Component form. Enter the following information: Code – enter the KRA Component Code Name – enter the KRA Component Name Category – select from the category dropdown or leave unselected Description – enter any information about the KRA Component or leave blank Click the Add button to add the KRA Component and click the Cancel button to go back to previous screen. | Page 65 User Manual goTNA 1.0 Edit KRA Component Refer to the Add KRA Component function for reference of the field. Click the Update button to update the KRA Component information or Cancel button to go to previous screen. Delete KRA Component Click on the Delete link from the KRA Component Listing. Click OK button to continue to delete. Click Cancel button to cancel the delete. KRA VALUE Access Point KRA Menu > KRA Value KRA Menu > KRA Value > Add KRA Value KRA Menu > KRA Value > KRA Value Code KRA Menu > KRA Value > Edit KRA Menu > KRA Value > Delete KRA Value The screen shows the list of KRA Value for the selected KRA. | Page 66 User Manual goTNA 1.0 Add KRA Value The screen show the add KRA Value form. Enter the following information: Code – enter the KRA Value Code Name – enter the KRA Value Name Component – select from the component dropdown or leave unselected Description – enter any information about the KRA Value or leave blank Click the Add button to add the KRA Value and click the Cancel button to go back to previous screen. Edit KRA Value Refer to the Add KRA Value function for reference of the field. Click the Update button to update the KRA Value information or Cancel button to go to previous screen. Delete KRA Value Click on the Delete link from the KRA Value Listing. Click OK button to continue to delete. Click Cancel button to cancel the delete. KRA ELEMENT Access Point KRA Menu > KRA Element KRA Menu > KRA Element > Add KRA Element KRA Menu > KRA Element > KRA Element Code | Page 67 User Manual goTNA 1.0 KRA Menu > KRA Element > Edit KRA Menu > KRA Element > Delete KRA Element The screen shows the list of KRA Element for the selected KRA. Add KRA Element The screen show the add KRA Element form. Enter the following information: Code – enter the KRA Element Code Name – enter the KRA Element Name Training Area – select from the Training Area dropdown or leave unselected Value – select from the value dropdown or leave unselected Element – enter the KRA Element Click the Add button to add the KRA Element and click the Cancel button to go back to previous screen. Edit KRA Element Refer to the Add KRA Element function for reference of the field. Click the Update button to update the KRA Element information or Cancel button to go to previous screen. | Page 68 User Manual goTNA 1.0 Delete KRA Element Click on the Delete link from the KRA Element Listing. Click OK button to continue to delete. Click Cancel button to cancel the delete. KRA ASSOCIATED EMPLOYEE Access Point KRA Menu > KRA Associated Employee KRA Menu > KRA Associated Employee > Employee ID KRA Associated Employee The screen shows the list of employees associated with the selected KRA. Employee Detail Please refer to the Employee Profile > Employee Detail section. | Page 69 User Manual goTNA 1.0 11. KEY PERFORMANCE INDICATOR Key Performance Indicator or KPI is a mechanism to set expectation towards employee. If KPI is being used, KPI will also becomes the basis for assessing employee’s performance and competency. Access Point TNA > Key Performance Indicator TNA > Key Performance Indicator > Add KPI TNA > Key Performance Indicator > Delete TNA > Key Performance Indicator > KPI Name TNA > Key Performance Indicator > Edit KPI Menu > KPI Details KPI MENU KPI Menu will be shown when the system displays information related to selected KPI. With this, user can then navigate to other information or function related to the selected KPI. KPI INFORMATION The KPI Information will be shown when the system displays information related to selected KPI. The information: Code – KPI Code Name – KPI Name Description – additional information about the KPI Target Group – the information with regards to target group To change the listed information, go to KPI Menu > KPI Detail. | Page 70 User Manual goTNA 1.0 SEARCH Key Performance Listing The screen show the list of KPI already registered in the system. Click the Search Bar to show the Search Form as show below. The listing shows: KPI Code KPI name KPI Item KPI Target Group Search Key Result Area The screen show the Search Form to search KPI. The search can be done by using either one or combination of the following fields: Code – enter partial or full KPI Code Name – enter partial or full KPI Name Item – enter partial or full KPI Item Target – enter partial or full KPI Target # of records – change to desired number of records or leave as default value – 100 records | Page 71 User Manual goTNA 1.0 Click Search button to show the search result. Refer to KPI Listing section for search result. ADD KEY PERFORMANCE INDICATOR The screen shows the add Key Performance Indicator form. Enter the following information: Code – enter the KPI Code Name – enter the KPI Name Target Group – enter any information about the target group or leave blank Description – enter any information about the KPI or leave blank Click the Add button to add the KPI and click the Cancel button to go back to previous screen. DELETE KEY PERFORMANCE INDICATOR Click on the Delete link from the KPI Listing. Click OK button to continue to delete. Click Cancel button to cancel the delete. UPDATE KEY PERFORMANCE INDICATOR | Page 72 User Manual goTNA 1.0 Refer to the Add KPI function for reference of the field. Click the Update button to update the KPI information or Cancel button to go to previous screen. KPI GROUP Access Point KPI Menu > KPI Group KPI Menu > KPI Group > Add KPI Group KPI Menu > KPI Group > KPI Group Code KPI Menu > KPI Group > Edit KPI Menu > KPI Group > Delete KPI Group The screen shows the list of KPI Group for the selected KPI. Add KPI Group The screen show the add KPI Group form. Enter the following information: Code – enter the KPI Group Code Name – enter the KPI Group Name KPI – select from the KPI dropdown or leave unselected Description – enter any information about the KPI Group or leave blank Click the Add button to add the KPI Group and click the Cancel button to go back to previous screen. | Page 73 User Manual goTNA 1.0 Edit KPI Group Refer to the Add KPI Group function for reference of the field. Click the Update button to update the KPI Group information or Cancel button to go to previous screen. Delete KPI Group Click on the Delete link from the KPI Group Listing. Click OK button to continue to delete. Click Cancel button to cancel the delete. KPI ITEM Access Point KPI Menu > KPI Item KPI Menu > KPI Item > Add KPI Item KPI Menu > KPI Item > KPI Item Code KPI Menu > KPI Item > Edit KPI Menu > KPI Item > Delete | Page 74 User Manual goTNA 1.0 KPI Item The screen shows the list of KPI Item for the selected KPI. Add KPI Item The screen show the add KPI Item form. Enter the following information: Code – enter the KPI Item Code Name – enter the KPI Item Name Group – select from the group dropdown or leave unselected Training Area – select from the Training Area dropdown or leave unselected Description – enter any information about the KPI Item or leave blank Click the Add button to add the KPI Item and click the Cancel button to go back to previous screen. Edit KPI Item | Page 75 User Manual goTNA 1.0 Refer to the Add KPI Item function for reference of the field. Click the Update button to update the KPI Item information or Cancel button to go to previous screen. Delete KPI Item Click on the Delete link from the KPI Item Listing. Click OK button to continue to delete. Click Cancel button to cancel the delete. KPI ASSOCIATED EMPLOYEE Access Point KPI Menu > KPI Associated Employee KPI Menu > KPI Associated Employee > Employee ID KPI Associated Employee The screen shows the list of employees associated with the selected KPI. Employee Detail Please refer to the Employee Profile > Employee Detail section. | Page 76 User Manual goTNA 1.0 12. JOB DESCRIPTION Job Description or JD is a mechanism to set expectation towards employee. If JD is being used, JD will also becomes the basis for assessing employee’s performance and competency. JOB DESIGNATION Access Point TNA > Job Designation TNA > Job Designation > New Job Designation TNA > Job Designation > Job Designation Code TNA > Job Designation > Edit TNA > Job Designation > Delete Job Designation Menu > Job Designation Job Designation Menu > Job Description Job Designation Menu > JD Associated Employee JOB DESIGNATION MENU Job Designation Menu will be shown when the system displays information related to selected Job Designation. With this, user can then navigate to other information or function related to the selected Job Designation. JOB DESIGNATION INFORMATION The Job Designation Information will be shown when the system displays information related to selected Job Designation. The information: Code – Job Designation Code Name – Job Designation Name To change the listed information, go to Job Designation Menu > Job Designation. | Page 77 User Manual goTNA 1.0 Job Designation Listing The screen show the list of Job Designation registered in the system. Click the Search Bar to show the Search Form as show below. The listing shows: Code Job Designation Remark Job Designation Search The screen show the Search Form to search Job Designation. The search can be done by using either one or combination of the following fields: Code – enter partial or full Job Designation Code Job Designation – enter partial or full Job Designation Name Remark – enter partial or full remark # of records – change to desired number of records or leave as default value – 100 records Click Search button to show the search result. Refer to Job Designation Listing section for search result. | Page 78 User Manual goTNA 1.0 New Job Designation The screen shows the add Job Designation form. Enter the following information: Code – enter the Job Designation Code Name – enter the Job Designation Name Remark – enter any information about the Job Designation or leave blank Click the Add button to add the Job Designation and click the Cancel button to go back to previous screen. Edit Job Designation Refer to the Add Job Designation function for reference of the field. Click the Update button to update the Job Designation information or Cancel button to go to previous screen. Delete Job Designation Click on the Delete link from the Job Designation Listing. Click OK button to continue to delete. Click Cancel button to cancel the delete. | Page 79 User Manual goTNA 1.0 Job Description The list shows the associated Job Description for the selected Job Designation. Select or de-select the checkbox at the far right to modify Job Description association. Click Update button to update the change or Cancel to return to previous screen. JD Associated Employee The screen shows the list of employees associated with the selected Job Designation. JOB DESCRIPTION Access Point TNA > Job Description TNA > Job Description > New JD Master TNA > Job Description > Job Description Code TNA > Job Description > Edit TNA > Job Description > Delete Job Description Menu > Master Job Description Job Description Menu > Job Designation Association Job Description Menu > Employee Association JOB DESCRIPTION MENU Job Description Menu will be shown when the system displays information related to selected Job Description. With this, user can then navigate to other information or function related to the selected Job Description. | Page 80 User Manual goTNA 1.0 JOB DESCRIPTION INFORMATION The Job Description Information will be shown when the system displays information related to selected Job Description. The information: Code – Job Description Code Name – Job Description Name Category – the Job Description Category Training Area – the Training Area To change the listed information, go to Job Description Menu > Master Job Description. Job Description Listing The screen show the list of Master Job Description registered in the system. Click the Search Bar to show the Search Form as show below. The listing shows: Code Category Description Training Area Job Description Search | Page 81 User Manual goTNA 1.0 The screen show the Search Form to search Master Job Description. The search can be done by using either one or combination of the following fields: Code – enter partial or full Job Designation Code Category – enter partial or full Category Code Description – enter partial or full remark # of records – change to desired number of records or leave as default value – 100 records Click Search button to show the search result. Refer to Master Job Description Listing section for search result. Add Job Description The screen shows the add Master Job Description form. Enter the following information: Code – enter the Job Description Code Category – select Job Description Category or leave unselected Training Area – select Training Area or leave unselected Description – enter any information about the Job Description or leave blank Click the Add button to add the Job Designation and click the Cancel button to go back to previous screen. Edit Job Description Refer to the Add Master Job Description function for reference of the field. Click the Update button to update the Master Job Description information or Cancel button to go to previous screen. | Page 82 User Manual goTNA 1.0 Delete Job Description Click on the Delete link from the Master Job Description Listing. Click OK button to continue to delete. Click Cancel button to cancel the delete. Job Designation Association The screen shows the list of Job Designation associated with the selected Master Job Description. Employee Association The screen shows the list of employees associated with the selected Master Job Description. JOB DESCRIPTION CATEGORY Access Point TNA > Job Description Category TNA > Job Description Category > New Job Description Category TNA > Job Description Category > Job Description Category Code TNA > Job Description Category > Edit TNA > Job Description Category > Delete JD Category Menu > Category Detail JD Category Menu > Job Description Association JOB DESCRIPTION CATEGORY MENU | Page 83 User Manual goTNA 1.0 JD Category Menu will be shown when the system displays information related to selected JD Category. With this, user can then navigate to other information or function related to the selected JD Category. JOB DESCRIPTION CATEGORY INFORMATION The JD Category Information will be shown when the system displays information related to selected JD Category. The information: Code – JD Category Code Name – JD Category Name To change the listed information, go to JD Category Menu > Category Detail. Job Description Category Listing The screen show the list of Job Description Category registered in the system. Click the Search Bar to show the Search Form as show below. The listing shows: Code Description Remark Job Description Category Search The screen show the Search Form to search Job Description Category. The search can be done by using either one or combination of the following fields: Code – enter partial or full Job Designation Code Description – enter partial or full description | Page 84 User Manual goTNA 1.0 Remark – enter partial or full remark # of records – change to desired number of records or leave as default value – 100 records Click Search button to show the search result. Refer to Job Description Category Listing section for search result. Add Job Description Category The screen shows the add Job Description Category form. Enter the following information: Code – enter the Job Description Category Code Name – enter the Job Description Category Name Remark – enter any information about the Job Description Category or leave blank Click the Add button to add the Job Description Category and click the Cancel button to go back to previous screen. Edit Job Description Category Refer to the Add Job Description Category function for reference of the field. Click the Update button to update the Job Description Category information or Cancel button to go to previous screen. | Page 85 User Manual goTNA 1.0 Delete Job Description Category Click on the Delete link from the Job Description Category Listing. Click OK button to continue to delete. Click Cancel button to cancel the delete. Job Description Association The screen shows the list of Job Description associated with the selected Job Description Category. | Page 86 User Manual goTNA 1.0 13. ASSESSMENT Assessment is a coordinated mechanism to inquire, study and analyze input from targetted participant with respect to: Employee o Self o Peer o Superior Training o Trainer o Content o Material ASSESSMENT TEMPLATE The system provides a mechanism to prepare template for the assessment or the questionnaire. This template can then be used to schedule the assessment. Access Point TNA > Assessment Template TNA > Assessment Template > New Assessment Template TNA > Assessment Template > Assessment Template Code TNA > Assessment Template > Edit Assessment Template Menu > Assessment Details Assessment Template Menu > Question Segments Assessment Template Menu > Question Segments > Add Question Segment Assessment Template Menu > Question Segments > Question Segment Code Assessment Template Menu > Question Segments > Edit Assessment Template Menu > Question Segments > Delete Assessment Template Menu > Questions Assessment Template Menu > Questions > Add Question Assessment Template Menu > Questions > Question Code Assessment Template Menu > Questions > Edit Assessment Template Menu > Questions > Delete Assessment Template Menu > Schedule Assessment Template Menu > Schedule > Schedule Assessment Assessment Template Menu > Schedule > Schedule Code Assessment Template Menu > Schedule > Edit Assessment Template Menu > Schedule > Delete ASSESSMENT TEMPLATE MENU | Page 87 User Manual goTNA 1.0 Assessment Template Menu will be shown when the system displays information related to selected Assessment Template. With this, user can then navigate to other information or function related to the selected Assessment Template. ASSESSMENT TEMPLATE INFORMATION The Assessment Template Information will be shown when the system displays information related to selected Assessment Template. The information: Code – Assessment Template Code Name – Assessment Template Name Type – Type of Assessment Bank – Assessment Bank To change the listed information, go to Assessment Template Menu > Assessment Detail. Assessment Template Listing The screen show the list of Assessment Template already registered in the system. Click the Search Bar to show the Search Form as show below. The listing shows: Template Code Template Name Template Type Assessment Bank Pre & Post Type Created Date | Page 88 User Manual goTNA 1.0 Assessment Template Search The screen show the Search Form to search Assessment Template. The search can be done by using either one or combination of the following fields: Code – enter partial or full Assessment Template Code Name – enter partial or full Assessment Template Name Type – select Template Type or leave unselected Bank – select Assessment Bank or leave unselected Pre & Post – select Pre & Post Type or leave unselected # of records – change to desired number of records or leave as default value – 100 records Click Search button to show the search result. Refer to Assessment Template Listing section for search result. New Assessment Template | Page 89 User Manual goTNA 1.0 The screen shows the add Assessment Template form. Enter the following information: Code – enter the Assessment Template Code Name – enter the Assessment Template Name Bank – select the Assessment Bank Default Type – select the default question type for the template Assessment Type – select the base for the assessment o Custom Assessment – to create blank assessment template o KRA Assessment – to use selected KRA as a base for the assessment template questionnaire o KPI Assessment – to use selected KPI as a base for the assessment template questionnaire o JD Assessment – to use selected JD as a base for the assessment template questionnaire Assessment Note – enter the Assessment Note Assessment Instruction – enter the Assessment Note Interpretation Note – enter the Assessment Note Click the Add button to add the Assessment Template and click the Cancel button to go back to previous screen. Edit Assessment Template Refer to the Add Assessment Template function for reference of the field. Click the Update button to update the Assessment Template information or Cancel button to go to previous screen. | Page 90 User Manual goTNA 1.0 Delete Assessment Template At this point, the system does not allow deletion of assessment template. ASESSMENT TEMPLATE SEGMENT Assessment Template Segment Listing The screen shows the list of Assessment Segment for the selected Assessment Template. | Page 91 User Manual goTNA 1.0 Add Assessment Template Segment The screen show the add Assessment Segment form. Enter the following information: Code – enter the Assessment Segment Code Name – enter the Assessment Segment Name Sequence – enter the order for which the Segment will be sorted Pre & Post - select the Pre & Post type Assessment Note – enter the Assessment Note Assessment Instruction – enter the Assessment Note Interpretation Note – enter the Assessment Note Click the Add button to add the Assessment Segment and click the Cancel button to go back to previous screen. | Page 92 User Manual goTNA 1.0 Edit Assessment Template Segment Refer to the Add Assessment Segment function for reference of the field. Click the Update button to update the Assessment Segment information or Cancel button to go to previous screen. Delete Assessment Template Segment Click on the Delete link from the Assessment Segment Listing. Click OK button to continue to delete. Click Cancel button to cancel the delete. | Page 93 User Manual goTNA 1.0 ASSESSMENT TEMPLATE QUESTION Assessment Template Question Listing The screen shows the list of Assessment Questionnaires for the selected Assessment Template. Add Assessment Template Question The screen show the add Assessment Questionnaire form. Enter the following information: | Page 94 User Manual goTNA 1.0 Code – enter the KRA Component Code Sequence – enter the sequence for which the question will appear Type – select the question type Segment – select the Assessment Segment Training Area – select the training area Question – enter the question Click the Add button to add the Assessment Questionnaire and click the Cancel button to go back to previous screen. Edit Assessment Template Question Refer to the Add Assessment Questionnaire function for reference of the field. Click the Update button to update the Assessment Questionnaire information or Cancel button to go to previous screen. Delete Assessment Template Question Click on the Delete link from the Assessment Questionnaire Listing. Click OK button to continue to delete. Click Cancel button to cancel the delete. | Page 95 User Manual goTNA 1.0 ASSESSMENT SCHEDULE Assessment Schedule Listing The screen shows the list of Assessment Schedule for the selected Assessment Template. Add Assessment Schedule The screen show the add Assessment Schedule form. Enter the following information: Target Group – select the target employees o All Employees o By Employee – select employee using the button o By Superior – subordinates of selected superior o By Department – member of selected Department o By Division – member of selected Division o By KRA Group – member of selected KRA o By KPI Group – member of selected KPI o By JD Group – member of selected Job Designation o By Training – participant of selected training program Assessor – select o Self assessment o Peer assessment o Superior assessment | Page 96 User Manual o goTNA 1.0 All assessment (self, peer & superior) Start Date and End Date – select the period of the assessment using the Remark – enter the remark or leave blank button Click the Add button to add the Assessment Schedule and click the Cancel button to go back to previous screen. Edit Assessment Schedule Please refer to Assessment Menu > Schedule Details section below. Delete Assessment Schedule Click on the Delete link from the Assessment Schedule Listing. Click OK button to continue to delete. Click Cancel button to cancel the delete. ASSESSMENT Access Point TNA > Assessment Schedule TNA > Assessment Schedule > Assessment Template Code TNA > Assessment Schedule > Edit TNA > Assessment Schedule > Delete Assessment Template Menu > Schedule Assessment Template Menu > Schedule > Schedule Assessment Assessment Template Menu > Schedule > Schedule Code Assessment Template Menu > Schedule > Edit Assessment Template Menu > Schedule > Delete Assessment Menu > Schedule Details Assessment Menu > Assessment Details Assessment Menu > Segment Assessment Menu > Segment > Add Segment Assessment Menu > Segment > Edit Assessment Menu > Segment > Delete Assessment Menu > Questionnaire Assessment Menu > Questionnaire > Add Question Assessment Menu > Questionnaire > Edit | Page 97 User Manual goTNA 1.0 Assessment Menu > Questionnaire > Delete Assessment Menu > Participant & Target Assessment Menu > Participant & Target > Add Target Assessment Menu > Participant & Target > View Participant Assessment Menu > Participant & Target > Delete Assessment Menu > Notification Assessment Menu > Notification > Add Notification Assessment Menu > Notification > View Detail Assessment Menu > Result Assessment Menu > Result > View Result Assessment Menu > Result > Print Assessment Menu > Summary ASSESSMENT MENU Assessment Menu will be shown when the system displays information related to selected Assessment. With this, user can then navigate to other information or function related to the selected Assessment. ASSESSMENT INFORMATION The Assessment Information will be shown when the system displays information related to selected Assessment. The information: Code – Assessment Code Name – Assessment Name Type – Type of Assessment Pre & Post Created – the creation date By – created by Target – the base or reference for the questionnaire Assessor – Type of assessor for the assessment Start Date and End Date – the period the assessment is valid To change the listed information, go to Assessment Menu > Assessment Detail and Assessment Menu > Schedule Detail. Assessment Listing | Page 98 User Manual goTNA 1.0 The screen show the list of Assessment schedules. Click the Search Bar to show the Search Form as show below. The listing shows: Schedule Code Schedule name Target Group Assessor Period Assessment Search The screen show the Search Form to search Assessment schedules. The search can be done by using either one or combination of the following fields: Code – enter partial or full Schedule Code Name – enter partial or full Schedule Name Assessor – select assessor type or leave unselected # of records – change to desired number of records or leave as default value – 100 records Click Search button to show the search result. Refer to Assessment schedules Listing section for search result. New Assessment Please refer to Assessment Template > Schedule Assessment section. Edit Schedule Details | Page 99 User Manual goTNA 1.0 Refer to the Add Assessment Schedule function for reference of the field. Click the Update button to update the Assessment Schedule information or Cancel button to go to previous screen. Edit Assessment Details Refer to the Add Assessment Template function for reference of the field. Click the Update button to update the Assessment information or Cancel button to go to previous screen. Delete Assessment Please refer to Assessment Template > Schedule Assessment > Delete Section. ASESSMENT SEGMENT | Page 100 User Manual goTNA 1.0 Asessment Segment Listing The screen shows the list of Assessment Segment for the selected Assessment Schedule. Add Asessment Segment The screen show the add Assessment Segment form. Enter the following information: Code – enter the Assessment Segment Code Name – enter the Assessment Segment Name Sequence – enter the order for which the Segment will be sorted Pre & Post - select the Pre & Post type Assessment Note – enter the Assessment Note Assessment Instruction – enter the Assessment Note Interpretation Note – enter the Assessment Note Click the Add button to add the Assessment Segment and click the Cancel button to go back to previous screen. | Page 101 User Manual goTNA 1.0 Edit Asessment Segment Refer to the Add Assessment Segment function for reference of the field. Click the Update button to update the Assessment Segment information or Cancel button to go to previous screen. Delete Asessment Segment Click on the Delete link from the Assessment Segment Listing. Click OK button to continue to delete. Click Cancel button to cancel the delete. | Page 102 User Manual goTNA 1.0 ASSESSMENT QUESTION Assessment Question Listing The screen shows the list of Assessment Questionnaires for the selected Assessment Schedule. Add Assessment Question The screen show the add Assessment Questionnaire form. Enter the following information: | Page 103 User Manual goTNA 1.0 Code – enter the KRA Component Code Sequence – enter the sequence for which the question will appear Type – select the question type Segment – select the Assessment Segment Training Area – select the training area Question – enter the question Click the Add button to add the Assessment Questionnaire and click the Cancel button to go back to previous screen. Edit Assessment Question Refer to the Add Assessment Questionnaire function for reference of the field. Click the Update button to update the Assessment Questionnaire information or Cancel button to go to previous screen. Delete Assessment Question Click on the Delete link from the Assessment Questionnaire Listing. Click OK button to continue to delete. Click Cancel button to cancel the delete. | Page 104 User Manual goTNA 1.0 PARTICIPANT & TARGET Participant & Target Listing The screen shows the list of Participant & Target for the selected Assessment Schedule. Assessor is the employee who is doing assessment and Target is the employee being assessed. Add Target Employee The screen shows the form to add Target Employee for the selected Assessment Schedule. Up to 10 employees can be added per form. Click on the to select target employee. The system will automatically use the Assessor Type selected for the selected Assessment Schedule. Edit Participant Detail Please see the Profile > Employee > Basic Information section. Edit Target Detail Please see the Profile > Employee > Basic Information section. | Page 105 User Manual goTNA 1.0 Print Assessment Click on the Print link from the Assessment Schedule Listing to print the selected Assessment Schedule for the selected employee. The screen shows a pop-up window containing the Assessment for printing. Delete Participant & Target Click on the Delete link from the Assessment Schedule Listing. Click OK button to continue to delete. Click Cancel button to cancel the delete. | Page 106 User Manual goTNA 1.0 NOTIFICATION Notification is a feature where system will send email to the target employee to notify about the assessment assigned to them. Notification Listing The screen shows the list of Notifications for the selected Assessment Schedule. Add Notification The screen show the add Assessment Notification form. Enter the following information: To – check all the target notification recipients. By default, all assessment participant will be listed where employee with valid email will be enabled and employees with invalid email will be disabled. Subject – modify the subject or leave unchanged Message – modify the message or leave unchanged | Page 107 User Manual goTNA 1.0 The Subject and Message may contain auto-replaceable items which are listed at the bottom. Click the Send Email button to send the notification and click the Cancel button to go back to previous screen. View Notification Detail Click on the View link from the Notification Listing. The system shows the actual message sent as well as the list of notification recipient. The list of recipient also indicate the status of the message sent. RESULT The Result is to show the response to the assessment already done. Result Listing The screen shows the list of Assessment Result for the selected Assessment Schedule. | Page 108 User Manual goTNA 1.0 Result Detail The screen shows the details of the assessment taken for the select Assessment Schedule and selected employee. The result show: Assessor – the employee doing the assessment Subject – the employee being assessed Assessment – Assessment Title Type – Assessor Type Period – Period taking the assessment Status – OPEN is to indicate the assessment is not yet completed and COMPLETE is to indicate that the assessment is completed Note – assessment note Instruction – assessment instruction Question o Rating Type o Training Area o Response o Gap o Weight | Page 109 User Manual goTNA 1.0 Print Result The screen shows the Assessment Result in a pop-up window for printing purpose. Refer to Assessment Menu > Result > Print for the details of the content. | Page 110 User Manual goTNA 1.0 14. TRAINING PROGRAM Training program is the actual training to be implemented. TRAINING PROGRAM Access Point TNA > Master Training TNA > Master Training > Add Training Schedule TNA > Master Training > Training Code TNA > Master Training > Edit TNA > Master Training > Delete TNA > Master Training Calendar TNA > Master Training Calendar > Add Training Schedule TNA > Master Training Calendar > Training Code Training Menu > Training Details Training Menu > Participants Training Menu > Participants > Add Suggested Participant Training Menu > Participants > Add Participant Training Menu > Participants > Edit Participant Training Menu > Participants > Delete Training Menu > Course Materials Training Menu > Course Materials > Add Training Material Training Menu > Course Materials > View Training Material Training Menu > Course Materials > Delete Training Menu > Notification Training Menu > Notification > Add Notification Training Menu > Notification > View Notification Detail Training Menu > Assessment TRAINING MENU Training Menu will be shown when the system displays information related to selected Training. With this, user can then navigate to other information or function related to the selected Training. | Page 111 User Manual goTNA 1.0 TRAINING INFORMATION The Training Information will be shown when the system displays information related to selected Training Program. The information: Code – Training Code Course – Title of the training Training Type Provider – Training Provider name Dates – the dates for the training Location – the location of the training Hours – the number of hours for the training Fee – the fee per participant To change the listed information, go to Training Menu > Training Detail. Training Listing The screen show the list of Master Training already registered in the system. Click the Search Bar to show the Search Form as show below. The listing shows: Training Code Course Name Dates Description | Page 112 User Manual goTNA 1.0 The screen show the Search Form to search Master Training. The search can be done by using either one or combination of the following fields: Code – enter partial or full Course Code Course – enter partial or full Course Name Description – enter partial or full Course Description # of records – change to desired number of records or leave as default value – 100 records Click Search button to show the search result. Refer to Master Training Listing section for search result. Training Calendar The above screen shows the Master Training Calendar for a specific year. The top portion shows the number of Master Training programs for each month in the specified year. Selecting the month name in this section will cause the calendar to display the daily training program for the selected month at the bottom part. | Page 113 User Manual goTNA 1.0 This training program displayed in the calendar is in the form of training code. Mouse-over the training code will cause the system to show more information about the training beside the mouse. Click the training code will show the training detail (see Training Menu > Training Detail). Add Training The screen shows the add Training Schedule form. Enter the following information: Course Code – enter the Course Code provided by the Training Provider Course Title – enter the Course Title Training Type – select the Training Type Category – select the Trainig Category Start Date and End Date - select the period of the training using the button Start Time and End Time – select the time from the drop-down selection Certification – enter the certification name is any or leave blank Location – enter the location of the training Training Provider – enter the Training Provider name if not yet registered or select from existing Training Provider from the drop-down selection Participant Fee – enter the fee per participant Total Fee – enter the total amount the organization spent for the training program Training Hours – enter the number of hours for the training – 1 day equal 8 hours Claimable – check if this training is claimable Description – enter any additional information for the training Click the Add button to add the Training Schedule and click the Cancel button to go back to previous screen. | Page 114 User Manual goTNA 1.0 Edit Training Refer to the Add Training Schedule function for reference of the field. Click the Update button to update the Training Schedule information or Cancel button to go to previous screen. Delete Training Click on the Delete link from the Training Schedule Listing. Click OK button to continue to delete. Click Cancel button to cancel the delete. | Page 115 User Manual goTNA 1.0 TRAINING PARTICIPANT This is a feature where the management of training participant can be performed. Participant Listing The screen shows the list of Participant for the selected Training Schedule. Add Participant The screen shows the form to add Participant for the selected Training Schedule. Up to 10 employees can be added per form. Click on the button to go to previous screen. to select target employee. Click Update button to add and Cancel | Page 116 User Manual goTNA 1.0 Add Suggested Participant The screen shows the form to add Suggested Participant for the selected Training Schedule. The system will list out up to 50 employees in the listing. The list contain highest priority employee at the top followed by the least priority. The priority is calculated based on the Weightage and the Training Area for with the selected Training Schedule is associated with. Click Update button to add and Cancel button to go to previous screen. Edit Participant Detail Please see Profile > Employee > Basic Information section. Delete Participant Click on the Delete link from the Training Participant Listing. Click OK button to continue to delete. Click Cancel button to cancel the delete. | Page 117 User Manual goTNA 1.0 COURSE MATERIAL This is the feature where management of course material can be performed. Course Material Listing The screen shows the list of Course Material for the selected Training Schedule. Add Training Material The screen show the add Training Material form. Enter the following information: Document Location – Click on the Browse button and a pop-up window will be shown to browse and select a file to upload Category – select the document category Name – enter the document name as reference Remark – enter remark or leave blank Click Upload button to upload the document or Cancel button to go back to previous screen. | Page 118 User Manual goTNA 1.0 The screen shows the Browse function to browse for a file to upload. Once the file is found, click on the file name and click Open button to select and close the window. View Training Material Click on the document name from the Document Listing and the system will prompt to save or view the document. For some clients, the system will not ask for confirmation and the document will be opened automatically. Delete Training Material Click on the delete link in the file listing to delete the file. A pop-up window will be shown as above to confirm the delete process. Click OK button to confirm the delete and Cancel button to cancel the delete. | Page 119 User Manual goTNA 1.0 NOTIFICATION Notification is a feature where system will send email to the target employee to notify about the training assigned to them. Notification Listing The screen shows the list of Notifications for the selected Training Schedule. Add Notification The screen show the add Training Notification form. Enter the following information: To – check all the target notification recipients. By default, all training participant will be listed where employee with valid email will be enabled and employees with invalid email will be disabled. Subject – modify the subject or leave unchanged Message – modify the message or leave unchanged | Page 120 User Manual goTNA 1.0 The Subject and Message may contain auto-replaceable items which are listed at the bottom. Click the Send Email button to send the notification and click the Cancel button to go back to previous screen. View Notification Detail Click on the View link from the Notification Listing. The system shows the actual message sent as well as the list of notification recipient. The list of recipient also indicate the status of the message sent. | Page 121 User Manual goTNA 1.0 15. TRAINING REQUEST Training Request is the training program requested by employees. TRAINING REQUEST Access Point TNA > Training Request TNA > Training Request > Employee ID TNA > Training Request > Course Name Employee Menu > Training Request Training Request Listing The screen show the list of Training Request. Click the Search Bar to show the Search Form as show below. The listing shows: Requestor Name Course Training Program Type Training Status Dates | Page 122 User Manual goTNA 1.0 Edit Employee Information Please see the Profile > Employee > Basic Information section. Edit Training Request Refer to Employee Menu > Training Request > Edit Training section. | Page 123 User Manual goTNA 1.0 16. TRAINING AREA MAP Training Area Map is a feature to link between performance problem and the training program. Performance problem is identified through assessment. Therefore, each assessment questionnaire should be tagged with existing Training Area Map. TRAINING AREA MAP Access Point TNA > Training Area Map TNA > Training Area Map > Add Training Area Map TNA > Training Area Map > Training Area Map Code TNA > Training Area Map > Edit TNA > Training Area Map > Delete Training Area Menu > Training Area Details Training Area Menu > Training Program Association Training Area Menu > Training Program Association > Training Details Training Area Menu > Training Program Association > Delete Training Area Menu > JD Association Training Area Menu > JD Association > Add JD Association Training Area Menu > JD Association > Delete Training Area Menu > KRA Association Training Area Menu > KRA Association > Delete Training Area Menu > KPI Association Training Area Menu > KPI Association > Delete Training Area Menu > Assessment Association Training Area Menu > Assessment Association > Delete TRAINING AREA MAP MENU Training Area Menu will be shown when the system displays information related to selected Training Area. With this, user can then navigate to other information or function related to the selected Training Area. TRAINING AREA MAP INFORMATION The Training Area Map Information will be shown when the system displays information related to selected Training Area Map. The information: | Page 124 User Manual goTNA 1.0 Code – Training Area Code Name – Training Area Name Description – further information about the training area Suggestion – suggestion for the training area To change the listed information, go to Training Area Menu > Training Area Detail. Training Area Map Listing The screen show the list of Training Area Map already registered in the system. Click the Search Bar to show the Search Form as show below. The listing shows: Training Area Map Code Training Area Map Name Training Area Map Description The screen show the Search Form to search Training Area Map. The search can be done by using either one or combination of the following fields: Code – enter partial or full Training Area Map Code Name – enter partial or full Training Area Map Name Description – enter partial or full Training Area Map description # of records – change to desired number of records or leave as default value – 100 records Click Search button to show the search result. Refer to Training Area Map Listing section for search result. | Page 125 User Manual goTNA 1.0 Add Training Area Map The screen shows the add Training Area Map form. Enter the following information: Code – enter the Training Area Map Code Name – enter the Training Area Map Name Competency Area – select from Training Area Map Competency Area – Attitude, Skill or Knowledge Description – enter any information about the Training Area Map or leave blank Suggestion – enter any information about the Training Area Map or leave blank Click the Add button to add the Training Area Map and click the Cancel button to go back to previous screen. Edit Training Area Map Refer to the Add Training Area Map function for reference of the field. Click the Update button to update the Training Area Map information or Cancel button to go to previous screen. | Page 126 User Manual goTNA 1.0 Delete Training Area Map Click on the Delete link from the Training Area Map Listing. Click OK button to continue to delete. Click Cancel button to cancel the delete. Training Program Association The screen shows the list of Training Program associated with the selected Training Area Map. Add Training Association The screen shows the Add Training Association form. Enter the following information: Training Program – select from existing training program Click the Update button to add the Training Program Association and click the Cancel button to go back to previous screen. Delete Training Program Association Please refer to Training Provider > Course Offering > Training Area > Delete section. JD Association The screen show the list of Job Description that is associated to the selected Training Area Map. | Page 127 User Manual goTNA 1.0 Add JD Association Click on the Add JD Association link from the JD Association Listing. To add JD Association, select the appropriate JD Master and set the Training Area for the selected JD Master. Delete JD Association To remove the JD Association, remove the selected Training Area in the Job Description Menu > Master Job Description section. KRA Association The screen show the list of KRA that is associated to the selected Training Area Map. Add KRA Association Click on the Add KRA Association link from the KRA Association Listing.To add KRA Association, select the appropriate KRA and set the Training Area for the selected KRA. Delete KRA Association To remove the KRA Association, remove the selected Training Area in the KRA Menu > KRA Details section. KPI Association The screen show the list of KPI that is associated to the selected Training Area Map. Add KPI Association Click on the Add KPI Association link from the KPI Association Listing.To add KPI Association, select the appropriate KPI and set the Training Area for the selected KPI. Delete KPI Association To remove the KPI Association, remove the selected Training Area in the KPI Menu > KPI Details section. | Page 128 User Manual goTNA 1.0 Assessment Association The screen show the list of Assessment Questions that is associated to the selected Training Area Map. Add Assessment Association Click on the Add Assessment Association link from the Assessment Association Listing.To add Assessment Association, select the appropriate Assessment Question and set the Training Area for the selected Assessment. Delete Assessment Association To remove the Assessment Association, remove the selected Training Area in the Assessment Menu > Questionnaire section. | Page 129 User Manual goTNA 1.0 17. TRAINING PROVIDER This feature allows the management of Training Providers for the organization. TRAINING PROVIDER Access Point TNA > Training Provider TNA > Training Provider > Add Training Provider TNA > Training Provider > Training Provider Code TNA > Training Provider > Edit TNA > Training Provider > Delete Training Provider Menu > Company Detail Training Provider Menu > Trainer Training Provider Menu > Trainer > Add Trainer Training Provider Menu > Trainer > Edit Trainer Training Provider Menu > Trainer > Delete Trainer Training Provider Menu > Course Offering Training Provider Menu > Course Offering > Add Course Training Provider Menu > Course Offering > Edit Course Training Provider Menu > Course Offering > Delete Training Provider Menu > Suspend/Terminate Training Provider Menu > Reset Password Training Provider Menu > Login History Training Provider Menu > Transaction History TRAINING PROVIDER MENU Training Provider Menu will be shown when the system displays information related to selected Training Provider. With this, user can then navigate to other information or function related to the selected Training Provider. TRAINING PROVIDER INFORMATION The Training Provider Information will be shown when the system displays information related to selected Training Provider. The information: Company Name – Full name of the company | Page 130 User Manual goTNA 1.0 Company No – Company registration number Classification – The Training Provider Class Office Phone Website Email To change the listed information, go to Training Provider Menu > Company Detail. Training Provider Listing The screen show the list of Training Provider already registered in the system. Click the Search Bar to show the Search Form as show below. The listing shows: Company Name Company Number Class The screen show the Search Form to search Training Provider. The search can be done by using either one or combination of the following fields: Company Number – enter partial or full Company Number Company Name – enter partial or full Company Name Classification – select one of classification or leave unselected # of records – change to desired number of records or leave as default value – 100 records Click Search button to show the search result. Refer to Training Provider Listing section for search result. | Page 131 User Manual goTNA 1.0 Add Training Provider The screen show the add Training Provider form. Enter the following information: Company Name – enter the Company Name of the Training Provider Company No – enter the Company Number of the Training Provider Classification – select existing Classification or leave unselected Username – enter unique username to be used as credential for login purpose Registration Date – click on the button to show the Calendar Pop-up and to make date selection Email – enter primary email address for the company Website – enter website of the company Mobile Phone – enter primary contact point for the company Office Phone – enter main office phone number for the company Fax – enter main fax number for the company Address and Billing Address – enter Address and Billing Address or leave blank. Use the same address button to make the Billing Address same as Address. State and Country – select the State and Country or leave unselected Click the Add button to add the Training Provider and click the Cancel button to go back to previous screen. | Page 132 User Manual goTNA 1.0 Edit Training Provider Refer to the Add Training Provider function for reference of the field. Click the Update button to update the Training Provider information or Cancel button to go to previous screen. Delete Training Provider The system does not allow the Training Provider to be deleted. As an alternative, Training Provider can be suspended or terminated instead. Please see the Suspend/Terminate section. TRAINER This feature is to manage the trainer for the Training Provider. Trainer Listing The screen shows the list of trainer for the selected Training Provider. | Page 133 User Manual goTNA 1.0 Add Trainer The screen show the add Trainer form. Enter the following information: Name – enter Full Name of the trainer New IC – enter Identification Number for the trainer Certification – enter certification held by the trainer or leave blank Experience – enter experience of the trainer or leave blank Specialty – enter specialty of the trainer or leave blank Remark – enter additional information about the trainer or leave blank Click the Add button to add the Trainer and click the Cancel button to go back to previous screen. Edit Trainer Refer to the Add Trainer function for reference of the field. Click the Update button to update the Trainer information or Cancel button to go to previous screen. | Page 134 User Manual goTNA 1.0 Delete Trainer Click on the Delete link from the Trainer Listing. Click OK button to continue to delete. Click Cancel button to cancel the delete. COURSE OFFERING This feature is to manage the course offering for the Training Provider. Course Offering Listing The screen shows the list of courses offered by the selected Training Provider. | Page 135 User Manual goTNA 1.0 Add Course Offering The screen show the add Course Offering form. Enter the following information: Course Code – enter Course Code Course Title – enter Course Title Certification – enter Certification name if any or leave blank Course Fee – enter total Course Fee if any Participant Fee – enter total Participant Fee if any or leave blank Training Type – select training type or leave unselected Training Category – select training category or leave unselected Hours – enter number of training hours, 1 day equals 8 hours Description – enter additional information about the trainer or leave blank Click the Add button to add the Course Offering and click the Cancel button to go back to previous screen. Edit Course Offering Refer to the Add Course Offering function for reference of the field. Click the Update button to update the Course Offering information or Cancel button to go to previous screen. Schedule Course Offering Please see the TNA > Master Training > Add Training section. The form will be pre-populated with the selected Course Offering. | Page 136 User Manual goTNA 1.0 Delete Course Offering Click on the Delete link from the Course Offering Listing. Click OK button to continue to delete. Click Cancel button to cancel the delete. SUSPEND/TERMINATE This feature is used to control the ability of the employee to access the system. The screen shows the Suspend/Terminate form. Enter the following information: Status – select current status of the Training Provider. Only Active status will allow Training Provider to login to the system. Other status will not allow Training Provider login to the system. Remark – use Remark to enter the reason for the operation Click Update button to proceed with the process or Cancel button to return to the previous screen. The screen also shows the list of previous operations for reference. RESET PASSWORD This feature is used to reset Training Provider password without knowing existing password. The screen shows the reset password form. Enter the new password twice to the form. Click Reset button to reset the password or Cancel button to return to the previous screen. | Page 137 User Manual goTNA 1.0 LOGIN HISTORY This feature is to provide a detail login history for the selected Training Provider. The screen shows the list of logins sorted by login date. TRANSACTION HISTORY This feature provides the detailed transaction history for the selected Training Provider throughout the lifespan in the system. The screen shows the list of detailed transaction sorted by transaction date. | Page 138 User Manual goTNA 1.0 18. REPORT LISTING REPORT Access Point Report > Report Listing Report > Report Listing > Report Name Report > Report Listing > Report Name > Save Report Report > Report Listing > Report Name > Output To Excel Report > Report Listing > Report Name > Print REPORT LISTING The screen show the list of Reports already installed in the system. Click the Search Bar to show the Search Form as show below. The listing shows: Report name Group Created By Created Date The screen show the Search Form to search Reports. The search can be done by using either one or combination of the following fields: Report ID – enter partial or full Report ID Report Name – enter partial or full Report Name Subject – select one of the subject or leave unselected # of records – change to desired number of records or leave as default value – 100 records | Page 139 User Manual goTNA 1.0 Click Search button to show the search result. Refer to Reports Listing section for search result. Report Setting The screen show the Report Setting. The setting can be set on the following item: Report Title – enter the report title or leave unchanged Parameter for filter – the parameter will depend on the report selected. The number of filter will vary depending on the report selected. For each filter, set the filter or leave unchanged as follow: o Operation – select from the available operation such as: = - equal to <> - not equal to Like – enter the free-text input to filter based on the result containing the input In – enter the free-text input separated with comma (,) to filter based on the result that matches any one of the input o Selection – if the filter is based on pre-defined codes such as division or department, select from the drop-down list or leave unselected OR o Free-text – use this option to enter free-text filter Refer to the section below for further operation. Save Report Click on the Save Report button from the Report Setting section to save the setting to the database. To produce report based on new setting, please ensure that the setting is saved first, or else the report produced will be based on the last saved setting. Click OK button to continue. Output To Excel | Page 140 User Manual goTNA 1.0 Click on the Output To Excel button from the Report Setting section to export the result of the report to excel format. The screen shows a dialog box asking what to do with the file. Select Open With option to open the report immediately or select the Save File option to save the file without opening it. Click on the OK button to continue or Cancel button to close with dialog box. Print Click on the Print link from the Report Setting section to display the report in a pop-up window. The window will contain the report which is ready to be printed immediately. Close the windows once done. | Page 141 User Manual goTNA 1.0 19. CHANGE PASSWORD Password is the main security feature that control who is the authorized access for a specific account. Every employee should have their own Password. The Password should be changed regularly to prevent unauthorized access. PASSWORD Access Point Admin > Change Password To change the Password, enter the Current Password and then the New Password twice and click Continue button to change the Password. | Page 142 User Manual goTNA 1.0 20. SYSTEM CONFIGURATION This feature is to enable system administrator to control the behaviour of the system in general. ADMINISTRATION Access Point Admin > System Configuration Admin > System Configuration > Configuration Listing Admin > System Configuration > Configuration Listing > Code Admin > System Configuration > Configuration Listing > Code > Sort Admin > System Configuration > Configuration Listing > Code > Add New Admin > System Configuration > Configuration Listing > Code > Edit Admin > System Configuration > Configuration Listing > Code > Delete Admin > User Group Access Admin > System Setting SYSTEM CONFIGURATION Configuration Listing The screen shows the list of configuration that can be performed. | Page 143 User Manual goTNA 1.0 Code Listing Click the Code or Configure link in the Configuration Listing to list all the code. The screen shows the code listing for the selected configuration. Select from the available option and click Sort Column to sort the list accordingly. Add Item The screen shows the Add Item form. The fields for each item will differ from one item to another. Enter all the necessary information required to add the item. Click the Add button to add the code for the item. | Page 144 User Manual goTNA 1.0 Edit Item The screen shows the Edit Item form for the selected item. The fields for each item will differ from one item to another. Enter all the necessary changes for the update. Click the Edit button to update the code for the item or Reset to return the values for each field to its original value. Delete Item Click on the Delete link from the Code Listing to delete the selected code. Click OK button to continue to delete. Click Cancel button to cancel the delete. | Page 145 User Manual goTNA 1.0 USER GROUP ACCESS The screen shows the list of pages that the selected User Group can have access to. Select the appropriate User Group from the User Group listing to display the pages the User Group can have access to. Make appropriate changes by check or un-check the pages listed. Click on the Submit button to save the changes or Reset button to return to original setting. | Page 146 User Manual goTNA 1.0 SYSTEM SETTING The screen shows the list of System Setting that can be changed which will affect the whole system operation. Click on Edit button to save and activate the change or Reset button to return to original setting. | Page 147 User Manual goTNA 1.0 21. CHANGE THEME Theme is how the system control the viewing format. The available choices of theme are to serve various user preferences. CHANGE THEME Access Point Home > Change Theme Profile > Change Theme TNA > Change Theme Report > Change Theme Admin > Change Theme Upon login, the default theme is Gold. Click on the available choice in the Theme dropdown to change from on Theme to another. Gold Theme Purple Theme | Page 148 User Manual goTNA 1.0 Black & White Theme Blue Theme Shade Theme | Page 149