1
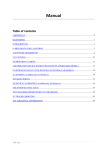
Thayer County Health Services // ThayerCountyHealth.com
User Manual Index:
Dashboard.....................................2
Editing the Front Page...............2
Adding/Editing Pages................3
Links in Pages................................4
Images in Pages...........................4
News Posts.....................................5
Events for Calendar.....................6
Doctors/Physicians.....................7
Job Manager.................................7
Drafts...............................................7
Edit/Add to the Menu................8
SEO................................................ 10
http://thayercountyhealth.com/login
thaycoh
q)x..)MhDO?c
This manual covers the basic of your website and will be updated and expanded as needed.
We’ve also uploaded a complete Wordpress user guide, which can be downloaded here:
http://thayercountyhealth.com/wp-content/uploads/2014/10/EasyWPGuide_4.0.pdf
This is a rather large file and covers way more information than you’ll probably need as
you get started with Wordpress, but it can be a valuable resource for further learning. That
manual can be helpful when it comes to learning more about placing content on your site,
and includes detailed information the functions of all buttons on the page editing screen
and much much more.
_________________________________________________________
CAUTION! IMPORTANT! CAUTION! IMPORTANT!
As an admin of the site, you have certain permissions that allow you to change some
things on the site that probably should not be changed. Please do not update any plugins
or the version of Wordpress, even if you see prompts to do so. If you’d like us to look into
any updates, just contact us and we’ll be happy to help. Updating certain parts of the site
without full knowledge of what they’re doing can break portions or all of your site.
_________________________________________________________
1
DASHBOARD:
When you login to the website, you will be redirected to the Dashboard. This is control
central for your website. Once logged in, at the very top of the site you’ll see the “admin bar”
that only appears when you’re logged in. Only logged in users see it. It’s a super quick and
easy way to bounce back and forth between the site and the Dashboard. For example, to the
left you’ll see “Thayer County Health” and if you hover over that you’ll see “Visit Site”. Clicking
that will take you to your site. The admin bar will still be visible at the top (again, only visible
to logged in users) and if you hover over “Thayer County Health” you’ll see that you can
quickly go back to the Dashboard. The admin bar also has links to quickly create new content
(pages & posts, add new media... all of which are covered below).
Your Wordpress site is comprised of PAGES and POSTS. Generally speaking, PAGES consist
of mainly static content, like the “About Us” and “Visitor Info” pages. POSTS are used for News
items and a custom post type called EVENTS is used for the calendar items.
_________________________________________________________
Editing the FRONT PAGE:
The front page of your site is comprised of the following sections.
• Slider
• Features (Services area)
• News
• Doctors (Meet Our Medical Specialists)
SLIDER:
To edit the slider (add or remove), you’ll want to find Theme Options at the bottom of the
left hand column in the Dashboard. Click on “Home” and you’ll see “Homepage Slider Slides”.
You’ll see the current slides and will be able to change the text that appears with the slide,
as well as change or edit the url you’d like to link to the slide. Text and links are optional. It’s
highly recommended that the images be 2000px X 800px to maintain the current look of the
site.
FEATURES (SERVICES AREA):
Go to Theme Options and click on “Home” and you’ll see “Home - Features”. Here you can
edit the text that appears above the Services area. If you scroll down you’ll see “3rd Variation
Features”, which is where you can change the text and icons that appear with each Service,
as well as change the url linked to each Service.
NEWS:
Go to Theme Options and click on “Home” and you’ll see “Home - News”. There’s nothing
to change in this area other than the single line of text that appears above the Upcoming
... Editing the FRONT PAGE continued on next page
2
Events and News Posts. This area is set up to automatically display the latest two Posts in the
“News” category as well as a widget that displays upcoming events. These are all pulled in
automatically, so to update this area you’ll add a new News Post or create a new Event. Post
and Event creation and covered later on in this manual.
DOCTORS:
Go to Theme Options and click on “Home” and you’ll see “Home - Doctors”. Just like the News
section the only thing to edit here would be the text that appears above the Doctor info. This
area automatically pulls in a custom post type called Doctors, which is covered later in this
manual.
_________________________________________________________
Editing/Adding PAGES:
In the Dashboard, click on “Pages” in the left hand menu and you’ll see the list of pages.
Hover over the page title and you can edit at will. When creating or editing a page, you have
two editing modes available to you, depending on which you are most comfortable with.
They are the Visual & Text editors.
Visual Editor
The Visual Editor looks very similar to a word processor. The visual editor icons allow you
to format text, change font alignment, insert bulleted and numbered lists, and more.
Text Editor
The Text editor has fewer options, but allows you to write your posts in HTML. This editing
mode is aimed at users who are comfortable working with HTML. When you need to add
a shortcode, add some font style, or paste in code from an outside source, you can use
the Text editor.
Both the Visual & Text editor will display the page differently than your actual page. It’s meant
to display a rough snapshot of what your page will look like, but fonts and text sizes will
vary. Changing text is extremely easy, but sometimes with photos some experimentation is
necessary.
Edit the page as needed, then hit the blue Update button.
... Editing/Adding Pages continued on next page
3
Links in Pages/Posts:
All you have to do to create a link, is highlight the text you want to link and then hit the Link
button, highlighted here:
(this is what it looks like in “Visual” mode)
(this is what it looks like in “html” mode)
After you click the button, you’ll be able to enter in the url address of the link destination.
Add a New Page
To create a new page, you’ll see “Add New” under Pages on the left. Give the page a title and
add the content. Before you Publish the page, look to the right where you’ll see “Attributes”
and under that “Parent.” If you want this page to be a sub-page of an existing page, select the
parent page. Adding pages to the page menu(s) on your site is covered below.
And as always, when logged into the site, you can click back and forth between the
Dashboard and the site, as well as add/edit pages, using the top bar.
IMAGES IN PAGES:
When editing/adding a page or post, you can upload an image using the “Add Media” button
that appears above the content area:
Click the button and follow the prompts. Drag-and-drop uploading is a new feature in the
latest versions of Wordpress. Once the image is uploaded, you have the option of either
inserting the item into the post or clicking the “Save all changes” button, which will save the
item in the Media Library for later use.
Positioning Images in Your Content
You will be presented with a number of options before placing the image in your post.
... Editing/Adding Pages continued on next page
4
You can choose to have the image link to something. This can be very handy if you want to
upload a large image. You can have a smaller sized on inside your post but have it link to a
larger version you’ve already uploaded to the server. Visitors can then click the link to view a
full sized image without breaking the layout of your site.
You can set the alignment of the image, either left or right, depending on where you want
the image to be displayed.
You may also set some size constraints here too. When you upload an image using the image
uploader in WordPress it also creates a small thumbnail file of the image. So you may choose
to display just the thumbnail in the post and have it link to the normal image. Or a medium
sized version or the full sized file.
Now click the “Insert Into Post” button, and the image will be placed on the page.
_________________________________________________________
POSTS (News Items):
A Post is created in the same way a Page is created... just find Posts in the left hand column
of the Dashboard and click Add New. Posts will appear on both the News page and in the
News area on the front page of the website. When creating a post, you’ll see that off to the
right you can place the Post in the category. Make sure the Post is in the “News” category, or
it won’t appear where you’d like it on the site.
Featured Image:
It’s also recommended that you include a featured image with your Post, but it isn’t
necessary. But including the image will certainly make the site look nicer and will maintain
the current look. Off to the right, under Categories and Tags, you’ll see Featured Image. You
can either drag your image to that area (causing it to auto-upload) or you can choose an
image that’s already been uploaded to the Media Library. For best results, your image should
be around 360px X 225px. Other sizes will work as your site auto-sizes images, but cropping
and re-sizing can lead to images not appearing as expected.
_________________________________________________________
5
EVENTS (Specialty Services Calendar and Nursery)
Adding an event is exactly like adding a Post. Once created, these items will automatically be
displayed on the Calendar pages. Which calendar page they appear on will be determined by
which category the event is placed in. Current categories are:
• Clinic Dates (these events appear on the Specialty Services Calendar)
• Hospital & Community Events (appear on the front page in the News area, as well as
on the event calendar)
• Baby Nursery - Boys (these will appear on the Nursery calendar, with a blue color)
• Baby Nursery - Girls (these will appear on the Nursery calendar, with a pinkcolor)
Find Events in the left hand column of the Dashboard. Hover over Events and click on Add
New. It’s pretty self-explanatory at this point. Give the event a title and enter in whatever
information you might have: cost, location, dates, times, etc... Make sure the event is placed
in the proper category.
You also have the option to include detailed text information or pictures, just as you would
a regular page or post. Once all the information is included, click the Publish button, or Save
Draft if you wish to edit later before making it public.
NURSERY FORM:
To include the form that allows visitors to send a message to new parents, this code should
be inserted in the area for additional information:
[gravityform id=”6” name=”Send your own message to the Parents”]
The above are the basic Event instructions. This link is a great resource for more detailed
instructions, including the creation of recurring events:
http://support.time.ly/creating-your-first-event/
_________________________________________________________
6
CUSTOM POST TYPES // DOCTORS & PHYSICIANS:
Your site uses two custom post types for the Doctors and visiting Physicians.
DOCTORS:
This post type is for the TCHS Physicians & Medical Staff. To create a new Doctor or edit a
current Doctor, find “Doctors” in the left hand column of the Dashboard. You’ll see where
you can enter in the various information, including which category you’d like the Doctor to
be placed in, for example “Family Practice”. The latest three Doctors will appear on the front
page. If possible, Doctor images should be 365px X 325px.
PHYSICIANS:
This is a similar post type, but it has a different name to differentiate between TCHS and
visiting physicians. They are created in much the same with but few options are available. For
instance, there are no categories and all information needs to go in the single content field.
There is also no need to include a Featured Image... rather, images should be included in the
content field. Images should be approximately 150px X 190px to match the current look, but
any reasonable size will work.
_________________________________________________________
JOB MANAGER:
To add Job Openings to the Employement page, your site is set up with a Jobs custom post
type. Go to “Job Manager” in the left hand column of the Dashboard and you’ll see where
you can click on “Add Job”. The categories are set up and you’ll see where you can enter in all
of the information for the opening and then click “Create Job”. The listing will automatically
appear on the site under the appropriate category.
_________________________________________________________
DRAFTS:
Pages and Posts, including Events and Doctors, that you’re working on but that are not
ready for the public can be saved for later editing by clicking the “Save Draft” button above
the Publish/Update button. This draft will show up in your list of pages/products and can be
edited at will, but will not be visible to the public.
_________________________________________________________
7
MENUS
Editing the Menus:
Your site has two menu areas. The MAIN menu:
... and a secondary menu that appears in the footer:
... Editing the Menus continued on next page
8
To edit these menus, look in the left hand column of the Dashboard. Under Appearance,
you’ll see Menus. Click there and you’ll be taken to an interface that looks like this:
To edit the order of menu items, locate them under “Menu Structure” and just drag and drop
them where you’d like, and hit the blue Save Menu button. The above image shows the Main
menu, but you can change between the Main & Secondary menus using the “Select a menu
to edit” dropdown.
Add pages to Menus:
1. Locate the pane entitled Pages.
2. Within this pane, select the View All link to bring up a list of all the currently published
Pages on your site.
3. Select the Pages that you want to add by clicking the checkbox next to each Page’s title.
4. Click the Add to Menu button located at the bottom of this pane to add your selection(s)
to the menu that you created in the previous step.
5. Drag and Drop the new menu item(s) where you’d like them in the menu.
6. Click the Save Menu button.
Deleting a Menu Item
1. Locate the menu item that you want to remove in the menu editor window
2. Click on the arrow icon in the top right-hand corner of the menu item/box to expand it.
3. Click on the Remove link. The menu item/box will be immediately removed.
4. Click the Save Menu button to save your changes.
Once a menu is saved, it will automatically update on the site.
_________________________________________________________
9
SEO on Pages:
When editing or adding a page, you have the option to add additional SEO information. You
can add a custom title and description which will be what displays in a Google search result,
and you can also add keywords. The keywords should be words that actually appear on the
page, and you should create them based on what you think people might use in a search
engine like Google. You don’t have to enter anything in these fields: Wordpress by default is
setup for good basic SEO, but this additional feature of your site will certainly help.
__________________________________________________
If you have any questions about your site or if you need any additional instructions not
covered in this manual please don’t hesitate to contact us:
[email protected] // [email protected]
402-476-3438
10