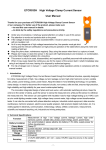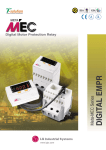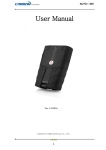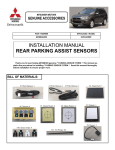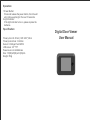
1
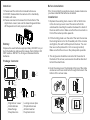
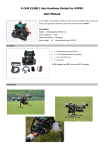
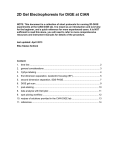
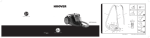
Operation:
1.Power Button:
Press and release the power button, then the unit
will continue working for the next 10 seconds.
2.Light Indicator:
If the light indicator turns on, please replace the
batteries.
Specification:
Fits any door:43-72mm (1.69"-2.83") thick
Fits any barrel hole: 14-22mm
Sensor: 0.3 Mega Pixel CMOS
LCD screen: 3.5" TFT
Power source: 4 AA Batteries
Size: 135(W)x85(H)x24.5(D)mm
Weight: 350g
Digital Door Viewer
User Manual
Attention:
Before installation:
1.Please read the instruction manual before use.
2.DO NOT disassemble the camera or the mainbody.
3.Handle with care.
4.Please unscrew both screws from the bottom of the
digital door viewer, take out the base flange and take
off the paster on it and prepare to install.
Prior to mounting the peephole viewer, please make sure
you have installed the batteries included.
Installation:
Battery:
2. Fit the holding plate over the end of the lens then screw
the locking barrel on to the threaded part of the camera
and tighten, this will hold the plate to the door. You can
then secure the plate with 2 or 3 screws (provided).
Make sure that the arrow on the plate points upwards.
Dispose the used batteries appropriately, DO NOT bury or
burn the batteries and keep them away from children. DO
NOT swallow. DO NOT re-charge or disassemble the
batteries.
Package Contents:
AA
AA
AA
AA
④
①
③
②
⑥
⑤
①Digital door viewer
③4 AA batteries
⑤Base flange
⑦Peephole lens
⑧
⑦
②Locking screws 2pcs
④Chipboard screws
⑥Antiskid washer
⑧Peephole barrel
1. Replace the existing door viewer or drill a 14mm hole
in the door at eye level. Insert the camera from the
outside while inserting the washer between the back of
the lens and the door. Make sure that the arrow mark on
front of the camera points upwards.
3. The single wire should be connected to the socket in
the back of the screen,excess wire should be attached
behind the small hook.
4. Hook the screen over the bracket at the top of the plate
and secure with two small bolts through the holes in the
bottom of the screen case.