1
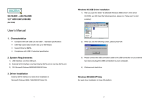
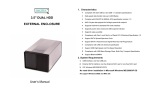
User’s Manual (DA-70575) SATA - USB 3,5" HDD ENCLOSURE System Requirements . . . . . . . . . . . . . . . . . . . . . 2 Driver Installation. . . . . . . . . . . . . . . . . . . . . . . . 3 Verification. . . . . . . . . . . . . . . . . . . . . . . . . . . . 5 FAQ. . . . . . . . . . . . . . . . . . . . . . . . . . . . 6 CAUTION . . . . . . . . . . . . . . . . . . . . . . . . 7 ADVICE . . . . . . . . . . . . . . . . . . . . . . . . 7 2. 3. 4. 7. 8. 9. 1 Characteristics. . . . . . . . . . . . . . . . . . . . . . . . . . . 1 1. CONTENT 2) or later. 2 OS: windows98/ME/2000/XP/Vista Mac OS 9.2 10.x 1) USB Interface: an available USB port 2. System Requirements: Supports wake-up ability Supports power down mode and USB suspend indicator mode interface(Ultra 33/66/100) Supports 16-bit multi-word DMA mode and Ultra DMA Supports 8-bit/16-bit standard PIO mode interface endpoint 64/512 bytes data payload for full/high speed bulk High-speed data transfer rate up to 480 Mbytes specifications Compliant with both USB 2.0 and USB 1.1 standard 1. Characteristics 2) 1) 3 When you see the following screen, please press“Next” you Will meet the following picture, please double-click it to start installing Insert the driver CD-ROM into the CD-ROM drive , Windows 98SE 3. Driver Installation 4) 3) 4 When you see the following screen, please press“Finish” When you see the following screen, Please choose“I accept the terms of the license ageement” and Click“Next”To Continue Need no driver installation. Windows ME/2000/XP/Vista, Macintosh OS9.X/10.X 5 Plug the device to your computer ,after divers are loaded,Please track the path “My computer→Properties→Device Manager” and expand the item “Universal Serial Bus Controllers”, you should meet the following screen. 4. Verification 6 Q1: I could see the icon at the right down comer on the screen, but I still couldn’t find my external HDD. A1: a. Please make sure your HDD has been installed correctly. b. Please make sure your HDD has been set in “Master” position. c. Please make sure you have installed correct driver for this enclosure. d. Please make sure your HDD has been formatted. If no, please format your hard drive first. e. If you are sure you have installed correctly all the hardware and software, please follow the steps as below to catch your HDD. i. Enter “Control Panel” and enter “System” icon ii. ii.Double click it to find a “System Manager”. iii. Find a “Disk” category. There should be 3 drivers, double click “Generic STORAGE DEVICE USB Device.” iv. Find the “Setting” button and choose the option “Removable Drive”. v. Your computer will automatically assign a new letter to this protable HDD after restarting your computer. 7. FAQ When using USB 2.0-interface model, external power is needed when HDD consumes power over 550mA. If you are not sure what OS you are using, please contact your PC dealer. Please don’t put this external enclosure in a humid or high-temperature environment. If your first installation is failed, please firstly remove the wrong device throung the path as below: Path=Control Panel > System > System Manager > PCI to USB Open Host Controller > Please remove the items with “?” or “!”mark. 7 It’s recommended that you use this USB IDE External Enclosure in bus-power mode. If it can’t work properly, please use it in self-power mode. 9. ADVICE e. d. b. c. a. 8. CAUTION!! Q2. Why I couldn’t find my enclosure at all? A2: This situation somethings happens to some notebook models. That’s because a few notebook maufactures remove the power current from USB port to reduce the heat in the notebook. Or some old models couldn’t supply sufficient power for USB. This problem mostly couldn’t solve the problem, please buy a AC power adaptor to offer sufficient power for enclosure. 2. Insert SATA hard drive enclosure 8 1. Carefully remove cover from HD 9 4. Assemble PCB shielding above PCBA (4pcs short screws) bottom of HD enclosure to fix hard disk 3. Securely tighten screws from the 10 6. Use screws (2pcs longer, 2pcs shorter) from the bottom of HD enclosure to tighten it 5. Replace cover onto HD enclosure 11 8. Plug adapter into the HD enclosure 7. Plug USB into the HD enclosure 10. Plug adapter 12 9. Plug USB cable into PC or laptop 13 11. Press the switch for power on