Download Product User Manual
Transcript
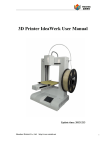
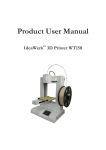
Quick Set Up Guide Product User Manual IdeaWerkTM 1 Shenzhen Weistek Co., Ltd Add.: RM2301, Shenzhen Overseas Chinese High-Tech Venture Park, Shenzhen, P. R. China Email: [email protected] Website: www.weistek.net Quick Set Up Guide Version:V1.0 Contents 1. Unpack and checking .......................................................... 错误!未定义书签。 1.1 Check the Machine ....................................................................................... 4 1.2 Check the Accessories .................................................................................. 4 2. Brief Introduction ................................................................................................. 5 2.1 Precautions and Safety.................................................................................. 5 2.2 Appearance and Structure ............................................................................ 6 2.3 Technical Specifications ............................................................................... 9 3. Software Installation ........................................................................................... 10 3.1 Driver Installation ....................................................................................... 10 3.2 XP System Driver Installation ................................... 错误!未定义书签。9 3.3 Win7 System Driver Installation ................................................................ 21 3.4 Win8 System Driver Installation ............................................................... 23 4. Preparations before printing ............................................................................... 30 4.1 Platform Calibration and measuring Z height ........................................... 30 4.2 Select temperature ...................................................................................... 38 5. Forward and reverse the filament ....................................................................... 39 5.1 How to feed material .................................................................................. 39 5.2 How to change another material ................................................................ 41 5.3 How to reverse material ............................................................................. 42 6. Introduction of software functions ..................................................................... 42 6.1 Introduction of main functions .................................................................. 42 7. Build from SD card and control .......................................................................... 55 7.1 Build from SD card ..................................................................................... 55 7.2 Operation on control screen ....................................................................... 56 8. How to fix common problem .............................................................................. 59 8.1 Resolution of filament feeding unsmooth ................................................. 59 8.2 Resolution of nozzle blocking ................................................................... 60 Acknowledgements .......................................................................................... 68 2 Shenzhen Weistek Co., Ltd Add.: RM2301, Shenzhen Overseas Chinese High-Tech Venture Park, Shenzhen, P. R. China Email: [email protected] Website: www.weistek.net Quick Set Up Guide 1. Unpack and checking 1.1 Check the Machine 1) Open the packing carton box, unwrap the EPE covering, remove the machine and accessories from the box. 2)Overall observe the machine to make sure there is no serious damage. If any problem, please contact with the after sale service staff in time. 3 Shenzhen Weistek Co., Ltd Add.: RM2301, Shenzhen Overseas Chinese High-Tech Venture Park, Shenzhen, P. R. China Email: [email protected] Website: www.weistek.net Quick Set Up Guide (Pic 1.1-01) 1.2 Check the Accessories All of the following accessories are consisted in the box together with the machine. Shovel Chisel Cut pliers Tweezers Allen wrench and screws Clips 4 Shenzhen Weistek Co., Ltd Add.: RM2301, Shenzhen Overseas Chinese High-Tech Venture Park, Shenzhen, P. R. China Email: [email protected] Website: www.weistek.net Quick Set Up Guide Power adapter and power cord USB Cable Acupuncture Needle Build plate Nylon cable ties Gloves Spool holder SD card Teflon tube filament guide (Pic 1.2-01) 2. Brief Introduction 2.1 Precautions and Safety Place the machine in dry environment when operating. 5 Shenzhen Weistek Co., Ltd Add.: RM2301, Shenzhen Overseas Chinese High-Tech Venture Park, Shenzhen, P. R. China Email: [email protected] Website: www.weistek.net Quick Set Up Guide To avoid blocking the nozzle, do not heat up the extruder before feeding the material Machine should be away from fire or water. Use the machine in a ventilated environment, so that to avoid smelling. Do not touch or remove the power cord or data line when operating. Never touch the extruder or build bed by any parts of your body or anything which is easy on fire when machine is operating, for they are very hot to harm your skin or cause fire. Gloves are required when removing the printed part to avoid harm of cutting, scratching or burning. 6 Shenzhen Weistek Co., Ltd Add.: RM2301, Shenzhen Overseas Chinese High-Tech Venture Park, Shenzhen, P. R. China Email: [email protected] Website: www.weistek.net Quick Set Up Guide 2.2 Appearance and Structure Extruder X axis Build Plate Z axis Filament Y axis Spool (Pic 2.2-01) Note: the direction of the clip must be parallel to the X axis 7 Shenzhen Weistek Co., Ltd Add.: RM2301, Shenzhen Overseas Chinese High-Tech Venture Park, Shenzhen, P. R. China Email: [email protected] Website: www.weistek.net Quick Set Up Guide (Pic 2.2-02) Please note how to insert SD card (Pic 2.2-03) 8 Shenzhen Weistek Co., Ltd Add.: RM2301, Shenzhen Overseas Chinese High-Tech Venture Park, Shenzhen, P. R. China Email: [email protected] Website: www.weistek.net Quick Set Up Guide Power Switch Power Input USB Port (Pic 2.2-04) 2.3 Technical Specifications Dimensions: 298×221×403mm Printing Dimensions: 150×150×140mm Layer Thickness: 0.2~0.3mm 3 Speed: 30-150 cm /h Net Weight: 7.5kg Material: PLA Materials Printing Temperature: PLA 220-230°C Power Input:100-240V~ 50/60Hz 2.6A-3.0A Output:12V—10A 9 Shenzhen Weistek Co., Ltd Add.: RM2301, Shenzhen Overseas Chinese High-Tech Venture Park, Shenzhen, P. R. China Email: [email protected] Website: www.weistek.net Quick Set Up Guide Maximum Operating Power: 63.6W Input format: STL/X3G/CODE Operating system: Windows XP/Vista/Win7/Win8 Operating software: DoraWare Environment Temperature: 5℃~35℃ Relative Humidity: 30%~90% 3. Software Installation Note: The following installation of drivers and software based on winXP, win7 and win8 system. Vista system and XP lite system please consult our company after-sales personnel, please find service contact and service QQ at the last page of the manual. 3.1 Driver Installation 1. Double-click English-Setup.exe. Click [more] and select [allows all programs] when a interface pops up from the installed antivirus software. 10 Shenzhen Weistek Co., Ltd Add.: RM2301, Shenzhen Overseas Chinese High-Tech Venture Park, Shenzhen, P. R. China Email: [email protected] Website: www.weistek.net Quick Set Up Guide 2. Click [next] when the following interface pops up. (Pic 3.1-01) 3.Click [next] to install in the pop-up interface and click [Browse] to change Destination Location. Select a folder, click [next] in Pic 3.1-02 (System C is not recommended). 11 Shenzhen Weistek Co., Ltd Add.: RM2301, Shenzhen Overseas Chinese High-Tech Venture Park, Shenzhen, P. R. China Email: [email protected] Website: www.weistek.net Quick Set Up Guide (Pic 3.1-02) 4. Click [next] in the following interface as Pic 3.1-03. (Pic 3.1-03) 5. Tick Create a desktop icon in the following pop-up interface, then 12 Shenzhen Weistek Co., Ltd Add.: RM2301, Shenzhen Overseas Chinese High-Tech Venture Park, Shenzhen, P. R. China Email: [email protected] Website: www.weistek.net Quick Set Up Guide click [next]. (Pic 3.1-04) 6. Click [install] in the below pop-up window. (Pic 3.1-05) 13 Shenzhen Weistek Co., Ltd Add.: RM2301, Shenzhen Overseas Chinese High-Tech Venture Park, Shenzhen, P. R. China Email: [email protected] Website: www.weistek.net Quick Set Up Guide 7. Click [finish] to complete software installation in the below pop-up interface. (Pic 3.1-06) 8. After finishing installation, set the software as run this program as an administrator based on Win7 and Win8 system to get a better access to writing date when installing in folders. Setting steps as following: right-click the desktop icon or Wstk. Exe under installation directory. 14 Shenzhen Weistek Co., Ltd Add.: RM2301, Shenzhen Overseas Chinese High-Tech Venture Park, Shenzhen, P. R. China Email: [email protected] Website: www.weistek.net Quick Set Up Guide (Pic 3.1-07) 9. Tick Run this program as an administrator in the pop-up Doraware-W Properties, then click [settings for all users]. (Pic 3.1-08) 10. Tick Run this program as an administrator in the below interface , 15 Shenzhen Weistek Co., Ltd Add.: RM2301, Shenzhen Overseas Chinese High-Tech Venture Park, Shenzhen, P. R. China Email: [email protected] Website: www.weistek.net Quick Set Up Guide then click [apply], then click [ok] to finish it. (Pic 3.1-09) (Note:as for Win7 and Win8, you should turn off the computer sleeping setting to avoid printing interruption. Steps as below: Win7 Click Control panel, then select Power options and find Change the computer sleep time. Then click to revise it. Win8 Right-click the desktop and select Personalization, then select Screensaver. 16 Shenzhen Weistek Co., Ltd Add.: RM2301, Shenzhen Overseas Chinese High-Tech Venture Park, Shenzhen, P. R. China Email: [email protected] Website: www.weistek.net Quick Set Up Guide (Pic 3.1-10) 2. Click Change power settings in the below pop-up interface. 17 Shenzhen Weistek Co., Ltd Add.: RM2301, Shenzhen Overseas Chinese High-Tech Venture Park, Shenzhen, P. R. China Email: [email protected] Website: www.weistek.net Quick Set Up Guide (Pic 3.1-11) 3. Click Change plan settings in Balanced(recommended) in the Select a power plan directory as below. (Pic 3.1-12) 4. Change the option Put the computer to sleep to Never and then save changes. 18 Shenzhen Weistek Co., Ltd Add.: RM2301, Shenzhen Overseas Chinese High-Tech Venture Park, Shenzhen, P. R. China Email: [email protected] Website: www.weistek.net Quick Set Up Guide (Pic 3.1-13) 3.2 XP System Driver Installation 3.2.1 Connect 3D printer and turn on the power switch, then select Install from a list or specific location(Advanced)in the below pop-up window Hardware Update Wizard. And then click [next]. (Pic 3.2-01) 3.2.2 If the below interface as Pic 3.2-0.2 don’t pop up after connecting 3D printer, right-click Computer and then click 19 Shenzhen Weistek Co., Ltd Add.: RM2301, Shenzhen Overseas Chinese High-Tech Venture Park, Shenzhen, P. R. China Email: [email protected] Website: www.weistek.net Quick Set Up Guide Management. Then click Device Manager. (Pic 3.2-02) 3.2.3 Right-click Ports(COM&LPT) and select Scan for hardware changes as Pic 3.2-03, Hardware Update Wizard pops up(Win7 allows automatical installation without a dialogue popping up)and select Install from a list or specific location[advanced](S), then click [next] to continue. (Pic 3.2-03) 3.2.4. Select Include this location in the search when the following 20 Shenzhen Weistek Co., Ltd Add.: RM2301, Shenzhen Overseas Chinese High-Tech Venture Park, Shenzhen, P. R. China Email: [email protected] Website: www.weistek.net Quick Set Up Guide dialogue pops up as Pic 3.2-04, and then click Browse. Tick 上 (Pic 3.2-04) 3.2.5. Find DoraWare-W Driver in disc C in the pop-up window Browse For Folder, and find “drivers” folder, then clicking [OK]. (Pic 3.2-05) 21 Shenzhen Weistek Co., Ltd Add.: RM2301, Shenzhen Overseas Chinese High-Tech Venture Park, Shenzhen, P. R. China Email: [email protected] Website: www.weistek.net Quick Set Up Guide 3.2.6. Click [next] and the below dialogue pops up as Pic 3.2-06. (Pic 3.2-06) 3.2.7. Click [finish] when the following interface pops up. (Pic 3.2-07) 22 Shenzhen Weistek Co., Ltd Add.: RM2301, Shenzhen Overseas Chinese High-Tech Venture Park, Shenzhen, P. R. China Email: [email protected] Website: www.weistek.net Quick Set Up Guide 3.2.8 To confirm if the driver installation is successful or not. a. right click「Computer」, choose「Manage」, and then choose「Device Manager」 (Pic 3.2-08) b. Select “Ports (COM&LPT)”in the below pop-up window, If no ? or ! ahead of “USB Serial Port” shows the USB Serial Port Drive is installed successfully. 23 Shenzhen Weistek Co., Ltd Add.: RM2301, Shenzhen Overseas Chinese High-Tech Venture Park, Shenzhen, P. R. China Email: [email protected] Website: www.weistek.net Quick Set Up Guide Installation succeeded (Pic 3.2-09) c. If failed, right-click Ports(COM & LPT), and choose Scan for hardware changes. Installation failed (Pic 3.2-10) 3.3 Win7 System Driver Installation After connecting, Win7 System Driver would install automatically. 24 Shenzhen Weistek Co., Ltd Add.: RM2301, Shenzhen Overseas Chinese High-Tech Venture Park, Shenzhen, P. R. China Email: [email protected] Website: www.weistek.net Quick Set Up Guide Confirm it directly. 3.3.1. right click「Computer」, choose「Manage」, and then choose 「Device Manager」 (Pic 3.3-01) 3.3.2. Select “Ports (COM&LPT)”in the below pop-up window, If no ? or ! ahead of “USB Serial Port” shows the USB Serial Port Drive is installed successfully. Installation succeeded (Pic 3.3-02) 3.3.3. If failed, right-click Ports(COM & LPT), and choose Scan for 25 Shenzhen Weistek Co., Ltd Add.: RM2301, Shenzhen Overseas Chinese High-Tech Venture Park, Shenzhen, P. R. China Email: [email protected] Website: www.weistek.net Quick Set Up Guide hardware changes. Installation failed (Pic 3.3-03) 3.3.4. If still failed and yellow ! under Other devices, right-click[The Replicator] and select Update Driver Software. (Pic 3.3-04) 3.3.5. Click Browse my computer for driver software, the following steps are the same as 3.2.5 ~ 3.2.7. 26 Shenzhen Weistek Co., Ltd Add.: RM2301, Shenzhen Overseas Chinese High-Tech Venture Park, Shenzhen, P. R. China Email: [email protected] Website: www.weistek.net Quick Set Up Guide (Pic 3.3-05) 3.4 Win8 System Driver Installation 3.4.1. right click「Computer」, choose「Manage」, and then choose 「Device Manager」and unfold [Other devices], right click [The Replicator] and select Update Driver Software. (Pic 3.4-01) 27 Shenzhen Weistek Co., Ltd Add.: RM2301, Shenzhen Overseas Chinese High-Tech Venture Park, Shenzhen, P. R. China Email: [email protected] Website: www.weistek.net Quick Set Up Guide 3.4.2. Select Browse my computer for driver software in the following pop-up window. (Pic 3.4-02) 3.4.3.Click Browse in the following window. (Pic 3.4-03) 28 Shenzhen Weistek Co., Ltd Add.: RM2301, Shenzhen Overseas Chinese High-Tech Venture Park, Shenzhen, P. R. China Email: [email protected] Website: www.weistek.net Quick Set Up Guide 3.4.4. Click [Install] to complete driver installation. (Pic 3.4-04) 3.4.5. Click + ahead of Ports (COM&LPT) in the below pop-up window, If a serial port under it shows USB serials port installed successfully. Installation succeeded 29 Shenzhen Weistek Co., Ltd Add.: RM2301, Shenzhen Overseas Chinese High-Tech Venture Park, Shenzhen, P. R. China Email: [email protected] Website: www.weistek.net Quick Set Up Guide (Pic 3.4-05) (Note:If there is a digital signature warning, disable driver signature enforcement. Steps as following: 1. Charm menu(shake mouse at the right corner of the screen and the manu appears; or click [Win]+[C] key ), find Setting in the full screen menu, right side of the Win8. (Pic 3.4-06) 3. Find Change PC settings at the bottom. 30 Shenzhen Weistek Co., Ltd Add.: RM2301, Shenzhen Overseas Chinese High-Tech Venture Park, Shenzhen, P. R. China Email: [email protected] Website: www.weistek.net Quick Set Up Guide (Pic 3.4-07) 3. Open PC settings, find General on the left and select Restart now on the right. Right here to change Windows start-up settings. (Pic 3.4-08) 4. Select Troubleshoot 31 Shenzhen Weistek Co., Ltd Add.: RM2301, Shenzhen Overseas Chinese High-Tech Venture Park, Shenzhen, P. R. China Email: [email protected] Website: www.weistek.net Quick Set Up Guide (Pic 3.4-09) 5. Select Advanced options (Pic 3.4-10) 6. Select start-up Settings (Pic 3.4-11) 32 Shenzhen Weistek Co., Ltd Add.: RM2301, Shenzhen Overseas Chinese High-Tech Venture Park, Shenzhen, P. R. China Email: [email protected] Website: www.weistek.net Quick Set Up Guide 7. Select 7 or Click F7 for Disable driver signature enforcement. After system restart, driver signature enforcement closes. (Pic 3.4-12) 4. Preparations before printing Before start to print the SD card should insert in the 3D printer, or software will not able to connect the printer. 4.1 Platform Calibration and measuring Z height 4.1.1 Open DoraWare-W 1.0, flush ports and connect, click [Flush] and then click [Connect]. (Pic 4.1-01) 4.1.2 The Connect Icon turn grey when connecting succeed. 33 Shenzhen Weistek Co., Ltd Add.: RM2301, Shenzhen Overseas Chinese High-Tech Venture Park, Shenzhen, P. R. China Email: [email protected] Website: www.weistek.net Quick Set Up Guide (Pic 4.1-02) 4.1.3 Click [3 Axis] and then click [Roughly measure]. (Pic 4.1-03) 4.1.4 Move up the platform to the nozzle and move the nozzle to the center of the platform. Push the platform to check if the platform in Y axis is flat. Then check X Axis. The plate should be calibrated before printing. Make sure the plate to be flat and 34 Shenzhen Weistek Co., Ltd Add.: RM2301, Shenzhen Overseas Chinese High-Tech Venture Park, Shenzhen, P. R. China Email: [email protected] Website: www.weistek.net Quick Set Up Guide level, and appropriate distance to the extruder. (Pic 4.1-04) 4.1.5 Select accurately measure step distance on the right of the [Accurately measure] button, then click [Accurately measure] to move the platform step by step, till only 0.3mm between the platform and the extruder. 35 Shenzhen Weistek Co., Ltd Add.: RM2301, Shenzhen Overseas Chinese High-Tech Venture Park, Shenzhen, P. R. China Email: [email protected] Website: www.weistek.net Quick Set Up Guide (Pic 4.1-05) 0.3mm between the platfor m and the e xtruder mm (Pic 4.1-06) Tip: How to estimate the distance: put a card between the extruder and the platform, while no more distance’s left, make sure the card can slice between extruder and platform smoothly without any damage. 36 Shenzhen Weistek Co., Ltd Add.: RM2301, Shenzhen Overseas Chinese High-Tech Venture Park, Shenzhen, P. R. China Email: [email protected] Website: www.weistek.net Quick Set Up Guide Put a card here (Pic 4.1-07) 4.1.6 Keep extruder still and move extruder forward and backward to ensure the same distance (0.3mm). Click [Accurately measure] to adjust the distance when somewhere is not around 0.3mm. 37 Shenzhen Weistek Co., Ltd Add.: RM2301, Shenzhen Overseas Chinese High-Tech Venture Park, Shenzhen, P. R. China Email: [email protected] Website: www.weistek.net Quick Set Up Guide (Pic 4.1-08) Screw B Screw C Screw A (Pic 4.1-09) Use the wrench to fasten or loosen the screws beneath the platform to adjust the platform (Pic 4.1-10) 38 Shenzhen Weistek Co., Ltd Add.: RM2301, Shenzhen Overseas Chinese High-Tech Venture Park, Shenzhen, P. R. China Email: [email protected] Website: www.weistek.net Quick Set Up Guide X Axis Y Axis (Pic 4.1-11) 4.1.7 Move the platform to make the extruder on the center of the platform and keep platform still, move extruder left and right to ensure the same distance (0.3mm). Click [Accurately measure] to adjust the distance when somewhere is not around 0.3mm. 39 Shenzhen Weistek Co., Ltd Add.: RM2301, Shenzhen Overseas Chinese High-Tech Venture Park, Shenzhen, P. R. China Email: [email protected] Website: www.weistek.net Quick Set Up Guide (Pic 4.1-12) 4.1.8 After adjusting the platform, click [Meter Z], platform will go down again and stop when it touches the Limit Switch. This process is measuring the Z height. Click [Size setting], new data will be shown on the program. 40 Shenzhen Weistek Co., Ltd Add.: RM2301, Shenzhen Overseas Chinese High-Tech Venture Park, Shenzhen, P. R. China Email: [email protected] Website: www.weistek.net Quick Set Up Guide Z height value (Pic 4.1-13) Tips: When print test model and find the distance is not around 0.3mm, you just connect machine and fine adjust the Z height (about ±0.2mm ), and then click [Size setting]. Don’t have to regenerate GCode. 41 Shenzhen Weistek Co., Ltd Add.: RM2301, Shenzhen Overseas Chinese High-Tech Venture Park, Shenzhen, P. R. China Email: [email protected] Website: www.weistek.net Quick Set Up Guide 4.2 Select temperature 4.2.1 How to select temperature: set extruder current temperature for PLA at 220-230℃, target temperature220℃. And click [Setting]. (Pic 4.2-01) 4.2.2 Open DoraWare-W, flush port and connect, click [Extruder]on the right menu. Wait till the current temperature is up to 220°C, click [Forward]. 42 Shenzhen Weistek Co., Ltd Add.: RM2301, Shenzhen Overseas Chinese High-Tech Venture Park, Shenzhen, P. R. China Email: [email protected] Website: www.weistek.net Quick Set Up Guide (Pic 4.2-01) 5. Forward and reverse filament 5.1 How to feed material 5.1.1 To avoid material stuck inside the extruder, please make sure the filament is fed through the center of the hole as Pic 5.1-01. 43 Shenzhen Weistek Co., Ltd Add.: RM2301, Shenzhen Overseas Chinese High-Tech Venture Park, Shenzhen, P. R. China Email: [email protected] Website: www.weistek.net Quick Set Up Guide Filament feeding hole (Pic 5.1-01) 5.1.2 First step, put the filament free end through the holder guide, and feed the filament through the guiding tube. Second, push the free end into the extruder feeding hole. (Pic 5.1-02) 5.1.3 Select Extruder Target Temperature at 220oC. Heat up extruder. After heating up, click 「Forward」until the material string comes 44 Shenzhen Weistek Co., Ltd Add.: RM2301, Shenzhen Overseas Chinese High-Tech Venture Park, Shenzhen, P. R. China Email: [email protected] Website: www.weistek.net Quick Set Up Guide out from the nozzle. Click「Stop」when finish this step. The filament free end must be cut to be flat and put it into the feeding hole, then click [Forward]. When the filament feeded into the extruder, relax your hands. Correct Error (Pic 5.1-03) 5.2 How to change another filament 5.2.1 When the wire is about to ran out, but your model has not finished yet. You need to change another filament to continue. The filament free end should be cut to be flat like Pic 5.1-03 and then hold the two ends till the linkage squeezes into the feeding hole and drops out normally from the extruder. Then you can relax your hands. 45 Shenzhen Weistek Co., Ltd Add.: RM2301, Shenzhen Overseas Chinese High-Tech Venture Park, Shenzhen, P. R. China Email: [email protected] Website: www.weistek.net Quick Set Up Guide 1.Cut the end to be flat and hold the left filament straight. 2. Bend filament can get extruder blocking easily. (Pic 5.2-01) Keeping pushing down the leftover filament and till the filament get stuck into the gear. Then relax your hands after 20 seconds. (Pic 5.2-02) 5.3 How to reverse filament To reverse material, the extruder should be heated up first(about 46 Shenzhen Weistek Co., Ltd Add.: RM2301, Shenzhen Overseas Chinese High-Tech Venture Park, Shenzhen, P. R. China Email: [email protected] Website: www.weistek.net Quick Set Up Guide 220℃). Then click [Reverse] until the filament is totally reversed from the extruder. Click [Stop] to finish this step. Reverse (Pic 5.3-01) 6. Introduction of software functions 6.1 Introduction of main functions 6.1.1 Software interface:(as Pic 6.1-01) Select model before editing model. When the selected model turns red, you can start to edit. 47 Shenzhen Weistek Co., Ltd Add.: RM2301, Shenzhen Overseas Chinese High-Tech Venture Park, Shenzhen, P. R. China Email: [email protected] Website: www.weistek.net Quick Set Up Guide Main menu Editing menu Model display area 3-axis reference (Pic 6.1-01) 6.1.2 Click top left corner, Model, Model size and Path displayed. 48 Shenzhen Weistek Co., Ltd Add.: RM2301, Shenzhen Overseas Chinese High-Tech Venture Park, Shenzhen, P. R. China Email: [email protected] Website: www.weistek.net Quick Set Up Guide (Pic 6.1-02) 6.1.3 Left click property and drag. The editing icon can be placed anywhere within the four icons each with a triangle inside. (Pic 6.1-03) 6.1.4 In total 14 functions icons among the main menu. Turn on the power switch, open the software and flush ports, then connect. The connect icon will turn grey if connection succeeded as Pic 6.1-04. (Pic 6.1-04) 6.1.5 Open the file you need to print, as Pic 6.1-05. 49 Shenzhen Weistek Co., Ltd Add.: RM2301, Shenzhen Overseas Chinese High-Tech Venture Park, Shenzhen, P. R. China Email: [email protected] Website: www.weistek.net Quick Set Up Guide (Pic 6.1-05) 6.1.6 Click [Flush], the port as below will appear when you find it. The port is different for different machines. When you click [Connect], it turns grey, which means the software has connected to the right serial port. (Pic 6.1-06) 6.1.7 When the operation process is abnormal, you can click [Discon] to stop it. 50 Shenzhen Weistek Co., Ltd Add.: RM2301, Shenzhen Overseas Chinese High-Tech Venture Park, Shenzhen, P. R. China Email: [email protected] Website: www.weistek.net Quick Set Up Guide (Pic 6.1-07) 6.1.8 Click [Start] to print after generating Gcode. (Pic 6.1-08) 6.1.9 When the machine is printing, the interface in the right can’t be edited. If you click, the following window The machine is printing pops up. (Pic 6.1-09) 51 Shenzhen Weistek Co., Ltd Add.: RM2301, Shenzhen Overseas Chinese High-Tech Venture Park, Shenzhen, P. R. China Email: [email protected] Website: www.weistek.net Quick Set Up Guide 6.1.10 Any abnormal process, please click [Stop] to interrupt printing. (Pic 6.1-10) 6.1.12 Adjust the direction of the model by clicking the seven view icons. The below is the seven view icons: Normal, Front, Back, Left, Right, Top, Bottom. By changing the different view, you can be easy to find if the model is beyond the building size. Normal Front Left Top (Pic 6.1-11) 6.1.13 The Property on the right side can be divided into three parts: Model Edit, 3 Axis, Extruder. Model Edit can also be divided into three parts: Edit, Configuration parameter and Generate Gcode. 52 Shenzhen Weistek Co., Ltd Add.: RM2301, Shenzhen Overseas Chinese High-Tech Venture Park, Shenzhen, P. R. China Email: [email protected] Website: www.weistek.net Quick Set Up Guide (Pic 6.1-12) I. Model Edit After importing the model, many occasions could happen, like model can’t display or the position is not correct. Then you can use these functions to adjust it. Move: before Generating Gcode, the model should be centered and placed on the platform. And you can move it on X/Y/Z three Axis or click [Auto Layout]. As for the below three statues, Pic a and Pic b shows model is not in the printing area (model displayed in green). Pic c shows model turns red when you select it. 53 Shenzhen Weistek Co., Ltd Add.: RM2301, Shenzhen Overseas Chinese High-Tech Venture Park, Shenzhen, P. R. China Email: [email protected] Website: www.weistek.net Quick Set Up Guide Model is beyond the printing area. When the model turns red, you can edit it. Pic a Pic b Pic c II. Rotate: Model can rotate along X\Y\Z axis, lower left icons are for your choices. III. Scale: Model can scale here or scale along a certain axis. If you are not satisfied with your operation, click [Auto Layout] to reset. After all this action, please click [save]. (Pic 6.1-13) In the following interface Edit Model, you can select the specific digital to edit it or enter any digital you need. 54 Shenzhen Weistek Co., Ltd Add.: RM2301, Shenzhen Overseas Chinese High-Tech Venture Park, Shenzhen, P. R. China Email: [email protected] Website: www.weistek.net Quick Set Up Guide (Pic 6.1-14) To print multiple models at one time, click ctrl and left mouse to choose multiple models. (Pic d and Pic e) Click Ctrl and left mouse to choose more models. Pic d Pic e Pic 6.1-15 shows the renderings of move, rotate and scale. Click Shift and right mouse, you can move the model free. Move Rotate Scale (Pic 6.1-15) 二、Parameter Settings Set the parameter according to the structure and size of model. 1. Print Base: Tick or not 55 Shenzhen Weistek Co., Ltd Add.: RM2301, Shenzhen Overseas Chinese High-Tech Venture Park, Shenzhen, P. R. China Email: [email protected] Website: www.weistek.net Quick Set Up Guide 2. Support Mode: No Support, Exterior Support and Interior Support. 3. Infill Ratio: solid printing is between 95%-100%, and 10%-30% is the common choice to save filament. Layer height is associated with accuracy, the thinner layer height, the more accurate you will get, and also the slower the printing speed is. As for PLA, you can choose 95% infill ratio needed for solid printing because PLA’s expansion index is relatively high. 4. Shells: the outer layers of the model. 5. Speed: normally, the feeding speed is 30~80, optimum speed is 60. (Pic 6.1-16) 三、Generate Gcode When the parameter is set, click [Generate Gcode] and a green progress bar will appear. Wait till the progress is finished. 56 Shenzhen Weistek Co., Ltd Add.: RM2301, Shenzhen Overseas Chinese High-Tech Venture Park, Shenzhen, P. R. China Email: [email protected] Website: www.weistek.net Quick Set Up Guide (Pic 6.1-17) (Pic 6.1-18) 6.1.14 The control of 3 Axis,choose the parameter and click the direction you want to move. 57 Shenzhen Weistek Co., Ltd Add.: RM2301, Shenzhen Overseas Chinese High-Tech Venture Park, Shenzhen, P. R. China Email: [email protected] Website: www.weistek.net Quick Set Up Guide (Pic 6.1-19) Jog 0.1mm (Pic 6.1-20) 6.1.15 Printing finished.(as Pic 6.1-21): 58 Shenzhen Weistek Co., Ltd Add.: RM2301, Shenzhen Overseas Chinese High-Tech Venture Park, Shenzhen, P. R. China Email: [email protected] Website: www.weistek.net Quick Set Up Guide (Pic 6.1-21) 6.1.16 Wear gloves and use shovel to remove the model.(as Pic 6.1-22 and 6.1-23): (Pic 6.1-22) (Pic 6.1-23) 59 Shenzhen Weistek Co., Ltd Add.: RM2301, Shenzhen Overseas Chinese High-Tech Venture Park, Shenzhen, P. R. China Email: [email protected] Website: www.weistek.net Quick Set Up Guide 6.1.17 If we want to start to print another model, choose model and right click the mouse to remove the former one. Otherwise, two or more models will be displayed in the printing area. (Pic 6.1-24) 七、Build from SD card and Operation on control screen 7.1 Build from SD card 7.1.1 After finishing generating Gcode, you can choose to build from SD card or connecting with the computer. If choose SD card, click [SD] to save as X3G format. (Pic 7.1-01) 60 Shenzhen Weistek Co., Ltd Add.: RM2301, Shenzhen Overseas Chinese High-Tech Venture Park, Shenzhen, P. R. China Email: [email protected] Website: www.weistek.net Quick Set Up Guide 7.1.2 Click , the below window pops up, select the destination folder to keep X3G file and you can also can keep it in SD card directly. Finally, click [Save] to start printing. (Pic 7.1-02) File name should be Arabic number or English only(do not exceed 20 digitals) and then copy it to SD card. Chinese name will be garbled or not identified. 7.2 Operation on control screen Control should be done on the screen when building from SD card. Detailed steps are as followings: 7.2.1 Main interface shows company name and model number, click 61 Shenzhen Weistek Co., Ltd Add.: RM2301, Shenzhen Overseas Chinese High-Tech Venture Park, Shenzhen, P. R. China Email: [email protected] Website: www.weistek.net Quick Set Up Guide the screen to enter files scan interface. (Pic 7.2-01) 7.2.2 Scan the files needed to be printed, the function only be used for offline printing. (Pic 7.2-02) 7.2.3 When build from SD card, you can save multiple files to print till the SD capacity reach 2GB. Touch any file to start print. 62 Shenzhen Weistek Co., Ltd Add.: RM2301, Shenzhen Overseas Chinese High-Tech Venture Park, Shenzhen, P. R. China Email: [email protected] Website: www.weistek.net Quick Set Up Guide (Pic 7.2-03) 7.2.4 This interface displays Machine condition, including File, Setting Tem., Extruder Tem., Finish. If something goes wrong during printing, touch Stop. (Pic 7.2-04) 7.2.5 Click Yes to end the process of building if needed. 63 Shenzhen Weistek Co., Ltd Add.: RM2301, Shenzhen Overseas Chinese High-Tech Venture Park, Shenzhen, P. R. China Email: [email protected] Website: www.weistek.net Quick Set Up Guide (Pic 7.2-05) 7.2.6 Error alert shows up if anything wrong when building. (Pic 7.2-06) 8. How to fix common problem 64 Shenzhen Weistek Co., Ltd Add.: RM2301, Shenzhen Overseas Chinese High-Tech Venture Park, Shenzhen, P. R. China Email: [email protected] Website: www.weistek.net Quick Set Up Guide 8.1 Resolution of filament feeding unsmooth What is unsmooth: During printing, the extruder can’t extrude filament or extrude intermittently, at this situation, 1)Check the extruder temperature if is too low or not, increase 5-10oC each time to see if the problem is solved or not. See Pic 8.1-01. 2)Check the gear of the extruder, if there are a lot of filament waste pellet, just clean it and then print again to see if situation get better or not. 65 Shenzhen Weistek Co., Ltd Add.: RM2301, Shenzhen Overseas Chinese High-Tech Venture Park, Shenzhen, P. R. China Email: [email protected] Website: www.weistek.net Quick Set Up Guide (Pic 8.1-01) 8.2 Resolution of nozzle blocking If the extruder is still not able to work, then you have to check if the nozzle of the extruder is blocked or not. This is always due to wrong operation of machine and use wrong filament or wrong operation of joining the filament. Solutions: Heat the extruder temperature to appropriate temperature (only for 66 Shenzhen Weistek Co., Ltd Add.: RM2301, Shenzhen Overseas Chinese High-Tech Venture Park, Shenzhen, P. R. China Email: [email protected] Website: www.weistek.net Quick Set Up Guide PLA. PLA: 220°C-230°C). Click Reverse, if needed, at the same time have to pull back the filament with hand (some time the filament was bite a breach by the gear, the gear can’t touch the filament, need to pull the filament to the gear so the reverse will work) 2)Change a new filament, the temperature of extruder can be selected a little high(around 250oC). 3)Then Start to extrude, use your needle (or any of your needle like tools) insert into the hole of nozzle, dredge up and down, at the same time, press the filament which is extruding. Keep doing this until the filament comes out from the nozzle.(wear gloves as Pic 8.2-01). 67 Shenzhen Weistek Co., Ltd Add.: RM2301, Shenzhen Overseas Chinese High-Tech Venture Park, Shenzhen, P. R. China Email: [email protected] Website: www.weistek.net Quick Set Up Guide (Pic 8.2-01) Acknowledgements Thanks for using IdeaWerk™ 3D printer and thanks for your supports for Weistek. For after sale service, please find the following contacts: Tel: +86-755-8669 9130 Ext. 622 Email: [email protected] 68 Shenzhen Weistek Co., Ltd Add.: RM2301, Shenzhen Overseas Chinese High-Tech Venture Park, Shenzhen, P. R. China Email: [email protected] Website: www.weistek.net





![Télécharger la documentation de conducteö [s]](http://vs1.manualzilla.com/store/data/006373371_1-af26308087bf5a6b266368401065138b-150x150.png)
