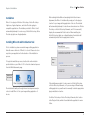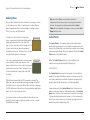
1
User Guide
© 2008 Josh Haftel
Chapter 1
Introduction
Introduction to Dfine® 2.0 and the User’s Manual
Dfine® 2.0
Chapter 1: Introduction
User Guide
The result? Dfine 2.0 is a powerful, yet easy-to-use tool that anyone
can use to perform high quality noise reduction without needing to
understand the complex underlying theory.
Because Dfine 2.0 is a plug-in for Adobe Photoshop, Adobe
Photoshop Lightroom, Apple Aperture and other compatible
applications, you must have Photoshop or a compatible application
installed on your computer.
New Feature Highlights
Introduction
Welcome to Dfine 2.0, the most powerful tool for reducing noise in
your digital photographic images.
All digital cameras inherently create unwanted imperfections known
as “noise.” The amount of noise in an image typically depends on
the quality and type of imaging sensor with which it was created.
High ISO speeds and low light can also add noise.
New Dfine 2.0 gives you unprecedented control over exactly how
much and where to apply noise reduction. This makes it ultra-easy
to eliminate noise in your images while maintaining detail and
sharpness, thus improving the quality of every digital photo you
take. Dfine 2.0 is designed to prevent the loss of detail other noise
reduction tools often introduce.
Dfine 2.0 introduces a brand new, re-sizable user interface that
includes Nik Software’s award-winning U Point® technology for the
ultimate in selective control. Busy photographers will appreciate
the workflow improvements offered by the new interface, as well
as improvements such as automatic camera profiles and batch
processing.
New interface
• Navigator Loupe
• Resizable
• New, more professional look and feel
Greatly improved noise reduction engine
• Higher quality noise reduction
• Better retention of fine details
Profile creation
• Profiles can be created automatically or manually
• Profiles can be shared
• Improved batch processing. Interface can be set to auto-profile or
auto-load profiles based on image EXIF data (needs a profile to be
created first for each camera/ISO combination)
• Improved Selective Tool interaction. Selective Tool can be called
from within the Interface, users do not have to access the filter
from the Selective Tool in order to selectively apply the filter
3
© 2008 Laurie Shupp
Chapter 2
What’s New in 2.0
New Features and Functionality in Dfine® 2.0
Dfine® 2.0
Chapter 2: What’s New in 2.0
Dfine 2.0 contains a considerable amount of enhancements and
improvements from Dfine 1.0. The majority of the improvements can
be summed up in 4 categories:
- Interface
- Noise Reduction Engine
- Noise Reduction Process
User Guide
Noise Reduction Engine
Dfine 2.0 contains a completely reworked noise reduction engine.
The goal when creating this new noise reduction engine was to
empower photographers with an incredibly powerful and precise
tool to reduce unwanted artifacts within photographs with the ability
to maintain high levels of detail, all without requiring a complicated
process or learning curve.
- Selective Tool Interaction
Interface
One of the most obvious new features of Dfine 2.0 is the completely
reworked interface. The interface represents the culmination of
extensive study of the look and feel that professional photographers
expect in a modern application along with requests from Nik
Software users.
The new interface was designed to look and act as a professional
photographic tool, with a color-neutral interface, medium-gray
background, and a strong focus on an efficient workflow.
Dfine 2.0 is completely resizable and groups important controls next
to one another, leading to less mouse clicks and therefore greater
efficiency and less time needed to achieve excellent quality noise
reduction results.
Please see Chapter 5: Dfine 2.0 Interface for more information on
the various tools and features found within the Dfine 2.0 interface.
Dfine 2.0
Noise Reduction
Engine
Dfine 2.0 incorporates an advanced, unique wavelet algorithm,
specially designed for use on photographic details. To support the
noise reduction algorithms and to ensure as simple and straightforward a workflow as possible, an automatic profiling system was
also developed.
The automatic profiling system was designed to make noise
reduction as easy as possible while working on the broadest range
of images as possible. A lot of care and attention was taken with
the automatic profiling system so that it would provide an optimal
profiling result for the majority of images, with no input required.
5
Dfine® 2.0
Chapter 2: What’s New in 2.0
Using this system, you can profile your image with one click and
apply noise reduction with only a few more steps to enjoy the
highest possible quality noise reduction.
Noise Reduction Process
With a new interface and state-of-the-art noise reduction engine,
Dfine 2.0 also needed some additional tools to ensure it provided as
much precision and control as professional photographers need.
To support this, Dfine 2.0 incorporates two different methods of
applying noise reduction to the image. The first, Control Points,
enables you to apply noise reduction globally to your image and
selectively with U Point powered Control Points. The Control Points
are based on Nik Software’s patented U Point image enhancement
technology. U Point is a technology that has been created and
designed to allow photographers to work directly on their images
to achieve exactly what they envision in an easy, fast and intuitive
manner. By incorporating U Point technology into Dfine 2.0, you
can take advantage of this exciting and powerful new technology to
quickly, easily, and selectively reduce noise on your images without
the use of complicated selections or masks.
The second, Color Ranges, takes the functionality previously found
within the camera profiles of Dfine 1.0 and improves upon them.
Now, the Color Ranges tool enables you to select the number of color
ranges that you want to select to control noise reduction against,
with a minimum of two and no maximum on the number of color
ranges selected for each image.
User Guide
Selective Tool Interaction
The final major area of improvement within Dfine 2.0 is in the
interaction with the Selective Tool. Previously, the Selective Tool was
used to determine when to apply Dfine’s noise reduction selectively
to an image. As photographers used Dfine more and more, the
Selective Tool often also became the preferred way of accessing the
filter, without needing to navigate through the many different filters
found in the Filters menu.
Additionally, from time to time, photographers indicated that after
selecting Dfine from the Filters menu, they may then have decided
to selectively apply the filter. Achieving this in Dfine 1.0 meant they
needed to cancel out of the interface, launch the Selective Tool, and
then begin the noise reduction process anew.
In Dfine 2.0, the choice of selectively applying the filter is done
within the Filter Interface, enabling you to use the method you prefer
of launching the Dfine 2.0 interface (either from within the Selective
Tool or from the Filters menu) without forcing you to decide to apply
the filter selectively or not.
For more information on this interaction, please see the Filter
Controls section of Chapter 5: Dfine 2.0 Interface.
For more information about the different noise reduction methods,
please see Chapter 7: Noise Reduction Step 2: Reducing Noise.
6
© 2008 Tony Corbell
Chapter 3
Installation
Installation Instructions and Accessing Dfine 2.0
Dfine® 2.0
Chapter 3: Installation
Installation
Dfine 2.0 is a plug-in for Adobe® Photoshop®, Adobe Photoshop
Lightroom®, Apple® Aperture™, and other Photoshop plug-in
compatible applications. The installer provided for Dfine 2.0 will
automatically attempt to locate a copy of Adobe Photoshop, Adobe
Photoshop Lightroom or Apple Aperture.
User Guide
After reading the Read Me and accepting the End User License
Agreement, the Dfine 2.0 installer will prompt you for the plug-in
location for your image editing application of choice. The installer
will automatically attempt to locate the most recent version of Adobe
Photoshop or Adobe Photoshop Elements, and if it is successful,
display the recommended folder location. When installing into
Adobe Photoshop Lightroom or Apple Aperture, the installer will
automatically install into the appropriate location.
Installing Dfine 2.0 and the Selective Tool
Prior to installation, please ensure the image editing application
that will serve as the host of Dfine 2.0 is closed. Please also close
any other open applications for the duration of the installation
process.
To begin the installation process, double-click on the installer
provided either on your Dfine 2.0 CD or from the download process
from the Nik Software web page.
Dfine 2.0
Setup
Double-click
the Installer
The installer will walk you through the various steps necessary in
order to install Dfine 2.0 into your image editing application of
choice.
If the installer was unable to locate a version of Adobe Photoshop
or Adobe Photoshop Elements, or if you are using a different image
editing application, you will need to manually locate the appropriate
plug-in installation location.
For Adobe Photoshop or Adobe Photoshop Elements, this location
is the Plug-Ins folder, which is found within the application’s main
folder.
8
Dfine® 2.0
Chapter 3: Installation
For example:
Adobe Photoshop
Windows – C:\Program Files\Adobe\Adobe Photoshop\Plug-Ins
Macintosh – Macintosh HD : Applications : Adobe Photoshop : PlugIns
User Guide
launches, or uncheck this box to prevent it from opening every
time. You can change this option within the Selective Tool settings
interface. For more information about this setting, please see
Chapter 10: Settings within the Selective Tool.
Note: The Selective Tool is available only with Adobe Photoshop and
Adobe Photoshop Elements serving as host for Dfine 2.0.
Adobe Photoshop Elements
Windows – C:\Program Files\Adobe\Adobe Photoshop Elements\
Plug-Ins
Click Finish to complete the installation process.
Macintosh – Macintosh HD : Applications : Adobe Photoshop
Elements : Plug-Ins
Accessing Dfine 2.0 and the Selective Tool
Click Browse… to open the Browse for Folder window, then navigate
to the appropriate folder.
Note: For guidance on the location of Plug-Ins in applications
other than Adobe Photoshop or Adobe Photoshop Elements,
please refer to your application’s user manual.
After selecting the appropriate folder location, click Install to begin
installing Dfine 2.0.
Once the installation is complete, you will be provided with the
option of indicating whether or not you would like the Selective
Tool to open when Photoshop or Photoshop Elements launches.
The Selective Tool enables you to selectively apply Dfine 2.0 by
automating Photoshop or Photoshop Element’s layers systems,
please see Chapter 8: Select Tool for more information about
this tool. Check this box if you would like the Selective Tool to
automatically launch every time Photoshop or Photoshop Elements
After completing the installation process, launch the image editing
application you installed Dfine 2.0 into. For Adobe Photoshop and
Adobe Photoshop Elements, Dfine 2.0 will be accessible from within
the Filter menu.
Open an image that requires noise reduction, navigate to the Filter
menu, locate the Dfine 2.0 sub-menu, and then within the Dfine 2.0
sub-menu, select Dfine 2.0.
This will call up the Dfine 2.0 interface and enable you to begin the
noise reduction process. Please see Chapter 5: Dfine 2.0 Interface
or Chapter 6: Noise Reduction Step 1: Measuring Noise for more
information on using Dfine 2.0.
You can access the Selective Tool by navigating to one of the
following locations:
Adobe Photoshop
File > Automate
9
Chapter 3: Installation
Adobe Photoshop Elements
File > Automation Tools
Accessing Dfine 2.0 in Apple Aperture
In Apple Aperture, Dfine 2.0 is accessed from the Images menu. To
begin using Dfine 2.0 in Aperture:
1. Highlight the image(s) that you wish to apply noise reduction
with Dfine 2.0.
2. Click the Images menu.
3. Roll over the Edit With sub-menu. A popup menu appears.
4. Select Dfine 2.0 from the popup.
The Dfine 2.0 interface appears, displaying the image(s) specified in
step 1 above.
Dfine® 2.0
User Guide
Note: Dfine 2.0 is only compatible with TIFF files (8 or 16-bit, with
no compression or LZW compression).
4.Click on Choose to select an application. Navigate to the
location of Dfine 2.0.
On Windows, the default installation location for Dfine 2.0 will
be:
C:\Program Files\Nik Software\Dfine 2.0 for Lightroom\
On Macintosh, the default installation location for Dfine 2.0
will be:
Macintosh HD : Applications : Nik Software : Dfine 2.0 for
Lightroom
5. Select the Dfine 2.0 file and click Choose.
Adding Dfine 2.0 to Lightroom as an External Editor
If Lightroom is found during the installation of Dfine 2.0 for
Lightroom, Dfine 2.0 can automatically be added as an external
editor. Dfine 2.0 can also be manually added as an external editor
providing easy access to edit your photos in Dfine 2.0. Follow the
steps below to manually add Dfine 2.0 as an external editor.
6.Under the Preset drop-down menu, select Save Current
Settings as New Preset… and name the preset.
Dfine 2.0 can then be easily accessed under the Photo menu as a
preset external editor.
1. Open the Preferences in Lightroom.
2. Click the External Editing tab.
3.In the Additional External Editor section select a desired File
Format, Color Space, Bit Depth, Resolution, and Compression.
10
Chapter 3: Installation
Dfine® 2.0
User Guide
Accessing Dfine 2.0 in Lightroom
Once Dfine 2.0 is added to Lightroom as an external editor, Dfine 2.0
is accessed from the Photo menu.
To begin using Dfine 2.0 in Lightroom:
1.Highlight the image(s) that you wish to enhance with Dfine
2.0.
2. Click the Photo menu.
3. Roll over the Edit In sub-menu. A popup menu appears.
4. Select Dfine 2.0 from the popup.
5.After selecting Dfine 2.0, select whether to Edit Original, Edit
a Copy, or Edit Copy with Lightroom Adjustments.
Note: If Edit a Copy with Lightoom Adjustments is selected, the
Copy File Options must be determined as well. Select the File
Format, Color Space, Bit Depth, Resolution and Compression for
the new file to be edited in Dfine 2.0*.
*Dfine 2.0 is only compatible with TIFF and JPEG files (8 or 16-bit
with no compression or LZW compression).
6.Click Edit and the Dfine 2.0 interface appears, displaying the
image(s) specified in Step 1 above.
11
© 2008 Tony Sweet
Chapter 4
Workflow
Workflow and Tips for Optimal Noise Reduction
Chapter 4: Workflow
Dfine® 2.0
User Guide
Noise reduction’s effectiveness varies depending on where it
is applied within the image editing workflow. Noise is a subtle
variation of recorded light values from one pixel to the next. The
more enhancements you apply to an image before reducing noise,
the greater the variation. As this variation increases, noise reduction
applications become less able to reduce unwanted artifacts without
degrading image detail.
Typical situations in which noise reduction is indicated are:
Apply noise reduction as early as possible in the image editing
process.
Dfine 2.0’s workflow is straightforward: measure noise, then reduce
it. The interface walks you through and automates the process
of measuring noise and provides the tools you need to reduce it.
(Please see Chapter 6: Step 1: Measuring Noise and Chapter 7: Step
2: Reducing Noise.)
The more contrast, sharpening, brightening, saturation
enhancements, or image resizing you perform before using Dfine
2.0, the less noise you will be able to remove without degrading the
image’s detail.
• When using high ISO settings on your camera
• After accidentally underexposing a series of images
• When opening up shadow details in an image
• Whenever noise is visible in an image
Turn off noise reduction and sharpening on your camera or RAW
conversion application.
Turning off these functions ensures that image details are preserved
and enables Dfine 2.0 to provide precise and powerful noise
reduction. Additionally, turning off sharpening functions in your
camera or RAW conversion application prevents amplification of
noise structures in images. If you choose to apply RAW or capture
sharpening to your image, do so after using Dfine 2.0, ideally with
Nik Sharpener Pro 3.0.
Apply noise reduction only when necessary.
Because noise reduction alters detail structures, however subtly,
apply noise reduction only when necessary. All images contain
some noise, but noise reduction should be applied only when noise
detracts from an image’s subject.
13
Dfine® 2.0
Chapter 4: Workflow
User Guide
Workflow
The order of steps involved in enhancing an image varies, depending
on the image. In general, there are only a few guidelines to consider:
- Apply noise reduction, such as with Nik Software Dfine® 2.0, as
early as possible in the process.
- Apply RAW Presharpening, if desired, with Nik Software
Sharpener Pro 3.0’s RAW Presharpener filter.
- Apply light and color enhancements with Nik Software
Viveza® (global, then local), and end with enhancements
using Nik Software Color Efex Pro™ 3.0 or Nik Software
Silver Efex Pro™.
- Apply output and creative sharpening with Nik Software
Sharpener Pro 3.0’s Output Sharpener filter.
© 2008 Don Mahr
Workflow Diagram
OR
Apply Noise Reduction
with Dfine 2.0
Apply RAW Presharpening
with Sharpener Pro 3.0
Control Color and
Light with Viveza
Apply Enhancements
with Color Efex Pro 3.0
Convert to black and white
with Silver Efex Pro
Apply Output Sharpening
with Sharpener Pro 3.0
14
Dfine® 2.0
Chapter 4: Workflow
User Guide
Dfine 2.0 Workflow
Select Dfine 2.0 from the Filter menu
or the Selective Tool.
1
1. Measure the noise in the image with the different
measuring methods.
2
2. Reduce noise using U Point powered Control Points, to
selectively control the noise reduction if desired.
3. Review the image in the Loupe.
4. Apply the filter.
3
4
Adobe® Photoshop® User Interface
Photograph © 2008 David Beckstead
15
Dfine® 2.0
Chapter 4: Workflow
Creating Actions and Batch Processes
(Adobe Photoshop Only)
Dfine 2.0 supports Actions and Batch Processing, as well as
Droplets.
All of the settings that were used when the filter was saved in the
action will be applied when the Action, Batch Process, or Droplet is
used.
To begin, create an Action with the filter that you wish to apply in the
Action, Batch Process, or Droplet. To create an Action, follow these
steps below:
1. Open an existing file.
2.Open the Actions palette within Photoshop. If the actions
palette is not visible within Photoshop, navigate to the
Window menu and select Actions.
3.Click on the Create New Action button located in the bottom
row of buttons of the Actions Palette.
4.Name the Action according to the filter that you wish to apply
as an Action, Batch Process, or Droplet, and click Record.
User Guide
it is recommended that you create a new folder on your desktop
labeled with the action name and the word “Processed.” For
Example: “Dfine 2.0 Processed.” This folder will contain all of the
images once the action has been applied to them.
To start the Batch Process, follow these steps:
1.Ensure that the action that was created earlier is indicated
in the Action pull-down menu. If the correct action is not
indicated, click on the pull-down menu and select the correct
action.
2.Under source, indicate folder, and then click Choose. Navigate
to the folder that contains all of the images that you want to
apply the Batch Process to.
3.Under Destination, select Folder. Click Choose and navigate
to the folder that was created on your desktop earlier. For
example, navigate to the “Dfine 2.0 Processed” folder.
4. Click OK.
The Batch Process will now begin and apply the filter from the Action
to all of the images in the folder, and save a new copy of the image
with the filter applied to the folder that was created on the desktop.
5.Navigate to the Filters menu of Photoshop, and select the
filter.
6.Adjust the sliders and controls within the filter, and click OK.
7.Stop the action by clicking on the square button located in the
bottom row of buttons of the Actions Palette.
To start a Batch Process of a folder of images, navigate to the File
> Automate menu and select Batch. Before beginning this process,
16
Dfine® 2.0
Chapter 4: Workflow
Note: When batch processing with Dfine 2.0, the filter effect is not
applied to a separate layer. To apply Dfine 2.0 to a separate layer
while recording the action, duplicate the layer prior to applying
Dfine 2.0. This ensures that the batch process includes a new
filtered layer for each image.
Note: When batch processing with Dfine 2.0, Control Points used
in the initial filter settings will not be applied due to the location
specific nature of Control Points. All other filter settings will be
used in the action. To selectively apply the filter with a batch
process, we suggest using the Color Ranges method as the batch
process can retain the color information.
User Guide
Note: Dfine 2.0 can only work as a Smart Filter feature with Adobe
Photoshop CS3 and CS4 as the host.
Note: Perform any rotations or transforms to the image prior
to applying Dfine 2.0 as a Smart Filter. Applying a rotation or
transformation after applying Dfine 2.0 as a Smart Filter can
result in a different filter effect which will require a new profile to
be created for the image. Also, any crops done to an image after
converting the layer to a Smart Object will not be shown in the
Dfine 2.0 interface, the image prior to crop will be displayed.
To use Dfine 2.0 as a Smart Filter:
1. Select the layer in the Layers Palette to apply Dfine 2.0 to.
Using Dfine 2.0 as a Smart Filter
(Adobe Photoshop Only)
When working within Adobe Photoshop CS3 and CS4, Dfine 2.0
can be applied as a Smart Filter. Smart Filters enable you to adjust
the filter’s settings even after the filter interface has been closed.
If saving the file as a PSD or layered TIFF, you can adjust the filter
settings after the image and Photoshop have been closed, enabling
a non-destructive workflow.
2. Click the Filter menu.
3. Select Convert for Smart Filters.
4. Select the Filter menu again.
5. Rollover the Nik Software submenu. A pop-up menu appears.
6. Select Dfine 2.0.
When working as a Smart Filter, the Brush button is disabled, and
the filter will be applied to the active layer (even if the After Clicking
OK setting is set to the Separate Layer option).
17
Chapter 4: Workflow
Dfine® 2.0
User Guide
Multiple Image Controls (Aperture Only)
Dfine 2.0 can be applied to multiple images when working in Apple
Aperture. To apply Dfine 2.0 to multiple images, follow the steps
below:
1. Highlight the images you wish to enhance. Hold the Shift key
to select a sequence of images or the Command key to select
individual images.
2. Click on the Images menu.
3. Roll over the Edit With sub-menu option. A popup will appear.
4. Select Dfine 2.0 from the popup.
When using Dfine 2.0 with multiple images, three new image
controls are available. The new image controls available are
Previous, Next and Save All.
Dfine 2.0 can be applied to multiple images when working in
Lightroom and Aperture.
Multiple Image Controls (Lightroom Only)
To apply Dfine 2.0 to multiple images when working in Lightroom,
follow the steps below:
1.Highlight the images you wish to enhance. Hold the Shift key
to select a sequence of images or the Control/Command key
to select individual images.
2.Click on the Photo menu.
3.Roll over the Edit In sub-menu option. A popup will appear.
4.Select Dfine 2.0 from the popup.
18
© 2008 Don Gale
Chapter 5
Dfine 2.0 Interface
®
Overview of the New Dfine 2.0 Interface
Dfine® 2.0
Chapter 5: Dfine 2.0 Interface
Preview Modes
User Guide
Select, Zoom, and Pan Tools
View Modes
Noise Reduction Area
Method Area
Control Points
Image Area
Navigator Loupe
Resize Corner
20
Dfine® 2.0
Chapter 5: Dfine 2.0 Interface
View Modes
User Guide
Side-by-side Preview
Dfine 2.0 offers different views to let you preview the noise
reduction effect on your image within the interface.
Two separate previews
appear. The portion on the
left or on top shows the
image prior to applying the
filter; the portion on the
right or at bottom shows the
image after the filter has
been applied.
Single Image View
In this view, the entire image is displayed, with the noise
reduction effect applied across the preview area. To see the effect
before and after, toggle the Preview option on and off.
Split View
The image is displayed with a red line
running either vertically or horizontally
through it. The portion to the left or
above the red line shows the image
prior to applying the filter; the portion
to the right or below the red line shows
the image after the filter has been
applied.
You can move the image with the Pan
Tool or click and drag the red line to
observe the effect on the image’s detail.
Click the Rotate Preview button to alternate between vertical
and horizontal split.
The previews are linked for zooming and panning. This lets you
see the before- and after-images as a whole, or at the fine-detail
level.
Click the Rotate Preview button to alternate between vertical
and horizontal layout.
Preview
The Preview checkbox enables you to toggle the noise reduction
effect applied to the image on or off. When the Preview checkbox
has a check within it, the noise reduction effect is being applied to
your image. When the checkbox is unchecked, the image displayed
has no noise reduction applied.
21
Dfine® 2.0
Chapter 5: Dfine 2.0 Interface
User Guide
Preview Modes
Contrast and Color Noise Masks
The various Preview Modes enable you to review and check your
image and the noise reduction effects being applied to your image.
You can review individual channels that make up your image or
see the masks created automatically by one of the various noise
reduction methods.
The two final options of the Preview Modes, Contrast Noise
Mask and Color Noise Mask let you see the mask that is created
automatically by either the Color Ranges noise reduction method
or the Control Points noise reduction method. A separate mask is
created for both contrast and color noise reduction, so you can see
how noise reduction is being applied to different areas and objects
throughout your image. You can interact with and adjust the controls
within either the Color Ranges or Control Points methods while in
one of the mask modes.
The Preview Modes are very helpful in reviewing your image and
ensuring the appropriate amount of noise reduction is being
applied.
RGB
Areas that are white are receiving the most of that type of noise
reduction, while areas that are black are receiving none. Areas that
are gray are receiving some intermediate value.
Select this option to view the image in color. This is the default view.
Red, Green, and Blue channels
Choose from Red, Green, or Blue to see a black and white
representation of the detail from that channel of your image. These
views are helpful if you want to review how the noise structures
occur only in each of those channels.
Luminance and Chrominance
Choose from Luminance or Chrominance to see a black and white
representation of the detail from either only the luminance (or light
to dark) components of the image, or the chrominance (or color)
components of the image. These views enable you to determine
how noise reduction is being applied to your image and how these
different elements are being affected.
22
Dfine® 2.0
Chapter 5: Dfine 2.0 Interface
Select Tool
The Select Tool lets you select and interact with either Noise
Rectangles that you add to your image during the measuring process
or Control Points that are added during the noise reduction process.
SELECT SHORTCUTS
User Guide
Ctrl (Windows) / Command (Macintosh) + ‘+’ to zoom in one level
Ctrl (Windows) / Command (Macintosh) + ‘-’ to zoom out one level
Ctrl (Windows) / Command (Macintosh) + 0 to Zoom to Fit
Ctrl (Windows) / Command (Macintosh) + Alt (Windows) / Option
(Macintosh) + 0 to zoom to 100%
Press the A key to switch to this tool.
Ctrl (Windows) / Command (Mac) to temporarily switch to this tool
Zoom Tool
The Zoom Tool provides you with the ability to zoom in and out of
your image. After selecting this tool, click on the area of the image
within the interface that you want to zoom in to. If you would like to
zoom out, press and hold the Alt (Windows) or Option (Macintosh)
and click on the image.
Dfine 2.0 has three zoom states: Zoom to Fit, 100%, and 300%.
Zoom to Fit ensures that the entire image fits within the preview and
automatically changes the zoom amount as you change the size of
the interface. The 100% view shows the actual pixel details, and is
the recommended viewing method when reviewing noise and image
detail. The 300% zoom amount allows you to zoom even further into
your image and review fine pixel detail.
Pan Tool
The Pan Tool lets you reposition the image while zoomed into the
100% or 300% views. When interacting with the Loupe tool, the
cursor always becomes a Pan Tool in order to allow you to reposition
the content of the Loupe tool.
PAN SHORTCUTS
Press the H key to switch to this tool.
Spacebar to temporarily switch to this tool
Background Color Selector
The Background Color Selector tool lets you change the color of the
background surrounding the image. The three choices are Light Gray,
Medium Gray, and Dark Gray.
ZOOM SHORTCUTS
Press the Z key to switch to this tool.
Ctrl (Windows) / Command (Macintosh) + Spacebar to temporarily
switch to this tool
23
Dfine® 2.0
Chapter 5: Dfine 2.0 Interface
User Guide
Image Preview
Noise Reduction Tools
The Image Preview area displays the active image and related
information beneath the image.
Dfine 2.0 has a two step noise reduction process: Measure and
Reduce. The measuring step enables Dfine to identify the unique
characteristics of noise present in either the current image or related
to a specific camera and ISO combination. The reduction steps lets
you determine how much noise reduction to apply and where to
apply it to.
Image
For information on the tools and processes for measuring and
reducing noise, please see Chapter 6: Noise Reduction Step 1:
Measuring Noise or Chapter 7: Noise Reduction Step 2: Reducing
The Image displays the image you are currently working on, with the
Preview as set within the interface as well as the Mode you selected.
This area has three zoom states: Zoom to Fit, 100%, and 300%.
Zooming in and out of your image can be done with the Zoom tool
or with keyboard shortcuts. Please refer to the Zoom tool section
earlier in this chapter for additional information on zooming in and
out of your image.
Noise.
Image Info
The Image Info area, typically only visible when zoomed to the Zoom
to Fit state, displays the name of the image, and if EXIF data is
available, the resolution, ISO, and the camera make and model used
to take the photograph.
This information is used when creating a profile and later when
automatically loading a profile based on EXIF data.
24
Dfine® 2.0
Chapter 5: Dfine 2.0 Interface
Navigator Loupe
The Navigator Loupe is one of the new interface features designed
specially for Dfine 2.0. This tool ensures that the appropriate
information is displayed depending on the state of the preview.
When zoomed to Zoom to Fit, the Loupe mode is displayed, showing
the details under the mouse cursor at 100%, showing the image
detail information before and after noise reduction is applied. When
zoomed to 100% or 300%, the Navigator mode is displayed, giving
you a bird’s eye view of where you are currently in the image.
The functionality switches automatically between Navigator and
Loupe to provide you with an efficient workflow, anticipating your
needs.
Loupe Mode
While the preview is zoomed to Zoom to Fit,
the Navigator Loupe switches to Loupe mode.
A red line is also displayed running down
the image showing on the right side of the red line the image prior
to noise reduction and on the left side the image detail after noise
reduction is applied.
This ensures that you are always able to see the image detail at
100% while reviewing the noise reduction effect anywhere you
position your mouse.
To lock the area displayed within the Loupe in place, click on the
pushpin icon and then click on the area of the image you want to
stay within the Loupe. To unlock the area, click on the pushpin icon
User Guide
again. You can also achieve this effect by right-clicking (Windows) or
Control-clicking (Macintosh) on the area you want to lock in place.
Right-clicking on Control-clicking again will unlock the area.
You can pan within the Loupe display by clicking and dragging on
the image background. Additionally, you can move the red line to
change where the before and after effect starts and stops.
Navigator Mode
As soon as you zoom in from the Zoom to
Fit mode, the Navigator Loupe will switch to
the Navigator mode. While in the Navigator
mode, a red rectangle will be displayed within
the Navigator showing you which part of your image is currently
displayed within the preview.
Click on the area within the Navigator that you would like to display
within the preview.
Filter Controls
To return back to Photoshop from within the Dfine 2.0 interface, you
will have to either apply or discard the settings you set from within
the interface.
Both the Brush and OK buttons will process and apply the noise
reduction effect to your image. The Cancel button will discard any
settings you made, close Dfine 2.0, and return you to Photoshop
without changing your image.
25
Dfine® 2.0
Chapter 5: Dfine 2.0 Interface
User Guide
Brush (Adobe Photoshop Only)
Multiple Image Controls (Lightroom & Aperture)
Select Brush if you would like to apply the noise reduction effect
to a separate layer and then selectively paint the noise reduction
in, using the Selective Tool to automatically create and modify a
layer mask. For more information on the Selective Tool, (Please see
Chapter 8: Selective Tool.)
When using Dfine 2.0 with multiple images, three new image
controls are available. The new image controls available are
Previous, Next, and Save All.
Cancel
The Previous button will go to the image previously enhanced within
the current Dfine 2.0 session.
Press this button to prevent any noise reduction from being applied
to your image, close Dfine 2.0, and return to Photoshop.
Next
CANCEL SHORTCUT
The Next button will proceed to the next selected image in the
current Dfine 2.0 session.
Press the Esc key to cancel.
OK (Adobe Photoshop) / Save (Lightroom & Aperture)
Press OK/Save if you would like to apply the noise reduction effect
to your image and return to your image editing application. Dfine
2.0 also gives you the option of applying the noise reduction to a
new layer within Adobe Photoshop or Photoshop Elements. For more
information, refer to Chapter 9: Settings within the Filter Interface.
Previous
Save All
Click Save All to apply Dfine 2.0 to the images, and close the current
Dfine 2.0 session, and return to Apple Aperture.
SAVE ALL SHORTCUT:
Press the Enter (Windows) / Return (Macintosh) key to apply Dfine
2.0 to the selected images in the current Dfine 2.0 session.
OK/Save SHORTCUT
Press Enter (Windows) / Return (Macintosh) key to apply the filter.
26
© 2008 Janice Wendt
Chapter 6
Noise Reduction Step 1: Measuring Noise
Starting the Noise Reduction Process
Dfine® 2.0
Chapter 6: Noise Reduction Step 1: Measuring Noise
The first step in reducing noise within Dfine 2.0 is to measure the
noise present in your image. This process enables Dfine 2.0 to
determine the characteristics of noise based on the details found
within the current image or within a previously saved profile to
ensure the optimal level of noise reduction is applied.
There are three options for measuring noise in your image:
Automatic measurement, Manual measurement, and loading a
profile.
Automatic
The Automatic measuring method utilizes advanced routines to
identify only areas that contain unwanted noise details and not
photographic detail. The Automatic method was designed to work
on a wide variety of images, providing optimal noise profiling, with
little to no interaction needed.
User Guide
produce the best noise reduction effect. At this point you can move
on to the Noise Reduction step, or you can modify the profile further.
To modify the profile that is created automatically by the Automatic
method, either click and adjust one of the automatically generated
Measurement Rectangles, or select the Manual mode and add
additional Measurement Rectangles.
After modifying one of the automatically generated Measurement
Rectangles, you will need to press the Measure button again to
profile the image again.
At any point, you can click on the Reset button to remove all
Measurement Rectangles that were added to the image and start the
measuring step over again.
Manual
The Manual measuring method enables you to manually determine
which areas within the image should be inspected to determine the
noise characteristics and then create a profile.
Automatic
Method
Manual
Method
Simply click on the Measure button, and Dfine 2.0 will automatically
profile your current image.
After the image has been measured, you will see that Dfine 2.0
has placed Measurement Rectangles on the areas it believes will
28
Dfine® 2.0
Chapter 6: Noise Reduction Step 1: Measuring Noise
To use the Manual method, click on the Add Measurement Rectangle
button and then click and drag on an area within the image. You
should add a Measurement Rectangle only on an area of the image
where there was not detail in the original scene. That is, you should
look for an area that should be smooth and without detail to place a
measurement rectangle on. Some examples of areas to look for are:
- Sky
- Featureless walls
- Other smooth, detail less surfaces
Avoid placing a rectangle over any area that has hard edges, walls
with structure, grass or foliage, or areas that are very light (nearly
white) or very dark (nearly black).
After placing a Measurement Rectangle on the image, click on the
Measure button to create a profile for the current image.
You can add multiple rectangles, with the more rectangles that are
added, the more refined the noise reduction being applied. You only
want to add additional rectangles on different color or tonal areas.
That is, applying two rectangles on objects with similar brightness
and color values will not yield superior results.
In most situations however, the Automatic measuring method will
yield optimal results, and it is recommended that you start there.
At any point, you can click on the Reset button to remove all
Measurement Rectangles that were added to the image and start the
measuring step over again.
User Guide
Load
Instead of creating a profile with either the Manual or Automatic
modes, you can load a profile that was previously created. By
loading a profile that was previously created, you can skip the step
of measuring the current image, or you can apply optimal noise
reduction results on those images that do not lend themselves to
being profiled.
Only load a profile that was created for the same camera and ISO
combination as the image you are currently working on. If you are
working on an image that cannot be profiled and you do not have a
profile already created for that camera and ISO combination, please
see the What to Do if Your Image Cannot be Profiled section later in
this chapter.
Click on the Browse button to navigate and select a profile that
you’ve stored on your computer. After loading a profile once, or after
saving a profile on your computer, the profiles will be stored in the
Load pull-down menu, providing you with quicker access.
Load Button
You can also set Dfine 2.0 to automatically load a profile based
on an image’s EXIF data. For more information on this, please see
Chapter 9: Settings within the Filter Interface.
29
Dfine® 2.0
Chapter 6: Noise Reduction Step 1: Measuring Noise
User Guide
Save
After you have created a profile using either the Manual or
Automatic methods, you can save your profile for later use or to
share with other Dfine 2.0 users.
Click on the Save button to call up a file naming dialog. Dfine 2.0
will recommend a name for the file automatically based on the
camera and ISO settings, along with the current date. You can
change the name if you like, and then press OK.
You can access and share the file directly from within your operating
system, and other users can load the shared file easily by loading
the profile from within the Dfine 2.0 interface.
Photography
of blank paper
for custom
profiling
What to Do if Your Image Cannot be Profiled
From time to time, you may find that you have an image that cannot
be profiled. Typically, this occurs if the image you are working on has
such a high level of detail that there is no appropriate area on which
to place a Measurement Rectangle.
In these situations, you will need to create a profile based on
another image and then load that profile into Dfine 2.0. This can be
done very simply by taking a picture of a blank piece of paper with
the camera at the ISO setting of the image that you wish to work on.
When photographing the blank sheet of paper, underexpose it
slightly to ensure that the paper comes out close to middle gray.
The absolute tonal value of the paper is not important, as long as
it is not too close to pure white or pure black. Also, try to provide
as even lighting as possible, however it is only important that you
create even lighting in an area large enough to add a Measurement
Rectangle.
After you have shot the image of the blank sheet of paper, open
that image in your host application without making any adjustments
to the image at all. That is, ensure that there is no contrast,
sharpening, noise reduction, etc. applied to the image.
Launch Dfine 2.0, and then use the Automatic measuring method
to create a profile. Save the profile using the Save button and then
cancel out of the Dfine 2.0 interface.
Next, open the original image you need to work on, launch Dfine 2.0,
and then using the Load button, load the profile you just created.
You can now apply optimal noise reduction to your image, as the
noise structures that are created are based on the characteristics of
the camera and ISO combination.
30
© 2008 Janice Wendt
Chapter 7
Noise Reduction Step 2: Reducing Noise
Completing the Noise Reduction Process
Dfine® 2.0
Chapter 7: Noise Reduction Step 2: Reducing Noise
Reducing Noise
Once you have measured the noise inherent to your image, it is time
to start reducing noise. Dfine 2.0 enables you to reduce different
types of unwanted artifacts from your images, including Contrast
Noise, Color Noise, and JPEG artifacts.
Contrast noise, also referred to as luminance
noise, is represented by darker and lighter specks
appearing in the same color of an object. This
type of noise is most often visible in large, smooth
objects, such as the sky, where the variance of
tonality is most obvious. This type of noise is often
associated with a grainy look in images.
Color noise, sometimes referred to as chrominance
noise, manifests itself as random spots of red,
green, and blue. Color noise is most visible against
neutral objects, such as clouds. This type of noise
is often accentuated by saving a file in the JPEG
file format.
Contrast Noise
User Guide
Note: each of the different noise reduction methods is
independent of each other, and you can only apply one method
at a time. For example, the settings made within the Control
Points will not be applied to the image as soon as you select Color
Ranges and vice-versa.
Control Points
The Control Points noise reduction method is the default mode
applied after measuring your noise. You will notice that even before
moving to the Reduce step, noise reduction is applied on your image
after measuring the image. This noise reduction effect is the Control
Points method at its default values.
Color Noise
JPEG Artifacts are caused by the JPEG compression scheme. The
higher the compression used when saving your images in the JPEG
file format, the more obvious the JPEG artifacts will be in your image.
The JPEG artifacts are often visible as blocking structures with higher
levels of color noise around each block.
You can choose from one of two methods to either reduce noise
globally from your image or selectively, based on colors or objects
found within your image.
Within the Control Points method, you can modify the noise
reduction process globally using the following tools:
Contrast Noise
The Contrast Noise slider controls the amount of noise reduction
applied to the image that affects contrast or luminance noise. This
noise type is manifested in artifacts of light and dark specks that
appear in what should otherwise be a uniform image detail.
Change the amount of the Contrast Noise slider to balance noise
reduction and detail retention. The higher the value of the Contrast
Noise slider, the more noise reduction will be applied to the image.
If you see the detail structures becoming too soft, try reducing this
slider. If you cannot achieve a good balance, try going back to the
measure step and modifying the profile.
32
Dfine® 2.0
Chapter 7: Noise Reduction Step 2: Reducing Noise
Color Noise
The Color Noise slider controls the amount of noise reduction
applied to the image that affects color or chrominance noise. This
noise type is usually visible as little specks of red, green, and blue
in areas that did not originally have those specks in them.
Change the amount of the Color Noise slider to balance noise
reduction and color detail retention. The higher the value of the
Color Noise slider, the more color noise reduction is applied. If you
see brightly saturated objects begin to loose their color, try reducing
the amount of color noise reduction that is applied to your image.
The Control Points method also allows you to selectively reduce
noise in the image with U Point powered Control Points. U Point
technology was designed to allow photographers to identify and
isolate objects that exist within a photograph by simply placing
a Control Point directly on the object that should be affected.
By analyzing the color, tonality, detail, and location, U Point can
automatically determine where to apply certain affects, based on
the needs of the photographer.
For more information on U Point technology, please visit
http://www.upoint.com
Each Control Point added to the image communicates with other
Control Points, with the goal of providing precise control over
different objects throughout the image.
Within Dfine 2.0, each Control Point can control the amount of
Contrast and Color noise reduction to apply to the object that it
has selected. In this manner, you can quickly add Control Points
User Guide
and then indicate whether or not to apply Contrast or Color noise
reduction to each object, and how much to apply.
Each Control Point has three sliders:
- The top slider, the Size slider, controls the size or reach of the
Control Point. Increase this slider to affect larger objects or
decrease this slider when working on smaller objects.
- The next slider, the Contrast Noise slider, controls the amount of
Contrast Noise reduction to apply to the object selected by the
Control Point.
- The last slider, the Color Noise slider, controls the amount of
Color Noise reduction to apply to the object selected by the
Control Point.
The Control Points method offers the following tools to selectively
apply the noise reduction:
Add 0% Control Point
Click this button to add a Control Point preset to no noise reduction
(i.e., 0% Contrast Noise and 0% Color Noise reduction). The mouse
pointer changes, indicating that you can place a Control Point on the
image. After placing the Control Point on the image, you can adjust
the noise reduction sliders.
Add 100% Control Point
Click this button to add a Control Point preset to the full noise
reduction effect (i.e., 100% Contrast Noise and Color Noise
reduction). The mouse pointer changes, indicating that you can
place a Control Point on the image. After placing the Control Point on
the image, you may adjust the noise reduction sliders.
33
Dfine® 2.0
Chapter 7: Noise Reduction Step 2: Reducing Noise
User Guide
If the first Control Point added is a 100% Control Point, the global
Contrast Noise and Color Noise sliders will automatically move to
0% to ensure that the noise reduction is applied only at that Control
Point. You can then adjust the sliders manually.
Ctrl (Windows) / Command (Macintosh) + D to duplicate in place
Control Point List
Delete
The Control Point List in Dfine 2.0 will display all Control Points used
in the image, and the Contrast Noise and Color Noise reduction
values for each Control Point.
Show Effect Preview Column
After adding a Control Point to the image, the checkbox within
the Show Effect Preview column will be enabled. By toggling this
checkbox, you can preview the Control Point’s effect on the image.
Contrast Noise Column
The Contrast Noise column will display the contrast noise reduction
applied by each Control Point in the image.
Color Noise Column
The Color Noise column will display the color noise reduction
applied by each Control Point in the image.
Duplicate
To create a duplicate copy of a Control Point, click the Select tool,
and then click on the Control Point to be duplicated. Next, click on
the Duplicate button. An exact copy of the selected Control Point will
be placed on the image and you can then reposition the new Control
Point by clicking and dragging it to a new location.
Alt (Windows) / Option (Macintosh) + Left-click to duplicate and
move a Control Point
Click the Delete button to remove the selected Control Points from
the image. Alternatively, select a Control Point and then click the
Delete key on the keyboard to remove the selected Control Point.
To adjust or delete multiple Control Points or adjust their controls
in parallel, first select the desired Control Points by one of the
following methods:
-C
lick the Select Tool, then left-click, hold and draw a bounding
box containing the desired Control Points, or
-H
old the Shift key down and click on the Control Points to be
selected.
With multiple Control Points selected, you can delete all or modify
the slider controls of all Control Points at the same time by adjusting
those of only one.
After adding some Control Points to your image and applying
different amounts of noise reduction to each range, you can look
at the Color Noise or Contrast Noise Mask to see how the noise
reduction is being applied selectively to the image. For more
information on this, please see the Color and Contrast Noise Masks
section of Chapter 5: Dfine 2.0 Interface
DUPLICATE SHORTCUTS:
34
Dfine® 2.0
Chapter 7: Noise Reduction Step 2: Reducing Noise
User Guide
Edge Preservation
Reset
Found under the More sub-section, the Edge Preservation slider
enables you to adjust the amount of detail preserved through the
noise reduction effect. To use this feature, first check the checkbox
next to the slider, then adjust the slider amount. This feature is
typically only used to ensure very fine detail is preserved. Using
too high a setting can affect the amount of noise reduction that is
applied to the image.
Click on the Reset button to revert back to the default noise
reduction settings.
JPEG Artifact Reduction
Also found under the More sub-section, this option reduces JPEG
artifacts that may be present in your image. Turn this enhancement
on to reduce the small square structures that may become visible
when saving your images using the JPEG file format.
If you are not working with a JPEG image, it is not recommended to
turn this feature on.
Debanding
Also found under the More sub-section, this option reduces banding
that may be present in your image. Turn this enhancement on to
reduce the color banding structures that may be visible in your
images.
Color Ranges
The second method of reducing noise within Dfine 2.0 is based on
individual Color Ranges.
This method is most effective when affecting large objects or if you
want to uniformly reduce noise based on color. Additionally, this
is the recommended method to use if you would like to selectively
reduce noise in a batch process.
You can have as few as two Color Ranges selected, with no maximum
to the number possible.
After setting up some Color Ranges and applying different amounts
of noise reduction to each range, you can look at the Color Noise or
Contrast Noise Mask to see how the noise reduction is being applied
selectively to the image. For more information on this, please see
the Color and Contrast Noise Masks section of Chapter 5: Dfine 2.0
Interface
If you do not see a visible banding problem in your image, it is not
recommended to turn this feature on.
35
Dfine® 2.0
Chapter 7: Noise Reduction Step 2: Reducing Noise
User Guide
Color Patch
Color Noise
The Color Patch will display the color considered for noise reduction
for the current Color Range. Hold the mouse over the patch to see a
read-out of the RGB color values for the color selected.
The Color Noise slider controls the amount of noise reduction
applied to the image that affects color or chrominance noise. This
noise type is usually visible as little specks of red, green, and blue
in areas that did not originally have those specks in them.
Click on the Color Patch to call up the Color Picker from your image
editing application to set a color directly.
Eyedropper
The Eyedropper will let you select a color from the image displayed
within the Dfine 2.0 interface. After selecting this color, you can then
determine how much noise reduction to apply against any objects
that are based on that color.
Contrast Noise
The Contrast Noise slider controls the amount of noise reduction
applied to the image that affects contrast or luminance noise. This
noise type is manifested in artifacts of light and dark specks that
appear in what should otherwise be uniform image detail.
Change the amount of the Contrast Noise slider to balance noise
reduction and detail retention, the higher the value of the Contrast
Noise slider, the more noise reduction will be applied to the image.
If you see the detail structures becoming too soft, try reducing this
slider. If you cannot achieve a good balance, try going back to the
measure step and modifying the profile.
Change the amount of the Color Noise slider to balance noise
reduction and color detail retention. The higher the value of the
Color Noise slider, the more color noise reduction is applied. If you
see brightly saturated objects begin to loose their color, try reducing
the amount of color noise reduction that is applied to your image.
Add Color Range
Click on this button to add an additional Color Range to the image.
Delete Color Range
Click on this button to delete a Color Range. The Delete Color Range
buttons will disappear if you reach only two Color Ranges, which is
the minimum. As soon as you click on the Add Color Range button,
the Delete Color Range buttons will appear again for all Color
Ranges.
36
Dfine® 2.0
Chapter 7: Noise Reduction Step 2: Reducing Noise
User Guide
Edge Preservation
Debanding
Found under the More sub-section, the Edge Preservation slider
enables you to adjust the amount of detail preserved through the
noise reduction effect. To use this feature, first check the checkbox
next to the slider, then adjust the slider amount. This feature is
typically only used to ensure very fine detail is preserved. Using
too high a setting can affect the amount of noise reduction that is
applied to the image.
Also found under the More sub-section, this option reduces banding
that may be present in your image. Turn this enhancement on to
reduce the color banding structures that may be visible in your
images.
The settings made to this slider will affect all Color Ranges in the
same way. As the Edge Preservation algorithm is based on the noise
reduction algorithm, this slider will not have any affect on those
areas that have 0% Contrast Noise reduction applied to them.
Reset
If you do not see a visible banding problem in your image, it is not
recommended to turn this feature on.
Click on the Reset button to revert back to the default settings,
colors, and number of Color Ranges.
JPEG Artifact Reduction
Also found under the More sub-section, this option reduces JPEG
artifacts that may be present in your image. Turn this enhancement
on to reduce the small square structures that may become visible
when saving your images using the JPEG file format.
If you are not working with a JPEG image, it is not recommended to
turn this feature on.
The JPEG Artifact Reduction feature always affects the entire image,
regardless of the settings made within the Color Ranges.
37
© 2008 Tony Sweet
Chapter 8
Selective Tool
Using the Selective Tool to Selectively Apply Noise Reduction
Dfine® 2.0
Chapter 8: Selective Tool
The Selective Tool automates the
creation of layers and layer masks
within Adobe Photoshop and
Adobe Photoshop Elements.
If Viveza™, Color Efex Pro™ 3.0,
Silver Efex Pro™ or Sharpener
Pro™ 3.0 is already installed
the Selective Tool installed by
Dfine 2.0 will simply update the
previously installed Selective
Tool, letting you access any Nik
Software product from the same
palette.
You can selectively apply either Dfine 2.0 or one of 7 detail specific
Noise Brushes.
The Selective Tool can be used along with a pressure sensitive tablet
such as a Wacom® Pen Tablet to selectively apply noise reduction
with pressure sensitivity.
Note: the Selective Tool and the additional Noise Brushes are only
available within Photoshop and Photoshop Elements.
User Guide
Interaction with Dfine 2.0
By selecting Dfine 2.0 from within the Selective Tool, the Dfine 2.0
interface will be opened and you will be able to measure and reduce
noise as normal.
If at any point you select the Brush button from within the Dfine
2.0 interface, regardless of if you selected Dfine 2.0 from within
the Selective Tool or from within the Filters menu of Photoshop or
Photoshop Elements, the Selective Tool will be made visible, the
filter will applied to a copy of the image on a separate layer, the new
layer will be named Dfine 2.0, and you will be able to selectively
apply the Dfine 2.0 noise reduction effect using the Paint, Erase,
Fill, and Clear buttons described later in this chapter.
Additional Noise Brushes
Dfine 2.0 comes with seven additional Noise Brushes, each
designed to work on a specific detail structure. These Noise Brushes
do not have an interface as they were designed to be applied
selectively and provide the optimal amount of noise reduction
for each of those different detail types. These Noise Brushes are
provided for those images in which noise reduction is only necessary
in a small area. The Noise Brushes can be quickly loaded and then
selectively applied to your image, without the need to load and
modify the settings within the Dfine 2.0 interface.
39
Dfine® 2.0
Chapter 8: Selective Tool
The available Noise Brushes are:
• Background - The Background Noise Brush applies noise
reduction that is designed to effectively reduce noise that
appears in a background of the image.
• Hot Pixels – The Hot Pixels Noise Brush helps minimize
unwanted pixels that become visible as bright dots in the
image, often appearing against dark backgrounds and night
shots.
• Fine Structures - The Fine Structures Noise Brush reduces
dominant color noise while reducing contrast noise. This
effectively balances the presence of detail and noise in image
components such as hair and fine image structures that may
otherwise be adversely affected by noise reduction.
• Skin – When applied to the skin of subjects with your images,
the Skin Noise Brush reduces both contrast and color noise and
irregularities while taking into account any fine detail structures
that may be present in the image.
• Sky - The Sky Noise Brush reduces chrominance noise and
smoothes noise artifacts that often appear very strongly in the
sky of an image.
• Shadows - The Shadows Noise Brush reduces chrominance
noise based on its appearance in shadows and low light areas,
while considering the potential for detail and structures in such
areas.
User Guide
• Strong Noise - The Strong Noise Brush reduces strong noise
while preserving as much image structure as possible. This
brush is appropriate in images with high levels of contrast
noise and for high ISO images where noise is very dominant.
The Strong Noise brush is an alternative method to selective
blurring, where traditional blurring methods often lead to
unnatural structures and color shifts.
To use one of the Noise Brushes, simply click on the detail that
matches the area you wish to apply noise reduction to. The Selective
Tool will process the image and then enable you to selectively apply
that effect using the Paint, Erase, Fill, and Clear buttons described
later in this chapter. You can control the amount of each of the Noise
Brushes’ effects by altering the opacity within the layer created by
that Noise Brush.
Selective tools
Within the Selective Tool you are provided with four different tools
with which you can apply the noise reduction created either with
Dfine 2.0 or one of the Noise Brushes.
After creating the desired effect, click on the Apply button
Paint
Use the Paint button to selectively paint the current noise reduction
effect into your image. Ensure that the mode of your Paint Brush
is set to Normal and that opacity is set to 100%. You can control
the amount of the effect that is added to your image by varying the
opacity of the brush.
40
Dfine® 2.0
Chapter 8: Selective Tool
User Guide
Erase
Apply / Discard
Use the Erase button to selectively remove the current noise
reduction effect from your image. Ensure that the mode of your
Paint Brush is set to Normal and that opacity is set to 100%. You
can control the amount of the effect that is added to your image by
varying the opacity of the brush.
The Apply and Discard buttons end the selective application of Dfine
2.0 or one of the Noise Brushes.
Fill
Use the Fill button to apply the noise reduction effect to the entire
image. This tool is especially useful if you want to apply the noise
reduction to all but a small area. Click Fill then use Erase to erase
that area out.
Click on the Apply button to apply the effect to the image or click on
the Discard button to prevent the current noise reduction effect from
being applied to your image.
After clicking on either Apply or Discard, you can continue working
on your images with Dfine 2.0 or any other tool within Photoshop or
Photoshop Elements.
Clear
Use the Clear button to remove the noise reduction effect from the
entire image. This is helpful if you made some mistakes with the
Paint tool and would like to start selectively applying the noise
reduction effect again.
41
© Michael Gilbert
Chapter 9
Filter Interface Settings
Controlling the Default Behavior of the Filter Interface
Dfine® 2.0
Chapter 9: Filter Interface Settings
Filter Interface Settings
Click on the Settings button within the Dfine 2.0 filter interface to
adjust the default settings for Dfine 2.0. These settings will help you
set the default look and functionality of Dfine 2.0, as well as allow
you to determine how Dfine 2.0 interacts with your images.
User Guide
Default Preview
Change the Default Preview setting to choose how the image is
displayed after opening Dfine 2.0.
Single Image View
Sets Single Image View as default.
Split View
Sets Split view as default.
Side-by-side View
Sets Side-by-side view as default.
Use Last Setting
Opens the image with the last preview state used in the previous
application of Dfine 2.0.
Default Appearance
Default Zoom
Default Appearance sets the brightness of the area surrounding the
image in the Preview.
• Light Gray
Default Zoom lets you specify the zoom state to be applied when the
interface is launched. (Please see Zoom Tool.)
100%
• Medium Gray
• Dark Gray
Opens images at 100% zoom.
Zoom to Fit
Ensures that the entire image is visible within the filter interface.
Use Last Setting
Opens the image with the last zoom state used in the previous
application of Dfine 2.0.
43
Dfine® 2.0
Chapter 9: Filter Interface Settings
User Guide
Apply Effect To (Adobe Photoshop Only)
Do Nothing
The Apply Effect To option lets you determine how to apply the Dfine
2.0 filter to the image.
When Do Nothing is selected, Dfine 2.0 will not measure the
noise within the image and will require that you select either the
Automatic or Manual method of noise measurement.
Note: This option is only valid within Photoshop and Photoshop
Elements
New Layer
Choose this option to always apply Dfine 2.0 to a separate layer.
By using this option and saving the final image in a layered format,
you can ensure you are never changing the original image details.
Turning this option on will increase your file size and may increase
the amount of time needed to process the image.
Originally Selected Layer
Select this option to apply Dfine 2.0 to the same layer that was
active when opening Dfine 2.0.
Auto Profile Load Behavior
The Auto Profile Load Behavior setting enables you to determine
how Dfine 2.0 automatically profiles each image. This setting
enables you to save time by setting it according to how you interact
with Dfine 2.0.
By enabling one of the automatic methods, you can enable
Dfine 2.0 to automatically adapt from image to image in a batch
process, providing the appropriate noise reduction to each image
individually.
Auto Profile
The Auto Profile option sets Dfine 2.0 to automatically profile every
image that is opened. This is a very useful option to set as it can
save time by automatically profiling your image.
Use Last Profile
This option will apply the same noise reduction effect that was
applied to the last image.
Load Based on EXIF Data
This option will look in the Default Profiles Path for any profiles that
you previously created and attempt to locate one that was created
for the same camera and ISO combination as the currently selected
image. If Dfine 2.0 cannot find a profile that matches the current
image’s camera and ISO combination, or if the current image does
not contain EXIF information, it will apply an Auto Profile.
Default Profiles Path
Click on the Browse button to set the default location to use for
Dfine 2.0 profiles. This is the folder that Dfine 2.0 will look within
when using the Load Based on EXIF Data as well as the folder the
Save option will default to.
Reset
Select this option if you would like to reset all of the Dfine 2.0 filter
settings to their default settings.
44
© 2008 Tony Sweet
Chapter 10
Selective Tool Settings
Controlling the Default Behavior of the Selective Tool
Dfine® 2.0
Chapter 10: Selective Tool Settings
Selective Tool Settings (Adobe Photoshop Only)
Click the Settings button at the bottom of the Selective Tool
interface to specify how the Selective Tool interacts with Adobe
Photoshop or Adobe Photoshop Elements and active images.
User Guide
After clicking Apply
This option enables you to determine whether or not the Selective
Tool should keep the Dfine 2.0 filter or Noise Brush effect as a
separate layer or merge the layers together after you click Apply.
Keep as layer
Selective
Tool
Settings
The Keep as Layer ensures that the filtered effect is kept on a
separate layer. By enabling this setting and saving your image in a
layered file, you will not affect your original image information and
will be able to remove the noise reduction effect at any point in the
future. Please keep in mind however, this option may increase your
file sizes.
Merge Layers
This option will merge the filtered image with your original image
into one layer. By selecting this option, you can prevent an increase
in your file size.
When Photoshop Launches
This option lets you specify whether the Selective Tool opens when
Adobe Photoshop or Adobe Photoshop elements is launched.
Choose between:
• Open Nik Selective Tool
• Do Not Open Nik Selective Tool
46
© Vincent Versace
Chapter 11
Contact and Support
Getting Additional Support
Dfine® 2.0
Chapter 11: Contact and Support
United States
For more information on Nik Software products go to
Contact Nik Software, Inc. by phone at (619) 725-3150
www.niksoftware.com or www.upoint.com.
Monday - Friday from 8:30 AM - 5:00 PM (PST) or via email at
[email protected]
© 2008 Nik Software, Inc.
Nik Software, Inc.
7588 Metropolitan Drive
San Diego, CA 92108, USA
Phone (619) 725-3150
Fax (619) 725-3151
[email protected]
www.niksoftware.com
User Guide
Protected by one or more US Pats. 6,728,421; 6,865,300;
7,031,547; and other patents pending.
Dfine, Viveza, Nik and U Point are registered trademarks of Nik
Software, Inc. Color Efex Pro, Silver Efex Pro, and Sharpener Pro are
trademarks of Nik Software, Inc. All other trade names mentioned
in this manual are trademarks or registered trademarks of their
respective holders.
Germany
In Europe, contact Nik Software, GmbH at +49-40-47-11-35-0
Monday - Friday from 9:00 AM - 5:00 PM (CET) or via email at
[email protected].
Nik Software, GmbH
Hammerbrookstraße 93
D-20097 Hamburg, Germany
Phone +49-40-47-11-35-0
Fax +49-40-47-11-35-35
[email protected]
www.niksoftware.com
SP30A-UG01-0808
48