Transcript
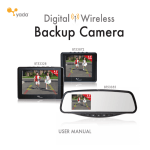
Beacon GPS Tracking Unit
(SS9PNO[9LZLY]LK
© 2007 Winplus North America Inc. All Rights Reserved. Winplus logo is
registered trademark of Winplus North America Inc.
Winplus North America is not affiliated with Google Inc. but use
free products and/or services of Google Inc.
Google Earth™ and Google Maps™ are trademarks or register trademarks of Google Inc.
Beacon
GPS
www.winplususa.com
THANK YOU
TABLE OF CONTENT
Beacon
Beacon
GPS
Tracking Unit
Beacon
GPS
DISCLAIMER
CONDITIONS OF WARRANTY
• Distracted driving is dangerous. Always use the GPS Tracking Unit in a
manner that does not reduce your attention and ability to drive carefully and
safely.
• Adhere to all applicable traffic laws and motor vehicle regulations applicable
to the GPS Tracking Unit.
• Consult local laws and regulations for any restrictions on installation or use.
• Do not place on or near an airbag. Such installation could interfere with airbag
deployment or could cause the product or another object to become a
projectile, which could result in serious personal injury to occupants.
• Ensure the product location will not obstruct your vision while driving.
If during the 90 day warranty period your new product is found to be defective,
WINPLUS North America will repair such defect, or replace the product, without
charge for parts or labor subject to the following conditions:
1. All repairs must be performed by WINPLUS North America.
2. All warranty claims must be accompanied by a copy of the sales receipt or
bill of sale.
3. The equipment must not have been altered or damaged through negligence,
accident, improper operation, or failure to follow the product instructions for
installation, use, or care.
4. The replacement of parts is excluded from the warranty when replacement is
necessary due to normal wear and tear.
5. Repair or replacement parts supplied by WINPLUS North America under this
warranty are protected only for the unexpired portion of the original warranty.
6. This is a “repair or replace” warranty only, and does not cover the costs
incurred for the installation, removal or reinstallation of the product, or
damage to any mobile phone devise or vehicle.
WARRANTY / LIABILITIES
LIMITED WARRANTY
WINPLUS North America warrants, to the original purchaser, that its products are
free from defects in material and workmanship for 90 days from the date of
original purchase. Where permitted by law, WINPLUS North America’s liability
shall be limited to that set forth in this limited express warranty. This limited
express warranty shall be the exclusive remedy of the purchaser and WINPLUS
North America makes no other warranty of any kind aside from the limited
express warranty stated above.
Tracking Unit
Page 04
Page 03
Tracking Unit
Tracking Unit
DISCLAIMER
WARRANTY / LIABILITIES
PACKAGE CONTENT
BATTERY OPERATIONS
SOFTWARE INSTALLATION
INITIAL SETTING
GPS OPERATIONS
LINK TO GOOGLE EARTH
CUSTOMER SERVICE / CONTACT US PAGE
FCC/ICC
Thank you for purchasing the Beacon GPS Tracking Unit,
the latest infotainment product from Winplus USA. We hope
you will enjoy all features and benefits offered by the GPS
Tracking Unit. These features and benefits were designed
with the goal of making our daily travel more convenient.
Winplus USA
375 W. Apra St. Rancho Dominguez CA 90220
[email protected]
www.winplususa.com
GPS
Beacon
GPS
Page 02
Page 01
Tracking Unit
User Manual
OWNER’S RESPONSIBILITIES:
WINPLUS North America will make every effort to provide warranty service within
a reasonable period of time. SHOULD YOU HAVE ANY QUESTIONS ABOUT
SERVICE RECEIVED OR IF YOU WOULD LIKE ASSISTANCE IN OBTAINING
SERVICE, PLEASE CALL TOLL FREE 1.866.294.9244 DURING REGULAR
BUSINESS HOURS MONDAY THROUGH FRIDAY 9:00 AM TO 5:00PM.
Note: Warranty only applies for North American customers or purchases made in
the North America.
Beacon
GPS In order to provide you with the proper warranty service, we request that you
adhere to the following procedure:
1. Include a copy of your sales receipt or bill of sale with your unit when it is
returned for warranty service.
2. If it is necessary to return your product for service, please return it securely
packed, preferably in the original shipping box, and freight and insurance
prepaid to the following address:
ATTN: WINPLUS BEACON GPS TRACKING UNIT
PRODUCTS RETURNS
375 W. Apra St.
Rancho Dominguez, CA 90220
3. Please include a detailed explanation of the problem you are having.
4. If your product is found by WINPLUS North America to have a defect in
material or workmanship, within the warranty period, it will be repaired or
replaced at no charge and returned to you prepaid.
Beacon
WINPLUS North America and/or its affiliates are not responsible for a user’s
intended or actual use of the Beacon GPS Tracking Unit. In no event shall
WINPLUS North America and/or its affiliates have any liability for any losses
(whether direct or indirect, in contract, tort or otherwise) incurred in connection
with the GPS Tracking Unit. Neither shall WINPLUS North America and/or its
affiliates have any liability for any decision, action or inaction taken by any
person in reliance on the GPS Tracking Unit, or for any delays, inaccuracies
and/or errors in connection with the GPS Tracking Unit and its functioning.
PACKAGE CONTENT
12V/24V
Car Charger
Glove
Beacon
Tracking Unit
Utility GPS receiver for both sport (country hike) & normal navigation
Implement SIRF 3rd generation GPS receiver
Electronic gyro compass function
Large LCM (128 X 128 dots) screen with dual color backlight indicates data
Built in 2000mA/h Li-Ion rechargeable battery
Track recording function
Standard USB data interface
GPS Tracking Unit interface
Set up to 32 destinations within one trip
Up to 16 hours Nav. mode (continue) & 160 hours Sport mode (interval)
operating time
GPS
To charge GPS device battery using USB Cable
• Connect USB cable to GPS device
• Plug USB to computer USB port
• Check for flashing battery icon which indicates
battery is charging
• Battery icon will stop flashing when battery is
fully charged
Tracking Unit
Page 08
Page 07
Tracking Unit
Beacon
BATTERY OPERATIONS
Note: GPS Tracking Unit can
still be operated only by
application program in
computer while charging
Charging the GPS Tracking Unit
The GPS Tracking Unit can be charged using the provided 12V/24V car charger
or any standard computer USB port.
IMPORTANT: Before using the GPS Tracking Unit
• Charge the batteries for 6 hours
• Only use rechargeable batteries provided with the device
To charge GPS device battery using the 12/24V car charger
• Connect 12/24V car charger to GPS device
• Plug car charger into the cigarette lighter socket
• Check for flashing battery icon which indicates
battery is charging
• Battery icon will stop flashing when battery is
fully charged
Beacon
GPS
Low Battery Indicator
Recharge the device immediately after the low
battery indicators are detected. When battery power
is low, the device panel will display low battery level.
To turn off the GPS Tracking
Unit if freezed, push “Info”
button for 20 seconds.
Beacon
GPS
SOFTWARE INSTALLATION
Follow the instructions below to install the GPS Tracking Unit software.
Tracking Unit
Page 10
Page 09
Tracking Unit
Tracking Unit
GPS Tracking Unit
Beacon
GPS Beacon GPS Tracking Unit Features
GPS
Beacon
GPS
Installation CD
USB Cable
•
•
•
•
•
•
•
•
•
•
Tracking Unit
WINPLUS North America and/or its affiliates shall have no responsibility or
liability for damage and/or injury resulting from accidents while user is utilizing
the GPS Tracking Unit; and WINPLUS North America and/or its affiliates, the
manufacturer, distributor and seller shall not be liable for any injury, loss or
damage, incidental or consequential, arising out of the use or intended use of the
product.
WINPLUS North America makes no other warranty of any kind aside from the
limited express warranty stated herein.
DISCLAIMER OF WARRANTIES, INCLUDING WARRANTY OF
MERCHANTABILITY AND WARRANTY OF FITNESS FOR PARTICULAR
PURPOSE: EXCEPT AS SPECIFICALLY SET FORTH HEREIN, NO
WARRANTY OR REPRESENTATION, EXPRESS OR IMPLIED, IS MADE AS TO
THE GPS TRACKING SYSTEM. EXCEPT AS EXPRESSLY SET FORTH
HEREIN, WINPLUS NORTH AMERICA AND/OR ITS AFFILIATES EXPRESSLY
DISCLAIMS, WITHOUT LIMITATION, ANY STATUTORY WARRANTIES AND
ALL IMPLIED WARRANTIES, INCLUDING ANY IMPLIED WARRANTY OF
MERCHANTABILITY OR FITNESS FOR A PARTICULAR PURPOSE.
GPS
Page 06
Page 05
Tracking Unit
3) Select the destination folder for
installation and click “Next”:
IMPORTANT: The software is only supported by Windows operating system.
The software requires and uses Microsoft®.NET 2.0 Framework. The .NET
installation will be included in the process if your PC doesn’t have the latest .NET
Framework
Note: Internet access is required to install
the Microsoft .NET framework.
1) Insert Installation CD to CD-Drive.
Note: Installation program will start
automatically.
4) Confirm installation
2) Click “Next” and follow the
installation wizard
Beacon
GPS
INITIAL SETTING
5) Click “Finish” to finalize the installation
Follow the instructions below to set your personal setting.
1. Press Mode button longer for 3 seconds or more to power on GPS Tracking
Unit device
2. LCM display will show the “Position” Page; this is the default page
3. Press and hold & buttons together for 3 seconds
4. LCM will display the first setting
Note: The GPS application automatically launches as soon as the device is
connected to your PC.
Beacon
Tracking Unit
For Sport Mode, select 5, 10, 20, or 30 minutes/recording intervals
Press or buttons to select time/recording interval
For Nav. Mode, select 5, 10, 30, or 60 seconds/recording intervals
Push Set button after selecting to go to the next setting
Local Time
Atlantic Standard
Atlantic Daylight
Eastern Standard
Eastern Daylight
Central Standard
Central Daylight
Mountain Standard
Mountain Daylight
Pacific Standard
Pacific Daylight
Alaskan Standard
Alaskan Daylight
Hawaiian Standard
GPS
GMT Time
-4
-3
-5
-4
-6
-5
-7
-6
-8
-7
-9
-9
-10
Tracking Unit
Page 14
Page 13
Tracking Unit
5. Set Distant Unit first
• Press or buttons to select distant unit
• Select from Mile, KM, or Nautical Mile (N. Mile); LCM panel will display
flashing mile as the default setting
• Push Set button after selecting to enter “GPS Sport” page
• Press or buttons to choose ON or OFF for GPS Sport
• Push Set button after selecting to go to the next setting
Beacon
GPS 6. Set Sport Mode time/recording Interval
•
•
•
•
Beacon
GPS
Page 12
Page 11
Tracking Unit
7. Set Nav Mode time/recording Interval
• For Nav. Mode, select 5, 10, 30, or 60 seconds/recording intervals
• Press or buttons to select time/recording interval
• Push Set button after selecting to go to the next setting
8. Set Local Time
• Select local Time adjustment from -11 to +12 hour
• Press or buttons to select time/recording interval
• Push Set button after selecting to go to the next setting
Beacon
GPS
Beacon
GPS
GPS OPERATIONS
Tracking Unit
Page 16
Page 15
Tracking Unit
9. Calibrate Compass
Note: Calibrate the device in open area for better signal.
• Press info
• Walk around in a circle with compass and press info
• Press Set button to select desired Backlight mode
• Press or buttons to select Backlight mode
• Selecting Auto will turn off the backlight automatically if without
any action for 15 seconds
• Push Set button after selecting to go to exit personal setting mode
The GPS Tracking Unit provides two modes of operation, Navigation mode
for normal navigation for travel and Sport mode for long period at low
moving speed activities such as mountain climbing, long-distance hiking,
and so on. Navigation Mode is the default mode when the GPS device is
powered ON
Note: Check the letter (“N” for Navigation and “S” for Sport) on the left top corner
on the screen while LCM display is in the Position display.
Power On/Off
1. To turn on, press and hold “Mode” button for 3 seconds or more
2. LCM display will show the “Position” Page; this is the default page
3. To turn off, Press and hold “Mode” button again for 5 seconds until
LCM display shows blank screen
Notes:
• Under Navigation Mode, GPS receiver will always be ON unless power is off.
• To save battery power while in Sport Mode, LCM backlight will power off or
enter standby mode automatically after 15 seconds once GPS receiver gets
current position.
• Press INFO button to turn on device while in standby mode.
Beacon
Beacon
GPS LCM Panel Navigation
GPS
Tracking Unit
Instructions below shows how navigate through the different LCM screens
• After turning the device on, LCM panel
will display the Position (default) screen
• Position screen displays current position
(longitude and latitude),
battery status and GPS
communication status
Page 18
Page 17
Tracking Unit
• Press INFO button to view next screen
• LCM displays Temporary Position Record
screen with TPR number, distance and bearing
Note: see steps for setting TPR
• Press INFO button to view next screen
• LCM displays GMT, Local Time, and date information
•
•
•
•
•
Press INFO button to view next screen
LCM displays Destination Number, Distance, and Bearing screen
Screen displays distance and bearing information of target destination
Push or to select different destination
Press SET button for at least 3 seconds to reverse the LCM display
of the current page
• Press INFO button to view next screen
• LCM displays Satellite Signal status
• Press INFO button again to return to Position screen
Beacon
Beacon
GPS Check Altitude & Speed
1. Press button while LCM display is in Position Screen
2. Device will display ALTITUDE and SPEED; only ALTITUDE will be
displayed in Sport Mode
3. Press button again to return to LCM Display to Position Screen
GPS
10. Press SET button once to enter latitude degree, minute and second
11. Press or buttons to select (e.g. 25° 08’ 03.0”)
12. Press SET button again to complete destination setting
13. To set another Destination, repeat Step 1
14. Press and hold SET button for 3 seconds to exit from this function
and return to “Destination Distance & Bearing” screen
Push Info. button
to enter 2nd page
Tracking Unit
Page 20
Page 19
Tracking Unit
Push Set button 3s to enter
destination setting mode
Set Trip Destination
Important: Find and list actual longitude and latitude before setting
the trip plan. A maximum of 32 destinations can be set.
Follow steps below to set trip destination
1. Press INFO button once to switch LCM display to
“Destination Distance & Bearing” screen
2. Press and hold SET button for 3 seconds until “D01” is flashing
3. Press or buttons to select set destinations from D01 to D32
4. Press SET button after selecting a destination to enter longitude
5. Press or buttons to select “E” or “W”
6. Press SET button once to enter longitude degree, minute and second
7. Press or buttons to select (e.g. 121° 30’ 30.0”)
8. Press SET button to enter Latitude settings
9. Press or buttons to select “N” or “S”
Beacon
GPS
Beacon
Push
or
GPS
button to select target destination
Tracking Unit
Page 22
Page 21
Tracking Unit
Push or button to
select target destination
Push Set button to enter
Longitude E or W select
Push Set button to enter longitude °, ’, & ” settings
After completed Longitude setting, push Set button to enter
Latitude setting, procedure same as Longitude setting
Beacon
Beacon
GPS
Page 23
GPS
Tracking Unit
Page 24
After completed destination “D01” setting, press Set button again
enter next destination setting, entire procedure is same as above.
Tracking Unit
After completed destinations setting, push Set button 3s to leave
set mode. LCM shows destination1 distance & bearing.
Beacon
GPS Set Temporary Position Record (TPR)
The device will record each point of information according to the
selected time interval and position request (Sport Mode)
Note: The device can set up to 60 TPR points
Note: Only KML file can be imported to the destination list.
GPS Tracking Unit includes a 4Mbs flash memory
to store the following data points
• YY/MM/DD
• HH/MM/SS
• Longitude
• Latitude
GPS
Tracking Unit
Page 26
Page 25
Beacon
• GPS Tracking Unit will show USB Connect to indicate it has
connected successfully
• After recording all TPR points, connect the device to a computer
using the USB cable
• Open the GPS Tracking Unit program
• Click on “Trace” from the menu
• Click on “Read Trace” to load coordinates
• Double click on any trace to see points
• Click on Google Earth icon to show the trace on Google Earth Map
• Right click on the house icon to save the point as KML data to be
imported to the destination list
Tracking Unit
Follow steps below to set temporary position record
1. Switch display to the POSITION Screen and see the coordinate is
shown on the screen.
2. Press and hold SET button for 3 seconds to record the coordinate
point to be one TPR point
3. To record another TPR point, repeat step 2
Data Transfer via USB Connection
Connect the device to your computer’s USB port to transfer trace and
trip data between GPS Tracking Unit and your computer.
Steps for data transfer:
• Connect USB cable to GPS device
• Connect USB to computer’s USB port
• Computer should automatically detect the USB connection,
(even if the device is not on)
Beacon
GPS
Beacon
GPS
LINK TO GOOGLE EARTH
Tracking Unit
Page 28
Page 27
Tracking Unit
Note: This function is only available if Google Earth has been
installed in the computer
To use this function:
• Open the GPS Tracking Unit program
• Double click the trace line
• Screen will display in the right bottom:
o Trace map
o Trace point
o Icons of “Export”, “Google Earth”, and “Quit”
• Or right click the mouse on the trace line
• Screen will display the following options:
o Export Text
o Export KML
o Launch Google Earth
• Select Google Earth and program will start automatically
Beacon
GPS
CUSTOMER SERVICE / CONTACT US PAGE
FCC
For questions or issues regarding the product, please contact Winplus at
1.866.294.9244 to speak to our customer service representative. You can also
contact us via email at [email protected] or visit www.winplus.com for more
information about the product.
Federal Communication Commission Interference Statement
This equipment has been tested and found to comply with the limits for a Class B
digital device, pursuant to Part 15 of the FCC Rules. These limits are designed to
provide reasonable protection against harmful interference in a residential
installation. This equipment generates, uses and can radiate radio frequency
energy and, if not installed and used in accordance with the instructions, may
cause harmful interference to radio communications. However, there is no
guarantee that interference will not occur in a particular installation. If this
equipment does cause harmful interference to radio or television reception,
which can be determined by turning the equipment off and on, the user is
encouraged to try to correct the interference by one of the following measures:
- Reorient or relocate the receiving antenna.
- Increase the separation between the equipment and receiver.
- Connect the equipment into an outlet on a circuit different from that
to which the receiver is connected.
- Consult the dealer or an experienced radio/TV technician for help.
This device complies with Part 15 of the FCC Rules. Operation is subject to the
following two conditions: (1) This device may not cause harmful interference,
and (2) this device must accept any interference received, including
interference that may cause undesired operation.
FCC Caution: Any changes or modifications not expressly approved by the party
responsible for compliance could void the user's authority to operate this
equipment.
IF YOU ARE EXPERIENCING ANY ISSUES WITH THE PRODUCT DURING
OPERATION, DO NOT RETURN THE PRODUCT TO THE STORE. CONTACT
WINPLUS DIRECTLY FOR INSTRUCTIONS ON HOW TO
RETURN/EXCHANGE THE PRODUCT.
IMPORTANT NOTE:
FCC Radiation Exposure Statement:
This equipment complies with FCC radiation exposure limits set forth for an
uncontrolled environment. End users must follow the specific operating
instructions for satisfying RF exposure compliance.
This transmitter must not be co-located or operating in conjunction with any
other antenna or transmitter.
Beacon
GPS
Tracking Unit
Page 30
Page 29
Tracking Unit