1
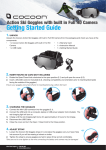
CREA TE
EDUC ATE
PL AY
with
Model Number: HE414118
INSTRUCTION MANUAL
Warranty Note
If you experience any issues with this product, or it’s
performance is not what you had expected, please
contact us at Winplus before returning the item to the
store.
It is likely that we can resolve any problems for you via
phone or email.
We can be reached on:
Phone: 1300 663 907 (8:30am - 6:00pm EST)
Email: [email protected]
KARAOKE MACHINE WITH BLUETOOTH
Warranty Details
The product is guaranteed to be free from defects in workmanship and parts for a period
of 12 months from the date of purchase. Defects that occur within this warranty period,
under normal use and care, will be repaired, replaced or refunded at our discretion.
The benefits conferred by this warranty are in addition to all rights and remedies in respect
of the product that the consumer has under the Competition and Consumer Act 2010 and
similar state and territory laws.
Our goods come with guarantees that cannot be excluded under the Australian Consumer Law.
You are entitled to a replacement or refund for a major failure and for compensation
for any other reasonably foreseeable loss or damage. You are also entitled to have the goods
repaired or replaced if the goods fail to be of acceptable quality and the failure
does not amount to a major failure.
AFTER SALES SUPPORT
AUS
1300 663 907
[email protected]
MODEL: HE414118 PRODUCT CODE: 49572 06/2015
1
YEAR WARRANTY
Safety Instructions
Read this manual thoroughly before first use and keep it in a safe place for future reference, along
with warranty card, purchase receipt and packaging. The safety precautions enclosed herein
reduce the risk of fire, electric shock and injury when correctly adhered to.
Follow all instructions and take notice of all warnings to reduce risk of fire or electric shock.
• Do not expose this product to water, rain, moisture or dust. Electronic products of this kind
should never be subjected to moisture or extreme temperatures.
• There are no user-serviceable parts inside this product.
• Do not repair the unit yourself. If your device is not functioning correctly, disconnect the
product from power, remove batteries, and contact after sales support.
• Supervise young children to ensure they do not play with the product.
• Do not expose to water, dust, moisture, chemicals, oils or other liquids.
• Do not expose to naked flames or other heat sources.
• Do not drop or subject the device to undue shock.
• Keep device away from magnets at all times.
• Keep away from direct sunlight.
• Unplug this device during lightning storms or when unused for long periods of time.
After Sales Support
1300 663 907
[email protected]
Model Number HE414118
5
Contents
Warranty Details
4
Safety Instructions
5
Parts List
7
Technical Specifications
7
Product Overview
8
1.1 Product Features
8
1.2 Item Overview
8
Installation10
2.1 Powering the Cocoon Kids Karaoke Machine
10
2.2 Connecting a Microphone
10
2.2 Inserting a CD or CD+G
10
Operation11
3.1 Controls
11
3.2 Audio Playback Functions
12
3.3 Connecting a Bluetooth Device
13
3.4 Disco Lights
13
3.5 Connecting to your TV
14
3.6 Charging a USB Device
14
Troubleshooting15
Repair and Refurbished Goods or Parts Notice
17
After Sales Support
1300 663 907
[email protected]
Model Number HE414118
6
Parts List
1 x Karaoke Machine
1 x Instruction Manual
1 x Microphone
1 x Getting Started Guide
1 x RCA Cable
1 x Warranty Card
1 x AC Power Adaptor
Technical Specifications
Audio Output Power: 5W
Microphone: Ø6.3mm dynamic microphone
Power Input: 240V AC 50Hz 25W
Power Output:
5V
Weight: 1.9kg
Dimensions: 23 x 32 x 21cm
Power Output:
5V 500mA
Compatibility:
CD, CD+G
1A
Bluetooth:2.1
After Sales Support
1300 663 907
[email protected]
Model Number HE414118
7
Product Overview
1.1 Product Features
Congratulations on the purchase of your Cocoon Kids Karaoke Machine. This product is designed
to Playback CDs, CD+Gs and bluetooth audio and provide many years of reliable use. Please read
and follow these instructions carefully. If you experience any difficulties setting up or using this
product, please see the inside cover of this manual for contact details.
1.2 Item Overview
CD/Bluetooth
Use to adjust the
source between
Bluetooth and CD+G .
Play/Pause
Press to play or pause
a loaded disc.
Power
Press to turn the unit
on or off.
Repeat
Press repeatedly to
set the current track
or entire album to
repeat.
Lights On/Off
Press to turn the lights
on or off.
Echo
Turn to adjust the
echo.
Mic 2 input
Mic 2 Volume
Turn to adjust the
volume from the Mic
2 input.
PROG.
REP.
CD
LIGHTS ON /OFF
PAIR
POWER
PROGRAM / PAIR
CD / BLUETOOTH
MASTER VOLUME
ECHO
MIC 2 VOLUME
AVC
MIC 1 VOLUME
MIC 2
MIC 1
MIN
MAXM
IN
MAXM
IN
MINM
AX
MAXM
IN
MAX
Skip/Search
Press to skip between
tracks on a loaded
disc. Press and hold
to fast-forward or fastrewind the current
track on a loaded CD.
Note: Fast forward and rewind
will not work with CD+G.
Master Volume
Turn to adjust the
master volume.
Stop
Press to stop a disc
during play.
AVC
Turn to adjust the
automatic voice
control.
Mic 1 Input
Program/Pair
Press to program a
loaded disc to play
Mic 1 Volume
Turn to adjust the
volume from the Mic
1 input.
order. Press to begin
pairing a Bluetooth
device.
After Sales Support
1300 663 907
[email protected]
Model Number HE414118
8
Product Overview
1.2 Item Overview
Composite Video
Output
Audio Outputs
Microphone
Holders
USB
CHARGER
VIDEO
OUT
AUDIO
R
L
AC IN ~
USB Charger
After Sales Support
1300 663 907
[email protected]
Model Number HE414118
9
Installation
2.1 Powering the Cocoon Kids Karaoke Machine
1. Connect the plug of the AC Power Cable to the rear of the
Cocoon Kids Karaoke Machine.
2. Connect the AC Power Cable to the mains power.
3. Switch on the power outlet.
4. Press the POWER button located below the display screen.
2.2 Connecting a Microphone
The Cocoon Kids Karaoke Machine can support up to 2 wired
microphones using a ¼” plug. There is 1 wired microphone
included with the Cocoon Kids Karaoke Machine to get you
started.
1. Connect the ¼” plug of the microphone to either the Mic 1
or Mic 2 ports located on the front of the unit.
2. Switch the microphone to ON using the switch located on
the microphone handle.
3. Adjust the microphone volume using the MIC VOLUME dial located on the top left side of the
unit.
4. Adjust the master volume using the MASTER VOLUME dial located on the top right side of the
unit.
Note: When not in use, you can conveniently store the microphone in either of the holders located on each
side of the unit.
2.2 Inserting a CD or CD+G
A karaoke CD or CD+G is the main type of format for the CDs
used for karaoke with CD+G being the most common label. CD+G
stands for compact disc plus graphics, a special disc format where
simple graphics and text are stored in the sub channels of the
audio disc. You can playback your favourite CDs using the Cocoon
Kids Karaoke Machine or insert CD+Gs into the unit to read lyrics
when connected to a TV. (Refer to p. 14 for further information)
NOTE: Lyrics will only be displayed when using a valid CG+G. Regular format CDs do not have this feature
1. Open the CD door by inserting your finger near the OPEN label on the CD door. Gently pull to
open the door.
After Sales Support
1300 663 907
[email protected]
Model Number HE414118
10
2. Ensure you remove the protective card, then load your CD into the compartment (graphics side
up) and gently close the CD door.
3. The LED display on your Cocoon Kids Karaoke Machine will show the number of tracks that are
available on the CD to play.
4. When you insert a CD+G, the CDG LED will be lit.
Note: Only 1 CD can be inserted at a time.
Warning: Never insert anything except for a CD or CD+G onto the disc tray. Foreign objects can damage
the unit.
Operation
3.1 Controls
Play/Pause
Push to toggle Play and Pause functions while a CD is inserted. The PLAY/PAUSE LED will light up
when paused.
Stop
Push to stop playback. The LED display will light up with the total number of tracks on the CD.
Skip Forward
Push to skip to the next track on the disc or the next track in the program order.
Skip Back
Push once to return to the beginning of the currently playing track, or press twice to skip to the
beginning of the previous track.
Program
You can program the Cocoon Kids Karaoke Machine to play songs in a pre-selected order.
1. If the CD is currently playing, press the STOP button to begin programming.
2. Press and hold the PROGRAM button until the “PROG” LED begins flashing.
3. Press the SKIP button to select the desired track number.
4. Press the PROGRAM button to confirm the track selection.
5. The LED display will show the next program position number. For example, if you have just
selected the 3rd track in your program, then the LED will display “4”. This indicates that the track
being selected currently will play 4th in the program.
6. You can repeat the above steps to add up to 20 tracks to your list.
7. When you have selected all the tracks you wish to play, press the PLAY button to start singing.
Tip: To clear all the programmed tracks, press the STOP button twice, and the “PROG” LED will stop
flashing.
After Sales Support
1300 663 907
[email protected]
Model Number HE414118
11
Operation
Repeat
To repeat the track currently playing:
1. While a track is playing, press the REPEAT button once.
2. The REPEAT LED will flash.
3. Press the PLAY/PAUSE button to begin playing.
4. To stop the repeat function press the repeat button until the repeat light turns off.
To repeat all tracks on the CD:
1. Press the REPEAT button twice.
2. The REPEAT LED will stay lit.
3. Press the PLAY/PAUSE button to begin playing.
4. To stop the repeat function press the repeat button until the repeat light turns off.
3.2 Audio Playback Functions
Master Volume
Use the MASTER VOLUME dial to control the overall volume of the unit. This will affect both the
microphone output volume and the CD playback volume.
Auto Voice Control
This function allows you to replace the lead singer’s voice with your own when playing a multiplex
recording.
1. Press the A.V.C button to turn the Auto Voice Control function ON/OFF.
2. The vocals on the multiplex recording will be muted when using the microphone.
3. When the microphone is not in use, the pre-recorded vocals will resume.
Note: This function will only work for multiplex recordings on CDs. These are generally CD+Gs and will
be labelled as such.
Balance
When playing a multiplex CD+G
1. Turning the balance dial to the right will lower the volume of the music track.
2. Turning the balance dial to the left will lower the volume lead singers vocals.
When playing an audio CD
1. Turning the balance dial to the right will shift volume output to the right speaker.
2. Turning the balance dial to the left will shift volume output to the left speaker.
Echo
Use the echo dial to enhance your voice to give a concert hall effect.
After Sales Support
1300 663 907
[email protected]
Model Number HE414118
12
Operation
3.3 Connecting a Bluetooth Device
Pairing a Bluetooth Device for the First Time
1. Make sure the Cocoon Kids Karaoke Machine is plugged into the wall and powered ON.
2. Press the CD/Bluetooth button to switch to Bluetooth mode.
3. Press the Pair button.
The pairing indicator will flash blue quickly and the unit will enter pairing mode. When pairing,
remain within 1 metre of the unit.
4. Using the native controls on your Bluetooth device, select the “HE414118” in your Bluetooth
settings to pair.
If your device requests a password, enter the default password “0 0 0 0”.
Refer to the user manual of your Bluetooth device for specific instructions on pairing and
connecting Bluetooth devices.
5. When successfully paired and connected, the pairing indicator will display a solid blue light. A
confirmation sound will also play from the Karaoke Machine.
After initial pairing, the unit will stay paired unless unpaired manually by the user or erased due to
a reset of the device.
If your device should become unpaired and you find it is unable to connect, repeat the above
steps or press the Pair button again to start the pairing process again.
Playing Audio Wirelessly
1. Follow the instructions for ‘Pairing a Bluetooth Device’.
2. Use the native controls on the connected Bluetooth device to select a track.
3. To play, pause or skip the selected track, use the native controls on the connected Bluetooth
device or press the Play/Pause or Skip/Search buttons on the Karaoke Machine.
4. Audio played through the connected Bluetooth device will now be heard through the
speakers.
3.4 Disco Lights
The Cocoon Kids Karaoke Player comes with Disco lights that will flash while you sing.
1. Press the Light ON/OFF button to turn the lights on.
2. Press the button again to switch the lights off.
After Sales Support
1300 663 907
[email protected]
Model Number HE414118
13
Operation
3.5 Connecting to your TV
The Cocoon Kids Karaoke Machine can be connected to your TV when playing CD+G format discs,
to allow you to read the lyrics as you sing to the audio track.
1. Using the included RCA cable, connect the yellow plug to the VIDEO OUT jack and the white
and red to the AUDIO OUT jacks on the Karaoke Machine.
2. Connect the opposite ends of the RCA cable to their respective VIDEO IN and AUDIO IN jacks
on your TV. (Refer to your TV manual)
3. Turn your TV to the corresponding AV channel. (Refer to your TV manual)
4. Insert a CD+G disc featuring lyric tracks into the Karaoke Machine. When you begin music
playback the lyrics will be displayed in time with the audio track.
Note: Lyrics will only be displayed when using a valid CD+G. Regular format audio CD’s do not have this
feature.
3.6 Charging a USB Device
1. Make sure the Cocoon Kids Karaoke Machine is plugged into the wall
2. Using the appropriate USB charging cable (not included), connect one end to the device and
the other to the USB Charging Port located on the back of the unit.
Note: The Cocoon Kids Karaoke Machine outputs 5V at up to 500mA. Always check the specific
requirements of your device prior to charging.
3. The device will now charge.
After Sales Support
1300 663 907
[email protected]
Model Number HE414118
14
Troubleshooting
Problem
Solution
No power when ON
• Check the power plug is connected to the back of the unit
and then plug into a power outlet.
• Check that the outlet is switched on.
• Check that the POWER button on the front of the unit has
been pressed.
No sound
• Turn up the master volume dial.
• If playing from an external audio device, ensure the volume
is turned up above 80%.
CD Player does not work
• Check your disc is not scratched or dirty.
• Check the CD lens is clean. If dusty, blow clean air across
the lens to remove the dust. If problems persist, use a CD
lens cleaner to clean the CD compartment.
• Check there is no moisture inside of the unit. Allow to dry
before use.
• Ensure the protective card has been removed from the CD
tray.
• Try a different CD.
No sound when connected
to a TV
• Ensure component or AV is selected as the source for your
TV audio.
• Ensure the colour coded RCA cables are correctly inserted
into their respective jacks.
• Turn up the volume of the TV or home theatre.
Lyrics do not appear on
screen
• Ensure the colour coded RCA cables are correctly inserted
into their respective jacks.
• Ensure you are playing a CD+G. Audio CDs will not display
lyrics.
• Ensure the CD+G LED is lit to confirm a CD+G format disc
is playing.
After Sales Support
1300 663 907
[email protected]
Model Number HE414118
15
Troubleshooting
Problem
Solution
No sound from microphone
• Turn up the volume on the MIC VOL and master volume
dial.
• Ensure the microphone is switched to the ON position on
the microphone handle.
• Ensure you are singing into the microphone and are not
more than 3cm away from the microphone.
• Ensure the microphone jack is securely connected to either
MIC 1 or MIC 2.
• Check the echo dial is not too low
Music or vocals cut out while
• Switch off Auto Voice Control
playing a CD+G and singing
• Ensure you are playing a CD+G that has a vocal track
with the microphone.
While playing a CD+G track
• Adjust the balance dial to the middle
with music and vocals, only
music or vocals play.
Burned CDs will not play
• Ensure the burned CD is a CD-R or CD-RW disc. Discs must
be burned as audio CD format, not MP3 CD format.
What format discs are
compatible?
• Formats supported are: CD, CD+G, CD-R (burned as an
audio CD), and CD-RW (burned as an audio CD).
Note: CD-R and CD-RW burned as MP3 discs are not supported
After Sales Support
1300 663 907
[email protected]
Model Number HE414118
16
KARAOKE MACHINE WITH BLUETOOTH
Repair and Refurbished Goods
or Parts Notice
Unfortunately, from time to time, faulty products are manufactured which need to be returned
to the Supplier for repair.
Please be aware that if your product is capable of retaining user-generated data (such as files
stored on a computer hard drive, telephone numbers stored on a mobile telephone, songs
stored on a portable media player, games saved on a games console or files stored on a USB
memory stick) during the process of repair, some or all of your stored data may be lost.
We recommend you save this data elsewhere prior to sending the product for repair.
You should also be aware that rather than repairing goods, we may replace them with
refurbished goods of the same type or use refurbished parts in the repair process.
Please be assured though, refurbished parts or replacements are only used where they
meet ALDI’s stringent quality specifications.
If at any time you feel your repair is being handled unsatisfactorily, you may escalate your
complaint. Please telephone us on 1300 663 907 or write to us at:
Winplus Australasia
PO BOX 537
Bayswater Business Centre
Bayswater, VIC 3153
Winplus Help Desk 1300 663 907
(Operating Hours: Mon-Fri 08:30AM to 6:00PM)
[email protected]
www.winplus.com.au
AFTER SALES SUPPORT
AUS
1300 663 907
[email protected]
MODEL: HE414118 PRODUCT CODE: 49572 06/2015
1
YEAR WARRANTY
Notes
Notes
CREA TE
EDUC ATE
PL AY