1
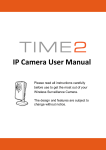
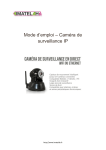
Quick Start Guide
For a detailed User Manual and setup video, please go to www.time2technology.com
1. Setting up your Time2 MIP11 Wireless Surveillance Camera
a) Connect the Camera to a power supply
1. Insert the power adapter plug into the port at the back of the camera
2. Connect the other end of the power adapter to a suitable mains power socket
b) Connect the Camera to your wireless internet router
1. Insert one end of the Ethernet (Internet) cable into a port on your wireless router
2. Connect the other end to the port at the back of the camera
c) Go to www.time2technology.com to download and install the IP Camera software onto your computer
d) Connect and view the camera by entering the Username
and Password at the back of the unit
e) Set the camera up wirelessly in 4 simple steps
1. Once you have logged into the camera (see Step D), right-click on the Camera name to bring up a list of options
2. Click on ‘Set WiFi connection’ then ‘start WiFi Settings’ and finally click ‘scan for networks’
3. Enter your Network name and Password then press ‘Ok’
f) Download and install the free ‘P2P Camviewer’ app on your
Smartphone to view the camera from anywhere at any time.
Warning: In case this product is being used to monitor infants or children, keep the camera and adapter out of their reach. Never place the
camera or adapter within a cot or near a bed. Secure the adapter and cord away from the child’s reach.
As with any electrical device, the supervision of your pet’s usage should be exercised until your pet is acclimated to the product. If your pet
is prone to chewing, we strongly recommend you keep this item and all other electrical devices out of reach.
2. Customer Support
If you are experiencing any issues with your Time2 MIP11 Surveillance Camera, please visit the help section
on our website http://www.time2technology.com