1
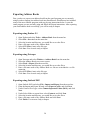
Adding to the Safe List on the Fly
1. Double-click EmailProtect from the system tray.
2. Click Add to Safe List from the toolbar, or click Add to Safe List from the
floating toolbar. Note: There is no need to have EmailProtect open when you are
using the floating toolbar.
3. Select the email item to allow from the list under Unblocked Address List.
4. Check and enter options as needed under the Addresses and/or Words tabs. Note:
You can click Help for web assistance within each tab to find help on which
option to choose and why, or refer to the Overview above. You can check and
select options under both tabs to apply rules as needed.
5. Click OK to save changes and close the window.
Note: Clicking Apply will save changes but will keep the window open. Clicking Cancel
will close the window, but will not save changes.
Sending to the Inbox
There may be a time that an email will be filtered and sent to Quarantine, but you want to
keep it anyway. You can send this email to its original destination (your Inbox), without
having to change filter rules. Be sure to review your Quarantine list from time to time for
email items you may possibly want to keep.
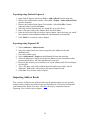
1. Double-click EmailProtect from the system tray.
2. Select an email item from the Quarantine list.
3. Click Send to Inbox from the toolbar to move the email item from Quarantine to
your Inbox.
Note: If you send a Quarantined email to the Inbox, it will appear in the Recent Email list
if you choose to Add to Block List or Add to Safe List.
The Floating Toolbar
By default, the Floating Toolbar is not displayed. The buttons on this toolbar look and
function just the same as the buttons do in the EmailProtect window. You can turn the
toolbar on and off by right-clicking EmailProtect from the system tray and selecting
Show Floating Toolbar. The shortcut menu from the system tray contains many of the
menu commands from the Quarantine window.
Toolbar buttons are described below from left to right:
49