Download Lab Guide ICND1
Transcript
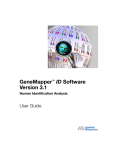
ICND1
Lab Guide
100-101
Interconnecting Cisco Networking Devices Part 1
Version 2.0
Labs powered by
ii
Labs powered by
© 2014 Boson Software, LLC
Interconnecting Cisco
Networking Devices Part 1
100-101 Lab Guide
LM20141014/BV2.11
© 2014 Boson Software, LLC
Labs powered by
iii
2 5 C e n t u r y B l v d . , S t e . 5 0 0 , N a s h v i l l e , T N 3 7214 | B o s o n . c o m
To perform the labs referenced in this book, please download and install the necessary files (refer to
your purchase receipt for the download link), navigate to the appropriate lab in the lab menu in the
Boson NetSim, and load the lab; all labs should work in NetSim 9 or later. To learn more about the
Boson NetSim or to purchase and download the software, please visit www.boson.com/netsim.
Copyright © 2014 Boson Software, LLC. All rights reserved. Boson, Boson NetSim, Boson Network
Simulator, and Boson Software are trademarks or registered trademarks of Boson Software, LLC.
Catalyst, Cisco, and Cisco IOS are trademarks or registered trademarks of Cisco Systems, Inc.
in the United States and certain other countries. Media elements, including images and clip art,
are the property of Microsoft. All other trademarks and/or registered trademarks are the property
of their respective owners. Any use of a third-party trademark does not constitute a challenge to
said mark. Any use of a product name or company name herein does not imply any sponsorship
of, recommendation of, endorsement of, or affiliation with Boson, its licensors, licensees, partners,
affiliates, and/or publishers.
iv
Version 2.0 © 2014 Boson Software, LLC
ICND1 Lab Guide Table of Contents
Boson NetSim Overview..................................................................................................................................... 1
Using NetSim to Prepare for Your Certification............................................................................................ 2
Using NetSim at Home – Single User............................................................................................................ 3
Downloading and Installing NetSim....................................................................................................... 3
Activating NetSim – Single User............................................................................................................. 3
Loading a Lab.......................................................................................................................................... 4
Accessing NetSim in the Classroom – Boson LS Client............................................................................... 4
Configuring NetSim to Authenticate with the Boson NetSim License Server....................................... 4
Loading a Lab.......................................................................................................................................... 6
Module 3: Network Addressing......................................................................................................................... 7
Lab 3.1 – Subnet Calculation.......................................................................................................................... 8
Lab Tasks................................................................................................................................................. 8
Lab Solutions..........................................................................................................................................14
Lab 3.2 – IPv6 Addressing............................................................................................................................18
Lab Tasks................................................................................................................................................18
Lab Solutions......................................................................................................................................... 19
Module 5: Device Management....................................................................................................................... 21
Lab 5.1 – Router Configuration................................................................................................................... 22
Lab Tasks............................................................................................................................................... 23
Lab Solutions......................................................................................................................................... 25
Lab 5.2 – TFTP and Router Configuration.................................................................................................. 30
Lab Tasks................................................................................................................................................31
Lab Solutions......................................................................................................................................... 33
A sample lab is included in this document to display the quality,
format, and content of labs that are included in the Boson NetSim
and the Boson Courseware products. However, you will not be able
to work through this lab in NetSim without purchasing both Boson
NetSim
and Basics................................................................................................................
the Boson ICND1 Courseware Lab Pack.
Module 6: Network
Security
35
Lab 6.1 – Basic Network Security................................................................................................................ 36
Lab Tasks............................................................................................................................................... 37
Lab Solutions......................................................................................................................................... 40
Please visit www.boson.com for more information.
Module 7: Advanced Network Security with ACLs....................................................................................... 51
Lab 7.1 – Standard ACLs............................................................................................................................. 52
Lab Tasks............................................................................................................................................... 53
Lab Solutions ........................................................................................................................................ 55
Lab 7.2 – Extended ACLs............................................................................................................................ 60
Lab Tasks................................................................................................................................................61
Lab Solutions......................................................................................................................................... 63
© 2014 Boson Software, LLC
ICND1 Lab Guide Table of Contents
Lab 7.3 – Named ACLs................................................................................................................................ 68
Lab Tasks............................................................................................................................................... 69
Lab Solutions......................................................................................................................................... 71
Module 8: Switches........................................................................................................................................... 77
Lab 8.1 – Switch Initial Configuration Dialog............................................................................................ 78
Lab Tasks............................................................................................................................................... 80
Lab Solutions......................................................................................................................................... 82
A sample lab is included in this document to display the quality,
format,
andTrunk
content
of labs
that areRouting..................................................................
included in the Boson NetSim92
Lab 9.1 – Basic
Configuration
and InterVLAN
Lab Tasks...............................................................................................................................................
and the
Boson Courseware products. However, you will not be able94
Lab Solutions......................................................................................................................................... 96
to work
through this lab in NetSim without purchasing both Boson
Module 10:NetSim
Routers.........................................................................................................................................
105
and the Boson ICND1 Courseware Lab Pack.
Module 9: Advanced Switching Concepts...................................................................................................... 91
Lab 10.1 – Router Interfaces...................................................................................................................... 106
Lab Tasks..............................................................................................................................................107
Lab Solutions....................................................................................................................................... 109
Lab 10.2 – Static Routes..............................................................................................................................116
Lab Tasks..............................................................................................................................................117
Lab Solutions........................................................................................................................................119
Lab 10.3 – Default Routes.......................................................................................................................... 124
Lab Tasks............................................................................................................................................. 125
Lab Solutions....................................................................................................................................... 127
Please visit www.boson.com for more information.
Module 11: Advanced Routing Concepts...................................................................................................... 131
Lab 11.1 – OSPF Configuration..................................................................................................................132
Lab Tasks..............................................................................................................................................133
Lab Solutions........................................................................................................................................137
Lab 11.2 – OSPFv3 Configuration..............................................................................................................152
Lab Tasks..............................................................................................................................................153
Lab Solutions........................................................................................................................................156
Module 12: Basic Network Services.............................................................................................................. 169
Lab 12.1 – DNS Configuration...................................................................................................................170
Lab Tasks..............................................................................................................................................171
Lab Solutions........................................................................................................................................173
Lab 12.2 – DHCP Configuration................................................................................................................178
Lab Tasks..............................................................................................................................................180
Lab Solutions........................................................................................................................................183
vi
© 2014 Boson Software, LLC
ICND1 Lab Guide Table of Contents
Lab 12.3 – NTP Configuration.................................................................................................................. 192
Lab Tasks..............................................................................................................................................193
Lab Solutions....................................................................................................................................... 194
Lab 12.4 – Static NAT and PAT................................................................................................................. 200
Lab Tasks............................................................................................................................................. 202
Lab Solutions....................................................................................................................................... 204
Lab 12.5 – Dynamic NAT...........................................................................................................................212
Lab Tasks..............................................................................................................................................213
Lab Solutions........................................................................................................................................217
A sample lab is included in this document to display the quality,
format, and content of labs that are included in the Boson NetSim
and the Boson Courseware products. However, you will not be able
to work through this lab in NetSim without purchasing both Boson
NetSim and the Boson ICND1 Courseware Lab Pack.
Please visit www.boson.com for more information.
© 2014 Boson Software, LLC
vii
ICND1 Lab Guide Table of Contents
viii
© 2014 Boson Software, LLC
Boson NetSim Overview
Boson NetSim Overview
The Boson NetSim® Network Simulator®, which includes the Boson Router Simulator®, is unique compared
to all others on the market because of the functionality it supports and its features. NetSim utilizes Boson’s
proprietary Network Simulator, Router Simulator®, and EROUTER® software technologies, along with
the Boson Virtual Packet Technology® engine, to create individual packets. These packets are routed and
switched through the simulated network, allowing NetSim to build an appropriate virtual routing table and
simulate true networking. Other simulation products on the market do not support this level of functionality.
NetSim is a Windows®-based product that simulates a wide variety of Cisco® routers, including the 2500
series, 2600 series, 2800 series, and 3600 series routers, as well as the Cisco Catalyst 1900 series, 2900
series, and 3500 series switches. NetSim supports multiple routing protocols, including RIP, IGRP, EIGRP,
BGP, and OSPF. It supports different LAN/WAN protocols, including PPP/CHAP, ISDN, and Frame Relay.
The labs in NetSim require only the devices and functionality included with NetSim—they do not require
access to any external router or switch hardware. NetSim supports many, but not all, of the IOS commands
available on a physical router or switch. All the commands referenced in the available labs are supported
by NetSim. The labs included in this book have been selected as companions to the Boson Curriculum.
However, you can perform any labs that are unlocked for additional practice.
Achieving Cisco CCENT®, CCNA®, or CCNP® certification is the goal of many people who use this
product. The Boson NetSim covers not only the SWITCH, TSHOOT, and ROUTE certifications but also
the ICND1, ICND2, and CCNA certifications, among others. The included labs guide you through the
configuration of routers, switches, and workstations in a variety of scenarios. Installed labs are made
available (unlocked) depending on the activation key used to activate the product. All labs are downloaded
and kept up to date after installation regardless of the activation key used.
Activation keys unlock labs and increase the number of available commands. Beginning with the Demo
version of NetSim, the command set is limited to those necessary to perform the steps in the lab. For
example, if you start your studies with a CCENT activation key, you will have the command set and labs
available that are necessary to study for that exam. When you are ready to study for either the CCNA or
CCNP exam, you will need to purchase a new activation key and then activate with the new CCNA or CCNP
activation key; then, more labs and a larger command set become available.
A small lock icon ( ) is displayed next to unavailable labs. Higher-level activation keys allow you to work
through all labs unlocked by lower-level activation keys. All labs included with NetSim are unlocked when a
CCNP-level activation key is used; courseware labs are unlocked with the appropriate activation key.
After you load and complete an unlocked lab, you can use the grading function in NetSim to grade the lab
so that you can determine whether you completed it correctly (click Lab > Grade Lab). As you progress
through the labs, you will master the skills needed to pass the simulation questions in the Cisco certification
exams. NetSim has the ability to guide and grade, and using it for practice can actually be more helpful than
using real routers and switches. NetSim allows you to gain experience without requiring you to purchase
expensive equipment.
The Boson NetSim can be used for additional purposes other than only working through labs. The included
full version of the NetMap tool allows you to practice designing and planning a network. This tool’s
functionality goes beyond that of most tools because, once you have created a network topology, you can
actually create the router configurations that are going to be used, save those configurations, and practice
using them on simulated devices.
© 2014 Boson Software, LLC
Labs powered by
Boson NetSim Overview
Routing protocol implementation is one of the more challenging tasks you may encounter. Troubleshooting
a production network can be a frustrating experience. Fortunately, you can create a virtual copy of your
network topology by using the Boson NetMap and troubleshoot the problems without interfering with your
production network. Although you can use NetSim as an aid in troubleshooting, you should not rely only on
NetSim to make decisions about a production network, because NetSim is not designed to test real networks.
Instead, it is a tool that you can use to study for Cisco certification.
In summary, Boson NetSim is a flexible and powerful product that can help you become certified and,
in some cases, can be used to create a simulation of the topology of your corporate network and help you
practice troubleshooting without using devices on the production network.
Using NetSim to Prepare for Your Certification
By incorporating NetSim as part of your process of achieving a Cisco certification, you can learn and master
the skills necessary to help you successfully complete your certification track. The purpose of NetSim is to
help you with the practical, hands-on portion of your education and to ensure that you not only understand
the concepts of routing but can actually configure and implement routing on Cisco devices.
Mastering Cisco networking involves two fundamental tasks:
1. Learn the theory of routers and switches.
2. Gain the hands-on experience of implementing that theory by configuring the devices in a network and
testing them in a lab.
Self-studying for a Cisco certification can be a daunting task. The amount of information a CCNA candidate
is required to know and the skills that candidate is required to possess are quite extensive. To begin learning
the theory of configuring a network, you can find a good reference book or listen to an instructor. But
a reference book might not be enough. The book will not give you the practical, hands-on experience of
routing and switching that you can learn from NetSim—experience that will help you build on the theoretical
knowledge you learned from the reference book.
Real equipment gives you the ability to practice on actual routers and switches, but it also is a very costly
way to practice and leaves a lot of room for error. The Boson NetSim, on the other hand, is an excellent tool
to help you prepare for the CCNA (www.boson.com/certification/CCNA) and CCNP
(www.boson.com/certification/CCNP) exams. NetSim simulates the behavior of a network and does not
just return preprogrammed responses to expected command inputs. It allows you to create virtual packets
and virtual frames that will be routed and switched through the simulated network. Aside from physically
plugging in the cables and listening to the fan noise, your experience with the simulated network will be
much the same as your experience with a fully functional lab rack without the expense of the hardware.
NetSim will enable you to practice various configurations and master helpful skills.
Once you feel you have mastered the theory and the practical labs, you can test your knowledge by using the
Boson ExSim-Max practice exam products available at the ExSim-Max home page
(www.boson.com/exsim-max-practice-exams). Boson ExSim-Max practice exam products can include
complex multiple-choice questions, drag-and-drop questions, Boson NetSimX simulation questions, and
trouble tickets that simulate the questions you will see on the live exam.
Labs powered by
© 2014 Boson Software, LLC
Boson NetSim Overview
The Boson NetSim Network Simulator is the most comprehensive product on the market for learning how to
configure a Cisco router. The Boson NetSim will not only help you become certified, it will actually help you
learn and understand how to configure routers, switches, and networks.
For more information on how to use NetSim, please read the NetSim User Manual by clicking Help > Users
Manual from within NetSim or by downloading the User Manual from the following link:
http://www.boson.com/Files/Support/NetSim-10-User-Manual.pdf
Using NetSim at Home – Single User
The following steps are for installation and activation for a single user license and should not be performed
on a classroom workstation.
Downloading and Installing NetSim
You can download NetSim from the Boson.com downloads page (account required):
http://www.boson.com/download
You must have a Boson account to download the NetSim Demo. To create a free account, visit the Boson
Online Account page (https://www.boson.com/account/default.aspx) and enter a valid e-mail address to begin
creating an account.
You should download the NetSim installer to your computer before beginning the installation. It is
recommended that you disable antivirus and firewall software while installing and activating NetSim and
then reactivate when the installation is complete. Double-click the downloaded installation file to begin the
installation, and perform the steps described in the prompts during installation.
Activating NetSim – Single User
When you first open NetSim, you will be presented with a Product Activation dialog box. Enter your e-mail
address and password, and then click Next. On the next screen, select whether you want to activate NetSim
in Online Mode (recommended method) or Offline Mode. Click Next. Then type the activation key; this
information should be in the purchase receipt you received via e-mail, or you can find the receipt online on
your Boson Online Account page (https://www.boson.com/account/default.aspx). If you are a student, you
might receive this information from your learning institution or your instructor. You must have an active
Internet connection in order to activate the full version of NetSim.
After a successful activation, the lab packs will be updated and NetSim will be ready for you to use. Installed
labs are made available (unlocked) depending on the activation key used to activate the product. A small lock
icon ( ) is displayed next to unavailable labs. To make additional labs available, you will need to purchase a
new activation key and then reactivate with the new activation key; then, more labs and a larger command set
become available.
If you have not purchased an activation key for NetSim or if you received an activation key from your
learning institution, you will not be able to activate the full version of NetSim on your personal computer.
However, you can choose to continue in Demo mode. When you are running the Demo mode, only the demo
lab and a limited set of commands are functional. To purchase the full version of NetSim, visit the About
NetSim page (www.boson.com/support/netsim-support-topics) of the Boson website.
© 2014 Boson Software, LLC
Labs powered by
Boson NetSim Overview
Loading a Lab
You can open NetSim from the shortcut installed during the download or from the Start menu by clicking
Boson Software > Boson NetSim > Boson NetSim. If you are a student using NetSim at a learning
institution, you should launch NetSim from the Start menu by clicking Boson Software > Boson NetSim >
Boson NetSim LS Client. This will enable you to configure NetSim to authenticate with the Boson NetSim
License Server.
1. You can begin a preloaded Boson NetSim lab by performing one of the following tasks:
•
On the navigation pane, click Labs; then, on the Standard tab of the Labs panel, double-click the lab
you want to open.
•
Click to highlight a lab on the Labs pane, then click Lab > Load lab.
•
Select a lab from the list of Recent Labs or Saved Labs on the Home pane.
2. After you have loaded a lab, click the Lab Instructions tab and read through the lab instructions.
3. From the Devices drop-down menu on the Consoles section, select the device(s) that you need to
configure in order to complete the lab and follow the steps in the lab. You can also select the device you
want to configure by clicking the NetMap tab, right-clicking the device, and selecting Configure in
Simulator.
4. When you have completed the lab, click Lab > Grade Lab to ensure that you have completed it
successfully.
5. You can choose to save your single device configuration or multiple device configurations by selecting the
appropriate option in the File menu.
You might also be instructed to open labs from a custom lab pack. If any custom labs are available, they will
be on the Custom tab of the Labs pane. To open a custom lab, double-click the lab you want to load.
Accessing NetSim in the Classroom – Boson LS Client
If you are using NetSim in the classroom, it should already be installed on your classroom workstation. You
should perform the following steps to configure NetSim to access the NetSim License Server.
As a student using NetSim at a learning institution, you should launch NetSim from the Start menu by
clicking Boson Software > Boson NetSim > Boson NetSim LS Client. This will enable you to configure
NetSim to authenticate with the Boson NetSim License Server.
Configuring NetSim to Authenticate with the Boson NetSim License Server
Note: Prior to using the Boson NetSim Client, you might need to associate your Boson.com account
information with Boson NetSim. If you receive an activation key from your learning institution, activate
Boson NetSim on your personal computer after creating a Boson.com account. Your network administrator/
instructor can then add you as an authorized user to the license server application. You may need to provide
your learning institution with the e-mail address associated with your Boson.com account. You should not
give your Boson.com account password to your instructor or learning institution. Your instructor will assign
you a password that he or she has configured on the License Server, which you will need for step 3.
1. Run the Boson NetSim LS Client by clicking Start > All Programs > Boson Software > Boson
NetSim > Boson NetSim LS Client.
Labs powered by
© 2014 Boson Software, LLC
Boson NetSim Overview
2. In the Boson NetSim - License Agreement dialog box, select Yes to agree to the Authorized User
Agreement. If you do not agree to the Authorized User Agreement, you will not be able to use the Boson
NetSim client.
3. Your instructor will provide you with the settings you need to enter in the Boson NetSim Client dialog
box. Enter the IP address (or computer name if the client computer and the license server are on a
Windows-based network) and the port number of the computer running the NetSim License Server
software. Enter the user name/password combination for authentication to the server. The user name will
be the login information you used to establish an account with Boson.com, or the user name provided by
your instructor. Enter the password assigned to you by your network administrator/instructor.
4. Select either CCNA or CCNP from the Version drop-down list; the version you select must match the
version that is the current license type configured on the NetSim License Server.
5. Click Connect.
6. If a license is available on the license server, the Continue button will be enabled. Click the Continue
button to start using the Boson NetSim.
For additional information on using Boson NetSim, please consult the Boson NetSim User Manual on Boson.
com or click Help > Users Manual.
© 2014 Boson Software, LLC
Labs powered by
Boson NetSim Overview
Loading a Lab
1. You can begin a preloaded Boson NetSim lab by performing one of the following tasks:
•
Expand the Labs panel; then, on the Standard tab of the Labs panel, double-click the lab you want
to open.
•
Click to highlight a lab, then click Lab > Load Lab.
•
Select a lab from the list of Recent Labs or Saved Labs on the Home pane.
2. After you have loaded a lab, click the Lab Instructions tab and read through the lab instructions.
3. From the Devices drop-down menu on the Consoles section, select the device(s) that you need to
configure in order to complete the lab and follow the steps in the lab. You can also select the device you
want to configure by clicking the NetMap tab, right-clicking the device, and selecting Configure in
Simulator.
4. When you have completed the lab, click Lab > Grade Lab to ensure that you have completed it
successfully.
5. You can choose to save your single device configuration or multiple device configurations by selecting the
appropriate option in the File menu.
You might also be instructed to open labs from a custom lab pack. If any custom labs are available, they will
be on the Custom tab of the Labs pane. To open a custom lab, double-click the lab you want to load.
Labs powered by
© 2014 Boson Software, LLC
Module 3
Network Addressing
Lab 3.1 – Subnet Calculation
Lab 3.2 – IPv6 Addressing
Module 3: Network Addressing
Labs powered by
ICND1 Lab 3.1 – Subnet Calculation
Lab 3.1 – Subnet Calculation
Objective
This lab corresponds to ICND1 Module 3: Network Addressing, of Boson’s CCNA Curriculum. In this lab,
you can practice calculating network, broadcast, and host addresses.
Lab Tasks
Use the IP address and subnet mask in each table to find the correct network address, first host address, last
host address, and broadcast address. The answers to these problems are on the following pages. You can use
the space near each IP address block to perform your calculations.
1.
192.168.55.56/29
Network
First Host
Last Host
Broadcast
2.
192.168.10.123/30
Network
First Host
Last Host
Broadcast
Lab ID: ICND1.0114A001.3.1
Labs powered by
© 2014 Boson Software, LLC
ICND1 Lab 3.1 – Subnet Calculation
3.
192.168.5.78/27
Network
First Host
Last Host
Broadcast
4.
192.168.15.137/28
Network
First Host
Last Host
Broadcast
5.
192.168.67.158/24
Network
First Host
Last Host
Broadcast
© 2014 Boson Software, LLC
Labs powered by
ICND1 Lab 3.1 – Subnet Calculation
6.
192.168.45.101/25
Network
First Host
Last Host
Broadcast
7.
192.168.78.91/26
Network
First Host
Last Host
Broadcast
8.
172.16.22.53/23
Network
First Host
Last Host
Broadcast
10
Labs powered by
© 2014 Boson Software, LLC
ICND1 Lab 3.1 – Subnet Calculation
9.
172.16.96.25/20
Network
First Host
Last Host
Broadcast
10.
172.16.87.56/22
Network
First Host
Last Host
Broadcast
11.
172.16.33.98/21
Network
First Host
Last Host
Broadcast
© 2014 Boson Software, LLC
Labs powered by
11
ICND1 Lab 3.1 – Subnet Calculation
12.
10.1.56.32/16
Network
First Host
Last Host
Broadcast
13.
15.16.17.18/28
Network
First Host
Last Host
Broadcast
14.
83.18.38.56/26
Network
First Host
Last Host
Broadcast
12
Labs powered by
© 2014 Boson Software, LLC
ICND1 Lab 3.1 – Subnet Calculation
15.
172.18.43.15/22
Network
First Host
Last Host
Broadcast
16.
192.168.12.146/30
Network
First Host
Last Host
Broadcast
© 2014 Boson Software, LLC
Labs powered by
13
ICND1 Lab 3.1 – Subnet Calculation
Lab Solutions
Subnet Calculation Answers
You can use the Boson subnetting calculator found at www.boson.com/FreeUtilities and the TCP/IP
subnetting worksheet found at www.boson.com/promo/guides/TCPIP-SUB.pdf to verify your answers.
1.
4.
192.168.55.56/29
192.168.15.137/28
Network
Network
192.168.55.56
192.168.15.128
First Host
First Host
192.168.55.57
192.168.15.129
Last Host
Last Host
192.168.55.62
192.168.15.142
Broadcast
Broadcast
168.168.55.63
192.168.15.143
2.
5.
192.168.10.123/30
192.168.67.158/24
Network
Network
192.168.10.120
192.168.67.0
First Host
First Host
192.168.10.121
192.168.67.1
Last Host
Last Host
192.168.10.122
192.168.67.254
Broadcast
Broadcast
192.168.10.123
192.168.67.255
3.
14
6.
192.168.5.78/27
192.168.45.101/25
Network
Network
192.168.5.64
192.168.45.0
First Host
First Host
192.168.5.65
192.168.45.1
Last Host
Last Host
192.168.5.94
192.168.45.126
Broadcast
Broadcast
192.168.5.95
192.168.45.127
Labs powered by
© 2014 Boson Software, LLC
ICND1 Lab 3.1 – Subnet Calculation
7.
10.
192.168.78.91/26
172.16.87.56/22
Network
Network
192.168.78.64
172.16.84.0
First Host
First Host
192.168.78.65
172.16.84.1
Last Host
Last Host
192.168.78.126
172.16.87.254
Broadcast
Broadcast
192.168.78.127
172.16.87.255
8.
11.
172.16.22.53/23
172.16.33.98/21
Network
Network
172.16.22.0
172.16.32.0
First Host
First Host
172.16.22.1
172.16.32.1
Last Host
Last Host
172.16.23.254
172.16.39.254
Broadcast
Broadcast
172.16.23.255
172.16.39.255
9.
12.
172.16.96.25/20
10.1.56.32/16
Network
Network
172.16.96.0
10.1.0.0
First Host
First Host
172.16.96.1
10.1.0.1
Last Host
Last Host
172.16.111.254
10.1.255.254
Broadcast
Broadcast
172.16.111.255
10.1.255.255
© 2014 Boson Software, LLC
Labs powered by
15
ICND1 Lab 3.1 – Subnet Calculation
13.
16.
15.16.17.18/28
192.168.12.146/30
Network
Network
15.16.17.16
192.168.12.144
First Host
First Host
15.16.17.17
192.168.12.145
Last Host
Last Host
15.16.17.30
192.168.12.146
Broadcast
Broadcast
15.16.17.31
192.168.12.147
14.
83.18.38.56/26
Network
83.18.38.0
First Host
83.18.38.1
Last Host
83.18.38.62
Broadcast
83.18.38.63
15.
172.18.43.15/22
Network
172.18.40.0
First Host
172.18.40.1
Last Host
172.18.43.254
Broadcast
172.18.43.255
16
Labs powered by
© 2014 Boson Software, LLC
ICND1 Lab 3.1 – Subnet Calculation
© 2014 Boson Software, LLC
Labs powered by
17
ICND1 Lab 3.2 – IPv6 Addressing
Lab 3.2 – IPv6 Addressing
Lab Tasks
Use your knowledge of IPv6 addressing to answer the questions below.
1.
IPv6 was created to solve a demand issue with 32-bit IPv4 addressing. How does IPv6 resolve that
issue? ______________________________________________________________________________
___________________________________________________________________________________
2.
What are the 16 valid hexadecimal characters that can be used in an IPv6 address? _________________
___________________________________________________________________________________
3.
Given the IPv6 address 0001:0002:0003:0000:0050:0006:0777:0ABC, what is a valid way of
abbreviating this address? ______________________________________________________________
___________________________________________________________________________________
4.
What is the name of the portion of an IPv6 address that is equivalent to the subnet mask for an IPv4
address?____________________________________________________________________________
___________________________________________________________________________________
5.
What three types of addresses are used with IPv4 addressing?__________________________________
___________________________________________________________________________________
6.
What three types of addresses are used with IPv6 addressing?__________________________________
___________________________________________________________________________________
7.
What type of IPv6 unicast address falls within the IPv6 range of FE80::/10?_ _____________________
___________________________________________________________________________________
8.
What pieces of information comprise an EUI-64 interface ID?_ ________________________________
___________________________________________________________________________________
9.
What is a dual stack configuration?_______________________________________________________
___________________________________________________________________________________
Lab ID: ICND1.0114A002.3.2
18
Labs powered by
© 2014 Boson Software, LLC
ICND1 Lab 3.2 – IPv6 Addressing
Lab Solutions
1.
Unlike Internet Protocol version 4 (IPv4), IP version 6 (IPv6) uses a 128-bit address space, which
means there are 2128 IPv6 addresses available versus 232 IPv4 addresses. An IPv6 address consists of 32
hexadecimal characters that represent a 128-bit binary value. The number of available addresses in the
IPv6 address space is thus much higher than in the 32-bit IPv4 address space.
2.
The 16 valid hexadecimal characters that can be used in an IPv6 address are 0, 1, 2, 3, 4, 5, 6, 7, 8,
9, A, B, C, D, E, and F. Unlike a decimal numbering system, the hexadecimal numbering system,
which is also known as base 16, contains 16 digits, the last six of which are represented by the first six
characters of the English alphabet. Therefore, a value of A in hexadecimal is equivalent to a value of 10
in decimal; a value of B is equivalent to a value of 11; a value of C is equivalent to a value of 12; and
so on through F, which is equivalent to 15.
To represent a value greater than 15 in hexadecimal, such as 16, you should use a place scheme: the
hexadecimal value of 10 is therefore equivalent to a decimal value of 16 because there is a 1 in the 16s
place and a 0 in the ones place. The hexadecimal value of 11 is therefore equivalent to 17, and so on.
A value of FF in hexadecimal is equivalent to a decimal formula of (15 × 16) + (15 × 1), because there
is an F in the 16s place and an F in the ones place. Therefore, FF in hexadecimal is equal to a value of
255 in decimal.
3.
The IPv6 address 0001:0002:0003:0000:0050:0006:0777:0ABC can be abbreviated in the following
ways:
1:2:3:0:50:6:777:ABC
1:2:3::50:6:777:ABC
An IPv6 address can be separated into eight four-character quartets. Quartets are separated by colons.
You can omit the leading zeros in each quartet, as shown in the first abbreviation above. Additionally,
you can replace a single quartet of zeros or a series of quartets of zeros with a double colon (::),
as shown in the second abbreviation. However, you can only use the double colon once in an IPv6
address. Therefore, if an IPv6 address contains multiple sets of zeros, you should replace the longest
set with a double colon. Finally, you cannot remove trailing zeros from an IPv6 address. The IPv6
address 1:2:3::5:6:777:ABC is different than the IPv6 address 1:2:3::50:6:777:ABC.
4.
The portion of an IPv6 address that is equivalent to the subnet mask for an IPv4 address is known as
a prefix. IPv6 addresses consist of two distinct segments: the prefix and the interface ID. The prefix is
the network portion of the address, and the interface ID is the host portion of the address. This format
mirrors that of IPv4 classless addressing. IPv6 is also similar to IPv4 in that it can use slash notation to
indicate the number of bits that are dedicated to the prefix.
5.
The three types of addresses that are used with IPv4 addressing are unicast, multicast, and broadcast. A
unicast address is used to send packets to a single device. A multicast address is used to send packets to
multiple devices that are configured with that multicast address. Broadcast addresses are used to send
packets to every device on a local area network (LAN).
© 2014 Boson Software, LLC
Labs powered by
19
ICND1 Lab 3.2 – IPv6 Addressing
6.
The three types of addresses that are used with IPv6 addressing are unicast, multicast, and anycast.
Unicast and multicast addresses in IPv6 work similarly to how they work in IPv4. Anycast addresses
are used to send packets to the closest device that is configured with the anycast address. The closest
device is selected by the routing protocol that is used by the router. Anycast addresses are ideal for
load balancing. It is important to note that a single interface can be configured with multiple unicast,
multicast, and anycast addresses. Each type of address uses a distinct type of prefix.
7.
A link-local IPv6 unicast address falls within the IPv6 range of FE80::/10 and therefore will always
begin with FE8, FE9, FEA, or FEB. IPv6 link-local unicast addresses are used for communication over
a single link. Routers do not forward traffic sent to a link-local address; the traffic stays on the local
link. IPv6 link-local unicast addresses are often used for neighbor discovery.
8.
An interface ID in extended unique identifier (EUI)-64 format is created by taking the organizationally
unique identifier (OUI) of the Media Access Control (MAC) address, appending the hexadecimal
number FFFE, and then appending the serial identifier. The seventh binary bit is then set to 0 if the
IPv6 address is locally unique or set to 1 if the address is globally unique; this might change the value
of the second hexadecimal character in the address, which consists of the fifth, sixth, seventh, and
eighth binary bits.
9.
A dual-stack configuration enables a host or a router to communicate over both IPv4 and IPv6. IPv4
and IPv6 are not interoperable. Therefore, other technologies must be implemented to enable an IPv4
network to communicate with an IPv6 network, and vice versa. Dual-stack devices are configured with
an IPv4 address and an IPv6 address. The version of IP that is used is determined by the destination
address of the packet. Although dual stack devices can communicate on both IPv4 and IPv6 networks,
they cannot translate IPv4 to IPv6 or vice versa. In order to accomplish that, Network Address
Translation-Protocol Translation (NAT-PT) or tunneling is required.
20
Labs powered by
© 2014 Boson Software, LLC
Certification Candidates
Boson Software’s ExSim-Max practice exams are designed to simulate the complete exam experience.
These practice exams have been written by in-house authors who have over 30 years combined
experience writing practice exams. ExSim-Max is designed to simulate the live exam, including topics
covered, question types, question difficulty, and time allowed, so you know what to expect. To learn
more about ExSim-Max practice exams, please visit www.boson.com/exsim-max-practice-exams or
contact Boson Software.
Organizational and Volume Customers
Boson Software’s outstanding IT training tools serve the skill development needs of organizations such
as colleges, technical training educators, corporations, and governmental agencies. If your organization
would like to inquire about volume opportunities and discounts, please contact Boson Software at
[email protected].
Contact Information
E-Mail:
[email protected]
Phone:877-333-EXAM (3926)
615-889-0121
Fax:615-889-0122
Address:
25 Century Blvd., Ste. 500
Nashville, TN 37214
B o s o n.c o m
8 7 7 . 3 3 3 . 3 9 2 6
[email protected]
© C o p y r i g h t 2 014 B o s o n S o f t w a r e , L L C . A l l r i g h t s r e s e r v e d .


