1
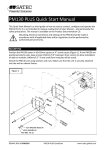
Win a Tablet! PM135 Quick Start Manual See back page This quick start manual is a short guide on how to mount, connect, configure and operate the PM135. It is not intended to replace reading the full user manual and particularly the safety precautions. Mounting, electrical connection and settings of the PM135 shall be made in accordance with all applicable laws and/or regulations and be performed by authorized personnel only. MOUNTING Position the PM135 meter in 92×92mm square or 4” round cutout (Figure 1). If two PM135 are positioned side by side, keep at least 150mm (5.9”) between their centers to allow installation of add-on modules (140mm/5.5” if only small form modules will be used). Attach the PM135 unit using washers and nuts. Make sure that the unit is securely attached into the wall or cabinet fixture. Figure 1 BG0517 REV.A1 ENGLISH PM135 QuickStart www.satec-global.com CONNECTION To connect follow these steps (Figure 2 shows a 4W LV installation with conventional CTs): 1. Ensure that all incoming power sources are OFF. 2. Check that you have the appropriate power supply. 3. Connect the Power Supply inputs using 1.5 mm²/14AWG dedicated wires and breaker. 4. Connect to the external CTs by passing the external CTs wires through the meter CT cores. Observe the arrow that indicates the current direction (Figure 2A). For HACS: connect the red or white wire to the “-” and orange or black wire to the “+“ terminal. 5. In case of a retrofit application where each external CT ends with two wires (Note 2B): 5.1. Pass one wire through the meter CT core. 5.2. Connect the wire to one of the meter “optional CT wire termination” screws. 5.3. Connect the second wire from the external CT to the termination screw. 6. Connect the measured voltage inputs 7. Connect COM1 – RS-485 communication port 8. To connect the optional module: 8.1. Make sure that the power is turned off 8.2. Remove the module cover 8.3. Attach the module and fasten the screws 8.4. Connect the module I/O or communication (see Figure 2C for DI/O wiring) 9. Turn the power up 10. Make sure the diagnostic led is off and solid “123” phase indication is displayed Figure 2 Figure 2C Figure 2A Note 2B The “optional CT wire termination” allows connection of the two wires from the CTs. They have no internal connection and their use is optional. PM135 QuickStart www.satec-global.com OPERATION The PM135 is operated using the front panel which consists of an LCD display, 12 LEDs and five keys as shown below: Diagnostic LED. Off = OK Title (displayed value, units, phase/s) Load bar graph (full load according to CT or in Display Setup) Main display (real time, min, max) Calibration LED (1 pulse/Wh or Varh) Status line (see below) Communication Indication Menu / Escape Select / Enter Scroll up/down TAB - Change screen, submenu etc. Status Line Date, time, operation mode, current tariff (T1T8), phase indicators and power flow direction. Operation modes: NORM and TEST. In the TEST mode the energy registers are not accumulated and the calibration led is 10 times faster (10 pulses per Wh or varh). Phase indication is on when voltage is ok, blinking when below voltage dip set value or marked as “-“ when below the interruption set value. Power flow direction: Normal flow (generation to load) – , reverse flow – or no load – Display Screens Group ( to change) Voltages Currents Powers Demands Min/Max Energy TOU (Import, Export) Harmonics Spectrum Waveform Phasor Digital I/O Diagnostic Alarms Basic Settings Device Info PM135 QuickStart Screens ( to go right, to go left). Underlined = included in Auto Scroll V L-L // V L-N // THD // Ue // Hz // Phase // Demand Amps // THD // TDD // K Factor // Unbalance // Demand Total // L1 // L2 // L3 // Import Demand // Export Demand P Import // P Export // Amps // Volts V L-L // V L-N // Amps // I neutral // P // PF // Hz Import // Export Reg#1 // Reg#2 #3 // #5 // #7 … #39 Navigation V1 // V2 // V3 // I1 // I2 // I3 L1 // L2 // L3 Press Press Press Page1 // Page2 Info // Com www.satec-global.com CONFIGURATION The essential configuration includes: 1. Basic measurement setup 2. Communication setup and testing 3. Resetting the min/max, energy, demands etc. Additional recommended configuration: set points, TOU and data logging Note: It may be easier to configure communication first and use PAS software for setup Basic Measurement Setup In any display screen, press MENU Parameter Wiring Mode (see below) PT Ratio PT Ratio Multiplier CT Primary Current Power Demand Period (E & EH models) Blocks in Sliding Demand (E & EH models) Volt/Ampere Demand Period Nominal Frequency Max. Demand Load Current to enter the Basic Settings Display. Description Network wiring configuration Transformation ratio of the Potential Transformers Additional PT factor for EHV network The Primary Rating Of The Current Transformers Duration in minutes of the power demand period calculations. E = External pulse in DI1. The number of blocks to be averaged for sliding window demands Duration in seconds for voltage and current demand The nominal frequency 0 = CT primary current. Other = max. current Default 4LN3 1 X1 5A 15 1 900 60 Hz 0 Wiring Mode Setup 3-wire 2-element Delta direct connection using 2 CTs 3DIR2 4-wire 3-element Wye direct connection or 3PTs, and 3 CTs 4LN3 or 4LL3* 3-wire 2-element Open Delta connection using 2 PTs, 2 CTs 3OP2 4-wire 2½-element Wye connection using 2 PTs, 3 CTs 3LN3 or 3LL3* 3-wire 2½-element Open Delta connection using 2 PTs, 3 CTs 3OP3 4-wire 3-element Delta direct connection using 3 CTs 4LN3 or 4LL3* 3-wire 2½-element Broken Delta connection using 2 PTs, 3 CTs 3bLN3 or 3bLL3* * LN or LL denotes the default use of L-L or L-N voltages (in thresholds, min/max, demands etc.) Communication setup and testing In any display screen, press MENU 5 times and to setup the built in RS-485 port (COM1). If communication module is present, configure also COM2. Resetting the min/max, energy, demands etc. Press MENU to enter the reset menu. Select the value to be reset, press to select, then press WIN! for 5 seconds until the "Do" notification is changed to "Done". For a Chance to Win a Tablet Register Your Product Here: www.satec-global.com/register Copyright © 2013 SATEC Ltd. PM135 QuickStart www.satec-global.com