1
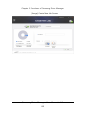
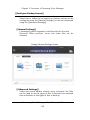
Samsung Drive Manager User Manual Samsung Drive Manager User Manual v2.0 The contents of this manual are subject to change without notice. Companies, names and data used in examples are not actual companies, names or data unless otherwise noted. This manual cannot be reproduced or used in part or in entirety in any way without written approval from Clarus, Inc. All trademarks, copyrights, patent rights, and intellectual property rights pertaining to this manual belong to Clarus, Inc. The purchase of this manual does not constitute transfer of trademarks, copyrights, patent rights or intellectual property rights unless otherwise stipulated in an agreement with Clarus, Inc. Copyright ⓒ 2011 by Clarus, Inc. All right reserved. Product Enquiries Clarus, Inc. Website http://www.clarussoft.com/ Samsung Drive Manager User Manual v2.0 Chapter 1 Starting to Use Samsung Drive Manager Chapter 1 Starting to Use Samsung Drive Manager Samsung Drive Manager User Manual v2.0 1 Chapter 1 Starting to Use Samsung Drive Manager Before Installation Samsung Drive Manager comprises Samsung AutoBackup (a personal backup solution), Samsung SecretZone, (a personal data protection solution), Samsung Secure Manager (a secure external hard disk management solution) and Samsung External Hard Drive management tools. Samsung AutoBackup is a personal backup solution for backing up important files easily. Samsung AutoBackup finds changed files and backs them up in real time, so you don't have to manage backup times. Samsung SecretZone is a personal information protection solution that lets you create and use an encrypted disk on your Samsung External Hard Drive. By using Samsung SecretZone, you can safely and conveniently protect important, confidential and personal data. Samsung Secure Manager is a Samsung secure hard disk management solution that encrypts and saves all data. All data saved on a Samsung secure hard disk is encrypted to safely protect important data. Data storage areas can be locked to prevent loss or theft of data stored on your hard disk. Samsung Drive Manager User Manual v2.0 2 Chapter 1 Starting to Use Samsung Drive Manager Contents CHAPTER 1 STARTING TO USE SAMSUNG DRIVE MANAGER ...................................................................................... 1 Before Installation ............................................................................................................ 2 Contents .............................................................................................................................. 3 Using Samsung Drive Manager Safely .................................................................... 5 Using Your Samsung External Hard Drive Correctly .......................................... 6 System Requirements for Using Samsung Drive Manager ............................. 7 Connecting a Hard Disk ................................................................................................ 8 Program Installation ....................................................................................................... 9 Program Start/Shutdown ........................................................................................... 18 CHAPTER 2 USING SAMSUNG DRIVE MANAGER ............ 20 2-1 SAMSUNG DRIVE MANAGER ............................................................................... 21 Execution .......................................................................................................................... 22 Safe Removal .................................................................................................................. 23 Unlocking the Secure Hard Disk............................................................................. 24 2-2 SAMSUNG AUTOBACKUP ..................................................................................... 25 Backup............................................................................................................................... 26 [[Restore]] ......................................................................................................................... 34 [[Delete]] ........................................................................................................................... 36 2-3 SAMSUNG SECRETZONE ...................................................................................... 38 [[Create New Secure Drive]] ..................................................................................... 39 Connect Secure Drive.................................................................................................. 45 Disconnect Secure Drive ............................................................................................ 49 2-4 SAMSUNG SECURE MANAGER ............................................................................ 52 Using a Secure Hard Disk.......................................................................................... 53 2-5 DIAGNOSTICS ......................................................................................................... 57 Diagnostic Test............................................................................................................... 58 2-6 DISK MANAGEMENT ............................................................................................. 60 What is Disk Management?...................................................................................... 60 Adding a Data Area ..................................................................................................... 60 Deleting a Data Area................................................................................................... 61 Samsung Drive Manager User Manual v2.0 3 Chapter 1 Starting to Use Samsung Drive Manager Formatting a Data Area.............................................................................................. 62 2-7 POWER SETTINGS .................................................................................................. 63 What is drive power settings? ................................................................................. 63 Power Settings ............................................................................................................... 63 2-8 SECURE UNLOCK ................................................................................................... 66 Using Secure Unlock ................................................................................................... 66 2-9 SAMSUNG PORTABLE SECRETZONE .................................................................... 68 What is Samsung Portable SecretZone? ............................................................. 68 CHAPTER 3 FUNCTIONS OF SAMSUNG DRIVE MANAGER ...................................................................................................... 71 3-1 SAMSUNG AUTOBACKUP ..................................................................................... 72 Samsung AutoBackup Screen .................................................................................. 72 Backup Job List .............................................................................................................. 74 Functions at the Top of the Samsung AutoBackup Screen ......................... 79 [[Create New Job]]........................................................................................................ 81 [[Configure Backup Source]]..................................................................................... 83 [[Backed up Data]] ........................................................................................................ 86 Backup, Restoration and Deletion Progress ....................................................... 94 [[Log]] ................................................................................................................................ 96 [[Info]] ................................................................................................................................ 99 Backup Error ................................................................................................................. 100 3-2 SAMSUNG SECRETZONE ....................................................................................102 What is Samsung SecretZone? .............................................................................. 102 Functions of Samsung SecretZone ...................................................................... 103 [[Connect/Disconnect Secure Drive]] .................................................................. 103 Delete Secure Drive ................................................................................................... 104 Set Secure Drive .......................................................................................................... 106 Secure Drive Log......................................................................................................... 111 3-3 SAMSUNG SECURE MANAGER ..........................................................................112 Functions of Samsung Secure Manager ............................................................ 113 TERMINOLOGY ......................................................................... 117 Samsung Drive Manager User Manual v2.0 4 Chapter 1 Starting to Use Samsung Drive Manager Using Samsung Drive Manager Safely It is advised that you understand your system environment and make appropriate preparations before using Samsung Drive Manager. If your system has not been cleaned (with unnecessary files removed, the hard disk checked, and the disk defragmented) for some time, take the following measures before using Samsung Drive Manager. If system issues (an error message displayed during booting, system failure, etc.) are experienced, use an appropriate program to address such issues before using Samsung Drive Manager. If your system is not affected by serious issues, check the hard disk, cleanup unnecessary files, and use the disk defragmenter to optimize your system before using Samsung Drive Manager. Important: Read the manual provided with your Samsung External Hard Drive before use. Important: Invalid operations or unexpected system errors may cause a data loss on a external hard drive. Please backup the important data. Samsung Drive Manager User Manual v2.0 5 Chapter 1 Starting to Use Samsung Drive Manager Using Your Samsung External Hard Drive Correctly Follow the instructions below to maximize the lifespan of your Samsung External Hard Drive. Regular Virus Scanning Perform regular virus scanning to protect your Samsung External Hard Drive. Safe Hardware Removal Always use the Safely Remove Hardware function to remove your external hard disk or USB cable from your computer. Samsung Drive Manager User Manual v2.0 6 Chapter 1 Starting to Use Samsung Drive Manager System Requirements for Using Samsung Drive Manager The following are the minimum system requirements for installing and using Samsung Drive Manager. CPU Memory HDD OS Minimum Requirements Intel Pentium Ⅲ 1GHz or higher 512MB or higher 500MB or higher Windows XP Family SP2 or higher, or Window Vista Family, or Windows 7 Internet Explorer 5.5 or higher (6.0 or higher recommended) Secure Unlock_mac.app : Mac OS X 10.5 or Later. Samsung Drive Manager User Manual v2.0 7 Chapter 1 Starting to Use Samsung Drive Manager Connecting a Hard Disk A USB cable to connect your Samsung External Hard Drive and PC is required. Connect the smaller terminal on the USB cable to your Samsung hard disk and the larger terminal to your PC. Connect a power adaptor to your Samsung external hard disk if required. Samsung Drive Manager User Manual v2.0 8 Chapter 1 Starting to Use Samsung Drive Manager Program Installation When your PC and Samsung External Hard Drive are connected, the Samsung Drive Manager installation screen is automatically displayed. Note: The installation screen is not automatically displayed on Windows Vista or Windows 7; you will need to manually run Samsung Drive Manager.exe on your Samsung External Hard Drive. Note: Depending on your OS settings, the installation screen may not appear automatically. In such a case, manually run Samsung Drive Manager.exe on your Samsung External Hard Drive. Select Run Samsung Drive Manager on the installation screen, and click [OK]. Samsung Drive Manager User Manual v2.0 9 Chapter 1 Starting to Use Samsung Drive Manager [Image] Setup Selection Screen Samsung Drive Manager User Manual v2.0 10 Chapter 1 Starting to Use Samsung Drive Manager Select a language Select a language to perform the installation in. 1. Select the Select Language window 2. Select a language 3. Select [OK] [Image] Language Selection Screen Samsung Drive Manager User Manual v2.0 11 Chapter 1 Starting to Use Samsung Drive Manager Installation The Installation Wizard screen is displayed after a language is selected. On the Samsung Drive Manager installation screen: 4. Click [Next >]. [Image] Samsung Drive Manager Installation Wizard Screen Samsung Drive Manager User Manual v2.0 12 Chapter 1 Starting to Use Samsung Drive Manager User Agreement Samsung Drive Manager user agreement is displayed. If you agree after reading the user agreement: 5. Click [Yes] [Image] User Agreement Display Wizard Screen Note: You must read and agree to the user agreement to proceed with the Samsung Drive Manager installation. Samsung Drive Manager User Manual v2.0 13 Chapter 1 Starting to Use Samsung Drive Manager Installation Folder Selection The installation folder selection screen is displayed for Samsung Drive Manager. The default installation folder is C:\Program Files\Clarus\Samsung Drive Manager. After changing the installation folder or selecting the default folder by clicking [Browse]: 6. Click [Next >]. [Image] Installation Path Selection Wizard Screen Samsung Drive Manager User Manual v2.0 14 Chapter 1 Starting to Use Samsung Drive Manager After selecting a program folder in which to register the Samsung Drive Manager icons on the program folder selection screen: 7. Click [Next >]. [Image] Program Folder Selection Wizard Screen Samsung Drive Manager User Manual v2.0 15 Chapter 1 Starting to Use Samsung Drive Manager [Image] Installation Progress Display Wizard Screen Samsung Drive Manager User Manual v2.0 16 Chapter 1 Starting to Use Samsung Drive Manager Your computer can be restarted after the program is installed. After confirming that the computer shall restart (if desired): 8. Click [Done]. [Image] Installation Completion Display Wizard Screen Note: Restart your computer when prompted to ensure normal execution of Samsung Drive Manager. Samsung Drive Manager is installed. Samsung Drive Manager User Manual v2.0 17 Chapter 1 Starting to Use Samsung Drive Manager Program Start/Shutdown The following are the instructions on how to use Samsung Drive Manager. [Image] Samsung Drive Manager Icon Select Start (from the Windows start menu) -> All Programs > Samsung -> Samsung Drive Manager -> Samsung Drive Manager. Samsung Drive Manager can also be run by clicking the shortcut icon on the desktop. Samsung Drive Manager User Manual v2.0 18 Chapter 1 Starting to Use Samsung Drive Manager [Image] Samsung Drive Manager Execution Screen Samsung Drive Manager User Manual v2.0 19 Chapter 2 Using Samsung Drive Manager Chapter 2 Using Samsung Drive Manager Samsung Drive Manager User Manual v2.0 20 Chapter 2 Using Samsung Drive Manager 2-1 Samsung Drive Manager Samsung Drive Manager comprises Samsung AutoBackup (a personal backup solution), Samsung SecretZone, (a personal data protection solution), Samsung Secure Manager (a secure external hard disk management solution) and Samsung External Hard Drive management tools. Samsung Drive Manager User Manual v2.0 21 Chapter 2 Using Samsung Drive Manager Execution The program can be executed from the Samsung Drive Manager screen. On the Samsung Drive Manager screen: [Image] Samsung Drive Manager Screen 1. Click on the program you want to execute. 2. The clicked program is opened. Samsung Drive Manager User Manual v2.0 22 Chapter 2 Using Samsung Drive Manager Safe Removal The connected Samsung External Hard Drive is safely removed. [[Safely Remove]] button Note: Samsung AutoBackup and Samsung SecretZone are paused during a safe removal. [Image] Safe Removal Screen 1. Select a Samsung External Hard Drive to remove. 2. Click [Safely Remove]. Samsung Drive Manager User Manual v2.0 23 Chapter 2 Using Samsung Drive Manager Unlocking the Secure Hard Disk This option can be selected if a secure external hard disk is selected and locked. Unlock a secure hard disk to view its stored data. [[Unlock]] Secure Disk button Note: Some models do not support this function. Then the unlock button appears in dimmed color. Samsung Drive Manager User Manual v2.0 24 Chapter 2 Using Samsung Drive Manager 2-2 Samsung AutoBackup Samsung AutoBackup is a personal backup solution that can backup individual files on a local drive or network. When backup sources are regularly backed up using Samsung AutoBackup, they are fully backed up only during the initial backup, and real-time backup (monitoring of backup data for auto-backup of changed data only) is performed subsequently for your convenience. Samsung AutoBackup is optimized for diskbased backup for fast restoration. To perform backup using Samsung AutoBackup, a backup job must be created first. Using the created job, you can perform a backup, a restoration or a deletion and manage the backup device. Samsung Drive Manager User Manual v2.0 25 Chapter 2 Using Samsung Drive Manager Backup Click "Create Backup" on the Samsung AutoBackup screen to go to the Create New Job screen. On the Samsung AutoBackup screen: [Image] Initial Samsung AutoBackup Screen 1. Click [+]. Samsung Drive Manager User Manual v2.0 26 Chapter 2 Using Samsung Drive Manager Create New Job Select the hard disk to save backed up files and set the backup options. 2. Select "I: Drive (new volume)" in [Hard Disk to Save the Backed Up Data]. 3. Enter "MyBackup" as the job name. 4. Click [Add]. [Image] Create New Job Screen Note: Only a Samsung External Hard Drive can be selected as a hard disk to save backed up data. Note: The above image and instructions are for reference only. Samsung Drive Manager User Manual v2.0 27 Chapter 2 Using Samsung Drive Manager SafetyKey Setting SafetyKey is an encrypted key for safe protection of backed up data. The key is used for "[[encrypted backup]]" and as a backup device password. 5. 6. 7. 8. Enter the password in the [SafetyKey] field. Re-enter the password in the [Confirm SafetyKey] field. Enter a hint. Click [OK]. [Image] SafetyKey Setting Screen Note: The SafetyKey password must be between 6 to 15 characters. Note: The SafetyKey can be set only once when creating a backup job, so do not forget your password. Samsung Drive Manager User Manual v2.0 28 Chapter 2 Using Samsung Drive Manager When the SafetyKey is set, the screen where you can select backup sources is displayed. [[Configure Backup Source]] Backup sources and backup options can be set. Backup sources can be configured using [[General Settings]] and [[Advanced Settings]]. Frequently used files can be easily selected in [[General Settings]] and a browser can be used to search and select backup sources in [[Advanced Settings]]. 9. Select [General Settings]. 10. Select [Favorites]. 11. Click [Backup]. The Backup screen is displayed automatically when [Backup] is clicked. Samsung Drive Manager User Manual v2.0 29 Chapter 2 Using Samsung Drive Manager [Image] [[Configure Backup Source]] Screen Backup The progress of the backup is displayed for the selected sources. Samsung Drive Manager User Manual v2.0 30 Chapter 2 Using Samsung Drive Manager [Image] Backup Progress Screen Click [Done] when the backup is completed to return to the Samsung AutoBackup screen. Newly created jobs and data can be checked on the Samsung AutoBackup screen. 12. Click [Done]. Samsung Drive Manager User Manual v2.0 31 Chapter 2 Using Samsung Drive Manager [Image] Auto Backup Complete Screen Select [Backed up Data] in a job to view backed up files. Samsung Drive Manager User Manual v2.0 32 Chapter 2 Using Samsung Drive Manager [Image] Backed up Data Screen Samsung Drive Manager User Manual v2.0 33 Chapter 2 Using Samsung Drive Manager [[Restore]] [[Backed up]] folders and files can be selected on the [[Backed up Data]] screen to be restored or deleted. 1. Select the [Favorites] folder. 2. Click [OK]. Your SafetyKey must be entered for security reasons before proceeding with the restoration. The Restore screen is automatically displayed. [Image] SafetyKey Input Screen [[Restore]] The restoration progress is displayed. Samsung Drive Manager User Manual v2.0 34 Chapter 2 Using Samsung Drive Manager [Image] Restore Screen Samsung Drive Manager User Manual v2.0 35 Chapter 2 Using Samsung Drive Manager [[Delete]] [[Backed up data]] that is no longer required can be deleted. Select [Delete] on the Backed up Data screen, and then select a backup folder or file to delete. 1. Select the [Favorites] folder. 2. Click [OK]. Your SafetyKey must be entered for security reasons before proceeding with the deletion. [Image] SafetyKey Confirmation Screen [[Delete]] The deletion progress is displayed. Samsung Drive Manager User Manual v2.0 36 Chapter 2 Using Samsung Drive Manager [Image] Delete Screen Samsung Drive Manager User Manual v2.0 37 Chapter 2 Using Samsung Drive Manager 2-3 Samsung SecretZone Samsung SecretZone is a personal information protection solution that lets you create and use an encrypted disk on your Samsung External Hard Drive. By using Samsung SecretZone, you can safely and conveniently protect important, confidential and personal data. A Secure Drive must be created before using Samsung SecretZone. A created Secure Drive can be used as your personal storage space. Note: A Secure Drive can only be created on a Samsung External Hard Drive. Samsung Drive Manager User Manual v2.0 38 Chapter 2 Using Samsung Drive Manager [[Create New Secure Drive]] A Secure Drive must be created before using Samsung SecretZone. Click [Secure Drive] on the initial Samsung SecretZone screen to open the [[Create New Secure Drive]] screen. On the Samsung SecretZone screen: [Image] Initial Samsung SecretZone Screen 1. Click [+]. 2. The [[Create New Secure Drive]] screen is displayed. After selecting a location to save the Secure Drive to, set the name and size of the Secure Drive and a drive to connect. The size of a Secure Drive can be set according to volume type. Samsung Drive Manager User Manual v2.0 39 Chapter 2 Using Samsung Drive Manager Note: If the file system of a selected external hard disk is FAT, only a normal Secure Drive can be created. [Image] [[Create New Secure Drive]] Screen 3. 4. 5. 6. 7. Select a [Secure Drive Path]. Enter "My Data" as the [Secure Drive Name]. Set [Secure Drive Size] to 10GB. Set [Drive Letter to Connect] as "Z". Click [Create]. A password setting screen for the Secure Drive is displayed when the above steps are completed. [[Normal Secure Drive]] (default settings) Samsung Drive Manager User Manual v2.0 40 Chapter 2 Using Samsung Drive Manager This option is used to create a Secure Drive of a specified size. The entire space on a Secure Drive can be used after being created. [[Dynamic Secure Drive]] This option is used to automatically expand the size of your Secure Drive according to the amount of space being used after setting a maximum Secure Drive size. A disk can be used efficiently by expanding the size according to the amount of space being used. Note: When creating a [[normal Secure Drive]] on a FAT or FAT32-formatted [[Samsung External Hard Drive]], the size of the [[normal Secure Drive]] created initially is 10GB which is then expanded at the set size. The created 10GB Secure Drive can be used immediately. Note: A [[dynamic Secure Drive]] requires at least 20GB to be used. Note: As a [[dynamic Secure Drive]] is expanded according to the amount of space being used, the size of the created Secure Drive connected is displayed as 20GB. Note: The volume type of the [[secure hard drive]] cannot be changed after being created. Samsung Drive Manager User Manual v2.0 41 Chapter 2 Using Samsung Drive Manager Note: The above image and instructions are for reference only. [Image] Secure Drive Password Setting Screen 8. 9. 10. 11. Enter the [Password] field. Enter the [Confirm Password] field. Enter a [Hint]. Click [OK]. After the Secure Drive is created following the above steps, the initial screen (Secure Drive list) is displayed again. Samsung Drive Manager User Manual v2.0 42 Chapter 2 Using Samsung Drive Manager [Image] Secure Drive Created Screen Note: The secure hard drive password must be between 6 to 15 characters. Note: Do not lose your Secure Drive password as you cannot access your Secure Drive without it. Samsung Drive Manager User Manual v2.0 43 Chapter 2 Using Samsung Drive Manager [Image] The Explorer Screen after a Secure Drive is Created Samsung Drive Manager User Manual v2.0 44 Chapter 2 Using Samsung Drive Manager Connect Secure Drive Connect Secure Drive lets you connect a created Secure Drive to Windows Explorer for use. On the Samsung SecretZone screen: [Image] Selecting a Secure Drive to Connect 1. Select a Secure Drive to connect from the list. 2. Click [Connect]. After checking the name of the selected Secure Drive, set the Secure Drive password, the connecting drive and the Secure Drive options. Samsung Drive Manager User Manual v2.0 45 Chapter 2 Using Samsung Drive Manager [Image] Connect Secure Drive Screen 3. Enter the [Password]. 4. Select the [Drive Letter to Connect]. 5. Click [Connect]. Note: Select Secure Drive [[Hint]] to view a hint for setting the Secure Drive password. When connected, information on the connected Secure Drive can be viewed on the Samsung SecretZone Secure Drive list screen. Samsung Drive Manager User Manual v2.0 46 Chapter 2 Using Samsung Drive Manager [Image] Secure Drive Connected Screen [Image] Explorer Screen after Connection Samsung Drive Manager User Manual v2.0 47 Chapter 2 Using Samsung Drive Manager Note: When "[[Auto Connection]]" is enabled, the Secure Drive may connect immediately after your Samsung External Hard Drive is reconnected. In such a case, wait a moment after connecting your Samsung External Hard Drive for the Secure Drive to connect. Samsung Drive Manager User Manual v2.0 48 Chapter 2 Using Samsung Drive Manager Disconnect Secure Drive Disconnect Secure Drive disconnects the Secure Drive connected to Windows Explorer. Once your Secure Drive is disconnected, it cannot be accessed from Windows Explorer. On the Samsung SecretZone screen: [Image] Secure Drive to Disconnect Selection Screen 1. Select a Secure Drive to disconnect from the list. 2. Click [Disconnect]. Samsung Drive Manager User Manual v2.0 49 Chapter 2 Using Samsung Drive Manager [Image] Secure Drive Disconnected Screen Disconnecting your Secure Drive can take some time if the drive is selected through Windows Explorer or if another application is accessing the drive. Note: When disconnecting your Samsung External Hard Drive from your computer, always use "Safely Remove Hardware" to prevent loss of saved data and damage to the Secure Drive. Note: An error may occur if the Secure Drive is disconnected immediately after copying and saving a large file or multiple files. In such a case, wait approximately 1 minute before disconnecting the Secure Samsung Drive Manager User Manual v2.0 50 Chapter 2 Using Samsung Drive Manager Drive. Samsung Drive Manager User Manual v2.0 51 Chapter 2 Using Samsung Drive Manager 2-4 Samsung Secure Manager Samsung Secure Manager is a Samsung secure hard disk management solution that encrypts and saves all data. All data saved on a Samsung secure hard disk is encrypted to safely protect important data. Data storage areas can be locked to prevent loss or theft of data stored on your hard disk. Note: Samsung Secure Manager cannot be used if your hard disk does not support the security function. Samsung Drive Manager User Manual v2.0 52 Chapter 2 Using Samsung Drive Manager Using a Secure Hard Disk A secure hard disk password must be set before using Samsung Secure Manager. The password ensures your hard disk can be used and managed more safely. Password Setting On the Samsung Secure Manager screen: 1. Select [Set Password] from the menu. [Image] Samsung Secure Manager Screen On the Set Password screen: 2. Complete the [New Password] and [Confirm Password] fields. 3. Enter a [Hint]. 4. Click [OK]. Samsung Drive Manager User Manual v2.0 53 Chapter 2 Using Samsung Drive Manager [Image] Set Password Screen The secure hard disk password is set. The secure hard disk is locked when reconnected. Note: The secure hard disk password must be between 6 to 15 characters. Note: Do not forget your secure hard disk password. Unlocking the Secure Hard Disk When a password-locked secure hard disk is connected, the stored data is not displayed. Enter the correct password to Samsung Drive Manager User Manual v2.0 54 Chapter 2 Using Samsung Drive Manager unlock the secure hard disk and view the hidden data. On the Samsung Secure Manager screen: 1. Click [Unlock] on the menu. [Image] Samsung Secure Manager Screen On the Unlock Secure Disk screen: 2. Enter the password. 3. Click [OK]. When the secure hard disk is unlocked, its data area is displayed and saved data can be viewed. Samsung Drive Manager User Manual v2.0 55 Chapter 2 Using Samsung Drive Manager [Image] Unlock Secure Disk Screen If Samsung Drive Manager is not installed, execute Secure Unlock_win.exe (saved on the CD area of the secure hard disk) to unlock the secure hard disk. Execute Secure Unlock_mac.app when connecting to Mac OS after locking your External Hard Drive. Refer to 2-8 Secure Unlock for further details on Secure Unlock. Samsung Drive Manager User Manual v2.0 56 Chapter 2 Using Samsung Drive Manager 2-5 Diagnostics Your hard disk can be diagnosed to identify any issues. Note: Make sure that your Samsung External Hard Drive does not disconnect from your computer during a diagnosis. The hard disk may be damaged if disconnected while a diagnosis is in progress. Samsung Drive Manager User Manual v2.0 57 Chapter 2 Using Samsung Drive Manager Diagnostic Test On the Samsung Drive Manager screen: 1. Click [Diagnostics]. [Image] Samsung Drive Manager Screen On the Diagnostics screen: 2. Select an external hard disk to diagnose. 3. Select [[Quick Drive Test]] or [[Complete Drive Test]]. 4. Click [Start]. Note: A Complete Drive Test may take some time to finish. Check the expected test time before starting a drive test. Samsung Drive Manager User Manual v2.0 58 Chapter 2 Using Samsung Drive Manager [Image] Diagnostics Screen Samsung Drive Manager User Manual v2.0 59 Chapter 2 Using Samsung Drive Manager 2-6 Disk Management What is Disk Management? Disk Management Tools let you create, delete or format a data area (partition) on your Samsung External Hard Drive. Adding a Data Area This function enables unassigned space on a Samsung External Hard Drive to be used as data storage space. A data area can be added as shown below. [Image] Add a Data Area Screen 1. Select an unassigned area. 2. Enter the size of the data area to be created in Volume Size. i. Move the slide bar to the size of the data area you want Samsung Drive Manager User Manual v2.0 60 Chapter 2 Using Samsung Drive Manager to create. ii. Enter the size of the data area to create in Volume Size. 3. Select a file system and enter a volume name. 4. Click [Add]. Deleting a Data Area This function is used to delete a data area that is no longer required. A data area can be deleted as shown below. [Image] Delete a Data Area Screen 1. Select a data area to delete. 2. Click [Delete]. Note: When a data area is deleted, all data saved in the data area is deleted and Samsung Drive Manager User Manual v2.0 61 Chapter 2 Using Samsung Drive Manager cannot be restored. Formatting a Data Area This function is used to delete all data saved in a selected data area. A data area can be formatted as shown below: 1. Select a data area to format. 2. Select a file system and enter a volume name. 3. Click [Format]. Note: When a data area is formatted, all data saved in the data area is deleted and cannot be restored. Samsung Drive Manager User Manual v2.0 62 Chapter 2 Using Samsung Drive Manager 2-7 Power Settings What is drive power settings? Energy consumption can be reduced through power settings for the hard disk. The external hard disk is automatically put on stand-by when not used for the set period of time. Note: This option may not be applied if OS power settings are applied. Note: This function is not compatible with external hard disks that do not support power settings. Power Settings On the Samsung Drive Manager screen: 1. Click [Power Settings]. Samsung Drive Manager User Manual v2.0 63 Chapter 2 Using Samsung Drive Manager [Image] Samsung Drive Manager Screen On the Power Settings screen: 2. Select an external hard disk to set. 3. Select Use Power Settings. 4. If [Power On] is selected: Set the off time in [Power off after specified period of time]. 5. Click [OK]. Information: The factory settings are [Use Power Settings Power On] and [Power off after specified period of time - 5 minutes]. Samsung Drive Manager User Manual v2.0 64 Chapter 2 Using Samsung Drive Manager [Image] Power Settings Screen Samsung Drive Manager User Manual v2.0 65 Chapter 2 Using Samsung Drive Manager 2-8 Secure Unlock Secure Unlock software can be used to unlock a Samsung secure hard disk connected to a computer that does not have Samsung Drive Manager installed. Your secure hard disk can be unlocked easily using Secure Unlock without any additional installations. Note: Secure Unlock cannot be used if your hard disk does not support the security function. Using Secure Unlock Secure Unlock can be executed using the following two methods. 1. Select "Run Samsung Drive Manager" on the window displayed when the secure external hard disk is connected to the computer. 2. Execute Secure Unlock_win.exe from the secure CD drive. Samsung Drive Manager User Manual v2.0 66 Chapter 2 Using Samsung Drive Manager [Image] Samsung Secure Manager Unlock Screen On the Samsung Secure Manager screen: 3. Enter the password. 4. Click [OK]. The secure hard disk is unlocked and its data area is displayed. On a Mac OS, enter the password after executing Secure Unlock_mac.app. Note: Secure Unlock is automatically closed if executed when the secure hard disk is unlocked. Samsung Drive Manager User Manual v2.0 67 Chapter 2 Using Samsung Drive Manager 2-9 Samsung Portable SecretZone What is Samsung Portable SecretZone? Samsung Portable SecretZone is a tool that allows you to connect and use a Secure Drive (used by Samsung SecretZone) on a PC that does not have Samsung Drive Manager installed. Your Secure Drive can be conveniently connected using Samsung Portable SecretZone without any additional installation. Connection On the Samsung Portable SecretZone screen: 1. Select a Secure Drive to connect. 2. Click [Connect]. [Image] Enter Secure Drive Password Screen 3. Enter the [Password]. 4. Click [OK]. Samsung Drive Manager User Manual v2.0 68 Chapter 2 Using Samsung Drive Manager [Image] Samsung Portable SecretZone Connection Screen Disconnection On the Samsung Portable SecretZone screen: 1. Select a Secure Drive to disconnect. 2. Click [Disconnect]. [Image] Samsung Portable SecretZone Disconnection Screen Samsung Drive Manager User Manual v2.0 69 Chapter 2 Using Samsung Drive Manager Select [Disconnect All] to disconnect all connected Secure Drives. Note: All connected Secure Drives are disconnected when Samsung Portable SecretZone is closed. Samsung Drive Manager User Manual v2.0 70 Chapter 3 Functions of Samsung Drive Manager Chapter 3 Functions of Samsung Drive Manager Samsung Drive Manager User Manual v2.0 71 Chapter 3 Functions of Samsung Drive Manager 3-1 Samsung AutoBackup Samsung AutoBackup Screen The Samsung AutoBackup screen can be used to create, edit and delete backup jobs. The following screen is displayed when a backup job is created. [Image] Samsung AutoBackup Screen Backup Job The Create Backup screen is displayed and backup jobs can be created. Sort Samsung Drive Manager User Manual v2.0 72 Chapter 3 Functions of Samsung Drive Manager This function is used to sort created jobs for easy viewing. Jobs can be sorted by job name, file size, and errors in the result of a job. Samsung Drive Manager User Manual v2.0 73 Chapter 3 Functions of Samsung Drive Manager Backup Job List The Backup Job List contains information such as created backup jobs, backup job status, backup size and settings. Backup Job Status Success This message is displayed if the most recent backup job was successful. [Image] Samsung AutoBackup Job Successful Screen Error This message is displayed if there was an error in the most recent backup job. An error message is displayed along with an error icon. Click on the error message to view information on how to fix the error. Samsung Drive Manager User Manual v2.0 74 Chapter 3 Functions of Samsung Drive Manager [Image] Samsung AutoBackup Job Error Screen Read Only This icon is displayed for backup jobs that were created on other computers. Read-only jobs cannot be backed up. They can only be restored or deleted. Samsung Drive Manager User Manual v2.0 75 Chapter 3 Functions of Samsung Drive Manager [Image] Samsung AutoBackup Read Only Screen Note: When the OS or Samsung Drive Manager is re-installed on the same computer, the existing backup jobs become read-only jobs. [[Menu]] [[Backup Source]] Backup sources can be selected and backup can be performed. [[Backed up Data]] Backed up data can be viewed, restored and deleted. [[Log]] A log of backup, restoration and deletion events can be viewed. [[Info]] Samsung Drive Manager User Manual v2.0 76 Chapter 3 Functions of Samsung Drive Manager The number, size and type of files backed up on a backup device can be viewed. [Image] Menu [[Options]] [[Encrypted Backup]] If Encrypted Backup is set, all files backed up are encrypted and saved. Set this option to encrypt backed up data to ensure additional storage protection. [[Historical Backup]] This backup option maintains the number of backup files set by the user. It does not allow the deletion of existing backup files when a backup is performed again after backup sources have changed. Set this option to save source files at various times. [Image] Options Other Functions Click on the arrow at the top right of the job item to display Samsung Drive Manager User Manual v2.0 77 Chapter 3 Functions of Samsung Drive Manager the button to edit and delete jobs. Edit Options for a selected job are edited. Options set when a backup job was created can be edited. Delete A selected job is deleted. All backed up files and data are deleted. [Image] Other Functions Note: Backed up files and data cannot be restored after being deleted. Samsung Drive Manager User Manual v2.0 78 Chapter 3 Functions of Samsung Drive Manager Functions at the Top of the Samsung AutoBackup Screen Previous Page The previous page is displayed. If the current screen is the Samsung AutoBackup screen, the Samsung Drive Manager screen is displayed. Quick Switch This option is only displayed when backup, restoration or deletion is in progress. If selected, the progress of backup, restoration or deletion is displayed. Real-Time Backup Real-Time Backup can be enabled or disabled. If enabled, realtime backup is performed when files or folders are added to (or edited in) backup sources. All backup processes in progress are stopped if Real-Time Backup is disabled. [Image] Samsung AutoBackup Screen Samsung Drive Manager User Manual v2.0 79 Chapter 3 Functions of Samsung Drive Manager Note: If Real-Time Backup is disabled, all backup processes in progress are stopped and real-time backup will no longer be performed. Samsung Drive Manager User Manual v2.0 80 Chapter 3 Functions of Samsung Drive Manager [[Create New Job]] New backup jobs can be created and backup job options can be set. [[Hard Disk to Save the Backed Up Data]] The hard disk where backup files and data will be saved is set. A backup device can be created on a Samsung External Hard Drive only. Hard Disk Size Information The total space, used space and free space of the selected hard disk are displayed as a diagram. [[Job Name]] Job names can be set to identify different backup jobs. [[Options]] Encrypted Backup or Historical Backup can be set. Note: [[Encrypted Backup]] is a function that encrypts and backs up data. It can be used after restoring data to be backed up using Samsung AutoBackup. Data cannot be used through the Explorer without restoring first. Data cannot be restored if contents are moved or edited. [[Encrypted Backup]] Encrypted Backup can be enabled or disabled. [[Historical Backup]] Historical Backup can be enabled or disabled. Samsung Drive Manager User Manual v2.0 81 Chapter 3 Functions of Samsung Drive Manager [Image] Create New Job Screen Samsung Drive Manager User Manual v2.0 82 Chapter 3 Functions of Samsung Drive Manager [[Configure Backup Source]] Select files or folders to be backed up. Backup sources can be configured using the [[General Settings]] or can be customized using the [[Advanced Settings]]. [[General Settings]] Conveniently select frequently used files with this function. Microsoft Office products, music and video files can be selected. [Image] General Settings Screen [[Advanced Settings]] Select and search backup sources using a browser. Set Filter can be used to set the types of files to exclude from selected files and folders or the types of files to back up. Samsung Drive Manager User Manual v2.0 83 Chapter 3 Functions of Samsung Drive Manager [Image] Advanced Settings Screen [[Set Filter]] Types of files to back up or exclude from backup can be selected on the Set Filter screen. By default, all types of files will be backed up. 1. Set files to back up and to exclude from backup. 2. Click [OK] after settings are made. Samsung Drive Manager User Manual v2.0 84 Chapter 3 Functions of Samsung Drive Manager [Image] [[Set Filter]] Screen File filter can be set by File Group or Extension. In File Group, preset or customized file groups can be used. Click [Backup] to start backup of selected backup sources. Samsung Drive Manager User Manual v2.0 85 Chapter 3 Functions of Samsung Drive Manager [[Backed up Data]] [[Backed up data]] can be viewed. [[Backed up data]] can be restored, deleted or searched. [[Restore]] Backed up files or folders are restored. Set the files or folders to restore and Restore Options to start restoration. Click [OK] to start restoration after entering SafetyKey. [[Restoration Path]] Settings The original path of backup files or a new path can be set. By default, the original path of backup files will be used as the [[restoration Path]]. [Image] [[Restoration Path]] Selection Screen Samsung Drive Manager User Manual v2.0 86 Chapter 3 Functions of Samsung Drive Manager [[Restoration Point]] Settings This function is used to restore [[backed up data]] to a specified time when Historical Backup is used. Only selected files or folders corresponding to the set time can be restored. Most recently backed up file characteristics or dates can be set. By default, the most recently backed up file properties will be applied. [Image] [[Configure Restoration Options]] Screen Samsung Drive Manager User Manual v2.0 87 Chapter 3 Functions of Samsung Drive Manager Set Filter Of selected files or folders, file types to restore or exclude from restoration can be set. By default, all file types will be applied. [Image] [[Set Filter]] Screen Restore 1. 2. 3. 4. 5. Click [Restore]. From [[backed up data]], select files or folders to restore. Configure Restoration Options Click [OK]. Enter SafetyKey. Samsung Drive Manager User Manual v2.0 88 Chapter 3 Functions of Samsung Drive Manager [Image] SafetyKey Input Screen 6. Click [OK]. Restoring [[backed up data]] will be started according to the configured settings. [[Delete]] This function is used to delete backed up data that is no longer required. Click [Delete] to start deletion. Select files or folders to delete and configure Delete Options to start deletion. Click [OK] to delete the selected backed up data after entering SafetyKey. Set Filter Of selected files or folders, file types to delete or exclude from deletion can be set. By default, all file types will be applied. [[Delete]] Samsung Drive Manager User Manual v2.0 89 Chapter 3 Functions of Samsung Drive Manager 1. Click [Delete]. 2. Select the files or folders to delete from the backed up data. 3. Click [OK]. 4. Enter SafetyKey. [Image] SafetyKey Input Screen 5. Click [OK]. Deleting [[backed up data]] will be started according to the configured settings. Note: Deleted [[backed up data]] cannot be restored. Samsung Drive Manager User Manual v2.0 90 Chapter 3 Functions of Samsung Drive Manager Search This function is used to search [[backed up data]]. 1. Enter the file name to search in the [Search] field. 2. Click [Search]. [Image] Backed up Data Screen Searched files can be restored or deleted. Samsung Drive Manager User Manual v2.0 91 Chapter 3 Functions of Samsung Drive Manager Backup List Icon The Backup List shows the location of backed up files and the status of backed up folders and files as icons. Icon descriptions are as follows. Backed up file exists but without a backup source Backed up file is identical to backup source Backed up file is different from backup source Backed up folder is identical to backup source Backed up folder exists but without a backup source File was encrypted and backed up and no backup source exists File was encrypted and backed up and is identical to backup source File was encrypted and backed up and is different from backup source File was historically backed up and no backup source exists File was historically backed up and is identical to backup source File was historically backed up and is different from backup source File was encrypted and historically backed up and no backup source exists Samsung Drive Manager User Manual v2.0 92 Chapter 3 Functions of Samsung Drive Manager File was encrypted and historically backed up and is identical to backup source File was encrypted and historically backed up and is different from backup source Samsung Drive Manager User Manual v2.0 93 Chapter 3 Functions of Samsung Drive Manager Backup, Restoration and Deletion Progress This screen shows the progress of backup, restoration or deletion. The initial default screen provides summarized data. Click on the button at the bottom to view further details. Default Screen 1. Job progress diagram 2. Progress bar 3. Size of file being processed The above are shown on the default screen. [Image] Backup Progress Screen Further Details File names, number of files and total number of files are displayed. Samsung Drive Manager User Manual v2.0 94 Chapter 3 Functions of Samsung Drive Manager [Image] Backup Job Details Screen Samsung Drive Manager User Manual v2.0 95 Chapter 3 Functions of Samsung Drive Manager [[Log]] Outcome of backup, restoration or deletion is displayed. Log List A log list is displayed on the left side of the screen. Result Success/Error icon is displayed to notify job result. Job Type Backup/Restore/Delete icon is displayed. Job Completion Date/Time The date and time of job completion are displayed. Job successful Job error encountered Manual backup Real-time backup Restore Delete Samsung Drive Manager User Manual v2.0 96 Chapter 3 Functions of Samsung Drive Manager Job Information Detailed job information is displayed. File Information Total number of job files and number of successful/failed job files are displayed. Time Information Date and time of job start/completion are displayed. Size Information Total size of a job is displayed. Settings Information Settings applied to a completed job are displayed. [Image] Log Screen Detailed Log Click on the button at the bottom to view a detailed log. Job success/failure, error information, file location and restored location are displayed. Samsung Drive Manager User Manual v2.0 97 Chapter 3 Functions of Samsung Drive Manager [Image] Detailed Log Screen Samsung Drive Manager User Manual v2.0 98 Chapter 3 Functions of Samsung Drive Manager [[Info]] Summarized backup information on a job and recent backup job results are displayed. [[Job Name]] The name of a currently selected job is displayed. [[Backed up Files]] Total number and size of backed up files for the current job are displayed. [[Backup Status]] Recent backup results are displayed. [[Backup Composition]] Size and proportion of frequently used backed up files will be displayed by type using a chart. [Image] [[Backup Information]] Screen Samsung Drive Manager User Manual v2.0 99 Chapter 3 Functions of Samsung Drive Manager Backup Error If recent backup results include an error, click [Error Correction] displayed within a job for correction. [[Job Name]] The name of a currently selected job is displayed. [[Backup Status]] The status and date of a backup error can be viewed. Error List Number of files and details of errors are displayed by error type. [[Details]] Detailed information is displayed for frequent errors to provide an effective solution. [[Error Correction]] Select "[[Error Correction]]" to correct errors that can be corrected by Samsung AutoBackup. Errors cannot be corrected if your system environment is prone to errors. Information: Refer to error details to properly correct an error. Samsung Drive Manager User Manual v2.0 100 Chapter 3 Functions of Samsung Drive Manager [Image] Backup Error Screen Samsung Drive Manager User Manual v2.0 101 Chapter 3 Functions of Samsung Drive Manager 3-2 Samsung SecretZone What is Samsung SecretZone? Samsung SecretZone is a personal information protection solution that lets you create and use an encrypted disk on your Samsung External Hard Drive. By using Samsung SecretZone, you can safely and conveniently protect important, confidential and personal data. [Image] Samsung SecretZone Screen Samsung Drive Manager User Manual v2.0 102 Chapter 3 Functions of Samsung Drive Manager Functions of Samsung SecretZone The following functions are used to manage your [[Secure Drive]]. [[Connect/Disconnect Secure Drive]] [[Connect/Disconnect Secure Drive]] is used to connect or disconnect a Secure Drive and Windows Explorer. Note: This function cannot be used unless a Secure Drive is created. Samsung Drive Manager User Manual v2.0 103 Chapter 3 Functions of Samsung Drive Manager Delete Secure Drive Delete Secure Drive is used to delete a Secure Drive from the Samsung SecretZone list and remove the Secure Drive permanently. Check the data stored on a Secure Drive before deleting the Secure Drive. On the Samsung SecretZone screen: [Image] Delete Secure Drive Screen 1. After selecting a drive from the list, click on the button at the top right of the screen. 2. Click [Delete]. Samsung Drive Manager User Manual v2.0 104 Chapter 3 Functions of Samsung Drive Manager [Image] Secure Drive Deletion Confirmation Message 3. After checking the data to be deleted, 4. Click [OK]. Note: All data stored on a deleted Secure Drive is permanently deleted and cannot be restored. Confirm the contents you want to delete on a Secure Drive before deleting the drive. Samsung Drive Manager User Manual v2.0 105 Chapter 3 Functions of Samsung Drive Manager Set Secure Drive If there is insufficient free space on a Secure Drive that is in use, the size of the Secure Drive can be expanded and the options and password can be changed. Data stored on a Secure Drive will not be altered even if the drive is expanded or the options or password is changed. On the Samsung SecretZone screen: [Image] Secure Drive Selection Screen 1. Select a Secure Drive to change the settings for. 2. Click [Settings]. or 3. Click on the button at the top right and then click [Set Options]. 4. The Set Secure Drive screen is displayed. After checking the location and name of the selected Secure Samsung Drive Manager User Manual v2.0 106 Chapter 3 Functions of Samsung Drive Manager Drive, set the options and Secure Drive size to change. [Image] Set Secure Drive Screen To change the password: 5. Click [Password]. [[Auto Connection]] Auto Connection connects your Secure Drive automatically without password confirmation when a Samsung External Hard Drive is connected. [[Auto-Disconnection Timeout]] Auto-Disconnection Timeout automatically disconnects your Secure Drive if it is not used for the set time. Samsung Drive Manager User Manual v2.0 107 Chapter 3 Functions of Samsung Drive Manager [Image] Secure Drive Password Setting Screen 6. 7. 8. 9. 10. Enter the [Old Password] field. Enter the [Password] field. Enter the [Confirm Password] field. Enter a [Hint]. Click [OK]. Note: The password must be between 6 to 15 characters. Note: You cannot use the Secure Drive functions if you forget your password. Note: Secure Drive settings can be made when the Secure Drive is connected. Changing the Secure Drive size or options: Samsung Drive Manager User Manual v2.0 108 Chapter 3 Functions of Samsung Drive Manager 11. Set the [Secure Drive Size] to expand to. 12. Change [Secure Drive Settings]. 13. Click [OK]. [Image] Secure Drive Setting Progress Screen The progress of saving settings is displayed when [OK] is clicked. When setting is completed, the changed Secure Drive settings can be viewed on the Samsung SecretZone Secure Drive list screen. Samsung Drive Manager User Manual v2.0 109 Chapter 3 Functions of Samsung Drive Manager [Image] Changed Secure Drive Screen Note: Do not disconnect the Samsung External Hard Drive from the computer when settings are being saved. The Secure Drive can become damaged if the hard disk is disconnected while settings are being saved. Samsung Drive Manager User Manual v2.0 110 Chapter 3 Functions of Samsung Drive Manager Secure Drive Log A Secure Drive log shows Secure Drive creation, connection, disconnection and settings. [Image] Secure Drive Log Screen Samsung Drive Manager User Manual v2.0 111 Chapter 3 Functions of Samsung Drive Manager 3-3 Samsung Secure Manager What is Samsung Secure Manager? Samsung Secure Manager is a management tool used to configure and check secure hard disk functions. Samsung Secure Manager can be used to [[lock/unlock]] data areas and conveniently change various secure hard disk settings including Auto Unloc. [Image] Samsung Secure Manager Screen Samsung Drive Manager User Manual v2.0 112 Chapter 3 Functions of Samsung Drive Manager Functions of Samsung Secure Manager The following functions are used for secure hard disk management. [[Lock/Unlock]] This function is used to lock and unlock your secure hard disk. The data area of a locked secure hard disk is not displayed and saved data cannot be used. The data area of an unlocked secure hard disk is displayed and saved data can be used. Note: [[Lock/Unlock]] cannot be used unless the password is set. [[Settings]] Click this button to view and set the functions required to conveniently use your secure hard disk. Samsung Drive Manager User Manual v2.0 113 Chapter 3 Functions of Samsung Drive Manager [Image] Settings Screen [[Set Auto Unlock]] Auto Unlock automatically unlocks your secure hard disk when connected without password confirmation. Note: [[Auto Unlock]] is only applied to computers it is set on. Note: The set functions are applied when the secure hard disk is reconnected. Samsung Drive Manager User Manual v2.0 114 Chapter 3 Functions of Samsung Drive Manager [[Factory Reset]] This function deletes all data stored on your secure hard disk and restores the default security settings. Note: All stored data is deleted and cannot be restored after factory reset. [Image] [[Factory Reset]] Screen Set/Change Password The secure hard disk password is set or changed. [[Do Not Use Password]] [Do Not Use Password] removes the set password. Note: The password must be between 6 to 15 characters. Samsung Drive Manager User Manual v2.0 115 Chapter 3 Functions of Samsung Drive Manager Note: Secure hard disk functions cannot be used or configured if no password is set. [Image] Change Password Screen Samsung Drive Manager User Manual v2.0 116 Terminology Terminology The following is the terminology you should become familiar with to use Samsung Drive Manager. What is backup? Backup is the act of safely storing data on a data storage device such as a hard disk. What is [[encrypted backup]]? [[Encrypted backup]] is the act of encrypting and safely storing data on a data storage device such as a hard disk. What is a [[historical backup]]? When backup sources change multiple times as backups are performed regularly, [[historical backup]] backs up changed files along with the information about the changed files among the backup sources each time the backup is performed. Source and Destination The file or folder to back up is referred to as the source. The device to which a source is backed up and saved is referred to as the destination. Full Backup Full backup involves backing up all folders and files included in a selected backup source. [[Real-Time Backup]] Real-time backup involves real-time monitoring of backup sources and backup of any new or changed files. Backup Log A backup log contains detailed information (backup time, completion time, number of backed up files, etc.) on backup jobs. Samsung Drive Manager User Manual v2.0 117 Terminology [[Auto-Connection]] If [[Auto-Connection]] is enabled, your Secure Drive is automatically connected when your Samsung External Hard Drive is connected. [[Auto-Disconnection Timeout]] This function automatically disconnects the connected Secure Drive if not accessed for the set time. [[Normal Secure Drive]] This option is used to create a Secure Drive of the set size. The entire space on a Secure Drive can be used after being created. [[Dynamic Secure Drive]] This option is used to automatically expand the size of your Secure Drive according to the amount of space being used after setting a maximum Secure Drive size. A disk can be used efficiently by expanding the size according to the amount of space being used. Data area Data area is the space in which data is stored on a Samsung secure hard disk. A secure hard disk can be locked to hide data or unlocked to display data. [[Lock]] When your Samsung secure hard disk is locked, the data area is hidden. The Samsung secure hard disk and the data saved on the disk cannot be accessed. [[Unlock]] When your Samsung secure hard disk is unlocked, the data area is unlocked and displayed. The Samsung secure hard disk can be accessed and the data saved on the disk can be viewed. Samsung Drive Manager User Manual v2.0 118