1
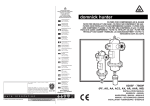
Sentinel
™
Portable Purification System
User’s Manual
Sentinel | User’s Manual
™
Preface
This Manual informs the installer and operator about the safe installation, operation and everyday maintenance
of the Sentinel Oil Purification System (further to be abbreviated as Sentinel).
Always keep this Manual near the Sentinel.
Read this Manual carefully before putting the Sentinel into use or before carrying out any operation. Only then
can optimal safety be obtained.
1
Sentinel | User’s Manual
™
Contents
Preface...................................................................... 1
4 Operation
Contents................................................................... 2
4.2 Preparing for Use............................................. 10
1 Introduction
4.3Starting ............................................................ 11
1.1Warning.............................................................. 3
1.2Manufacturer...................................................... 3
4.3.2 Starting.................................................... 11
4.1Safety .............................................................. 10
4.3.1 Initial Start Up.......................................... 11
1.2.1 Introduction Parker Hannifin...................... 3
4.4 Screen Option.................................................. 12
1.2.2 Partnership................................................ 3
4.5 Set-Up Screen.................................................. 12
1.3 Related Documents............................................ 3
4.6 Adjusting Set Points......................................... 13
1.4Machine-Identification........................................ 3
4.7 Removing from Service.................................... 13
1.5 Applicable Legislation........................................ 3
1.6Copyright............................................................ 4
5 Transport & Storage
1.7Liability............................................................... 4
5.1 Safety Precautions........................................... 14
1.8Responsibility..................................................... 4
5.2 Transport (rolling).............................................. 14
5.3 Transport (lifting)............................................... 14
2 Safety
5.4 Transport (fork lift)............................................. 14
2.1 Safety and Precautionary Symbols.................... 5
5.5Storage............................................................. 15
2.2 Warning Pictorials............................................... 5
2.3 Operator............................................................. 5
6 Maintenance
2.4 Engineer............................................................. 5
6.1 Safety precautions............................................ 15
2.5 General............................................................... 6
6.2Inspections....................................................... 16
6.2.1 Daily Inspections..................................... 16
6.2.2 Weekly inspections.................................. 16
3 Machine description
6.2.3 Yearly inspections.................................... 16
3.1 Introduction........................................................ 7
3.2Function.............................................................. 7
2.5.1 Hazardous Materials.................................. 6
6.3Maintenance..................................................... 16
7 Disposal
3.2.1 Running modes......................................... 7
3.3 Process Description........................................... 7
7.1 Safety precautions............................................ 17
3.3.1 Air Flow...................................................... 8
7.2 Disposing of the Sentinel................................. 17
3.3.2 Oil Flow...................................................... 8
7.3 Environmental aspects..................................... 17
3.3.3 Water Flow................................................ 8
3.4Controls.............................................................. 8
3.5 Hose Connections.............................................. 8
3.6 User adjustable Set Points................................. 9
8 Parts List................................................................... 17
9 Troubleshooting.......................................................... 18
3.6.1 Moisture Level........................................... 9
3.6.2 Temperature.............................................. 9
Appendix 1
3.6.4 Sample Rate.............................................. 9
Technical Specifications ........................................ 21
Appendix 2
2
Test Specifications.................................................. 22
Sentinel | User’s Manual
™
1 Introduction
This chapter gives basic information about the Sentinel and the accompanying operations and maintenance
instructions.
1.1 Warning
Only qualified personnel are allowed to install, operate and maintain the Sentinel.
Safety is only ensured when you read this manual carefully before putting the Sentinel into use or before
carrying out any operation.
1.2 Manufacturer
The Sentinel is manufactured by:
Parker Hannifin Corporation
Hydraulic Filter Division
16810 Fulton County Road #2
Metamora, OH 43450
Phone: 419 644 4311
Fax: 419 644 6205
Internet: www.parker.com/hydraulicfilter
1.2.1 Introduction to Parker Hannifin
Parker Hannifin is the world’s leading manufacturer of motion and control technologies and systems, providing
precision-engineered solutions for a wide variety of commercial, mobile, industrial and aerospace markets.
The company employs approximately 62,000 people in 48 countries around the world. Parker provides quality
services and products to our customers through strong, professional distribution and Technology Centers.
To meet our customer needs in motion and control, Parker provides the broadest range of products available
from any single supplier. This is supported by expertise in nine major technologies: hydraulics, pneumatics,
electromechanical, filtration, process control, fluid and gas handling, sealing and shielding, climate control and
aerospace.
1.2.2 Partnership
At Parker we believe in partnership with our customers so we can provide them with solutions which help
achieve higher levels of productivity and profitability by engineering the best systems for their requirements. This
means studying customer applications to find new and better ways to create value. Not only a product supplier,
Parker also offers Value Added Services to help its customers save time and money.
1.3 Related Documents
In addition to this manual the following documents are included:
• Bill of Materials
• Vacuum Pump Manual
• Installation Drawings
• Hydraulic & Electric Schematics
1.4 Machine Identification
The machine is identified as: the Sentinel.
1.5 Applicable Legislation
Not all parts of the Sentinel comply to the directives of the EU. Therefore it is not provided with the CE
mark.
3
Sentinel | User’s Manual
™
1.6 Copyright
Copyright Parker Hannifin. All rights reserved. No part of this publication may be reproduced, stored in a
database or retrieval system, or publication in any form or in any way, electronically, mechanically, by print,
photo print, microfilm or any other means without prior written permission from the manufacturer.
1.7 Limitation of Liability
UPON NOTIFICATION, SELLER WILL, AT ITS OPTION, REPAIR OR REPLACE A DEFECTIVE PRODUCT, OR
REFUND THE PURCHASE PRICE. IN NO EVENT SHALL SELLER BE LIABLE TO BUYER FOR ANY SPECIAL,
INDIRECT, INCIDENTAL OR CONSEQUENTIAL DAMAGES ARISING OUT OF, OR AS THE RESULT OF, THE
SALE, DELIVERY, NON-DELIVERY, SERVICING, USE OR LOSS OF USE OF THE PRODUCTS OR ANY PART
THEREOF, OR FOR ANY CHARGES OR EXPENSES OF ANY NATURE INCURRED WITHOUT SELLER’S
WRITTEN CONSENT, EVEN IF SELLER HAS BEEN NEGLIGENT, WHETHER IN CONTRACT, TORT OR
OTHER LEGAL THEORY. IN NO EVENT SHALL SELLER’S LIABILITY UNDER ANY CLAIM MADE BY BUYER
EXCEED THE PURCHASE PRICE OF THE PRODUCTS.
• Neglecting warnings or prescriptions as shown on the Sentinel or stated in this manual.
• The use of the Sentinel for other applications or under other circumstances than stated in this manual.
• Modifying the Sentinel in any way. This includes the application of other spare parts and/or changing the
control program.
• Insufficient maintenance.
1.8 User’s Responsibility
The user, through its own analysis and testing, is solely responsible for making the final selection of the system
and Product and assuring that all performance, endurance, maintenance, safety and warning requirements of
the application are met. The user must analyze all aspects of the application and follow applicable industry
standards and Product information. If Seller provides Product or system options, the user is responsible for
determining that such data and specifications are suitable and sufficient for all applications and reasonably
foreseeable uses of the Products or systems.
4
Sentinel | User’s Manual
™
2 Safety
This chapter describes the safety precautions with regard to the Sentinel. The safety precautions in this
manual should be respected. Deviation from the precautions can cause unacceptable risks.
2.1 Safety and Precautionary Symbols
Suggestion to carry out tasks easier.
Draws attention to potential problems.
Draws attention to damage to the Sentinel if the instructions are not carried out carefully.
Draws attention to serious injuries to the operator if the instructions are not carried out carefully.
2.2 Warning Pictorials
There are no warning pictorials attached to the Sentinel.
2.3 Operator
Only qualified operators should operate the Sentinel.
The operator has to be informed of chapters 1 through 6 of this manual before carrying out any operations on
the Sentinel.
While operating the Sentinel, the following Personal Protective Equipment (PPE) must be worn:
• protective clothing
• work shoes
• safety glasses
2.4 Engineer
All maintenance and installation activities are reserved for specially trained engineers.
The engineer has to be informed of the entire contents of this manual before carrying out any maintenance on
the Sentinel.
While performing maintenance on the Sentinel, the following Personal Protective Equipment (PPE) must be worn:
• protective clothing
• work shoes
• safety glasses
Figure 2.3 & 2.4: PPEs to be worn
5
Sentinel | User’s Manual
™
2.5 General
The Sentinel can be operated and maintained safely if all safety precautions are observed; however, dangerous
situations can occur due to poor judgement or negligent use.
Always stay alert for dangerous situations.
Observe the following general precautions:
• Pay attention to loose clothing and hair.
• Keep your hands away from dangerous zones.
• Check the functionality of the Sentinel daily.
• Do not turn on the main switch if persons are in contact with the machine.
• Unplug before performing maintenance activities.
• Replace damaged or defective parts before putting the machine into service.
• Modifications to the machine without prior approval of the manufacturer are not permitted.
• Never disassemble piping lines or components while under pressure.
The Sentinel is a powerful tool that supplies hydraulic fluid under high pressure. Be careful when using it.
In case of unexpected leakage:
• Immediately stop the complete system.
• Protect yourself (face, hands, etc.) against spraying liquid.
• Never try to stop the leak flow by covering it with your hands.
• Use absorbing paper to prevent fluid from entering the environment.
• Properly dispose of all spilled fluids.
2.5.1 Oil Contaminated with Hazardous Materials
If there is any possibility the oil being purified contains a solvent or materials which could be considered
hazardous, either with toxicant or flammable explosives, the Sentinel should not be used.
The Sentinel should never be used to remove volatile’s such as: diesel fuel, gasoline or other products
with low flash points, explosive in nature, or toxic. For clarification, consult your factory representative for
detailed information.
6
Sentinel | User’s Manual
™
3 Machine Description
This chapter describes the function, the major components, and the operation of the Sentinel.
3.1 Introduction
Parker Hannifin is responsible for the engineering and delivery of the Sentinel.
3.2 Function
Dehydration and purification of hydraulic fluid.
The Sentinel is not permitted for any other purposes than those stated above.
3.2.1 Running Modes
There are three modes of operation for the Sentinel.
• Standard mode: Once started, the machine runs continuously until the moisture level reaches the set
point. When set point is achieved, the Sentinel will automatically shut down.
• Sentinel mode: Once started, the machine will power up and sample the oil. If the sample is above the
high moisture level set point, the machine remains on until the lower moisture level set point is reached.
The Sentinel will remain off until the high level set point is reached again.
• Batch mode: Once started, the machine runs one batch to the moisture level set point before
discharging. New batches are pulled in until the the inlet moisture is below the set point.
3.3 Process Description
The figure below is a schematic representation of the Sentinel.
The technical specifications can be found in Appendix 1 - ‘Technical specifications’.
7
Sentinel | User’s Manual
™
3.3.1 Air Flow
Air moves through the unit as a result of the vacuum pump. Atmospheric air enters through a desiccant breather,
flows through a needle valve, into the vacuum chamber where the mass transfer of water takes place. The
saturated air then exhausts through a coalescing element, to eliminate any oil mist, before traveling through the
vacuum pump. Finally, the air is exhausted through the condensate tank where the free water falls out.
3.3.2 Oil Flow
Oil enters the back of the unit through the inlet port. The inlet control valve is energized during the filling cycle.
Once through the heater tube, the oil enters a diffuser where the maximum surface area is exposed while
minimizing oil carry over. At this point in the cycle, any water in the oil is flashed off and enters the drier air
above. The oil then falls into the sump where it is circulated back through the heater tube and vacuum chamber
until the temperature set point is reached. Once the temperature set point is reached the oil circulates in the
chamber for a period that optimizes the water removal rate and energy usage. At the end of this period, the oil is
returned via the return port on the back of the unit.
3.3.3 Water Flow
Water in the oil is transferred to the air where it is exhausted and trapped in the condensate tank. Roughly 20%
of the water is retained and 80% is exhausted via the exhaust port on the rear of the unit.
3.4 Controls
The controls for the Sentinel are located across the top of
the unit as shown. See chapter 4 “Operation” on how to
use the control panel.
B
A
A. The main power switch provides power to the unit.
C
B. The IQAN, a PLC control screen, is used to operate
all functions of the machine.
C. The phase selector is used when the IQAN screen
displays a phase fail fault. In this instance the phase
selector must be switched for proper operation.
2
3.5 Hose Connections
3
1. Hydraulic Outlet
2. Vacuum Exhaust
1
3. Hydraulic Inlet
4. Water Drain
4
8
Sentinel | User’s Manual
™
3.6 User Adjustable Set Points
The following settings are adjustable within the IQAN:
• Moisture high limit
• Sample rate
• Moisture set point (low limit)
• Temperature
• Unit selector
3.6.1 Moisture Level
The oil moisture level is measured by a relative humidity sensor and is reported as a percentage. When
saturation is 100%, the oil contains the maximum amount of water that can be dissolved in the oil (any excess
seen is free water). The low moisture level is the lowest level that is desired. This is determined by the application
and oil in use. The lower the set point, the longer the Sentinel takes to reach this moisture level of saturation. The
high moisture level is the point at which the Sentinel mode of operation will stay on. This combination creates an
acceptable window of moisture below saturation.
The default low moisture level is 25% of saturation; The default high moisture level is 75% of saturation.
The maximum amount of water that is dissolved is dependent on the temperature and the type of oil. The
moisture level should always be maintained below saturation at all time to avoid system damage.
3.6.2 Temperature
The temperature set point is the point to which the oil is heated during the dehydration process.
The default value is 130° F
The maximum allowable temperature is oil dependent. Consult the oil specifications to avoid decrease
life or damage.
3.6.3 Sample Rate
The sample rate is the duration between sampling when the machine is set to Sentinel mode.
The default value is 120 minutes.
3.7 Auto Condensate Drain
When the auto condensate is selected from the set up screen, see section 4.6, the water collected in the
condensate tank will automatically drain when full. If the auto condensate is not selected a manual drain will be
required and the Sentinel will shut off when the condensate tank is full.
3.8 Vacuum Purge
A vacuum purge cycle runs the vacuum pump while no oil is taken into
the Sentinel. This purge cycle is preformed so that any moisture in the
vacuum pump is driven out and the integrity of the pump is maintained.
Press the left arrow key to cancel the vacuum purge.
3.9 Run Empty
The run empty cycle pumps any remaining oil out of the vacuum
chamber.
9
Sentinel | User’s Manual
™
4 Operation
This chapter describes the operation of the Sentinel.
4.1 Safety
The Sentinel is fitted with fluorocarbon seals. All process fluid
must be compatible with fluorocarbon. Contact Parker with fluid
compatibility questions.
4.2 Preparing for Use
Check that the oil in the vacuum pump is at the proper level before
operating.
1. Place the Sentinel on a flat surface
2. Lock the brake on the two front wheels
3. Connect the hoses:
a. Hydraulic Outlet
b. Hydraulic Inlet
c. Water Drain
4. Plug in the power cord
2
Ensure proper ventilation when operating.
2
See the technical specification for proper power requirements.
3b
3a
4
3c
10
Sentinel | User’s Manual
™
4.3 Starting
3
4.3.1 Initial Start-Up
4
1. Sentinel is shipped with the breakers in the off position and
must be turned on to operate.
2. NEMA L16-30P flanged inlet is standard on all units. Cord set
(PN 943238) is available to order through Parker.
4
3. Power the system on.
4. If the “Phase Fail Alarm” is shown on the display, change the
phase switch position. Press OK, F2.
5. To set the language and to set the date & time, press the menu
button, located in the lower right hand corner of the IQAN.
Languages can be selected through the main set-up screen.
To choose language from the main screen choose preferences,
then F3 for languages.
5
6. English or Metric units can be selected see 4.6 Adjust Groups.
4.3.2 Starting
1. Power the system on.
2. If the “Phase Fail Alarm” is shown on the display, change the
phase switch position. Press OK, F2.
If oil remains in the system a message will be displayed reminding
the user to drain the oil before operating.
1
2
2
11
Sentinel | User’s Manual
™
3
3. Start-up screen. Press F1 to continue.
4. After reading and agreeing to the messages, press F4 to
continue.
5. Press F1, F2, or F3 to select the desired operating mode.
Pressing the function keys a second time deselects the chosen
mode and allows for another selection to be made.
4
6. Press F4 to start the Sentinel. Press a second time to stop.
When stopped, the Sentinel will automatically run a purge cycle to
ensure the system is empty and that the integrity of the vacuum
pump is maintained.
4.4 Screen Option
Use the vertical arrow keys to select a screen option.
1. Run screen (default)
2. Gauge screen (see 4.3.2 for function keys use)
3. Set-up screen
6
4.5 Set-Up Screen
1. F1 performs a run empty function should any oil be left in the
system.
2. Pressing F2 allows for auto condensate drain to be selected.
Pressing and holding F2 drains the condensate tank.
3. F3 performs a vacuum purge function.
4. F4 allows the user to adjust the set points.
5. OK will reset the cycle counter and system timer.
1
12
2
3
4
Sentinel | User’s Manual
™
4.6 Adjusting Set Points
The adjustable set points are:
• Moisture high limit
• Sample rate
• Moisture set point (low limit)
• Temperature
• Unit Selector
Use the arrow buttons to scroll through the options and press the
“OK” button when a selection has been made.
See Chapter 3 for the set points function
Press the escape key (back arrow) to return to the Set-Up Screen
1. Once the adjustable parameter is chosen, use the up and down
arrows to adjust to the desired setting, press ok to accept.
2. Press the escape key once to return to the point selection page.
4.7 Removing from Service
Make sure the Sentinel has stopped running before taking it out of
service.
1. Purge the vacuum pump from the set-up screen by pressing F3.
2. Make sure the oil is emptied from the system by pressing F1
“Run Empty” within the set-up screen.
3. Drain the condensate by pressing and holding F2 within the setup screen.
4. Turn off power via the main switch.
5. Disconnect the power cord from the back of the unit.
6. Disconnect all the hoses from the back of the unit.
Pressing the escape key while on the set-up screen, with the
Sentinel not running, will open the inlet valve to allow for the heater
tube to be drained.
Oil may leak from the hoses
13
4
Sentinel | User’s Manual
™
5 Transportation & Storage
This chapter describes how to transport and store the Sentinel.
5.1 Safety Precautions
Always check that the Sentinel is completely disconnected before
transporting and storing the Sentinel.
Do not lay the Sentinel on its side.
1
Never lift or transport a Sentinel that is filled with oil.
See Chapter 2 for more information and safety precautions.
5.2 Transport (rolling)
1
1. Disconnect the hoses.
2. Disconnect the power supply.
2
3. Unlock the brake on the two front wheels.
3
The Sentinel can now be freely rolled around.
Make sure the brakes are locked again when transportation is
done.
3
3
5.3 Transport (lifting)
1. Disconnect the hoses.
2. Disconnect the power supply.
3. Connect the hoisting gear to the four hoisting eyes.
Always use all four hoisting eyes when hoisting the Sentinel.
See Appendix 1 ‘Technical Specifications’ for information about
the weight of the Sentinel.
5.4 Transport (fork lift)
1. Disconnect the hoses.
2. Disconnect the power supply.
3. Insert the forks into the fork pockets from the front.
3
14
Sentinel | User’s Manual
™
5.4 Storage
When storing the Sentinel it must be placed in a room which complies to the following requirements:
•
•
•
The room must be dry with a relative humidity of 45-75%.
The ambient temperature of the storage area must be between -10 and 40°C for fluid handling
components. In case of electronic components the storage temperature should be at least 0°C.
The room where the machine or parts are stored must be free from dust otherwise the fluid handling
components must be sealed with plastic foil.
If the Sentinel is stored for over a year, specific care is needed. Please contact Parker Hannifin in case longer
storage is required. Otherwise, warranty may not be valid.
6 Maintenance
This chapter describes how to maintain the Sentinel.
6.1 Safety Precautions
Only qualified personnel should carry out maintenance procedures on the Sentinel.
Make sure the system is switched off completely and the power supply is locked before carrying out any
maintenance activities.
Make sure the system is completely depressurized before carrying out any maintenance activities.
After disconnecting any part, immediately block open ports with clean plugs to prevent dirt from
infiltrating the hydraulic system.
See Chapter 2 for more information and safety precautions.
15
Sentinel | User’s Manual
™
A
Fill Port
6.2 Inspections
To ensure proper operation of the system, maintenance must be
carried out on a regular basis.
6.2.1 Daily Inspection
2
A Vacuum oil level.
6.2.2 Weekly Inspections
Items
Inspection Activities
1 System operation
Check system operation - no unusual noise and
vibrations.
2 Air breather
Check the breather. Normal color will be blue. If
the color is pink, the desiccant is saturated with
moisture and needs to be changed.
3 Oil filters
Check the filter element condition indicator. If
needed, change the filter element.
6.2.3 Yearly Inspections
3
Only qualified personnel should carry out the yearly inspection.
Items
Inspection Activities
Hoses
Check the overall quality of the hoses.
6.3 Maintenance
To ensure proper operation of the system maintenance must be
carried out on a regular basis.
Maintain hydraulic filter according to the ∆P indicator.
(PN 936711Q)
B Replace all coalescing filters after 300 hours of use.
(PN 943237)
3
B
16
Sentinel | User’s Manual
™
7 Disposal
This chapter describes how to dispose of the Sentinel.
7.1 Safety Precautions
Switch off the Sentinel completely before disposing of the Sentinel.
Always check that the Sentinel is disconnected from its power sources before disposing of the Sentinel.
See Chapter 2 for more information and safety precautions.
7.2 Disposing of the Sentinel
When disposing of the Sentinel, always consult Parker Hannifin.
Only qualified personnel is authorized to dispose of the Sentinel.
7.3 Environmental Aspects
Please observe the following environmental aspects:
• Dispose of the Sentinel according to the legal and local regulations.
• Re-use parts and substances of the Sentinel and process parts and substances in an environmentallyfriendly manner if re-use is impossible.
• Discharge harmful, dangerous and possibly contaminated substances (or liquids) according to the legal
and local regulations.
Make sure the Sentinel is disposed of in a safe way and according to the environmental rules in the
country of use.
8 Parts List
Part Number
Description
Part Number
Description
00424
Float Switch
B-10235-0-230
Heater 230VAC
06F20C2218A1FPH80
Condensate Drain Valve
B-10235-0-380
Heater 380VAC
20072409
IQAN MD3 display module
B-10235-0-460
Heater 460VAC
2820008
Pressure Sensor
CEM3546T
Hydraulic Pump Motor
3349116565
Gear Pump
MPS-V33N-PGAT
Vacuum Sensor
40CN205QEVE2GS164
Filter
MS1504
Moisture Sensor
7221GBN51V00N0D300C2
Inlet valve
7221GBN51V00N0D300C2
Recirculation valve
For Service Requiring No Yellow Metals
936711Q
Hydraulic Particulate Element
Part Number
Description
943236
Mounting Bracket Kit
945302
943237
Service Kit (includes TriCeptor air breather, hydraulic
particulate element, coalescing element, vacuum pump
exhaust element, vacuum
pump oil)
No Yellow Metals Accessory
Kit - wetted components
only (includes below part
numbers)
15U29-00V
Inlet Valve
12F22C6148A3FPH80
Recirculation Valve
12F-C12L-1/3-SS
Check Valve
F800S
Flow Control Valve
943238
Cordset (pigtail end)
used with 943116 and
943213 only
17
Sentinel | User’s Manual
™
9 Troubleshooting
9.1 Safety Precautions
Always wear the prescribed personal protective equipment while working with the Sentinel.
Indicates the alarm will cause an automatic shut down.
See Chapter 2 for more information and safety precautions.
Alarm Image
Problem
Cause
Solution
Unit fails to
run from IQAN
screen
Mode not selected
Choose mode of operation before pressing “On/Off”.
Phase Fail
Are you out of phase?
High Sump
See “Oil in Sump” warning.
Vacuum Overflow
See “High Oil Level” warning.
High Ambient Temp
See “High Ambient Temp” warning.
Inlet obstructed or
pinched hose
Straighten or replace. Check any filtration placed
before the Sentinel for blockage. Check all isolation
valves.
Inlet Valve
Check solenoid on the inlet valve to make sure it is
functioning.
Low vacuum level,
should be greater than
22 in/HG (558 mm)
Check vacuum pump for proper operation.
Check for leaks by shutting off oil inlet valve, closing
air inlet valve to vacuum chamber, manually operate
unit until vacuum gage reads 25 in/HG, and then
stop unit. If vacuum holds for less than 30 sec then
a leak is present. If 22 in Hg cannot be achieved
and no leak is detected then check the vacuum
pump for proper function adjust or replace parts as
required.
Check needle valve, adjust for altitude.
Improper PVS installation, negative head too
high for unit
Check specification sheet. Maximum negative
suction head is 8 ft. (2438 mm). Increase inlet hose
diameter and shorten hose length to reduce line
pressure loss. Preheat oil to reduce viscosity.
Use of quick disconnect on inlet hose.
Quick disconnects are not recommended. Replace
with standard “full port” valve or increase size of
quick disconnect to 1.5 times the diameter of inlet
hose or consult factory for other options.
Inlet control valve not
closing
Check inlet control valve for debris caught in the
diaphragm. If problem persists, install a suction filter.
Middle float switch
stuck closed
Check float switch in vacuum chamber.
Air inlet needle valve
closed
Check needle valve and adjust if necessary.
Low Flow
A low flow alarm will be displayed if the
Sentinel does not take in fluid at a rate
quick enough to operate properly
High Oil Level
18
Sentinel | User’s Manual
™
Alarm Image
Problem
Cause
Solution
High Sump
Alarm
Foaming oil in vacuum
chamber
Be sure intake is full submerged.
Some oils will foam under normal operating conditions. Lower vacuum level by opening air bleed valve
slowly until vacuum reaches 23 in/HG (584 mm).
Lower temperature set point.
Further maintenance:
If the sump is full a warning screen will be displayed
and the light on the gauge screen titled “High Sump”
will appear red.
1) Drain sump via the port located on the bottom
2) Change coalescing filter.
3) Check vacuum pump oil. It should be clear if not
change oil and replace vacuum pump coalescing filter.
4) Confirm the vacuum chamber overflow switch is
functioning by removing the vacuum chamber cover
and exercising the float switch, watch for the “Vacuum
Chamber Overflow” alarm to be display. If the switch
works then oil entered the sump because the Sentinel
was placed on its side or the oil was allowed to foam.
High inlet moisture
Transportation
High level float switch
failure
Check high level switch in vacuum chamber.
Condensate tank full
Drain condensate tank or turn on automatic drain
function.
Float switch faulty
Check for stuck or broken switch. Repair or replace
by removing from the back side of the condensate
tank.
Excessive pressure on
the inlet
Restrict inlet line.
Oil left in system
Run empty before starting.
Over Pressure
Alarm
The pressure in the return line exceeds 60psi
Minimize pressure losses in return hose.
Maintenance
Screen Displayed
The Sentinel has
exceeded its maintenance timer interval
Change filters.
High Ambient
Temperature
Warning
High temperature
inside cabinet
Reset the thermostat, which is located under the
top door, by pressing the button in the middle.
Other actions include:
1. Remove doors
2. Install fan
3. Insure proper ventilation
High Level
Condensate
Alarm
Fast Fill Alarm
19
Sentinel | User’s Manual
™
Alarm Image
Problem
Cause
Solution
Filter Alarm
Hydraulic filter differential pressure setting is
exceeded.
Change hydraulic filter.
No Alarm Images for the Problems listed below.
Problem
Cause
Solution
Unit fails to power up/brown
out
Improper external power
connection, low voltage, low
amp service or power supply
cord sizing
Check input power. Does it match machine specifications? Is the
power cord sized right? Make changes as required.
Circuit breaker/fuses tripped
on main power disconnect or
drive motor contacters
Reset circuit breakers or replace fuses. If circuit breaker/fuse trips
again, check motor for failure. Check supply line voltage for match
to units design voltage.
Control voltage power failure
Check circuit breaker /fuse on control voltage transformer. Reset if
necessary.
If primary circuit breaker/fuse trips again, transformer has probably
failed. Test continuity. Replace if necessary.
If secondary circuit breaker / fuse trips again, problem is most likely
low voltage in the control circuit. Check components and control
power circuit for problems.
Over temp thermostat
Consult factory.
Temperature display shows
“999” degrees
Check moisture/temperature module. Replace if necessary.
Heater failure
Check continuity on each leg of heater element(s). Replace if necessary.
Heater circuit breaker/fuses
tripped.
Reset circuit breaker or replace fuses, check continuity of heater(s)
for short. If no short is found, check circuit breaker/fuses for defect
or weakness.
Recirculation solenoid failed
Check solenoid.
High temperature alarm
Oil temperature exceeds
180F
Reduce set point, consult factory if higher temperatures are desired.
Vacuum level varies without
manual adjustment
Barometric pressure change
from weather system
Adjusting the air bleed inlet valve will compensate for changes in
barometric pressure.
Sudden introduction of water
into oil during normal operation
Vacuum will “seek” it’s own level when operating with high water
content. As water is removed from the oil the vacuum will automatically increase as oil becomes drier.
Vacuum leak in system
Check for leaks by shutting off oil inlet valve and air bleed inlet
valve. Operate unit manually, when vacuum reaches 22 in/HG shut
off unit. If vacuum holds for less than 30 seconds a leak is present.
If leak is present, check the lid seal, inlet hose and fittings.
Check for leaks around lines. Repair or replace as required.
Vacuum pump oil reservoir
Uses excessive oil (needs
filling every day)
Check oil for correct type recommended in this manual.
System will not cycle
Temperature set point not
being reached
See “Oil Temperature will not reach desired operating point” in this
trouble shooting guide.
Hydraulic Pump inoperable
Check hydraulic pump breaker.
Check electric motor operation.
Oil temperature will not reach
desired operating point
The unit is not functioning
properly
Consult Factory.
20
Sentinel | User’s Manual
™
Appendix 1
IQAN Control
Main Power
Phase Reversal
Technical Specifications
Standard Unit
Part Number
Description
943118*
230VAC, 3P, 60Hz
943116*
380VAC, 3P, 50Hz
943213*
460VAC, 3P, 60Hz
943494*
415VAC, 3P, 50Hz
45.2
(1148 mm)
Optional Accessories
943236
943238
Mounting Bracket Kit
Cordset (pigtail end)
24.4 (619 mm)
used with 943116 and
943213 only
* Included with standard unit
- Dry sealed vacuum pump
- Coalescing filter
- 5 micron Ecoglass III element
- 6kW 3 phase low-density heater
- 3” diameter rubber-wheel casters
- Consult factory for other options
1/2” NPT
Cabinet Drain
4 Point Tie
Down Rings
19.5 (495 mm)
Electrical Requirements:
230VAC, 3P, 60Hz
460VAC, 3P, 60Hz
380VAC, 3P, 50Hz
Hydraulic
Outlet
Max AMP Draw: 16 amp
Electrical Connection Port:
NEMA L16-30P Flanged Inlet
Hydraulic Connections:
Inlet: JIC 12
Outlet: JIC 12
Max Flow: 5 GPM
Water Drain: JIC 8
Fork Truck
Support Pocket
Vacuum
Exhaust
Vacuum Exhaust Port: JIC 8
Inlet Pressure: 0-60 psi (gauge)
Hydraulic
Inlet
Weight: approximately 400 lbs.
Electrical
Connection
Port
Operating Temp: 80°F (27°C) doors on
105°F (40°C) doors off
Storage: Max Temp 180°F, 100% RH
Water
Drain
21
Sentinel | User’s Manual
™
Notes
22
Worldwide Filtration Manufacturing Locations
North America
Europe
Asia Pacific
Filtration & Separation/Balston
domnick hunter Filtration & Separation
Castle Hill, Australia
+61 2 9634 7777
www.parker.com/australia
Compressed Air Treatment
Haverhill, MA
978 858 0505
www.parker.com/balston
Finite Airtek Filtration
Airtek/domnick hunter/Zander
Lancaster, NY
716 686 6400
www.parker.com/faf
Finite Airtek Filtration/Finite
Oxford, MI
248 628 6400
www.parker.com/finitefilter
Engine Filtration &
Water Purification
Racor
Modesto, CA
209 521 7860
www.parker.com/racor
Holly Springs, MS
662 252 2656
www.parker.com/racor
Beaufort, SC
843 846 3200
www.parker.com/racor
Racor – Village Marine Tec.
Gardena, CA
310 516 9911
desalination.parker.com
Parker Sea Recovery
Carson, CA
310 637 3400
www.searecovery.com
Hydraulic Filtration
Hydraulic Filter
Metamora, OH
419 644 4311
www.parker.com/hydraulicfilter
Laval, QC Canada
450 629 9594
www.parkerfarr.com
Process Filtration
domnick hunter Process Filtration
Oxnard, CA
805 604 3400
www.parker.com/processfiltration
Madison, WI
608 824 0500
www.scilog.com
Phoenixville, PA
610 933 1600
www.parker.com/processfiltration
Aerospace Filtration
Velcon Filtration
Colorado Springs, CO
719 531 5855
www.velcon.com
Compressed Air Treatment
Gateshead, England
+44 (0) 191 402 9000
www.parker.com/dhfns
Parker Gas Separations
Etten-Leur, Netherlands
+31 76 508 5300
www.parker.com/dhfns
Hiross Zander
Padova Business Unit
Padova, Italy
+39 049 9712 111
www.parker.com/hzd
Hiross Zander
Essen Business Unit
Essen, Germany
+49 2054 9340
www.parker.com/hzd
Engine Filtration &
Water Purification
Racor
Dewsbury, England
+44 (0) 1924 487 000
www.parker.com/rfde
Racor Research & Development
Stuttgart, Germany
+49 (0)711 7071 290-10
www.parker.com/rfde
Hydraulic Filtration
Hydraulic Filter
Arnhem, Holland
+31 26 3760376
www.parker.com/hfde
Urjala Operation
Urjala, Finland
+358 20 753 2500
www.parker.com/hfde
Australia
China
Shanghai, China
+86 21 5031 2525
www.parker.com/china
India
Navi Mumbai, India
+91 22 651 370 8185
www.parker.com/india
Parker Fowler
Bangalore, India
+91 80 2783 6794
www.johnfowlerindia.com
Japan
Tokyo, Japan
+81 45 870 1522
www.parker.com/japan
Parker Techno
Osaka, Japan
+81 66 340 1600
www.techno.taiyo-ltd.co.jp
Korea
Hwaseon-City
+82 31 359 0852
www.parker.com/korea
Singapore
Jurong Town, Singapore
+65 6887 6300
www.parker.com/singapore
Thailand
Bangkok, Thailand
+66 2186 7000
www.parker.com/thailand
Condition Monitoring Centre
Latin America
Parker Kittiwake
Sao Paulo, Brazil
+55 12 4009 3500
www.parker.com/br
Norfolk, England
+44 (0) 1842 763 299
www.parker.com/hfde
West Sussex, England
+44 (0) 1903 731 470
www.kittiwake.com
Parker Procal
Peterborough, England
+44 (0) 1733 232 495
www.kittiwake.com
Process Filtration
domnick hunter Process Filtration
Birtley, England
+44 (0) 191 410 5121
www.parker.com/processfiltration
Parker Comercio Ltda.
Filtration Division
Pan American Division
Miami, FL
305 470 8800
www.parker.com/panam
Africa
Aeroport Kempton Park, South Africa
+27 11 9610700
www.parker.com/africa
Parker Twin Filter BV
Zaandam, Netherlands
+31(0)75 655 50 00
www.twinfilter.com
© 2013 Parker Hannifin Corporation. Product names are trademarks or registered trademarks of their respective companies.
Parker Hannifin Corporation
Hydraulic Filter Division
16810 Fulton County Road #2
Metamora, OH 43540-9714
phone 419 644 4311
www.parker.com/hydraulicfilter
Sentinel User’s Manual
Rev D 05/15