1
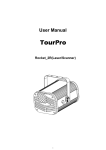
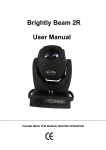
2R Moving Head Beam
WEIGHT 15KG
COLOR TEMPERATURE 9300K
POWER
1
250W
Item
Item ............................................................................................................................................. 2
1.Product introduce ................................................................................................................ 3
1.1 Fixture Size ........................................................................................................................4
2.Safety information ......................................................................................................... …..5
2.1 Anti-high temperature .................................................................................................... ...6
2.2 Burst Prevention .................................................................................................................6
.
2.3 To prevent falling wounding ...............................................................................................6
2.4 UV protection and the bulb explosion ..............................................................................6
2.5 Prevention of electric shock ................................................................................................ 6
2.6 to prevent burning or fire ......................................................................................................6
3.Packing and shipping .............................................................................................................7
3.1 packaging randomized accessories project .............................................................................7
3.2 transport the protection locks. ................................................................................................ 7
3.3 device packaging ................................................................................................................. ...7
3.4 Unpacking. ............................................................................................................................. 7
4.Installation standards
................................................................................................. …...8
4.1 device fixed to the bracket ......................................................................................................8
4.2 rigging installation ................................................................................................................. 8
4.3 connected devices .................................................................................................................. 8
5.AC power........................................................................................................................... ……9
5.1 Fuse......................................................................................................................................8
5.2 Power connection ................................................................................................................8
6.Lamp......................................... ....................................................................................………10
6.1Bulb Description ....................................................................................................................10
6.2 changing a light bulb .......................................................................................................... ..10
7.Channels................................................................................................................. ..........……12
8. Clear and Maintenance…………................................……...........................…..………..15
9. PCB Board….......................………................................……...........................…..………..16
2
STATEMENT
The product is good packing when ship out the factory. All users should strictly abide by the
warnings and instructions stated in this manual, any damage and results due to misuse and the
neglect of this operating manual will be excluded from the deal responsibility this manual will not
informed in additionally if have technical changes.
PRODUCT DESCRIPTION
Thank you for choose this BEAM 2R products, this model is the moving head light which is the
latest development of the smart, efficient products, beautiful shape, smooth R & D, combined with
the advanced technology of today's stage lighting products with international advanced electronic
control technology and excellent user-friendly industrial design , fully comply with CE standard,
accepted international standard DMX512 signal mode.
This moving head lights, use ceramic luminescent film reflector as a condenser system, coupled
with the high-quality optical lens components, broadband voltage, a clear pattern, sharp and
uniform output light efficiency. Intelligent LED display module, the English language selection
mode, intuitive operating menu, shortcut.
This Beam spot, have 16/20 international standard DMX512 channels optional Horizontal scan:
540 ° vertical scanning 270 ° (16bit precision scanning) electronic correction, LCD display, can be
inverted 180 °, the color wheel is combined with white and 14 colors. Gobo wheel: 17 patterns +
white effect round by 8 facet prism and atomization function. 0-100% mechanical dimmer,
support mechanical strobe and variable strobe effect, strobe macro function. The optical system of
the lens group electric focusing, the beam angle of 0 to 4° with overheating protection function.
This Moving head lights are widely used in television, disco, dance halls, nightclubs,performances
and other professional venues
3
1. PRODUCT INTRODUCE
1.1 FIXTURE SIZE
Size::302×346×502mm
Gross Weight:18.2KG
Net weight:15KG
4
2. SAFETY INFORMATION
Safety warning:
This product is only suitable for professional use, and does not apply to security for other purposes.
After you got the lights, please check the package whether have any damage caused by
transportation. If there is any damage, do not use this fixture, and please contact the dealer or
manufacturer as soon as possible.
This product is only suitable for indoor, IP20 protection class. Lamps should be kept dry to avoid
Moisture, overheating or dusty environment. Prevent lamps come into contact with water or any
other liquid.
The use of this product should pay attention to: fire, heat, electric shock, ultraviolet radiation, the
lamp to explode or
Shedding caused serious or fatal injury.
Need to read the instructions before use energized or installing.
Follow through the operation of security methods and pay attention to the warning signs on the
specification and equipment. If you have any problem for how to safely operate the equipment.
Please contact your dealer.
5
2.1 ANTI-HIGH TEMPERATURE
ta =40°C
Please don’t use the equipment if the temperature above 40℃
2.2 BURST PREVENTION
The lens should be changed if had damaged or any problems. Don’t change the
non-original manufacturer lens.
Len size: ¢119mm×23mm
2.3 TO PREVENT FALLING WOUNDING
Please don’t move the package by one person only.
When Hang the fixture, please must verify that the facilities to be able to
withstand
the weight of the lamps at least 10 times more.
Please make sure the Mounting hardware is strong enough no any damage, and
insurance for the safety rope as auxiliary security fixed in other facilities will need to
verify before installation. Installing or removing the equipment, to make the pulley
below the work location
2.4 UV PROTECTION AND THE BULB EXPLOSION
Prohibit straight viewpoint with exposed bulbs to avoid UV damage to the eyes;
Do not use the equipment without the lens screen and the lid;
The lens and the light head covers should be timely replaced if any damage to rupture
The Fixture should be used with the protection screen together.
2.5 PREVENTION OF ELECTIC SHOCK
The electrical connection must only be carried out with corresponding qualifications;
Before installing, make sure you use the power voltage lamps must comply with the identified
power, voltage and have an overload or leakage protection;
Each lamp must be properly grounded, installed in accordance with the relevant standards;
Cut off the power when stall or replace the lamp and the fuse;
Prohibit the use of a lightning storm or wet environment.
2.6 TO PREVENT BURNING OR FIRE
1,The fixture can be mounted directly on the surface of ordinary combustible material.
2. Do not short-circuit temperature protection switch or fuse, use the specified type of fuse.
3. The equipment must be installed away from inflammable and explosive materials.
4. The equipment should be projected range of 3 meters away objects and projectiles temperature
less than 60 ° C; .
6
5. Fan or ventilation, at least in the range of 0.5 meters can not be an obstacle.
6. Do not place any object on the lens.
7. Handling at least allow the device to cool for 20 minutes.
8. Do not replace the non-original parts.
3. PACKAGE
3.1 ATTACHMENT
Beam 2R packed with fly-case of one in one ,two in one ,or carton box.
Attach follow accessory.
ACCESSORY
CONTENT
USER MANUL
HANG FIXTURE
SIGNAL CABLE
QUANTITY
1 piece
2 pcs
1 piece
PACAKGE SIZE
CARTON BOX
37×42×56cm
FLY-CASE 1 IN 1
44×47×72cm
FLY-CASE 2 IN 1
82×47×72cm
3.2 TRANSPORT PROTECT LOCK
In order to protect the light, there is a protect lock; During the transport , the lock will closed
keeping the item in safety state.
3.3 ABOUT PACK STAGE
1. Before packed, make sure power is off, and wait for at least 20mins for cooling down.
2. Before clean the fixture, make sure X, Y axis protect lock closed.
3. After packed by plastic bag, high-lift the fixture with two handles besides the product. put
the product into the fly-case up-side-down.
4. After packed the product, put the accessory into the accessory case, then closed and lock the
fly-case.
5. Fly-case only up stacked two layers. Prohibited upside down
6. When packed with carton box, equipment should be put into the foam first, then set into a
carton, pay attention to the vertical position.
3.4
UNPACKING
Note: Before unpacking check the damage is whether due to the transportation or not, if you
find any such damage, please do not use this item, and contact with the dealer or manufacturer as
soon as possible.
1. Open the fly-case, and discover the inside plastic bag.
2. High-lift the product by two handles beside the bottom base and move it out.
7
3. Before power on, make sure you have opened the X, Y axis lock!
4、INSTALL STRANDARD
4.1
INSTALL LOCK
Beam 2R can be placed on the stage, or mounted in an arbitrary direction of the truss. Two fast
locks system could fix the item easily .
4.2
EQUIPMENT FIXED
1. Before installation must verify the fast lock is keep in good state, and can withstand at
least 10 times the weight of product. Verify that the building can withstand at least 10
times of the total weight of the product and accessory equipments.
2. Fix the hang fixture into the hole, which located on the base of the price.
Seize handle of fasteners, clockwise rotate 1/4 turn and lock. Installed other one fastener
in the same method.
3. Using the safety cable which can withstand 10 times the weight of the equipment.
4. Make sure the X,Y protect locks are opened, Verify that within 3 meters there is no
combustibles .
WARNING
Fixture must use two fixing devices, and make sure the fixing device have locked! And only
fully clockwise rotate 90 ° can lock the hang fixture! Do remember plus a safety rope, and
do not connect the safety rope to plastic handle. It should be connect to the hole on the base!
4.3 FIXTURE CONNECT
Attention! One product only can accept one input one output.
Beam 2R DMX cable include 3 contact pins:
Pin 1, FOR GROUND; Pin 2 connected to the negative polarity signal; The pin 3
connected to the positive polarity signal.
DMX512 cable must use the professional shielded twisted pair cable; standard
loudspeaker cable is not reliable to control the long-range data. 24AWG cable is
suitable for more than 300 meters long-distance signal transmission and must add\
DMX 512 signal amplifier.
Do not use two outputs to separate the connection, if separate a continuous connection
to branch, DMX512 splitter is necessary.
If use the DMX512 splitter. At first connect DMX512 Splitter input terminal to
controller .And then connected from the splitter output terminal to next device.
8
Do as above guide to connect other device, and finally coupled with terminal insertion
as following:
5、 ALTERNATING CURRENT POWER SUPPLY
5.1 VOLTAGE, POWER, FUSE SPECIFICATION
Input Voltage
110~240V
Fuse voltage
250V
Total Power
350W
Electronic current
6A
Frequency
50/60Hz
Specification
5×20
5.2 POWER PROTECT
The equipment must be operated by professionals; Make sure that the voltage of
power supply must be comply with the voltage identified on the lamp, and must have
an overload or leakage electrical protection.
ATTENTION!
Factory has equipped the standard 3 pin plug socket. Connect the power supply as
below table.
If lamp cable is damaged, replacement should be operate by factory or qualified staff.
Any question, please contact professionals or talk to a qualified electrician.
Live wire(L)
Null(N)
Ground wire
RED
BLUE
Yellow +Green
9
6、LAMP
6.1 LAMP DESCRIPTION
COLOR
LAMP MODEL
POWER OF LAMP
LIFE/HOUR
TEMPERATURE
Philips MSD
132W
2200 HOURS
9300K
Osram HRI
132W
2200 HOURS
9300K
YODN MSD
132W
2200 HOURS
9300K
WARNING!
There is a safety hazard or damage if install similar bulb To reduce the risk
of damage to light ,do change the lamp before using time over 90% of lamp
life .
6.2 LAMP REPLACE
Attention! When replace the lamp is forbidden to touch lamp with bare hand, to
avoid the greasy dirt stains filament. filament must be kept clean
1. Disconnect the power. Before replace lamp, fixture need 20 minutes for lamp
cooling. Fasten the head with Y axis protect lock in 60 ° position.
2, Use cross screwdriver to open the light body cover, remove the fan bracket,
pull out the bulb cable as this picture show:
10
3. Please loose the connect wire as the following.
4. Please loose the screws installed in the metal pieces as following.
11
5. Press the lamp reflector slightly use one finger, and press the lamp bottom slightly use another
finger. So the lamp will loose from the stand.
6, Repeat the above steps on the contrary action to install the lamp.
7. CHANNELS
Channels
1CH Color
DMX value
Detail
0~4
White
5~8
White+Color 1
9~12
White 1
13~17
Color 1+Color 2
18~21
Color 2
22~25
Color 2+Color 3
26~29
Color 3
30~34
Color 3+Color 4
35~38
Color 4
39~42
Color 4+Color 5
43~46
Color 5
47~51
Color 5+Color 6
52~55
Color 6
56~59
Color 6+Color 7
60~63
Color 7
64~68
Color 7+Color 8
69~72
Color 8
73~76
Color 8+Color 9
77~81
Color 9
12
2CH Strobe
3CH Dimmer
4CH Gobo
82~85
Color 9+Color 10
86~89
Color 10
90~93
Color 10+Color 11
94~98
Color 11
99~102
Color 11+Color 12
103~106
Color 12
107~110
Color 12+Color 13
111~115
Color 13
116~119
Color 13+Color 14
120~123
Color 14
124~127
Color 14+Color 15
128~255
Color 15
0~3
White
4~103
Slow strobe to fast strobe
104~107
White
108~207
Fast strobe to slow strobe
208~212
White
213~225
Random slow strobe
226~138
Random medium strobe
239~251
Random fast strobe
252~255
White
0~255
0~100% Linear
0~3
White
4~7
Gobo 1
8~11
Gobo 2
12~15
Gobo 3
16~19
Gobo 4
20~23
Gobo 5
24~27
Gobo 6
28~31
Gobo 7
32~35
Gobo 8
36~39
Gobo 9
40~43
Gobo 10
44~47
Gobo 11
48~51
Gobo 12
52~55
Gobo 13
56~59
Gobo 14
60~63
Gobo 15
64~67
Gobo 16
68~71
Gobo 17
72~113
Gobo change from fast to slow
114~117
Stop
118~159
Gobo change from slow to fast
13
5CH Prism
6CH Prism Rotation
160~166
Gobo 2 shaking from slow to
fast
167~172
Gobo 3 shaking from slow to
fast
173~179
Gobo 4 shaking from slow to
fast
180~185
Gobo 5 shaking from slow to
fast
186~191
Gobo 6 shaking from slow to
fast
192~198
Gobo 7 shaking from slow to
fast
199~204
Gobo 8 shaking from slow to
fast
205~211
Gobo 9 shaking from slow to
fast
212~217
Gobo 10 shaking from slow to
fast
218~223
Gobo 11 shaking from slow to
fast
224~230
Gobo 12 shaking from slow to
fast
231~236
Gobo 13 shaking from slow to
fast
237~243
Gobo14 shaking from slow to
fast
244~249
Gobo 15 shaking from slow to
fast15
250~255
Gobo 16 shaking from slow to
fast
0~127
White
128~255
Prism insert
0~20
Angle 0
21~41
Angle 90
42~62
Angle 180
63~83
Angle 270
84~104
Angle 360
105~126
Angle 450
127
Angle 540
128~190
Fast to slow Rotation
191~192
Stop
193~255
Slow to fast rotation
0-14
white
14
15-32
Effect 1
33-46
Effect 2
47-63
Effect 3
64-79
Effect 4
80-95
Effect 5
95-110
Effect 6
111-125
Effect 7
126-145
Effect 8
146-159
Effect 9
160-175
Effect 10
176-190
Effect 11
191-205
Effect 12
206-220
Effect 13
221-255
8CH Frost
0~255
Effect 14
0~100% Linear frost
9CH Focus
0~255
0~100% Linear focus
10CH Pan
0~255
540°
11CH Pan fine
0~255
1.8°
12CH Tilt
0~255
270°
13CH Tilt fine
0~255
1.8°
14CH Macro
0~11
15CH Reset
128
Reset
63
Lamp off
16CH Lamp
178
Lamp on
17CH Pan/Tilt speed
0~255
Linear adjust
18CH Gobo wheel speed
0~255
Linear adjust
19CH Focus speed
0~255
Linear adjust
20CH Gobo Speed
0~255
Linear adjust
8. CLEAR AND MAINTENANCE
Warning: Please make sure cut off the power before open the covers.
( Kind Remind: Non-Professional don’t do this)
1、 Cut off the power supply, cool down the lamp and open the covers.
2、 Using vacuum or pressure blows gently blow any dust and floating structures.
15