1
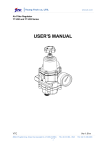
Air Filter Regulators
YT-200, YT-205
USER'S MANUAL
YTC
V.1.02
Air Filter R egulators
YT-200, Y T-205
Product Description
Air Filter Regulator, YT-200 (YT-205), receives main air pressure and supplies to the
desirable level to a positioner or other devices.
Product Characteristic
Maintain desirable pressure level, regardless of fluctuation of pressure input.
Aluminum body increases versatility of the product in different environments.
5 micron filter sorts minuteness particles in the air.
Relief function is available which discharges to atmosphere if the outlet pressure is
higher than setting pressure.
Label
MODEL:
Indicates product's model, suffix, and options (if any)
SIZE:
Indicates the port size of air connection.
MAX. SUPPLY:
Indicates maximum level of air supply.
ADJUST RANGE:
Indicates adjusting range.
PRODUCT NO.:
Indicates serial number.
Suffix Symbol
YT-200 (YT-205) follows suffix symbols as below.
YT-200 / YT-205
Adjustable Range
A : 0∼4.2kgf/cm2
B : 0∼8.4kgf/cm2
C : 0∼2.1kgf/cm2
Connection Type
P : PT
N:
Gauge
NPT
0 : None
1 : 4kgf/cm2
2 : 10kgf/cm2
Ambient Temperature
1 : -20 ~ 70℃
2 : -20 ~ 120℃
3 : -40 ~ 70℃
*
NPT 1/4 Connection Type is only available for YT-205 model.
- 1 -
Air Filter R egulators
YT-200, Y T-205
Specification
Category
YT-200
A
B
Max Supply Pressure
Max Output Pressure
Air Connection
Gauge Connection
Ambient Temperature
Min Filtering Size
YT-205
C
15kgf/㎠ (231psi)
4.2kgf/㎠
PT(NPT) 1/4
8.4kgf/㎠
2.1kgf/㎠
NPT1/4
PT(NPT) 1/8
NPT1/8
-20~70℃(Standard),
-20~120℃(High Temp.), -40~120℃(Low Temp.)
5 micron
Material
Aluminum
Stainless Steel 316
Weight
0.6kg
1.4kg
Parts and Assembly
Please be knowledgeable of product's major parts and assembly steps for future
maintenance.
- 2 -
Air Filter R egulators
YT-200, Y T-205
Operation Logic
Air pressure is being supplied to output port by turning adjust bolt clockwise which will
push diaphragm, then disconnects from stem and disc.
The set pressure level stays by
transferring pressure to lower diaphragm, which results to balance adjust spring. In case
of higher pressure than setting, the pressure pushes diaphragm and pressure is released
through the hole on spring case.
Dimension (outer)
- 3 -
Air Filter R egulators
YT-200, Y T-205
Installing
☞ Caution
When installing the product, please follow below procedures.
Always wear safety equipments and follow safety procedures.
Air must be clean and dry.
Please operate within the range of specified capacity of the regulator in the manual.
If exceeded, the product can be damaged and may result serious damages and
accident.
The product can be malfunctioned if any damages applied. Please treat the unit
with appropriate care.
For maintenance, release drain bolt on timely basis to extract any water inside.
Filter must be replaced on timely basis. Filter usage depends on the
environment/field.
After pressure is set, please make sure adjust bolt is completely fastened.
Pipe Connection
YT-200 is used for constant supply pressure to positioner, actuator, solenoid valves, or
etc.
It can be installed without a bracket <Figure1>, which can be installed on through
the pipeline. Before connecting with pipeline, please make sure pipeline is emptied, and
the size of the pipeline is appropriate for required capacity.
If YT-200 must be installed on the bracket, please make a bracket according to the
product's dimension.
<Figure 2>
<Figure 1>
<Figure 2>
- 4 -
Air Filter R egulators
YT-200, Y T-205
Instruction
(1) Before supplying air pressure into YT-200, turn adjust bolt counter-clockwise, so
the ring is not pushed.
(2) Install pressure gauge on the secondary pressure output port. The pressure
gauge indicates primary pressure that is being output.
(3) Air pressure is supplied through primary pressure input port after output port is
being blocked by using ball-valve or other fitting tools.
(4) When the secondary pressure reaches at set level, fasten the adjust bolt
completely.
Output and Flow (LPM)
Pressure
Flow (LPM)
- 5 -
Air Filter R egulators
YT-200, Y T-205
Maintenance
Please refer to below table (repair kit) and parts' name. Before replacing any parts,
please make sure to follow field's safety procedure and the manual to avoid any
accidents and damages to the product.
Repair kit
Part Name
Qty
Stem
1 (ea)
Diaphragm Assembly
1 (ea)
Filter
1 (ea)
O-Ring
2 (ea)
When using Repair Kit, all of the parts must be replaced at the same time. Partial part
replacement may result in shortening product's life cycle.
▶ Draining condensed water
① When draining out condensed water, supply air pressure must be shut down
completely or adjust the pressure level below 1kgf/cm2. The operator can be
seriously hurt when draining out at high pressure.
② Slowly open drain plug to drain condensed water.
③ After draining out completely, close the drain plug.
▶ Replacing filter case and parts
① Shut off supply air pressure.
② Release lock nut on adjust bolt, rotate adjust bolt counter-clockwise to lower
setting pressure.
③ Open drain plug on filter case to drain condensed water and close.
④ Unscrew bolts on filter case in diagonal order.
⑤ Replace filter, o-ring, and stem.
⑥ Screw bolts on filter case in diagonal order.
⑦ Unscrew 6 bolts on spring case in diagonal order.
⑧ Replace diaphragm assembly.
⑨ Screw bolts on spring case in diagonal order.
Make sure not to damage
diaphragm when screwing.
⑩ After part replacement, set air pressure to desired level.
- 6 -