1
Chapter 1, INSTALLATION
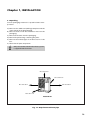
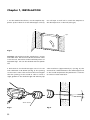
1. For the standard installation, use the template supplied to position the hole for the exhaust pipe correctly.
Use cellotape or small nails to attach the template to
the desired position on the wall (see Fig. 4).
Tape
Fig. 4
Comment: The heater must be installed on a strong
and stable floor. The floor must be flat and level. If this
is not the case, the heater can be levelled by means of
adjustable legs. This can be checked with the plumb
line.
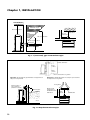
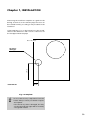
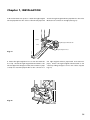
2. Drill the hole for the exhaust pipe. Use a hole saw
with a diameter of 70~80 mm (see Fig. 5). The opening
on the interior side of the wall must be a little higher
than the opening on the outside in order to create a
slight gradient in the feed-through and exhaust pipe
after installation (approximately 2º) (see Fig. 6). This
ensures that condensed water in the exhaust pipe flows
to the outside and prevents the penetration of rainwater and snow after installation.
2°
70 mm - 80 mm
Fig. 5
33
Fig. 6